 09/06/2017, 08:16 PM
|
#95
|
|
Premium Member
Join Date: Mar 2004
Location: Maryland
Posts: 1,799
|
I switched memory cards in my camera so my dates are out of order...
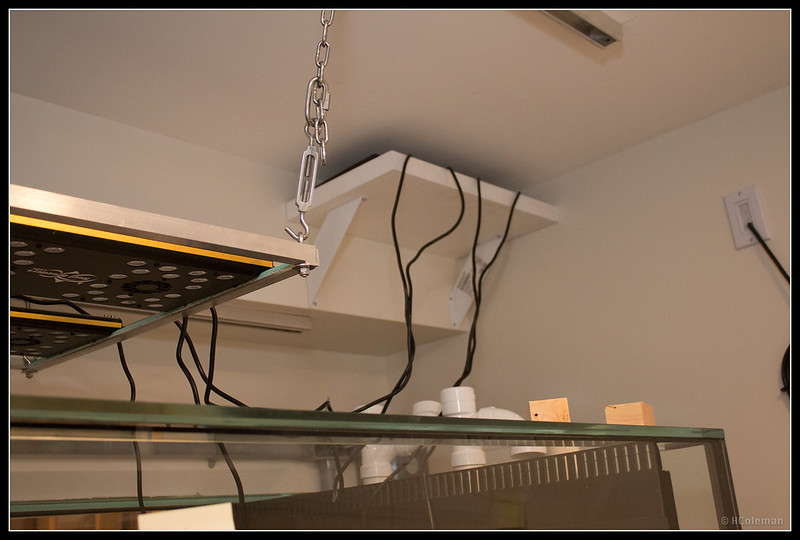
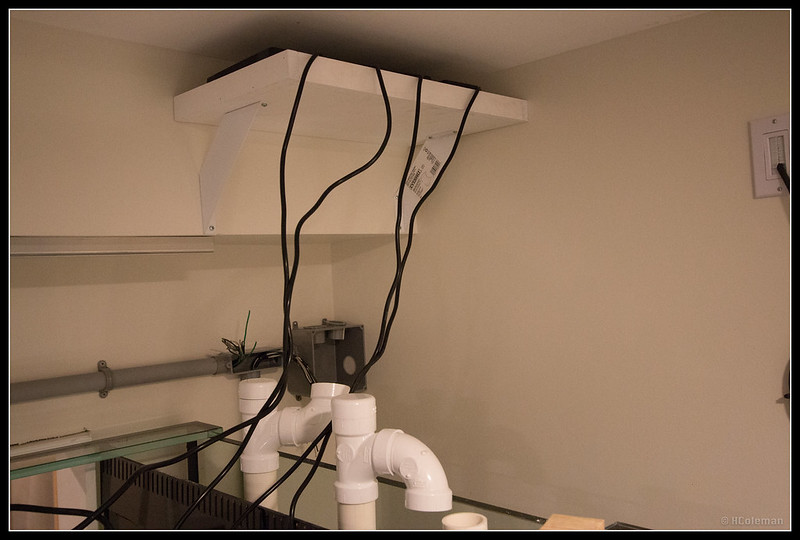
08/19/2017 - Added Shelf to Hold LED Ballasts
I made a modification to my light rail to hold the ballasts but due to weight concerns I decided to make a shelf where they could sit. I added a third support to my light rail but even with that the weight just felt too heavy. My next step is to figure out some type of cord management system for the cords when I push the light rail to the left.
Shelf
 IMG_9650 by LifeThrough_TheLense, on Flickr IMG_9650 by LifeThrough_TheLense, on Flickr
 IMG_9669 by LifeThrough_TheLense, on Flickr IMG_9669 by LifeThrough_TheLense, on Flickr
08/21/2017 - Bleaching Rock - WIP
BRS Investigates is one of my favorite YouTube series to watch. I have used acid baths for my rock in the past but noticed the rocks seemed to be eaten away more that I would have liked. After spending so much for my beloved Pukani I was a little leery of an acid bath this go around. After watching the episode on different ways to cure rock I am definitely done with acid baths on Pukani. The roock costs too much and losing 10% or more in weight is throwing money away. The bleach method showed great promise so that is the method I selected. I went down to Wally World and picked up about 6 gallons of bleach. I put my rock in the two 30 gallon trash cans and and started to fill with water. After it was about half way I put on my safety goggles and gloves and poured in the bleach the foaming action began almost immediately and when filled there was a dirty bubble bath for the rock.
Trashcan 1
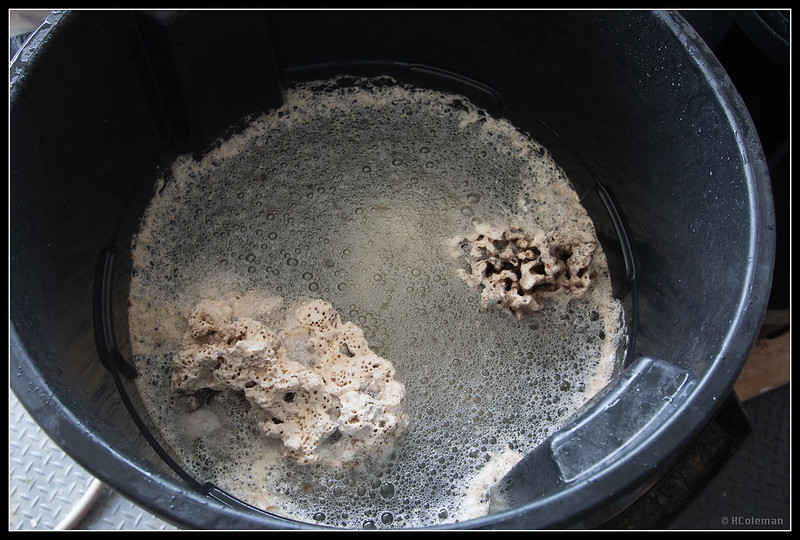 IMG_9658 by LifeThrough_TheLense, on Flickr IMG_9658 by LifeThrough_TheLense, on Flickr
Trashcan 2
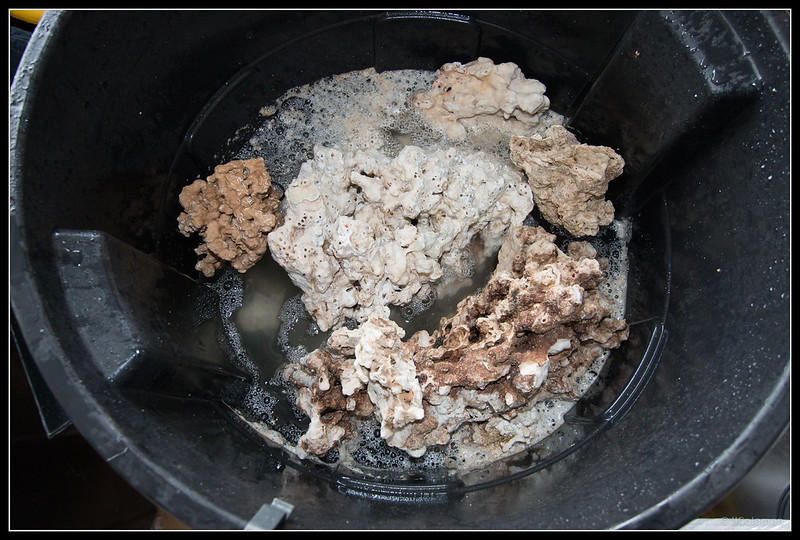 IMG_9659 by LifeThrough_TheLense, on Flickr IMG_9659 by LifeThrough_TheLense, on Flickr
08/23/2017 - Main Sump In Place - WIP
Due to making the stand in two parts and having a big skimmer collection cup maintenance on my skimmer is going to be a pain. The skimmer can only be removed from the back side of the sump and only when the ATO is not in the way. Right now the ATO is just sitting on the floor until I figure out all the plumbing under the tank. Once again I used unions to help break up sections over 3-4 feet in length. This will also allow some flexibility if I want to swap out sections with modifications. Everything is dry fit right now. I am working on final placement of my drain lines. I need to find some scraps of acrylic to place under the unions above each hole in the sump. Once all the plumbing is done I will slide the ATO in place behind the sump. The ATO has the gallon markers on the end so I can see how much water is in there at any given time.
Main Sump
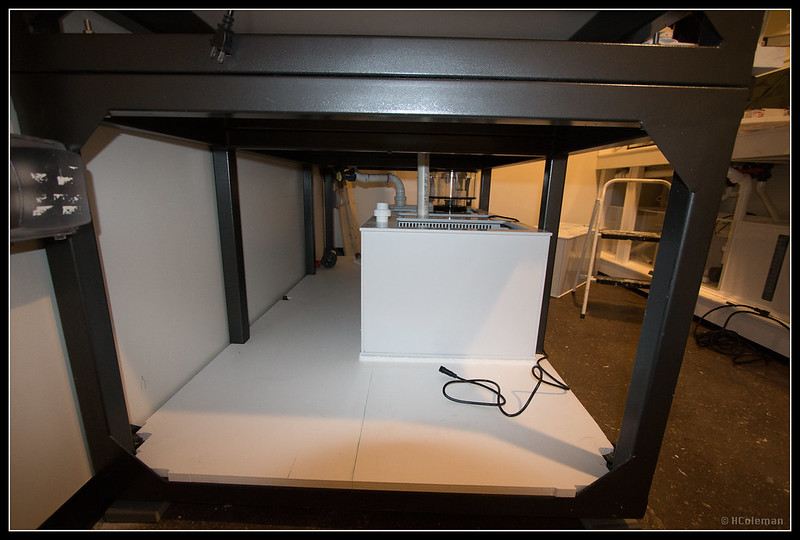 IMG_9663 by LifeThrough_TheLense, on Flickr IMG_9663 by LifeThrough_TheLense, on Flickr
Sump Side View
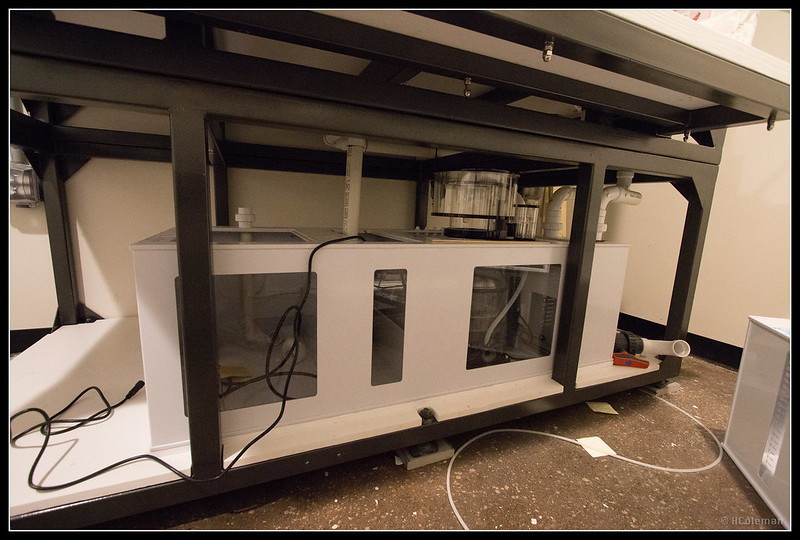 IMG_9665 by LifeThrough_TheLense, on Flickr IMG_9665 by LifeThrough_TheLense, on Flickr
ATO
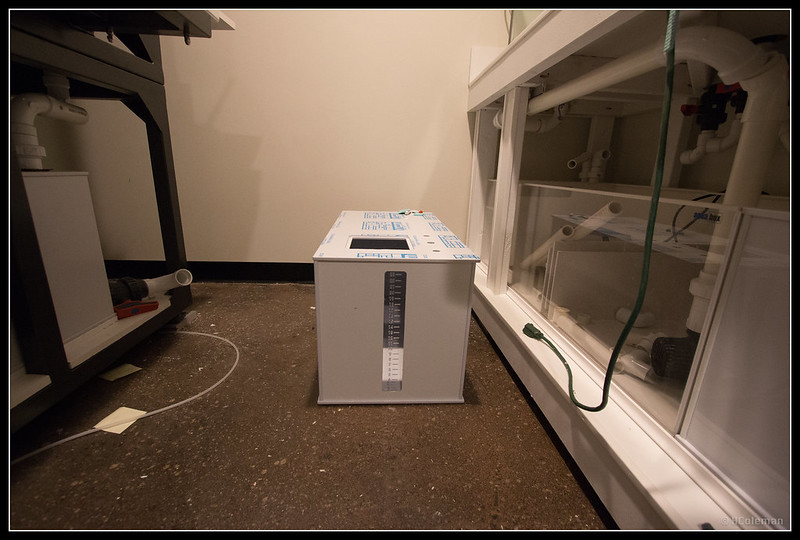 IMG_9667 by LifeThrough_TheLense, on Flickr IMG_9667 by LifeThrough_TheLense, on Flickr
09/03/2017 - Saltwater Mixing Helper Prototype - WIP
Because I want to have my salt water mixing done fast and thoroughly I started thinking about how when I pour salt in the tank it will sink to the bottom. When I mix in my buckets I just stir the salt with my hand for a bit then let the pump run for a few hours. Since my arms are not long enough to reach the bottom and I do not want a pump in the storage tank I started thinking about how I could make sure the salt that was on the bottom of the container would get mixed. My protoype turned out a bit too big for the bottom of the tank but I think I am on to something and how it will work. To get into the tank I had to cut in half which means the final product may end up using an union for the two parts. In the picture with the pipe on the octagon you can see my first attempt without using a pattern. With my pattern it goes pretty quickly and I have a system down where I can make a bend and secure it in place in about 4-5 mins or so. Next steps will be to drill holes on the outside and inside of the mixer.
Template 1
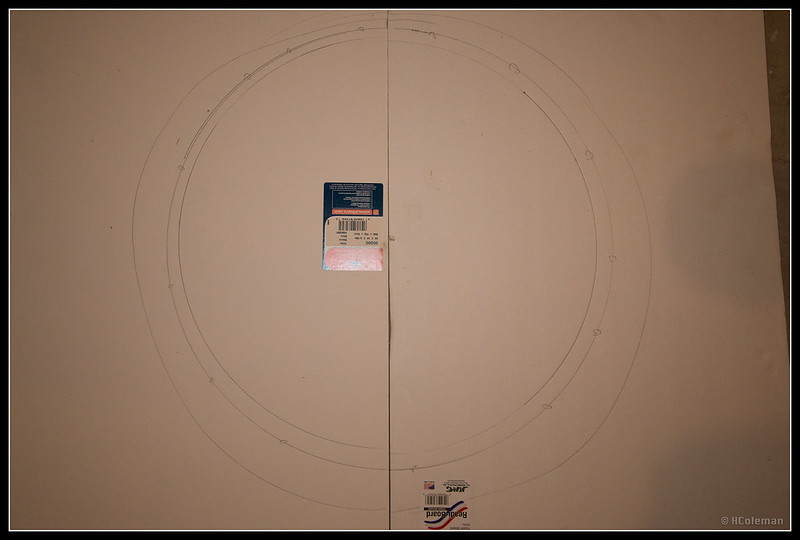 IMG_9673 by LifeThrough_TheLense, on Flickr IMG_9673 by LifeThrough_TheLense, on Flickr
Octagon Template
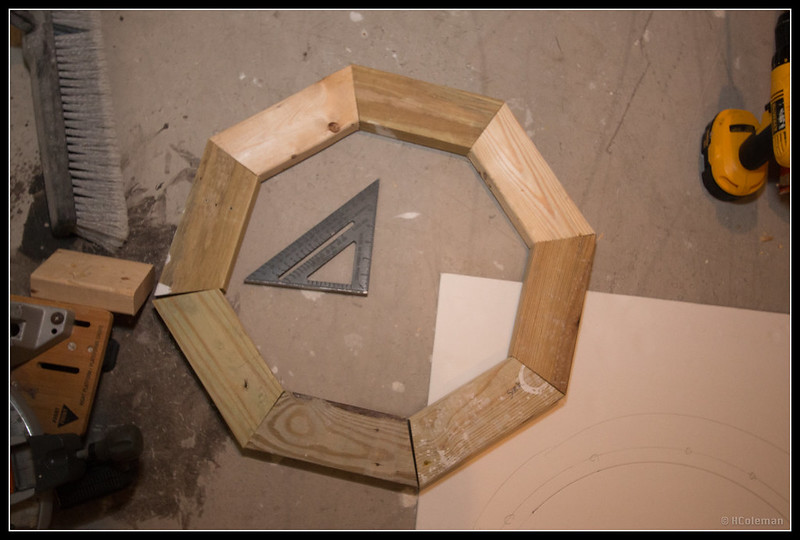 IMG_9674 by LifeThrough_TheLense, on Flickr IMG_9674 by LifeThrough_TheLense, on Flickr
Prototype
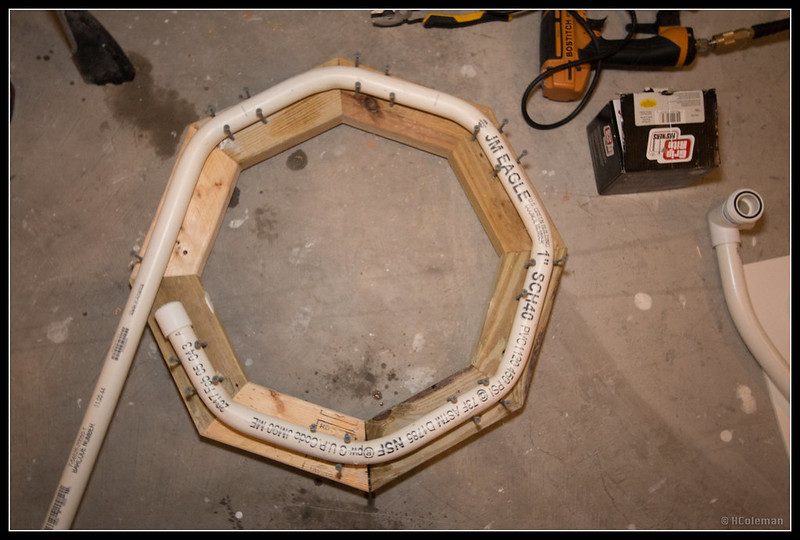 IMG_9676 by LifeThrough_TheLense, on Flickr IMG_9676 by LifeThrough_TheLense, on Flickr
09/04/2017 - Walk-up Bar Cabinets - WIP
I found out that the same type of cabinets in the kitchen upstairs was going to be much more than I expected. The wife and I shuffled down to Lowe's and looked at some ready to pick-up cabinets. I will go with a dark color like upstairs but will save a nice amount and wifey can see I am making progress as she has implemented a Thanksgiving deadline for the main tank to be up and running.
09/05/2017 - Drywall Sanding -WIP
I spent some time sanding the walls in the area outside the fish room and noticed there are few places I still need to get squared away. The ceiling is a pain in the butt and I still need to address a few places around the lights, outlets, and the sprinklers. I hope to have this wrapped up in the next week and the walls primed by the end of next week. Once those are primed I can finish the framing of the fish tank and be one step closer to no more construction projects.
09/06/2017 - Neutralized Chlorine in Trashcan 1 & 2
I dumped about 3 cap-fulls in each trash can but when I went to look for an ammonia test kit I could not find it. I may run out tomorrow and get one after visiting the gym. If all the chlorine is removed I will change the water tomorrow let it sit overnight then test again. If there are no traces after that I will start the cycling process next week.
With that we are now all caught up...
__________________
To check out my pictures of my tank and trips just click on my name and visit my homepage.
Tank Build Thread (Miracles Custom) - http://www.reefcentral.com/forums/showthread.php?t=2628737
|

|

|