
|
|
 03/27/2006, 10:51 AM
|
#1 |
|
Registered Member

Join Date: Jun 2004
Location: Northern VA
Posts: 1,631
|
Tyggerââ¬â¢s 72g New Bow Front Setup ââ¬â *Pic Intense*
My setup is pretty basic and I still have a lot of learning to do. I started collecting ââ¬Åpartsââ¬Â for my new 72g tank over a year ago while doing tons of research along the way. Reefcentral has been a great tool and the members have been very helpful.
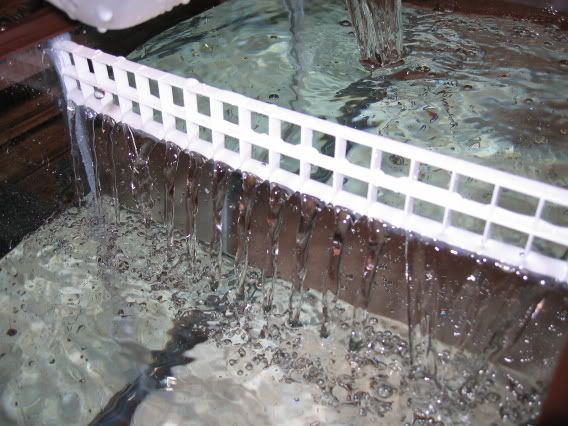
This is my first >15g salt water tank and I was overwhelmed with the amount of planning required for such a task. I wanted to do it right and so far, I think Iââ¬â¢m on the right path. Like many others, I started in fresh water and had always wanted to get into salt water. When a friend with a 10g s/w tank had to move about 1.5yrs ago, he offered it to me or else the fish were going down the toilet. I donââ¬â¢t have a pic of the 10g tank on hand, but it was a basic 10g tank with Penguin HOB filter, about 1-2 inches of sand and one 5lb live rock in the center with 3 fish, a false perc. clown, yellow-tail blue damsel and four striped damsel. I needed to learn how to care for these guys and after searching; I quickly learned that my 10g tank was way too small for 3 fish. I wanted to upgrade immediately, but I kept reading that I should buy the biggest tank I had space for and could afford. I knew this was going to take time... In the mean time, my buddy gave me a 15g tall because it was the same footprint as the 10g. Hereââ¬â¢s a pic of the 15g that Iââ¬â¢ve had for about 1.5yrs. Donââ¬â¢t mind the algae   I wanted to get a standard 75g tank, but my gf and friends convinced me to go with a bow front tank since they thought it looked more modern. After looking a bunch of different tanks, I agreed. I ended up with a 72g Reef-ready All Glass Aquarium bow front tank and stand. I was going to get the Oceanic stand (single glass door in the front), but it didnââ¬â¢t have enough space or accessibility underneath so I sacrificed aesthetics for functionality. 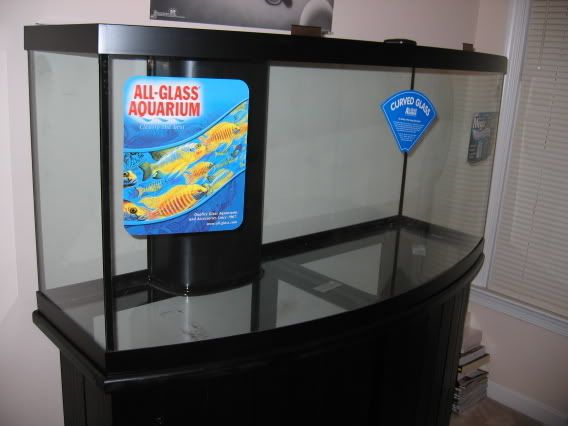 My next task was to find the biggest sump I could fit underneath the stand. After a taking lots of measurements to be sure, I ended up with a 29g AGA tank for the sump. I tried fitting it through the front and rear to no avail! Last resort was to remove the top center braceââ¬Â¦ IT FIT! 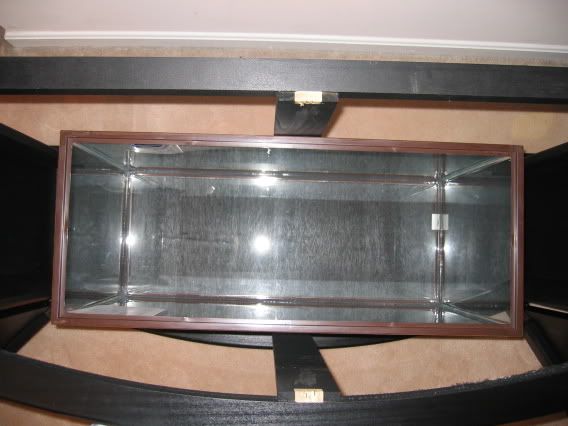 In this pic, you can see the tight fit.  Hereââ¬â¢s how it looks from the front. 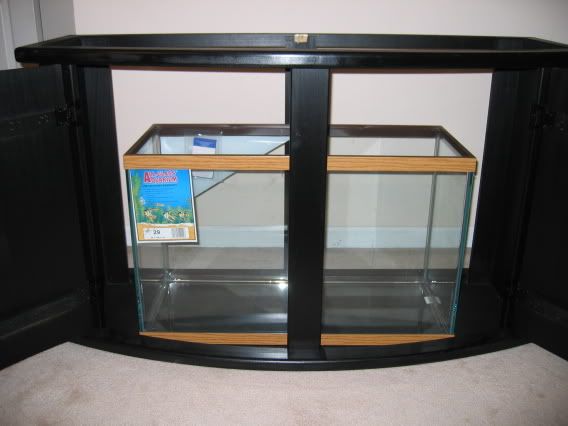 Ok, so now that I know it fits, I can begin on working on the sump by adding baffles. The sump in itself was a lot of work because not only did I have to figure out which design I liked best, I wanted to maximize water capacity while leaving enough space for my built-in overflow to overflow into the sump during power outages. I went with the design with the return chamber in the center and a skimmer area on the left and refuge on the right. I didnââ¬â¢t have the tools to cut üââ¬Â acrylic for the baffles like many recommended, so I went with a thinner acrylic that I found at Homedepot. After cutting and gluing everything into place, it was time for the water test. This is where I came across my first mistake. The acrylic I used was too thin and began to flex because the water in the return chamber (center area) was a lot lower than the skimmer and fuge chamber. The weight and flow of the water made the acrylic flex and I wasnââ¬â¢t comfortable with the bowed baffles so I took them out and replaced them with glass. In hindsight, I couldââ¬â¢ve found a shop to cut the acrylic for meââ¬Â¦ but most places like my local hardware store, Homedepot and Lowes wouldnââ¬â¢t cut acrylic that thick. The glass baffles worked fine, I just have to becareful when working in the sump. 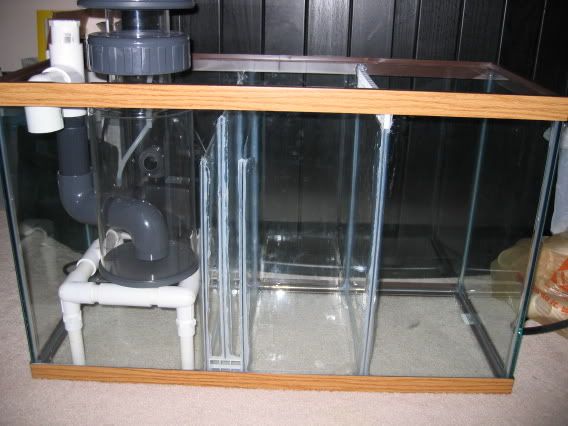 I cut a section from a light diffuser (egg-crate) to use as a screen on the fuge. That should keep larger things in the fuge while allowing pods to flow over the edge. 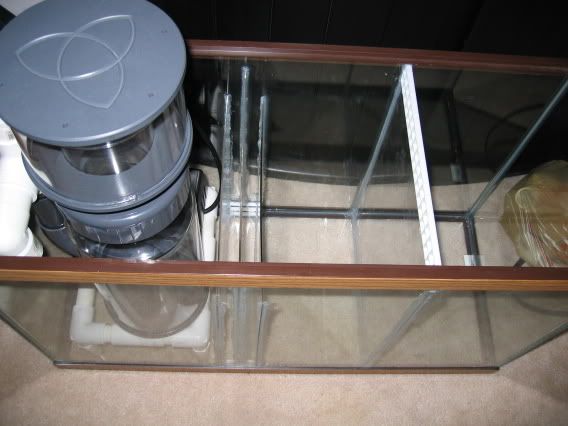 More to comeââ¬Â¦ |

|

|
|
03/27/2006, 11:33 AM
|
#2 |
|
Registered Member

Join Date: Oct 2004
Location: Watertown, SD
Posts: 217
|
Nice nano, the xenia looks great
__________________
Michael Ewald Current Tank Info: 35g 110 Watt PCs, BakPak Skimmer converted Refugium, Mostly Soft and LPS Corals, few sps corals |
|
|
|
|
03/27/2006, 11:34 AM
|
#3 |
|
Go Dawgs!
Join Date: Jan 2006
Location: Mississippi
Posts: 170
|
yes please add more..cant wait to see!
Looks good so far
__________________
Mississippi State University Bulldogs! |
|
|
|
|
03/27/2006, 11:35 AM
|
#4 |
|
Registered Member
Join Date: Jun 2004
Location: Northern VA
Posts: 1,631
|
Hereââ¬â¢s a pic of the egg-crate screen in action during the water test.
 I used to use stick-on backgrounds and got tired of them eventually peeling off or bubbling up, so I decided to paint on a background. I used Krylon Fusion Navy Blue spray paint and it worked great. 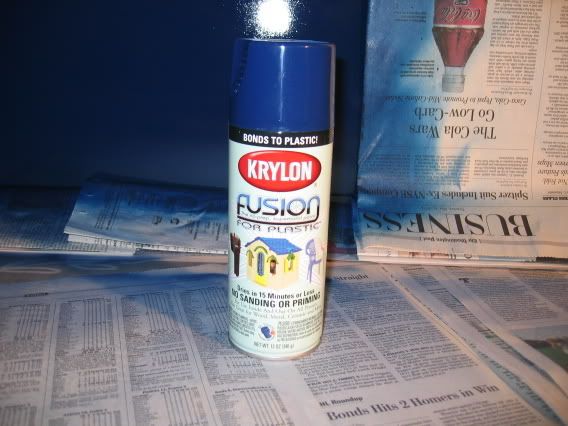 I started taping everything up and decided not to paint over the built-in overflow. One can was good for about 3 layers. 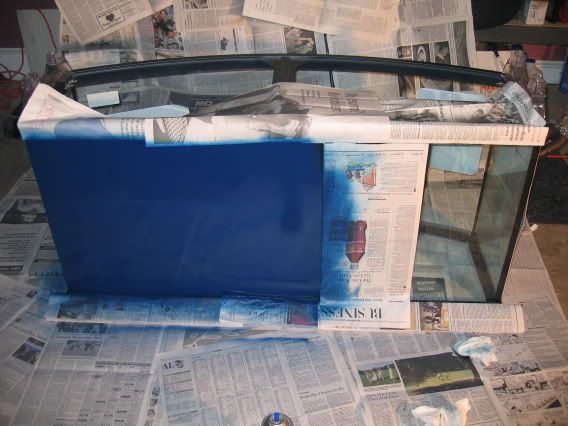 My next task was to find a good skimmer that would fit into my limited space. I had to account for the water level in the skimmer area, the recommended water level in which the skimmer had to be in and the height of my stand so that I could remove the skimmer and skimmate cup easily. I ended up with a Euroreef CS6-1. You can see it in the pics above. ER has a recommended water height in which the skimmer should sit. I think it was around 8-10ââ¬Â. I built this stand out of pvc. Itââ¬â¢s sturdy and easily adjustable if I needed to change the height of water level. 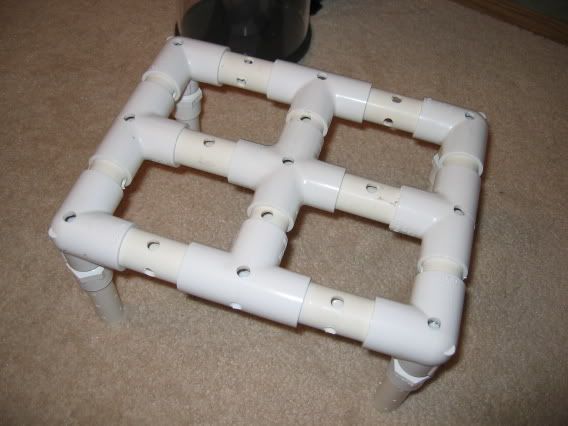 Now I had to figure out how to plumb everything together. At the time, I wanted to use a SCWD so I had to find a submersible pump that would flow enough to operate the SCWD efficiently. I read that the SCWD was very restrictive. Many recommended a Mag9.5 so thatââ¬â¢s what I went with. I also read that the SCWD sometimes leaks so I decided to put it into the built-in overflow. The durso drain pipe was in the way so I had to cut a new hole to accommodate the SCWDââ¬â¢s two outputs. 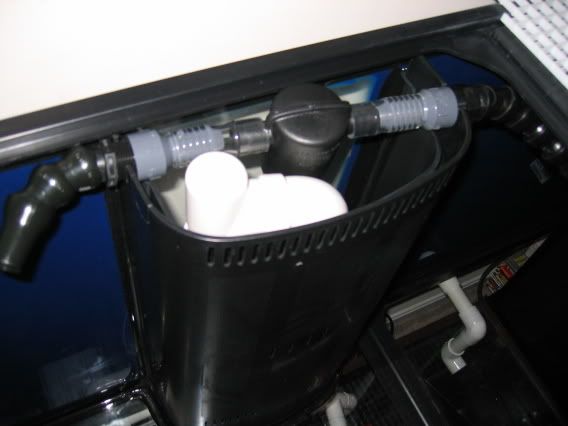 Hereââ¬â¢s what I had to do to make the SCWD fit: 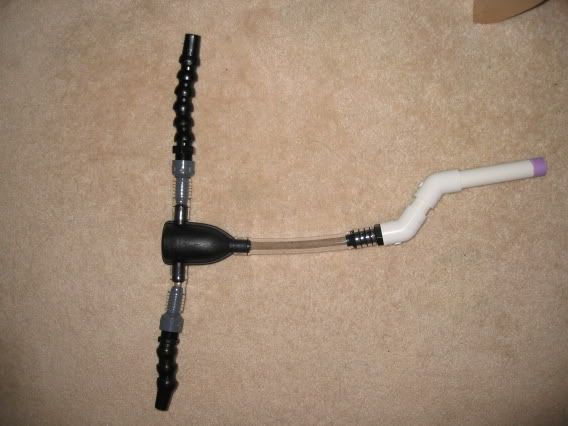 Long story short about the SCWDââ¬Â¦ it also makes a slight gear-like noise. It was enough to drive me crazy at night, but it wasnââ¬â¢t as noticeable during the day. I also read that people had to clean them quite often or they would get stuck. I didnââ¬â¢t want to deal with this so I sold it. More to followââ¬Â¦ |
|
|
|
|
03/27/2006, 12:02 PM
|
#5 |
|
Registered Member
Join Date: Jan 2006
Posts: 399
|
Looks great!
Can't wait to see the finished product. |
|
|
|
|
03/27/2006, 01:50 PM
|
#6 |
|
Registered Member
Join Date: Jun 2004
Location: Northern VA
Posts: 1,631
|
Forgot to add this pic. Here's what the painted background looks like from the front. Don't mind the egg crate on the bottom. I was planning on using it underneath the sand to support the rock work, but was advised against using it.
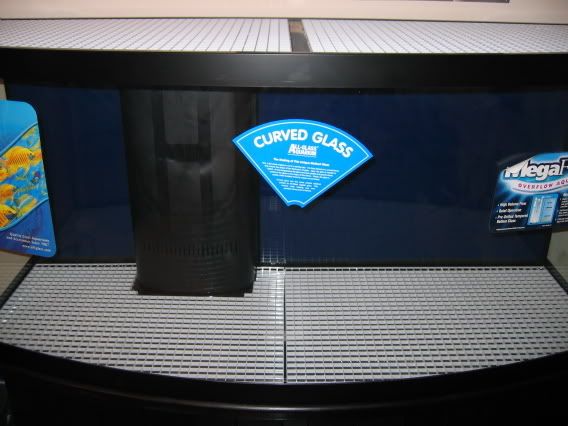 I convered the top with egg crate which can be found at Homedepot and Lowe's in the lighting department. It's also called a light diffuser. 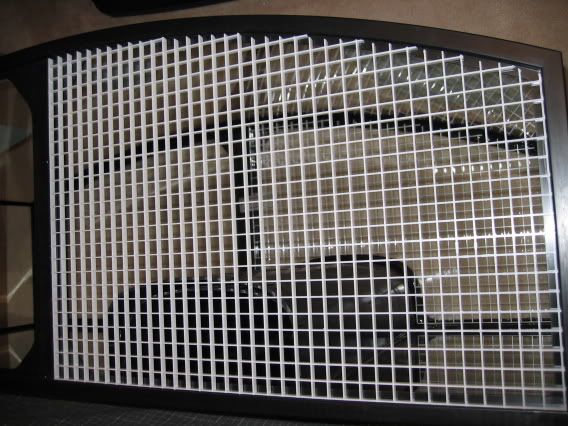 This is what I used to cut the egg crate. It's a regular ol' dremel with a cutting disc. 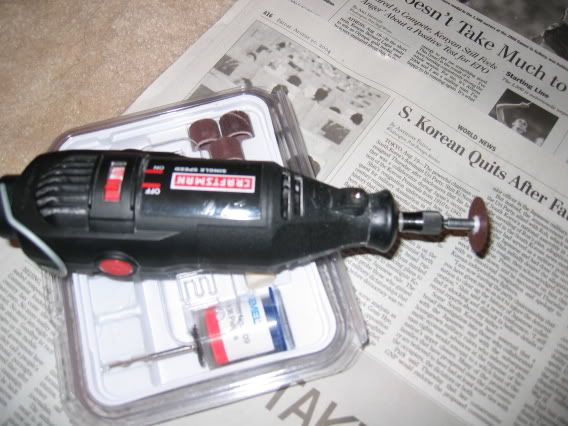 I bought the AGA tank with the built-in MegaFlow overflow and durso kit. In the overflow are two holes, one 1ââ¬Â drain and one þââ¬Â return. After initial water testing, I decided that the durso was going to be way too loud because it caused bubbles to crash into the sump. An exaggeration heard quite often is that it sounds like Niagara Falls and I couldnââ¬â¢t agree more! I had little space in the sump, so my configuration options were limited. I tried many different methods recommended and none of them quiet the sump down enough. I can only find these two pictures. I think I was too frustrated at the time and forgot to take pics of the other attempts. This pic shows where I tried to split the drain into 3 separate outputs underneath the water.  It didnââ¬â¢t workââ¬Â¦ This one shows where I moved the outputs halfway out the water to help vent the bubblesââ¬Â¦ 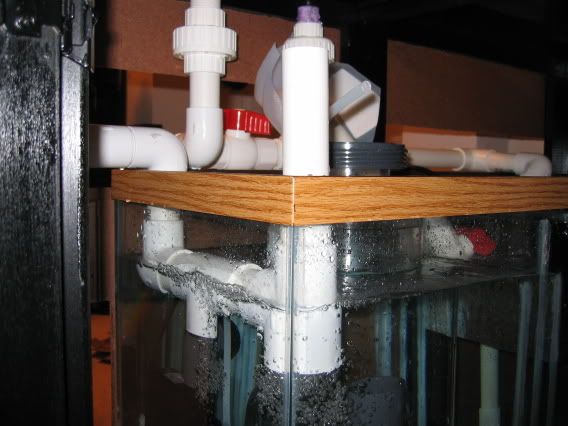 It didnââ¬â¢t work eitherââ¬Â¦ constant rubbling... 
|
|
|
|
|
03/27/2006, 02:10 PM
|
#7 |
|
Registered Member
Join Date: Jun 2004
Location: Northern VA
Posts: 1,631
|
Here is what I anticipated the plumbing/sump to look like.
 The return is no longer going up the þââ¬Â bulkhead. I plumbed it over the back of the tank and used both holes as drains. I also modified the skimmer with the gate-valve mod. More on these laterââ¬Â¦ 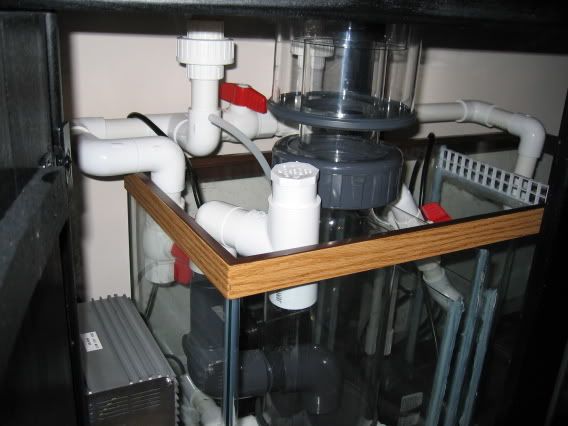 Hereââ¬â¢s a top down view of the sump/plumbing.  Close up of the left side. Skimmer area. Close up of the right side. Fuge area. 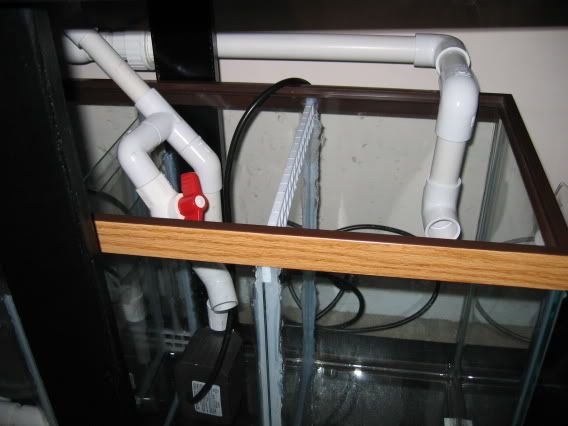
|
|
|
|
|
03/27/2006, 02:19 PM
|
#8 |
|
Premium Member
 Join Date: Feb 2006
Location: Pensacola FL
Posts: 179
|
Nice setup!! I just setup a 10 gal sump underneath my 55 gal tank this past weekend. I had a problem with noise from the overflow line going down to my sump, sounded like someone was draining a loud bathtub that never stopped draining!! After trying to cover the top of my overflow box, I stuck about 2-3 ft of airline tubing down the overflow line and clipped the top of the tubing to the top of my overflow box. It removed the loud draining sound by venting any air in the line leading from my overflow box to my sump. All I can hear now is water trickling from my skimmer, and a slight hum from the Mag 5 return pump. I don't know if this is the same problem you are having, but you might could try it with maybe some airline or 1/4" tubing.
__________________
It's a hobby, relax and enjoy it!! Current Tank Info: 100 gallon is...down for now! But I couldn't completely give it up..... 20 Gal cube up and running - Odyssea 24" - 1 x 250W 15K HQI, 2x 65W PC Actinic, Seio M620, AquaC Remora Pro |
|
|
|
|
03/27/2006, 02:39 PM
|
#9 |
|
Registered Member
Join Date: Jun 2004
Location: Northern VA
Posts: 1,631
|
Thanks chemesgh. I found a resolution...
Ok, so letââ¬â¢s go back to the noisy sump issue. My stand was open in the back so I decided to close most of it to try and reduce the noise. I found some hard board at Homedepot and cut it to fit while leaving enough room for some ventilation and electrical cords. 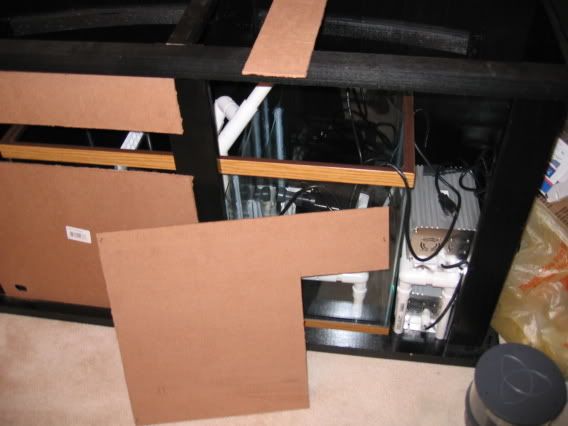 As I was desperately searching for new ideas to quiet down the sump, I came across Herbieââ¬â¢s plumbing method. This method requires more planning, testing and tuning than the more commonly used Durso or Stockman methods. In this design, the main drain is fully submerged in the overflow and controlled by a gate valve. Since there is no air going down the drain, thereââ¬â¢s no crashing in the sump! The þââ¬Â hole designed for the return is now being used as a backup drain and the return line is now plumbed over the back. This method WORKS! It used to be the noise of water that would overpower everything in the sump, now itââ¬â¢s quiet and hum of the pumps are all I can hear. For more details about this method, check this link. Be warnedââ¬Â¦ itââ¬â¢s a long thread! http://www.reefcentral.com/forums/sh...hreadid=344892 Here is Herbieââ¬â¢s method in action. In this pic, the water level above the main drain is pretty low. Iââ¬â¢ve since increased the water level and the noise in the overflow is also silent. The right drainpipe is the main drain. I purchased the black screen pipe from Marinedepot. The holes appear to be large enough to not restrict the flow while small enough to block critters and junk from getting stuck in the plumbing. 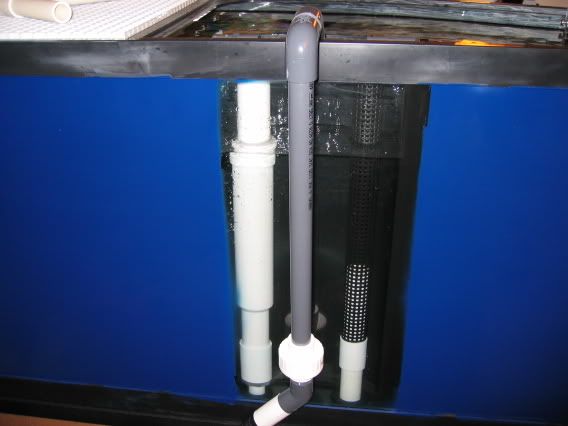 Hereââ¬â¢s another angle of the back. 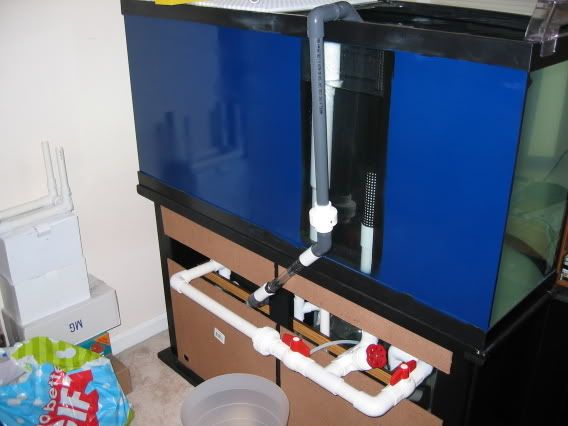
|
|
|
|
|
03/27/2006, 02:59 PM
|
#10 |
|
Registered Member
Join Date: Feb 2006
Location: London UK
Posts: 188
|
very nice , good DIY skills thers, i like the idea putting somthign over the drain pipe to stop critters gettign in i might use that
|
|
|
|
|
03/27/2006, 03:08 PM
|
#11 |
|
Registered Member
Join Date: Jun 2004
Location: Northern VA
Posts: 1,631
|
Thanks joshthenosh!
If I had the tools, I wouldââ¬â¢ve liked to build a bow canopy. But since I donââ¬â¢t, I decided to get a 48ââ¬Â fixture. I kept reading how people wished they wouldââ¬â¢ve gone with metal halides from the start instead of spending more money by taking steps. I decided to buy a MH fixture since I didnââ¬â¢t know exactly what I wanted to keep. When I bought this, T5s werenââ¬â¢t really popular like they are now. Even still, I donââ¬â¢t know if I regret the decision to choose MH over T5s. I like the looks of MH over T5s, but the heat and electricity cost would make me think twice next time around. I ended up buying a CoralVue fixture. It has 2 250w MH, Dual Ended HQI on electronic ballasts and 4 36w PC actinics. I opted for the 10K bulbs. It also comes with mounting legs since I didnââ¬â¢t want to hang the fixture from the ceiling. The box came in pretty beat up, but it was packaged pretty well. It was a box inside another box. Itââ¬â¢s hard to tell from this angle, but it looked like someone kicked the middle of the box. 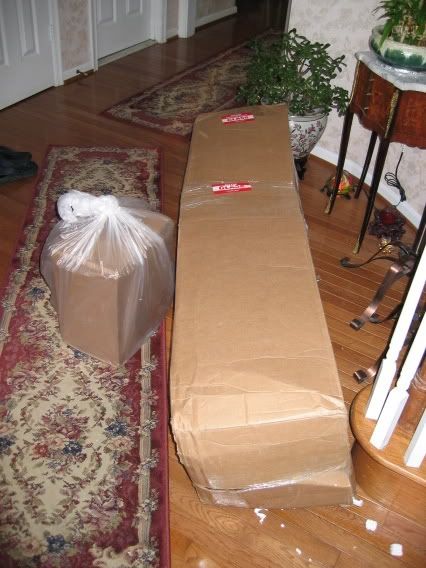 Hereââ¬â¢s the top side.  Bottom side. 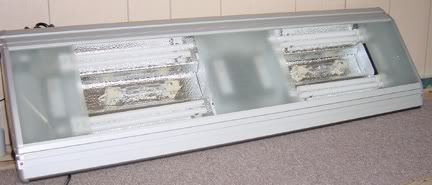 Here are the legs. If you notice, you can adjust to three different heights be either adding or removing a leg. All three are being used in the pic. 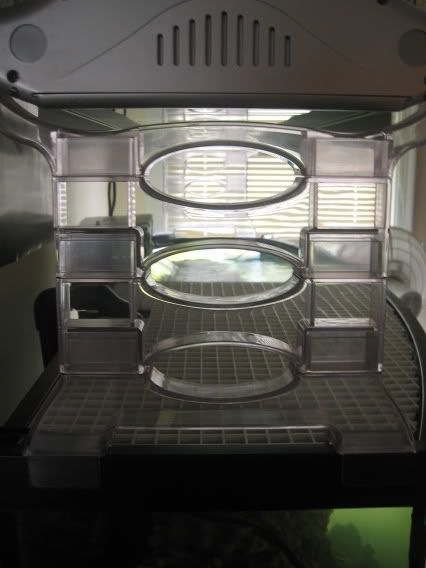 I thought I had a side profile of the fixtureââ¬Â¦ |
|
|
|
|
03/27/2006, 03:20 PM
|
#12 |
|
MASVC OG
Join Date: Oct 2003
Location: Home of the FREE, Thanks to the BRAVE!
Posts: 5,089
|
tygger,
I too recently got a 72 G bow front to upgrade from my 45 G hex. I moved everything over from the 45. I can't see your pic's right now as my work blocks them but I know which lights you are talking about. I have Helios brand which look exactly like yours and have the same type of mounting that you describe. I have 150 W Mh though instead of teh 250's. One thing I found out when I initially tried to mount the lights using the legs was that 1) the legs did not fit the rim around the tank very good and 2) the light was just a tad short for the tank. I had planned on hanging the lights and so had to go ahead and mount them before I was really ready to do so. I did get the Oceanic stand though. It's nice and had just enough room in the back to fit a 29 G tank into the stand. Nothing else will fit in there though. I also did as you and am running a euroreff RS 6-2 skimmer. I'm going with a ehiem 1262 return pump as the rio I have is too noisey and the ehiem is suppoed to be the quiestest. I'm on a wooden floor so every noise kind of echos in the room and is amplified. Good luck with the tank.
__________________
Have you THANKED a Veteran lately for the freedoms you take for granted each day? Best quote ever! "This is a hobby for God sakes and so many people get so uptite. A "hobby" so it should be fun and not a cause to worry or go broke." Paul B Current Tank Info: Tankless for a while. RIP my 8+ yr old pair of Naso tangs, 4 + yr old Moorish Idol |
|
|
|
|
03/27/2006, 05:02 PM
|
#13 |
|
Registered Member
Join Date: Jun 2004
Location: Northern VA
Posts: 1,631
|
Yea, the legs didn't fit over the lip of the tank so I had to trim the inside lip just a bit.
I also saw someone else with the Oceanic stand and a 29g sump. When looking at the stand at the store, I didn't think it was going to fit. Does the small door in the front give you enough room to comfortably work in the sump? |
|
|
|
|
03/28/2006, 07:12 AM
|
#14 |
|
Registered Member
Join Date: Jun 2004
Location: Northern VA
Posts: 1,631
|
Yardright Sand aka SouthDown
I added a couple bags of Yardright Tropical Play sand without rinsing. The blue bag in the center...
 I slowly filled the tank with water using the plate method to avoid a sand storm. Unfortunately, I think a sand storm is inevitable! My tank became completely white and silt quickly covered everything in the tank. Here's are pics of the skimmate. It was sandy/slimy and a film of it covered everything in the tank. What a mess...  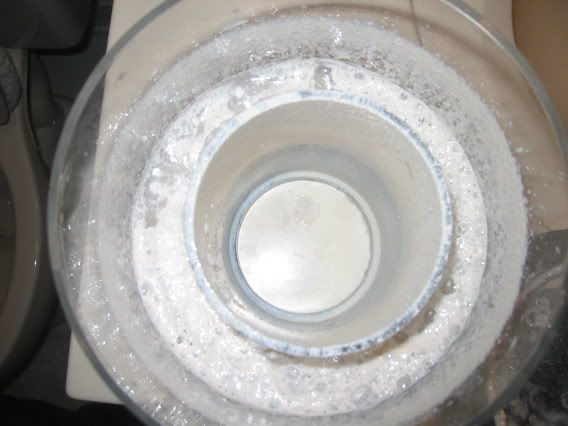
|
|
|
|
|
03/28/2006, 07:26 AM
|
#15 |
|
Registered Member
Join Date: Jun 2004
Location: Northern VA
Posts: 1,631
|
Hirocks
I got in on a group buy with my local reef club for 60lbs of Hirocks "Our Best" base rock. The rocks looked pretty dull and solid, but after rinsing them, about half where nice and porous. The other half were mostly solid bolders. If you go back to my first pic of the 15g tank, the bottom three rocks were from Hirocks.
When I weighed the box, it was actually only around 45lbs. The group buy organizer contacted Hirocks and they actually shipped me an additional 15-20lbs of rock for free. This pic was the original 45lbs. 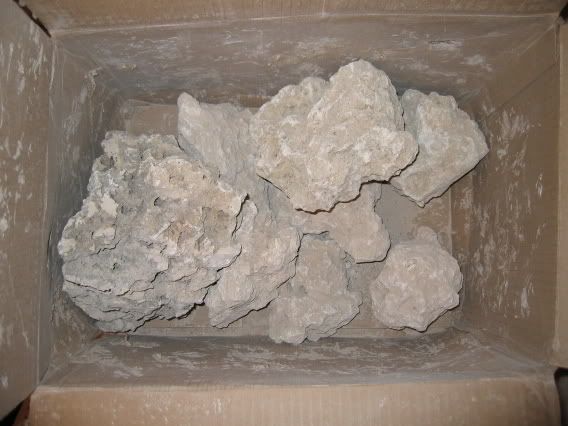 I proceeded to rinse the rest and added them to the 72g sand storm. This pic was taken a couple days after the initial fill. You can start to see some of the base rock. 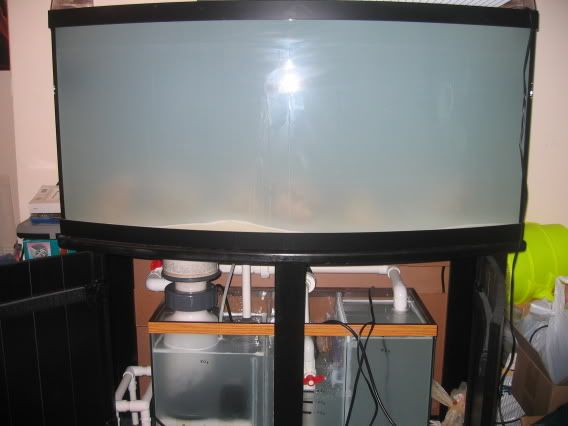 I added a HOB power filter to help clear the storm and it still took approximately 2 weeks clear! I was also skimming pretty wet. Til this day, there's still silt covering parts of the tank and sump that I can't easily clean.
|
|
|
|
|
03/28/2006, 07:46 AM
|
#16 |
|
Registered Member
Join Date: Jun 2004
Location: Northern VA
Posts: 1,631
|
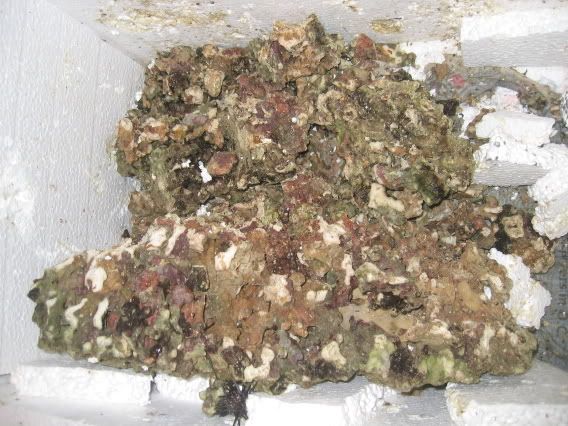
Liverock
I had originally planned on going with Tampabaysaltwerââ¬â¢s liverock after seeing the incredible pictures posted by satisfied customers. But after looking at more and more pics, I wasnââ¬â¢t too excited about the shapes.
Since TBS ships in water, you get lots of hitchhikers, both good and bad. I liked the idea of finding something new everyday, but again, I didnââ¬â¢t want to deal with all the bad hitchhikers. I narrowed my options down to PremiumAquaticââ¬â¢s Marshall Island liverock and ReeferMadnessââ¬â¢ Fiji Pukani liverock. RM was more responsive to my questions and after seeing Pukani pics posted by bubbaphish, I was sold. http://www.columbiamarineaquariumclu...T&f=19&t=1629& I ordered 88lbs of Fiji Pukani Fused Porites from RM and the rocks came within 1 week. It appears that bubbaphishââ¬â¢s rock came in safer than mine. I had small styrofoam pieces stuck in a lot of crevices and about a 1-2ââ¬Â bed of rubble on the bottom of the box. Iââ¬â¢ll just toss those pieces in the fuge. Overall, Iââ¬â¢m really happy about the shapes and color. See for yourself... 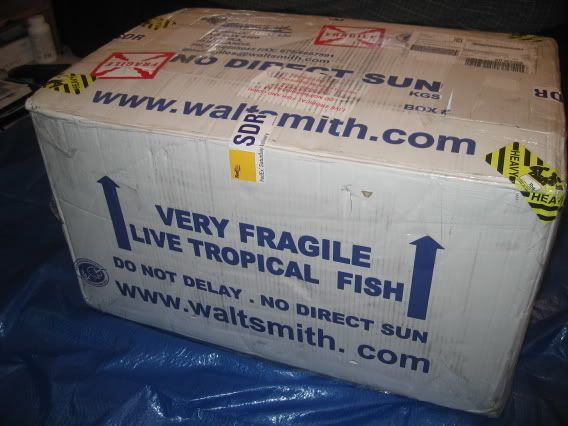 Not showing in this pic are the heat packs that were attached to the lid of the Styrofoam box. 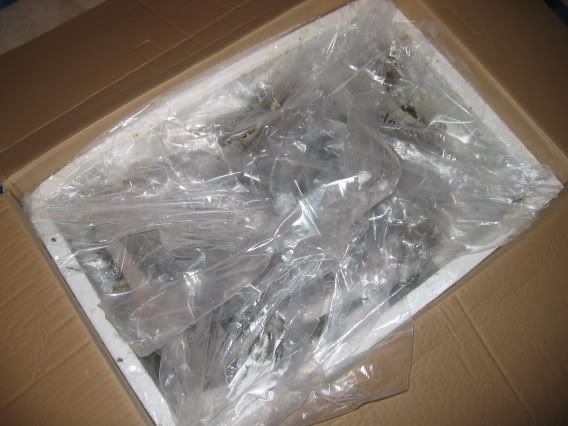
|
|
|
|
|
03/28/2006, 07:53 AM
|
#17 |
|
Registered Member
Join Date: Jun 2004
Location: Northern VA
Posts: 1,631
|
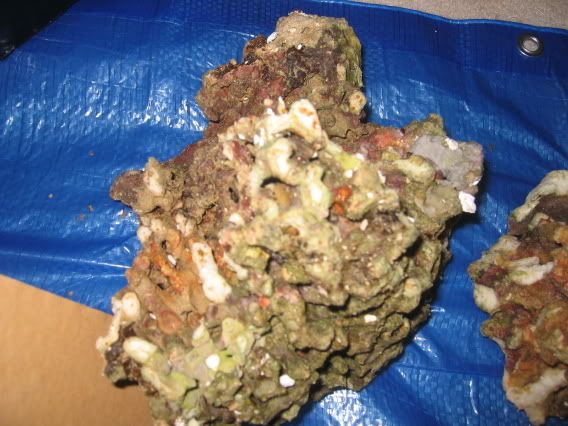
You canââ¬â¢t tell from this pic, but there are little styrofoam balls stuck in the crevices. The bigger chunks you see in the pic were placed there to cushion the rock from breaking each other.
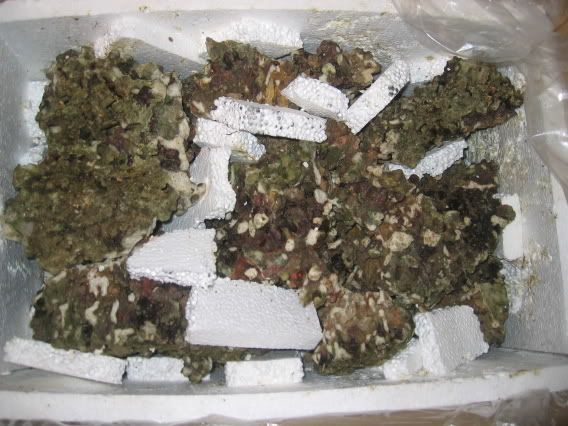 I didnââ¬â¢t take the greatest pics because I wanted to tank the rock asap. 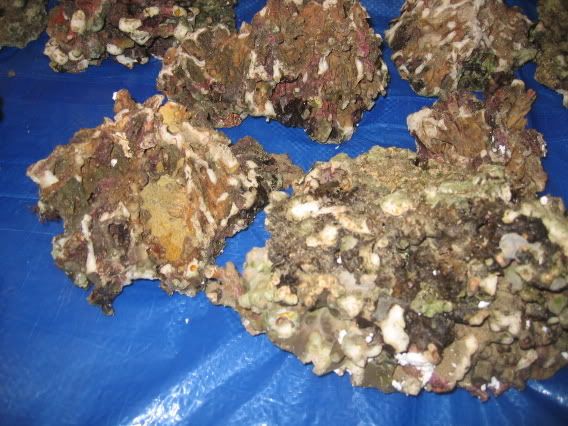 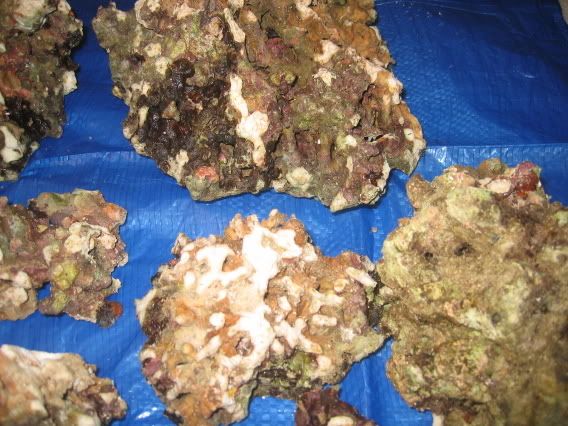 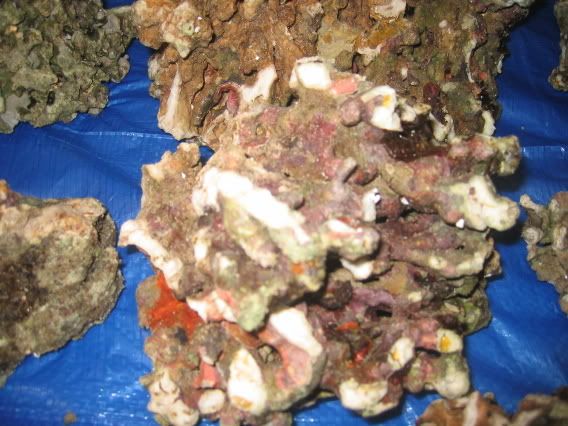
|
|
|
|
|
03/28/2006, 08:01 AM
|
#18 |
|
Registered Member
Join Date: Jun 2004
Location: Northern VA
Posts: 1,631
|
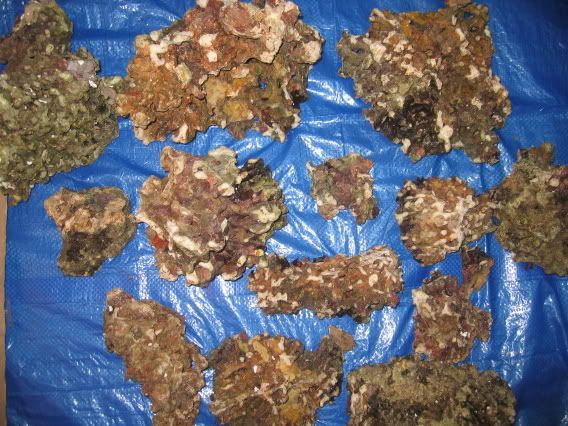
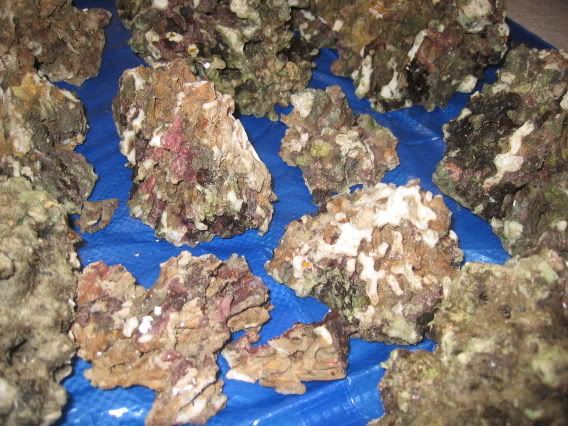
More...
|
|
|
|
|
03/28/2006, 08:04 AM
|
#19 |
|
Registered Member
Join Date: Jun 2004
Location: Northern VA
Posts: 1,631
|
 This one was a huge piece. I'm probably going to break it into smaller pieces... 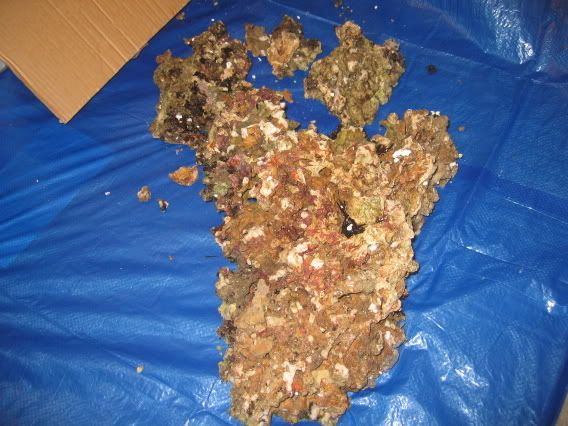 Another angle. 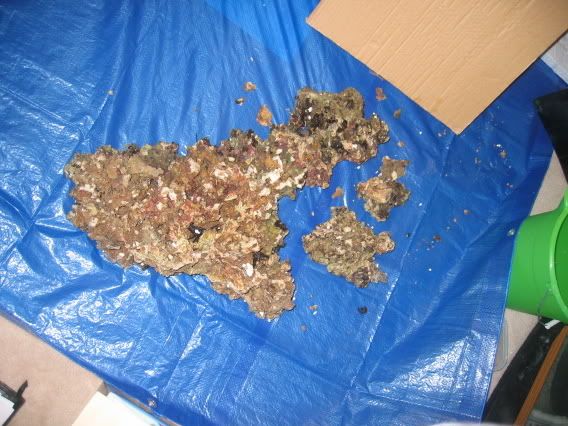
|
|
|
|
|
03/28/2006, 08:08 AM
|
#20 |
|
Registered Member
Join Date: Jun 2004
Location: Northern VA
Posts: 1,631
|
Hitchhikers
Here are some of the dead hitchhikers. Not pictured were a bunch of black urchins.
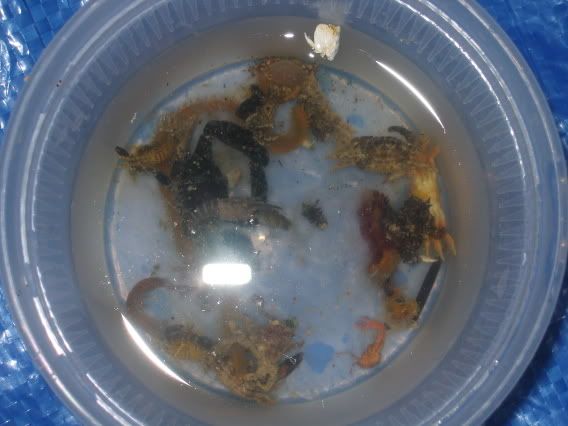 Here are some of the live hitchhikers. I also found a small 1-1.5" mantis (not pictured) crawling around in the rubble. 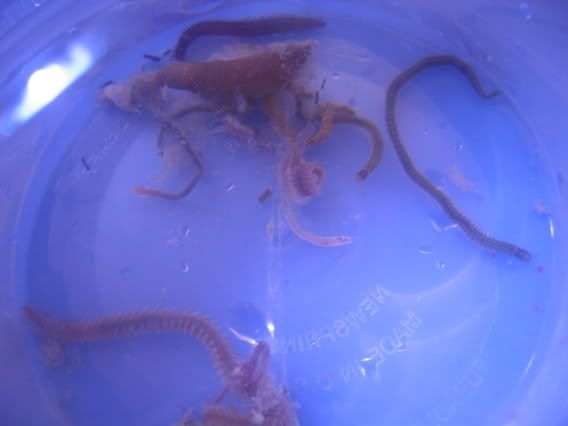
|
|
|
|
|
03/28/2006, 08:13 AM
|
#21 |
|
Registered Member
Join Date: Jun 2004
Location: Northern VA
Posts: 1,631
|
88lbs Pukani in tank w/ approx. 40lbs Hirock base
This isn't aquascaped yet. I just kinda put them in the tank so that they wouldn't fall over.
Notice the one huge rock on the left. 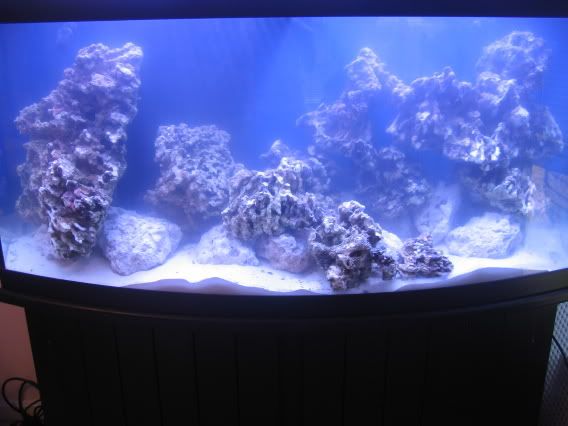 Here's a close up. 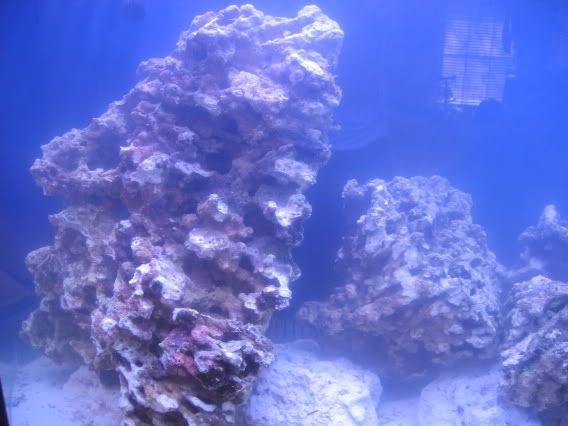 Left center. 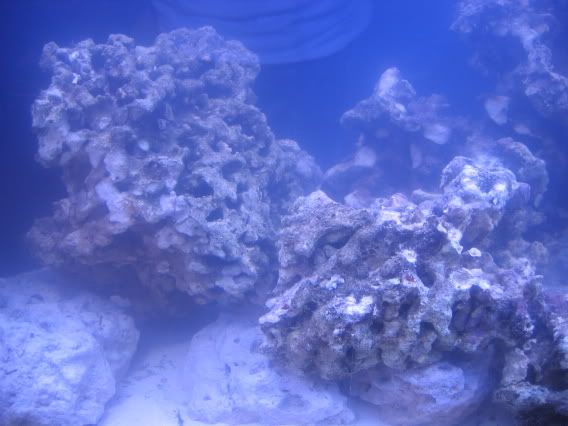 Right center. 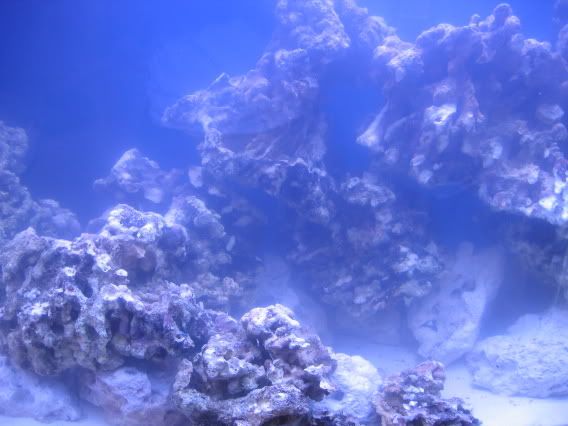 Right. 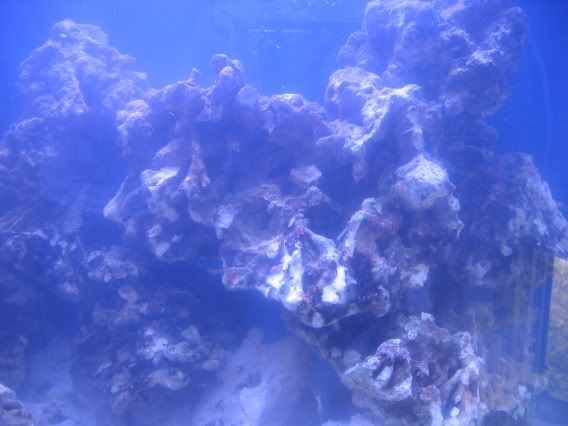
|
|
|
|
|
03/28/2006, 08:14 AM
|
#22 |
|
Registered Member
Join Date: Feb 2006
Location: Cincinnati, Oh
Posts: 10,773
|
Can you get a picture of the manits? I may be interested in taking it off your hands if you want to get rid of it, or havent already killed it!
Great tank by the way!! Looks awesome so far!
__________________
Click the red house for my aqua notes page. Username: guest, password: 1234 Current Tank Info: 24x24x18 SPS reef Last edited by 30mini; 03/28/2006 at 08:33 AM. |
|
|
|
|
03/28/2006, 08:18 AM
|
#23 |
|
Registered Member
Join Date: Jun 2004
Location: Northern VA
Posts: 1,631
|
My skimmer went crazy and I had to empty my cup every hour or so for the first few hours.
The skimmer was set to skim as driest as possible and the skimmate was still collecting pretty wet. This is what Day 1 skimmate consistently looked liked. 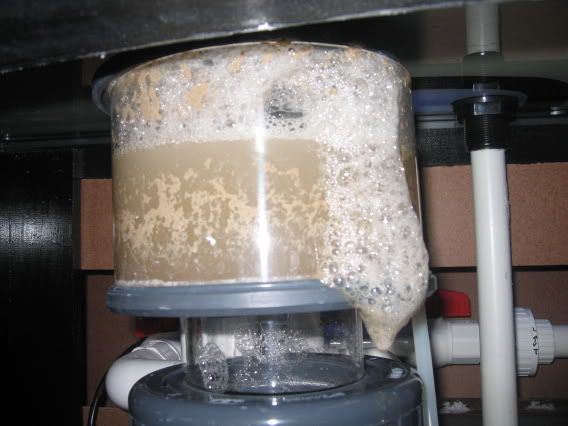 This is what Day 2 consistently looked liked. 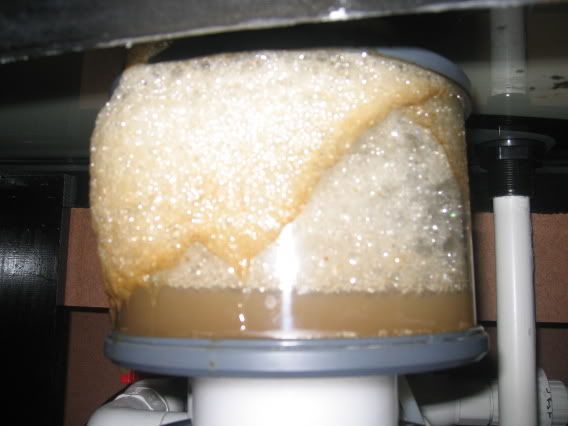
|
|
|
|
|
03/28/2006, 09:23 AM
|
#24 |
|
MASVC OG
Join Date: Oct 2003
Location: Home of the FREE, Thanks to the BRAVE!
Posts: 5,089
|
The tank barley fits. I had to slide one end in at an angle and then twist the tank to get the rest in. It would only go in one way. Wouldn't go in if I started with the other end first.
 As far as working in the sump, it seems OK. I don't have anything in mine but the skimmer, heater, return pump and some polyfilter. I may eventually add a fuge to it.
__________________
Have you THANKED a Veteran lately for the freedoms you take for granted each day? Best quote ever! "This is a hobby for God sakes and so many people get so uptite. A "hobby" so it should be fun and not a cause to worry or go broke." Paul B Current Tank Info: Tankless for a while. RIP my 8+ yr old pair of Naso tangs, 4 + yr old Moorish Idol |
|
|
|
|
03/28/2006, 09:38 AM
|
#25 |
|
Registered Member
Join Date: Nov 2003
Location: Alaska For 18 Years, Now Cape Coral, Florida
Posts: 2,795
|
nice setup you have there, keep us updated with alot of pics
 That big peice of LR is aweome, what are you going to do with it? That big peice of LR is aweome, what are you going to do with it?
__________________
WARNING: Taking my advice may result in personal injury and/or jail time. ~Amber~ |
|
|
|
 |
|
|


