
|
|
 04/19/2008, 12:16 PM
|
#26 |
|
Registered Member
Join Date: Aug 2005
Location: Columbia, IL
Posts: 2,070
|
Save for the Tunzes, in the long run the power they draw is more of an incentive to me than anything....not counting their reputation for long life, great customer service, and the ability to kick up a sandstorm if given the chance. They will "reach" across that 8ft better than most.
Why using the light like that over the sump? Seems like much unneeded power consumption, maybe a grow out tank but not a sump. You don't need bulbs like that over a fuge, you could use them to supplement the main tank or sell them and use the cash for needed stuff. How about a full basement shot so we can see whats cooking down there. Will you be framing all the walls up before setting up the tank? Also in that last pic ditch the Bud, Miller Lite is better for you.
__________________
"For he who serves his fellows, is of all his fellows, greatest" - E. Urner Goodman Current Tank Info: Downgrading from a 75 back to a nanocube of some kind. |

|

|
|
04/19/2008, 12:27 PM
|
#27 |
|
Angelfish Nerd
 |
still debating on the pumps. Just remember, you can buy 4 seios at 2600 gallons each, for the price of one tunze or vortech. but if I figure out a way to have good ones, I will. Just maybe not at first. The seios will not hurt if used temporarily.
The light over the sump was decided before I knew I was going to do a sump and a fuge. Light will go over the fuge. The basement is just a plain basement. This is the first step of refinishing. I collect beer memrobilia (sp?), I drink Coors Light. Miller Lite is NASTY! LOL
__________________
__________________________ Micheal Current Tank Info: 40 Gallon Breeder Reef |
|
|
|
|
04/19/2008, 12:32 PM
|
#28 |
|
Registered Member
Join Date: Aug 2005
Location: Columbia, IL
Posts: 2,070
|
Will you be framing the walls or jsut getting the tanks setup and running first?
__________________
"For he who serves his fellows, is of all his fellows, greatest" - E. Urner Goodman Current Tank Info: Downgrading from a 75 back to a nanocube of some kind. |
|
|
|
|
04/19/2008, 12:34 PM
|
#29 |
|
Angelfish Nerd
|
tanks will moved within the walls, then the walls will be framed, stand built, then tanks put in place. then outside of room finished out
__________________
__________________________ Micheal Current Tank Info: 40 Gallon Breeder Reef |
|
|
|
|
04/19/2008, 06:45 PM
|
#30 |
|
Registered Member
Join Date: Feb 2007
Location: St. Libory, Illinois
Posts: 1,618
|
lookin good, cant wait to see some water in it!
__________________
shoe "When I was younger, I could remember anything, whether it happened or not." - Mark Twain |
|
|
|
|
04/20/2008, 04:13 AM
|
#31 |
|
Registered Member
Join Date: Apr 2006
Location: centralia,il
Posts: 1,111
|
sweet tank,have you thought about maxi-jet mods?maybe 4or so to get you by.if you need any help let me know im only of on sunday but if your cooking steaks i can be there monday haha..
|
|
|
|
|
04/21/2008, 11:08 AM
|
#32 |
|
Premium Member
Join Date: Oct 2007
Location: Cary, NC
Posts: 3,760
|
great project michael. tagging along
__________________
- Ryan B "that is enough skimmate to ruin lives." - GSMguy Current Tank Info: 220g Display, 70g sump, 35g frag, 50g fuge, 2x250w MH, 1x400w MH, 2x80w T5, 2x140w VHO Actinic |
|
|
|
|
04/21/2008, 01:23 PM
|
#34 |
|
Premium Member
Join Date: Oct 2007
Location: Cary, NC
Posts: 3,760
|
are you just using the pressure treated as a base for the rest of the stand to sit upon?
i like how you mounted the RO unit by the sink. i wanted to do something like that, but since my resevoir is up high I thought the backpressure of the small tubing might reduce the output. so I mounted my RO unit up high next to the reservoir. Is this not necessary? it seems to me that when I raise/lower the outlet of my RO, the production rate changes accordingly.
__________________
- Ryan B "that is enough skimmate to ruin lives." - GSMguy Current Tank Info: 220g Display, 70g sump, 35g frag, 50g fuge, 2x250w MH, 1x400w MH, 2x80w T5, 2x140w VHO Actinic |
|
|
|
|
04/21/2008, 07:42 PM
|
#35 |
|
Angelfish Nerd
|
I have not used the ro/di to make water in mass yet, so we will see.
The pressure treated wood is just for the base of the stand where it will be in contact with the aquarium.
__________________
__________________________ Micheal Current Tank Info: 40 Gallon Breeder Reef |
|
|
|
|
04/21/2008, 08:15 PM
|
#36 |
|
Registered Member
Join Date: Apr 2006
Location: southern Il
Posts: 907
|
IMO I would use pressure treated on any of your walls/stand where the wood comes in contact with the cement floors. I also used pressure treated marine grade 3\4'' plywood for the top of my stand. An acrylic tank needs supported on the entire bottom of the tank, not just the edges like a glass tank.
__________________
6 pack a day keeps the doctor away :) Current Tank Info: 525 gallon mixed reef |
|
|
|
|
04/21/2008, 08:25 PM
|
#37 |
|
Angelfish Nerd
|
I will only use the pressure treated on the bottom because if the wood warps, it will mean trouble. That stuff was really green that I got at Lowes. I will use it on the bottoms of the walls too.
Thanks for the advice on the plywood. I had not planned on using it. Glad you mentioned that!!
__________________
__________________________ Micheal Current Tank Info: 40 Gallon Breeder Reef |
|
|
|
|
04/22/2008, 12:21 AM
|
#38 |
|
Registered Member
Join Date: Feb 2007
Location: Downtown Chicago
Posts: 4,093
|
You could save some money on flow by doing a CLS and/or surges. Reefkeeperscorner has a 600 gal that uses surges exclusively, I'll try to look for his thread somewhere. It takes a lot of space above the tank to do surges, but they can create a lot of flow.
__________________
238g 60x36x26, 100g sump/fuge, 30g frag, 23g skimmer sump, 4 Vortechs, ATB L, Sfiligoi 12x54w T5 Bulb Combo: Super actinic, 6 Blue Plus/AS 22k, Fiji Purple, 2 Aquablue special, 2 Aquascience Duo |
|
|
|
|
04/22/2008, 05:29 AM
|
#39 |
|
Angelfish Nerd
|
Skimmer on the way! I got a great deal. I paid 395 shipped on ebay for an Aqua C EV2000! That is right a 2000. It also comes with a Mag 36. I am pumped about that deal! Will post pics soon.
__________________
__________________________ Micheal Current Tank Info: 40 Gallon Breeder Reef |
|
|
|
|
04/22/2008, 11:48 AM
|
#40 |
|
Angelfish Nerd
|
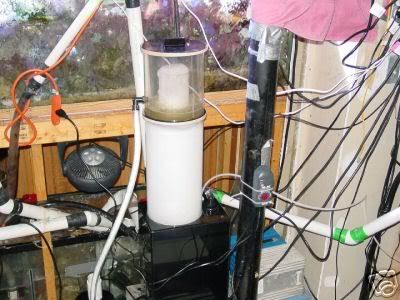
Here is the picture of the skimmer. This is the pic that was on the auction. Obviously I do not have it hooked up yet. I will post more pics when I get it. Looks like a monster.
__________________
__________________________ Micheal Current Tank Info: 40 Gallon Breeder Reef |
|
|
|
|
04/22/2008, 04:09 PM
|
#41 |
|
Registered Member
Join Date: Mar 2002
Location: Highland, IL
Posts: 219
|
looking good man. i can't wait to have a few frosty cold ones in front of it!!!
|
|
|
|
|
04/22/2008, 04:16 PM
|
#42 |
|
Angelfish Nerd
|
Thanks Kribbz. Let me know when I can pick up the 75.
Everyone, Kribbz cut me a heck of a deal on his 75. I am going to install baffles and make it my sump. Still looking for a 75 rr for cheap to use as a fuge. The fuge will be installed over top of the 75 sump. I also wanted to share some questions and answers Kraash and I discussed on messenger last night. He asked me about moisture and temperature control of the fish room and basement. Moisture control will be simple. In my old house moisture was a problem in the basement, so we had a nice dehumidifier. In the new house this is no longer a problem, so wa-la! I will use it in the fish room. As far as room temperature i plan on installing a fairly large vent on the end of the tank that faces the hallway. I will mount a box fan there, then I plan on mounting another box fan on the other end of the lights blowing towards the box fan by the vent. This should be plenty of ventilation to keep the lights cool and remove a large amount of heat from the room. Plus this will help in heating the basement which is pretty cold year round. For the summers I plan on tapping off the duct work to put a vent in the room for AC. Any comments?
__________________
__________________________ Micheal Current Tank Info: 40 Gallon Breeder Reef |
|
|
|
|
04/22/2008, 04:26 PM
|
#43 | |
|
Angelfish Nerd
|
Quote:
|
|
|
|
|
|
04/24/2008, 07:19 PM
|
#45 |
|
Angelfish Nerd
|
Here is the start of the stand, miles from being done, it will be a built like a German tank when I am done. It will be kind of high because it will need to be seen over top of my sectional.
 Some one asked for pictures of the rest of the basement, nothing really that great to look a except cludder. Here is one view, note the gym equipment, because if you meet me you will know where I got these jacks! LOL. off to the left is the sectional I refered to earlier. 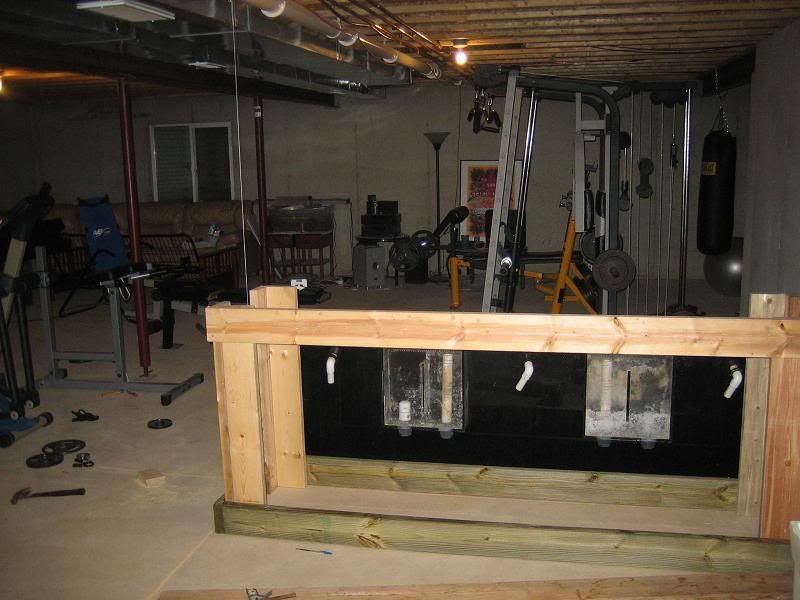 DJ equipment I am trying to sell to support this build. 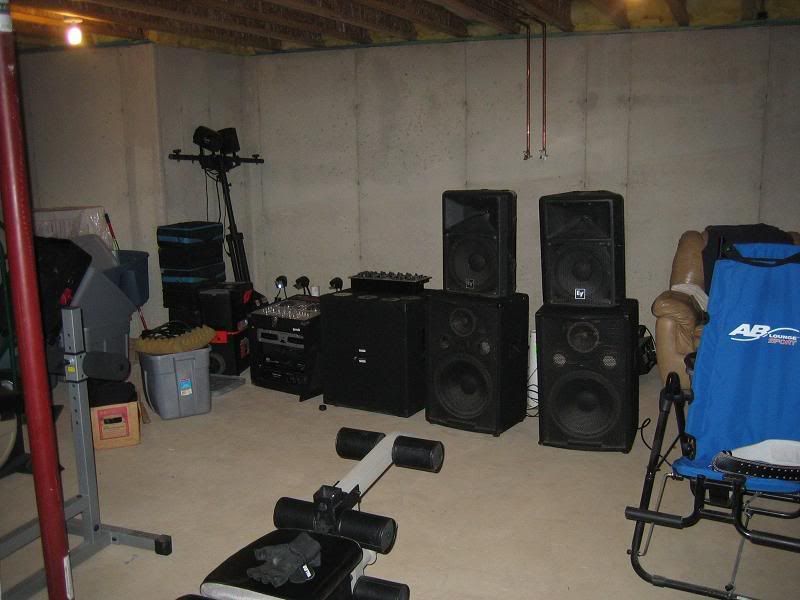 Here is my wife's make-shift salon. We had it set up down there before she opened her own salon in Highland. 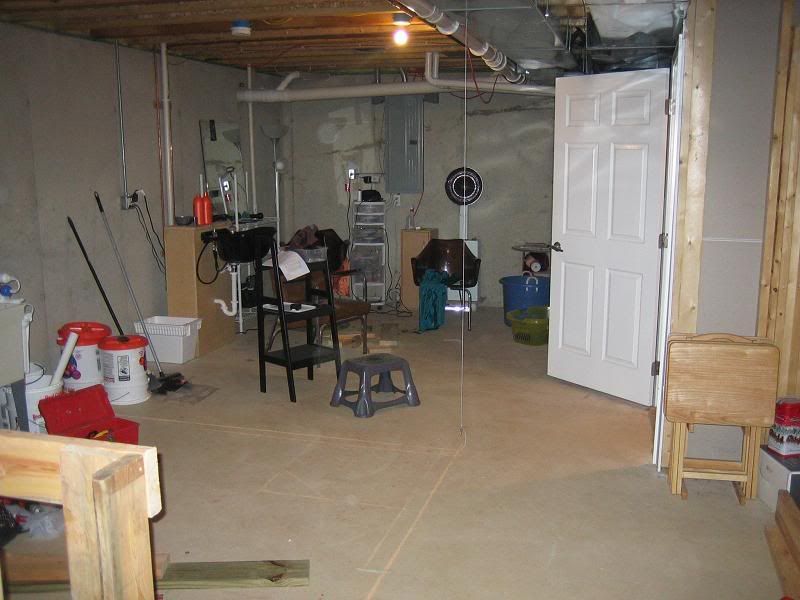
__________________
__________________________ Micheal Current Tank Info: 40 Gallon Breeder Reef |
|
|
|
|
04/27/2008, 12:54 AM
|
#46 |
|
Angelfish Nerd
|
Ok, I got my stand finished up today. Things are moving quicker than I expected. Amazing what happens when you put your mind to something, and have all Saturday to devote to a project.
Here is a couple after the frame was finally done. 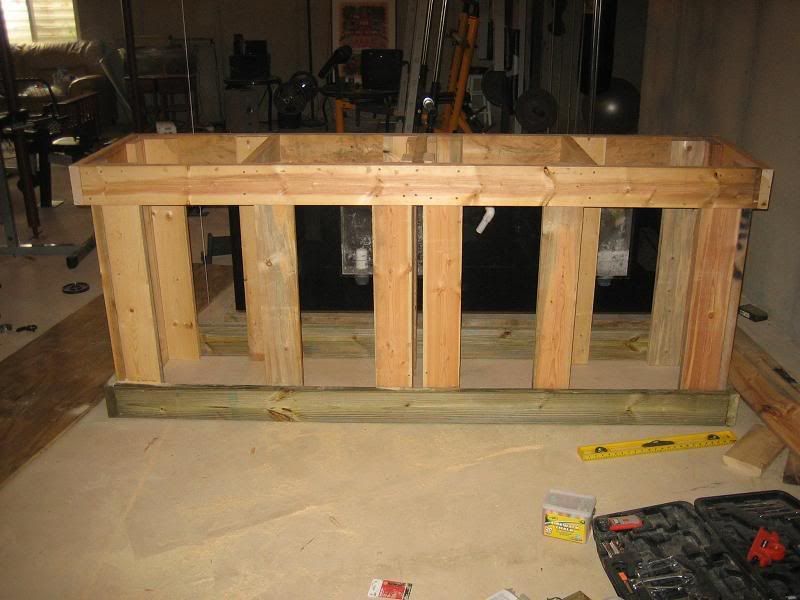 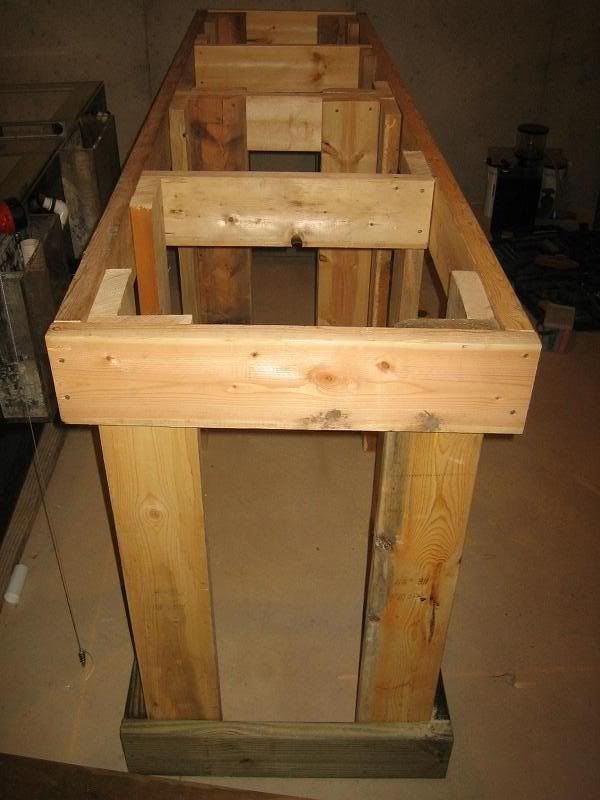 I ran to the hardware store right before they closed to get a piece of 3/4" pressure treated plywood to put on the top. I had them rip it down for me. Once I got it on, I thought about scrapping the whole project and just using it as a bar, LOL! 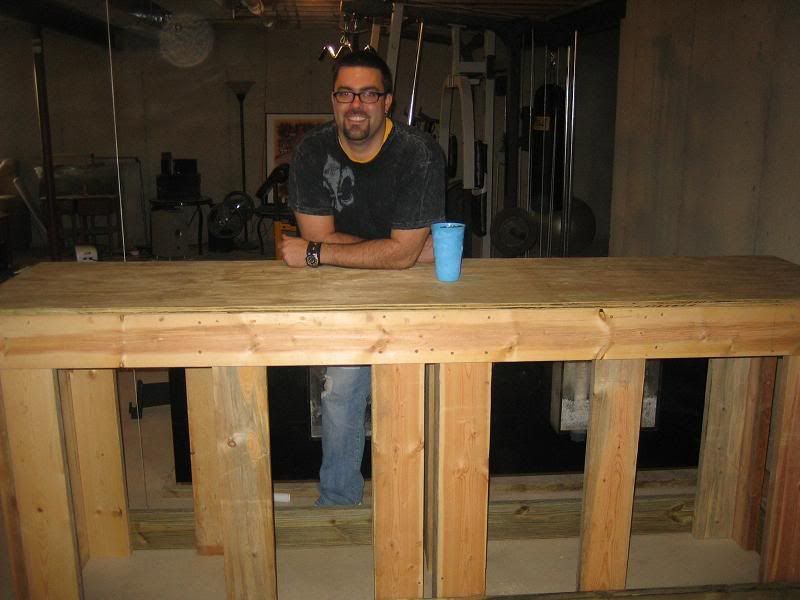 At the hardware store I also got a sheet of polystyrene, which is normally used to insulate the outside of houses, and cut it down to use it as the foam under the tank. Here is the finished product in place. 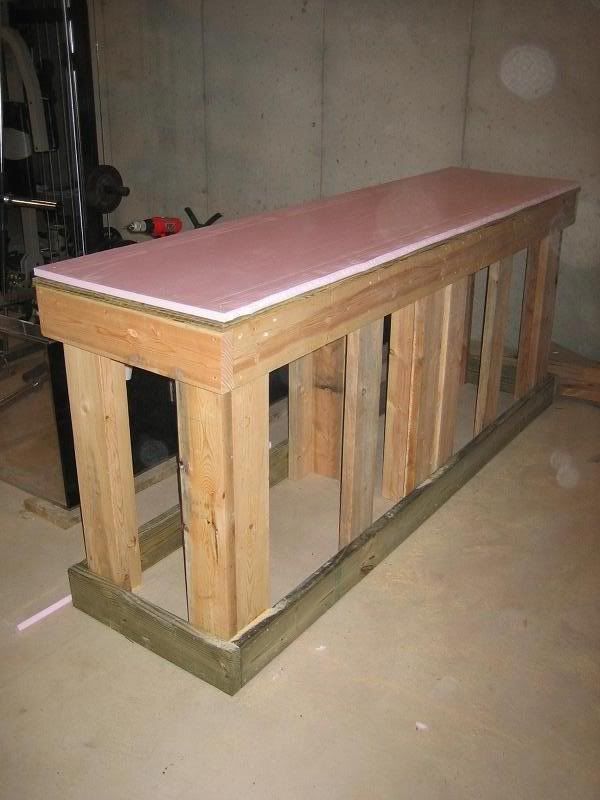 Now all I need next is to pick up the 75 gal and put it in place for the sump, still looking for a 75rr to mount over it for a fuge, then I will go ahead and frame the room. Then the next step will be to install the 46 corner rr for a quaranitine. Stay tuned!
__________________
__________________________ Micheal Current Tank Info: 40 Gallon Breeder Reef |
|
|
|
|
04/27/2008, 11:16 AM
|
#47 |
|
Registered Member
Join Date: Dec 2004
Location: St. Louis
Posts: 1,466
|
I would suggest to cripple in some 2x4 or 2x6 on your uprights outside between the top and bottom perimiters. I takes the pressure off the screws and should make it alot stronger. Thats how we built all my stands in my store and its always better to be safe since wood is fairly cheap and you will have 3000lbs on top of the stand.
|
|
|
|
|
04/27/2008, 03:44 PM
|
#49 |
|
Registered Member
Join Date: Dec 2004
Location: St. Louis
Posts: 1,466
|
Put a piece of wood against your upright posts between the top and bottom frames. It should be a tight tap in fit to releive pressure of the screws holing the frame up and will make it a lot stronger imo. Does that make sense ?? Basically it will make your upright posts double the size and the outside pieces that get crippled in there will take alot of the weight load especially off the screws.
|
|
|
|
|
04/27/2008, 06:59 PM
|
#50 |
|
Registered Member
Join Date: Feb 2007
Location: new jersey
Posts: 266
|
this is what he means by cripplers just 2x4 or 2x6 studs to support the weight instead of the weight of the tank being on the frame that is only screwed hope this helps.
 |
|
|
|
 |
| Tags |
| 240, angels, illinois, slash, tangs |
| Thread Tools | |
|
|


