
|
|
 03/08/2013, 03:57 PM
|
#1 |
|
I never finish anyth
Join Date: Dec 2008
Location: Houston TX
Posts: 1,120
|
DIY Vortech screen cover
Made a DIY vortech cover awhile back, finally got around to writing something up about how I did it
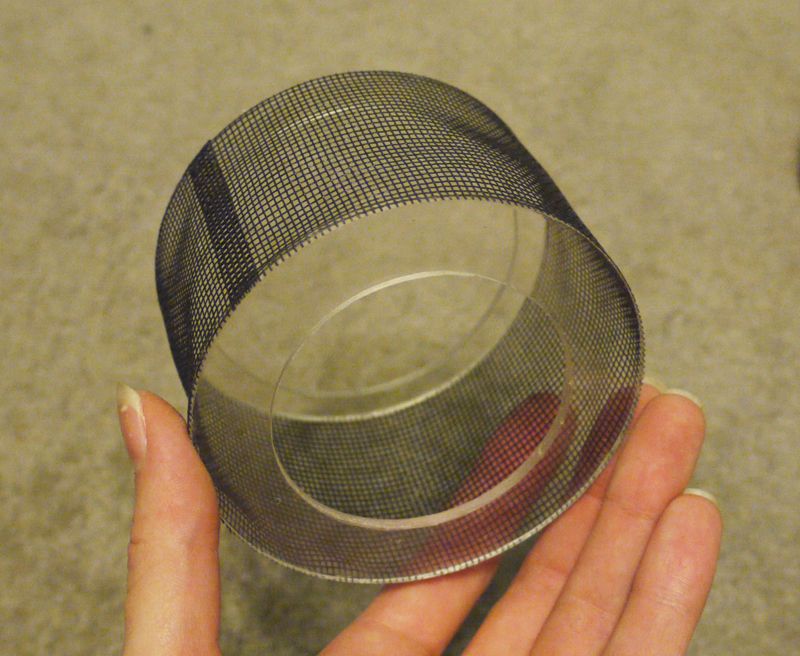
 Anemone proof! Anemone proof!Product made 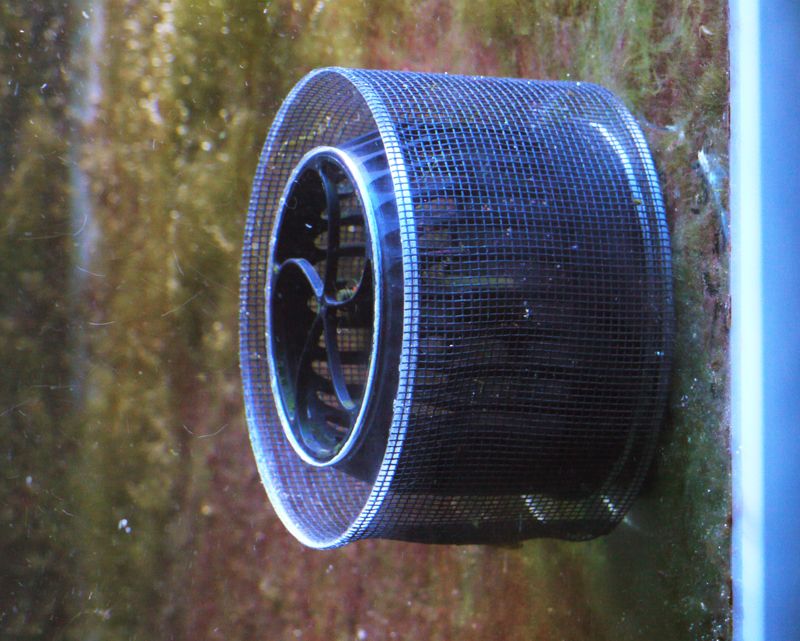 Supplies used: Drill, dremel, 1/8" acrylic, regular fiberglass window screen, and 3 holesaws (4", 3 1/8", 2 1/2") 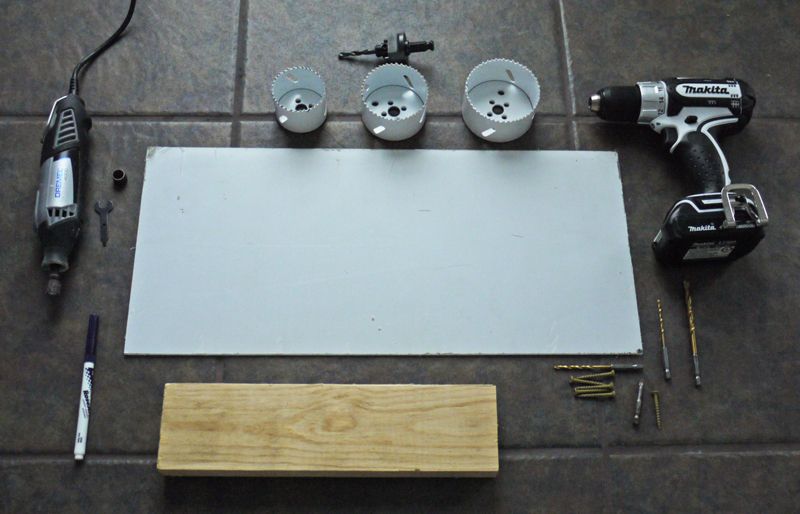 Secured the acrylic to the wood so it wouldn't move while making the rings, predrilled the center 1/4" shaft for the holesaw bit 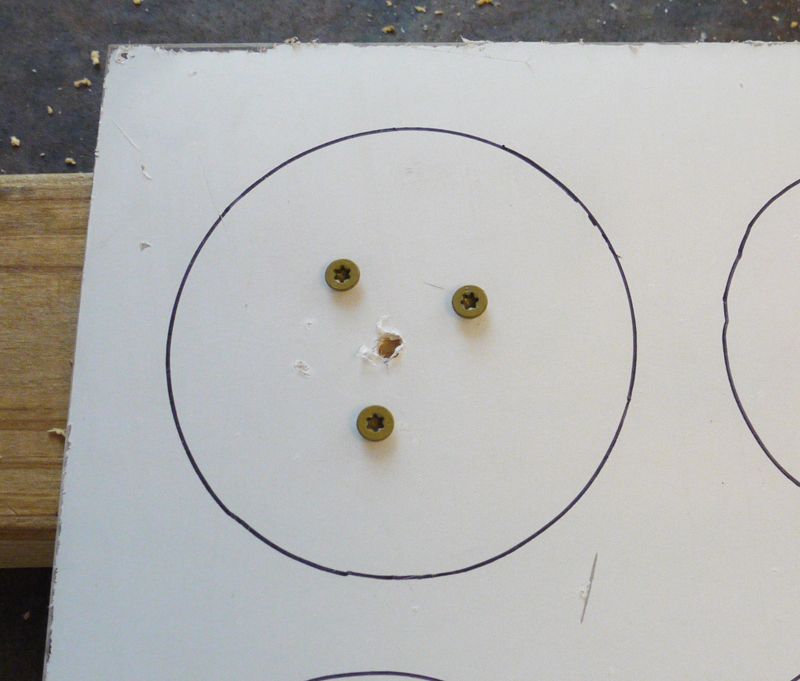 Made my disc, 4" holesaw used 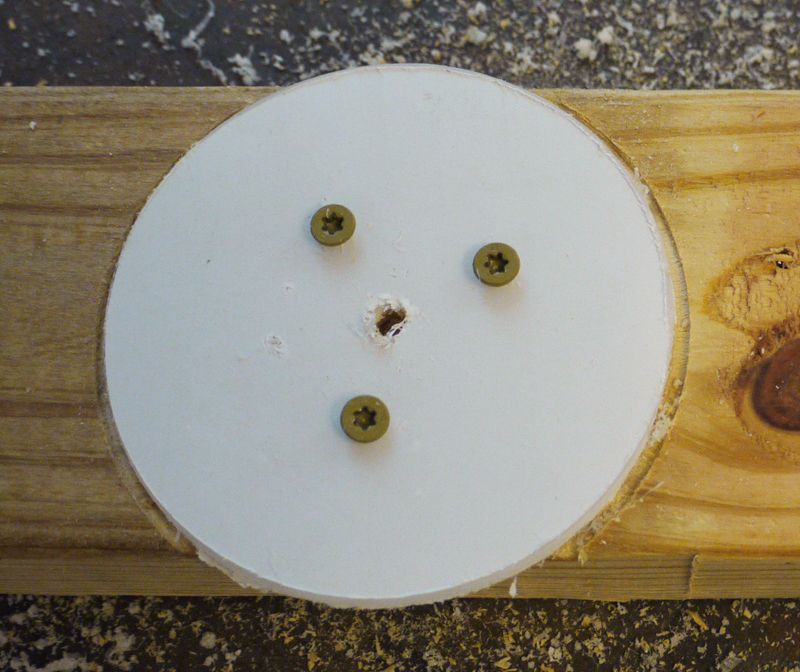 Drilled again with the smaller holesaws, using the same center hole for the holesaw's bit so it was exactly centered - 2 1/2" holesaw used for the front vortech ring, 3 1/8" holesaw for the rear ring  Sanded the ring a bit, holesaw's not too smooth The front ring only needed evening out, the back ring will need to be sanded just a little bit larger than 3 1/8". A little bit of sanding and the rear ring fits snugly over the back of the vortech. Don't sand too much because its the snug fit that keeps the cover on the vortech.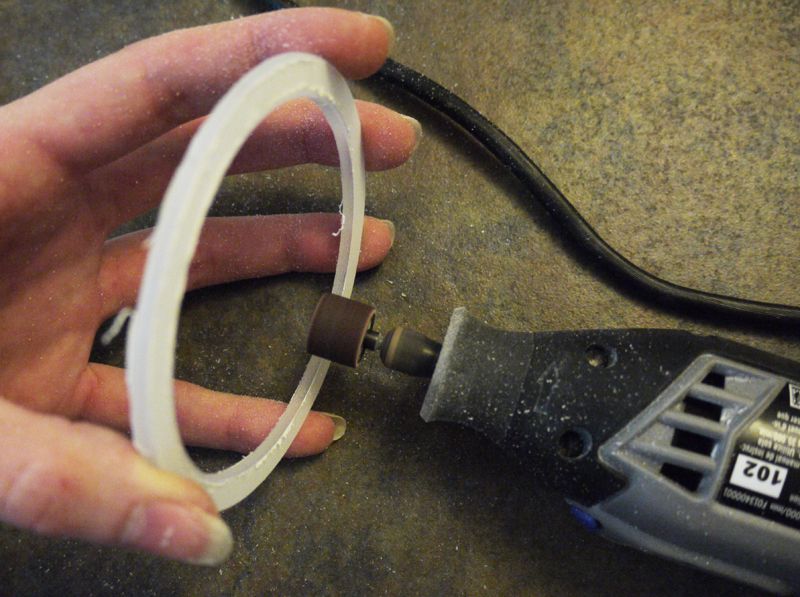 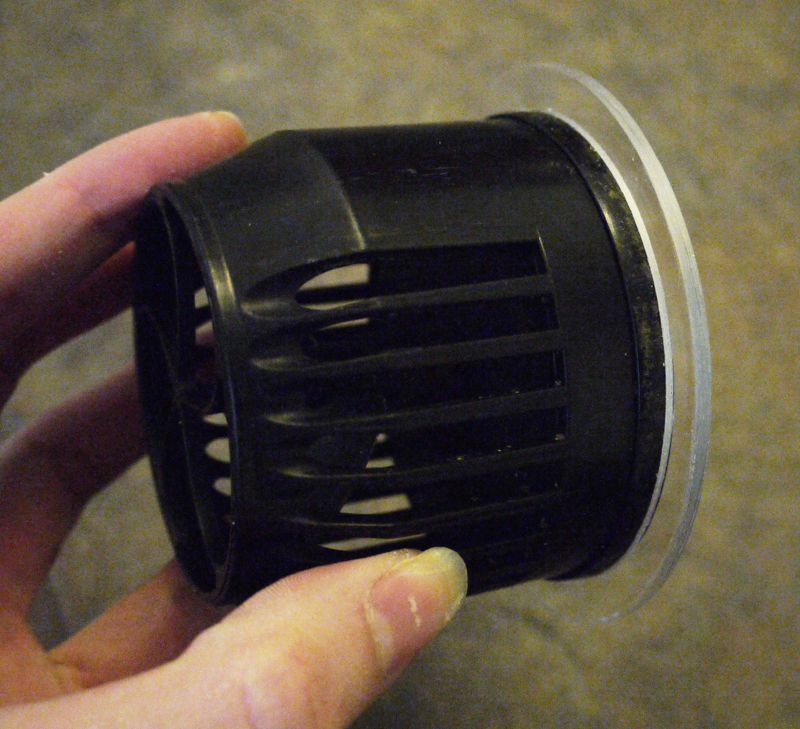
__________________
No trees were harmed in the sending of this message; however, a significant number of electrons were slightly inconvenienced. |

|

|
|
03/08/2013, 03:58 PM
|
#2 |
|
I never finish anyth
Join Date: Dec 2008
Location: Houston TX
Posts: 1,120
|
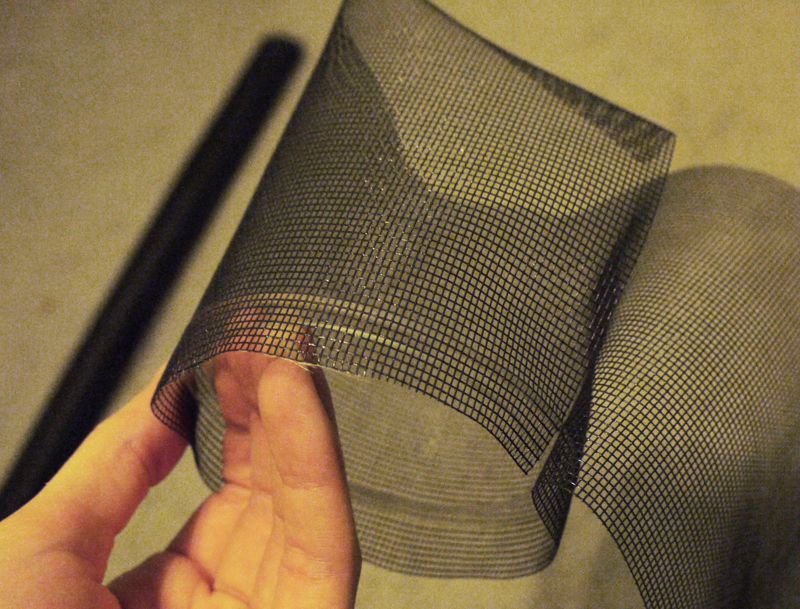
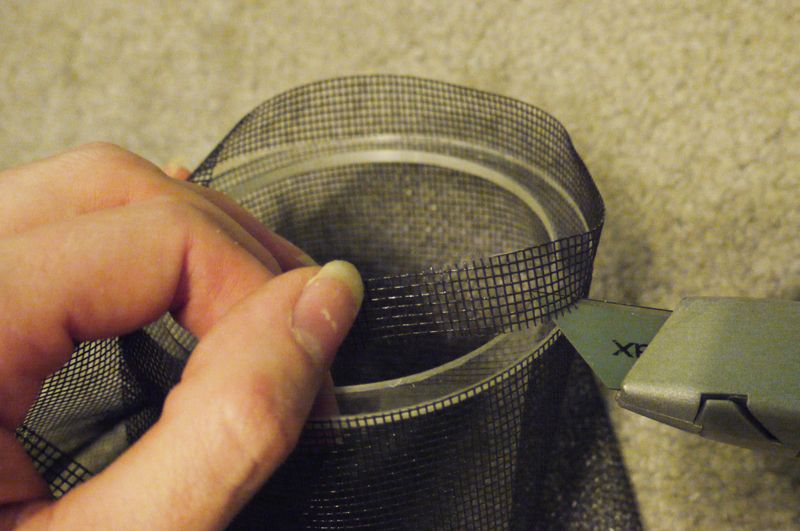
Small piece of window screen, superglued to the outside of both rings. Extra cut off and the cover is done!
   Fits perfectly over the vortech. Easy to slide off and clean. One thing I did not add to this prototype was small pieces of acrylic joining the front and back rings to add some rigidity to the cover, I will do that with future covers. 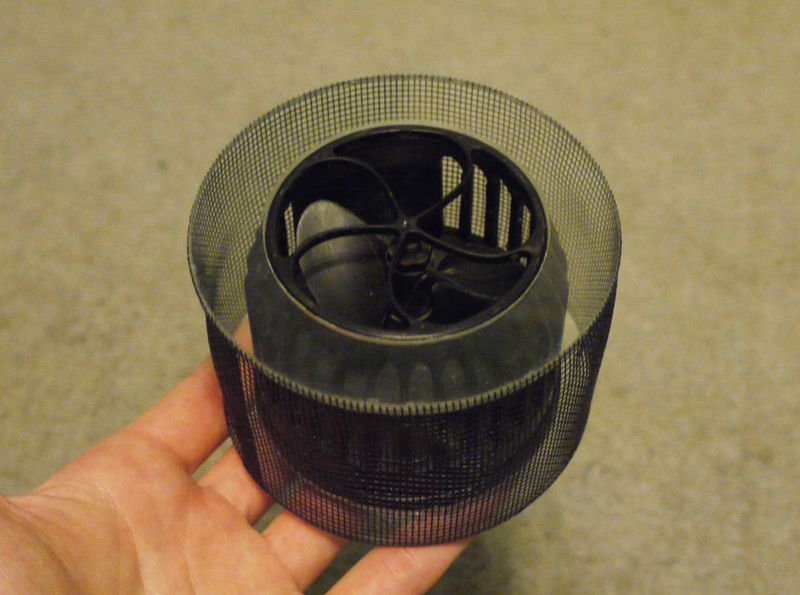 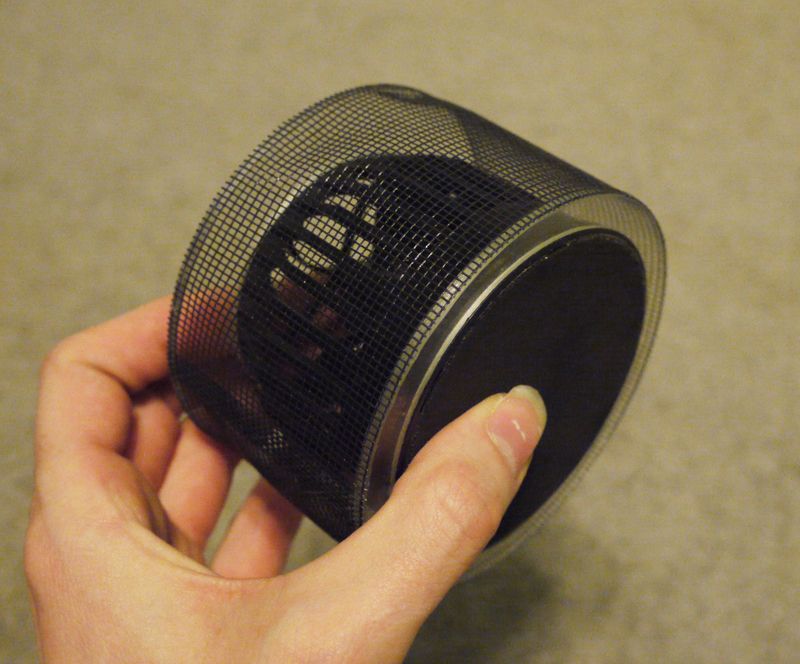 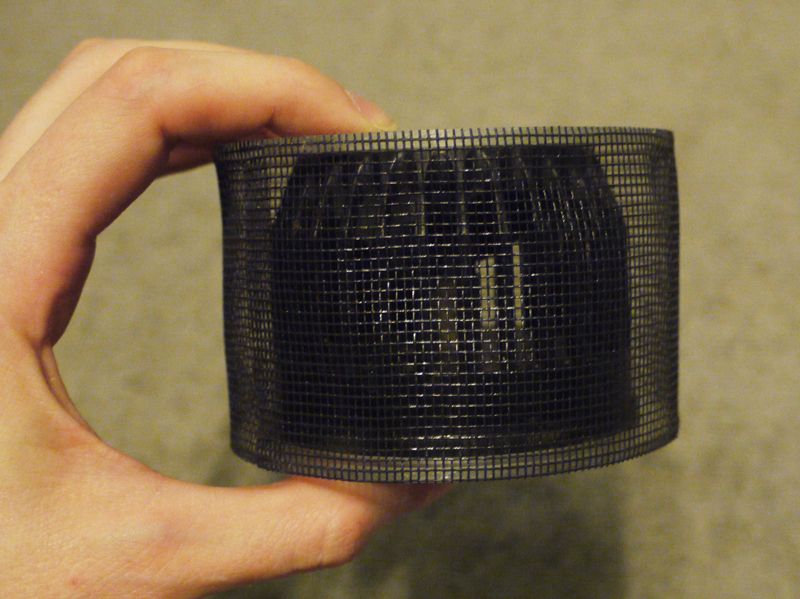
__________________
No trees were harmed in the sending of this message; however, a significant number of electrons were slightly inconvenienced. |
|
|
|
|
03/08/2013, 04:03 PM
|
#3 |
|
Registered Member
Join Date: Jan 2006
Location: Toledo OH
Posts: 2,466
|
Ohhh..very slick and non clogging!
__________________
Inwall Basement Setup w/ Growout Tank & Common Acrylic sump, SRO XP3000E, Neptune Apex, Bubble Magus Triple Doser, CLS- Super Dart Gold + OM 4way, 2-400w MH & 4-80w T-5, ROX .08 carbon... |
|
|
|
|
03/08/2013, 04:06 PM
|
#4 |
|
I never finish anyth
Join Date: Dec 2008
Location: Houston TX
Posts: 1,120
|
I was going for something that would be easy to clean and not impede flow too much
__________________
No trees were harmed in the sending of this message; however, a significant number of electrons were slightly inconvenienced. |
|
|
|
|
03/08/2013, 04:41 PM
|
#5 |
|
Not afriad to admit wrong
Join Date: Jun 2012
Location: South of WashDC in Maryland
Posts: 7,774
|
I had DIY tank seperator screen and put it around mine.
Lets just say they became a trap for everything. Those holes look tighter than what I used. Very nice and good idea. How long has it been running so far?
__________________
Stock:LPS/SPS|1 hippo|4 OC Clown|4 Pepp shrimp|2 Brittle Star|3000+ Copepods|10+ MiniBrittle|8+ Bristle Worm|2 Anemone|100+ mini-feather|4 boys 14,21,22,22 Current Tank Info: Tank:300g Mixed Reef 300+lb LR|4" LS|5x MP40W|75g fuge|5x RadionPRO|RO DB250 skimmer|Apex |
|
|
|
|
03/08/2013, 04:45 PM
|
#6 |
|
Registered Member
Join Date: Sep 2003
Location: San Jose, CA
Posts: 6,499
|
I just zip tied the screen to my vortech works well too
|
|
|
|
|
03/08/2013, 05:52 PM
|
#7 |
|
Registered Member
Join Date: Aug 2012
Posts: 111
|
That one of the best idea I have seen .
|
|
|
|
|
03/08/2013, 06:00 PM
|
#8 |
|
Refugium pat.#D414,242
Join Date: Dec 2011
Posts: 844
|
Great DIY........well done!
Maybe try that BRS 1/4" screen if you have a chance
__________________
Doctor "Aquatron" Mister "Spinner" 300 gallon TRUVU AquaSystem "Mod" w/ 150 gallon control center....... Build Thread: http://www.reefcentral.com/forums/showthread.php?t=2276765&highlight=300+dt+ |
|
|
|
|
03/08/2013, 06:19 PM
|
#9 |
|
I never finish anyth
Join Date: Dec 2008
Location: Houston TX
Posts: 1,120
|
I have tube anemones so I wanted small holes. The BRS screen would help keep some things out, just too big of holes for my application.
__________________
No trees were harmed in the sending of this message; however, a significant number of electrons were slightly inconvenienced. |
|
|
|
|
03/08/2013, 06:38 PM
|
#10 |
|
Registered Member
Join Date: Jan 2011
Posts: 194
|
very nice !!!!
|
|
|
|
|
03/08/2013, 06:57 PM
|
#11 |
|
Registered Member
Join Date: Oct 2006
Location: Rio Rancho NM USA
Posts: 302
|
Your a g*d d*mn genious! Nice!
|
|
|
|
|
03/09/2013, 10:50 AM
|
#12 |
|
Electrician
Join Date: Nov 2006
Location: Canada
Posts: 1,653
|
Torques head screws..... are those normal there?
I'm confused as to why you would need this with a tube anemone though, they don't really move and certainly not up the glass. Any pictures of it after it's been running for a week or two? |
|
|
|
|
03/09/2013, 10:58 AM
|
#13 |
|
I never finish anyth
Join Date: Dec 2008
Location: Houston TX
Posts: 1,120
|
Lol, i just needed to keep the acrylic clamped to the wood, just used some wood screws i had laying around. Tube anemones especially when they are new to an aquarium can leave their tube and go floating around.
__________________
No trees were harmed in the sending of this message; however, a significant number of electrons were slightly inconvenienced. |
|
|
|
|
03/14/2013, 02:00 PM
|
#14 |
|
Registered Member
Join Date: Apr 2003
Location: Des Moines, IA USA
Posts: 809
|
You want timely? Put a nice sized bta in the 150 yesterday afternoon. It was hanging on the rock where I wanted it to ultimately stay and lights went out and all was well. Woke up this morning and see my wet side of one of my vortechs laying on the bottom with the bta inside it. Stupid thing decided to take a stroll and wound up *almost* dead. Just a while ago it looked like he was going to split because of the trauma but I don't see him melting away just yet so we'll see if he makes it.
At any rate I just want to thank you for posting this (heading to Home Depot to get the materials after work today). I am always amazed at any of my hobby forums such as this one when someone takes the time to post pictures and instructions on how to do something like this. It makes it easy for the rest of us who barely have the skills to tie their shoe to be able to make something this ingenious. Anyway, much appreciated. Your post was VERY timely and I'll bet it will help a lot of people .
__________________
Reefing Law #22: The more a coral costs, the greater the likelihood it will die in your tank. Current Tank Info: In-wall VHO LPS/Softie 150 Gallon Reef, 5g MaxiMini Carpet tank |
|
|
|
|
03/14/2013, 07:35 PM
|
#15 |
|
Registered Member
Join Date: Nov 2011
Location: Manassas, VA
Posts: 411
|
I'm going to make 2 of these for my MP40's, what a amazing idea!
|
|
|
|
|
03/14/2013, 07:50 PM
|
#16 |
|
I never finish anyth
Join Date: Dec 2008
Location: Houston TX
Posts: 1,120
|
I have a lot of little projects like this, just thought this one might be useful to others. Glad to help
__________________
No trees were harmed in the sending of this message; however, a significant number of electrons were slightly inconvenienced. |
|
|
|
|
03/15/2013, 10:29 AM
|
#17 |
|
Registered Member
Join Date: Jan 2013
Location: carthage tn
Posts: 61
|
I just made one very nice. but I went to harbor freight and got a hole cutter that you can adjust to what size you need. used calipers to get the dia. and cut to fit
|
|
|
|
|
05/03/2013, 04:13 PM
|
#18 |
|
Registered Member
Join Date: Jan 2012
Location: OKC
Posts: 27
|
Thanks for taking the time to post this. I like how clean the finished product looks.
|
|
|
|
|
05/03/2013, 07:22 PM
|
#19 |
|
Registered Member
Join Date: Jun 2012
Location: Houston, TX
Posts: 15
|
Great job Kat! Thanks for sharing.
Now I need to make one so my Mom's tank can have a 'nem and she can sleep at night. |
|
|
|
|
02/18/2018, 08:53 AM
|
#20 |
|
Registered Member
Join Date: Nov 2008
Location: Indialantic, FL
Posts: 690
|
anyone have any pics of this project. originals no longer available ....
would love a permanent solution that doesn't have me buying new screens every couple of months ... thx!
__________________
Inconviencing marine life since 1984 Current Tank Info: 150 mixed reef |
|
|
|
 |
| Thread Tools | |
|
|


