
|
|
 09/15/2009, 02:54 PM
|
#51 |
|
Baby Fish Wrangler
Join Date: Apr 2007
Location: Greenville, NC
Posts: 1,237
|
I am incredibly interested to see how you will do the volute for the motorblock. I have been toying with the idea for quite a while just don't have enought information to start cutting one in the shop. PLease post your details on the volute and venturi!!!
__________________
Put Wings on it and Let it Fly!!! PBITAWA !!! Current Tank Info: 180 Cube 3x3x3. 29Gallon Sump 20 Gallon Fuge (1) Lumenarc Reflector w. 250W ARO Ballast and - Modded GS1 Skimmer - Eheim 1262 Return - Vortech MP40W and Swirler Stein |

|
|
09/15/2009, 04:38 PM
|
#52 |
|
Skimmer Guy
Join Date: Apr 2007
Location: IN
Posts: 5,647
|
well the volute is done for the most part. I have to drill and tap a couple holes. Order some titanium screws first so I know how big to drill. Just made the output pipe tonight out of sch 80 pvc. And mill out the inside of it some too so it would be less restrictive. Tomorrow will be the stand for the motor. I am waiting on the the Weldon 40 to come in anyhow. The lid is almost done a couple vent holes and it will be done. Then I will have to work on getting the bubble plate in and all the holes lined up for the pump. Probably running in another week or so.
__________________
Mojo~ |
|
|
|
09/15/2009, 08:54 PM
|
#53 |
|
Registered Member
Join Date: Sep 2008
Location: Jacksonville NC
Posts: 151
|
so when you finish
when you finish your skimmer of skimmers who is gona ask for the blue prints first.
"THE NEW MOJO SKIMMER" well with all of your experience on skimmers i would love to get my hands on them!! tagging along to see the out come of the new line of MOJO skimmers.
__________________
President of Jacksonville Reef Keepers. Current Tank Info: 300gStarfire and a 8 foot monster |
|
|
|
09/15/2009, 09:55 PM
|
#54 |
|
Skimmer Guy
Join Date: Apr 2007
Location: IN
Posts: 5,647
|
well thanks for the promising words. THis is my first skimmer I have I have ever built. So their is a lot of learning curves for me. I will be building a second but first things first.
I still have the protective wrap on the bottom section but it is coming together. It is not glued yet. I still have drilling to do and other things with the pump to do. but here it is set in place to give you a better idea of what its looking like. 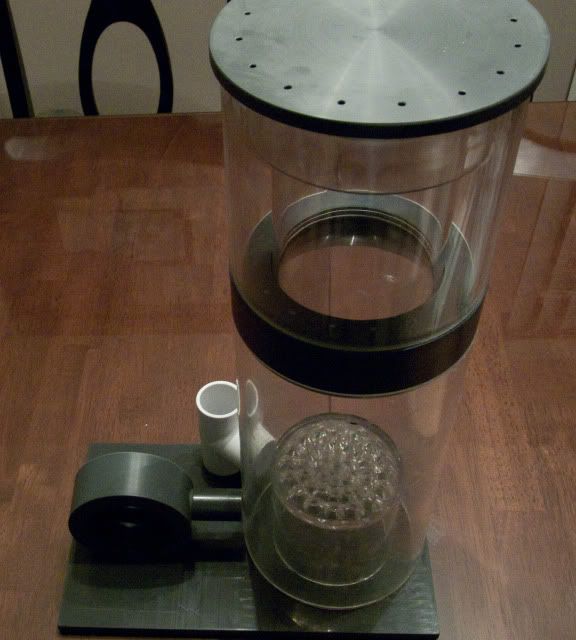 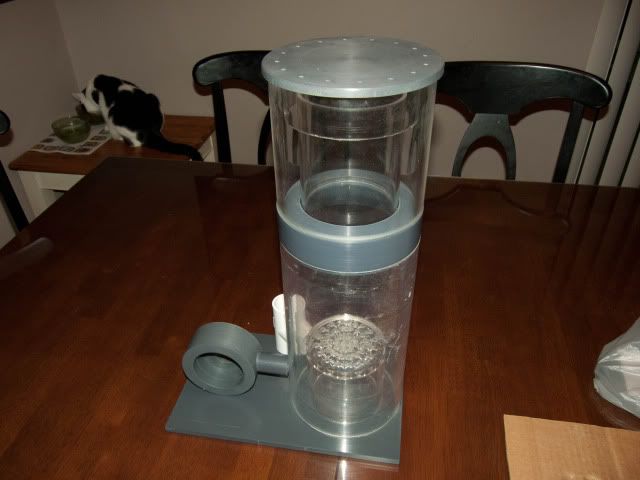 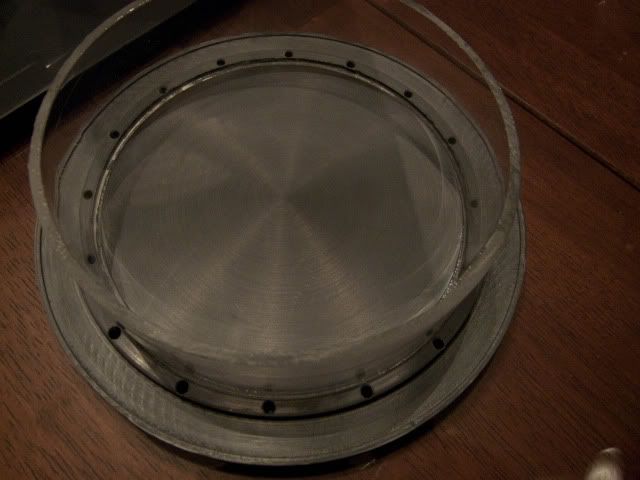 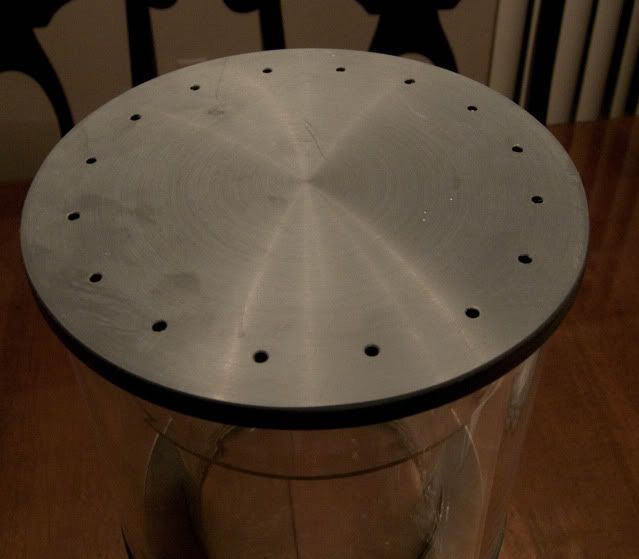 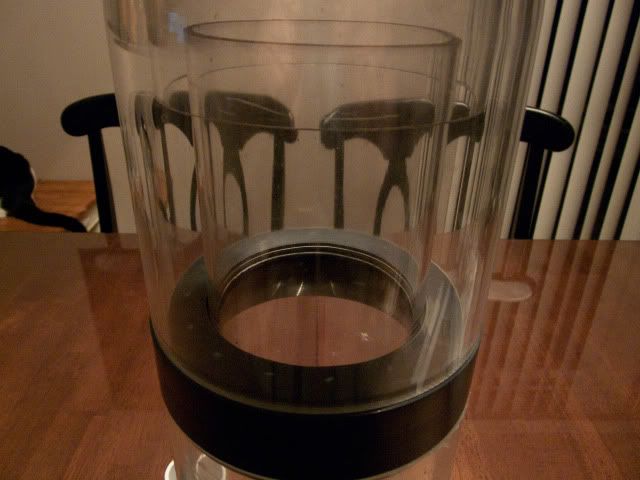 
__________________
Mojo~ |
|
|
|
09/15/2009, 09:56 PM
|
#55 |
|
Skimmer Guy
Join Date: Apr 2007
Location: IN
Posts: 5,647
|
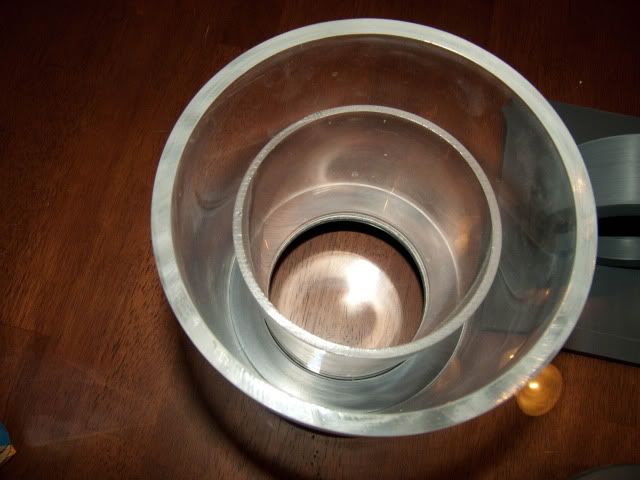   That should give you all a better idea of Mojo's Mini
__________________
Mojo~ |
|
|
|
09/15/2009, 10:01 PM
|
#56 |
|
Skimmer Guy
Join Date: Apr 2007
Location: IN
Posts: 5,647
|
I have to add, I drilled the vent holes on the lid all by hand with a cordless drill.
no cnc here. Wish I had one at this point. lol
__________________
Mojo~ |
|
|
|
09/15/2009, 10:18 PM
|
#57 |
|
Rejisturd Mimbur
Join Date: Oct 2005
Location: Brevard County, FL
Posts: 1,346
|
Looks really good. I may try my hand at a cone skimmer, but I want to see some more DIYs first.
__________________
Ummmm... yeah... don't touch the Mag Float. Sorry kids, your college fund is gone, but the tank looks SWEET right? Current Tank Info: 150gal mixed reef. ER CS135, 65gal sump/fuge with a Mag12 return. (2) Korillia 4s, (1) modded MJ1200, two SunSun 3200gph powerheads. 250+lbs LR. |
|
|
|
09/15/2009, 10:28 PM
|
#58 |
|
Skimmer Guy
Join Date: Apr 2007
Location: IN
Posts: 5,647
|
the cone will be next.
__________________
Mojo~ |
|
|
|
09/16/2009, 07:27 AM
|
#59 |
|
T3am Zissou
Join Date: Mar 2006
Location: Galactic Sector ZZ9 Plural Z Alpha
Posts: 1,123
|
hey, that looks great so far...
 excellent work. subscribed. |
|
|
|
09/16/2009, 07:30 AM
|
#60 |
|
T3am Zissou
Join Date: Mar 2006
Location: Galactic Sector ZZ9 Plural Z Alpha
Posts: 1,123
|
you might want to look at possibly using a knife valve outlets for more control and smaller footprint.
this skimmer reminds me of a bk mini with the pump off to the side. |
|
|
|
09/16/2009, 09:40 AM
|
#61 |
|
Registered Member
Join Date: Jan 2005
Location: Mason, OH
Posts: 199
|
I am waiting to see Mojo inscribed into the lid.
Does look good. Can wait to see it in operation. |
|
|
|
09/16/2009, 10:14 AM
|
#62 | |
|
Skimmer Guy
Join Date: Apr 2007
Location: IN
Posts: 5,647
|
Quote:
__________________
Mojo~ |
|
|
|
|
09/16/2009, 10:16 AM
|
#63 | |
|
Skimmer Guy
Join Date: Apr 2007
Location: IN
Posts: 5,647
|
Quote:
Mojo~
__________________
Mojo~ |
|
|
|
|
09/16/2009, 10:27 AM
|
#64 |
|
Registered Member

Join Date: Jan 2008
Location: New York City
Posts: 425
|
nice! great job man.
|
|
|
|
09/16/2009, 11:00 AM
|
#65 |
|
Skimmer Guy
Join Date: Apr 2007
Location: IN
Posts: 5,647
|
thanks. Pump just came today. Woot !!
__________________
Mojo~ |
|
|
|
09/16/2009, 12:46 PM
|
#66 |
|
One reef to rule them all
Join Date: Sep 2009
Location: Leominster, MA
Posts: 5,299
|
Pretty nice. How much did this baby end up costing you?
__________________
"A dog is the only thing on earth that loves you more than you love yourself" ~ Josh Billings Visit My Home page for current build thread (click my user name and select "Visit LordoftheReef's Homepage" in the drop down menu! |
|
|
|
09/16/2009, 03:21 PM
|
#67 |
|
Skimmer Guy
Join Date: Apr 2007
Location: IN
Posts: 5,647
|
lol cost, I havent added it up yet. Kind of afraid too to be honest
Ill tally it all up when I am done. Some of it is a learning curve as well. And I have material left over because some of it I had to buy at a min amount.
__________________
Mojo~ |
|
|
|
09/16/2009, 06:16 PM
|
#68 |
|
T3am Zissou
Join Date: Mar 2006
Location: Galactic Sector ZZ9 Plural Z Alpha
Posts: 1,123
|
another thing to think about is you could put the pump underneath for a smaller footprint, as long as it doesnt add too much back pressure. what's the height of the reaction chamber and total height?
oh, and sweet transition in the neck... |
|
|
|
09/16/2009, 08:03 PM
|
#69 |
|
Premium Member
 Join Date: Jan 2002
Location: O'Fallon, IL
Posts: 4,520
|
Very nice!
|
|
|
|
09/16/2009, 10:13 PM
|
#70 |
|
Skimmer Guy
Join Date: Apr 2007
Location: IN
Posts: 5,647
|
well i was making an improvement to the bk mini as I wanted to give it more contact time.
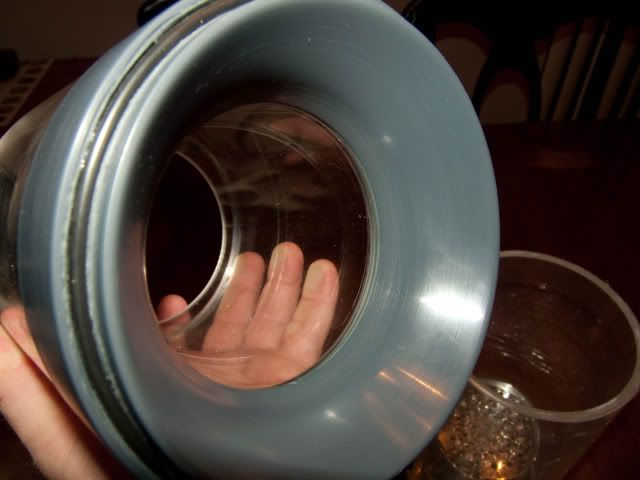
Here are a couple pump pics 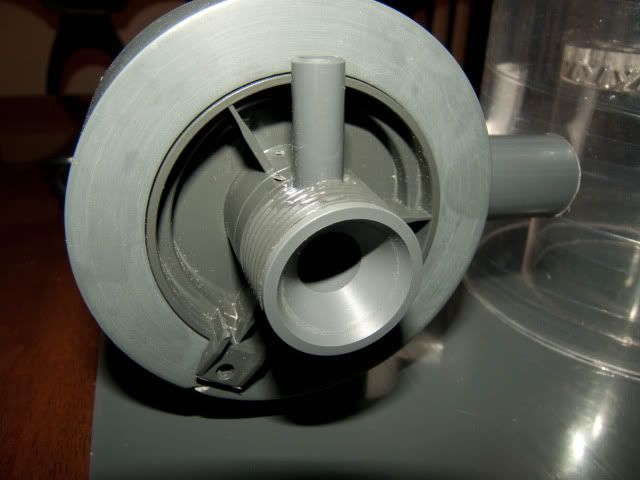 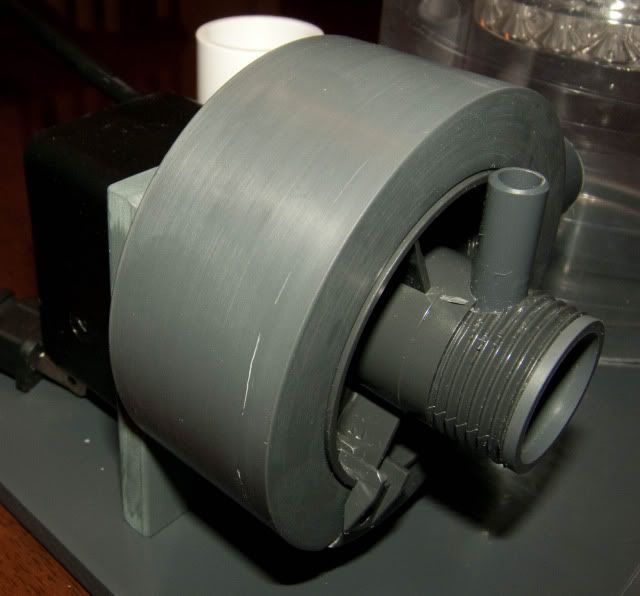 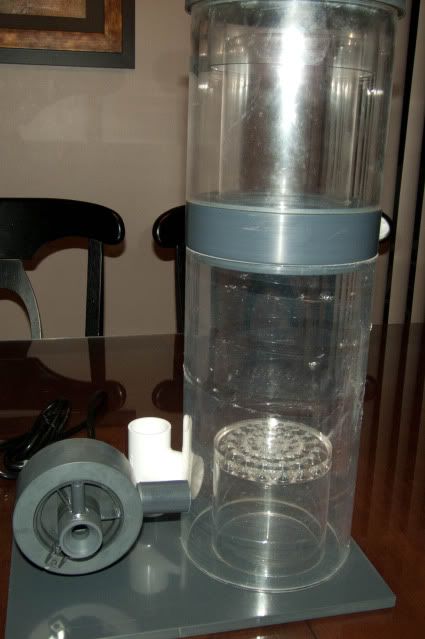 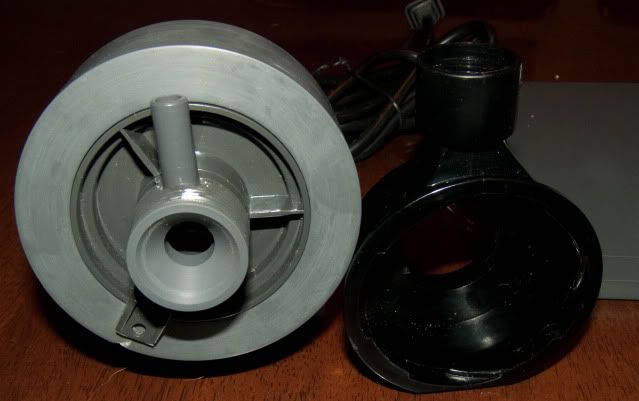 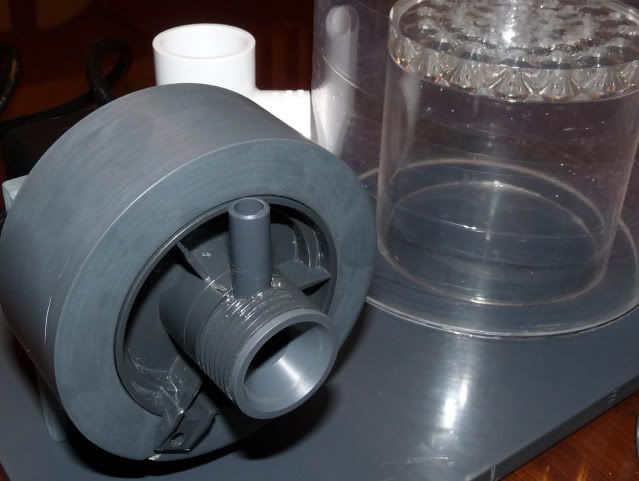
__________________
Mojo~ |
|
|
|
09/16/2009, 10:21 PM
|
#71 |
|
Registered Member

Join Date: Dec 2008
Location: On the Web
Posts: 319
|
Looking good
I wonder if that combo of pump/PW/reducer will be too much air for the 6" body...that skimmer is ~ the same dim's as the 160, and it has a hard time handling any more than 35 SCFH IME. When do you think you'll have the volute done and get some #'s?Did you machine the tabs off of the volute cover? Aren't you worried about it coming out while running? |
|
|
|
09/16/2009, 10:41 PM
|
#72 |
|
Skimmer Guy
Join Date: Apr 2007
Location: IN
Posts: 5,647
|
it will have two set screws just like the ATB mini airstar does to hold it in. I can fire it up right now and check out the air draw on it. The volute cover fits tight but I will still drill and tap the set screws in once I get them.
__________________
Mojo~ |
|
|
|
09/16/2009, 10:51 PM
|
#73 |
|
Registered Member
Join Date: Dec 2008
Location: On the Web
Posts: 319
|
Gotcha...that makes sense

|
|
|
|
09/17/2009, 04:42 AM
|
#74 |
|
Registered Member
Join Date: Sep 2008
Location: Jacksonville NC
Posts: 151
|
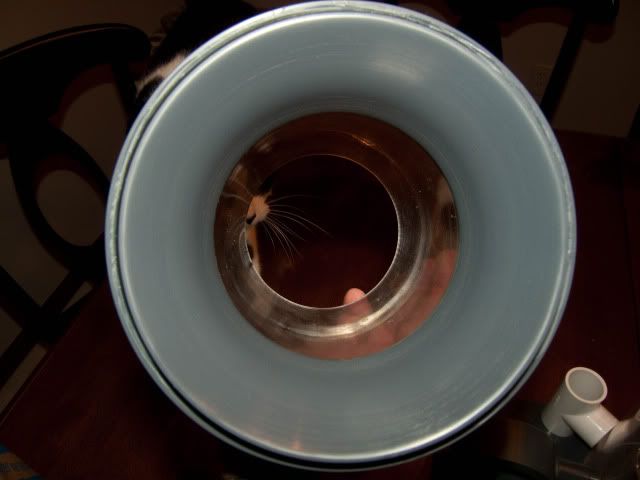
MOJO on this picture is the bubble plate in use?
I have no experience with skimmers with bubble plates but should the pump go to the skimmer center "bubble plate" will there be a in hole for the water to flow in and the bubbles to rise from there?
__________________
President of Jacksonville Reef Keepers. Current Tank Info: 300gStarfire and a 8 foot monster |
|
|
|
09/17/2009, 08:15 AM
|
#75 |
|
Skimmer Guy
Join Date: Apr 2007
Location: IN
Posts: 5,647
|
yeap you are corect. THe skimmer pump is just setting there I havent drilled the holes yes. Just kinda set everything in place for a mock up picture.
__________________
Mojo~ |
|
|
 |
|
|


