


|
 |
|
|
#1 |
|
Registered Member
Join Date: Oct 2004
Location: Greenville, Pa
Posts: 411
|
Custom Acrylic Shallow 44g Build
Hey guys!! I'm so happy to be back in the hobby. I was out for almost two years as a divorce caused a move and tank take down. I kept all my old equipment with the hope of setting it back up again. But the tank got cracked in the move, 34g Solana cube. I've had several tanks over the last 10+ years, 72g bow front, 90g in wall.. one thing I've learned, I hate tall tanks! lol I'm short and getting into a 20-24" deep tanks for cleaning sucks. I also dislike tanks that are not deep front to back. It leave you little options for aquascaping. I usually just ended up with a big pile of rock and little room for coral. So now that I'm in a stable location, why not put a tank back up?! This time I wanted to go shallow but deep front to back. That way it would be easy to clean and should get some cool aquascaping that isn't just a wall. I took thedoogan's shallow tank build as inspiration as I love that tank. But I wanted to go a little bit bigger. So I ordered a custom acrylic tank from Acrylic Creations in Butler Pa. We went with a 30" wide, 24" deep, and 14" tall. Built in overflow with three holes for the herbie overflow method. Not sure if this build will help or interest any of you but this forum has helped me in countless ways so I just hope to try and return the favor. It's been a while since I've been on here so it might take a while to remember how to operate everything. Pictures coming.
|
|
|

|
|
|
#2 |
|
Registered Member
Join Date: Mar 2005
Location: Simi Valley, CA
Posts: 2,245
|
Welcome back! and congrats on the tank - those dimensions are excellent. Cant wait to see a pic.
Yes, in two short years things have changed, and information is more plentiful. Myself had been out of the hobby for 6 years, and wow, how things have advanced. Lots more to learn, but to be honest, the basics remain the same.
__________________
180g DT - Now.. Wet w/ Frags.... Back in the hobby after 6 years void of saltwater.... |
|
|

|
|
|
#3 |
|
Registered Member
Join Date: Oct 2004
Location: Greenville, Pa
Posts: 411
|
First thing is first. I need to be able to make water. I had all the equipment except for the rubbermaid cans and pump. I've had this RO/DI system for years and has always worked well. I did buy the 150gpd upgrade before but never installed it. So this time I got that installed and made sure I could do a freshwater tub and saltwater mixing tub. My previous mixing station was only 10g and I wanted to go bigger this time. If I'm going to do this, I want to do the best I can with the funds I have. I got a Pan World 40PX for my pump. I also hooked a line that goes up stairs to a ATO storage tank. I angled the return inside the saltwater mixing tub to help circulate and mix the salt.
And... I can't paste an image in quick reply. |
|
|

|
|
|
#4 |
|
Registered Member
Join Date: Oct 2004
Location: Greenville, Pa
Posts: 411
|
|
|
|

|
|
|
#5 | |
|
Registered Member
Join Date: Oct 2004
Location: Greenville, Pa
Posts: 411
|
Quote:
|
|
|
|

|
|
|
#6 |
|
Registered Member
Join Date: Oct 2004
Location: Greenville, Pa
Posts: 411
|
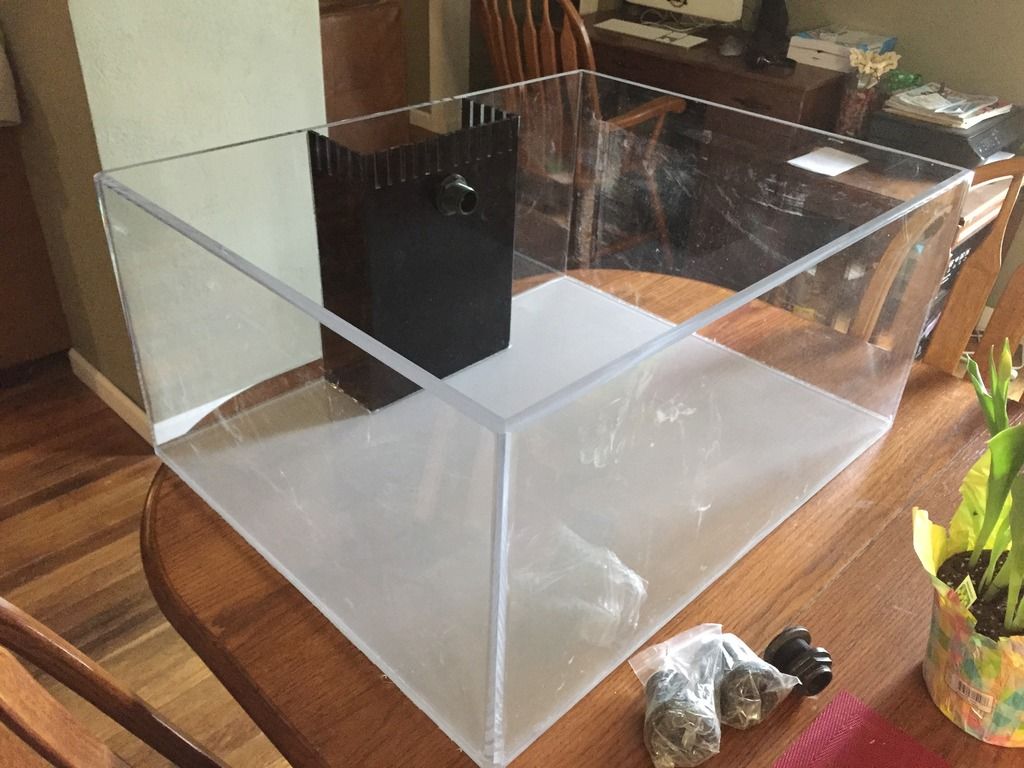
Ok now I can make saltwater. Time to pick up the tank. I got a deal on the tank I couldn't pass up. 30x24x14 with 1/2" acrylic. I really debated back and forth with glass or acrylic, but the price on this was cheaper than glass and I really like the idea that it's welded together. Makes me sleep better at night. Yes I know things can still happen but I still feel safer.
|
|
|

|
|
|
#7 |
|
Registered Member
Join Date: Mar 2005
Location: Simi Valley, CA
Posts: 2,245
|
Looks good. You having them build you a sump as well?
__________________
180g DT - Now.. Wet w/ Frags.... Back in the hobby after 6 years void of saltwater.... |
|
|

|
|
|
#8 |
|
Registered Member
Join Date: Oct 2004
Location: Greenville, Pa
Posts: 411
|
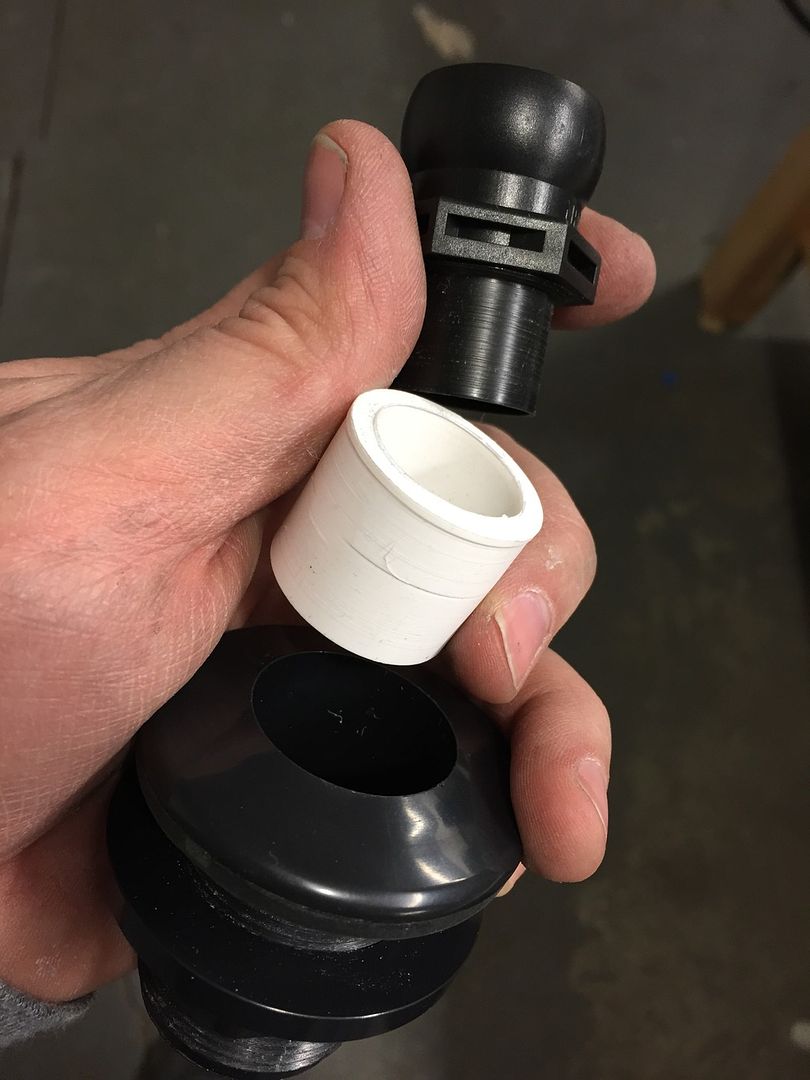
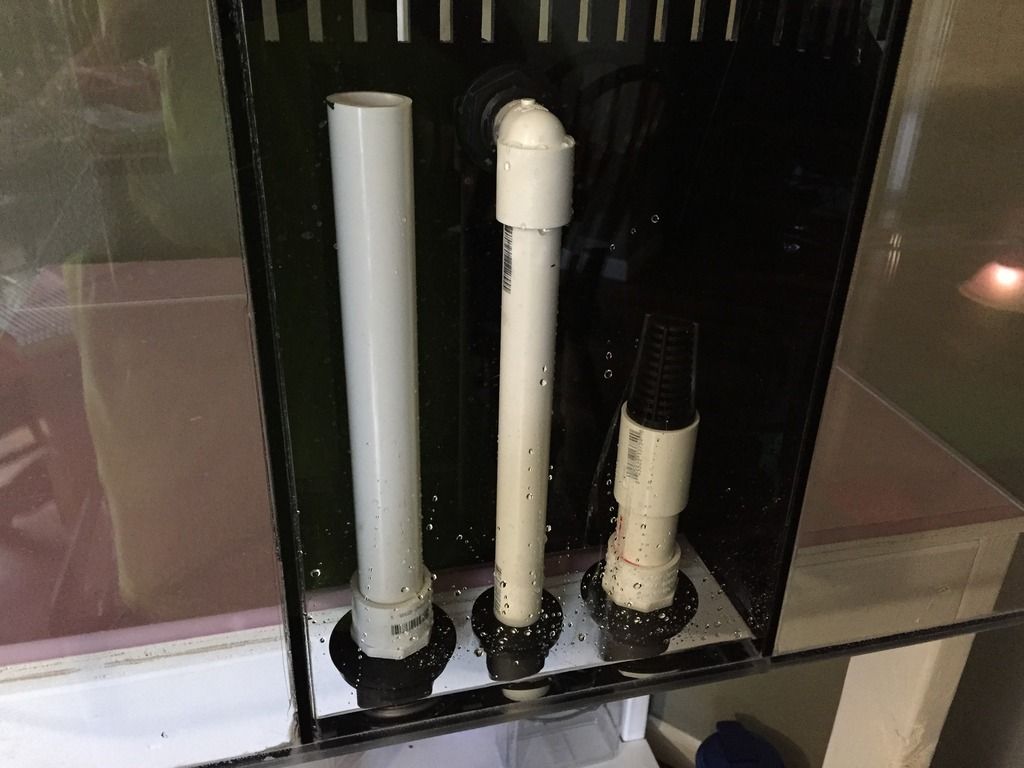
Time to plumb it. I went with the two drains of the Herbie system. My old 90g in wall only had one overflow and always worried me. This feels much safer. I also put a check valve in the return line, I don't think they had those last time I plumbed a tank. The tank builder put a bulkhead for the return through the overflow wall and into the display. Not how I would have done it but now I needed to get the Loc-line to fit into the bulkhead. I had to turn down a piece of pipe for an adaptor. I knew all that knife making equipment would come in handy!
|
|
|

|
|
|
#9 |
|
Registered Member
Join Date: Oct 2004
Location: Greenville, Pa
Posts: 411
|
|
|
|

|
|
|
#10 |
|
Registered Member
Join Date: Mar 2005
Location: Simi Valley, CA
Posts: 2,245
|
Nice work on the herbie. Make sure not to glue your siphon line just yet... have to find the sweet spot and tune it. you really don't have to glue it to be honest, as long as the slip fitting is tight enough it won't fall out you'll be good.
__________________
180g DT - Now.. Wet w/ Frags.... Back in the hobby after 6 years void of saltwater.... |
|
|

|
|
|
#11 |
|
Registered Member
Join Date: Oct 2004
Location: Greenville, Pa
Posts: 411
|
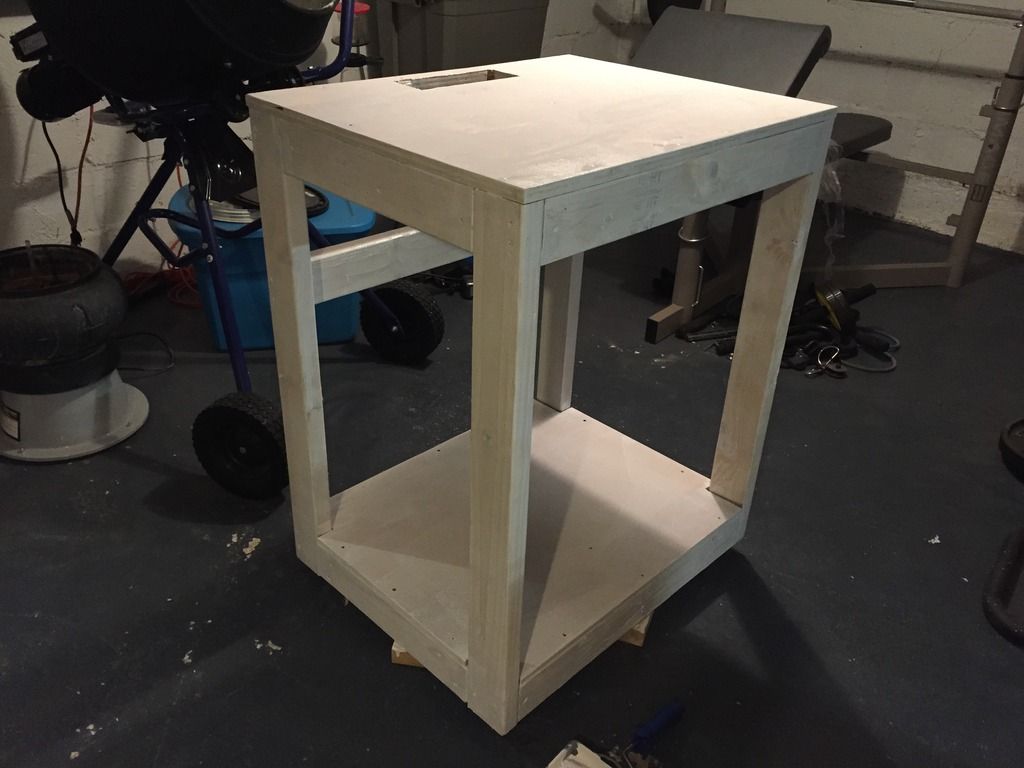
Next thing is to build the stand. I pretty much took the same plans TheDoogan used for his but made it wider. This is my fifth tank stand build so I'm pretty confident I did a good job. At this stage it still needed painted. I'll build sides for it once everything else is done. Glued screwed and could hold a car.
|
|
|

|
|
|
#12 | |
|
Registered Member
Join Date: Oct 2004
Location: Greenville, Pa
Posts: 411
|
Quote:
|
|
|
|

|
|
|
#13 |
|
Registered Member
Join Date: Oct 2004
Location: Greenville, Pa
Posts: 411
|
|
|
|

|
|
|
#14 |
|
Registered Member
Join Date: Oct 2004
Location: Greenville, Pa
Posts: 411
|
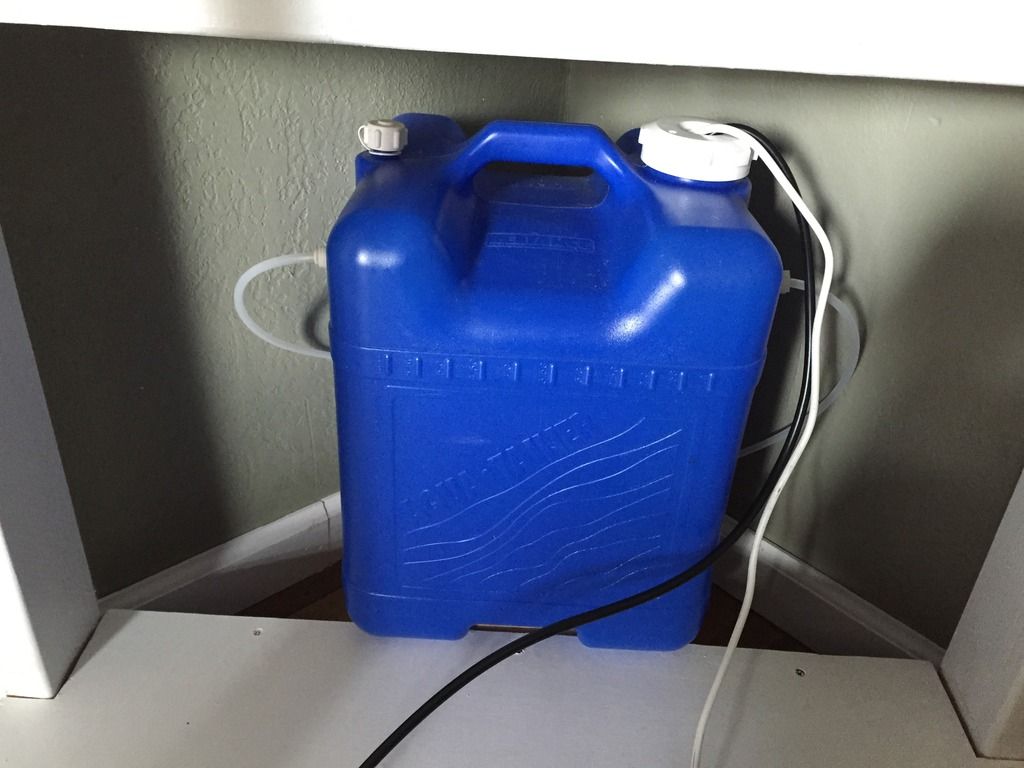
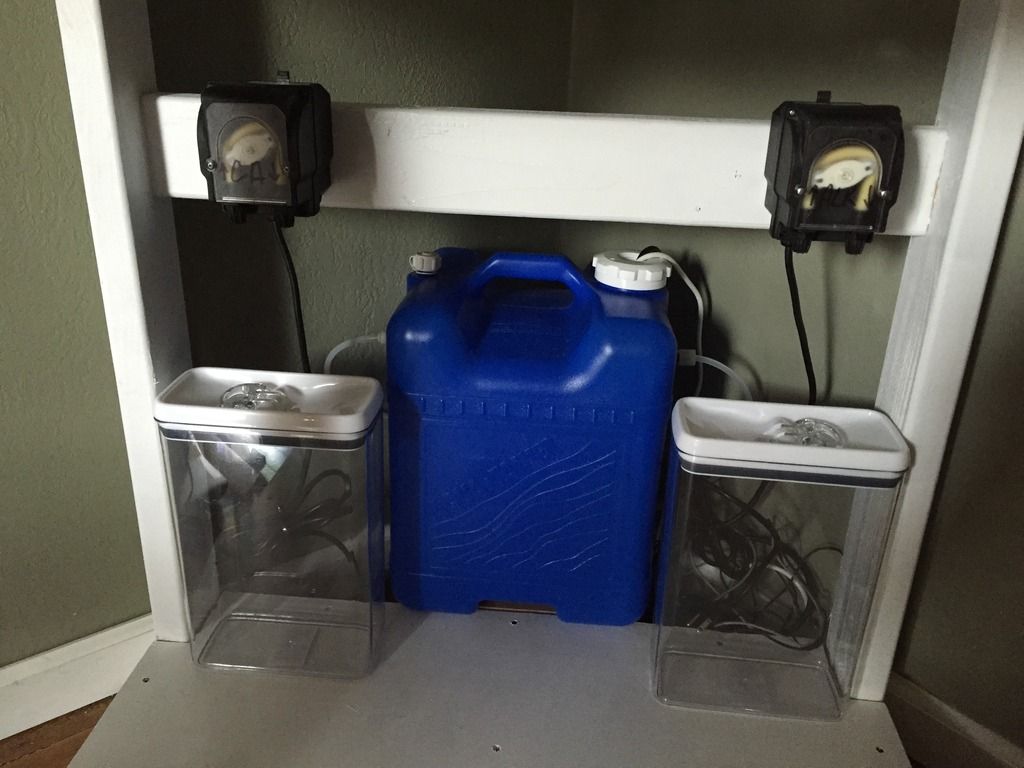
Now for the ATO system. I have a Tunze osmolator that hasn't failed me yet. The ATO storage tub was from my old system. Just a camping water jug that I put the pump in and drilled two lines, one hooked up to the RO/DI with a float valve and the other for an emergency drain. Just in case the float valve sticks. Also started putting in the dosing pumps from BRS. Put new hoses in them and ready to go. I will not need these for a while but I want them ready to go.
|
|
|

|
|
|
#15 |
|
Registered Member
Join Date: Oct 2004
Location: Greenville, Pa
Posts: 411
|
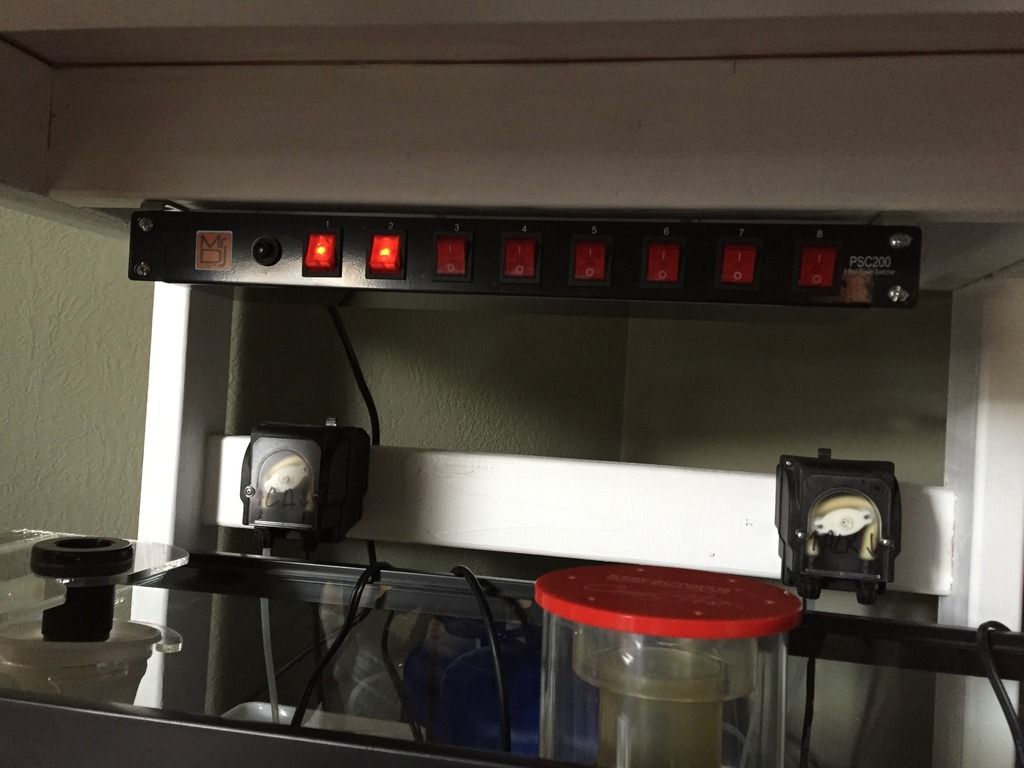
Electrical. First thing was to put in a GFI socket. Next was control.. hmmm I have a Reefkeeper 2 from my old system but the display is so dim it's almost impossible to see. I hear this can be DIY fixed but I've also had problems with it turning my BRS dosing pumps on and off. Something about the power draw not being enough or something. I've always used a DJ light bar for things that didn't need controlled by the Reefkeeper so I figured for now, just use the DJ bar. I can turn things on and off and most things today have their own control. I do plan to get an Apex system but just can't afford it right now.
|
|
|

|
|
|
#16 |
|
Registered Member
Join Date: Oct 2004
Location: Greenville, Pa
Posts: 411
|
I'll have to finish this later.
|
|
|

|
|
|
#17 |
|
Registered Member
Join Date: Oct 2004
Location: Greenville, Pa
Posts: 411
|
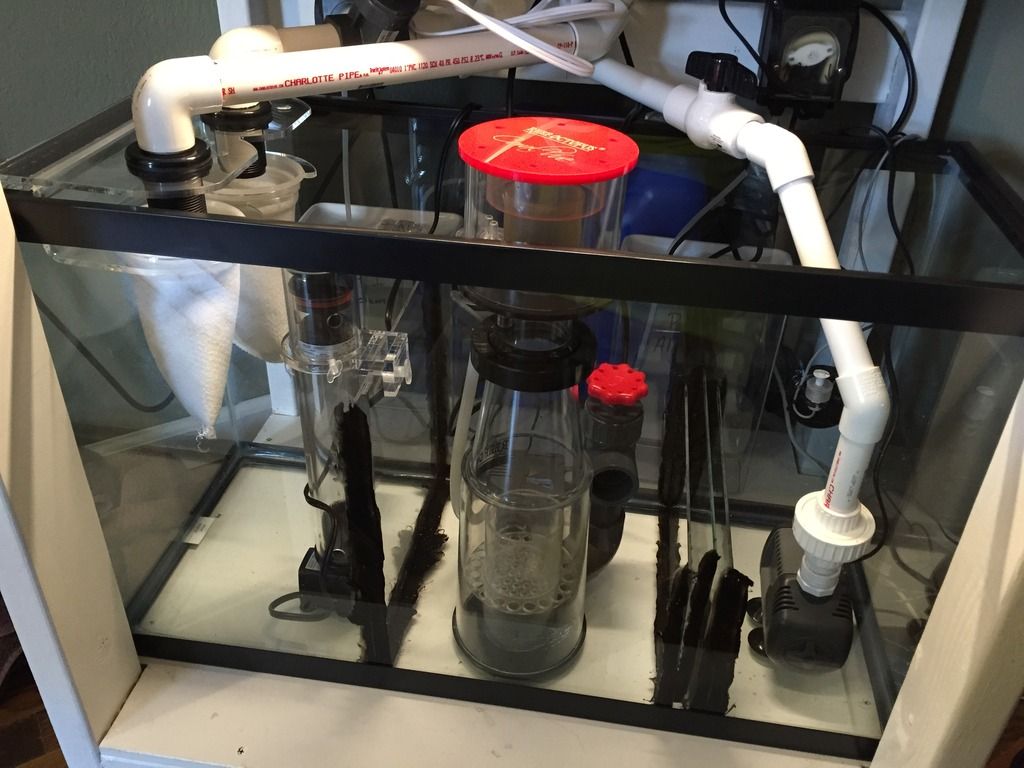
I plan to order a custom acrylic sump but for now I did the old school 29g glass with glass dividers. I really want to get the tank up and running and can't wait for the acrylic sump. It will come later. I ordered a dual 4" filter sock holder, Sicce Syncra 2.0 return pump, and got a used Reef Octopus skimmer. I also got a almost free deal on a MiniMax reactor. I hear mixed reviews on these but I really like the idea of how easy the media is to change. I actually tried to design something like this about 3 years ago. I'm also a product designer. I tried the BRS reactors but they were way too big and no way of changing the media without getting everything wet. I'll see how the MiniMax works out and I'm sure if something needs DIY to work, I'll be able to fix it. I planned for the MiniMax and made the first chamber 12" tall so I could use it in the sump. I plan to get another one for GFO or BioPellets. I've never been a fan of a refugium just because I'm a neat freak and it makes the sump look like crap. I know that is the idea but I just can't handle it. I also didn't want to run the pumping horizontal because of trapping air but it couldn't be helped, ran out of room.
|
|
|

|
|
|
#18 |
|
Registered Member
Join Date: Oct 2004
Location: Greenville, Pa
Posts: 411
|
Time to add sand and rock. Ordered some sand and had a ton of rock from my previous builds. I did have to nuke it and clean it all. So it's dead.. completely dead. Which is good. No pests. I'll have to get some live rock to seed everything.
The goal with the aquascaping is to show depth front to back. When viewing from the front I want it to look like you are looking across the bottom of the reef. I've learned to hate rock walls where once the corals start growing on top, they shadow everything below them. 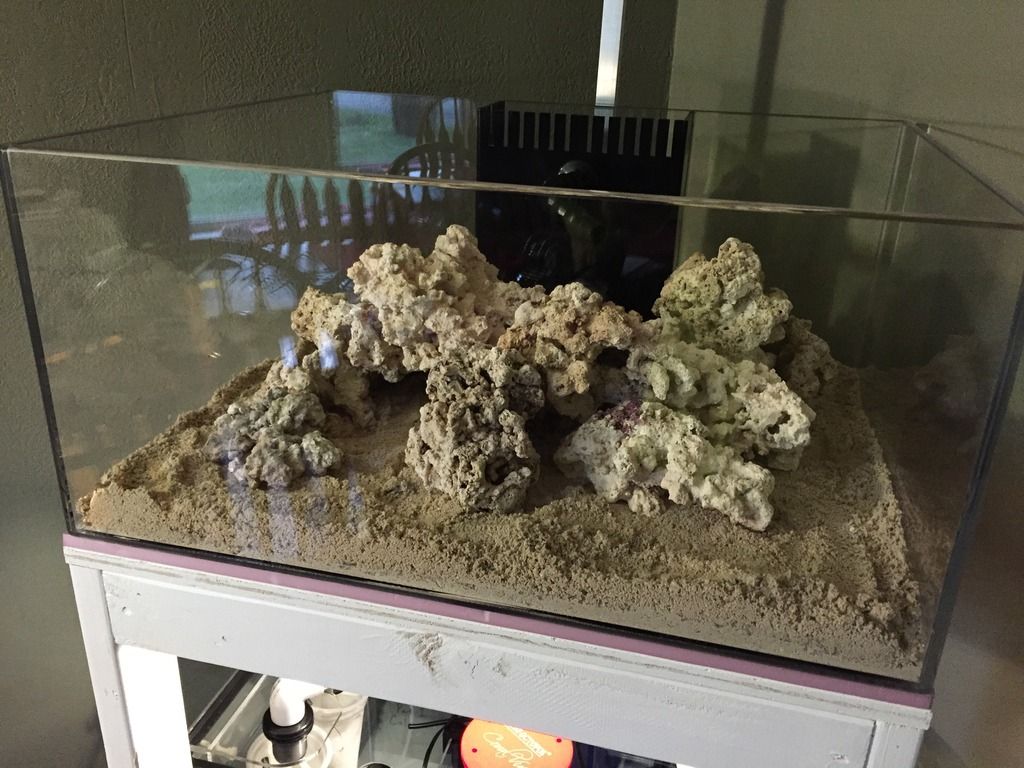
|
|
|

|
|
|
#19 |
|
Registered Member
Join Date: Oct 2004
Location: Greenville, Pa
Posts: 411
|
I have double that amount of rock total. This is just a starting point. I want to see how it looks full of water.
|
|
|

|
|
|
#20 |
|
Registered Member
Join Date: Oct 2004
Location: Greenville, Pa
Posts: 411
|
I also installed a LED light from Lowes under the stand to light up the sump area. Mostly for maintenance purposes.
|
|
|

|
|
|
#21 |
|
Registered Member
Join Date: Oct 2004
Location: Greenville, Pa
Posts: 411
|
|
|
|

|
|
|
#22 |
|
Registered Member
Join Date: Oct 2004
Location: Greenville, Pa
Posts: 411
|
|
|
|

|
|
|
#23 |
|
Registered Member
Join Date: Oct 2004
Location: Greenville, Pa
Posts: 411
|
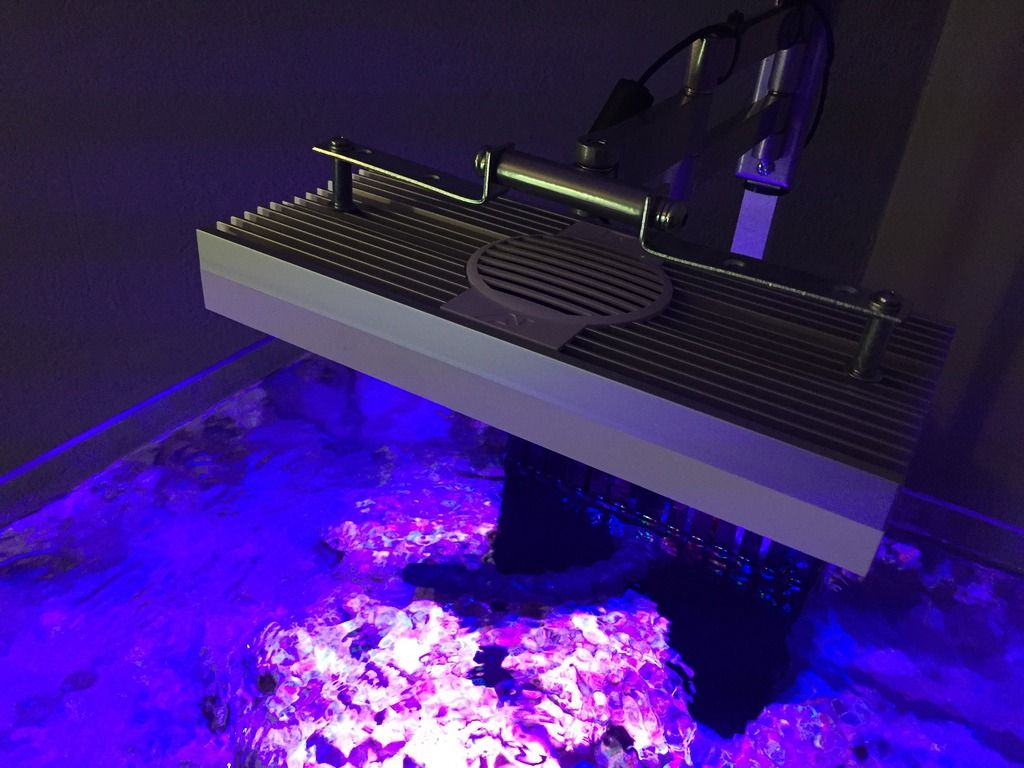
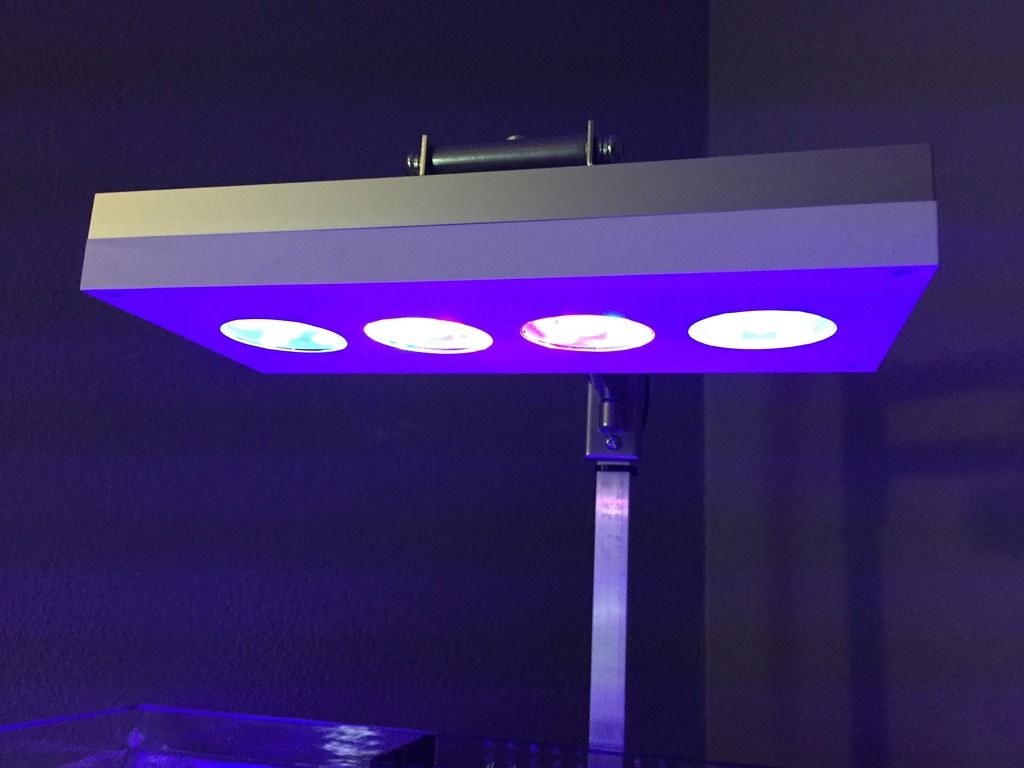
Lighting is a little up in the air. I have an AI Sol Blue and Hydra. I'm trying them both out but I think I'm going to go with a Radion. Two main reasons, I want to be able to control my MP40 and Light with one program. And my local store only carries Ecotech stuff and I want to support my local shop. I built the mounting bracket out of a TV wall mount and 1" aluminum square bar.
|
|
|

|
|
|
#24 |
|
Registered Member
Join Date: Oct 2004
Location: Greenville, Pa
Posts: 411
|
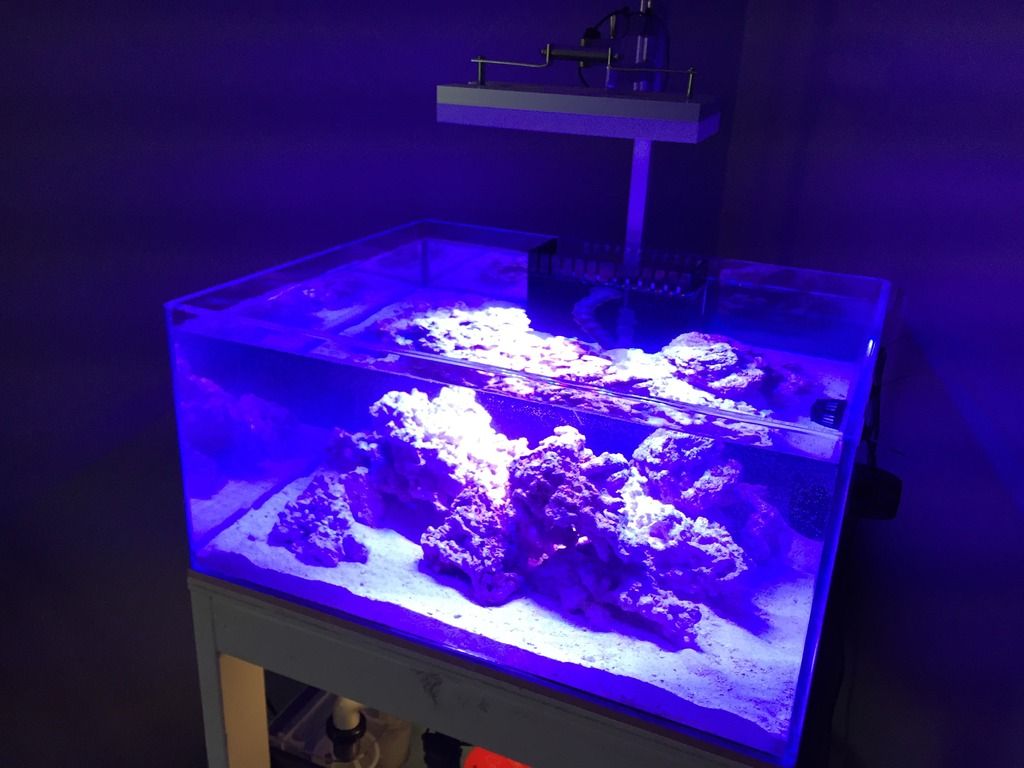
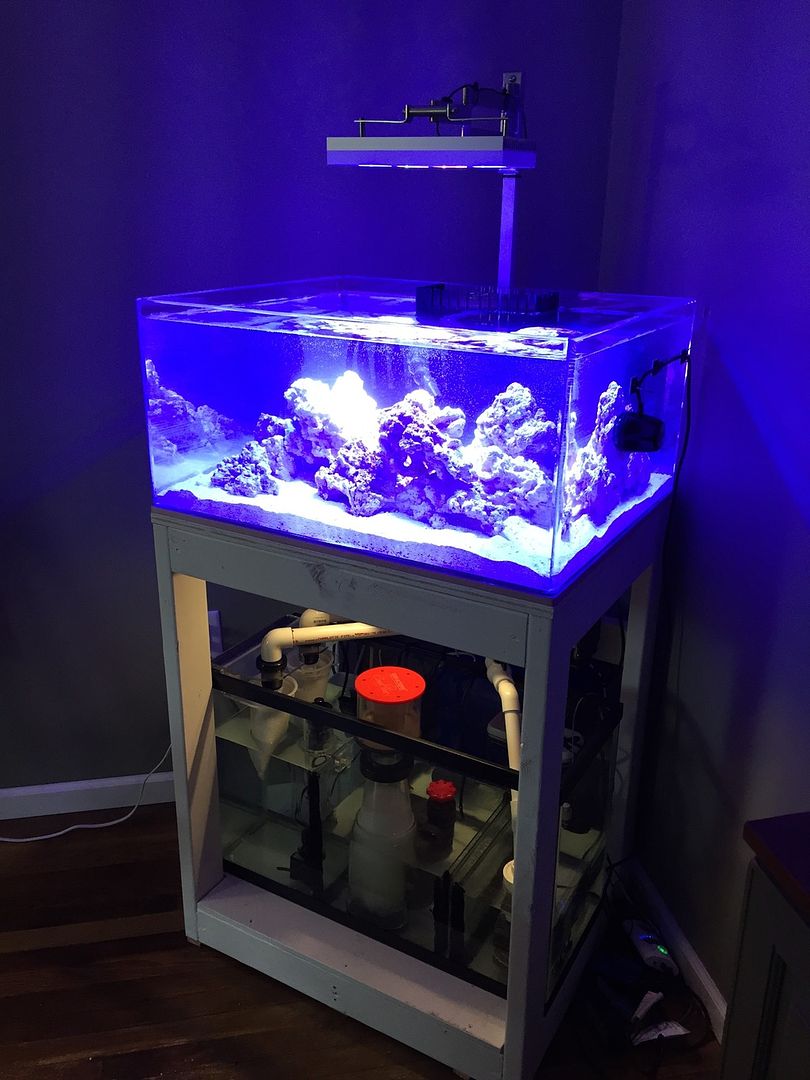
So the tank has been up for just over a week. I've put two piece of live rock in the tank and been using a bacteria starter product. Don't remember which one. My MP10 wasn't holding on the 1/2" acrylic so I sold it and bought a new MP40 Quiet Drive. So far I am impressed and can only run it at about 30-40%. Equipment left is another MiniMax, Apex, Radion, and custom sump. No hurry, time to let nature take it's corse and maybe have something alive in the tank in a week or two. I love this stuff, I think my girlfriend thinks I'm on crack. lol
|
|
|

|
|
|
#25 |
|
Registered Member
Join Date: Mar 2005
Location: Kansas City, MO
Posts: 644
|
Looking good and welcome back to the hobby.
__________________
–Andy 265g w/ 20" synergy overflow box Hamilton Cebu MH/T5 fixture w/ 250w Radium bulbs SPS/LPS mix | 30g (long) refugium with cheato | 40g sump |
|
|

|
 |
| Tags |
| acrylic, build, cube, custom, shallow |
|
|