
|
|
 02/11/2011, 10:49 PM
|
#26 |
|
Registered Member
Join Date: Oct 2009
Location: REDFORD,MI
Posts: 77
|
nice basement
|

|

|
|
02/11/2011, 11:58 PM
|
#27 |
|
Registered Member
Join Date: Feb 2009
Location: Lubbock, Tx
Posts: 3,165
|
see if you can sneak a peek at what silicone your builder is using?
(please) thanks
__________________
Its not just my tank, its OUR tank!!! :-) 240display, reef in progress Current Tank Info: 240 display, a few frags here and there. lots of fish, and lots of watching. (230 big screen getting re-sealed and going to add to the gallonage) My wife has no clue how addicted i really am..... |
|
|
|
|
02/12/2011, 12:17 AM
|
#28 |
|
Premium Member
 Join Date: Nov 2004
Location: Georgia
Posts: 454
|
It was a GE 100% black silicone.
|
|
|
|
|
02/12/2011, 01:18 AM
|
#29 |
|
broke but happy
Join Date: Jul 2006
Location: stevenson ranch, ca
Posts: 14,053
|
looking good dimension buddy

__________________
Lawrence SFVR member 435 gallon display in wall see through no more hyposalinity... Current Tank Info: 96x36x29 inwall |
|
|
|
|
02/12/2011, 07:47 AM
|
#30 | |
|
Premium Member
Join Date: Jun 2004
Location: Middletown, MD
Posts: 562
|
Quote:
Typically stands have the vertical posts (your 2 pressure treated 4x4's) directly under the horizontal support. It looks like you are relying on the strength of the screws to support the top. Depending on where the frame of the tank sits, you may have some of the weight transferred to the 4x4's, but then you are relying on only the 3'x8' plywood for support across the 8' span. Also, I personally would be concerned that the 2x4's in the back of the photo aren't strong enough or stable enough. Just my 2 cents, Craig |
|
|
|
|
|
02/12/2011, 08:33 AM
|
#31 |
|
Premium Member
Join Date: Nov 2004
Location: Georgia
Posts: 454
|
There are horizontal beams across the top. The plywood is sitting on seven rows of horizontal beems running across the top of the stand.
|
|
|
|
|
02/28/2011, 04:36 PM
|
#32 |
|
Premium Member
Join Date: Nov 2004
Location: Georgia
Posts: 454
|
I thought that I would update with some pictures. The tank is up and curing. Could most likely add water today but I am waiting on some equipment. The sump and skimmer came in along with some rock but I will wait and post some pictures later in the week. Should have almost everything moved down to the basement this weekend. Still waiting on the return pump. Seems like forever on the back order.
[IMG] 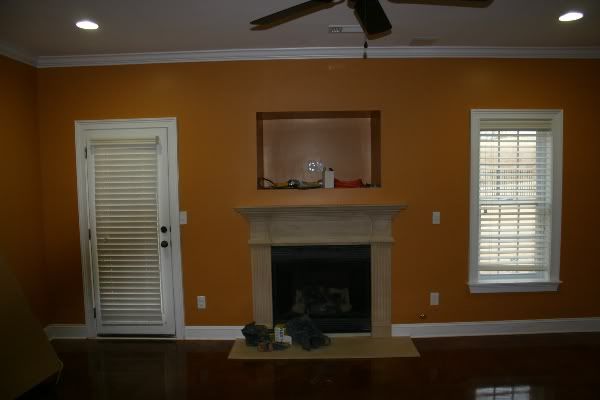 [/IMG] [/IMG]The fireplace is finished [IMG] 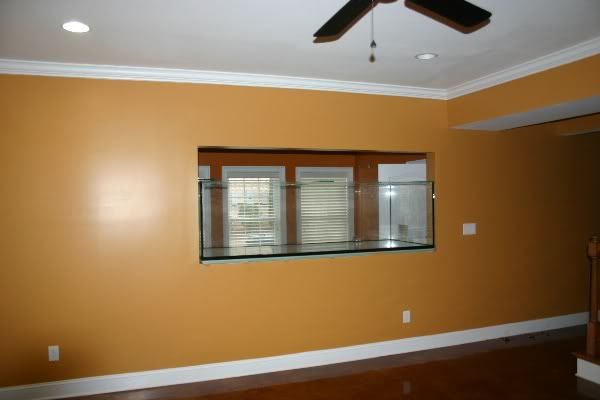 [/IMG] [/IMG]Never thought I would think an eight foot tank would like small [IMG] 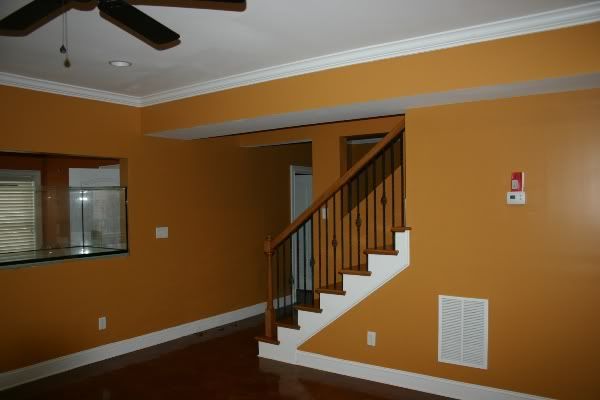 [/IMG] [/IMG]The stairwell came out really nice [IMG] 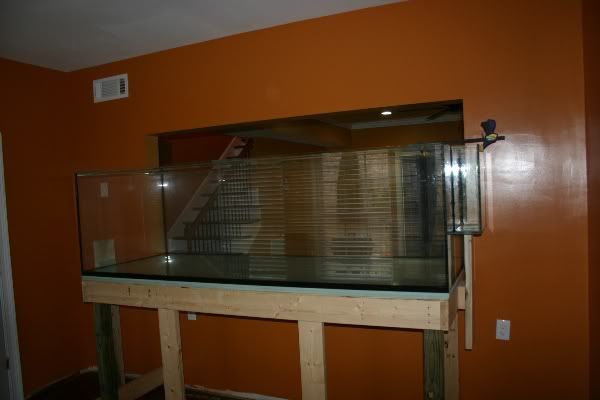 [/IMG] [/IMG]From the fish room [IMG] 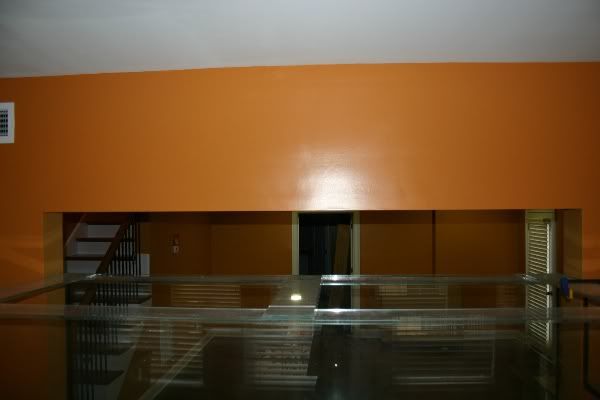 [/IMG] [/IMG]Eurobracing complete. |
|
|
|
|
02/28/2011, 06:57 PM
|
#33 |
|
RC Sponsor
Join Date: Sep 2009
Posts: 14,173
|
Personally, I would add some (lots) additional vertical supports to that stand. You have far to much weight distributed over far too small of an area in my opinion. There will probably be more than 5000 pounds between tank and water on that stand. Would you park full size SUV on it and let your kids sleep under it day in and day out? "Danger Will Robinson!!!"
Think of it this way, a handful of 4x4's cost pennies compared to what you will have into that setup to risk it having an issue due to the lack of structure below it. I have a similar dimension tank and I would not feel very comfortable with the lack of vertical support that you have. My tank is 96"x48"x24" tall and is made from Acrylic. Yours looks to be glass. I would expect some shrinkage of the studs and the less you have in there, the more likely things will settle. To much settling on one side and not enough on the other could cause catastrophic issues. That said, maybe mine is a bit overkill. We packed the frame with 2x4's and 4x4's but considering the tank was built in back in 1997 and its still going strong and still level, I would say the extra effort was worth it. I hope you dont take offense to my comments. It looks like you have a great build coming along. Here is the door side of the tank before it was dry wall'd in. 
__________________
Director Customer Support Royal Exclusiv USA For All Royal Exclusiv & Bubble King questions please refer to our Sponsor forum: http://www.reefcentral.com/forums/fo...play.php?f=745 Current Tank Info: 480G display mixed reef, 90G sump, 90G refugium, 60G display refugium. Check out my build thread: http://www.reefcentral.com/forums/showthread.php?t=1783476 Last edited by slief; 02/28/2011 at 07:09 PM. |
|
|
|
|
03/01/2011, 12:50 PM
|
#34 |
|
RC Sponsor
Join Date: Sep 2009
Posts: 14,173
|
Another note. It looks from your pictures that your verical posts dead end into the plywood that the tank will sit on. That or they dead end into 2x4's that are laying flat instead of sitting upright. If that is the case, they really should dead end into the framing/joists below the tank.
If you look at my stand picture above, there is a complete 2x6 frame around the perimeter of the tank. What you cant see are the 2x4's standing on end every 12" spanning the width of the frame with 2x4's doubled up towards the center. The plywood rests on that frame. That frame rests on top of the vertical 2x4 and 4x4 posts that support the tank. Those vertical posts dead end into the above mentioned fram that the tank sits on. We used a combination of stacked 2x4's and 4x4's. There are certain benifits to stacked 2x4's vs 4x4's when it comes to structure. As I said, maybe a bit overkill but structural integrity of the stand was one of the most critical factors when we built the tank in. The last thing in the world that I would ever want to deal with is tearing the tank apart to fix the stands structure or even worse, coming home to a disaster due to an under engineered stand that was built to hold several thousand pounds. From the looks of it, it does not look to late to beef things up a bit under your tank.
__________________
Director Customer Support Royal Exclusiv USA For All Royal Exclusiv & Bubble King questions please refer to our Sponsor forum: http://www.reefcentral.com/forums/fo...play.php?f=745 Current Tank Info: 480G display mixed reef, 90G sump, 90G refugium, 60G display refugium. Check out my build thread: http://www.reefcentral.com/forums/showthread.php?t=1783476 Last edited by slief; 03/01/2011 at 12:57 PM. |
|
|
|
|
03/06/2011, 06:30 PM
|
#35 |
|
Premium Member
Join Date: Nov 2004
Location: Georgia
Posts: 454
|
The front part of the tank sits on the wall that was drywalled in. There are no 2x4s anywhere. Even the wall is studded with 2x6s. All of the wood is 4x4 or 2x6. The front wall is studded with 2x6s as well. The front 7 or 8 inches of the tank rests on the studded wall and plywood. You think 16 inch 2x6s is not enough? The two front 2 x 6s are in addition to all of the wall studs that are supporting the tank. The back part is being supported by 2 4x4s and 2 2x6s.
|
|
|
|
|
03/06/2011, 06:50 PM
|
#36 |
|
Registered Member
Join Date: Dec 2007
Location: Cumming, GA
Posts: 38
|
Nice build. In wall tanks look smaller than they really are. Keep the updates coming.
|
|
|
|
|
03/07/2011, 01:06 PM
|
#37 |
|
Registered Member

Join Date: Dec 2007
Location: Glen Mills, PA
Posts: 51
|
looks like a great project...Good luck!!!
__________________
~Charles~ |
|
|
|
|
03/07/2011, 04:27 PM
|
#38 |
|
Registered Member
Join Date: Oct 2006
Location: Stockton, CA
Posts: 103
|
Nice build so far, will be looking for update pictures.
|
|
|
|
|
04/04/2011, 11:55 AM
|
#39 |
|
Premium Member
Join Date: Nov 2004
Location: Georgia
Posts: 454
|
It has been awhile since I updated. Had a battle with swine flu and work season has started so my free time has been limited.
The tank builder installed the removable black acrylic that will act as a background. It looks really nice. [IMG] 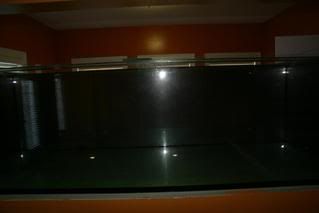 [/IMG] [/IMG]The equipment was all moved from the garage to the fish room. Wednesday I should have water. Plumbing supplies are coming in on Monday and the drain hoses will be here on Tuesday. The fun is about to begin. [IMG] 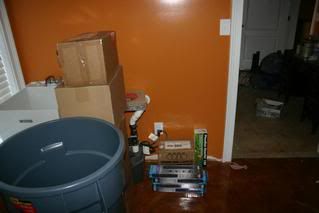 [/IMG] [/IMG]The sump has been in for awhile. It was built by John at Advance Acrylics. He does great work and I am a repeat customer. 72 x 24 x 18. [IMG] 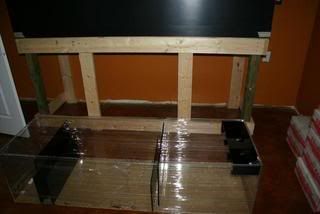 [/IMG] [/IMG][IMG] 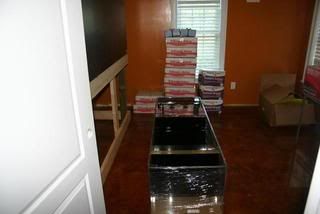 [/IMG] [/IMG]Just a little sand and salt Some other goodies [IMG] 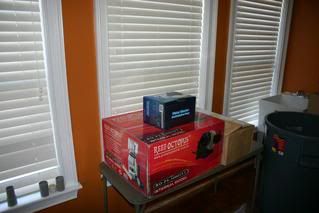 [/IMG] [/IMG]More updates should be up by the end of the week. I hope that you enjoy as always I look forward to your feedback. |
|
|
|
|
04/04/2011, 12:04 PM
|
#40 |
|
Premium Member
Join Date: Nov 2004
Location: Georgia
Posts: 454
|
A couple that I left out.
[IMG]  [/IMG] [/IMG]With that black acrylic background. [IMG] 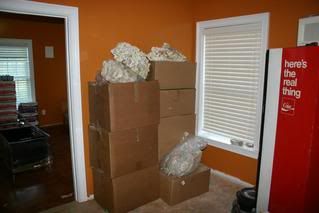 [/IMG] [/IMG]Some dry rock ready to go! I ordered some very large pieces from Bulkreefsupply, some shelf from Marco and some other from Marco. Should be an interesting blend. I look forward to aquascaping this 36" wide tank. Fairly open with large pieces and lots of places for coral. A couple of the rocks were taken out of the boxes so I could throw the boxes away. |
|
|
|
|
07/09/2011, 04:33 PM
|
#41 |
|
Premium Member
Join Date: Nov 2004
Location: Georgia
Posts: 454
|
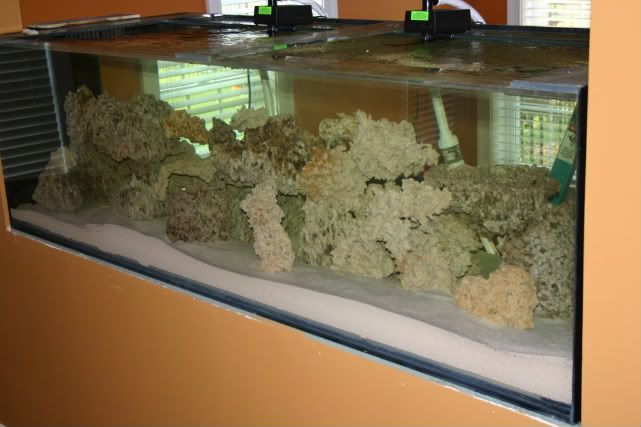
First update in a long time. I dropped the rock in today but I am not 100 percent sold on the aquascape. The tank is 36" deep so I wanted to create a lot of swim through areas, caves, and tunnels. I accomplished that but I am just not sure this is the right aquascape. I have several rocks left and I wanted to use mosty large pieces. Would love your feedback. Pictures are not the cleanest as I wanted to get them taken before dark.
[IMG] 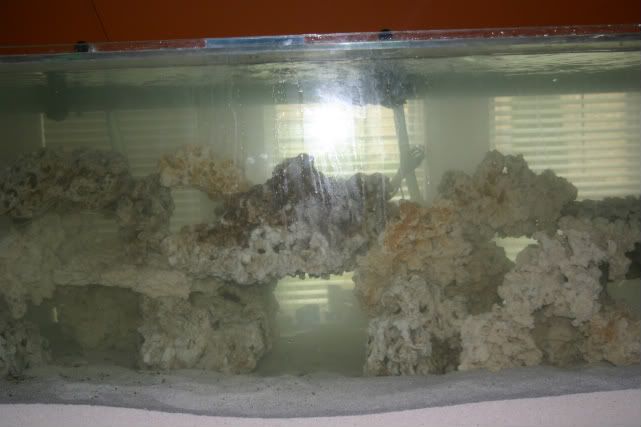 [/IMG] [/IMG][IMG] 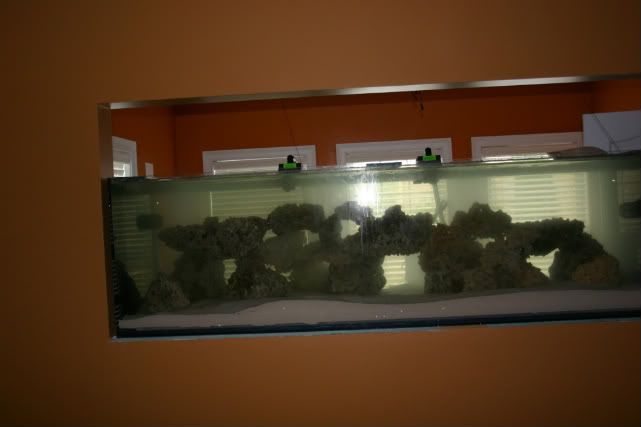 [/IMG] [/IMG][IMG] 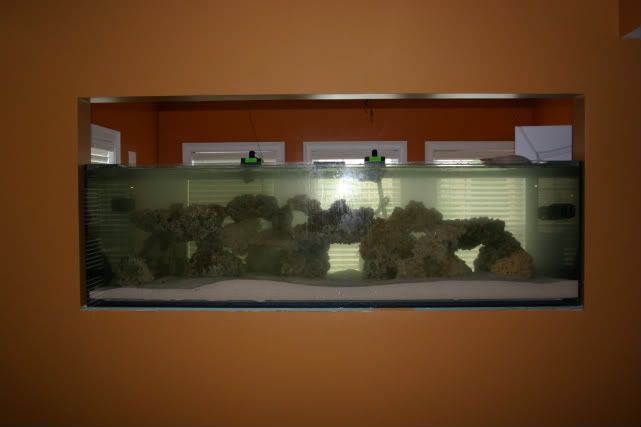 [/IMG] [/IMG][IMG] 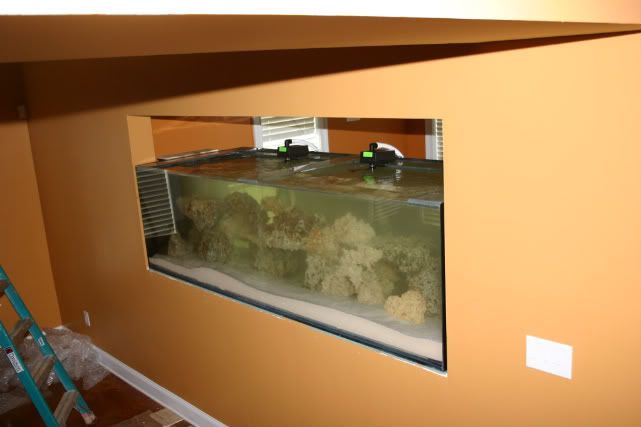 [/IMG] [/IMG][IMG] 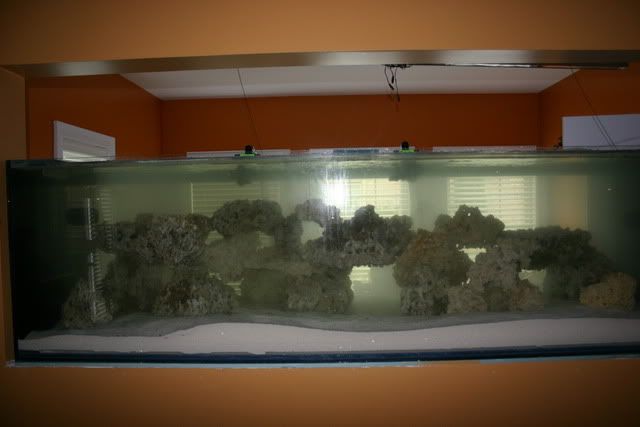 [/IMG] [/IMG]
|
|
|
|
|
07/09/2011, 07:32 PM
|
#42 |
|
Registered Member
Join Date: Feb 2001
Location: Charlotte, NC
Posts: 155
|
if you like the aquascape thats all that matters. I prefer more open spaces and not so much a rock wall. My tank is almost the same as yours but mine is only 24" tall. Here are pictures of my aquascape.
 
|
|
|
|
|
07/09/2011, 11:14 PM
|
#43 |
|
Registered Member
Join Date: Dec 2006
Location: Roanoke, VA
Posts: 250
|
I agree with the aforementioned comments about your stand. If the front of the stand is built into the walk that should be fine, but the back is concerning:
First, I would not use treated 4x4s - They notoriously twist, bend, and crack when they dry out. 2x4s nailed edge to edge (like a long L) will work much better. Also treated lumber is treated with all kinds of nasty chemical that you would never want leaching out in a reef tank. Do a quick search on treated lumber in stands and you'll find others who made the same mistake and switched them out. Second, and more importantly, the back of your stand is not structurally sound. The 2x4 in the back should lie between the top perimeter of the stand and the bottom perimeter of the stand. That way all the weight of the top is distributed through the long axis of the 2x4. As you have it now the weight of the top of the stand is only being supported to the bottom by whatever screws/nails you attached the 2x4s to. Fortunately its a quick and easy fix - all you have to to do cut 2x4 to fit in front of the ones have now, such that they sit between the top and bottom frame. Do the same with the corners. It is a $20 fix and will significantly increase the strength and longevity of your stand.
__________________
~John Current Tank Info: Working on that Last edited by TRITON1; 07/09/2011 at 11:15 PM. Reason: typo |
|
|
|
|
08/15/2011, 12:01 PM
|
#44 |
|
Premium Member
Join Date: Nov 2004
Location: Georgia
Posts: 454
|
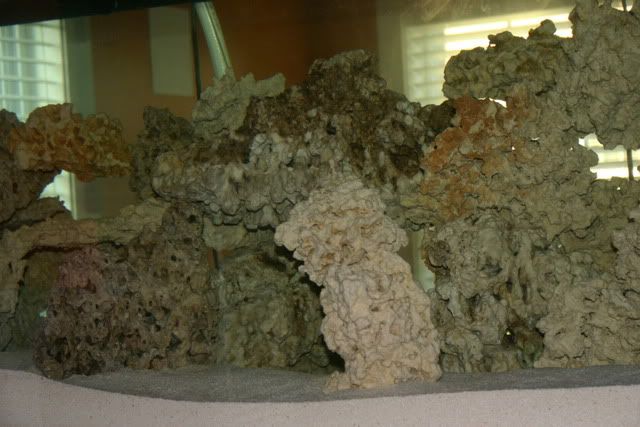
I never felt real good about the aquascape so I redid it a couple of days after the original. I like this one much better as it shows the depth of the caves and tunnels much better.
[IMG]  [/IMG] [/IMG][IMG] 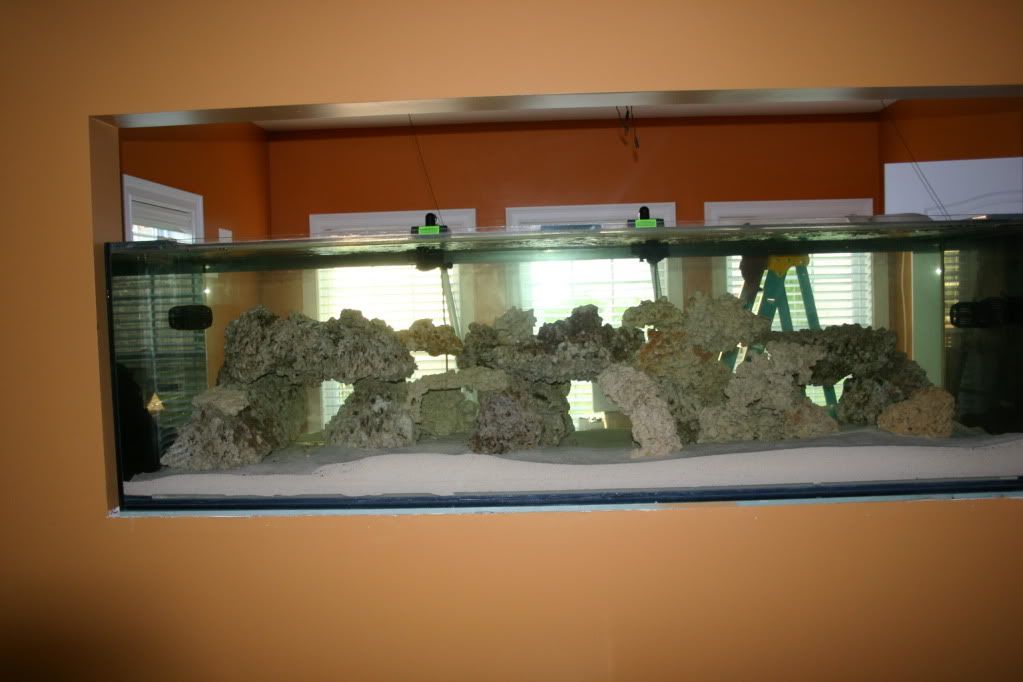 [/IMG] [/IMG][IMG] 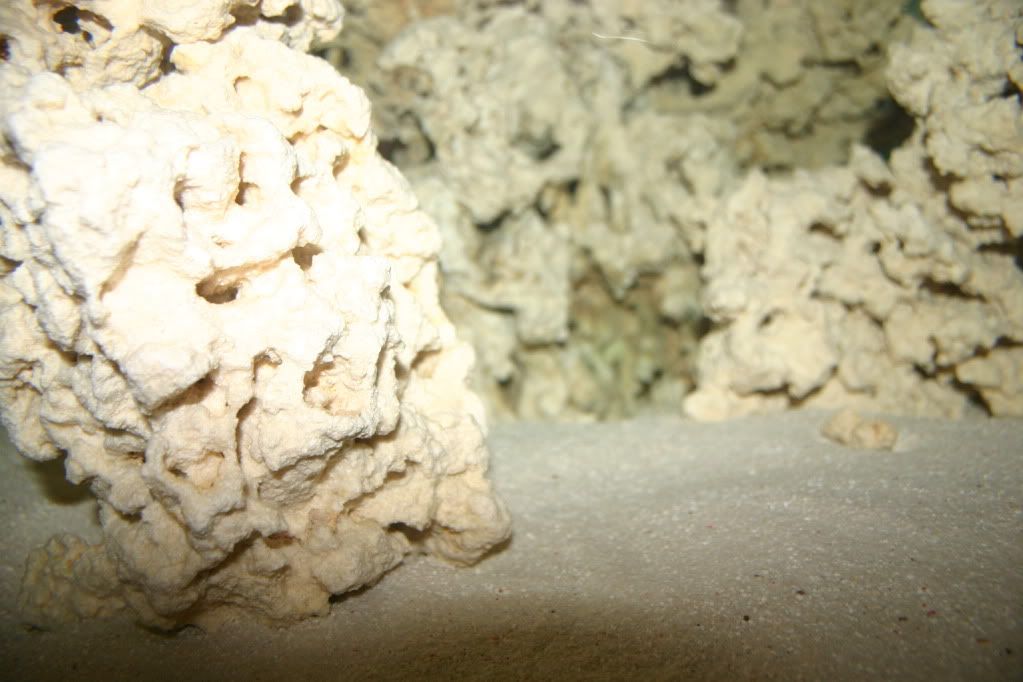 [/IMG] [/IMG][IMG] 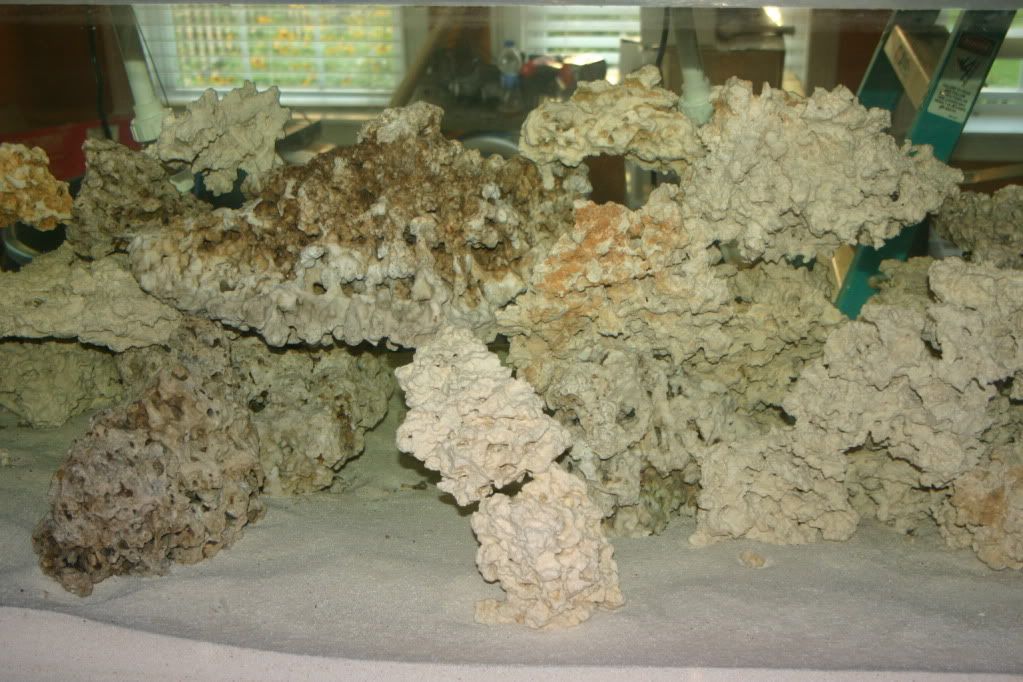 [/IMG] [/IMG][IMG] 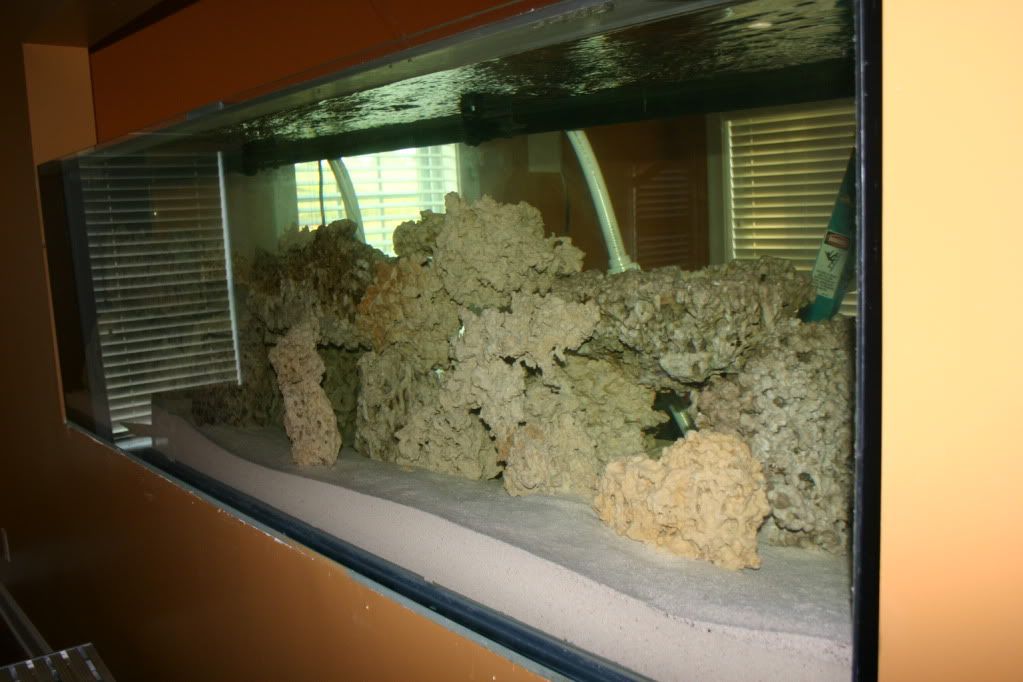 [/IMG] [/IMG]
|
|
|
|
|
08/15/2011, 12:03 PM
|
#45 |
|
Premium Member
Join Date: Nov 2004
Location: Georgia
Posts: 454
|
[IMG]
 [/IMG] [/IMG][IMG] 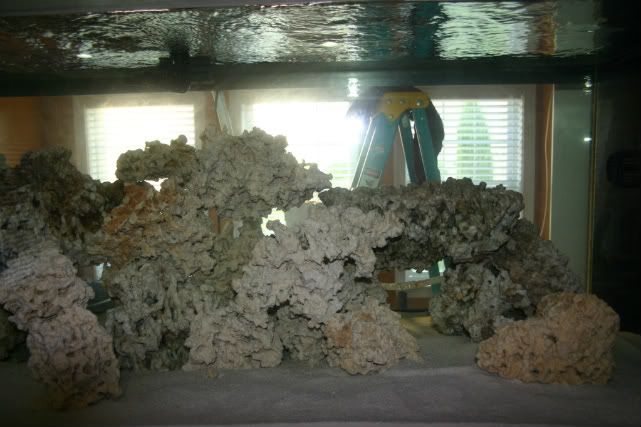 [/IMG] [/IMG][IMG]  [/IMG] [/IMG][IMG] 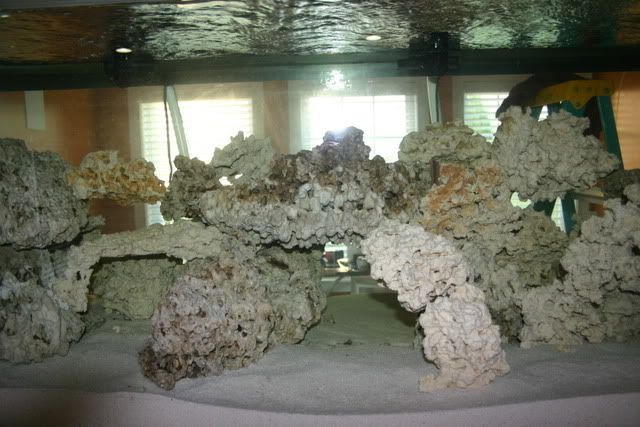 [/IMG] [/IMG][IMG]  [/IMG] [/IMG]
|
|
|
|
|
08/15/2011, 12:04 PM
|
#46 |
|
Premium Member
Join Date: Nov 2004
Location: Georgia
Posts: 454
|
[IMG]
 [/IMG] [/IMG][IMG] 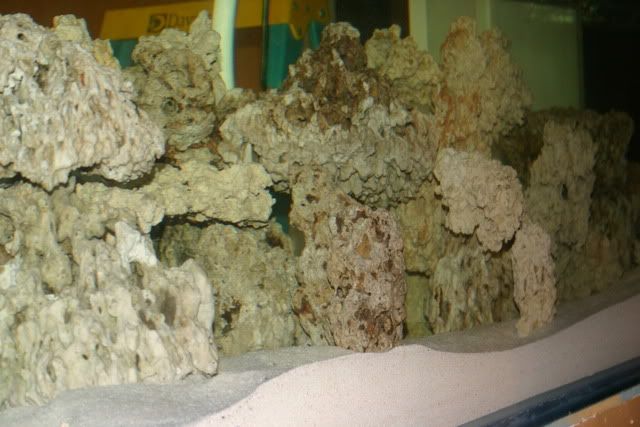 [/IMG] [/IMG][IMG]  [/IMG] [/IMG]
|
|
|
|
|
09/19/2011, 01:43 PM
|
#47 |
|
Premium Member
Join Date: Nov 2004
Location: Georgia
Posts: 454
|
Finally some pictures to show the almost finished product. A friend from the Atlanta Reef Club is master woodsman and he was a great help in getting the trim work on the tank done.
The view coming down the stairs [IMG] 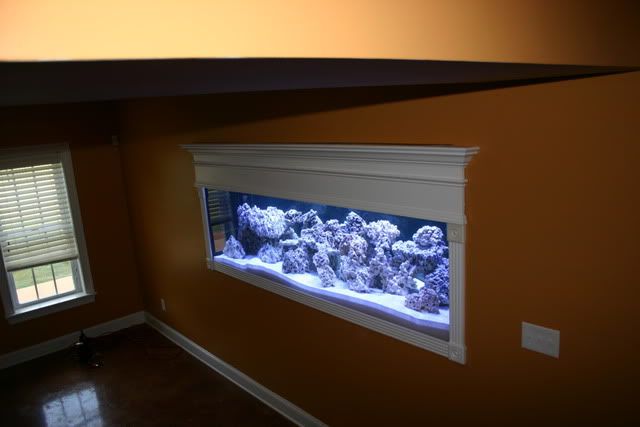 [/IMG] [/IMG]Front view [IMG] 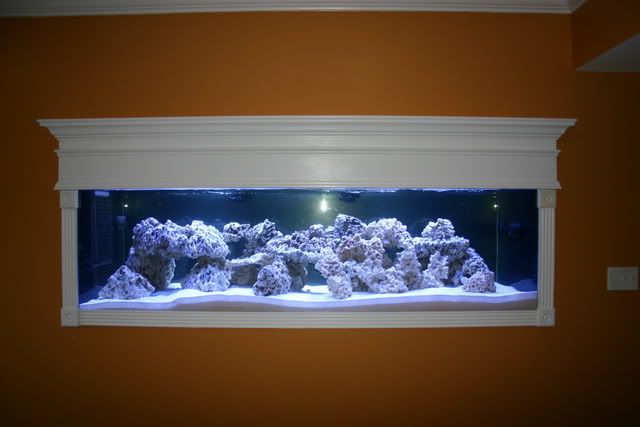 [/IMG] [/IMG]The front top trim work [IMG]  [/IMG] [/IMG]Exactly how I wanted it to work. Makes it almost silent and I can access the tank from the front. [IMG] 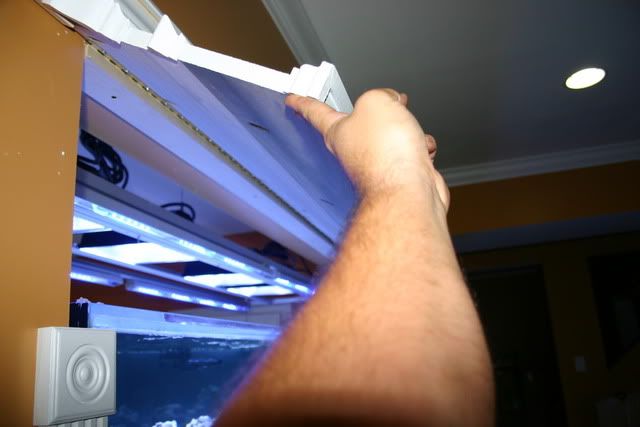 [/IMG] [/IMG]
|
|
|
|
|
09/19/2011, 01:48 PM
|
#48 |
|
Premium Member
Join Date: Nov 2004
Location: Georgia
Posts: 454
|
All of the trim work has not been painted in case you were wondering from the pictures before.
Here is the light rack [IMG] 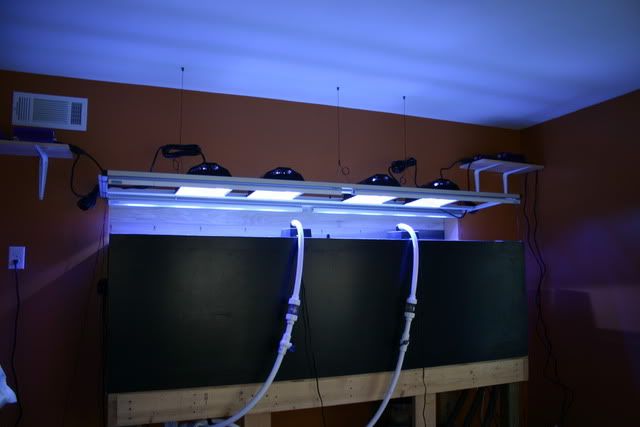 [/IMG] [/IMG][IMG]  [/IMG] [/IMG]Water change station. Still a little work to do here. [IMG] 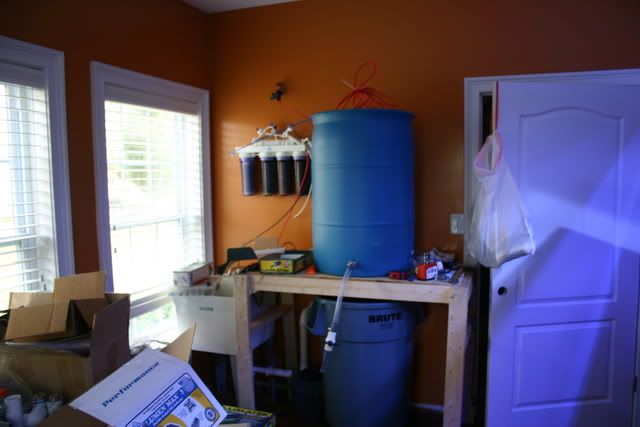 [/IMG] [/IMG]View from way across the room. Makes an 8 foot tank look pretty small. [IMG] 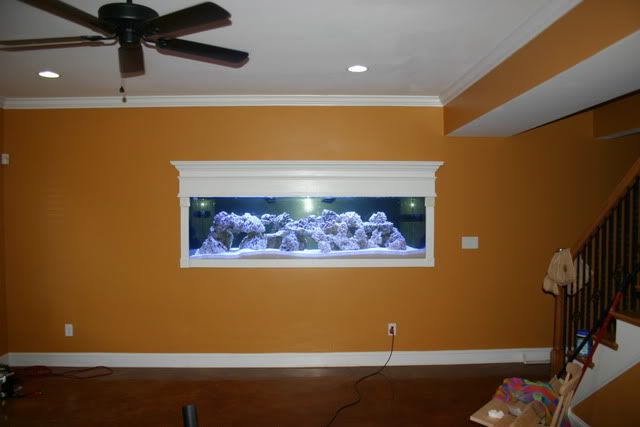 [/IMG] [/IMG]Tank has been cycling and running for about 12 weeks. It is almost time to start adding the goodies. |
|
|
|
|
10/21/2012, 07:22 PM
|
#49 |
|
Premium Member
Join Date: Nov 2004
Location: Georgia
Posts: 454
|
Thought I would add some updates a little over a year later.
[IMG] 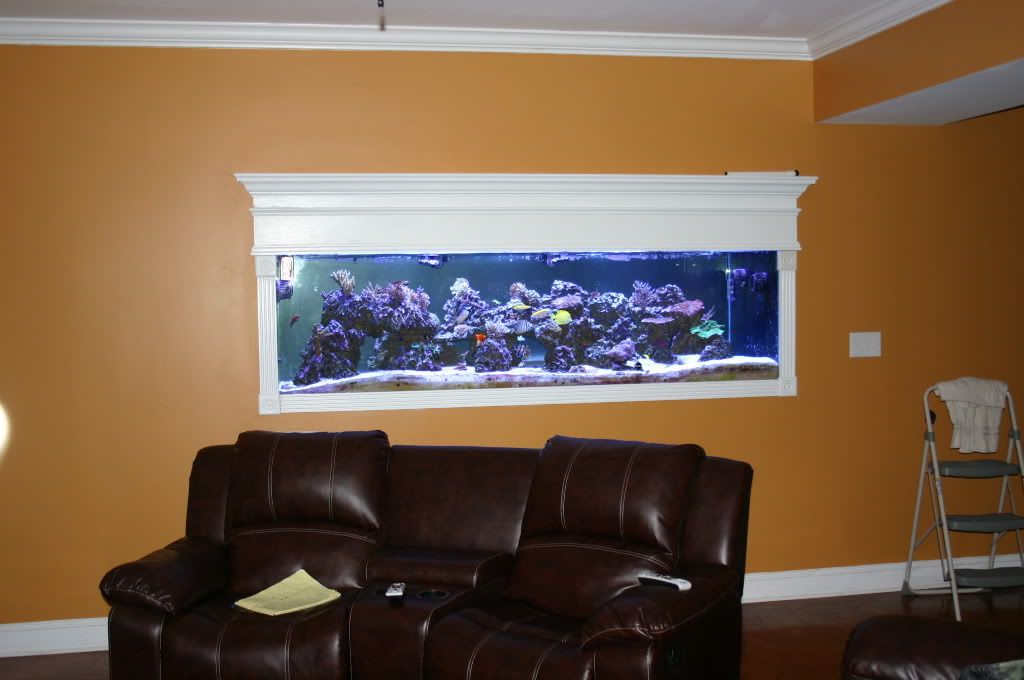 [/IMG] [/IMG][IMG] 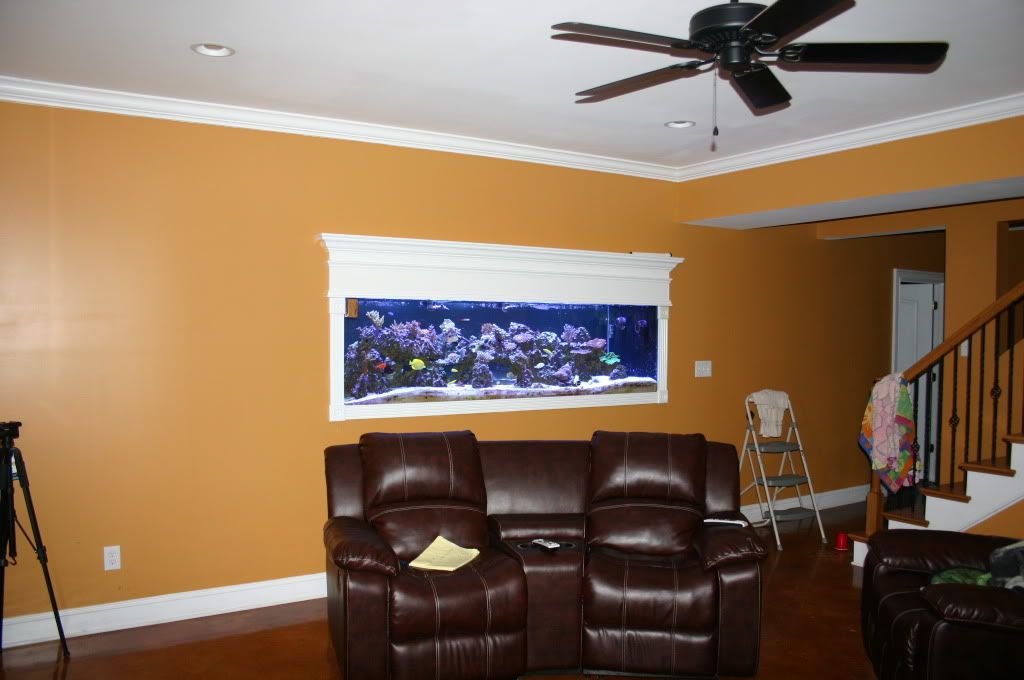 [/IMG] [/IMG][IMG]  [/IMG] [/IMG]
|
|
|
|
|
10/21/2012, 07:25 PM
|
#50 |
|
Premium Member
Join Date: Nov 2004
Location: Georgia
Posts: 454
|
Some more photos:
[IMG]  [/IMG] [/IMG][IMG]  [/IMG] [/IMG][IMG]  [/IMG] [/IMG][IMG]  [/IMG] [/IMG][IMG]  [/IMG] [/IMG]
|
|
|
|
 |
|
|
 Similar Threads
|
||||
| Thread | Thread Starter | Forum | Replies | Last Post |
| Mo's first 95g DIY build thread - Egypt ! | Mounda | Reef Discussion | 29 | 03/18/2014 01:37 AM |
| 20H build thread. | jtgordon20 | Nano Reefs | 0 | 07/23/2010 03:57 PM |
| My 180g in-wall pre-build & build thread | ycrazyy | Large Reef Tanks | 1 | 01/02/2008 09:32 PM |
| New Build:Need Help/Suggestions with new build. New Build Thread | Tripspike | Greater Connecticut Area Regional Forum | 43 | 04/29/2007 08:25 AM |


 [/IMG]