
|
|
 01/02/2012, 02:30 PM
|
#101 |
|
Registered Member
Join Date: Aug 2007
Location: Georgetown, Tx
Posts: 1,016
|
I think he meant the water storage tanks.
I sent you a PM at ARC, btw. |

|

|
|
01/02/2012, 03:00 PM
|
#102 |
|
Registered Member
|
Oh D'oh! Yes of course, that makes sense... too many things called "tank!"
 The storage tanks are actually 50g ones, not 55g as I had previously stated, my bad! They were from an eBay seller called "TANKS&MORE" and were the best price I could find, although shipping is a painful but necessary evil. (Apologies to mods if naming names isn't allowed... plz let me know if that's the case so I won't do it in the future.)
__________________
Click on my homepage link to see my new 144g Half Circle Build! Current Tank Info: 144g Half Circle Oceanic (started 11/7/2011) |
|
|
|
|
01/02/2012, 06:28 PM
|
#103 | |
|
Registered Member
Join Date: Jun 2011
Location: Richmond, Virginia
Posts: 152
|
Quote:
Again, thanks for the detailed posts. I've been piddling with plans for a while now for automating water changes. ATO is already handled by a LM3 UPLC-II. I have been really happy with the SpectraPure pumps. Well made and very robust. Thanks again for the information!
__________________
Mike "Just get me to the airport put me on a plane" - The Ramones |
|
|
|
|
|
01/02/2012, 09:17 PM
|
#104 |
|
Registered Member
Join Date: Sep 2008
Location: Vancouver WA
Posts: 517
|
Wow great post and tank. Ill keep an eye on this one. I love the rock work.
__________________
Josh Click on the redhouse for my 180 build. Current Tank Info: 180 gallon pennisula reef |
|
|
|
|
01/03/2012, 07:06 AM
|
#105 |
|
SKIMMER WHORE
 Join Date: Sep 2001
Location: Fredericton, NB, Canada
Posts: 1,564
|
great build Love the rock, looks amazing. the litemeter you like them? so you are saying that you are constantly changing water 24/7 with the pump.
__________________
Doesn't matter how much you have been reading, until you take the plunge. You don't know as much as you think. Moved from the WEST to the EAST |
|
|
|
|
01/03/2012, 10:03 AM
|
#106 | |
|
Registered Member
Join Date: Aug 2011
Posts: 1,050
|
Quote:
You can find a pretty cheap temp controller for coordinating multiple heaters at Foster and Smiths. It is call the Azoo Micro Temp Controller, you set the temp, crank the heaters to full blast and done. Here is a link: http://www.drsfostersmith.com/produc...m?pcatid=23735 Oh and great water exchange system! I am trying to work out a way to set up something similar though I don't want to spend that much on a liter meter. I got some ideas forming in my head, but have not finalized it. |
|
|
|
|
|
01/03/2012, 04:45 PM
|
#107 |
|
Registered Member
Join Date: Jun 2011
Location: West Texas
Posts: 127
|
How long are your runs from the storage tanks to the DT? Does your LiterMeter have any problem with the rise and fall of your runs?
Eddie |
|
|
|
|
01/04/2012, 12:12 PM
|
#108 |
|
Registered Member
Join Date: Nov 2009
Posts: 68
|
Very nice set-up. I'm in the process of doing the same thing and have purchased the same Litermeter pumps. My question is maintaining the level in your RO water tank. You have a float valve at the top of the tank to turn off the RO unit. So does your RO tank stay constantly full on normal day to day operations? I realize that when you make new salt water you will fill the other tank, then have a long on time for your RO unit to refill the RO tank. My concern is having small amounts of RO water being made as evaporation takes place in your DT. I have heard that it is not good to run an RO unit in small increments. Maybe you shut the RO unit off manually and let the RO tank run down a bit.
My solution is to use two float valves in the RO tank (high level/low level) and a solenoid shut off valve to the RO unit driven by the float valves. As this is a bit complicated (although doable), I would like to know what you do. Thanks Chasman |
|
|
|
|
01/04/2012, 02:34 PM
|
#109 | ||||
|
Registered Member
|
Thanks everyone!
 Quote:
The pumps operate one at a time for about ~20s (I haven't timed it, but it feels like it's around that.) Pump A turns on and sucks waste water outside. Then Pump B kicks in and brings in fresh SW (the same amount that Pump A removed.) Finally, if the water lvl sensor allows it, Pump C turns on and delivers RO water. This sequence repeats several times a day until the set amount of water has been moved. So it's not exactly continuous; it's very small amounts stretched over the day. I arranged it so the waste water is drawn from the first sump chamber and the fresh RO and SW are delivered to the next chamber. That way it's less likely that the new water will be removed, as it has to travel into the DT and back to the sump first. Quote:
Drat, now I have to buy a new heater! Where were you a couple of months ago?!  Quote:
They're all peristaltic pumps so they can pump water very long distances. Water is sucked instead of pushed; kind of like how you can easily suck water through a really long, curly drink straw. The manual says: Draw Height: from maximum 25 feet (7.7 meters) below Delivery Height: to maximum 60 feet (18.5meters) above I'm not sure if there is a max distance it can pull from. I expect if there is it's pretty far. Quote:
I'll start turning off the water supply under the sink for the time being. Thanks for the tip! I'll let you know what I figure out!
__________________
Click on my homepage link to see my new 144g Half Circle Build! Current Tank Info: 144g Half Circle Oceanic (started 11/7/2011) |
||||
|
|
|
|
01/04/2012, 04:37 PM
|
#110 |
|
Registered Member
Join Date: Jun 2011
Location: West Texas
Posts: 127
|
Thanks Fran,
I'll be paying attention to what you discover on the R/O short cycle. Eddie |
|
|
|
|
01/05/2012, 01:31 PM
|
#111 | |
|
Registered Member
Join Date: Nov 2009
Posts: 68
|
Quote:
|
|
|
|
|
|
01/05/2012, 05:12 PM
|
#112 | |
|
Registered Member
|
Quote:
I fixed the wet foundation problem too! Here's Bandit inspecting my work... 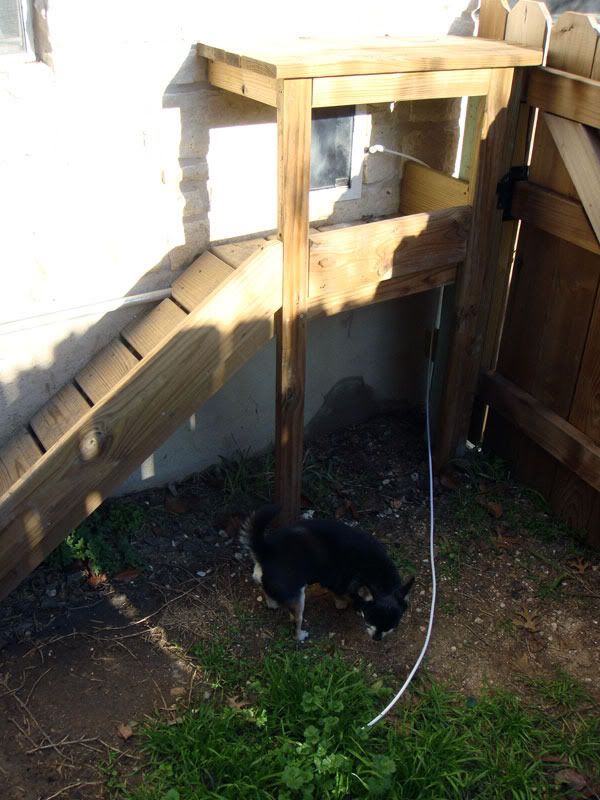 I'll move the tube about every time I go out there to collect the dogs toys, -Krypto (the Boston Terrier) has a habit of taking all the toys outside and leaving them there to get rained on... 
__________________
Click on my homepage link to see my new 144g Half Circle Build! Current Tank Info: 144g Half Circle Oceanic (started 11/7/2011) |
|
|
|
|
|
01/05/2012, 05:24 PM
|
#113 |
|
Registered Member
|
I've been testing the nitrate and it's finally starting to fall! (20 instead of 30)
I thought I'd celebrate by releasing Guybrush & Marley into the big tank!!  I pulled Marley's beloved faux-nemone out first and placed it on "nem forest to be" pillar. Then I scooped both clowns out. Guybrush proved true to his name and was far more resourceful at eluding capture, but I got him in the end. When I added them to the 144g Marley dove straight into her fake anemone! 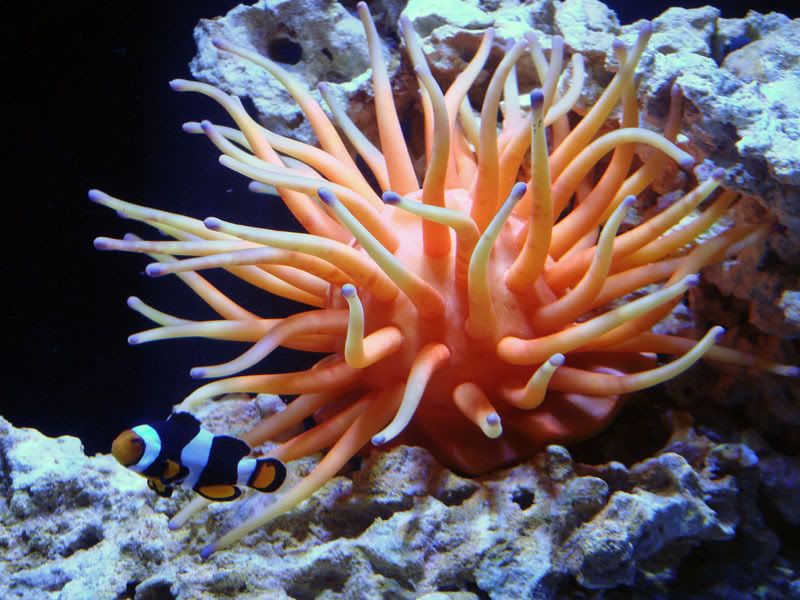 Guybrush swam to the side of the tank and looked a bit lost, but after about 10mins she found him and they went exploring together... 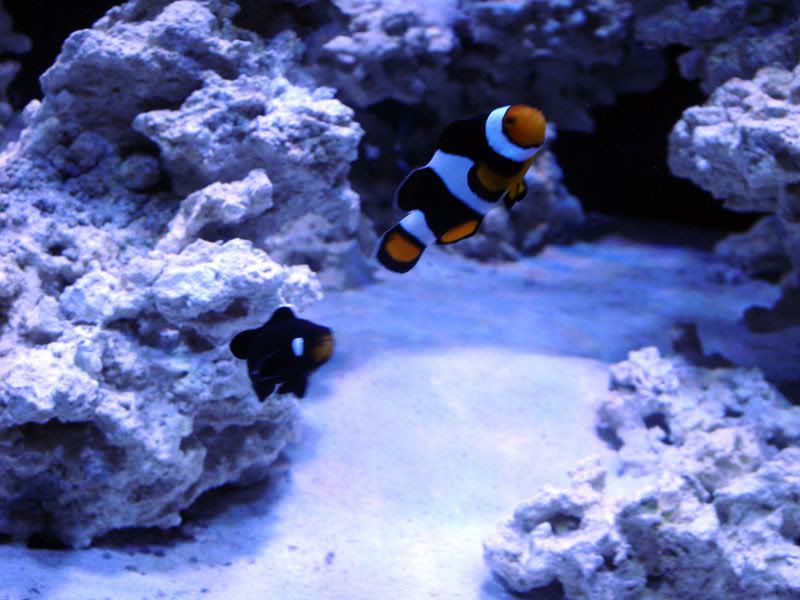 She'd only leave the comfort of her anemone for a little while before returning to it... so she definitely considers it her host. I managed to get a vid of her behavior, (excuse the noise in the background, hubby was making dinner.) This was shot about 15mins after they were added to the tank. http://youtu.be/SYUXAvnQ7io They've had 3 nights in the big tank now and for some reason Marley has elected to leave the anemone and sleep near the sandbed with Guybrush... which is odd because the main time she used the anemone in the nano was to sleep. I suspect it might be the Radion moonlights causing it. At the moment they don't have a lunar cycle like the AI Sols did, so they are quite bright at nighttime. I'm going to have another play with the settings and see if I can get the brightness down. Still, I take it as a good sign that she wants to sleep next to Guybrush.  As time wares on they've been getting braver, exploring more and more of the tank. Being tank bred fish I recon they must think this is "That Ocean Place" the other wild caught fish have told them so much about! They certainly seem pleased with their new digs... I just hope they won't mind when they get some roommates!Speaking of roommates... I got to cash in my first Christmas fish token! Say hello to my new Bangaii Cardinals; Isaac & Miria!  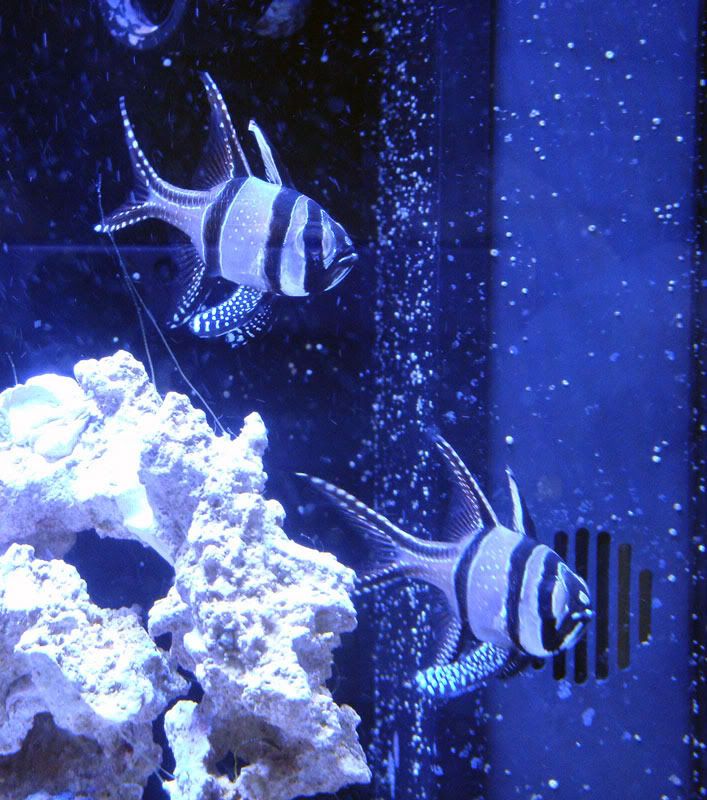 A local reef club member had seen my thread so when he saw them being traded in at the LFS he msged me! They're tank bred and were spawning in the previous owners tank. It was only a half hr until the LFS closed but luckily we live pretty close, so we sped over there to grab them. It was so unexpected and exciting!! MUCH more fun (and cheaper!) than ordering from Divers Den! Local reef clubs are so cool!!  They're in my nano now which will be my QT for the time being. They were pretty nervous of me until I offered them some frozen mysis. Wow can cardinals really move when they want too! Now we're best buds and they keep coming to the front to see if I have more treats for them. Gotta love tank bred fish hehe! I've been reading up Bangaii Cardinal breeding. Did you know they're actually on the endangered species list?? That's pretty crazy! I hope I can help the wild population by raising some babies myself.
__________________
Click on my homepage link to see my new 144g Half Circle Build! Current Tank Info: 144g Half Circle Oceanic (started 11/7/2011) |
|
|
|
|
01/05/2012, 08:35 PM
|
#114 |
|
Master of my domain
Join Date: Jun 2003
Location: Rhode Island
Posts: 3,466
|
wonderful job on that litermeter topoff set up. all that time and energy will be rewarded when all you have to do is mix the water and push a button.
__________________
Cool Club Current Tank Info: coming soon... |
|
|
|
|
01/05/2012, 10:05 PM
|
#115 | |
|
FMMAS Executive Director
Join Date: Aug 2009
Location: Fargo ND
Posts: 1,504
|
Quote:
1) The first part would be installing a flush valve on your RO waste line. This will allow you to flush out any debris on the membrane. This will not only reduce the effects of TDS creep, but will prolong the life of your RO membrane. All you would have to do is flush for appox. 15 minuets after making water. 2) The second part would be to install a ball valve on your DI out line any where between your float valve and your DI cartridge. The purpose of this would be to manually shut off the water so long as there is water in your reservoir. When the tank gets low or empty, you simply turn the valve back on and walk away, only to return a few hours later to shut the valve back off when the tank is full. This will allow you to manually shut off the unit to prevent the unit from running for a short time when your LM3 runs for top off, thereby allowing the TDS out of your RO membrane to maintain low levels when making water. When making RODI water it is best to make as much water as possible at one time. This will result in greater efficiency of the unit, and prolong the life of your DI resin.
__________________
"My advise is, always look at their aquarium before you take their advise. Because alot of people give advise and they havnt got a clue" ~David Saxby~ "Only after the last tree's cut and the last river poisoned only after the last fish is caught will you find that money cannot be eaten" ~Lamb of God~ Current Tank Info: 125g DT, 45g sump ---- 57g Illuminata, custom sump |
|
|
|
|
|
01/06/2012, 04:40 PM
|
#116 |
|
Registered Member
|
Excellent advice/info, thanks Metal Man! I think that's exactly what I'm going to do!
I'll manually turn the RO/DI back on after I make some SW... let it fill back up and switch itself off. After the RO/DI has finished for the day I'll flush the system. Rinse and repeat next time I make SW; perfect! It's not quite as automated as having 2 float valves, but the RO tank drains so slowly that it couldn't possibly empty before I need to mix more SW anyway. I'll post some more pics/links to the new bits I order.
__________________
Click on my homepage link to see my new 144g Half Circle Build! Current Tank Info: 144g Half Circle Oceanic (started 11/7/2011) |
|
|
|
|
01/06/2012, 11:13 PM
|
#117 | |
|
FMMAS Executive Director
Join Date: Aug 2009
Location: Fargo ND
Posts: 1,504
|
Quote:
Im not sure how two float valves would allow the system to shutdown and restart upon the tank emptying, unless you meant float switches, in which case never mind. In the event that one would use float switches, you must also throw in solenoid valves, wiring, a power source, and most likely relays; all of which are additional factors adding to the complexion of the system and increasing the variables in which failure can occur. With the system I have described you simply add two valves to the system and your set. Remember to let the tank drain almost completely before making more water. As I mentioned before, this will result in higher efficiency of your filters. And we all know this hobby is expensive enough. I think my last DI change, before my most recent change, was almost seven months. I should also add that I was averaging about 40g a week and I used the same DI resin to refill my 125 when we moved it this fall, as well as massive water changes when I had a mini crash shortly after. If you are unfamiliar with a flush valve, it is merely a valve that bypasses the flow restrictor on your waste line. The flow restrictor creates back pressure on the membrane allowing the pressure in the valve canister to push water through the membrane resulting in purified water. When the flush (bypass) valve is opened, there is no longer any back pressure created on the membrane resulting in all of the water into the membrane canister to exit via the waste line, removing debris and sediment with it. One question, how large of water changes is the LM3 set to perform? Sorry if you posted it, I likely missed it.
__________________
"My advise is, always look at their aquarium before you take their advise. Because alot of people give advise and they havnt got a clue" ~David Saxby~ "Only after the last tree's cut and the last river poisoned only after the last fish is caught will you find that money cannot be eaten" ~Lamb of God~ Current Tank Info: 125g DT, 45g sump ---- 57g Illuminata, custom sump |
|
|
|
|
|
01/07/2012, 01:35 AM
|
#118 |
|
Registered Member
|
Ah yes sorry, I meant float switches! My bad!
Thanks for all the detailed info. Really appreciate the time you're taking to help me. My nitrates are still pretty high for some reason, so I thought I'd crank up the WCs until they lowered. 144g + 30g(ish?) sump = ~175g 20% of that per week = 35g 35/7 days = 5g per day (18.92 liters) It's a little heavy handed, but it seems to be working (nitrates now at 20, down from 30.) Would you recommend more or less? I'd like to get it down to 10% per week once things settle down... maybe a touch more to make up for the inevitable dilution effect.
__________________
Click on my homepage link to see my new 144g Half Circle Build! Current Tank Info: 144g Half Circle Oceanic (started 11/7/2011) |
|
|
|
|
01/07/2012, 11:43 AM
|
#119 |
|
Registered Member
Join Date: Sep 2010
Location: central KY
Posts: 1,053
|
Lots of good info in the breeding forum on here about raising cardinal babies.
|
|
|
|
|
01/07/2012, 05:01 PM
|
#120 |
|
FMMAS Executive Director
Join Date: Aug 2009
Location: Fargo ND
Posts: 1,504
|
Your water change regimen looks good. For the time being, just keep it up and the nitrates will eventually subside. It just takes time.
If the levels persist, I had good luck with vodka dosing. Actually I have no idea what my nitrates are at currently, if theyre up there again, I will probably start dosing again. If your interested there have been well written write ups and articles on the subject. Here is a good one
__________________
"My advise is, always look at their aquarium before you take their advise. Because alot of people give advise and they havnt got a clue" ~David Saxby~ "Only after the last tree's cut and the last river poisoned only after the last fish is caught will you find that money cannot be eaten" ~Lamb of God~ Current Tank Info: 125g DT, 45g sump ---- 57g Illuminata, custom sump |
|
|
|
|
01/14/2012, 06:14 PM
|
#121 |
|
Registered Member
|
ARGH... my reef junkie tendencies are showing again...
  ...but before I open the box, I need to do an update. The LiterMeter has been running for 2 weeks now and I'm very impressed with it. I loooove not having to do manual water changes! (...and the hardwood floor loves it too! Tip for husbands; if you want your wife to sign off on an automatic water changer, just point out how much less water will end up on the floor!)  When the SW reservoir gets down to around 35g it starts splashing; which is a perfect reminder for me to top it up. I turn the taps to fill it back up with FW, dump in some salt and let the pump do the mixing. So far I've been leaving the LiterMeter on during all of this. If I was mixing the whole 50g up I'd turn it off, but as it's less than half the tank I figure it's probably OK to allow it to keep drawing water. By the time water gets to the aquarium its probably going to be pretty well mixed in the tube anyway... and even if it isn't, it's such a small amount I doubt it will notice. I guess it could cause some damage if I left it running unsupervised indefinitely, but with occasional checkups it's easy to keep an eye on things and correct accordingly. SG has kept steady at 1.025 and Nitrates have fallen somewhere between 10-20ppm (hard to tell exactly on those color test kits.) I had thought getting the salt mix amounts right would be more of a pain, but it's turned out to be pretty forgiving. The storage tanks helpfully have the gallon amounts marked on the sides, so I can guesstimate the amount of salt needed. I test it later on and if it's slightly off I just add a little more salt or water. I'm getting pretty good at it now and I can usually get it right first time. The only hiccups have been:
As per forum feedback (thanks Metal Man! ) I added a few bits to the fish cupboard to make it more efficient. Shown here are:Top: Reverse Osmosis System Flush Valve Kit Bottom: JG 1/4 inch x 1/4 inch Union Ball Valve 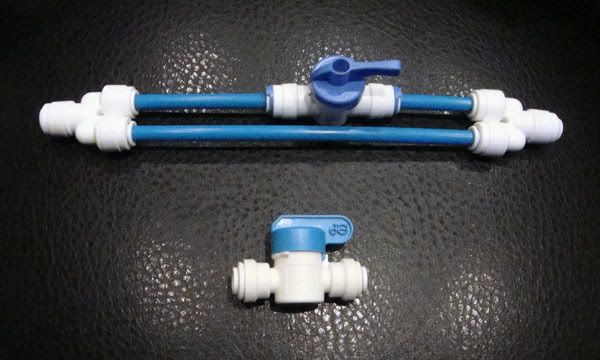 RO/DI unit with new bits added: 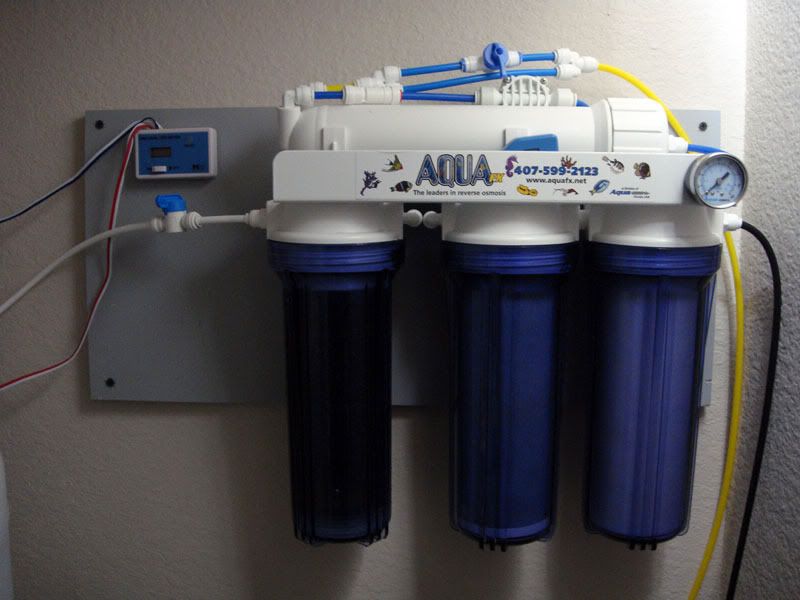 The Ball Valve goes in between the RO/DI unit output and the float switch. When I close the valve the back pressure shuts off the whole RO/DI unit (no more reaching under the sink, yay!) Rather than letting the float switch constantly top off the freshwater tank with tiny splashes of (increasingly dirty) RO; now I just flip this switch and shut the whole thing off. Once the RO tank is empty enough, I open the valve and let it fill back up. The float switch prevents it from overflowing and I just need to remember to turn it back off again when it's full. 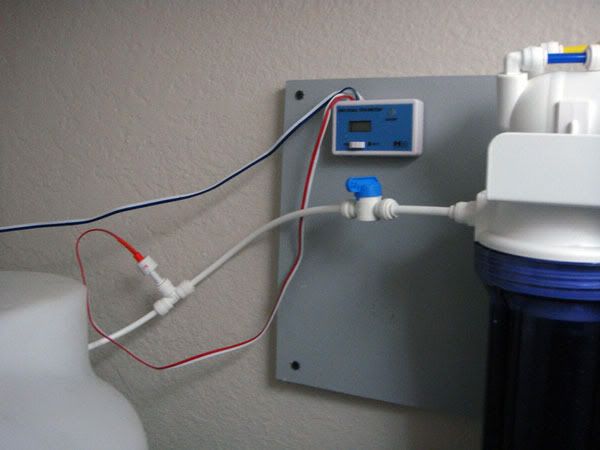 The flush valve goes on the waste water (yellow) line. After I've made a batch of RO I open the flush valve for 20s. This allows the waste water to bypass the flow restrictor and rush though the system, pulling any crud and impure water with it. I'm learning so much about RO units! 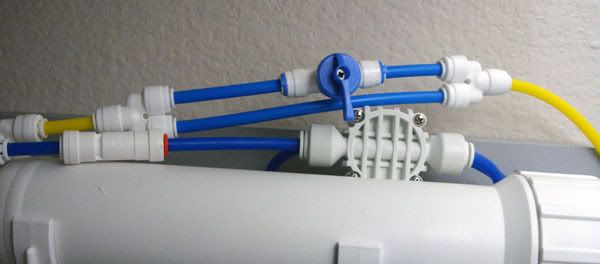
__________________
Click on my homepage link to see my new 144g Half Circle Build! Current Tank Info: 144g Half Circle Oceanic (started 11/7/2011) |
|
|
|
|
01/14/2012, 06:16 PM
|
#122 |
|
Registered Member
|
Isaac & Miria (Bangaii Cardinals) have been coming out of their shells in QT. They're quite picky eaters, but will happily except the larger meaty bits in frozen food, especially when it whizzes by them in the current. When my father-in-law met them he said they look like "Italian Piranhas!"
They were spitting out more food than I liked, so I started spicing it up with a little Garlic Xtreme & Selcon. 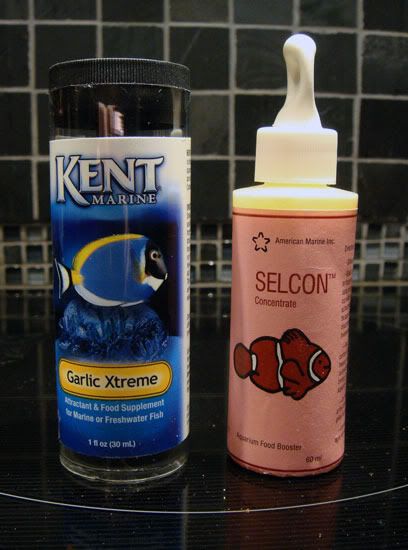 That was a big hit and now they rush to the front to see me! 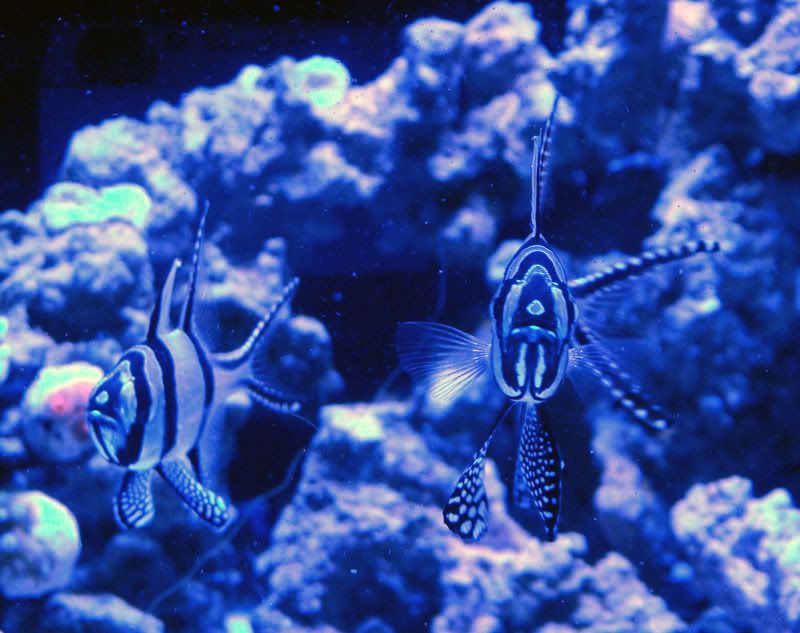 I noticed one of them looked a little pinker than the other. You can kind of see it in the following picture; the left one has a slightly darker body than the right one (it's a more pronounced in person.) 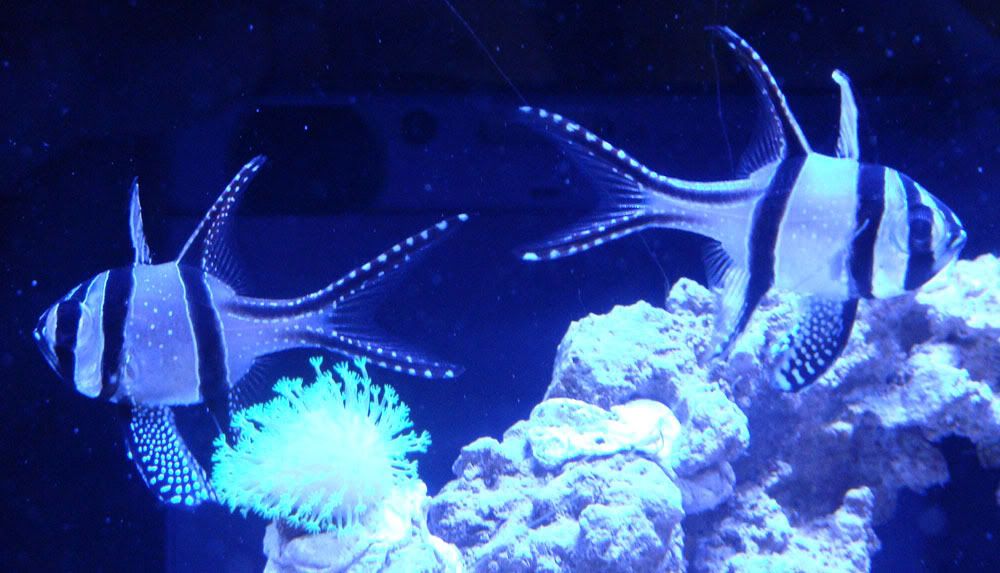 At first I thought something might be wrong, but after looking on the breeder forums (thanks john!) it turns out that it could be a sign the female is getting ready to lay eggs! Now that it was easier to tell them apart (and they were readily coming over to say "Feed me Garlic!") I started noticing more differences. The (presumed) male is slightly smaller and has longer dorsal fins. Apparently males often have longer dorsal fins, although not always. 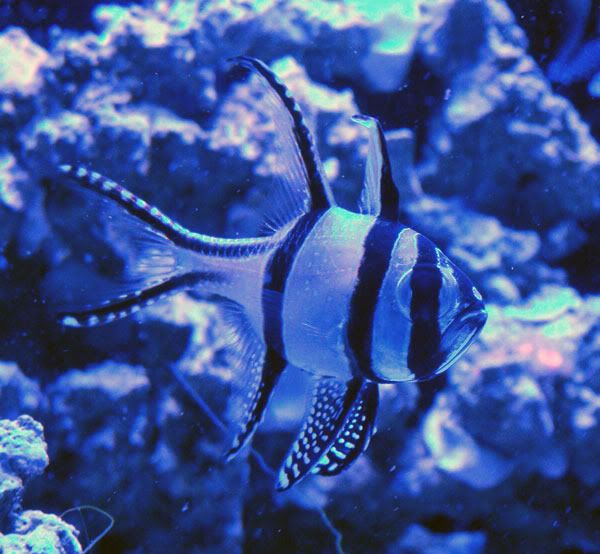 In comparison the (presumed) female's dorsal fins look blunted.  She's also more feisty and keeps having amusing bouts of "shadow boxing" with her reflection! This is in line with the male/female roles; as female has to defend her chap while he's busy holding the eggs/fry in his mouth.  This is my first time QTing and it must say it's surprisingly fun! You get to know the new fish a little better (and them you!) and it's exciting to look forward to the release date. It does suck having to go 4 weeks before purchasing anything else, but it feels good doing it the "right way" at last (there was only so long I could have gotten away with being lucky!)Speaking of new purchases, it looks like I'm going to have to pass on the Blue Spotted Jawfish. I knew they needed deep sand for a burrow, but I had thought they were like Pistol Shrimp / Gobies which dig sideways; allowing the hole be quite deep in relatively shallow sand. Alas, this is not the case for Jawfish; who prefer to build their burrows straight down in 6" of sand (4" in a pinch.) There's no way my sand is anywhere near that depth, so bye bye Blue-Spot... Bah! Being responsible can suck sometimes!
__________________
Click on my homepage link to see my new 144g Half Circle Build! Current Tank Info: 144g Half Circle Oceanic (started 11/7/2011) |
|
|
|
|
01/14/2012, 06:17 PM
|
#123 |
|
Registered Member
|
Time to find out what's lurking in the box!
Ta da! It's a Pellet Reactor Kit from Dr Tim's Aquatics! 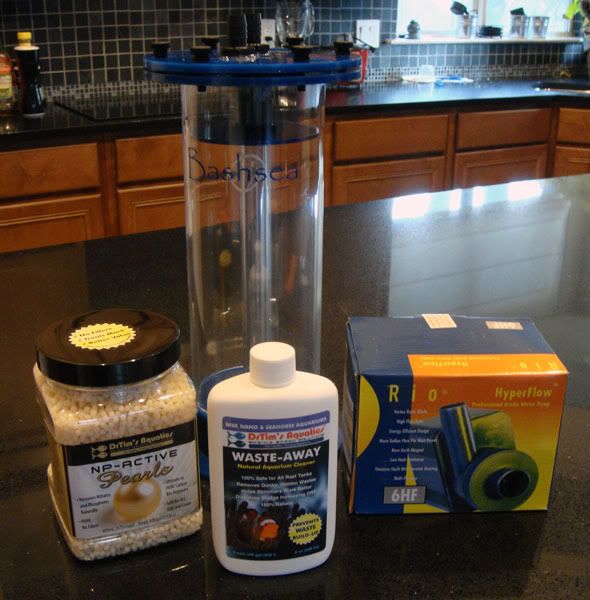
What brought this on? Well my nano has been getting a bit of nuisance algae of late (the long filaments you can see in the cardinal pics) and it's got me thinking about nutrient control in the big tank. I had looked into algae scrubbers, but was ultimately put off by them needing a light. Even if I didn't have the problem with the glass cabinet doors letting light out, I still don't like the idea of having a light in the sump -from both an electricity bill and safety standpoint. Enter the pellet reactor! Which is essentially the same as an algae scrubber, but utilizing bacteria instead. The pellets provide a home and food source for the bacteria, which consume nitrates and phosphates from the water as they grow (just like chaeto.) The protein skimmer then removes any fattened bacteria that drift out into the water, taking the nutrients they've eaten with them (equivalent of trimming chaeto.) This is my first reactor of any kind and I was excited to get my hands on it. It feels very sturdy and it even has Dr Tim's logo etched into the top, which I thought was a nice touch. 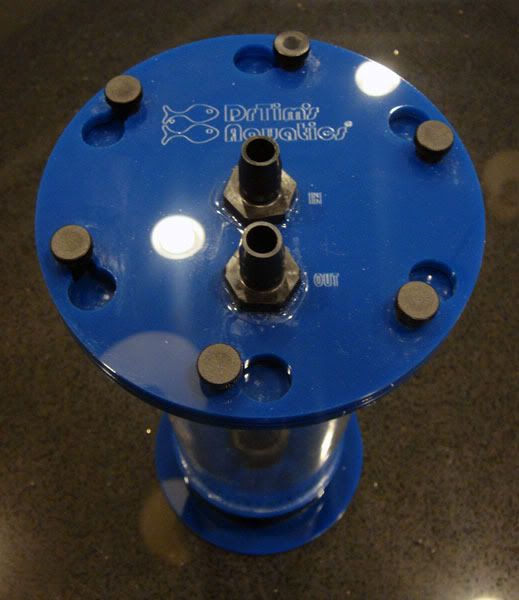 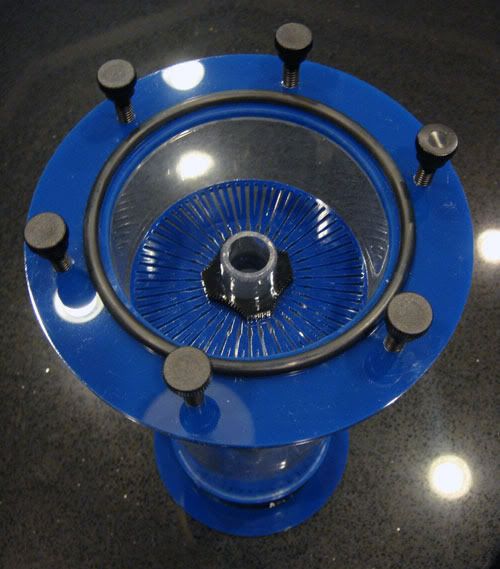 The only thing that didn't come with the kit was the tubing... which led me to the awesome discovery that they sell all kinds of tubing on Amazon Prime! I went for White Silicone Tubing (1/2" ID) The instructions say you have to build up to the correct dose of pellets over the course of a few weeks, so I only put a little in to start with.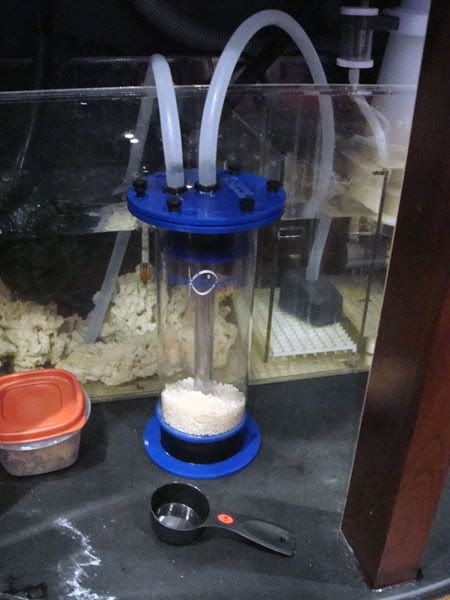 Ignition! 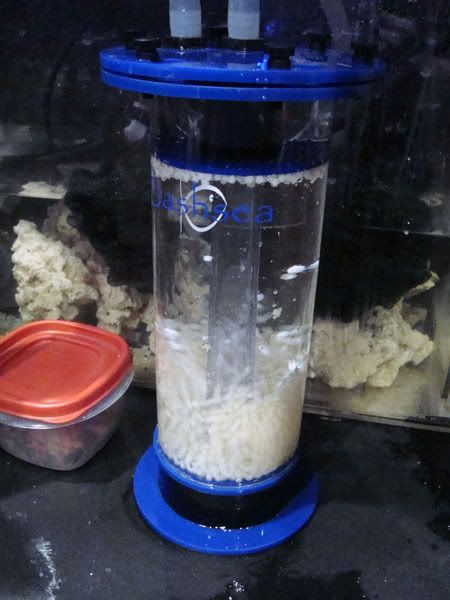 I'm no expert, but the pellets appear to be tumbling really well. As the reactor is new there was a bit of air trapped inside, but after a few hours (and some shaking) all the pellets you can see stuck at the top, sank down to join the rest. As per the instructions, I squirted a few turkey basters full of "Waste-Away" into the reactor pump. Apparently that should help things get kick started. It says to add it for 3-4 days, but as it's only a 8oz bottle, there's actually only enough for 2 days. I'm a little miffed there isn't more provided for the larger kit, (the small one has the same 8oz bottle,) but I'm not in any particular hurry, so it doesn't really matter... I figure I'll just spread what I have out over a few days instead. The pump started out VERY loud. I shook all the bubbles out and left it a day to settle in, but it was still noticeable over everything else (skimmer, return etc.) I was all ready to send it back, but as a last resort I moved it from where it was (chamber after the skimmer,) to the fuge and after a day in there it finally quietened down. I think microbubbles from the skimmer must have been collecting in it and rattling around. While I was under the hood I decided to sort out some issues with the skimmer. Lately it hasn't been skimming as well as I'd like. The water lvl has needed to be up higher than the recommended max lvl to stop it uploading it's residue before it reaches the cup. I've come to the conclusion this is due to 2 things:
The space saving skimmer is kind of annoying because the pump has to dock into an opening on the bottom of the skimmer. It's quite a loose fit, so after you wrestle the skimmer into position in it's (barely big enough) chamber, the pump has a tendency to slip out... and once the skimmer is in place there's absolutely no way to squeeze your hands in there to adjust the pump position. To fix issue number one I used larger pipes to raise the skimmer another couple of inches. The second problem was solved by a usefully sized tupperware lid. It happened to fit perfectly into the base of the skimmer; holding the pump in place and giving it a better surface to rest on, (it's even red to match!) It's been skimming much better since. 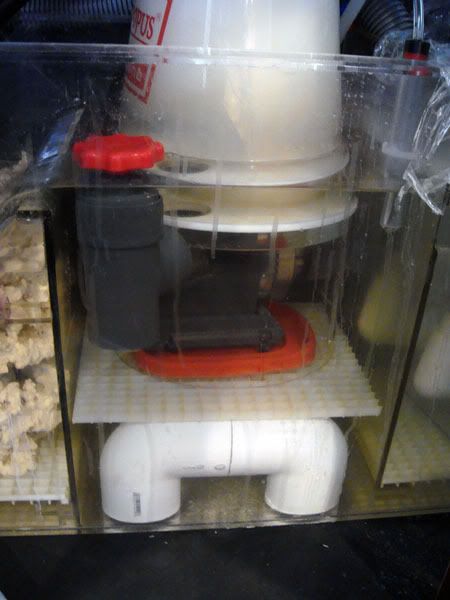 Here's how the sump is looking now: 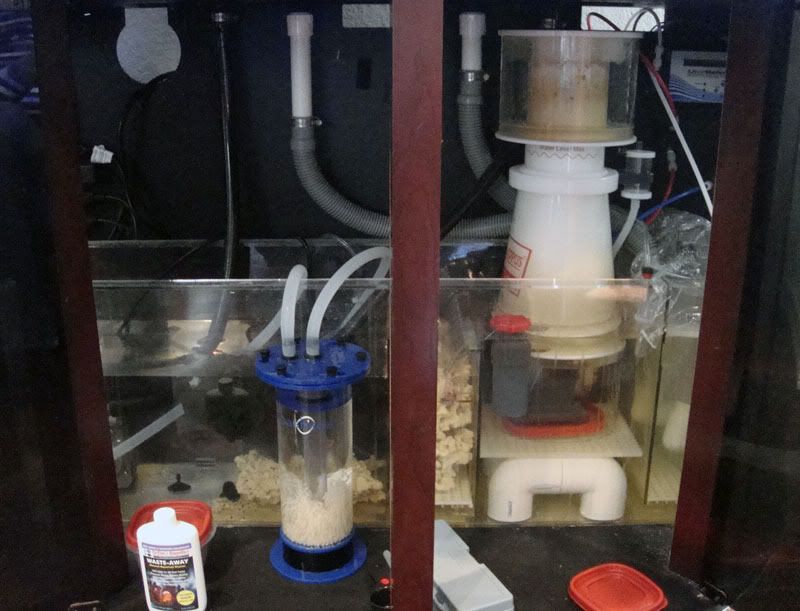 I think my next purchase will be a carbon reactor. I'm hoping I might be able to plumb it into one of the return lines, but I may just chicken out and get yet another pump.
__________________
Click on my homepage link to see my new 144g Half Circle Build! Current Tank Info: 144g Half Circle Oceanic (started 11/7/2011) |
|
|
|
|
01/14/2012, 07:24 PM
|
#124 |
|
Registered Member
Join Date: Feb 2001
Location: Hong Kong
Posts: 1,709
|
Great Build and very informative - thank you!
If you haven't already, I believe the output line of the BP needs to be in front of your skimmer intake to export excess nutrients. I am no expert though. cheers
__________________
NEVER get eye level with an infants anus! New build, planning stages. 30 x 20 x 20", Geisemann Spectra 250W with Radium, Profilux controller, Profilux doser 2, Fluval SP4 return pump, Life Reef 28 |
|
|
|
|
01/14/2012, 08:39 PM
|
#125 |
|
Registered Member
Join Date: Sep 2010
Location: central KY
Posts: 1,053
|
Your females second dorsal looks blunted because part of it is missing. Same thing happened to mine once, but don't worry it will slowly grow back.
|
|
|
|
 |
|
|
 Similar Threads
|
||||
| Thread | Thread Starter | Forum | Replies | Last Post |
| FS: Oceanic 144g half circle tank | ladybug5234 | Florida Marine Aquarium Society (FMAS) - Miami/Ft. Lauderdale | 20 | 01/05/2013 08:11 AM |
| Oceanic 144g half circle.... anyone? | its fry | Reef Discussion | 36 | 02/11/2008 04:32 PM |
| POST PICS Oceanic half-circle 76 or 144g | its fry | Reef Discussion | 3 | 02/11/2008 04:29 PM |
| Oceanic 144g Half Circle | sschafer | Upstate Reef Society | 11 | 03/13/2006 07:23 PM |


