
|
|
 06/11/2010, 10:14 PM
|
#26 |
|
Registered Member
Join Date: May 2006
Posts: 330
|
Great looking build! I look forward to seeing the final product!
|

|

|
|
06/11/2010, 11:09 PM
|
#27 | ||||
|
Registered Member
Join Date: May 2008
Location: Durham, NC
Posts: 2,205
|
Quote:
Quote:
I keep trying to tell myself that this is the fun part, but I am definitely looking forward to the finished product right now. I basically ruined my first acrylic project (a 20"x18"x18" SW mixing tank) because I didn't take the time to research, that was costly. Once I get the sump plumbing and return plumbing, and maybe even the APEX hooked to the internet, I can sit back and enjoy my handiwork. Quote:
Quote:
__________________
^ Click on my username and 'Visit Taqpol's Home Page!" to view my 220 gallon custom Miracles tank! -Alex |
||||
|
|
|
|
06/11/2010, 11:12 PM
|
#28 | ||
|
Registered Member
Join Date: May 2008
Location: Durham, NC
Posts: 2,205
|
Quote:
Quote:
__________________
^ Click on my username and 'Visit Taqpol's Home Page!" to view my 220 gallon custom Miracles tank! -Alex |
||
|
|
|
|
06/11/2010, 11:23 PM
|
#29 | |
|
Registered Member
Join Date: May 2008
Location: Durham, NC
Posts: 2,205
|
Quote:
An ideal fuge would aid in food production (pods) and export of nutrients through growth of macro-algae. Fuges help with pod production by not allowing predation in their breeding ground, but if I added some live rock to the return area of my sump I can get the same benefit with much less maintenance. Secondly, I plan on using a bacteria/carbon driven system coupled with a powerful skimmer for nutrient export. Many people, including myself, have actually had trouble growing macro-algae in this type of setup. In my mind, a refugium equals lower flow, which equals detritus accumulation, which equals more maintenance. I have seen lots of great fuge-less systems in action (Like SunnyX) so this time around I plan on trying it out myself. That being said, I am leaving room to install one in the future. I have even had a crazy idea to setup a fuge like a potted plant between the two tank, but grow mangroves out of it for purely aesthetic reasons.
__________________
^ Click on my username and 'Visit Taqpol's Home Page!" to view my 220 gallon custom Miracles tank! -Alex |
|
|
|
|
|
06/12/2010, 04:11 AM
|
#30 |
|
Premium Member
 Join Date: Jun 2006
Location: NY
Posts: 831
|
Alex......I agree 100% in regard to your comments on the fuge setup. I had an external fuge on my last 180-gl and decided against it on my new Miracles tank. Way too much maintenance and I simply did not see the benefits outweighing the cons imho. I was finding myself spending waaaay more time on fuge rather then the display.
After 13-weeks up and running my nitrates are way down (used dry rock & new sand too on the new setup) and I have been feeding 2x's/day with no issues. Skim heavy and have great flow and you will be fine....... Good luck going forward and have fun with the setup.....was the most rewarding time in the hobby the past couple of months with the new tank.
__________________
180-gl. SPS Miracles Tank 60" x 24" x 29". Lighting is Old School...(3) 250w MH Radiums using M80 ballasts w/ VHO Actinics (2) EcoTech MP60's, 75-gl. Sump, Kalk Reactor, MRC CalRx, Hurricone Skimmer |
|
|
|
|
06/12/2010, 12:38 PM
|
#31 | |
|
Premium Member
Join Date: Jun 2007
Location: Minot, ND
Posts: 815
|
Quote:
__________________
23,996 thawed iced cubes in a big cube and filled with flowers that grow under water. |
|
|
|
|
|
06/15/2010, 12:32 AM
|
#32 |
|
Registered Member
Join Date: May 2008
Location: Durham, NC
Posts: 2,205
|
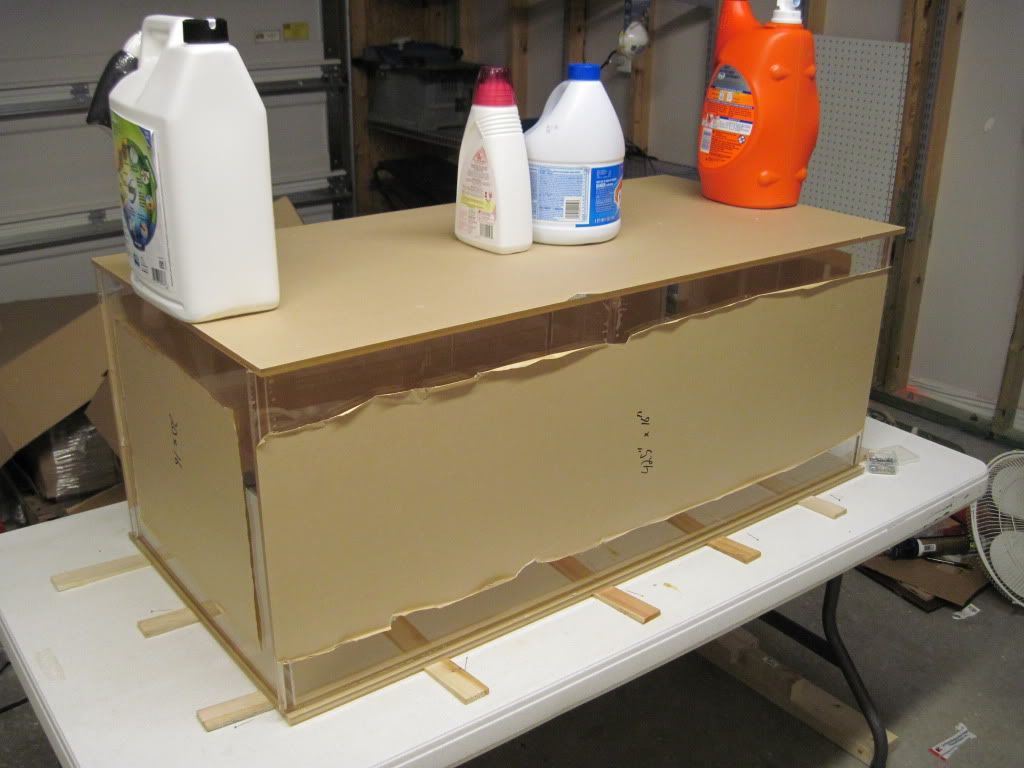
Acrylic sump construction time! This is my first time ever working with this nasty stuff,and it shows!
Getting a straight and clean edge was the hard part. Gluing the sides together reminded me of glass tank construction, which i actually enjoy. End pieces on the front pane:  All my pieces were oversized, but that left lots of room for 'flashing' that would be routed off at the end: 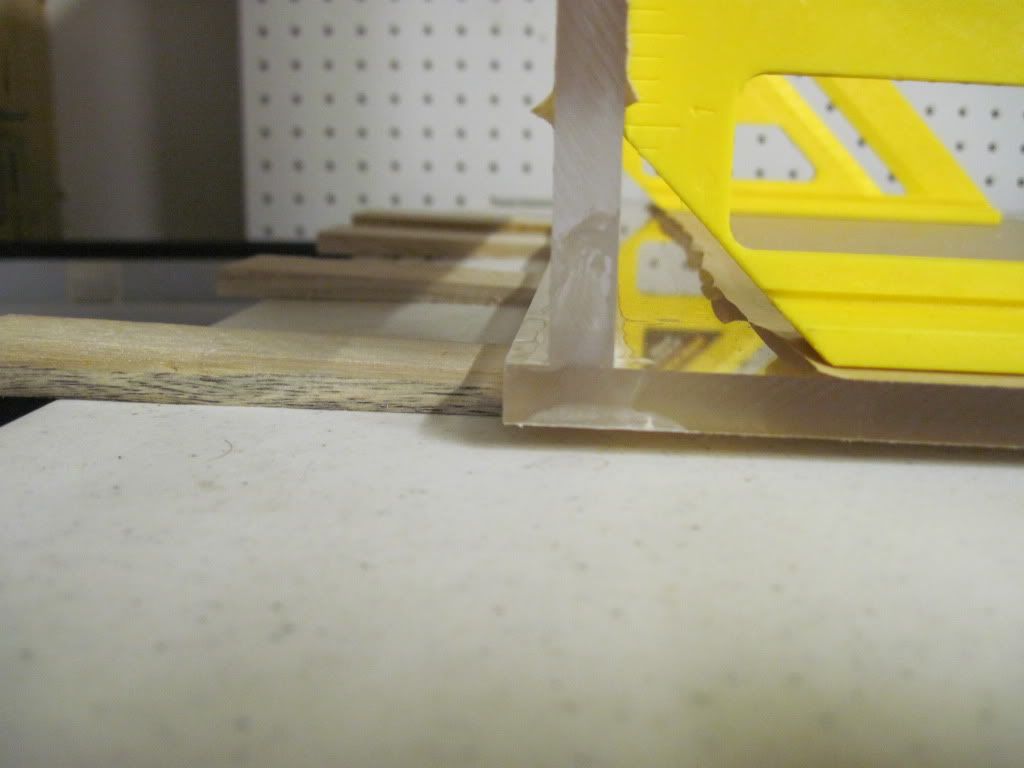 I actually constructed my bubble trap and baffles outside of the tank. I don't know if this is better or worse: 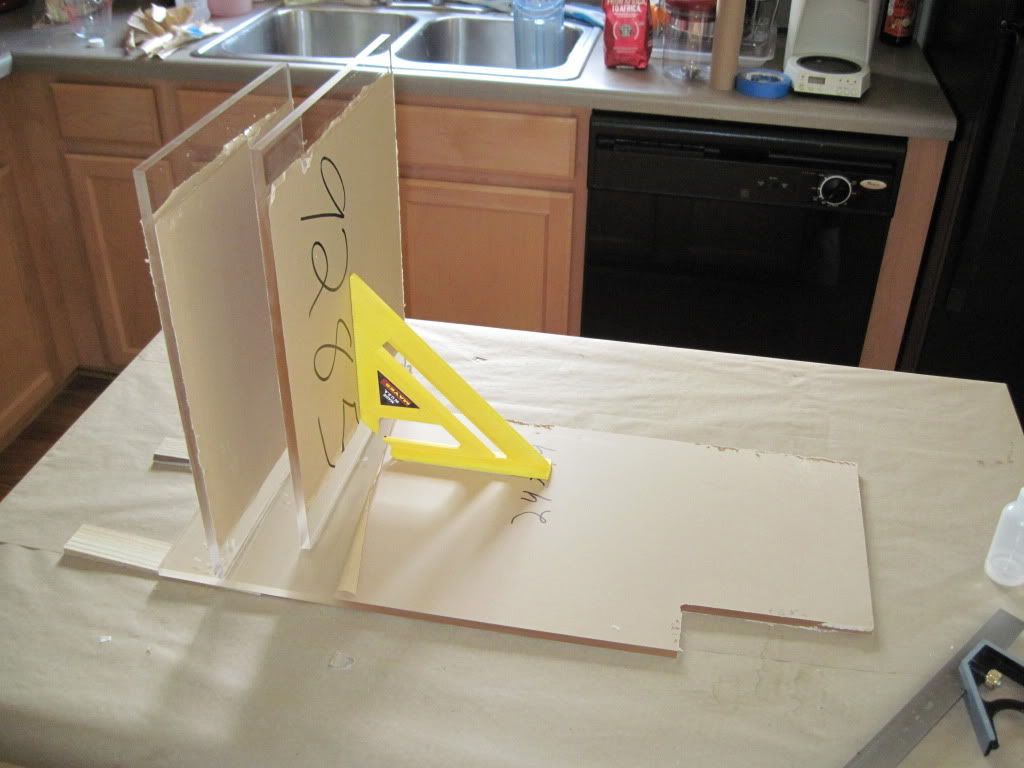 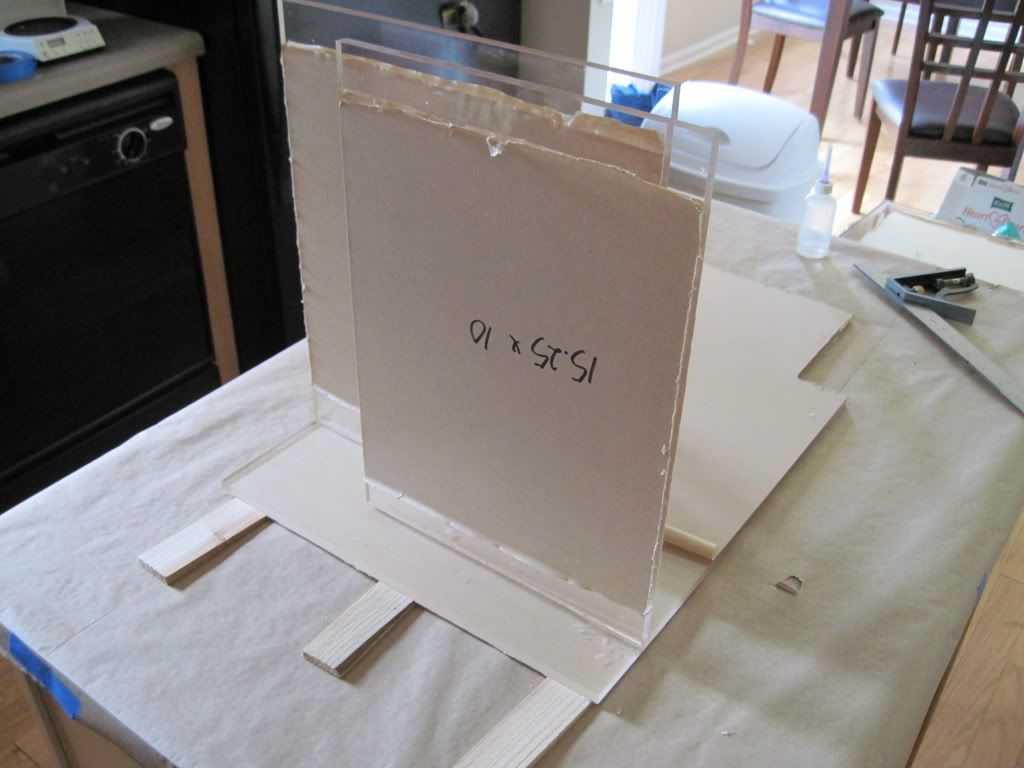 When working with acrylic you can only glue horizontally, so I first glued the two baffles to the front pane: 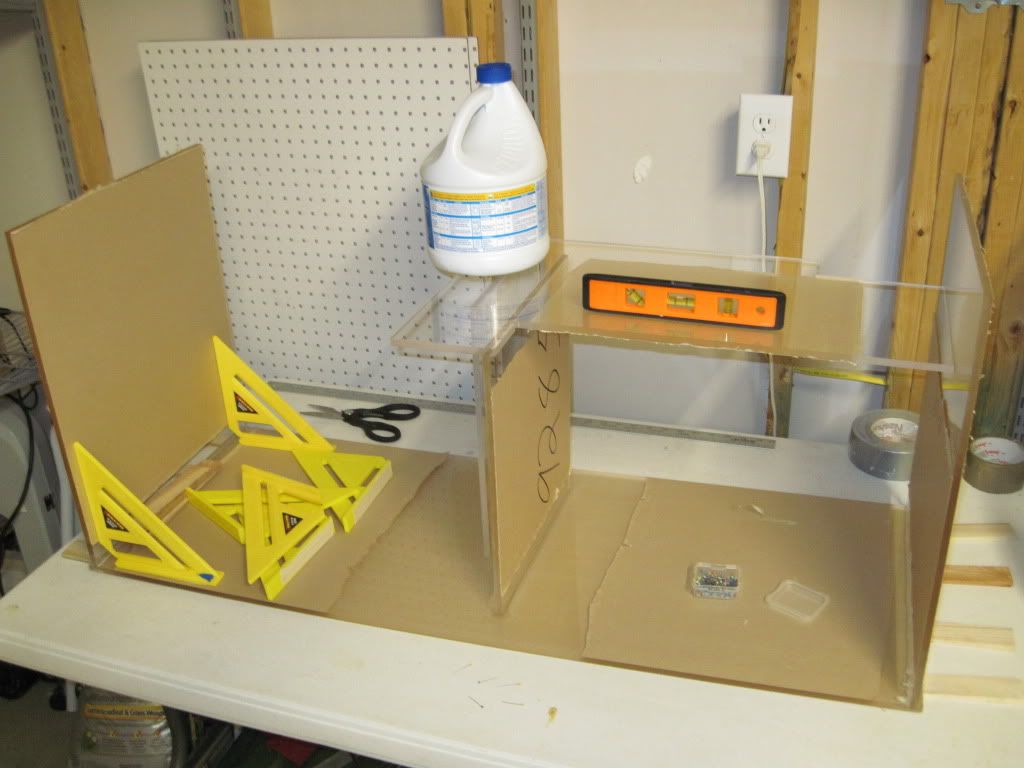 Then I was able to turn the tank on end (after waiting four hours to be safe) and glue the bubble trap to the side: 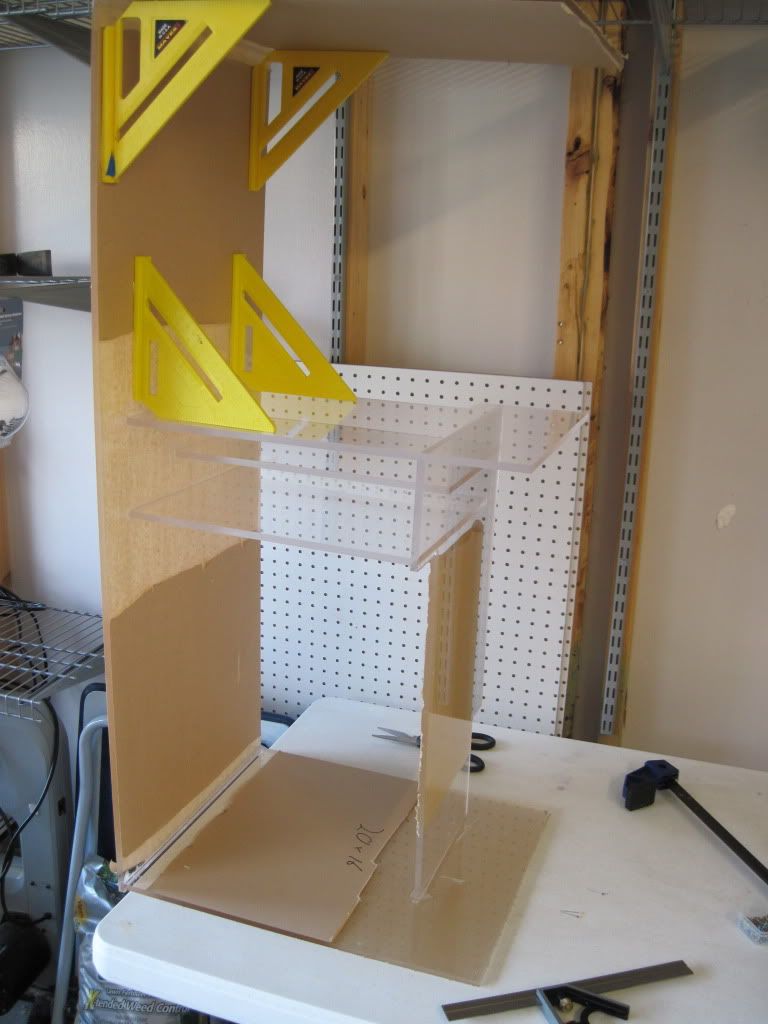 ...and the bubble trap to the remaining baffle: 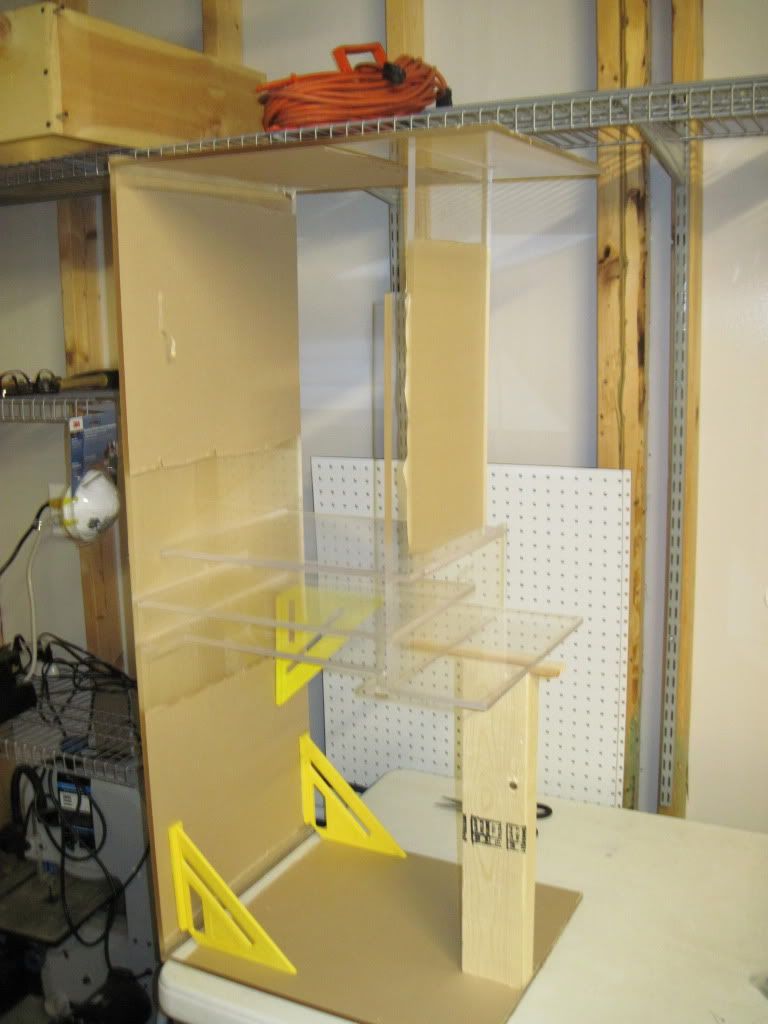 Back Panel: 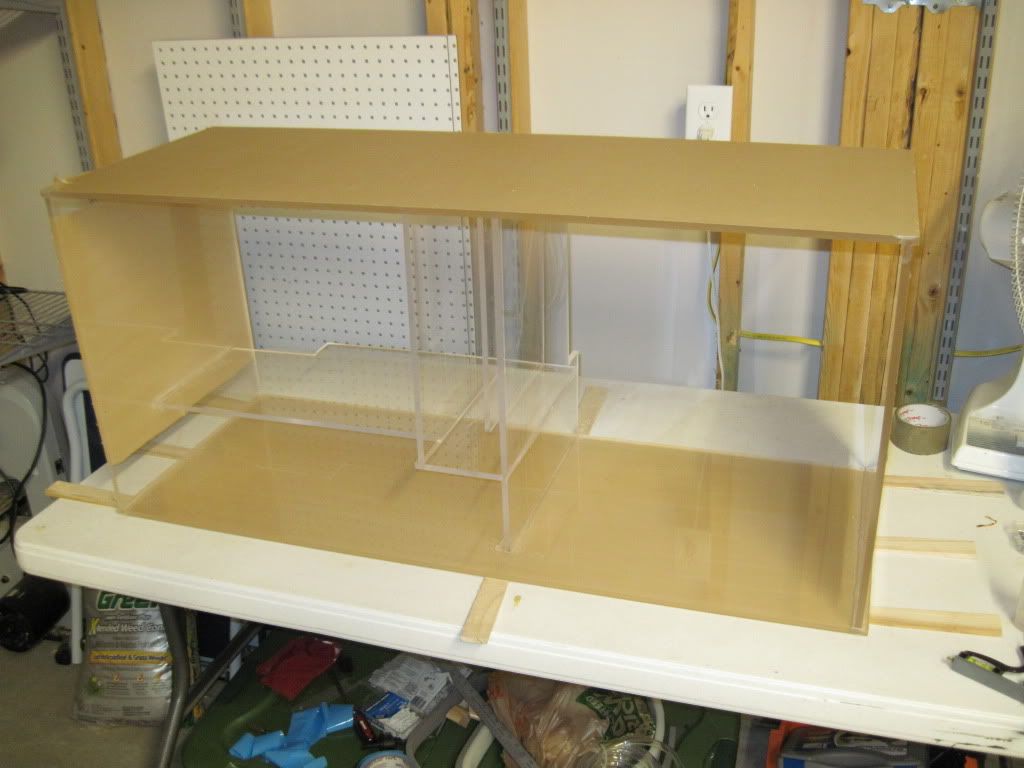 And the hard part, the bottom! I didn't have anyone helping me on this project, so I had to run around like a chicken with my head cut off to get glue in all the seams (including the internal ones!) and get the pins out before the glue set:  Of course I forgot a pin! I was able to get the plastic head off, but that sucker was stuck in there! I ended up covering over it with WeldOn 16 to stop any metals from leaching out into the water. 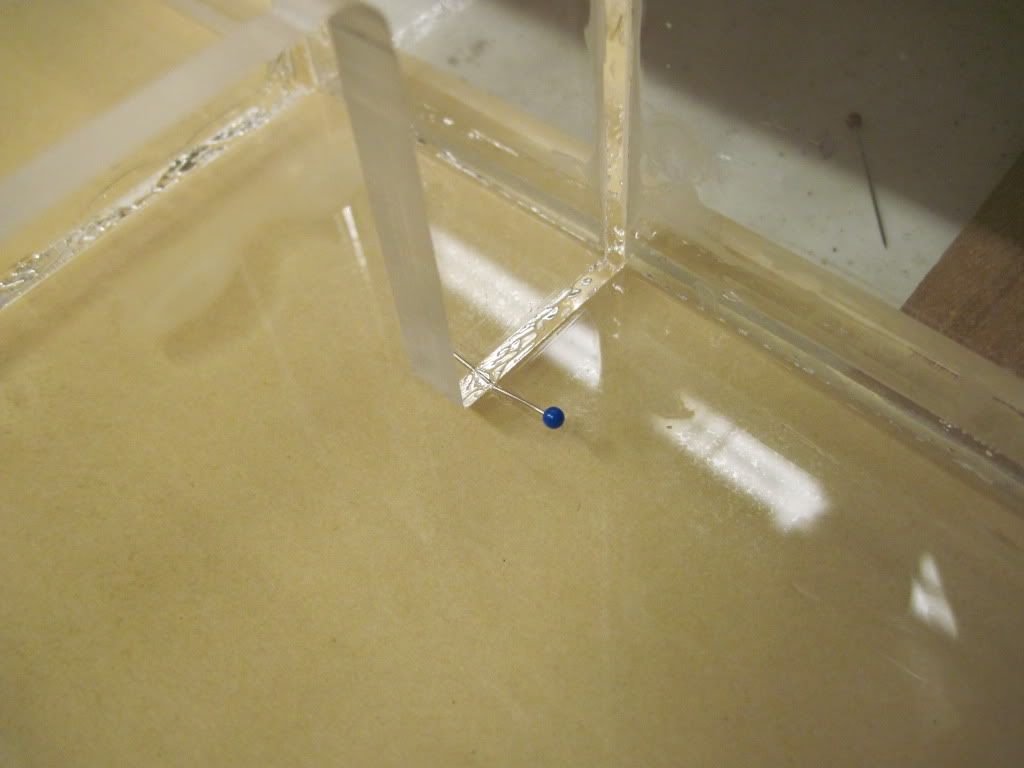
__________________
^ Click on my username and 'Visit Taqpol's Home Page!" to view my 220 gallon custom Miracles tank! -Alex |
|
|
|
|
06/15/2010, 12:39 AM
|
#33 |
|
Registered Member
Join Date: May 2008
Location: Durham, NC
Posts: 2,205
|
Lastly the top was put on.
 I did make sure to drill a hole in it to let gasses pass to the inside of the container as the glue cured. 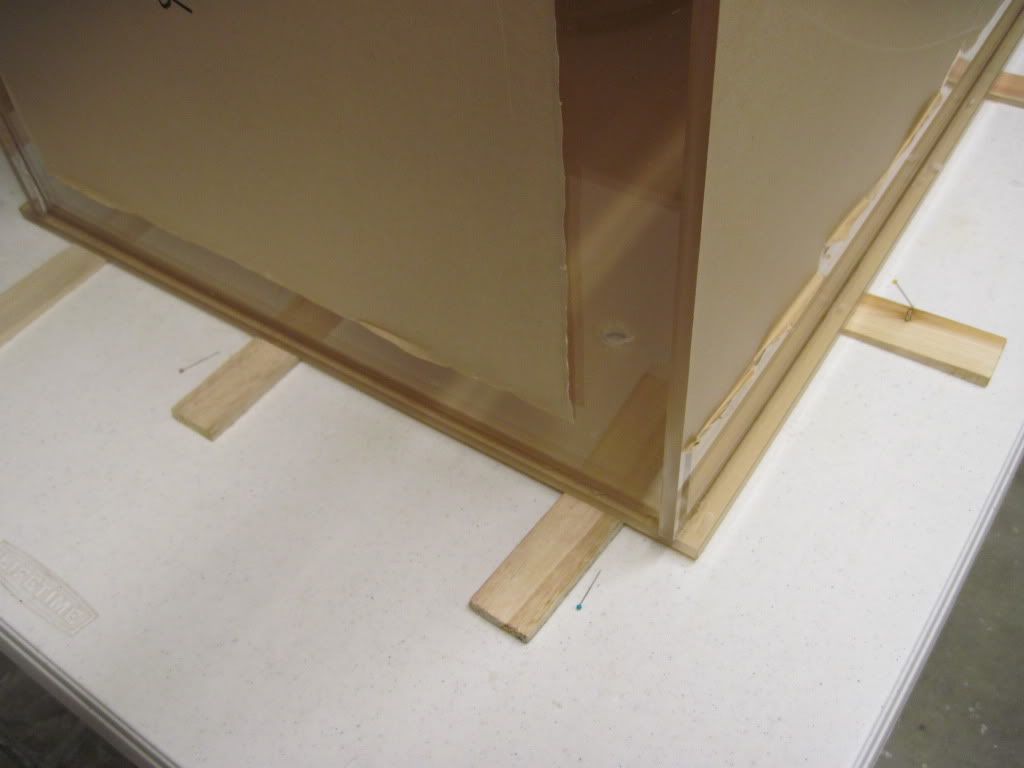 Time to use a flush bit router to remove all of the flashing I had sticking out, as well as to cut out the euro brace! I have to say, Acrylic is the messiest solid I have ever worked for in my life! I made this thing days ago and I am still pulling acrylic shavings out of my hair and pockets! 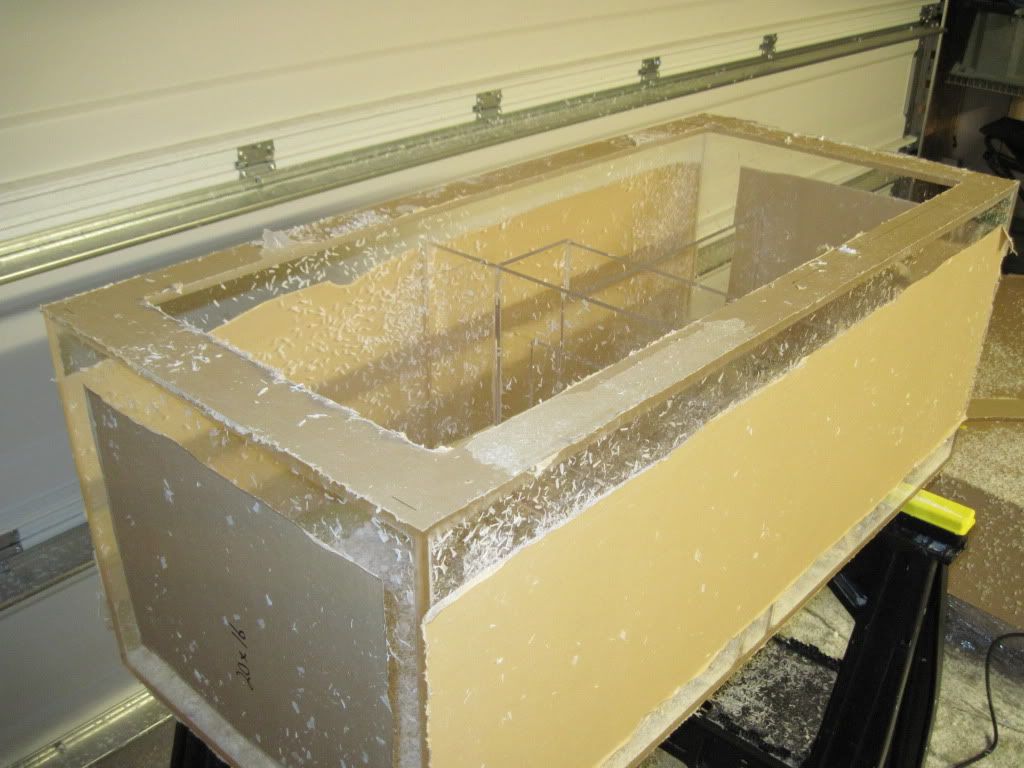 It looks so much better without paper!  Sort of... I told you it showed that I was new to acrylic construction! Sometimes that Weld On just got away from me! 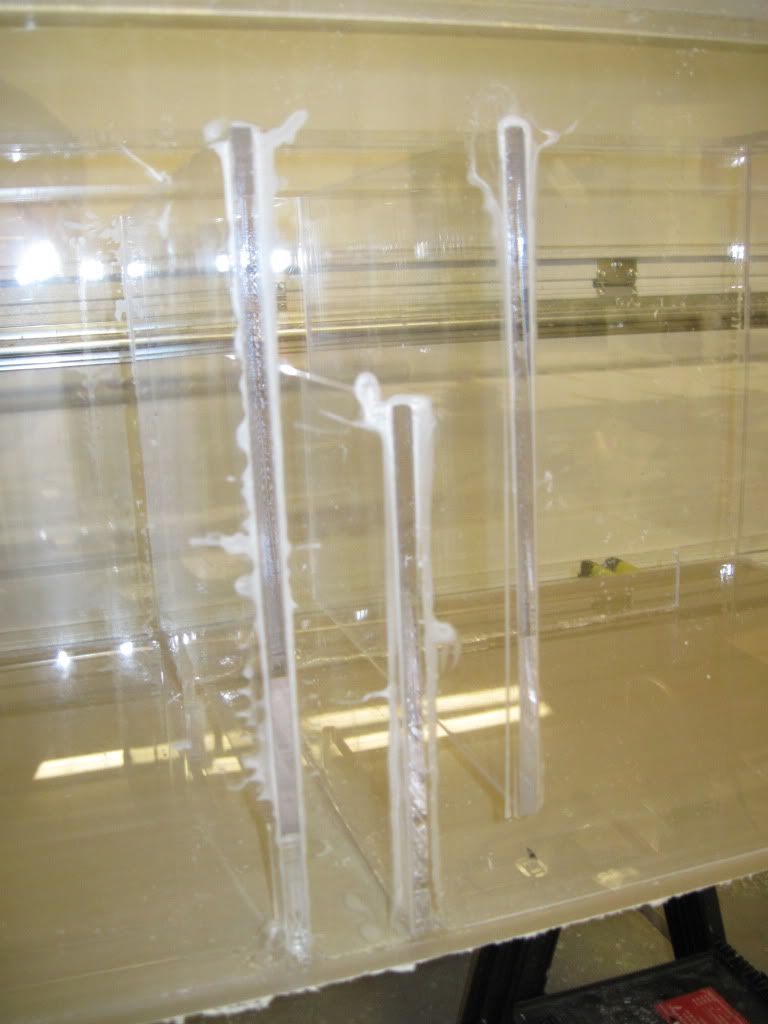 Time for a water test... 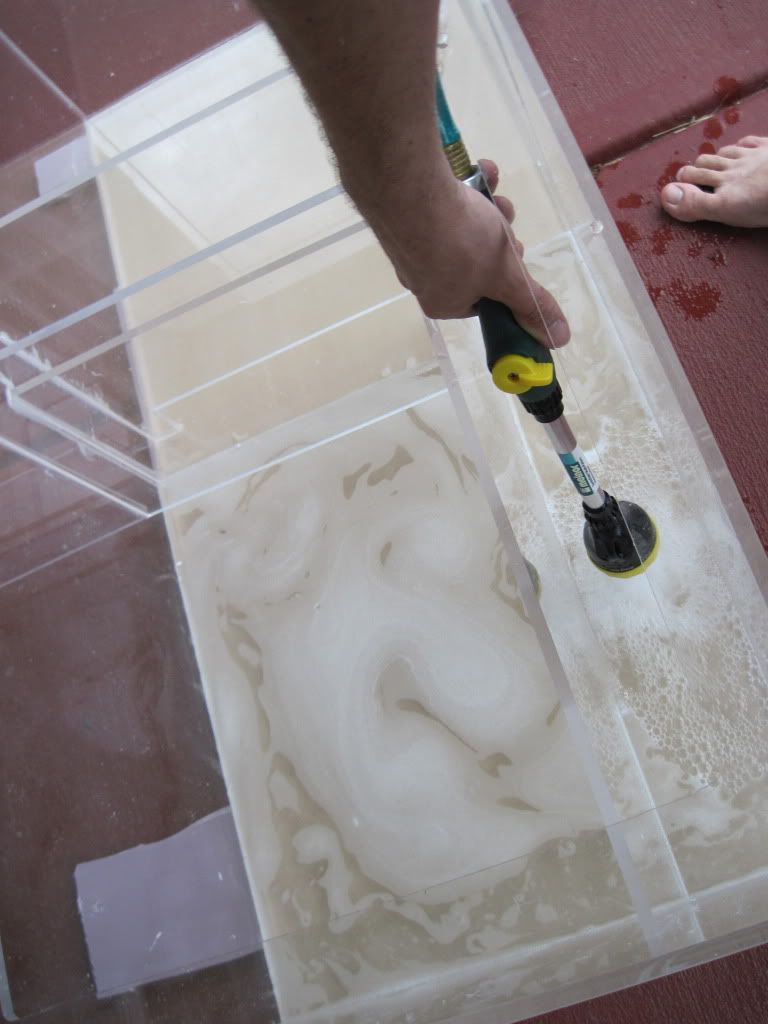 Not a single drop made it past the first chamber: 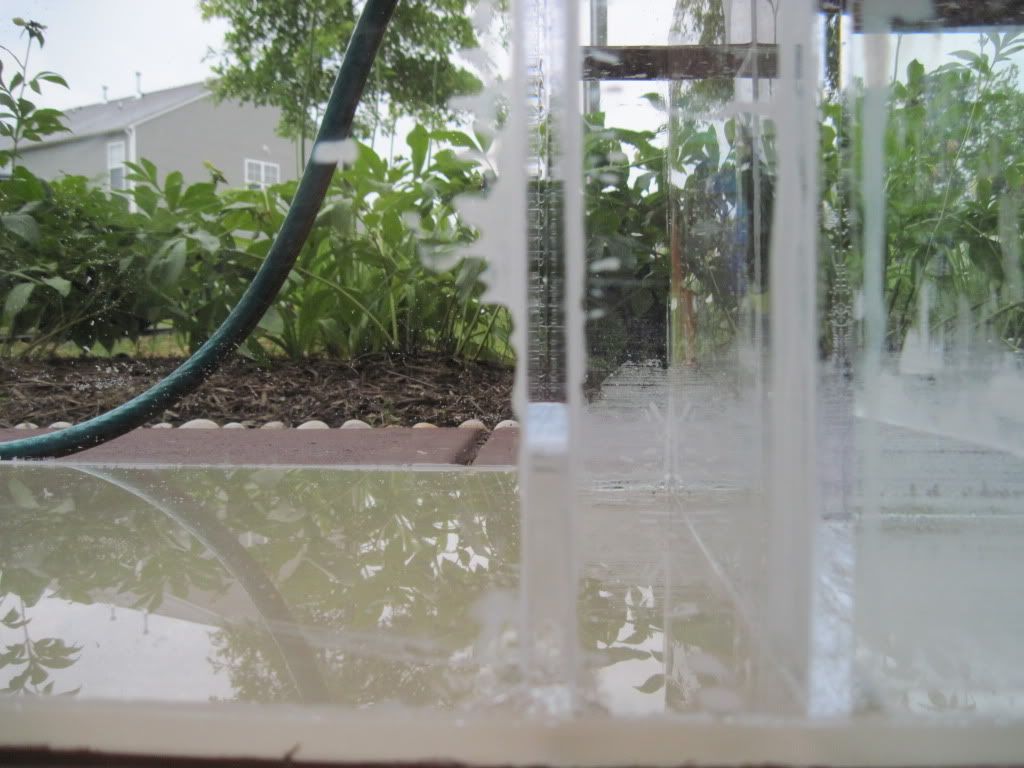 And full! I let it sit like this for almost 48 hours and not a single leak! 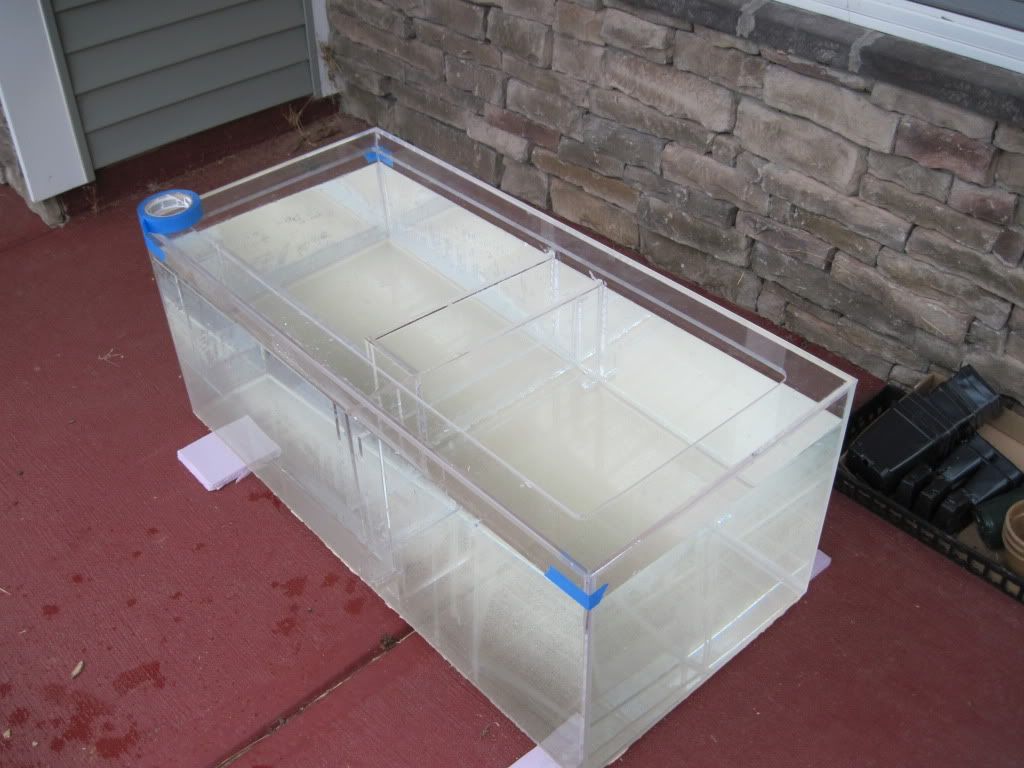
__________________
^ Click on my username and 'Visit Taqpol's Home Page!" to view my 220 gallon custom Miracles tank! -Alex |
|
|
|
|
06/15/2010, 12:50 AM
|
#34 |
|
Registered Member
Join Date: May 2008
Location: Durham, NC
Posts: 2,205
|
Now I had a tank with water in it, and a sump, but no way to get water between the two! If you look at the floor plan on page one you see that my fish room is actually to the side of the tank, and that the tank rests against an outside wall. There was no way I could rout the drain pipes outside or through the floor, so they were going to have to look pretty!
Drilling more holes in the wall. I think being able to drill holes in your walls is the definition of being a homeowner!  Dry-fitting the pipe that was going to have to make the span:  And finished pipe in place. After I got it all assembled and glued I spray painted it with Krylon fusion. Another tank is going in front of these guys, and maybe even a potted plant/mangrove refugium, but I think the paint color will help it blend in better: 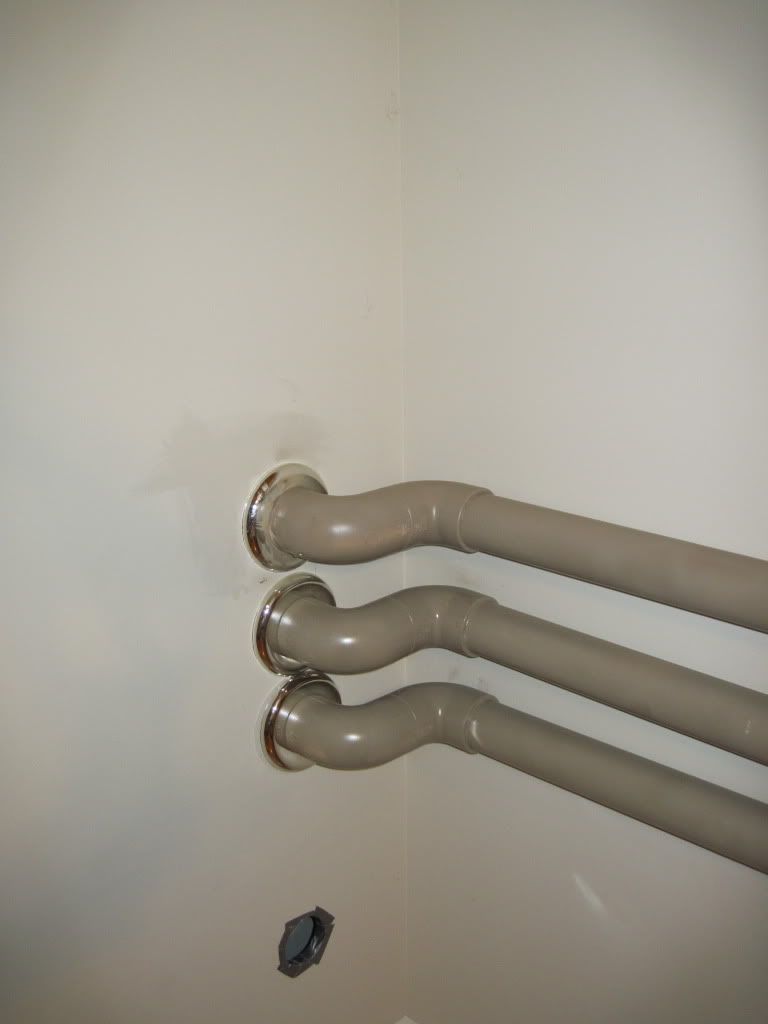 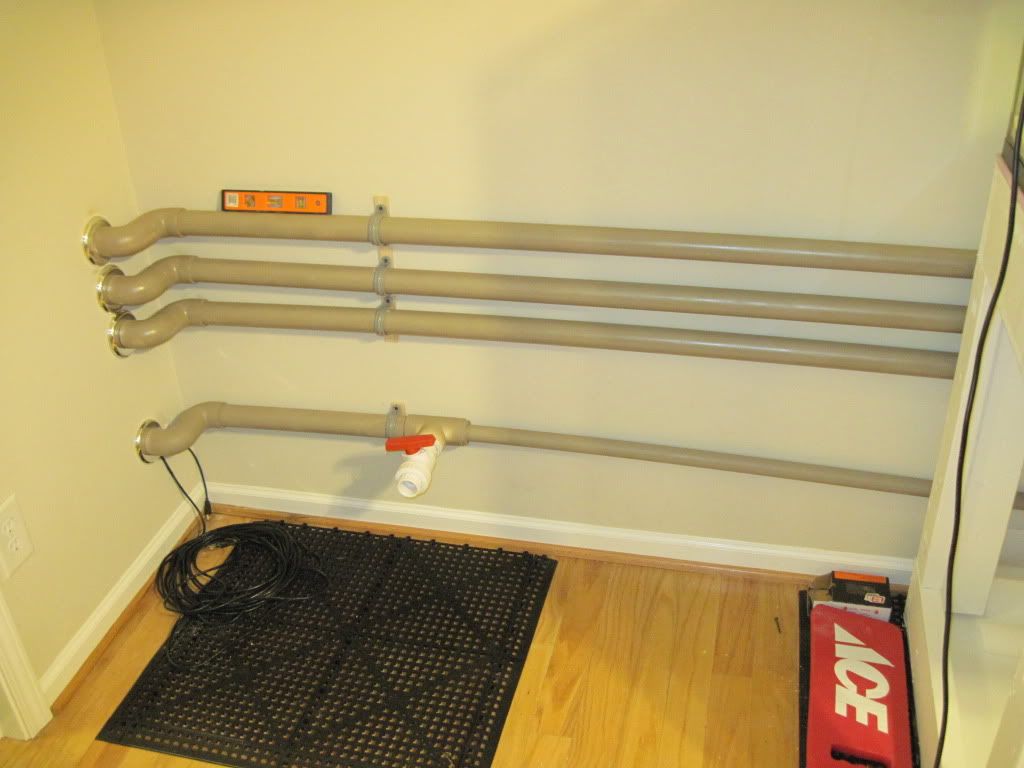 Fish room side of the holes: 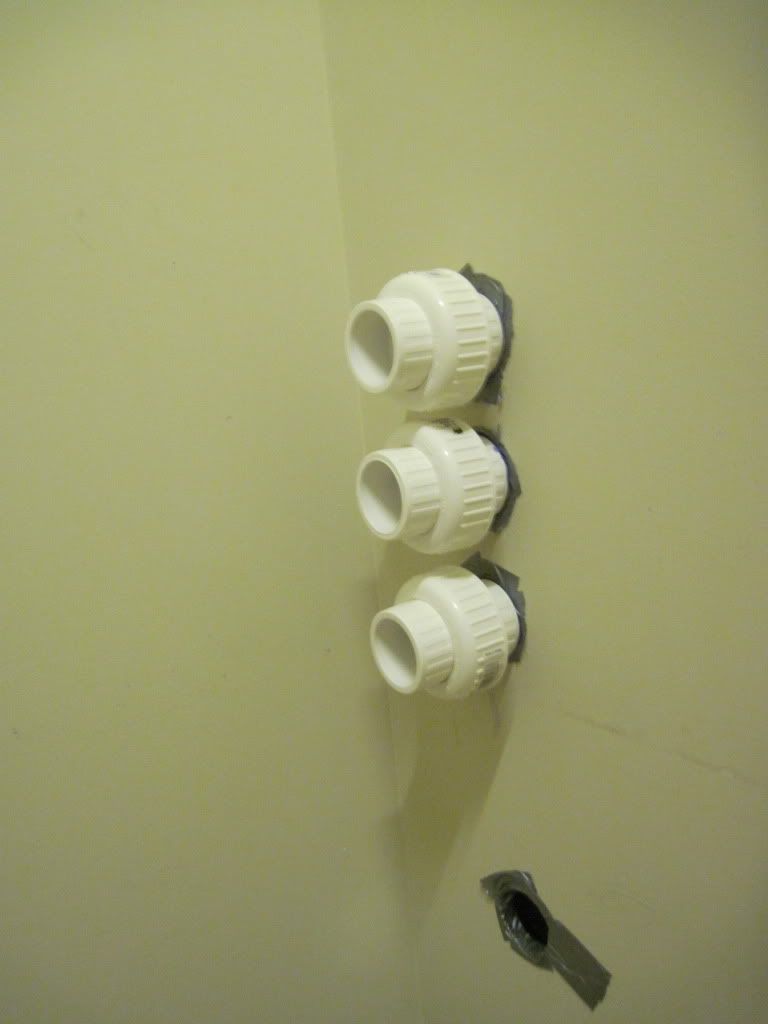 Drains under the tank: 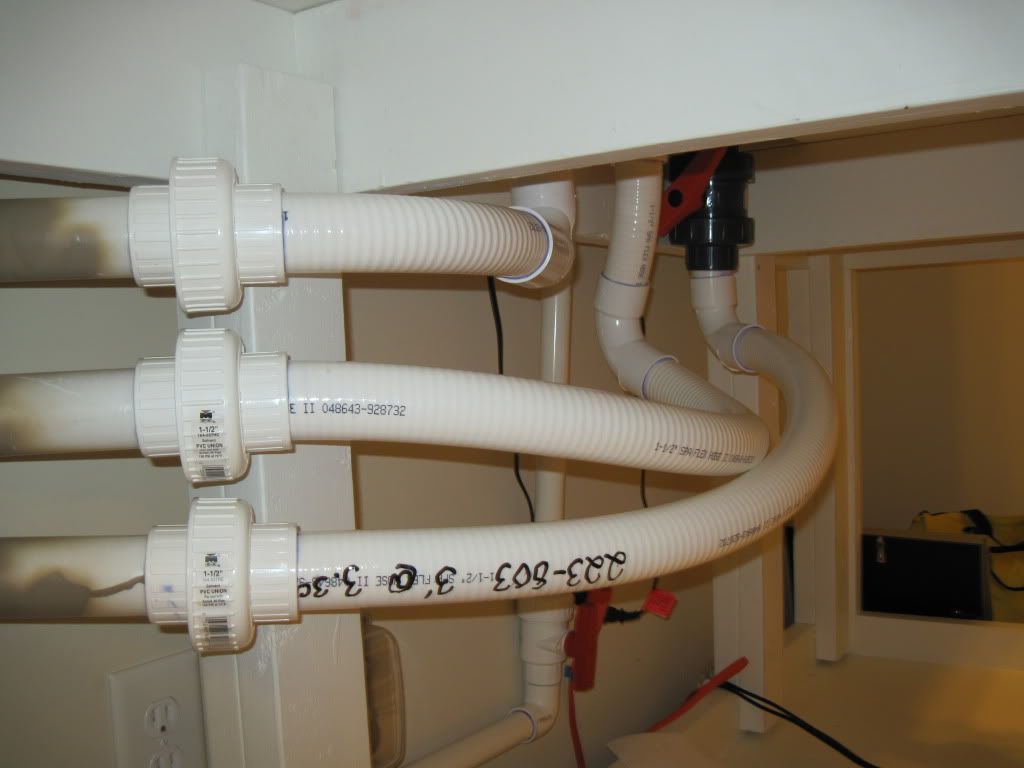 Drains going into the sump: 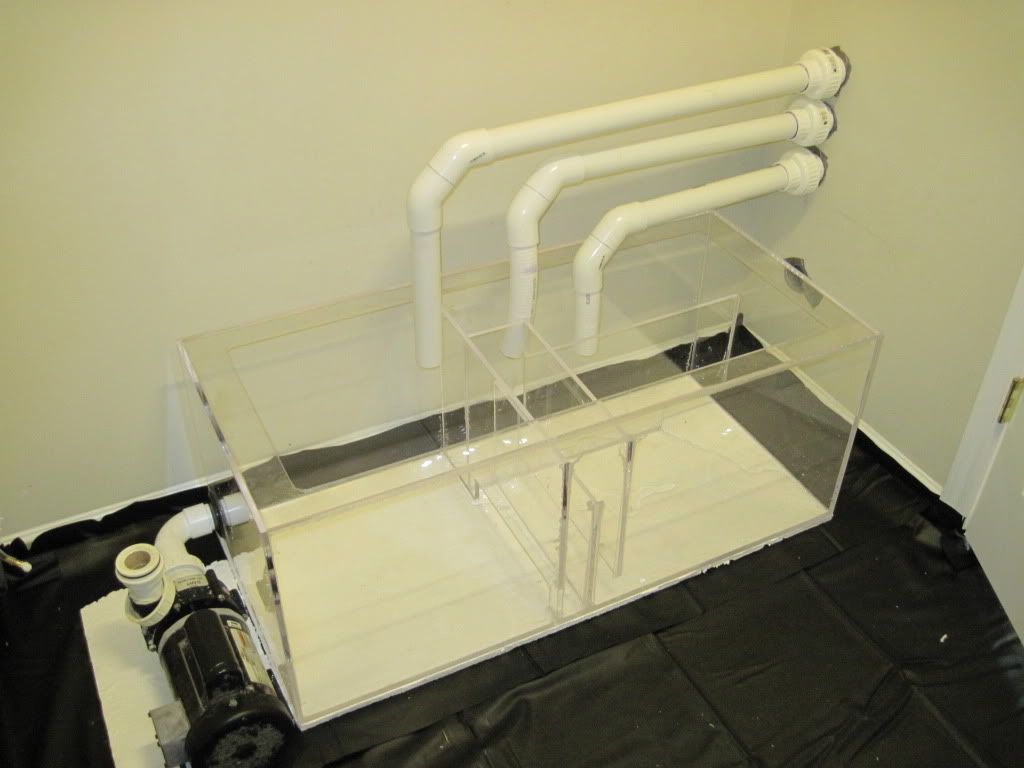 Temporary return coming from ReeFlo Dart: 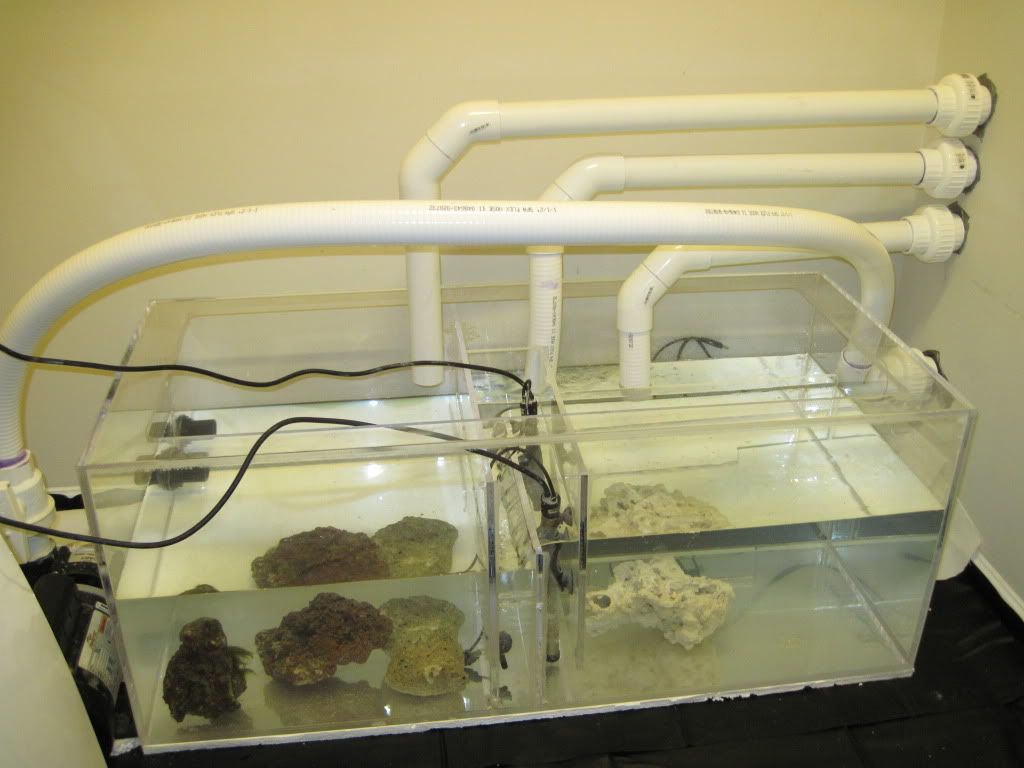 Returns coming up and over the tank: 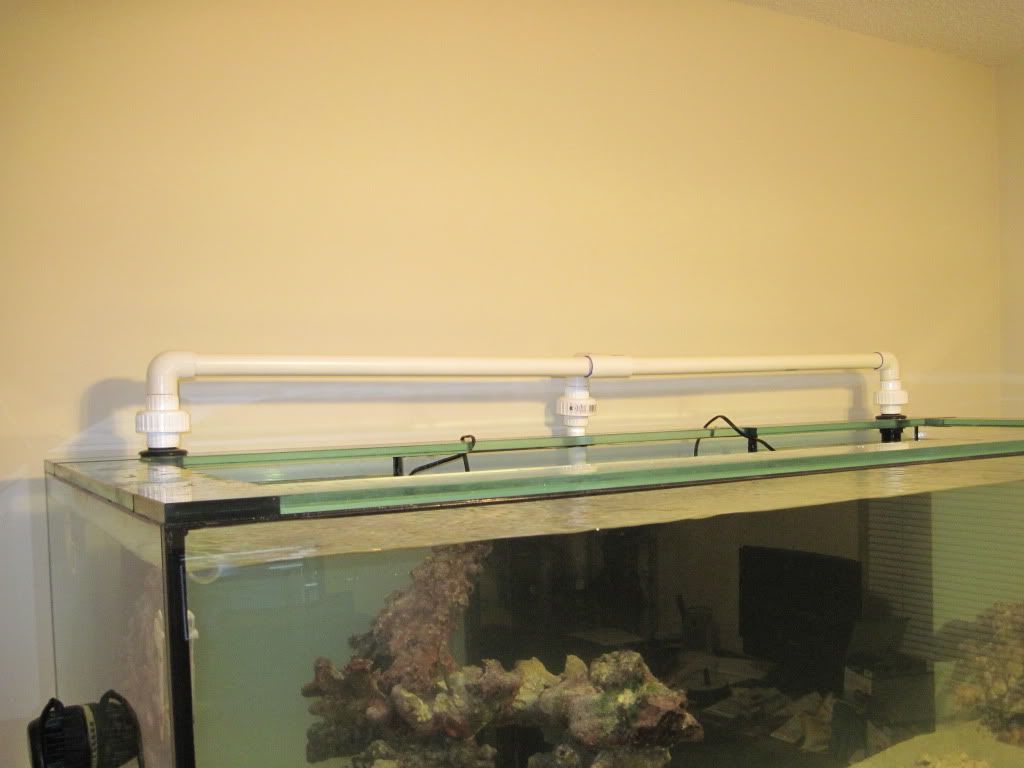 With all the crazy twists and head pressure on the pipe I'm not getting very noticeable flow in the DT. I might try out some penductors in the future.
__________________
^ Click on my username and 'Visit Taqpol's Home Page!" to view my 220 gallon custom Miracles tank! -Alex |
|
|
|
|
06/15/2010, 01:00 AM
|
#35 |
|
Registered Member
Join Date: May 2008
Location: Durham, NC
Posts: 2,205
|
My goal was to just get all my rock in the tank with flow and heat so that it could cycle while I was gone. After getting it in there I decied I might as well aquascape it, too. I tried to keep my two islands I had in the 120 as i was very proud of them, but I wanted a scape that had more balance and showed off the size of the tank. I came up with this (Thanks to Drummereef for the inspiration!):
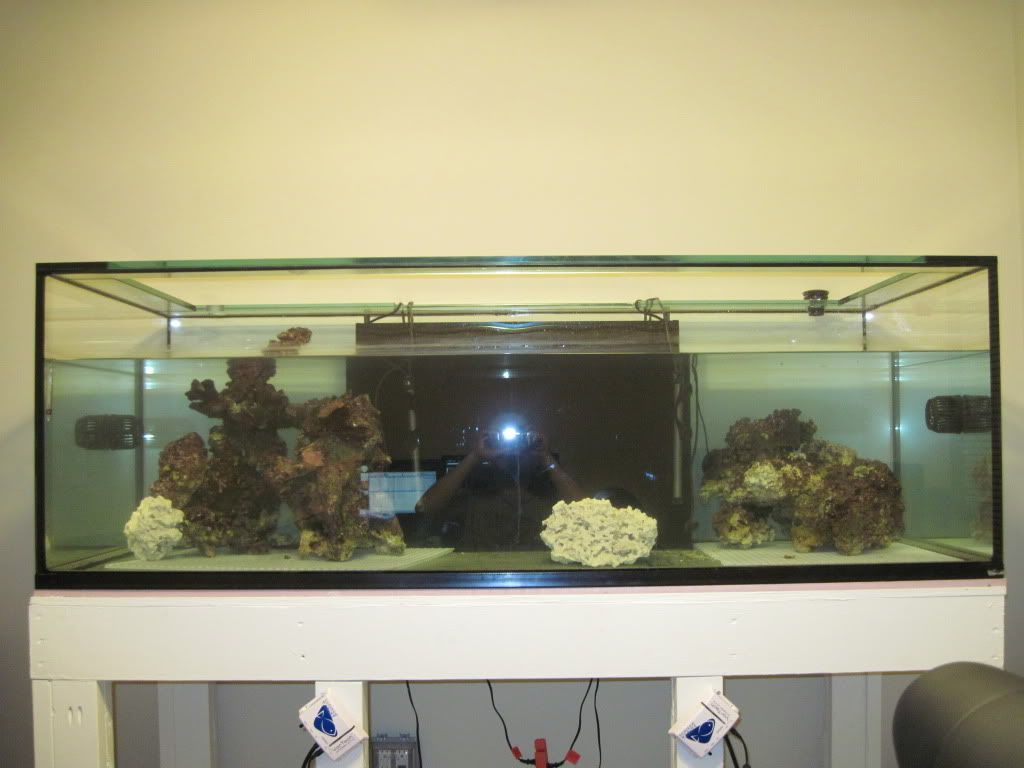 This is my new favorite sand, CaribSea Seaflor Special Grade. The stuff looks good, settled in one day, and doesn't get blown around by my vortechs at 100%. 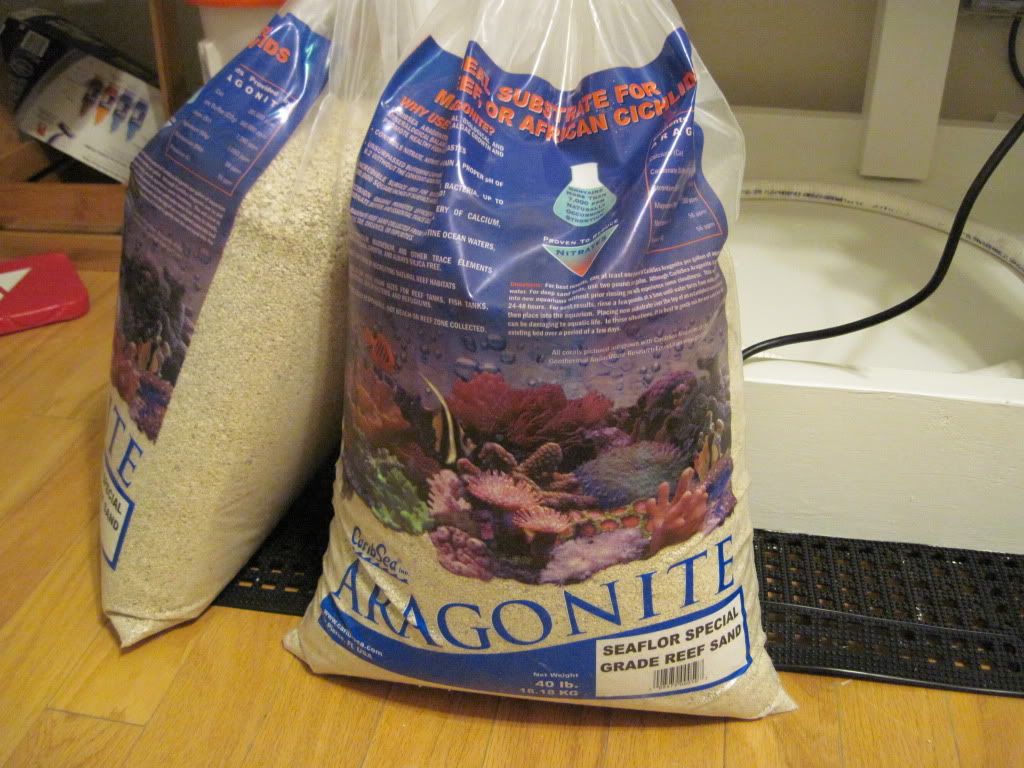 After the sand settled: 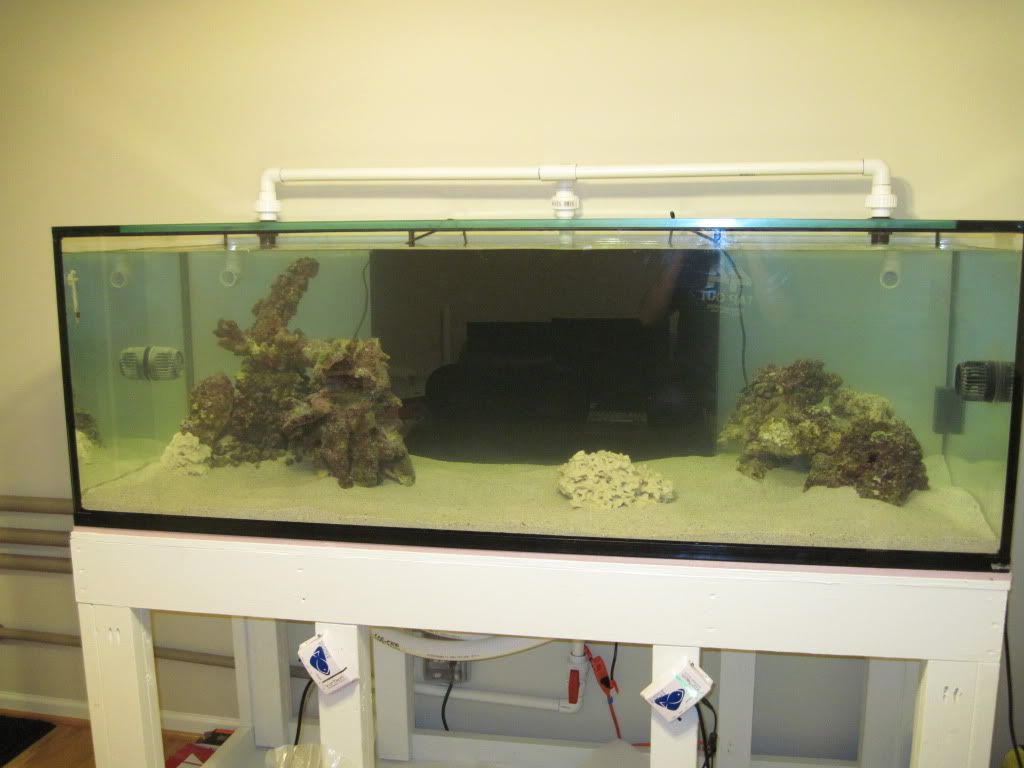 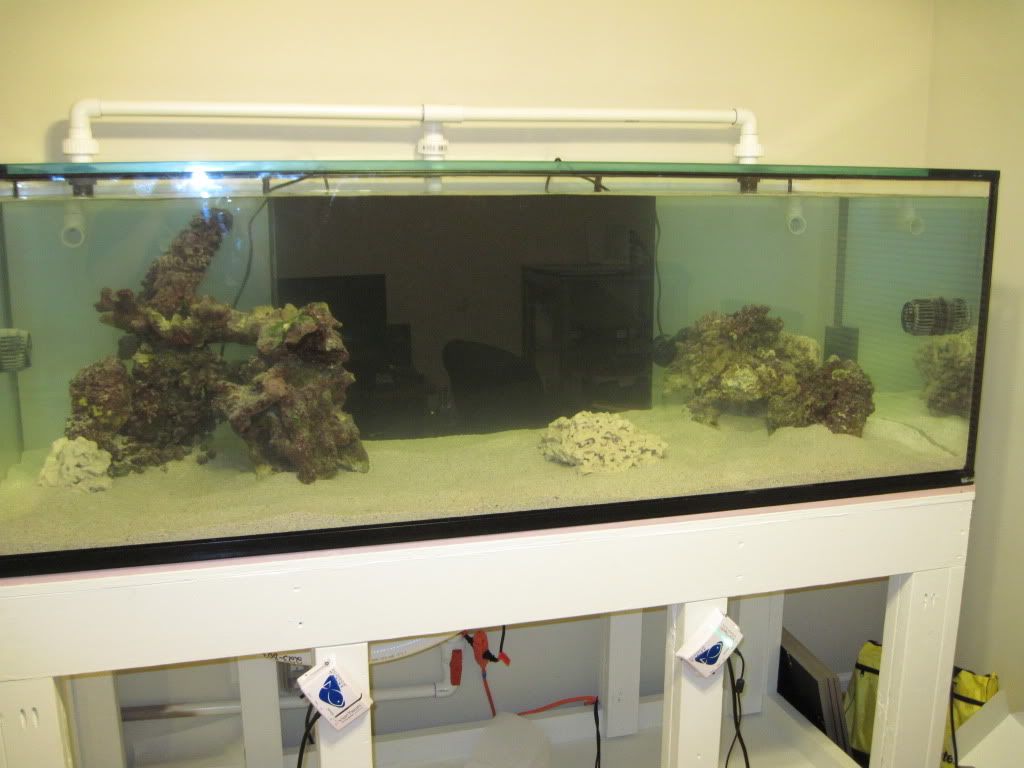 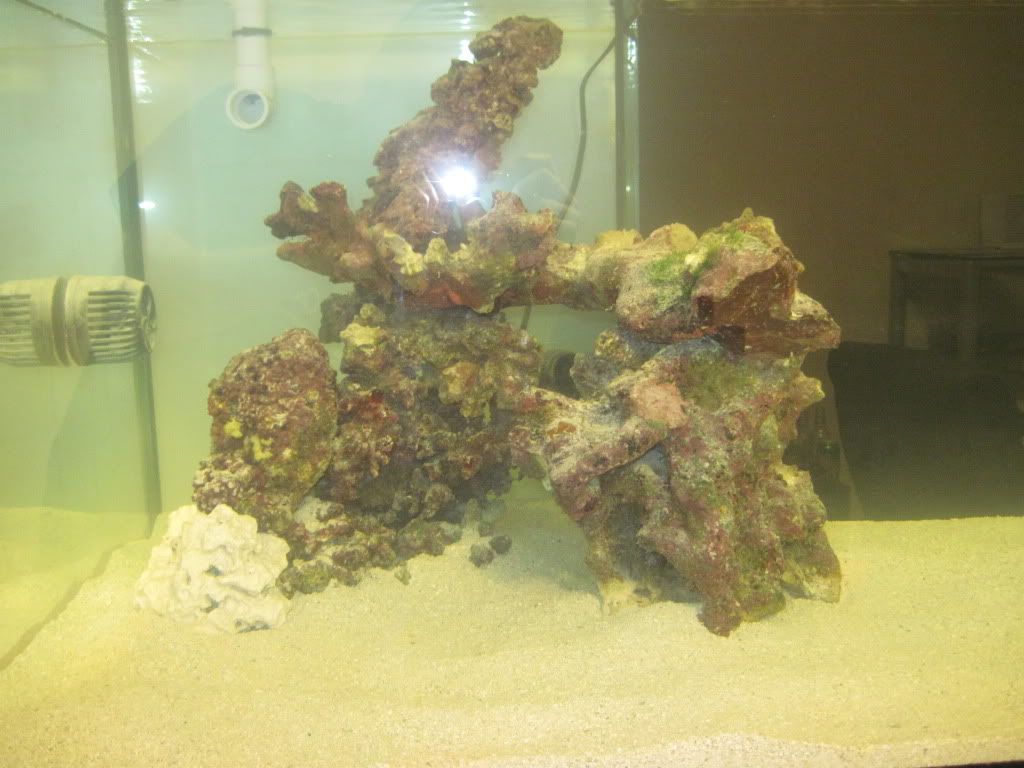 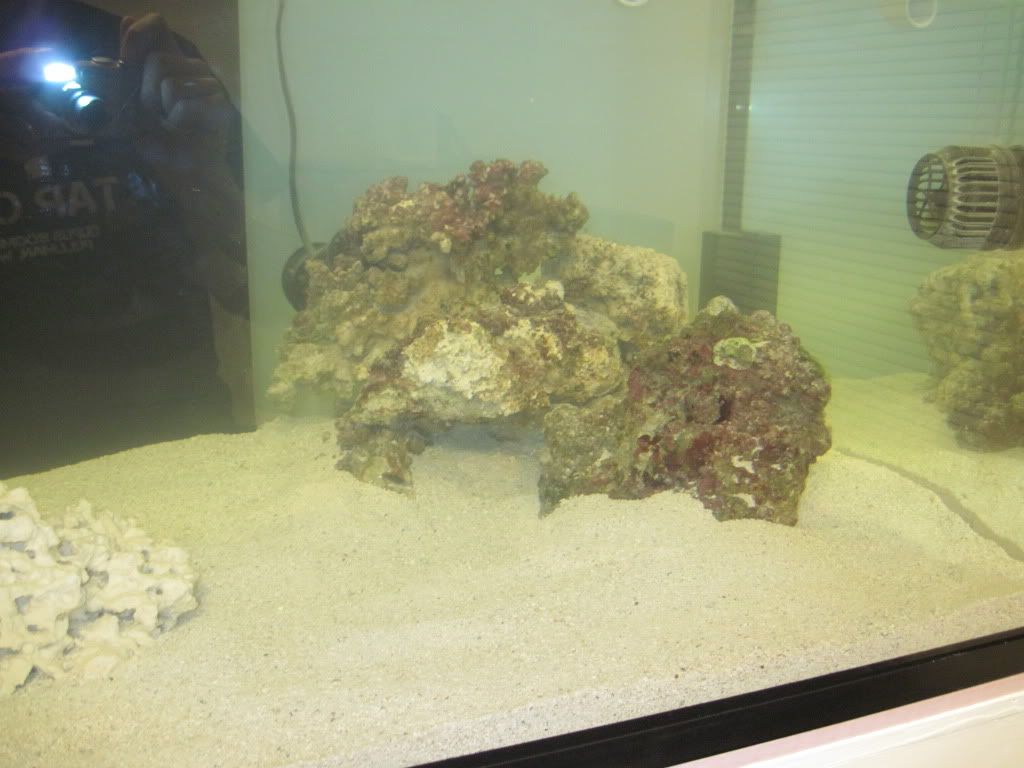 There is still room for improvement, as I am missing a fair number of my rocks right now (they either had corals or nems attached to them). As it is now it looks vacant but I keep telling myself to resist the urge to put any more rock in. Once all my corals grow in it will get crowded soon enough. Also, for whatever reason adding the sand really brought out the bristle worms that (unfortunately) made the trip all the way from Washington: 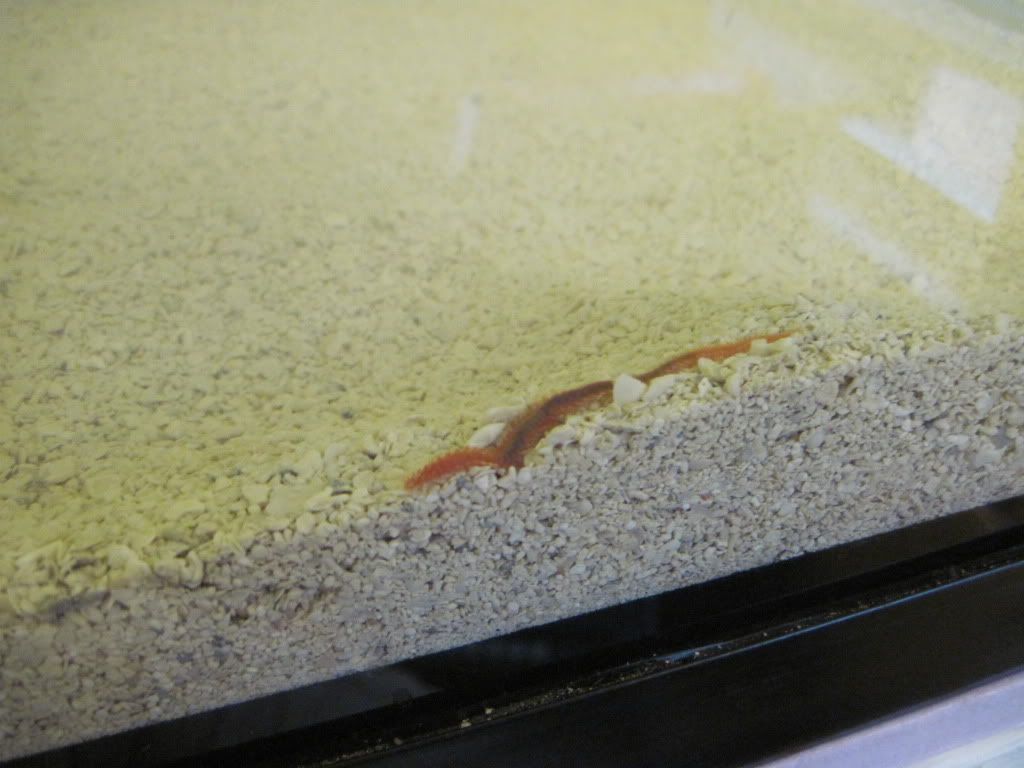 This one big, but not even 1/4 the size of one I pulled out of the 120. Once I get back to my SLR I'll have to see if I can find the picture I took of that one! 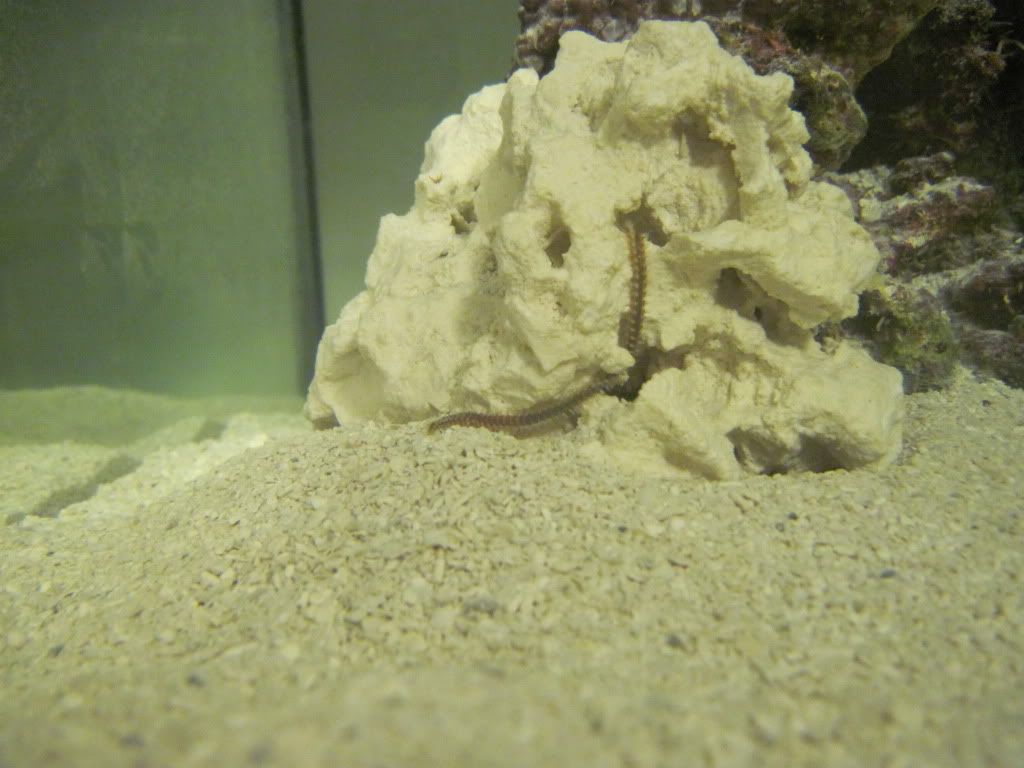
__________________
^ Click on my username and 'Visit Taqpol's Home Page!" to view my 220 gallon custom Miracles tank! -Alex |
|
|
|
|
06/15/2010, 05:34 AM
|
#36 | |
|
ReefKeeping Mag staff
Join Date: Feb 2004
Location: Grand Rapids, MI
Posts: 5,423
|
Quote:
__________________
Brian June 2013 TOTM Current Tank Info: 270 Starphire by Miracles in Glass*BK 250 Internal*Sequence Blackfin 1800*(2) 6105 Tunzes Streams*(3) 400 watt Blueline E-Ballast*400w 20k Radiums*(3) Lumanarc III*GEO 624 Ca Reactor*Tunze Osmolotor*PM SR45 and TLF PhosBan Reactor 150*Apex |
|
|
|
|
|
06/15/2010, 07:48 AM
|
#37 |
|
Registered Member
Join Date: Mar 2010
Location: WA
Posts: 162
|
Alex, everything is looking great, I am excited to see how the rest of it comes together. Congratulations on your Marriage!!!
__________________
~Rene' My tank thread: http://www.reefcentral.com/forums/showthread.php?p=24034396#post24034396 Current Tank Info: 75g DT with 40g breeder custom built sump W/refugium! Livestock: 2 Purple Firefish |
|
|
|
|
06/15/2010, 07:59 AM
|
#38 | ||
|
Registered Member
Join Date: May 2008
Location: Durham, NC
Posts: 2,205
|
Quote:
Quote:
__________________
^ Click on my username and 'Visit Taqpol's Home Page!" to view my 220 gallon custom Miracles tank! -Alex |
||
|
|
|
|
06/15/2010, 03:47 PM
|
#39 |
|
SPS Slave
Join Date: Aug 2003
Location: Richmond, VA
Posts: 3,388
|
CONGRATS ALEX!!
An incredible new wife, and tank, too! Looks like all of your work so far is just superb. The aquascaping is great... subscribed! 
__________________
- Mike & Terry "Less technology, more biology ... indeed." - Gary White Current Tank Info: 200g temp garage tank |
|
|
|
|
06/15/2010, 06:32 PM
|
#40 |
|
Team RC Member
Join Date: Jul 2005
Location: houstonia
Posts: 7,989
|
Looks great, Alex. But you're making me feel incredibly lazy. My project is no where near as far along. Go have a kid or something.

__________________
-Chris- You don't win friends with salad. "Look! They're trying to learn for free!" ... "Use your phony guns as clubs!" Current Tank Info: rectangluar? wet? |
|
|
|
|
06/15/2010, 07:54 PM
|
#41 |
|
Registered Member
Join Date: Dec 2001
Location: Orlando
Posts: 796
|
Great start! I can't wait to see ya stock your tank! Good job on your build out thread!
|
|
|
|
|
06/16/2010, 11:01 AM
|
#42 | |
|
Reef Hugger
Join Date: Jul 2007
Location: Submerged
Posts: 3,253
|
Looks really great so far, very enjoyable build to watch
Quote:

__________________
-Austin Make your animals Thrive, not just Survive. |
|
|
|
|
|
06/17/2010, 01:16 AM
|
#43 |
|
Premium Member
Join Date: Jun 2007
Location: Minot, ND
Posts: 815
|
I wish I had those skills. That sump is awesome. I will agree with crvz though, you are making me look lazy with as much as you have done. Your plumbing is super nice as well, looks great and like it belongs there.

__________________
23,996 thawed iced cubes in a big cube and filled with flowers that grow under water. |
|
|
|
|
06/18/2010, 12:05 AM
|
#44 |
|
Registered Member
Join Date: Jul 2007
Location: Puerto Rico
Posts: 673
|
Looking Good Alex. The sump turned out great! I hate when the weldon leaves the stain like that but if it works and doesn't leak is what counts! I'd say the problem was the pins you used were to large for that allowing more solvent to enter between both acrylic pieces. When you pulled them out, the excess stains the surroundings like that. I like to use thin cooper wire or even better guitar strings
Keep it up
|
|
|
|
|
06/18/2010, 05:37 AM
|
#45 |
|
Registered Member
Join Date: Jan 2010
Location: Bronx, New York
Posts: 94
|
Tagging along.
__________________
Let's leave the brainwork to those with the brains! |
|
|
|
|
06/19/2010, 12:56 AM
|
#46 | |||||
|
Registered Member
Join Date: May 2008
Location: Durham, NC
Posts: 2,205
|
Quote:
Quote:
Quote:
Quote:
Quote:
__________________
^ Click on my username and 'Visit Taqpol's Home Page!" to view my 220 gallon custom Miracles tank! -Alex |
|||||
|
|
|
|
06/19/2010, 01:02 AM
|
#47 | ||
|
Registered Member
Join Date: May 2008
Location: Durham, NC
Posts: 2,205
|
Quote:
The good news is, especially for my sanity, I am now back in Washington state and will be taking a break for the next two and a half weeks! After this I promise a much slower pace. Quote:
__________________
^ Click on my username and 'Visit Taqpol's Home Page!" to view my 220 gallon custom Miracles tank! -Alex |
||
|
|
|
|
06/22/2010, 06:27 PM
|
#48 |
|
Premium Member
Join Date: Mar 2009
Location: Wakefield, Rhode Island
Posts: 275
|
Tagging along...beautiful miracles tank
__________________
Do or do not, there is no try ! Current Tank Info: Transition..... |
|
|
|
|
06/22/2010, 06:41 PM
|
#49 |
|
Registered Member
Join Date: Apr 2010
Posts: 64
|
You have skills Taqpol.
|
|
|
|
|
06/22/2010, 06:48 PM
|
#50 |
|
Team RC Member
Join Date: Jul 2005
Location: houstonia
Posts: 7,989
|
You certainly have no reason to apologize, you've done good work. It just hurts remembering what productivity really was when we had two incomes and no kids. but that's my problem.
 Continue on, sir! Continue on, sir!
__________________
-Chris- You don't win friends with salad. "Look! They're trying to learn for free!" ... "Use your phony guns as clubs!" Current Tank Info: rectangluar? wet? |
|
|
|
 |
| Thread Tools | |
|
|
 Similar Threads
|
||||
| Thread | Thread Starter | Forum | Replies | Last Post |
| 220 Gallon Reef Ready Tank Setup | FREDDY31270 | Tampa Bay Reef Club | 1 | 06/09/2006 10:30 PM |


