
|
|
 08/20/2008, 01:08 PM
|
#126 |
|
Moved On
Join Date: Sep 2002
Location: Ft Worth, Tx
Posts: 43,217
|
If you have a brad gun, wood glue and the nail gun is all you need.
|

|

|
|
08/20/2008, 01:26 PM
|
#127 |
|
Likey the bikey
Join Date: Dec 2004
Location: Colorado
Posts: 3,371
|
I think I'm going to practice with triangles, hand-nailed brads, and gunned brads before I go forward. IME with putting up crown mouldings (not a ton, three rooms - but they all turned out really well), nail guns are not as consistent as I would like them to be. One shot is shallow and needs to be punched...the next shot is deep enough to leave a small split in the moulding.
__________________
Mike On hiatus. I'm either out riding my bicycle, playing with my family, or throwing ferts in my planted tank. Or working. I hope I'm not doing that though. Current Tank Info: 140 DIY Cube |
|
|
|
|
08/20/2008, 01:34 PM
|
#128 |
|
Moved On
Join Date: Sep 2002
Location: Ft Worth, Tx
Posts: 43,217
|
There's nothing wrong with a little practice first.
 The nice thing about pin guns is that if the nail doesn't seat all the way, remove the nails from the gun and shoot the brad deeper with a few squeezes on the trigger. If you are good, you won't create craters in the trim. The nice thing about pin guns is that if the nail doesn't seat all the way, remove the nails from the gun and shoot the brad deeper with a few squeezes on the trigger. If you are good, you won't create craters in the trim.Of course, if the nail gun has a safety on it, this is harder to do. 
|
|
|
|
|
08/20/2008, 01:41 PM
|
#129 |
|
Likey the bikey
Join Date: Dec 2004
Location: Colorado
Posts: 3,371
|
And I bet you were wearing safety glasses, ear plugs, gloves, long pants, and a long sleeve shirt. Just like me every time I'm working with power tools.
Thanks for the tip!
__________________
Mike On hiatus. I'm either out riding my bicycle, playing with my family, or throwing ferts in my planted tank. Or working. I hope I'm not doing that though. Current Tank Info: 140 DIY Cube |
|
|
|
|
08/20/2008, 02:29 PM
|
#130 |
|
Moved On
Join Date: Sep 2002
Location: Ft Worth, Tx
Posts: 43,217
|
If you ever see one of my acrylics video presentations, you'll be laughing I'm sure. On video, I'm caught adjusting the fence on my table saw, measuring the gap with a tape while the blade is still on.

|
|
|
|
|
08/20/2008, 02:37 PM
|
#131 |
|
Registered Member
 Join Date: Dec 2003
Location: Denver, Colorado
Posts: 9,579
|
I prefer to do my woodworking in the buff, the only time it ever really becomes a problem is when its real humid and I start getting sweaty.....
Anyway, I saw the tank today and I gotta say it looks awesome Mike. I am blown away at how well everything looks. What a huge improvement over the old tank. ...and remember its always better to beg for forgiveness, than it is to ask for permission. Great job Mike. Spleify
__________________
Make it a Great Day!!!! Current Tank Info: 60 gal SPS cube, with 25 gal refugium, 400W MH, DIY Lumenarc III, DIY skimmer, DIY stand and canopy. 40 breeder LPS with 40 gallon sump, DIY stand, 250W MH |
|
|
|
|
08/20/2008, 03:03 PM
|
#132 |
|
Likey the bikey
Join Date: Dec 2004
Location: Colorado
Posts: 3,371
|
Leif - I didn't need to know that.
 I asked for permission and now I'm asking for forgiveness. This project is many hundreds over the original budget and has been since about two weeks into it. I asked for permission and now I'm asking for forgiveness. This project is many hundreds over the original budget and has been since about two weeks into it.Melev - I've seen a video or two or yours along the way. I don't recall seeing the event you described (I think I would have noticed it). I hope you were at least wearing eye protection! 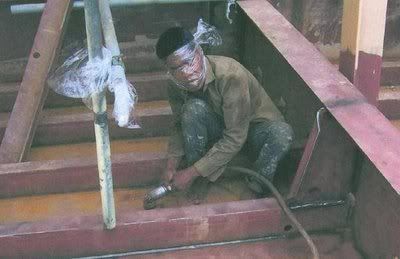
__________________
Mike On hiatus. I'm either out riding my bicycle, playing with my family, or throwing ferts in my planted tank. Or working. I hope I'm not doing that though. Current Tank Info: 140 DIY Cube |
|
|
|
|
08/20/2008, 03:14 PM
|
#133 |
|
Registered Member
Join Date: Sep 2007
Location: Virginia
Posts: 474
|
what a gorgeous tank. I love cubes.
|
|
|
|
|
08/20/2008, 04:13 PM
|
#134 |
|
Registered Member
Join Date: Dec 2003
Location: Denver, Colorado
Posts: 9,579
|
OMG, I am having a hard time typing because I am laughing so hard at that pic!!!! That is absolutely classic, I'm actually tearing up here.
__________________
Make it a Great Day!!!! Current Tank Info: 60 gal SPS cube, with 25 gal refugium, 400W MH, DIY Lumenarc III, DIY skimmer, DIY stand and canopy. 40 breeder LPS with 40 gallon sump, DIY stand, 250W MH |
|
|
|
|
08/21/2008, 04:34 PM
|
#135 |
|
Registered Member
Join Date: Mar 2007
Location: Palm Bay FL
Posts: 2,957
|
Man I can't bieliev that guy doesn't evan have a pair of sandals on..Barefoot...
__________________
Eric (Red House for my 300 display 600 system) Current Tank Info: 600 gallon system with 300 display |
|
|
|
|
08/21/2008, 05:11 PM
|
#136 |
|
Registered Member
Join Date: Dec 2003
Location: Denver, Colorado
Posts: 9,579
|
Sandals???? He's lucky they gave him a bag to put over has head.........
__________________
Make it a Great Day!!!! Current Tank Info: 60 gal SPS cube, with 25 gal refugium, 400W MH, DIY Lumenarc III, DIY skimmer, DIY stand and canopy. 40 breeder LPS with 40 gallon sump, DIY stand, 250W MH |
|
|
|
|
08/22/2008, 12:04 AM
|
#137 |
|
Likey the bikey
Join Date: Dec 2004
Location: Colorado
Posts: 3,371
|
Note to anyone buying hinges...don't buy Home Depot 1/2" overlay eurohinges. I installed them per the directions and they tore the crap out of the edges of two of my doors. After the first one I thought it *might* have been my fault. The second one confirmed it though - they suck. I'm off to the wood shop tomorrow to find some two piece euro hinges like the ones I got from Advantage Cabinets and Doors. No scraping. The two piece hinges also have a release button that allows you to pop the door off in a flash without removing any screws.
__________________
Mike On hiatus. I'm either out riding my bicycle, playing with my family, or throwing ferts in my planted tank. Or working. I hope I'm not doing that though. Current Tank Info: 140 DIY Cube |
|
|
|
|
08/22/2008, 12:37 AM
|
#138 | |
|
Registered Member
Join Date: Jan 2005
Location: Panorama City, CA
Posts: 4,703
|
Quote:
nice build thread Mike.. I'll be taggin along!
__________________
Function before fashion Current Tank Info: 120g SPS Tank (48x24x24) |
|
|
|
|
|
08/22/2008, 12:44 AM
|
#139 | |
|
Registered Member
Join Date: Jan 2005
Location: Panorama City, CA
Posts: 4,703
|
Quote:
 I'm glad you liked the open look I'm glad you liked the open look you know you want it.......... 
__________________
Function before fashion Current Tank Info: 120g SPS Tank (48x24x24) Last edited by xtm; 08/22/2008 at 12:52 AM. |
|
|
|
|
|
08/22/2008, 01:20 AM
|
#140 |
|
Likey the bikey
Join Date: Dec 2004
Location: Colorado
Posts: 3,371
|
Hi XTM - Ohhhhh, that looks nice! I built the structure and hope to install it this weekend. I've never had any substantial open sand in any of my reefs...definitely looking forward to it.
__________________
Mike On hiatus. I'm either out riding my bicycle, playing with my family, or throwing ferts in my planted tank. Or working. I hope I'm not doing that though. Current Tank Info: 140 DIY Cube Last edited by miwoodar; 08/22/2008 at 01:26 AM. |
|
|
|
|
08/22/2008, 06:25 PM
|
#141 |
|
Likey the bikey
Join Date: Dec 2004
Location: Colorado
Posts: 3,371
|
Time for an update....
Draining the old tank...the pics were taken with the flash and without actinics or MH so the colors aren't the best. I think they are pretty neat anyways. 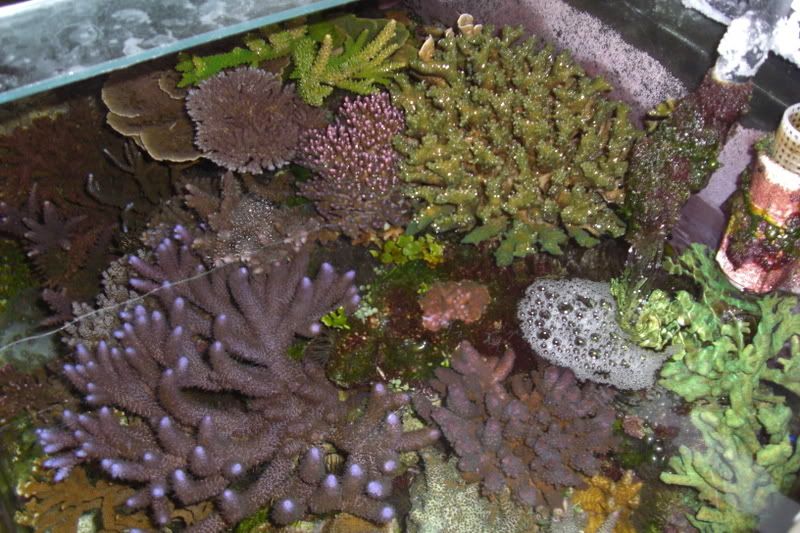 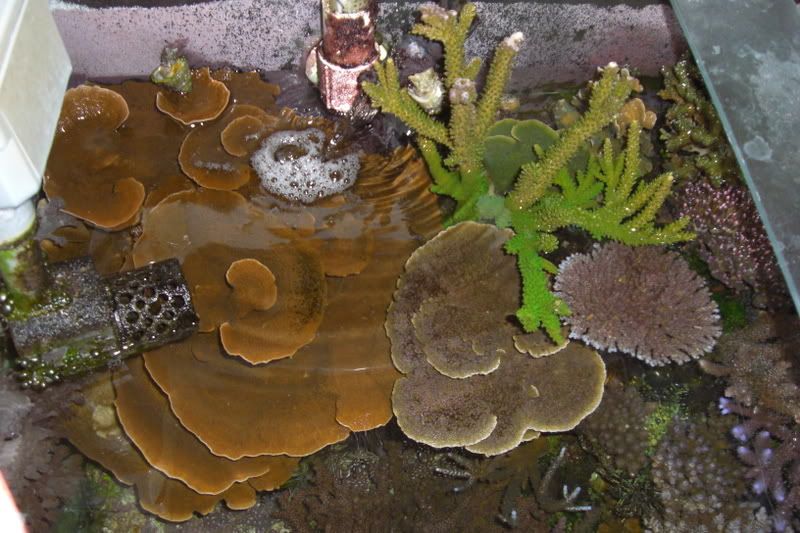 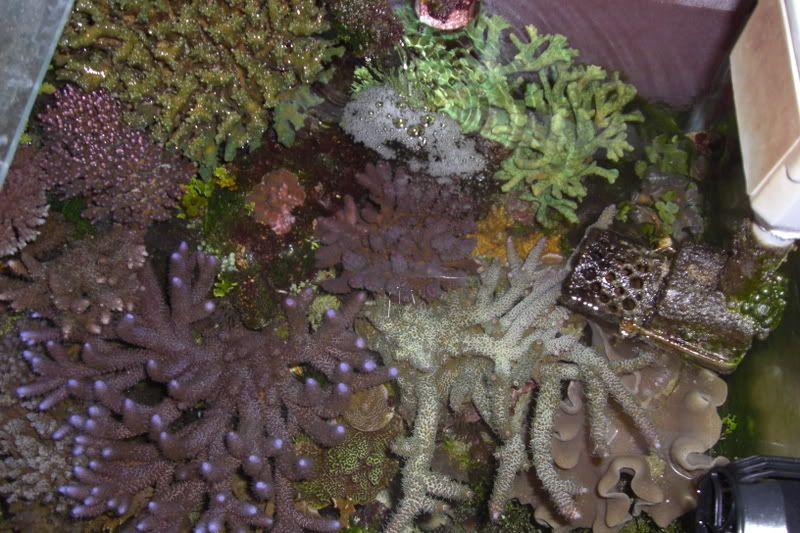 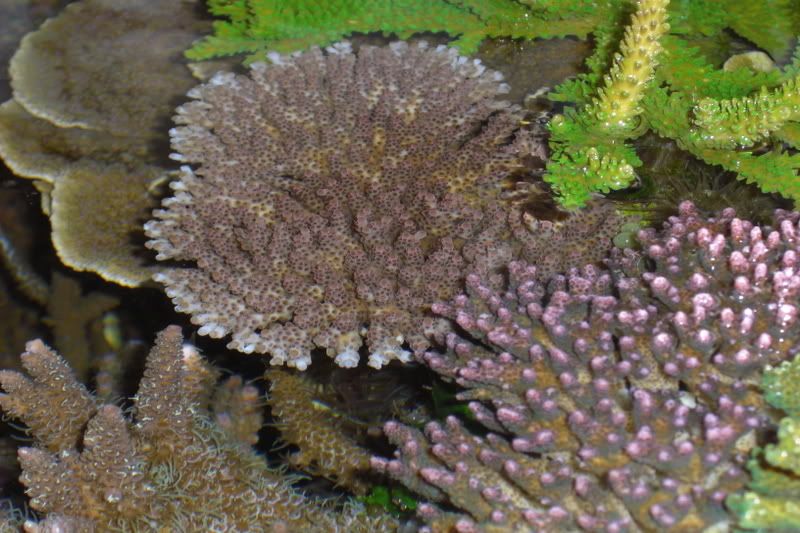 Bye bye little guy! I wish this thing was able to clean itself in prep for the sale. 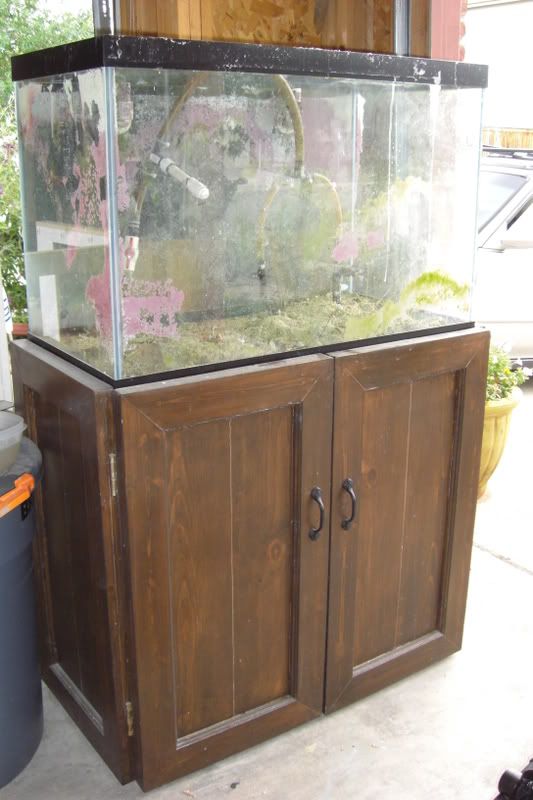 Everything is doing great. The corals and fish are all A-OK. No bleaching. The STN on my tenuis has completely stopped and all of the impacted tips are nearly covered again. The green slimer, which had been at the surface for many months has already started to cover itâs tips too. The kiddo approves. So does his girlfriend. 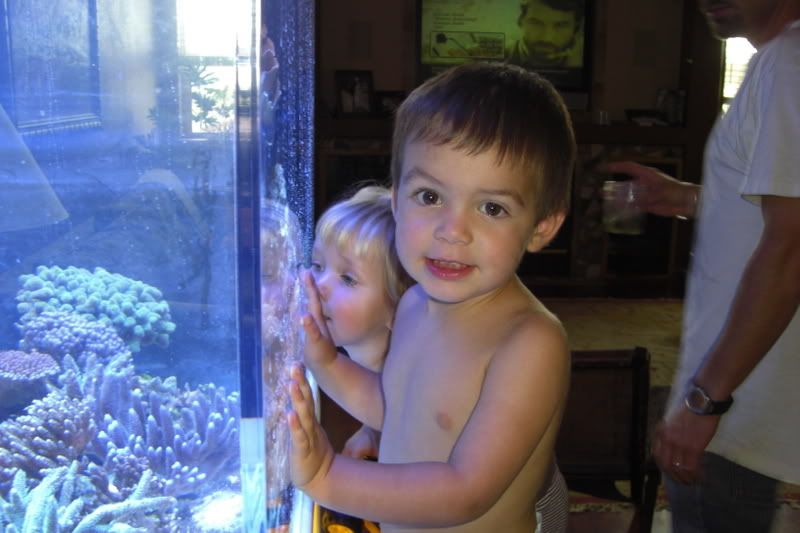
__________________
Mike On hiatus. I'm either out riding my bicycle, playing with my family, or throwing ferts in my planted tank. Or working. I hope I'm not doing that though. Current Tank Info: 140 DIY Cube |
|
|
|
|
08/22/2008, 06:26 PM
|
#142 |
|
Likey the bikey
Join Date: Dec 2004
Location: Colorado
Posts: 3,371
|
New toys
This thing is dashiznit. Hand down. Hmm, maybe I should have put my dirty woodworking hands down so they werenât in the pic.  Finally, a *real* magnet scraper. 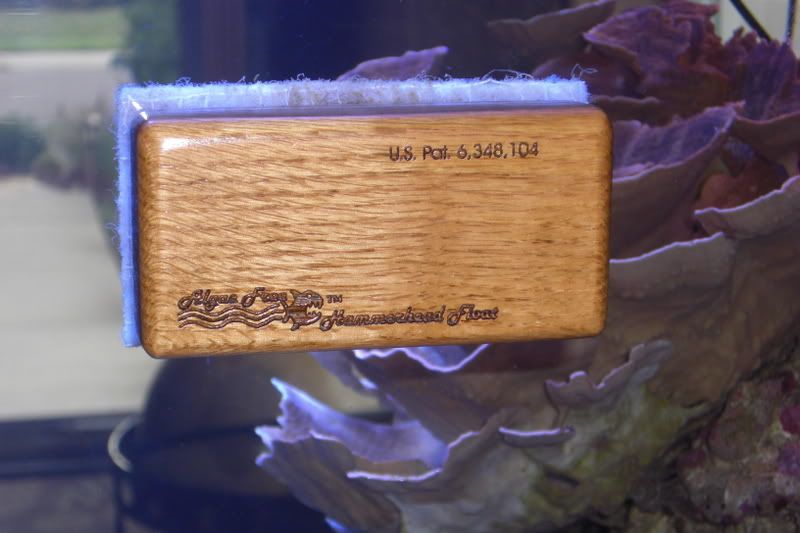 I tried this out last night. The ripples and faint glow look fantastic. I initially wanted to do LEDs again but I like the look of this even better. It's less of a pin point than an LED. The entire tank ends up with a faint glow instead. 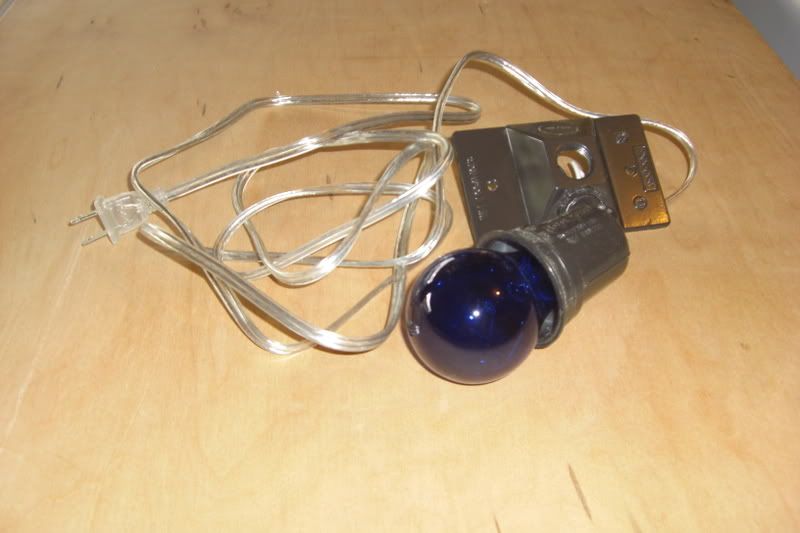
__________________
Mike On hiatus. I'm either out riding my bicycle, playing with my family, or throwing ferts in my planted tank. Or working. I hope I'm not doing that though. Current Tank Info: 140 DIY Cube |
|
|
|
|
08/22/2008, 06:26 PM
|
#143 |
|
Likey the bikey
Join Date: Dec 2004
Location: Colorado
Posts: 3,371
|
And back to the tank itselfâ¦
The ATO is soon to be installed. I donât know how I ever (EVER) lived without one. 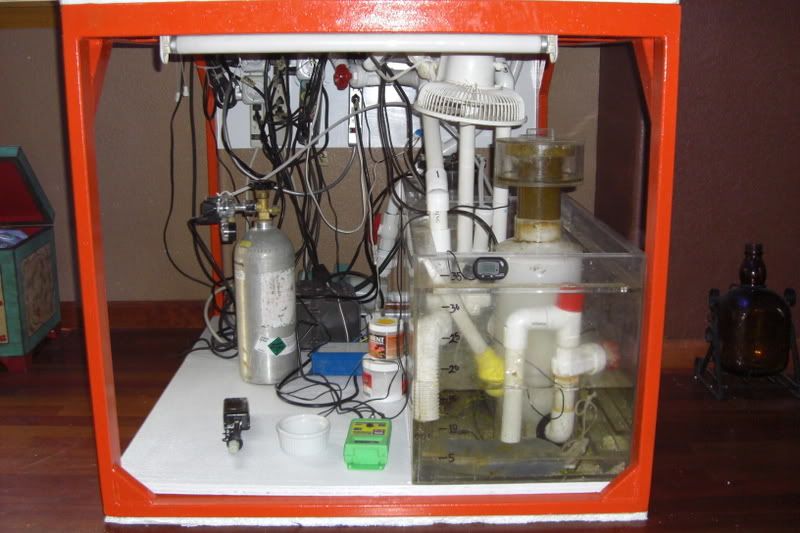 Hereâs the FTS with my old hood precariously balanced on top. Itâs only being held on by less than a half an inch on each side. Every time I pop the top it wants to slip off and crash to the floor. 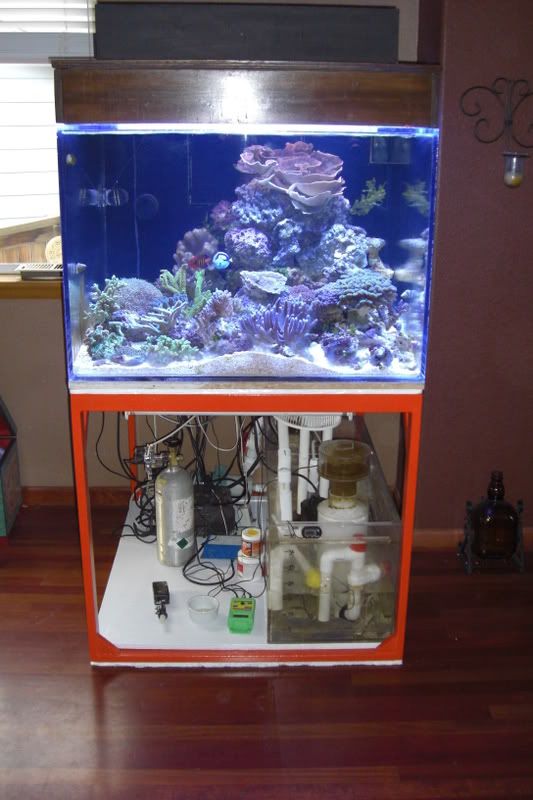 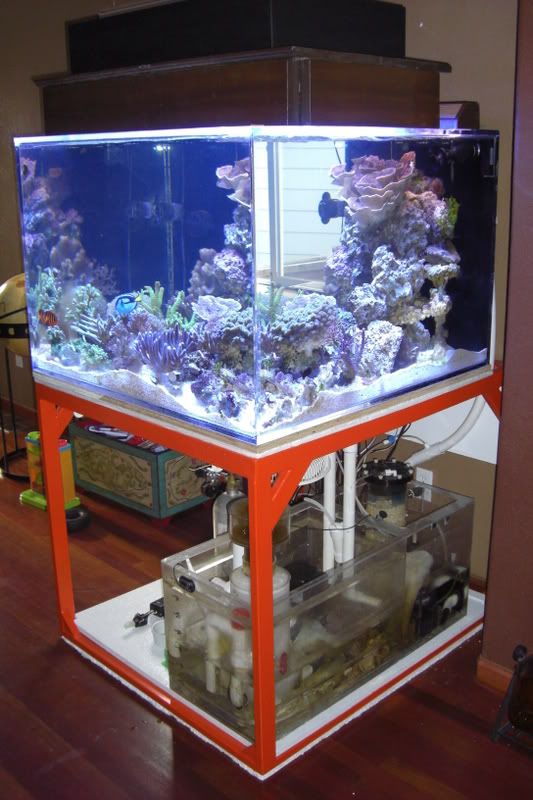 Hereâs the support that will be foamed and put under the rock on the right. It might change a little before I apply the foam. BTW, the PVC plus Great Stuff piece I added to the 65 last year will be reused as well. The foam is still in great condition. 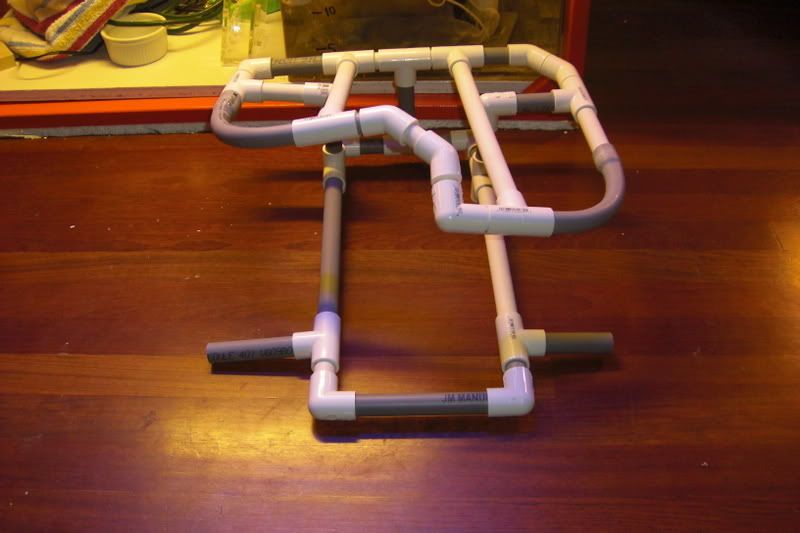
__________________
Mike On hiatus. I'm either out riding my bicycle, playing with my family, or throwing ferts in my planted tank. Or working. I hope I'm not doing that though. Current Tank Info: 140 DIY Cube |
|
|
|
|
08/22/2008, 06:27 PM
|
#144 |
|
Likey the bikey
Join Date: Dec 2004
Location: Colorado
Posts: 3,371
|
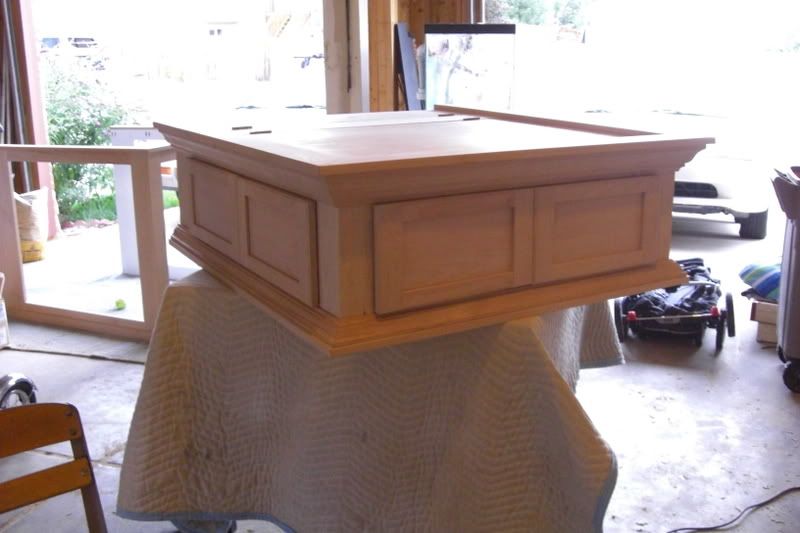
And the wood work. The crown has been installed on the canopy. I ended up gluing the corners, letting them dry, then hand driven brads and glue to attach it to the frame. A punch was used to recess them below the surface. The doors are only on to check the fit. They will be coming off tonight so I can putty over the nail holes and sand/stain tomorrow.
 Here is another pic with the doors open and top up in case I need to work on the lighting or deep dive into the tank. 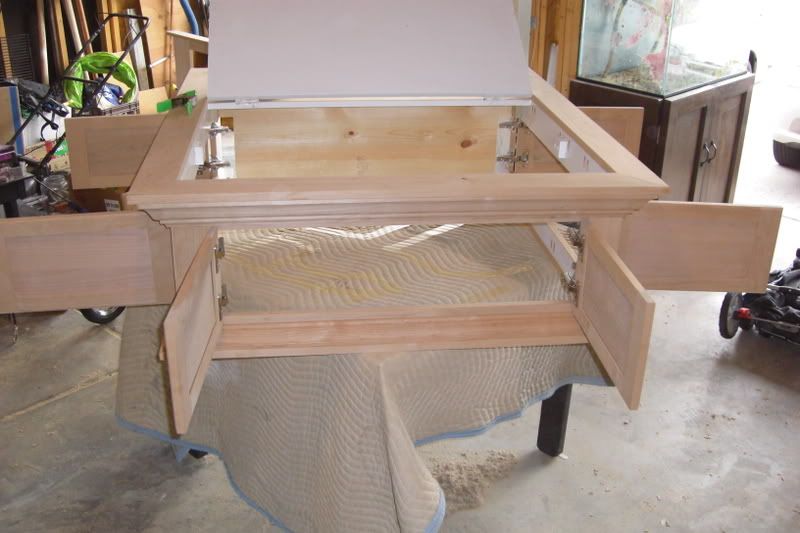 Weâre going to experiment with the dye and end up with something between these two finishes. The dyed and stained piece is on the left. The right piece has received a straight Java stain. After seeing this stuff Iâm never buying stain from Home Depot again! 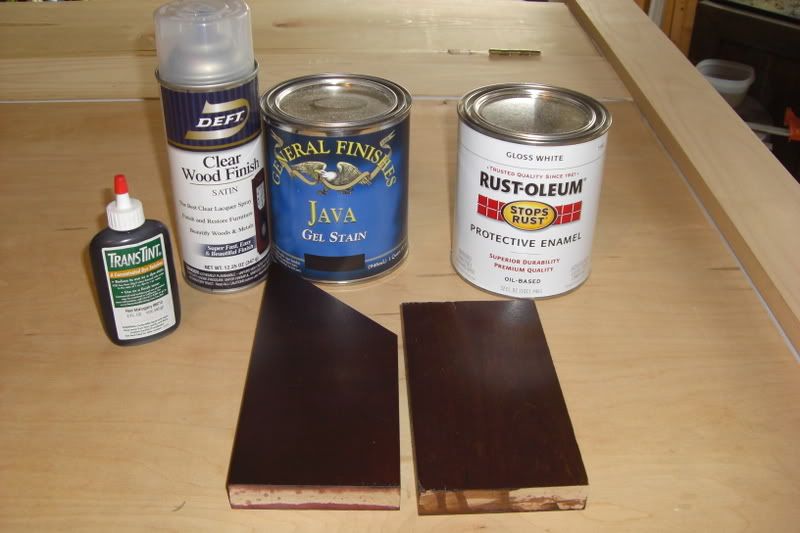
__________________
Mike On hiatus. I'm either out riding my bicycle, playing with my family, or throwing ferts in my planted tank. Or working. I hope I'm not doing that though. Current Tank Info: 140 DIY Cube |
|
|
|
|
08/22/2008, 06:46 PM
|
#145 |
|
Registered Member
Join Date: Dec 2003
Location: Denver, Colorado
Posts: 9,579
|
AWESOME MAN!!! I ABSOLUTELY LOVE IT!!!!!!!!!!!!!!!!!!!
Mike everything is coming out beautiful!! Man I am so jealous, what a beautiful tank and build. Really, really awesome work bud. Let me know if you happen to frag that Milli this weekend. Keep up the great work, again, awesome build!! Spleify
__________________
Make it a Great Day!!!! Current Tank Info: 60 gal SPS cube, with 25 gal refugium, 400W MH, DIY Lumenarc III, DIY skimmer, DIY stand and canopy. 40 breeder LPS with 40 gallon sump, DIY stand, 250W MH |
|
|
|
|
08/22/2008, 07:29 PM
|
#146 |
|
Likey the bikey
Join Date: Dec 2004
Location: Colorado
Posts: 3,371
|
Thanks Leif. What did you use to patch holes and/or scratches on your build? Did you use putty or a glue and sawdust mix?
__________________
Mike On hiatus. I'm either out riding my bicycle, playing with my family, or throwing ferts in my planted tank. Or working. I hope I'm not doing that though. Current Tank Info: 140 DIY Cube |
|
|
|
|
08/22/2008, 07:44 PM
|
#147 |
|
Registered Member
Join Date: Dec 2003
Location: Denver, Colorado
Posts: 9,579
|
Putty. If I ever have to fill big holes I use a glue sawdust mix, but I still leave it short and finish with a like colored putty.
Glue simply just won't stain, putty usually does real well, especially when you are staining as dark as you are. HTH JMO/E Spleify
__________________
Make it a Great Day!!!! Current Tank Info: 60 gal SPS cube, with 25 gal refugium, 400W MH, DIY Lumenarc III, DIY skimmer, DIY stand and canopy. 40 breeder LPS with 40 gallon sump, DIY stand, 250W MH |
|
|
|
|
08/22/2008, 08:19 PM
|
#148 |
|
Likey the bikey
Join Date: Dec 2004
Location: Colorado
Posts: 3,371
|
I've set up a test piece with a light putty, a dark putty, and two glue + sawdust mixes. I'm going to test the stainability tomorrow. This might push back staining the canopy until Sunday. Hopefully a clear winner will be found.
__________________
Mike On hiatus. I'm either out riding my bicycle, playing with my family, or throwing ferts in my planted tank. Or working. I hope I'm not doing that though. Current Tank Info: 140 DIY Cube |
|
|
|
|
08/22/2008, 10:43 PM
|
#149 |
|
Moved On
Join Date: Sep 2002
Location: Ft Worth, Tx
Posts: 43,217
|
It is really coming along nicely.
I have the same cleaning magnet. Love those, and the pads last a very good long time. |
|
|
|
|
08/22/2008, 11:33 PM
|
#150 |
|
Foaming Conehead
Join Date: Sep 2006
Location: CO
Posts: 1,002
|
That canopy turned out really nice. I like the design and accessibility it has..
|
|
|
|
 |
| Thread Tools | |
|
|


