
|
|
 06/04/2012, 11:04 PM
|
#3826 | |||
|
Team RC Member
Join Date: Jul 2006
Location: STL
Posts: 14,754
|
Quote:
 Quote:

__________________
-Brett 180g Marineland Starfire In-Wall 278 gallon system |
|||

|

|
|
06/05/2012, 11:01 PM
|
#3827 |
|
Team RC Member
Join Date: Jul 2006
Location: STL
Posts: 14,754
|
Quick couple questions...
1. Will 2 inches of drop be plenty over 6 feet for the drains on the stock tank? Just making sure there will be enough flow without creating Niagara Falls when the drains terminate in the sump. 2. How high over the upturned elbow will the water level be as it flows over the elbows? Like 1/4" or more? Obviously depends on flow rates but what's a good guesstimate? I guess this would also effect the overall water level in the tank?
__________________
-Brett 180g Marineland Starfire In-Wall 278 gallon system Last edited by drummereef; 06/05/2012 at 11:08 PM. |
|
|
|
|
06/06/2012, 07:47 AM
|
#3828 | |
|
Registered Member
Join Date: Jan 2006
Location: Toledo OH
Posts: 2,466
|
Quote:
1.) 2" drop should be fine. But if you can do an extra inch or 2 i would. You going to have it empty into a sock or bubble buster anyway right? 2.) The water should be about 1/4-abouve the top of the elbows, just enuf to overcome the surface tension of the water.
__________________
Inwall Basement Setup w/ Growout Tank & Common Acrylic sump, SRO XP3000E, Neptune Apex, Bubble Magus Triple Doser, CLS- Super Dart Gold + OM 4way, 2-400w MH & 4-80w T-5, ROX .08 carbon... |
|
|
|
|
|
06/06/2012, 12:08 PM
|
#3829 | |
|
Team RC Member
Join Date: Jul 2006
Location: STL
Posts: 14,754
|
Quote:
OK sounds good. I'm going to pick some pipe and fittings up tonight and check some angles. I was trying to avoid using a sock or other bubble killing device just to avoid catching pods etc that I would like to see make it into the display. Do you think that's a good or bad idea? I was going to put a 90 on the end of the down pipe in the sump and submerge it halfway underwater to make a gentle transition of flow into the sump. But maybe there's going to be too much flow to avoid excess bubbles huh...?
__________________
-Brett 180g Marineland Starfire In-Wall 278 gallon system |
|
|
|
|
|
06/06/2012, 02:59 PM
|
#3830 |
|
Registered Member
Join Date: Jan 2006
Location: Toledo OH
Posts: 2,466
|
True. Ignore the sock. Flow should be slow Enuf and at a very small slope so splashing should be very little.
I have faith Ull make it work perfectly!
__________________
Inwall Basement Setup w/ Growout Tank & Common Acrylic sump, SRO XP3000E, Neptune Apex, Bubble Magus Triple Doser, CLS- Super Dart Gold + OM 4way, 2-400w MH & 4-80w T-5, ROX .08 carbon... |
|
|
|
|
06/06/2012, 03:14 PM
|
#3831 |
|
Registered Member
Join Date: Oct 2005
Location: DFW Texas
Posts: 5,249
|
I've tried several slow refugium flow return designs on my 300g and found a horizontal tee placed with the center line at the water level and the return coming in from the top (side of tee turned up) worked the best.
__________________
A smooth sea never made a skillful mariner Current Tank Info: 110g Mixed Reef, LED's & T5's |
|
|
|
|
06/06/2012, 10:14 PM
|
#3832 | ||
|
Team RC Member
Join Date: Jul 2006
Location: STL
Posts: 14,754
|
Quote:
 Quote:

__________________
-Brett 180g Marineland Starfire In-Wall 278 gallon system |
||
|
|
|
|
06/06/2012, 10:39 PM
|
#3833 |
|
Team RC Member
Join Date: Jul 2006
Location: STL
Posts: 14,754
|
UPDATE:
A little more progress... I brainstormed some rough plumbing designs tonight to see if I could route the plumbing with the proper drop while keeping the lines as clean and simple as possible. The first pic shows the pipe with a simple elbow. With a shallow drop to the sump, the two drains would have to overlap to keep the bulkheads in the stock tank even. This obviously won't work... The two elbows pictured would be plumbed to the bulkheads in the stock tank. **Visualize the floor as the wall behind the stock tank.** 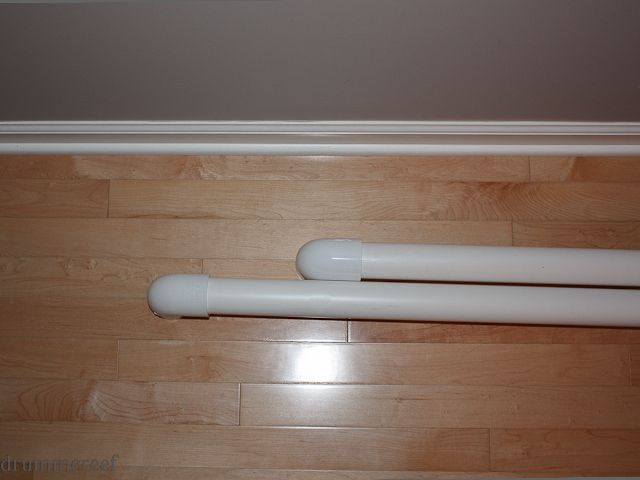 So I brainstormed some more... By adding a 45 along with the elbow, I was able to stagger the pipes a bit to keep the bulkheads even. The design still allows for a decent amount of drop along the total run back to the sump. Again, this would be the side plumbed to the stock tank. 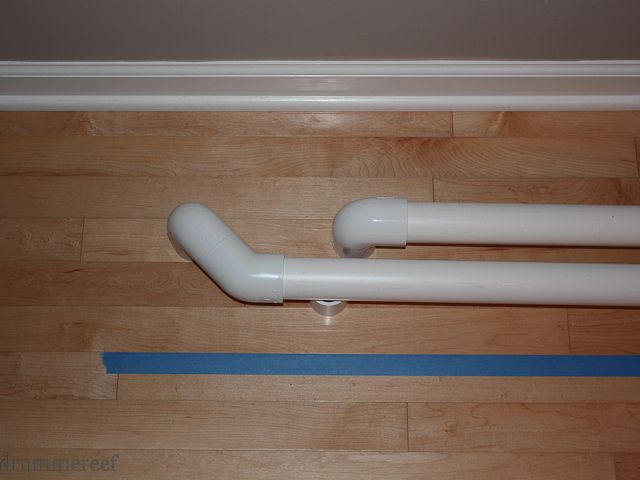 Here is the opposite side that would return back through the wall and terminate at the sump. I'll probably shorten the top pipe a bit to keep the drains closer together when they return back to the sump. 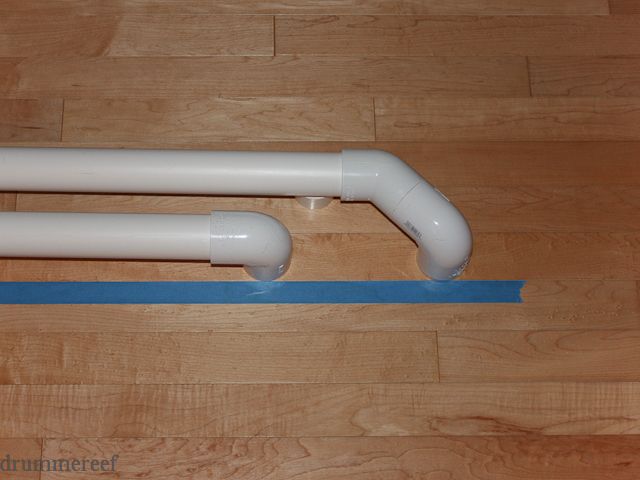 Here you can see the whole run, stock tank at the top and sump return at the bottom of the pic. The total drop of the pipe is 2". If you factor in the fittings, the total drop of the whole run is 4.5". The blue tape represents a plum line so you can see the angle of the pipe for a comparison. Still need to add unions to complete the design but I'll probably fit those in as I rough it out on the wall. Let me know what you think. 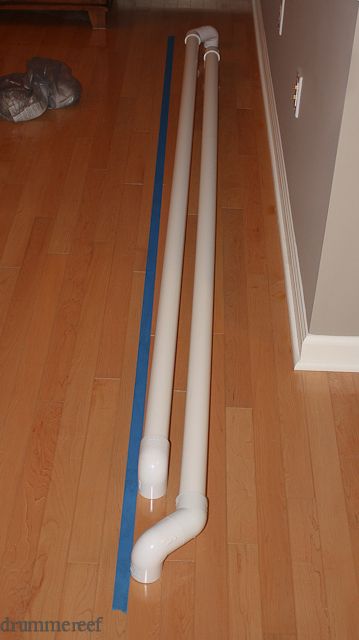
__________________
-Brett 180g Marineland Starfire In-Wall 278 gallon system Last edited by Misled; 04/09/2018 at 06:58 PM. |
|
|
|
|
06/07/2012, 07:38 AM
|
#3834 |
|
Registered Member
Join Date: May 2008
Location: Durham, NC
Posts: 2,205
|
That looks awesome! I think if you just use a bubble trap as opposed to a filter sock you wouldn't get rid of any 'pods, but I also think you are not going to be getting enough flow/bubbles to even really worry about it. Especially if you have the pipes terminate into the sump decently far away from the return pump inlet.
__________________
^ Click on my username and 'Visit Taqpol's Home Page!" to view my 220 gallon custom Miracles tank! -Alex |
|
|
|
|
06/07/2012, 07:56 AM
|
#3835 |
|
Registered Member
Join Date: Jul 2009
Location: Virginia Beach
Posts: 6,659
|
Hey drummer....good to see you still have this thread going. Tanks looks great. I have to say its got to be one of the cleanest setups ive ever seen. You might actually be more OCD than me lol
|
|
|
|
|
06/07/2012, 01:01 PM
|
#3836 | ||
|
Team RC Member
Join Date: Jul 2006
Location: STL
Posts: 14,754
|
Quote:
Quote:
__________________
-Brett 180g Marineland Starfire In-Wall 278 gallon system |
||
|
|
|
|
06/11/2012, 12:32 PM
|
#3837 |
|
Team RC Member
Join Date: Jul 2006
Location: STL
Posts: 14,754
|
Having a brain fart guys... Is there a way to transition from 1" flex pvc pipe to a 3/4" 90 elbow?
 So basically reduce from 1" pipe to a 3/4" elbow... So basically reduce from 1" pipe to a 3/4" elbow...
__________________
-Brett 180g Marineland Starfire In-Wall 278 gallon system |
|
|
|
|
06/11/2012, 12:38 PM
|
#3838 |
|
blank
Join Date: Feb 2008
Location: Rochester, NY
Posts: 987
|
|
|
|
|
|
06/11/2012, 12:40 PM
|
#3839 |
|
Registered Member
Join Date: Jan 2006
Location: Toledo OH
Posts: 2,466
|
I dont think u can do it with one piece especially if you want slip x slip.
Get 1" elbow and then add a 1" x 3/4" reducer..... Sometimes I think you can find a 1" slip x 3/4" thread elbow? Or as shown above!
__________________
Inwall Basement Setup w/ Growout Tank & Common Acrylic sump, SRO XP3000E, Neptune Apex, Bubble Magus Triple Doser, CLS- Super Dart Gold + OM 4way, 2-400w MH & 4-80w T-5, ROX .08 carbon... |
|
|
|
|
06/11/2012, 12:41 PM
|
#3840 |
|
Registered Member
Join Date: May 2008
Location: Durham, NC
Posts: 2,205
|
Do you need to do it in one fitting? In that case I'm sure specialty plumbing stores have "reducing elbows" that are 1" on one side and 3/4" on the other. Otherwise just buy a normal 1" to 3/4" reducer at a hardware store and a normal 3/4" elbow.
__________________
^ Click on my username and 'Visit Taqpol's Home Page!" to view my 220 gallon custom Miracles tank! -Alex |
|
|
|
|
06/11/2012, 12:53 PM
|
#3841 | |||
|
Team RC Member
Join Date: Jul 2006
Location: STL
Posts: 14,754
|
Quote:
Quote:
Quote:
Thanks guys!! My Monday brain was at full throttle Seems like an easy fix. I think I saw a reducing elbow at Lowe's last time I was there... I'll look again. Otherwise the slip bushing will make it work. Making progress on the fuge build. I'll try and post some updated pics tonight. 
__________________
-Brett 180g Marineland Starfire In-Wall 278 gallon system |
|||
|
|
|
|
06/12/2012, 12:38 PM
|
#3842 |
|
Team RC Member
Join Date: Jul 2006
Location: STL
Posts: 14,754
|
UPDATE:
It lives!!! As you know I've been working on a recirculating mod for the NextReef SMR1 Bio Pellet Reactor for some time now. I ended up sending the reactor in to NextReef to have them drill the two holes necessary for the recirc mod as well as have them fabricate a custom lid for the reactor. Believe it or not, it was cheaper to send it in then for me to purchase a bit to drill the holes myself... so it was a no brainer. Anyhow, the guys ended up cracking my original reactor and also a second piece of acrylic tube during the process so the decision to send it in was a good one. This apparently wasn't a job for the novice (like me). NextReef anneals the acrylic making it very difficult to drill which also makes the acrylic more susceptible to cracking. But after 3 tries they were able to fabricate the reactor to my specifications. Here it is! The much anticipated delivery. 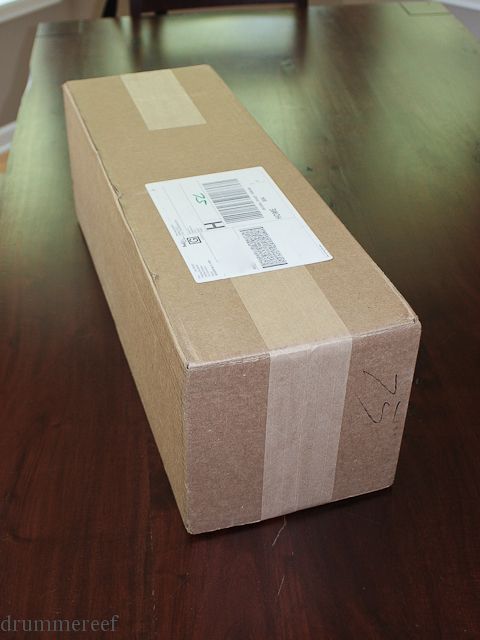 The new reactors are shipping in a slightly darker blue color than the original reactors. A very crisp and pleasing color scheme.  Here's the custom lid NextReef fabricated for me. It only has one 1/4" hole tapped for the effluent tubing. 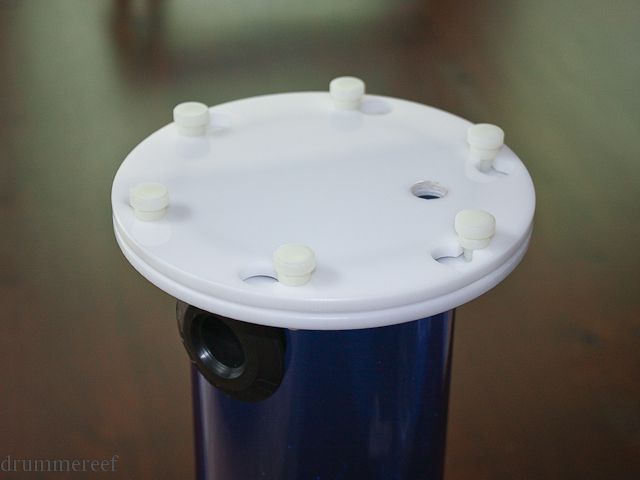 I used a Mur-Lok 3/8" elbow valve to connect the effluent tubing. I also incorporated a #9 O-ring into the design which helps create a water tight seal. 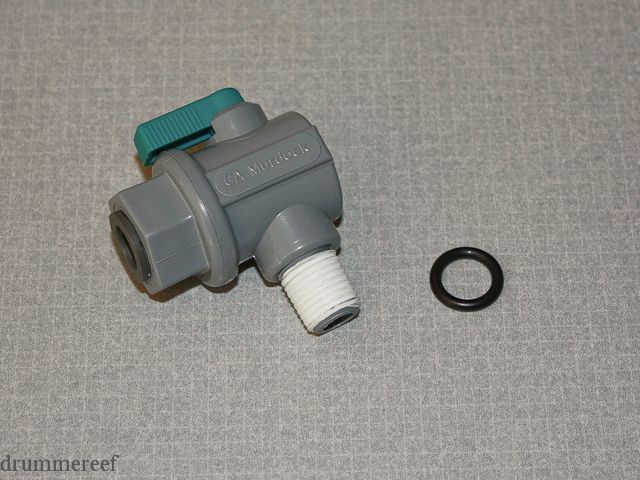 Finished lid assembly. 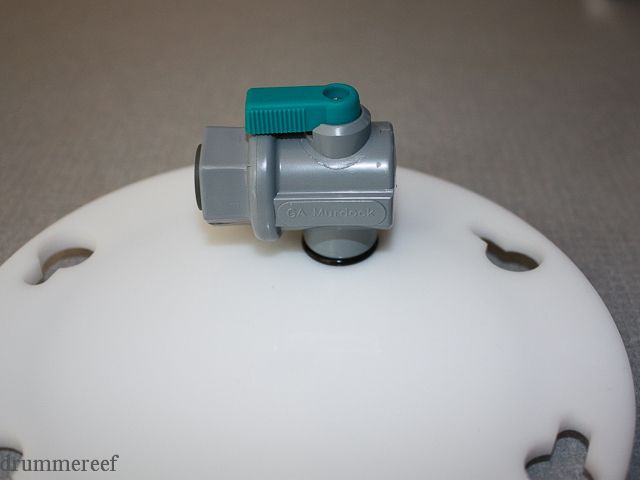 To be continued... 
__________________
-Brett 180g Marineland Starfire In-Wall 278 gallon system Last edited by Misled; 04/09/2018 at 06:58 PM. |
|
|
|
|
06/12/2012, 12:39 PM
|
#3843 |
|
Team RC Member
Join Date: Jul 2006
Location: STL
Posts: 14,754
|
Here's a shot of the suction side inlet plumbing and intake screen. I had to fabricate a custom connector to fit between the intake screen and pipe that passes through the reactor wall. I used a 1/2" schedule 80 coupler, cut to fit and routed out to easily slip over the pipe.
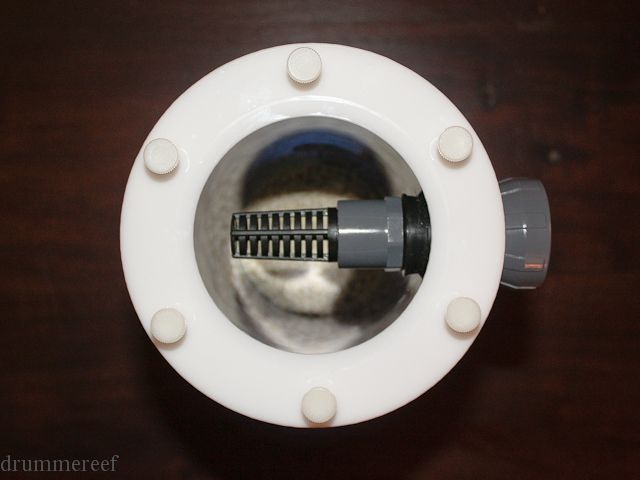 Here is the business side. A simple elbow with a short length of pipe that sits ~1/4" off the bottom of the reactor. 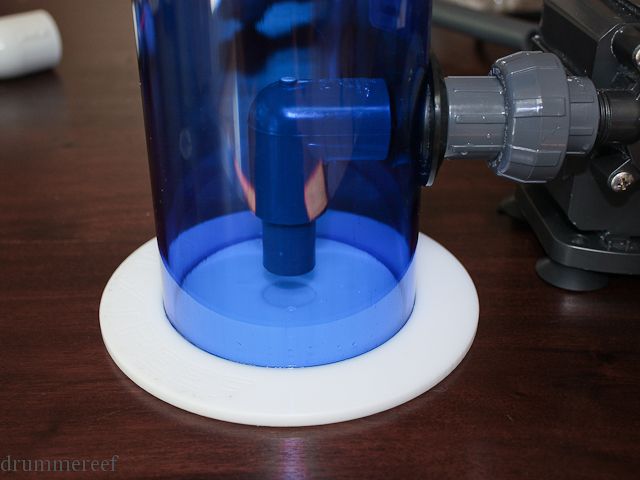 And the finished reactor all plumbed up and ready for water. 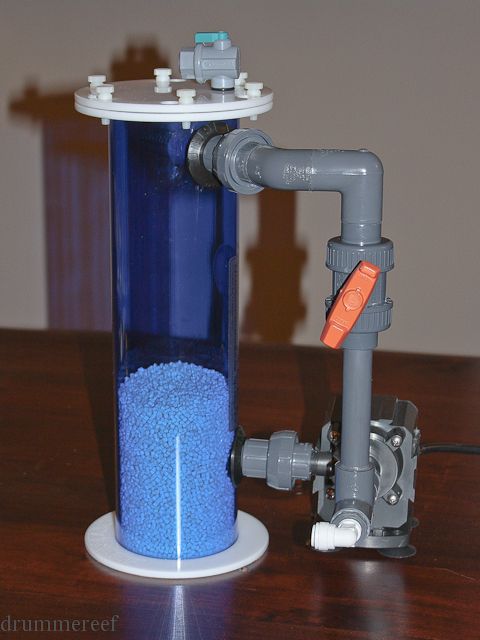 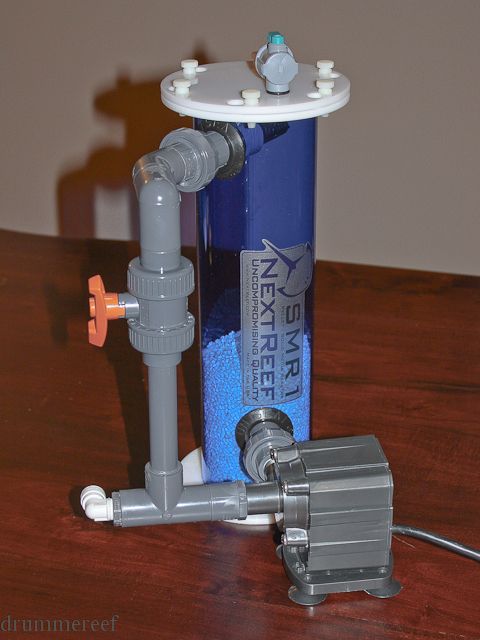 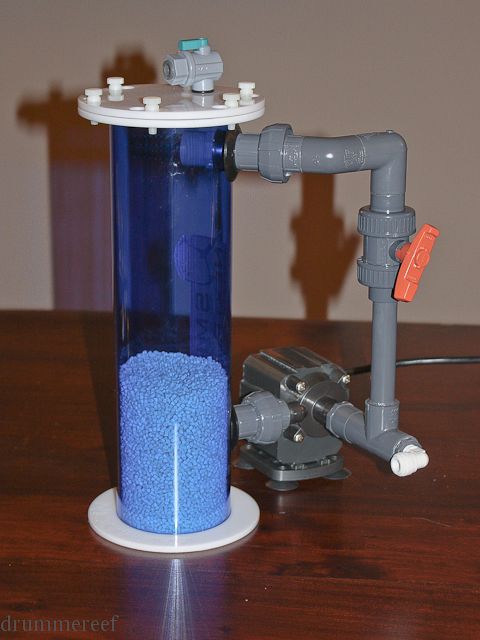 And a couple action shots. 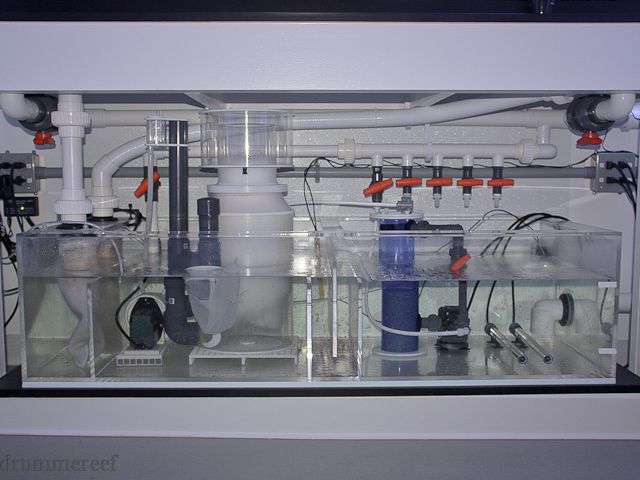 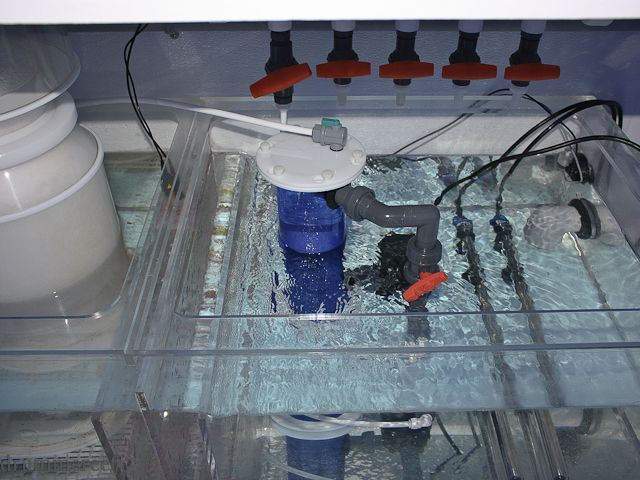
__________________
-Brett 180g Marineland Starfire In-Wall 278 gallon system Last edited by Misled; 04/09/2018 at 06:59 PM. |
|
|
|
|
06/12/2012, 12:43 PM
|
#3844 |
|
Registered Member
Join Date: Jan 2006
Location: Toledo OH
Posts: 2,466
|
 (somewhere inside brett's brain!) (somewhere inside brett's brain!) Hmmm...Im bored,  what can I tinker with, improve upon, elaborate , redesign, add to, or just all out re-do next!  HAHAHAHA  Hopefully you see improvement w/ the reactor. That is one super slick looking setup!!
__________________
Inwall Basement Setup w/ Growout Tank & Common Acrylic sump, SRO XP3000E, Neptune Apex, Bubble Magus Triple Doser, CLS- Super Dart Gold + OM 4way, 2-400w MH & 4-80w T-5, ROX .08 carbon... |
|
|
|
|
06/12/2012, 10:19 PM
|
#3845 | |
|
Team RC Member
Join Date: Jul 2006
Location: STL
Posts: 14,754
|
Quote:
Hahahaha! That's me!!!  Thanks 110g. Thanks 110g.
__________________
-Brett 180g Marineland Starfire In-Wall 278 gallon system |
|
|
|
|
|
06/12/2012, 10:42 PM
|
#3846 |
|
Registered Member
Join Date: May 2008
Location: Durham, NC
Posts: 2,205
|
I know its open on the exhaust end of the pump, but are you not worried about some pellets getting back siphoned into the pump impeller (in a power outage, maybe?)? I would think you would want to put something like this on the end of that pipe:
http://www.avastmarine.com/ssc/do/pr...-Mixing-Nozzle I don't know how well your pellets are fluidizing, but that piece might also help evenly distribute the flow.
__________________
^ Click on my username and 'Visit Taqpol's Home Page!" to view my 220 gallon custom Miracles tank! -Alex |
|
|
|
|
06/12/2012, 11:03 PM
|
#3847 | |
|
Team RC Member
Join Date: Jul 2006
Location: STL
Posts: 14,754
|
Quote:
__________________
-Brett 180g Marineland Starfire In-Wall 278 gallon system |
|
|
|
|
|
06/12/2012, 11:05 PM
|
#3848 |
|
Team RC Member
Join Date: Jul 2006
Location: STL
Posts: 14,754
|
UPDATE:
Further progress made on the fuge build... I had to address some issues with the room before I move forward with the plumbing. Originally when I built the room I had the HVAC company install a return air vent near the floor towards the back of the room when I installed our whole house HVAC system. Unfortunately with the new plans it was going to be behind the stock tank. I wanted access to the grill in case I would need to replace it at some point, so moving it was at the top of the list. Here's the original placement of the return air vent in the sump room. 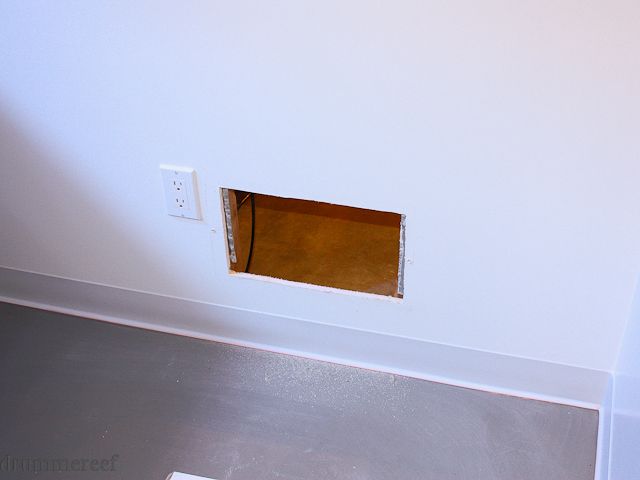 Luckily I didn't need to move the sheet metal to make this work. The HVAC company originally ran the pipe near the ceiling where the new vent will be installed. There were panels of sheet metal below the pipe assembly that were already taken off in this pic. You will see them below. Those panels directed the flow up from the vent to the intake near the ceiling. 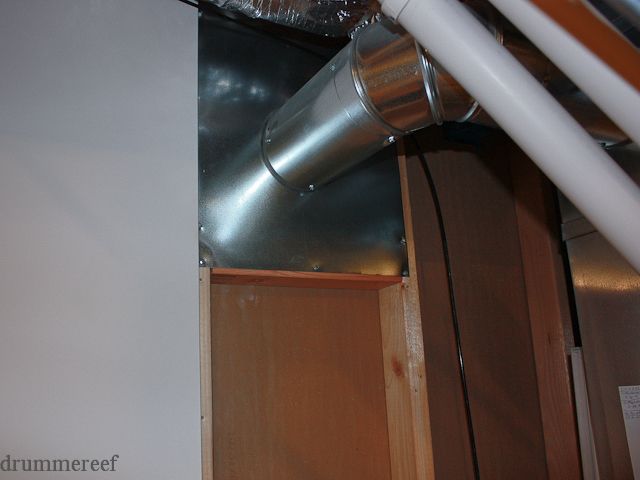 Behind the wall there was also a 2x4 directly where the plumbing will come through the wall. This also would need to be addressed. You can see the sheet metal on the left that was attached to the wall to create the original vent. 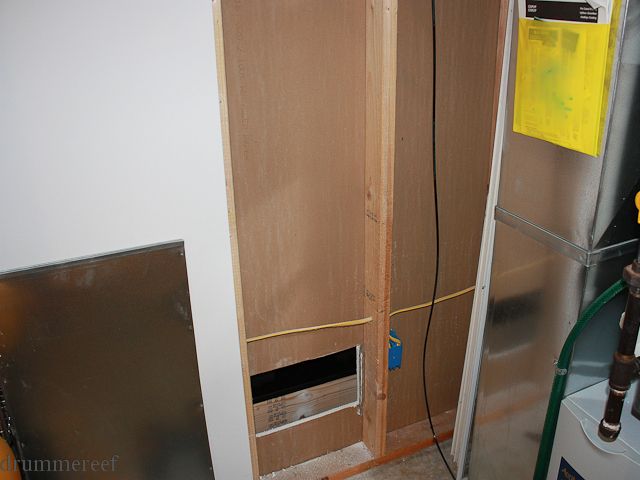 This is about to get real. 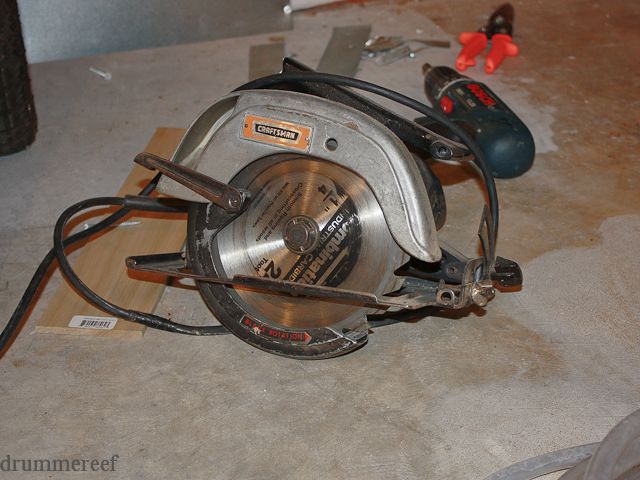 Using the circular saw I cut out the 2x4 leaving enough area to plumb the stock tank through the wall. I had to finish the cut with a hand saw since the circular saw wouldn't cut the whole depth of the 2x4. 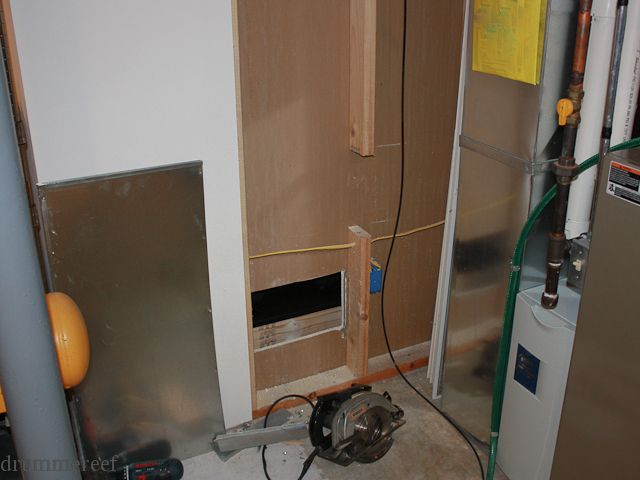 Then I framed in the opening with new lumber leaving enough room to plumb the stock tank. 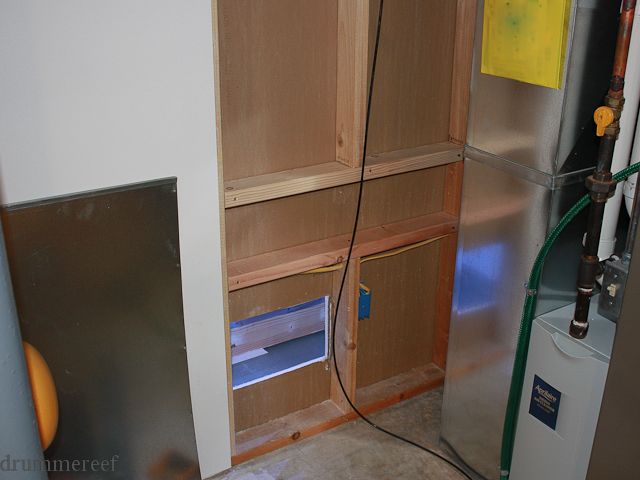 New vent opening cut. You can see the sheet metal from the vent pipe is directly behind the wall where new opening was cut. 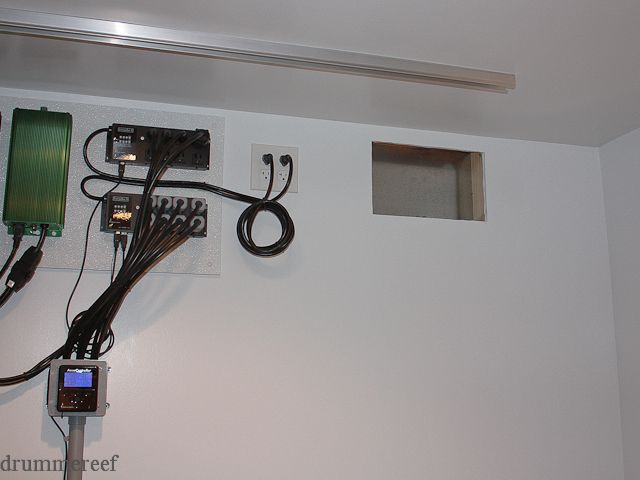 Vent cover installed. I also gave it a fresh coat of spray paint since it was looking a little rusty before I re-installed it. 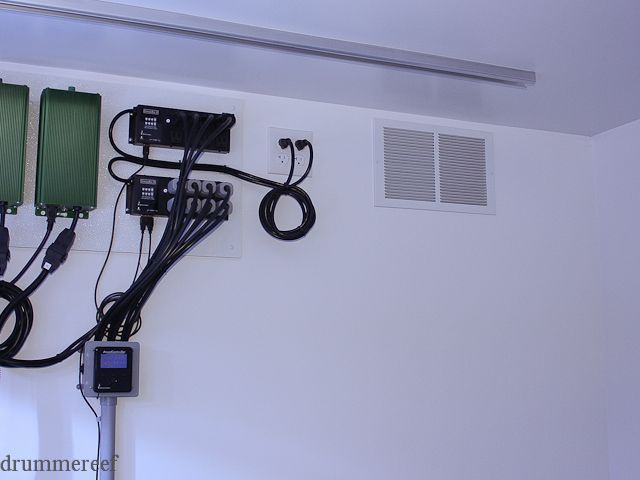 To be continued...
__________________
-Brett 180g Marineland Starfire In-Wall 278 gallon system Last edited by Misled; 04/09/2018 at 07:01 PM. |
|
|
|
|
06/12/2012, 11:05 PM
|
#3849 |
|
Team RC Member
Join Date: Jul 2006
Location: STL
Posts: 14,754
|
Here's a little tip for anyone that needs a quick drywall repair. It works best on small repairs but I will be covering the area behind the stock tank with FRP so there's not really a need to brace a larger piece like this.
Again, here's the opening that needs to be repaired. First, cut a piece of drywall that is ~2" larger than the opening to be repaired. 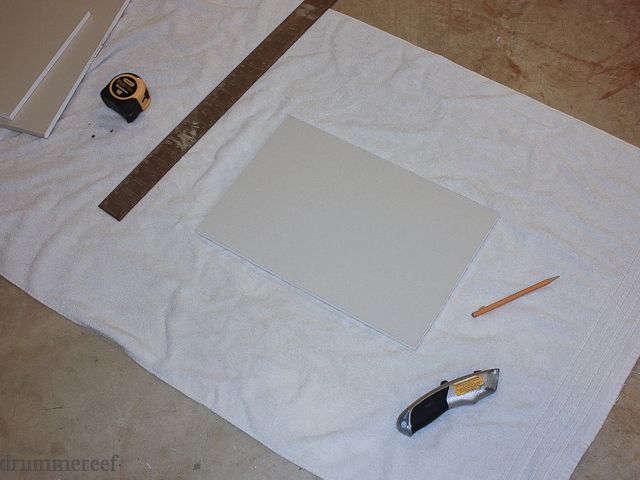 Next, draw the actual size of the opening on the back of the piece of drywall. As you can see there is roughly 1" of overlap around the perimeter of the piece. 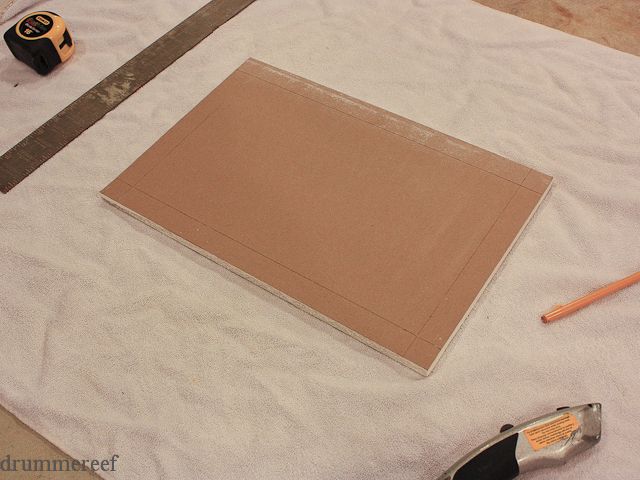 Then using a utility knife and straight edge, trace the lines with the blade. 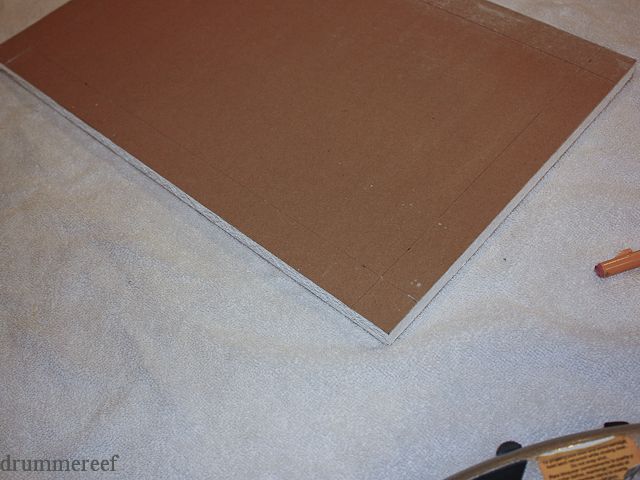 Then, as if you were cutting new drywall, snap the drywall on the cut lines. Again, this is done from the back of the drywall. 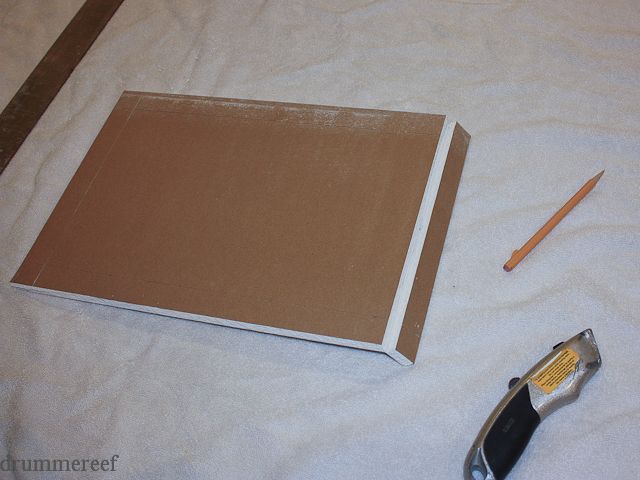 Now, carefully remove the back of the drywall leaving the paper face intact. Continue until all sides have been removed leaving the 1" strip of the paper face all the way around the patch. 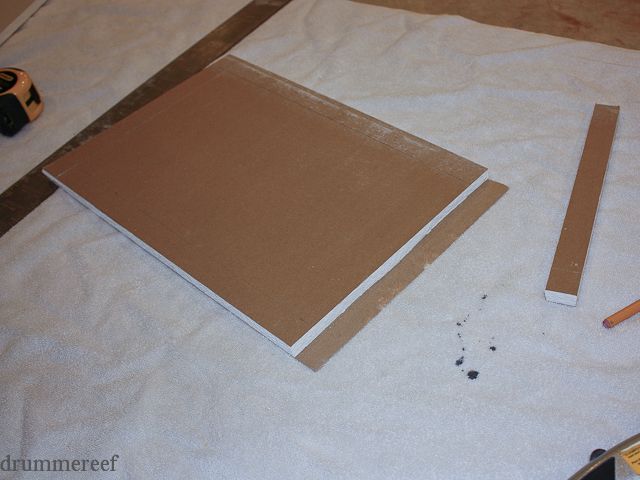 Typically I would use mud to adhere the patch to the wall. But in this case since I'll be covering it with FRP, I used some spray adhesive to install it. Here's what the finished patch looks like. 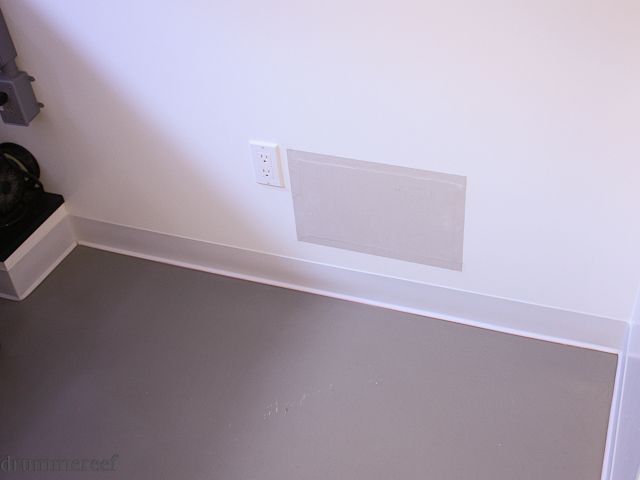 To be continued...
__________________
-Brett 180g Marineland Starfire In-Wall 278 gallon system Last edited by Misled; 04/09/2018 at 07:02 PM. |
|
|
|
|
06/12/2012, 11:06 PM
|
#3850 |
|
Team RC Member
Join Date: Jul 2006
Location: STL
Posts: 14,754
|
And finally...
Originally I was set on using cinder blocks to raise the stock tank, but after doing some careful measuring and seeing that the basement floor drops ~1/2" towards the wall behind the stock tank I though it would be best to build something. This time I went all black since it's a free-standing platform, not attached to the walls. I want it to be more of an accent in the room versus a part of the room. It's built with 2x6 and 2x4 lumber topped with 3/4" finished side ply. The top is laminated with the same black laminate that I used on my other projects, just some scrap I had leftover. And the rest painted semi-gloss black to match. I will eventually put black vinyl base molding around the bottom to water proof it from spills. 110galreef will surely get a kick out of this one. 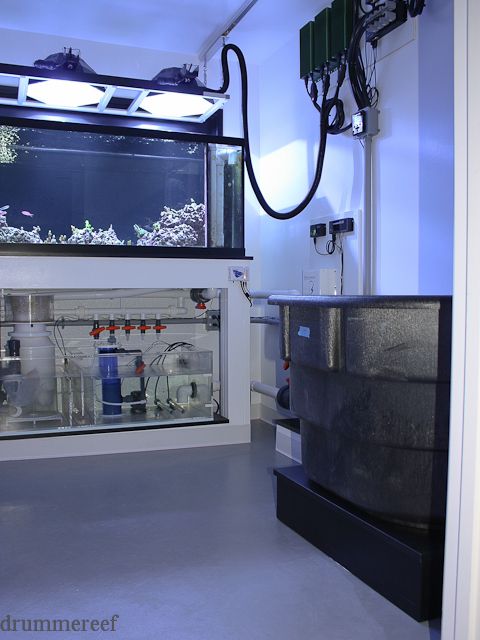 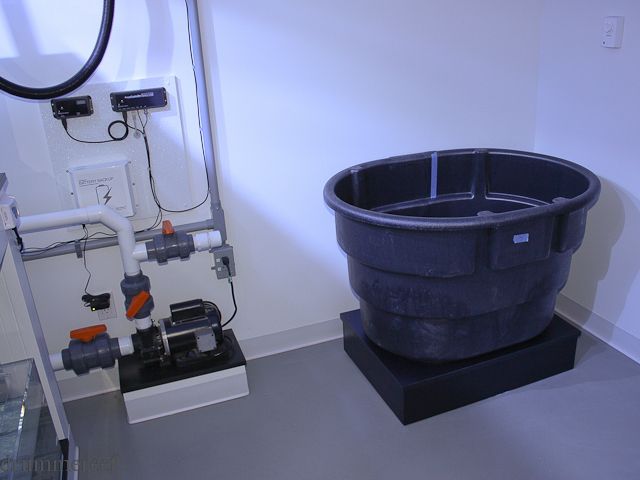
__________________
-Brett 180g Marineland Starfire In-Wall 278 gallon system Last edited by Misled; 04/09/2018 at 07:02 PM. |
|
|
|
 |
|
|


