
|
|
 09/26/2017, 02:54 PM
|
#351 |
|
Registered Member
Join Date: Jan 2006
Location: Westminster, CO
Posts: 17,289
|
A little update. Today marks the 14th day my queen angel and crosshatch triggers have been in .5 cupramine for 14 days. I'll start doing water changes and get carbon going on their system tomorrow. They have been through formalin dips, fw dips, two rounds of prazi, and a round of kanaplex.
I still haven't caught the flame angel from the display but once I catch him he will be going into QT with the remainder of fish in my various tanks. All tanks in the house will be fallow for the next 3 months. During that time the plan is to start focusing on nutrients in the 600gal, getting the coral flat installed, and the BTA tanks up and running. I've been trying to distract myself with yard work, selling off old equipment, and playing with my puppies. It's time to get back to business in the reefing world! The 360gal was sold and removed this past weekend so progress is still being made. Slow but steady!
__________________
Hobby Experience: 9200ish gallons, 26 skimmers, and a handful of Kent Scrapers. Current Tank: Vortech Powered 600G SPS Tank w/ 100gal frag tank & 100g Sump. RK2-RK10 Skimmer. ReefAngel. Radium 20k. Last edited by tkeracer619; 09/26/2017 at 03:05 PM. |

|

|
|
09/26/2017, 10:59 PM
|
#352 |
|
Registered Member
Join Date: Dec 2014
Location: Boulder, Colorado
Posts: 1,430
|
Glad to hear everything's alright. Keep cranking man!
Sent from my iPhone using Tapatalk
__________________
75 gal, 20 L using as sump, MP40Qd , Eheim 1260 Return,Royal Exclusiv Bubble King Mini 160,Kamoer FX-STP Calcium Reactor Setup, ATI Sunpower 6x54W |
|
|
|
|
09/27/2017, 11:48 PM
|
#353 |
|
Registered Member
Join Date: Jan 2006
Location: Westminster, CO
Posts: 17,289
|
Thanks! Made some progress today.
Did a 50% WC on the triggers and the queen. Started dosing the 600gal, it's parameters are all out of wack. Started by dumping in a 5gal bucket of Randys Recipe 1 part 3A. I was really only supposed to add 1gal... oops  Ordered a new motor for my Aquamedic kalkwasser stirrer, it's been running trouble free for 15 years so why not. I hope to install it on the 600 in the next few days. Assembled the sump inserts for the 20gal BTA tanks. I'll post pics once I silicone them in. Have some Ecotech magic sauce coming in as well. Going to start outfitting the display with some new hardware 
__________________
Hobby Experience: 9200ish gallons, 26 skimmers, and a handful of Kent Scrapers. Current Tank: Vortech Powered 600G SPS Tank w/ 100gal frag tank & 100g Sump. RK2-RK10 Skimmer. ReefAngel. Radium 20k. |
|
|
|
|
09/29/2017, 08:56 PM
|
#354 |
|
Registered Member
Join Date: Sep 2000
Location: Los Angeles, CA
Posts: 1,907
|
Not sure if I missed this, are you planning to use mh only?
Sent from my iPhone using Tapatalk |
|
|
|
|
09/30/2017, 12:05 AM
|
#355 |
|
Registered Member
Join Date: Jan 2006
Location: Westminster, CO
Posts: 17,289
|
It will be a combo of mh and t5. 4x 250w radium 20k on m80 ballasts and 8x t5.
__________________
Hobby Experience: 9200ish gallons, 26 skimmers, and a handful of Kent Scrapers. Current Tank: Vortech Powered 600G SPS Tank w/ 100gal frag tank & 100g Sump. RK2-RK10 Skimmer. ReefAngel. Radium 20k. |
|
|
|
|
10/06/2017, 11:49 PM
|
#356 |
|
Registered Member
Join Date: Jan 2006
Location: Westminster, CO
Posts: 17,289
|
Building the BTA Propagation System (Part 1)
I'm not finished yet so this will be a micro build inside my build thread. There will be several parts over the next few weeks. In this set of posts I'll show how I constructed the built in sumps for these tanks. They will all be independent systems. I have collected a few different BTA's over the years. I have several different rainbows, roses, and Colorado Sunbursts. I am dedicating five 20gal long tanks for propagating rainbows and one for the Sunbursts. I also have a 60gal system dedicated towards the Sunbursts but will use one of the 20gal as a second independent system.
I started with a stack of cut-to-size black cast acrylic that I purchased from a local shop. I have a 3hp Grizzly table saw setup to do this on my own but in this house don't have the means yet to run it so I purchased it already cut. The sumps will have a full height overflow box that will contain a sponge filter and bio media. This leaves a chamber that will contain open space for media reactors, bags, a skimmer, a heater, baffles, twin float switches, and a return/circulation pump. First Step was to cut all weirs. I'm using a CNC End Mill at work. Air cooling. 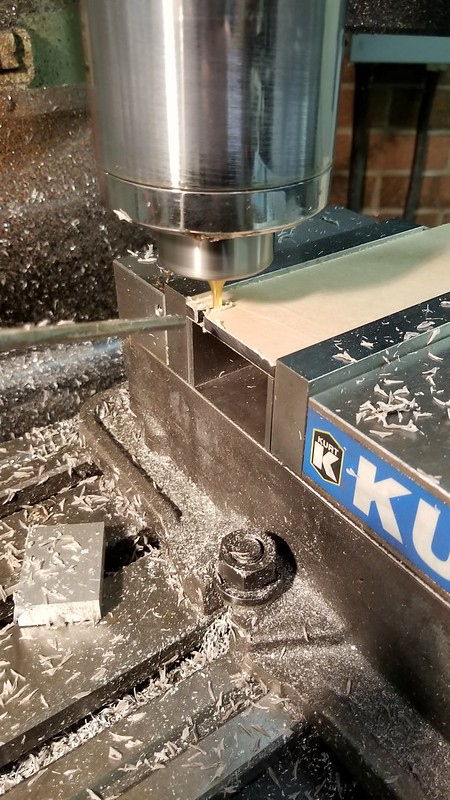 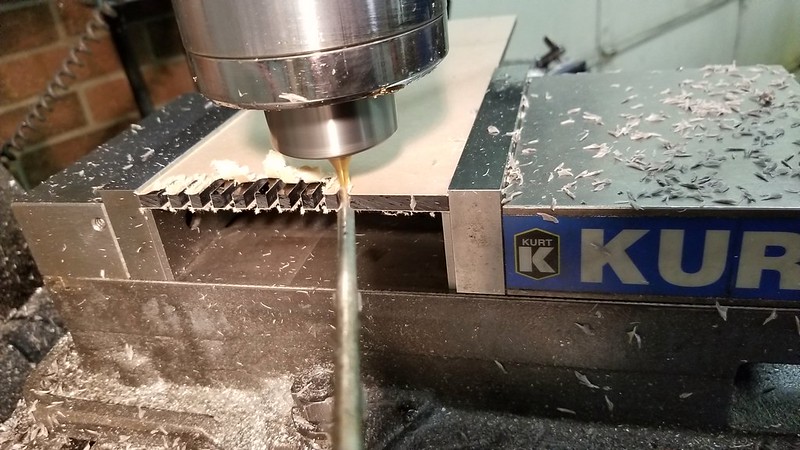 I put long weirs in the bottom of the overflow. Once all said and done these are what my cut pieces look like. They are ready to be bonded together. I'm using Weld-On 3.  Lining up and bonding the stand offs I will use for egg crate to rest on for a shelf. It's 1/2"x1/2" clear square rod. 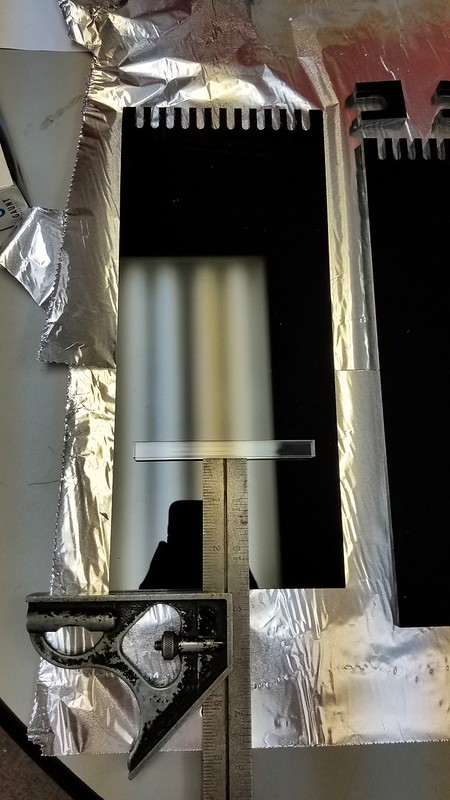 Bonded to both front and back of the overflow chamber. 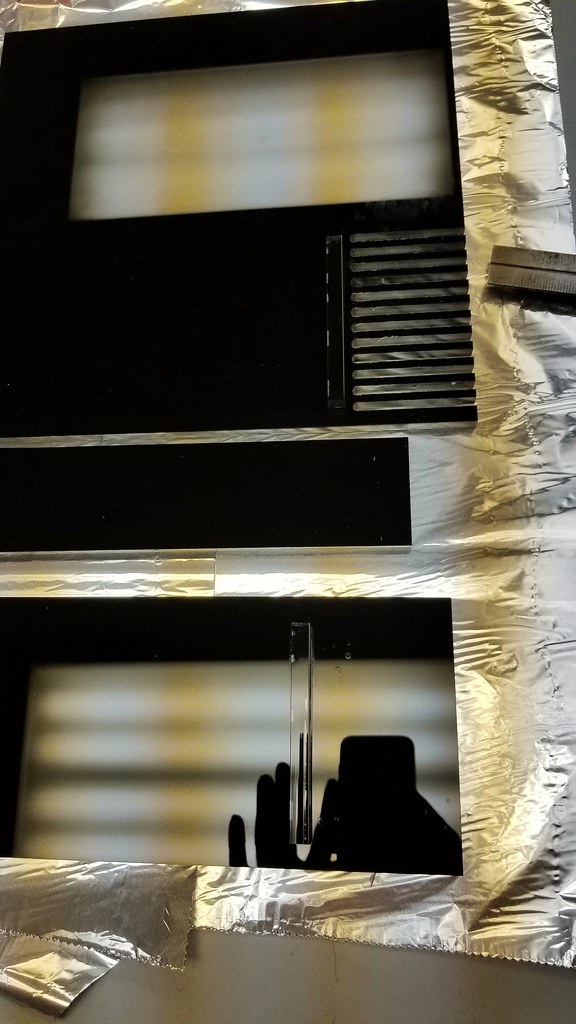 Assembling the overflow chamber. 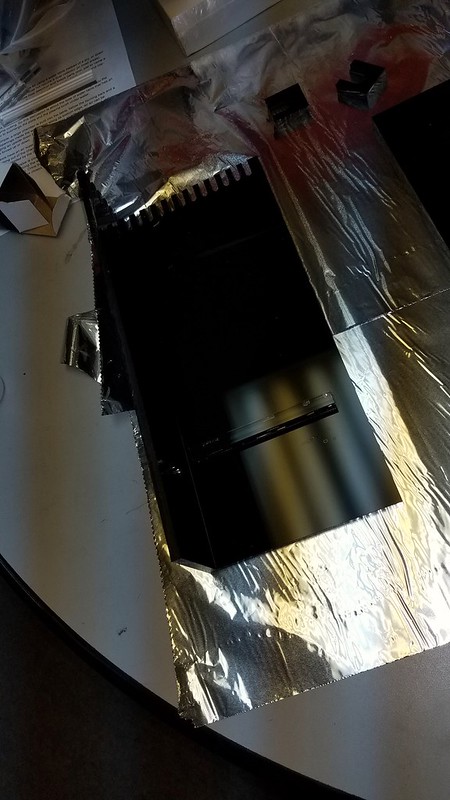
__________________
Hobby Experience: 9200ish gallons, 26 skimmers, and a handful of Kent Scrapers. Current Tank: Vortech Powered 600G SPS Tank w/ 100gal frag tank & 100g Sump. RK2-RK10 Skimmer. ReefAngel. Radium 20k. Last edited by tkeracer619; 10/07/2017 at 12:03 AM. |
|
|
|
|
10/07/2017, 12:03 AM
|
#357 |
|
Registered Member
Join Date: Jan 2006
Location: Westminster, CO
Posts: 17,289
|
Building the BTA Propagation System (Part 1) Continued
Mounting overflow box to main divider.
 Overflow and main divider bonded. 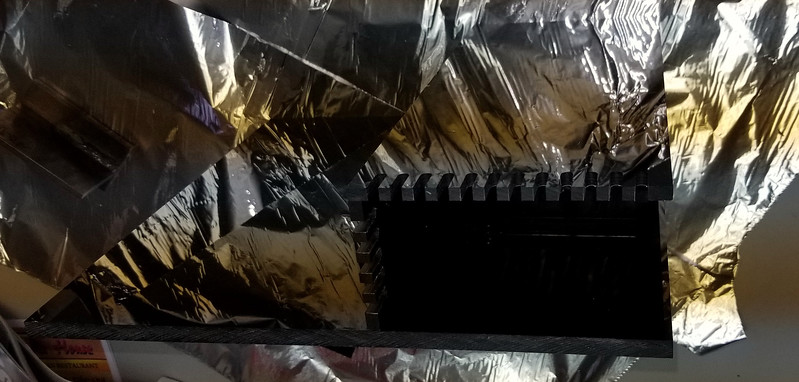 Bubble trap baffles and float switch mounts bonded. 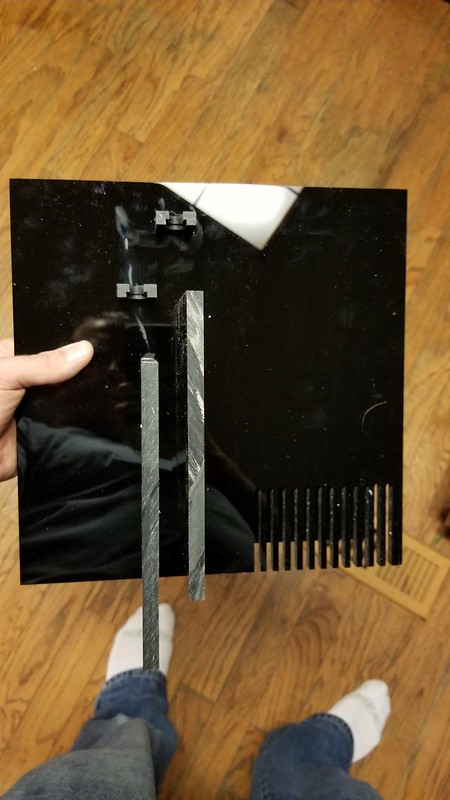 Fully assembled x6. 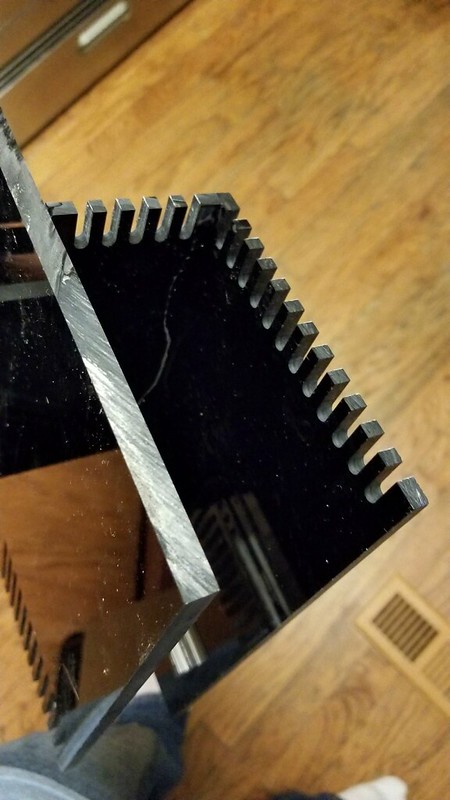 Notice there are 3 right and 3 left setups. I mirrored half of them so that when they are in the racks the sumps will all be close to the center common dry area of the stands. 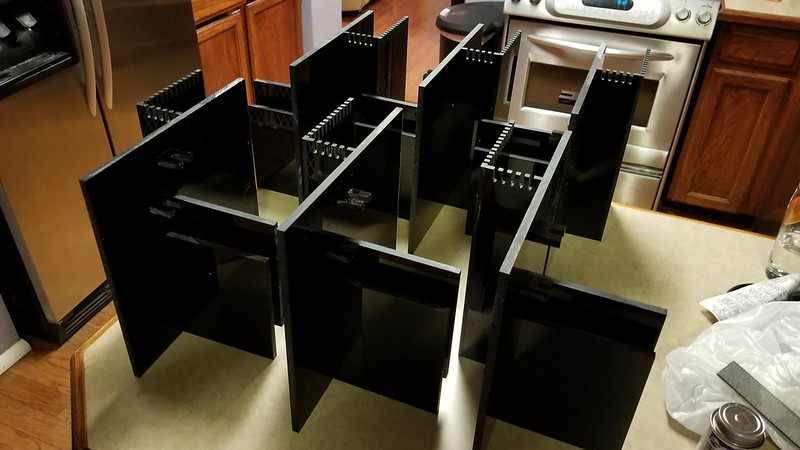 Hoping to silicone these into the 20gals this weekend!
__________________
Hobby Experience: 9200ish gallons, 26 skimmers, and a handful of Kent Scrapers. Current Tank: Vortech Powered 600G SPS Tank w/ 100gal frag tank & 100g Sump. RK2-RK10 Skimmer. ReefAngel. Radium 20k. |
|
|
|
|
10/07/2017, 02:37 PM
|
#358 |
|
Registered Member
Join Date: Dec 2014
Location: Boulder, Colorado
Posts: 1,430
|
Looks great Mark! Cant wait to start helping again...
Sent from my iPhone using Tapatalk
__________________
75 gal, 20 L using as sump, MP40Qd , Eheim 1260 Return,Royal Exclusiv Bubble King Mini 160,Kamoer FX-STP Calcium Reactor Setup, ATI Sunpower 6x54W |
|
|
|
|
10/07/2017, 05:07 PM
|
#359 |
|
Registered Member
 Join Date: Apr 2012
Posts: 2,258
|
Awesome work Mark, those look great!
|
|
|
|
|
10/07/2017, 11:00 PM
|
#360 |
|
Registered Member
Join Date: Jan 2006
Location: Westminster, CO
Posts: 17,289
|
Thanks guys! Appreciate that

__________________
Hobby Experience: 9200ish gallons, 26 skimmers, and a handful of Kent Scrapers. Current Tank: Vortech Powered 600G SPS Tank w/ 100gal frag tank & 100g Sump. RK2-RK10 Skimmer. ReefAngel. Radium 20k. |
|
|
|
|
10/08/2017, 01:30 PM
|
#361 |
|
Registered Member
Join Date: Jan 2006
Location: Westminster, CO
Posts: 17,289
|
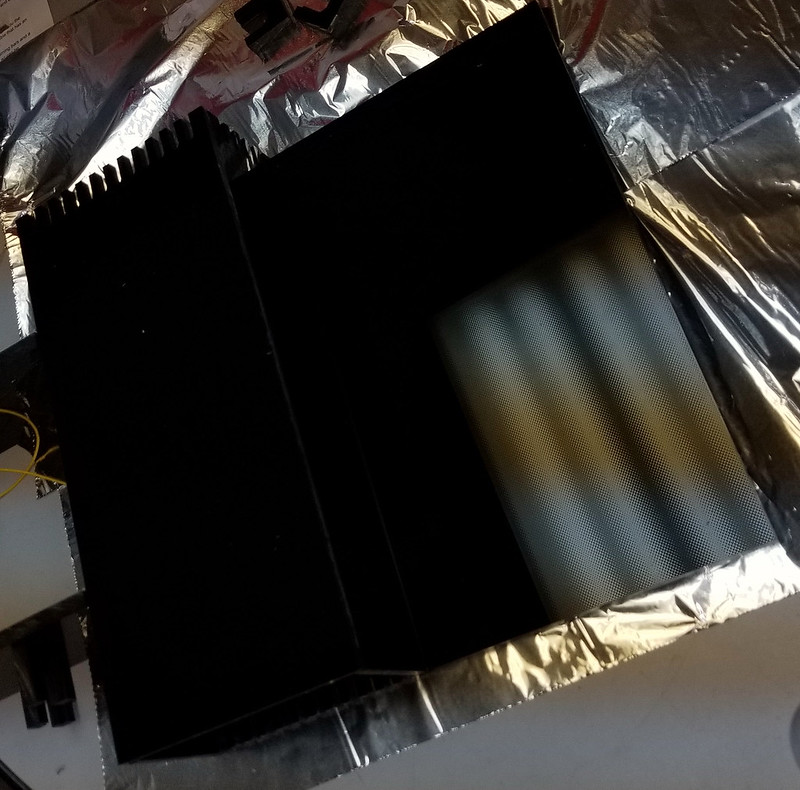
Building the BTA Propagation System (Part 2)
First step today was to clean all of the tanks with white vinegar. Once squeaky clean I set them up on some cinder blocks and 2x4s so I could hammer them out in quick secession. I also won't need to move them until this is done.
I placed an insert into each tank and squared them up.  Once square I used a razor blade to notch out the trim so that the inserts could be inserted straight down. This will really simplify installation.  Now that I know where they will go I crawl under the tanks and use a sharpie marker to draw lines down the middle of the acrylic, this is how I will position the silicone application. 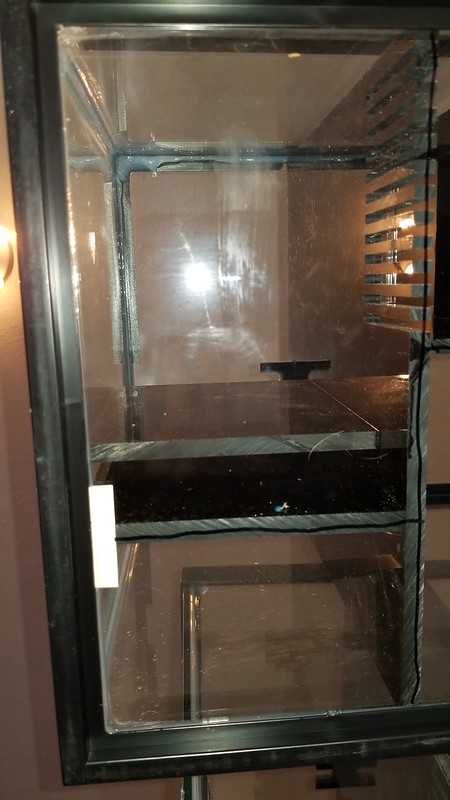 Ready to go! 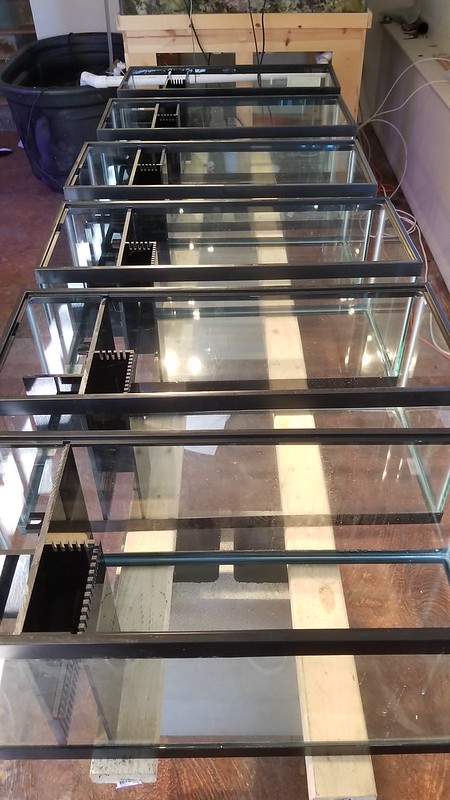 I'll be using Momentive RTV103. This is a strong black silicone adhesive. If you haven't ever used it before it is thick and skins over quickly so you need to work fast. 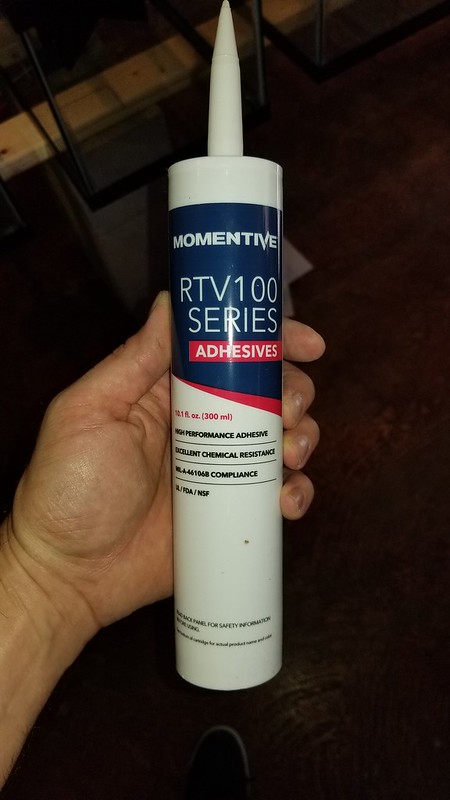 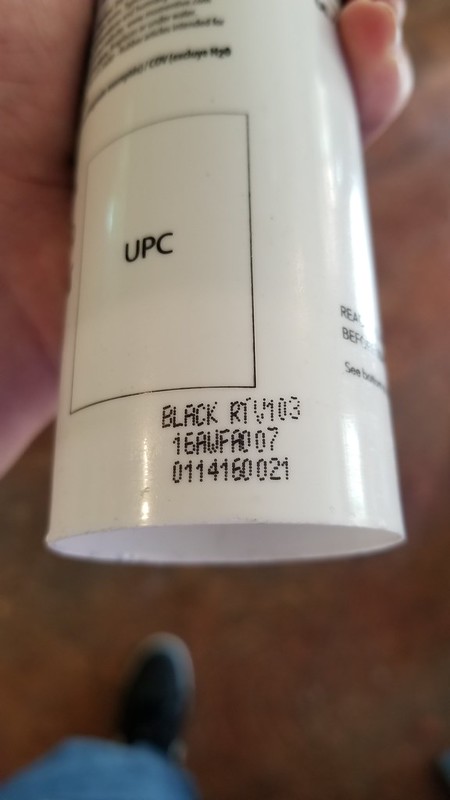 I move all of the inserts out of the way, cut the tip, and apply a bead of silicone along my lines. Each tank is done one at a time to minimize any skinning effect.  I carefully and quickly slide the insert down through the top notches and align it to the silicone. Once in place I will square it up within reason. It is best not to move it so if it's close (they all were) I left it. I wanted to see silicone squeeze out on both sides of each pane. I will trim this once it cures.  I will wait for the silicone to cure before going any further. I don't want to shift the inserts. Once cured I will do the sides via the injection method. Since this is just an insert it won't have much load on it and I am using a high end silicone. Otherwise I would recommend against the injection method.
__________________
Hobby Experience: 9200ish gallons, 26 skimmers, and a handful of Kent Scrapers. Current Tank: Vortech Powered 600G SPS Tank w/ 100gal frag tank & 100g Sump. RK2-RK10 Skimmer. ReefAngel. Radium 20k. |
|
|
|
|
10/08/2017, 04:56 PM
|
#362 |
|
Registered Member
Join Date: Mar 2011
Location: Golden, CO
Posts: 340
|
Awesome work! I need to go back and review the earlier pictures to get a sense of where these are going in the room.
I will be begging to come over and check out your setup once things are running. I think we have similar levels of insanity being built out not too far down the road from each other. |
|
|
|
|
10/08/2017, 11:18 PM
|
#363 |
|
Registered Member
Join Date: Jan 2006
Location: Westminster, CO
Posts: 17,289
|
Thanks, you're welcome to come over any time!
Everything is a serious mess right now. Hoping to reign things back in over the next 2 months. Going to have to check your system out as well 
__________________
Hobby Experience: 9200ish gallons, 26 skimmers, and a handful of Kent Scrapers. Current Tank: Vortech Powered 600G SPS Tank w/ 100gal frag tank & 100g Sump. RK2-RK10 Skimmer. ReefAngel. Radium 20k. |
|
|
|
|
10/09/2017, 07:06 AM
|
#364 |
|
Registered Member
Join Date: Dec 2012
Location: Michigan
Posts: 1,735
|
That is some really nice work! I'm impressed!
|
|
|
|
|
10/10/2017, 01:20 PM
|
#365 | |
|
Registered Member
Join Date: Jan 2006
Location: Westminster, CO
Posts: 17,289
|
Quote:
__________________
Hobby Experience: 9200ish gallons, 26 skimmers, and a handful of Kent Scrapers. Current Tank: Vortech Powered 600G SPS Tank w/ 100gal frag tank & 100g Sump. RK2-RK10 Skimmer. ReefAngel. Radium 20k. |
|
|
|
|
|
10/19/2017, 03:10 PM
|
#366 |
|
Registered Member
Join Date: Dec 2014
Location: Schenectady,NY
Posts: 165
|
I don't know what to say but WOW thx for sharing
Phil |
|
|
|
|
10/23/2017, 01:30 PM
|
#367 |
|
Registered Member
Join Date: Apr 2005
Posts: 242
|
Enjoyed the tread, awesome job.
|
|
|
|
|
10/25/2017, 03:27 PM
|
#368 | |
|
In Memoriam
Join Date: Nov 2016
Location: NY
Posts: 363
|
Quote:
Kinda looks like a store |
|
|
|
|
|
10/25/2017, 04:57 PM
|
#369 | |
|
Registered Member
Join Date: Dec 2006
Location: Denver, CO
Posts: 1,241
|
Quote:
__________________
"An aquarium is a hole between sheets of glass that the aquarist fills with money." Current Tank Info: 93g Cube |
|
|
|
|
|
10/25/2017, 08:03 PM
|
#370 | |
|
In Memoriam
Join Date: Nov 2016
Location: NY
Posts: 363
|
Quote:
Lol |
|
|
|
|
|
10/26/2017, 09:40 AM
|
#371 | |
|
Registered Member
Join Date: Apr 2012
Posts: 2,258
|
Quote:
|
|
|
|
|
|
11/01/2017, 03:53 PM
|
#372 | |||||
|
Registered Member
Join Date: Jan 2006
Location: Westminster, CO
Posts: 17,289
|
Quote:
Quote:
. Thanks for tagging along!Quote:
Quote:
Quote:

__________________
Hobby Experience: 9200ish gallons, 26 skimmers, and a handful of Kent Scrapers. Current Tank: Vortech Powered 600G SPS Tank w/ 100gal frag tank & 100g Sump. RK2-RK10 Skimmer. ReefAngel. Radium 20k. |
|||||
|
|
|
|
11/01/2017, 04:48 PM
|
#373 |
|
Registered Member
Join Date: Jan 2006
Location: Westminster, CO
Posts: 17,289
|
Building the BTA Propagation System (Part 3)
To quote Elon Musk here. My company is in "production hell" so time isn't on my side right now. Still any moment I get to spend on this I try to press on forward.
In an otherwise mostly white room I decided to give some contrast and black out the BTA system. Hopefully the end result will look as good as I think it will. Now that the sump and overflow chambers have cured in place I wanted to black out the tanks. I rolled the top, bottom, and sides with 4 coats of a Rustolium latex high gloss black paint. It came out good enough, not perfect but it should work. 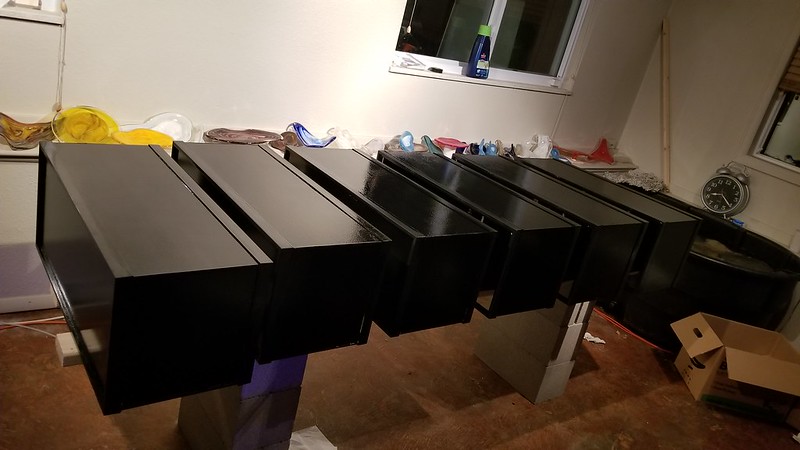 Once dry, I scraped any excess paint with a razor blade and then cleaned the front paint with vinegar. I didn't want to paint the front since it doesn't look the greatest. I decided on a high gloss vinyl, it's like $10 a roll at Michaels. 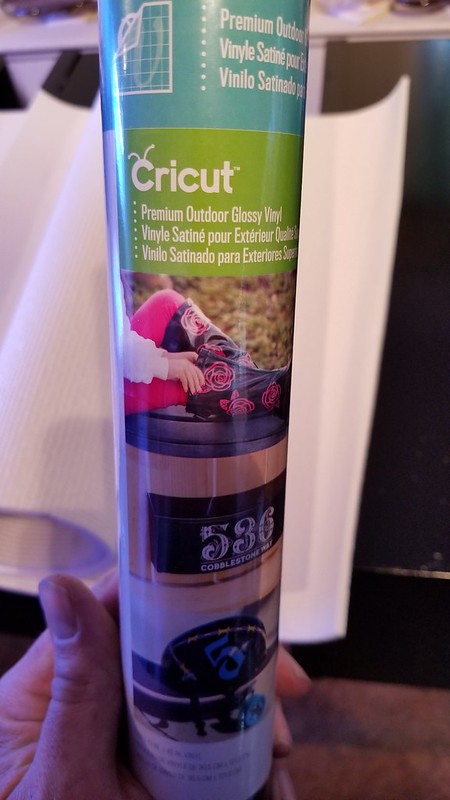 Cut your material to size, leaving it long top to bottom. 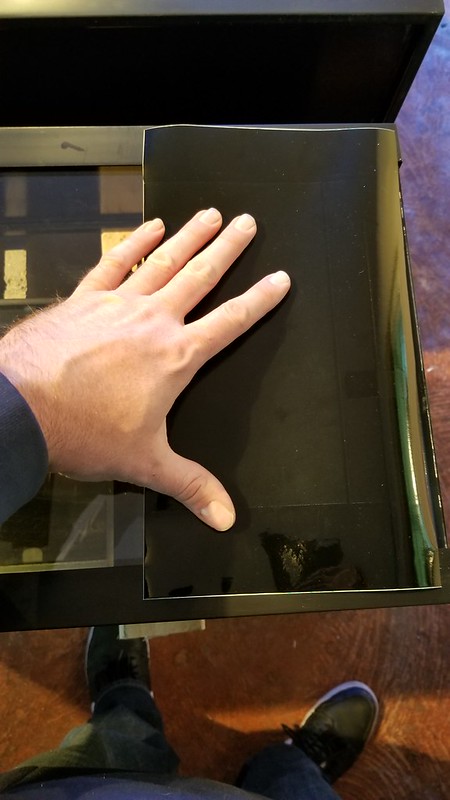 To get a bubble free application of vinyl you need to spray the surface down with some type of soapy water. I often just use windex, it works well enough. 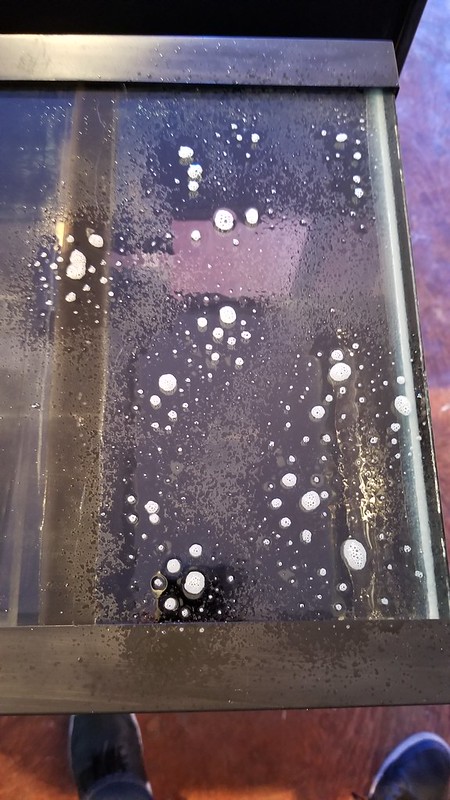 Carefully lay your vinyl out and make sure it isn't sticking anywhere. If it is you didn't use enough liquid. Position the vinyl in its final spot. Tuck the top of the vinyl underneath the trim.  We the top surface and carefully using the dull edge of a credit card (or squeegee) push the liquid underneath the vinyl out of the sides. Work slow and careful from the center out. Eventually you will get the liquid out and have a bubble free flat application. 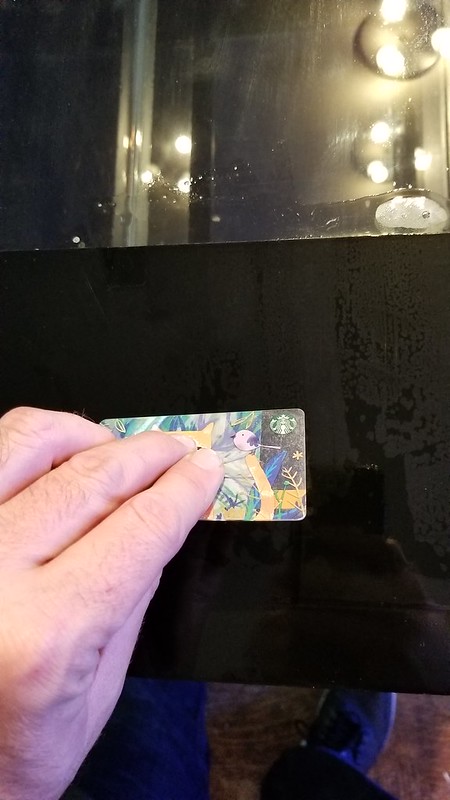 Use a sharp razor blade to trim along the bottom edge along the tank rim and then squeegee one last time. Always hold the vinyl with one hand since until it fully dries it can still slide around on the glass. 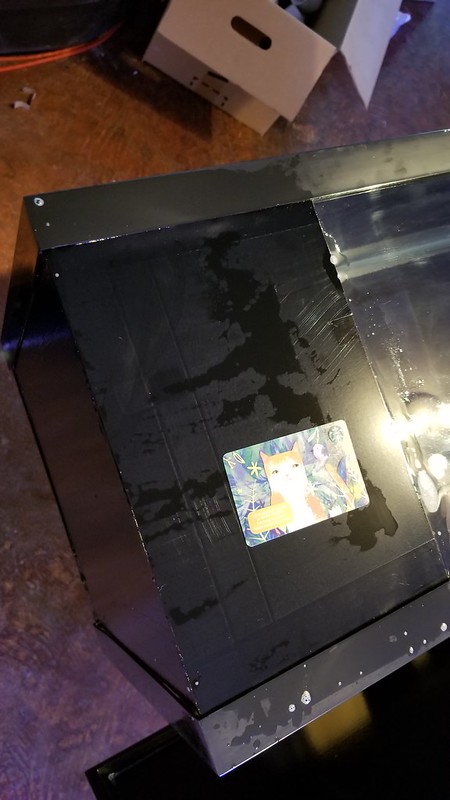 Once dried the vinyl looks good. Here is a before and 3 after pics. This was the first tank I completed and you can see where the vinyl was taped on the roll, i'm going to redo this one before I fill it. The other ones don't have those marks. 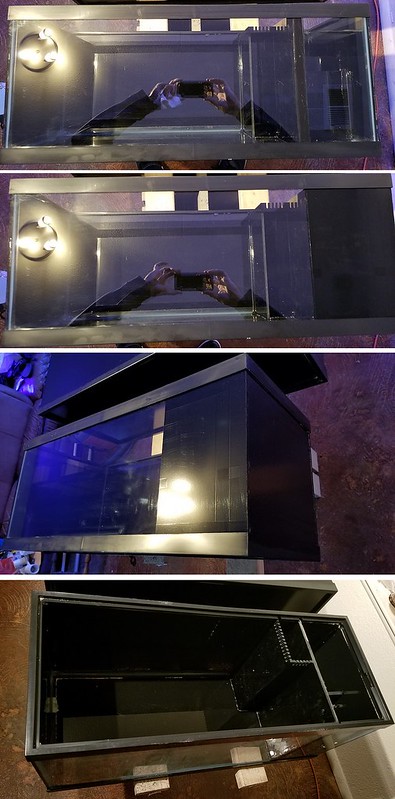 The tanks in place and most of the hardware needed for setup tossed in each one. Next step is to make sure I have everything I need, clean them one last time, and set them up one at a time. Once electrical is completed i'll put that last tile in place 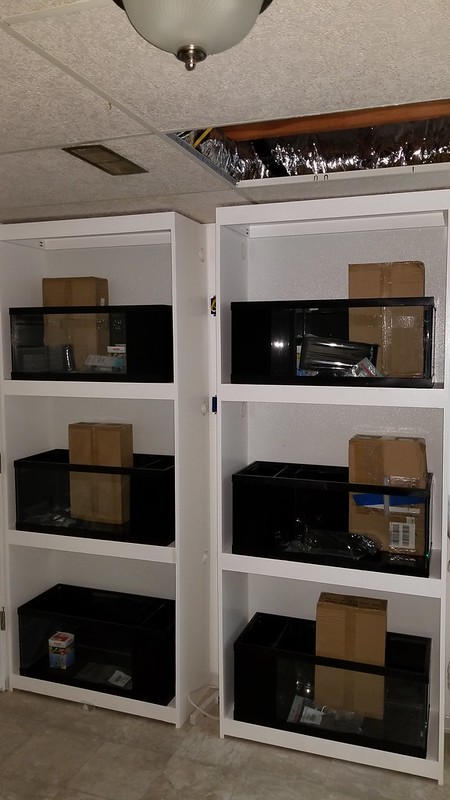 Each tank will have an SB Reeflights LED fixture, Eheim Compact 1000 return/circulation pump, 50w heater, temp controller, fan in case of overtemp, Pond Matrix filter media, a sponge in the overflow area, and an ATO that will run kalkwasser. As of now I am going bare bottom but that could change. I'll probably run bags of carbon as well but will rely on water changes for nutrient control.
__________________
Hobby Experience: 9200ish gallons, 26 skimmers, and a handful of Kent Scrapers. Current Tank: Vortech Powered 600G SPS Tank w/ 100gal frag tank & 100g Sump. RK2-RK10 Skimmer. ReefAngel. Radium 20k. Last edited by tkeracer619; 11/01/2017 at 04:58 PM. |
|
|
|
|
11/07/2017, 08:30 AM
|
#374 |
|
Registered Member
Join Date: Mar 2011
Location: Golden, CO
Posts: 340
|
Nicely done on all of those matching tanks! What kind of company do you work for that you have access to a CNC? Thats an awesome convenience.
Are all of those tanks just for breeding anemones and all the same kind or are you going to diversify? |
|
|
|
|
11/07/2017, 09:41 PM
|
#375 | |
|
Registered Member
Join Date: Jan 2006
Location: Westminster, CO
Posts: 17,289
|
Quote:
I'm an engineer at a R&D firm. The assortment of tools at my disposal is priceless  I already have a couple different BTAs but will likely be rotating them until I get a crazy selection. As far as BTAs are concerned I don't want them mixing. I think it's better that way.
__________________
Hobby Experience: 9200ish gallons, 26 skimmers, and a handful of Kent Scrapers. Current Tank: Vortech Powered 600G SPS Tank w/ 100gal frag tank & 100g Sump. RK2-RK10 Skimmer. ReefAngel. Radium 20k. |
|
|
|
|
 |
|
|


