
|
|
 12/26/2015, 04:41 PM
|
#101 |
|
Registered Member
Join Date: Mar 2014
Location: Michigan
Posts: 148
|
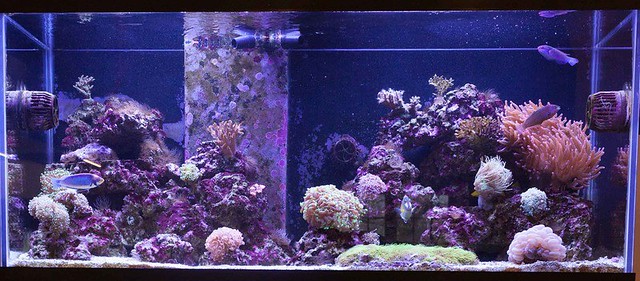
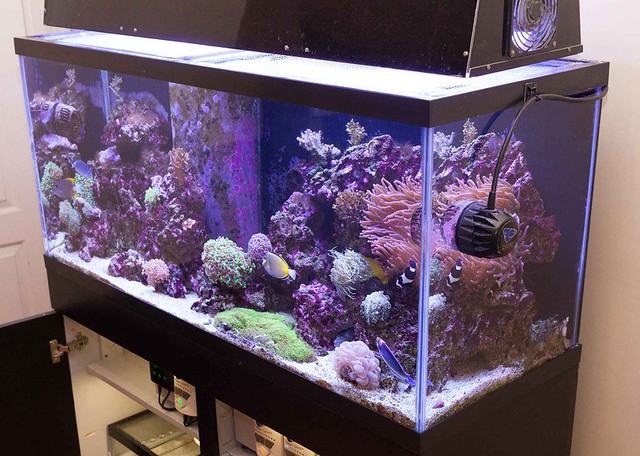
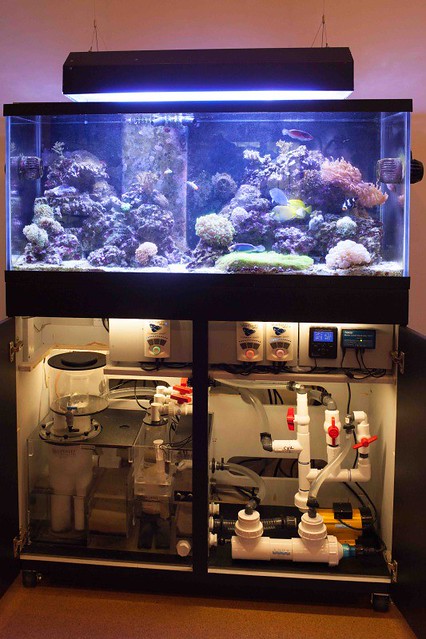
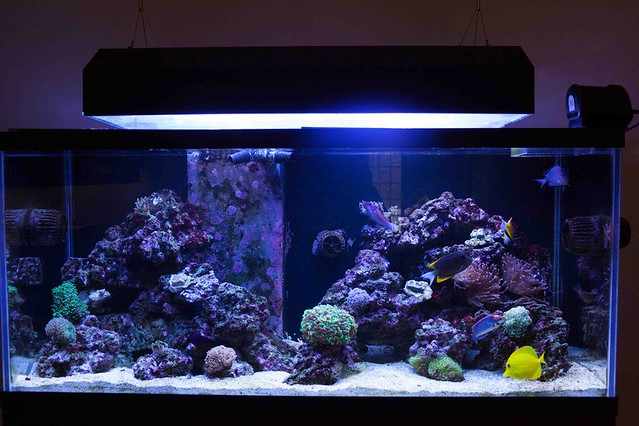
Here are few updated pictures. These are the last ones before starting version 2.0. I plan to stop Zeovit, add a refugium and replace the skimmer and sump.
Last edited by rmchoi; 12/27/2017 at 04:12 PM. |

|

|
|
12/26/2015, 11:41 PM
|
#102 |
|
Registered Member
Join Date: Dec 2015
Posts: 4
|
Great start so far! Nice to see stand that's not made strong enough to support a battle ship.
Last edited by dfgjdgyuj; 12/26/2015 at 11:46 PM. |
|
|
|
|
12/27/2015, 09:44 PM
|
#103 |
|
Registered Member
Join Date: Oct 2015
Location: Chillicothe Ohio
Posts: 468
|
Absolutely excellent job !
__________________
"But did you die !" Current Tank Info: 75g nondrilled reef. |
|
|
|
|
12/28/2015, 08:01 AM
|
#104 |
|
Registered Member
Join Date: Dec 2015
Location: Mechanicsville, MD
Posts: 11
|
Awesome build! I really like the modern look of the stand.
I had also made the same mistake of tying all of the wires together to neaten up the tank. It was such a hassle to undo everything. |
|
|
|
|
12/28/2015, 10:02 AM
|
#105 |
|
Registered Member
Join Date: Dec 2015
Location: Nebraska/Missouri
Posts: 770
|
Q```````` cxd
__________________
72x24x16 115 gallon under construction Current Tank Info: 40 gallon reef |
|
|
|
|
12/28/2015, 03:45 PM
|
#106 | ||
|
Registered Member
Join Date: Mar 2014
Location: Michigan
Posts: 148
|
Quote:
Quote:
Last edited by rmchoi; 12/28/2017 at 09:37 AM. |
||
|
|
|
|
12/28/2015, 09:16 PM
|
#107 |
|
Registered Member
Join Date: Oct 2015
Location: Chillicothe Ohio
Posts: 468
|
Tag them
__________________
"But did you die !" Current Tank Info: 75g nondrilled reef. |
|
|
|
|
12/29/2015, 08:58 AM
|
#108 |
|
Registered Member

Join Date: Apr 2002
Posts: 196
|
Did you replace the Radion's?
|
|
|
|
|
12/29/2015, 10:52 AM
|
#109 | |
|
Registered Member
Join Date: Mar 2014
Location: Michigan
Posts: 148
|
Quote:
I found you need more LEDs than what the manufacturers recommend for good light spread and to avoid shadowing. This maybe hard to believe, but I use about the same wattage for MH/T5 and I did with the LEDs. Also, I was surprised how bright and clear the MH lighting makes the tank look. 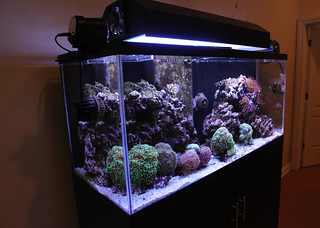
Last edited by rmchoi; 12/28/2017 at 09:38 AM. |
|
|
|
|
|
12/29/2015, 11:15 PM
|
#110 |
|
Registered Member
Join Date: Dec 2015
Posts: 4
|
Great start so far! Nice to see stand that's not made strong enough to support a battle ship.
|
|
|
|
|
01/13/2016, 06:10 PM
|
#111 |
|
Registered Member
Join Date: Sep 2011
Posts: 149
|
How did the filter sock silencers work out? I have seen royal exclusives but yours are the only DIY I have seen made.
|
|
|
|
|
01/13/2016, 09:54 PM
|
#112 |
|
Registered Member
Join Date: Mar 2011
Posts: 114
|
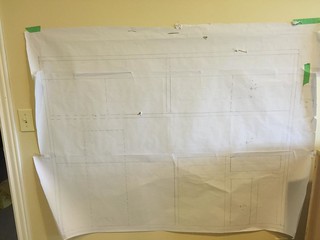
You wouldn't happen to have any plans drawn up for that stand or say a sketch up for it?
|
|
|
|
|
01/14/2016, 09:19 PM
|
#113 | ||
|
Registered Member
Join Date: Mar 2014
Location: Michigan
Posts: 148
|
Quote:
 Quote:
Last edited by rmchoi; 12/28/2017 at 09:44 AM. |
||
|
|
|
|
02/29/2016, 11:37 PM
|
#114 |
|
Registered Member
Join Date: Jan 2011
Location: Walnut Creek, near San Francisco
Posts: 39
|
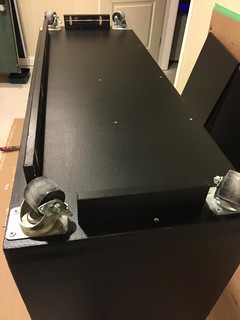
Nice setup. I put my tank on wheels but they had a much higher load rating. I don't have filter socks and am curious how well yours work and if it is worth having the splash chamber instead of just dumping the overflow directly into the sock.
Thanks for sharing. |
|
|
|
|
03/09/2016, 09:40 PM
|
#115 |
|
Registered Member

Join Date: Jul 2010
Location: some where
Posts: 559
|
I want to make your exact sump for my 75g. How do you like it and would you change anything looking back at it? Thanks.
|
|
|
|
|
03/11/2016, 08:57 AM
|
#116 | ||
|
Registered Member
Join Date: Mar 2014
Location: Michigan
Posts: 148
|
Quote:
 Filter socks are preference for sure. But when I see how much debris they trap, I can't help to think they improve water quality. Maybe make a place for socks, but only use them as needed? Quote:
Another change is to make the splash chamber bigger. Especially if you have two drains. Keeping the drain lines separate from the socks, makes changing out the socks quick and easy. That alone made it worth separating. 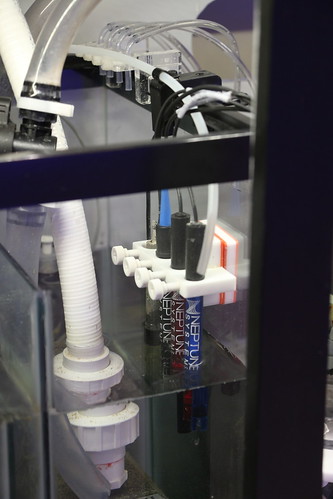
Last edited by rmchoi; 12/28/2017 at 09:13 AM. |
||
|
|
|
|
04/17/2016, 02:22 PM
|
#117 |
|
Registered Member
Join Date: Jul 2010
Location: Sacramento, CA
Posts: 87
|
Really nice design and setup. Great planning!
Many of us will benefit from your build pictures. |
|
|
|
|
09/14/2016, 06:06 PM
|
#118 |
|
Registered Member
Join Date: Jul 2015
Location: Dayton OH
Posts: 12
|
Very nice build. I really like then electrical wire planning and the white interior for enhanced visibility. By the way, what color is the back of your tank; it that a deep blue or black?
|
|
|
|
|
11/08/2016, 04:39 PM
|
#119 |
|
Registered Member
Join Date: Mar 2014
Location: Michigan
Posts: 148
|
Update
I made several changes this year. Stopped Zeovit, filter socks, and dosing. Too many things that needed to be done too often was turning into a burden. I had to rethink things long term to make it sustainable.
So I moved things in a different direction. First I switched to a Lifereef sump and skimmer. Its designed like a "turnkey" system, with all the components fit together in a compact space. Everything is accessible and easier to maintain than my previous sump and skimmer. 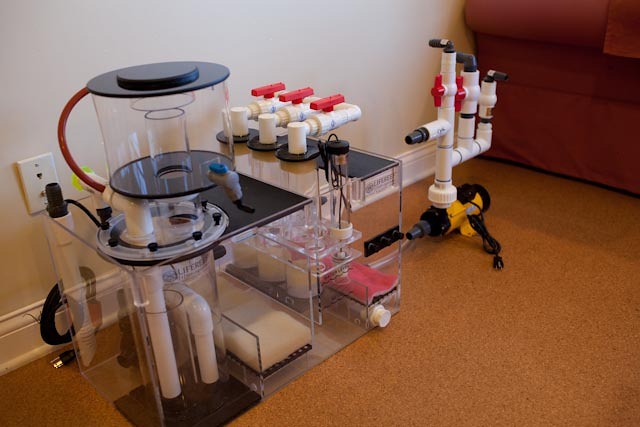 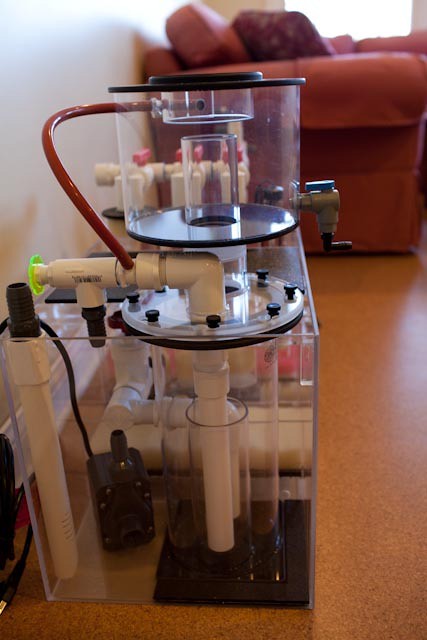 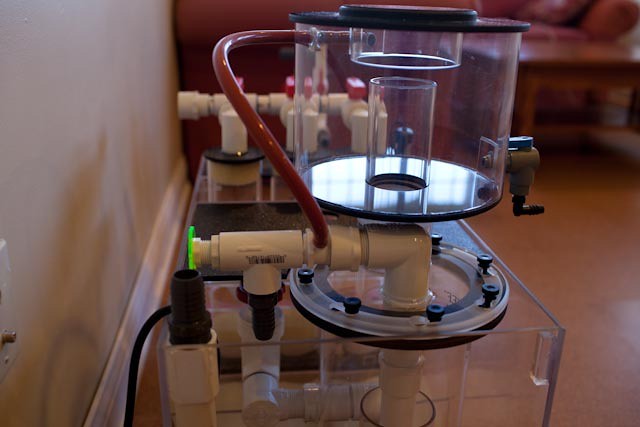
Last edited by rmchoi; 12/27/2017 at 04:06 PM. |
|
|
|
|
11/08/2016, 06:29 PM
|
#120 |
|
Registered Member
Join Date: Mar 2014
Location: Michigan
Posts: 148
|
Initial set up of Lifereef sump
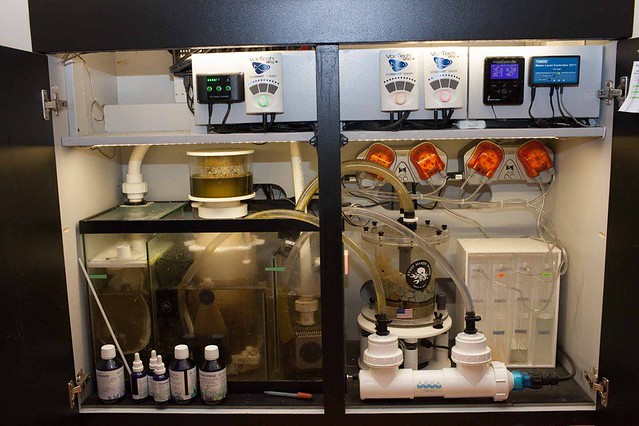
This is the change over to the Lifereef sump and skimmer.
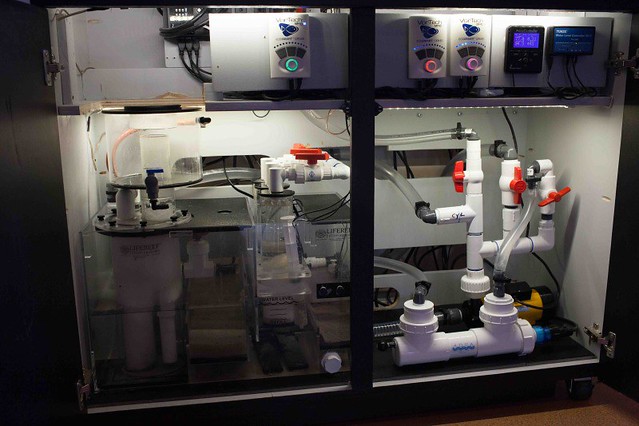 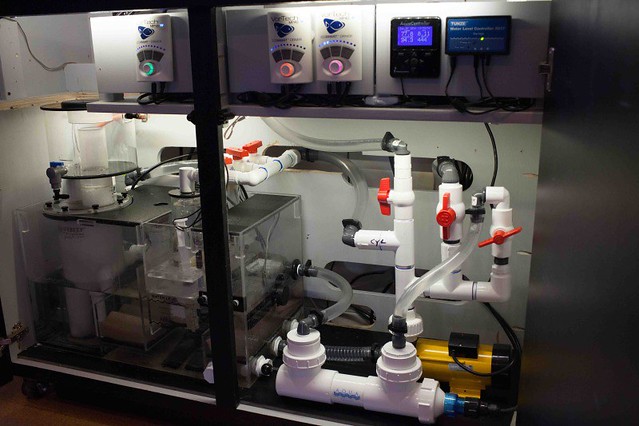 The yellow pump is a Blue Line system pump. I kept the UV sterilizer, due to outbreak of ich earlier on. 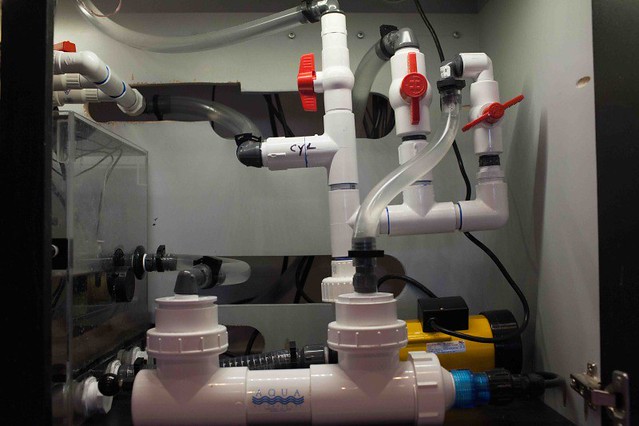 The sump is the CLF1 and skimmer is a VS3-24". The extra large skimmer cup is nice t empty less often. A MagDrive 9.5 pump runs the skimmer. I had to cut away part of the cabinet shelf to accommodate a taller skimmer. There is a valve for each of the 3 media cylinders to control flow independently. At first, the cylinders were awkward to fill and refill, but found them easier to use over time. Actually they are so simple, there is nothing to break on them. Lifereef uses is a thick yellow sponge filter and a fiber filter for mechanical filtration. About 7-10 days, rinse the sponge and toss the blue filter. This was way easier replacing and cleaning filter socks every 2-3 days. 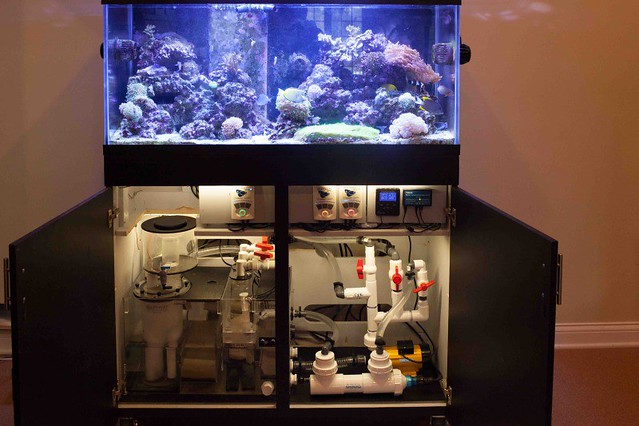
Last edited by rmchoi; 12/27/2017 at 04:19 PM. |
|
|
|
|
11/08/2016, 06:53 PM
|
#121 |
|
Registered Member
Join Date: Mar 2014
Location: Michigan
Posts: 148
|
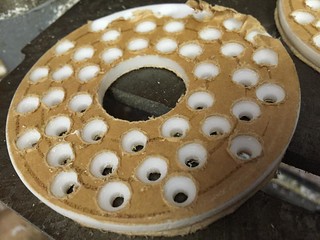
CEBU Sun & Apex Autofeeder
The Radions were great lights, but I had trouble searching for the right adjustment for color and intensity. There were too many options. I felt I had to test PAR with each adjustment. I finally decided to go with CEBU Sun metal halide/ T5/ LED combo. At least now I can rule out the lights as a source of any coral issues (other than old bulbs).
  Keeping up with feeding became an issue with changing schedules. I set up an Apex auto feeder. Now I just keep it filled, but I still enjoy watching feeding with occasional nori. I did not like watching uneaten food floating around then going into the overflow. Using a BAO feeding ring, this is how I modified and attached it to the Apex feeder. 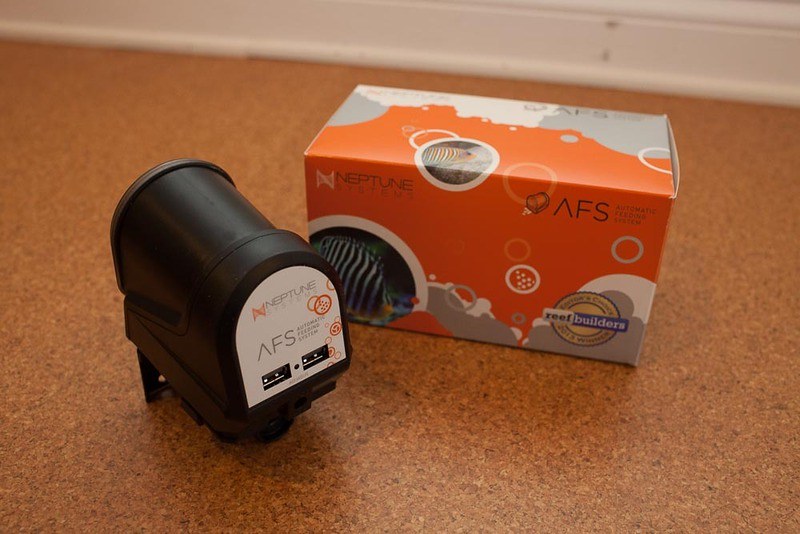 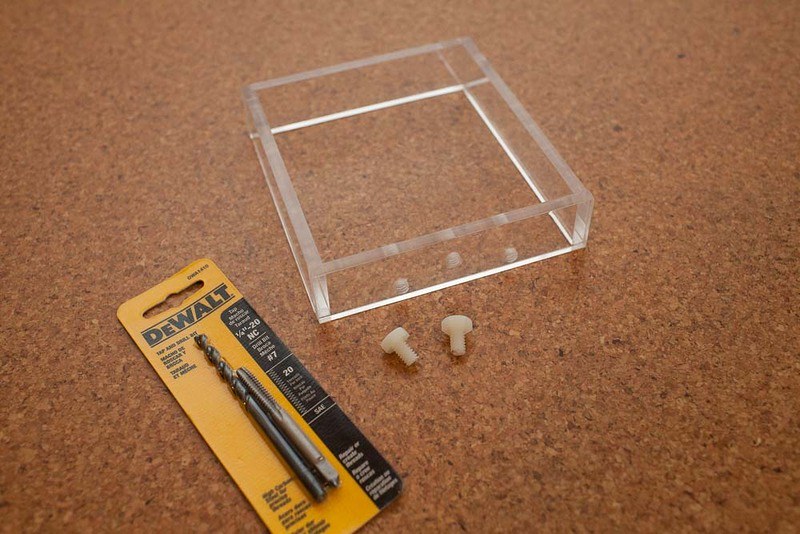 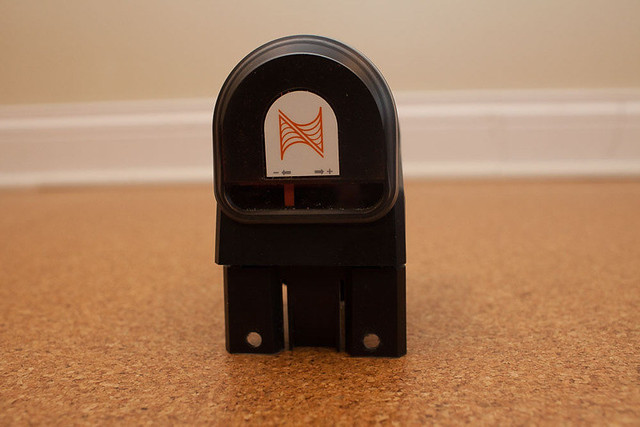 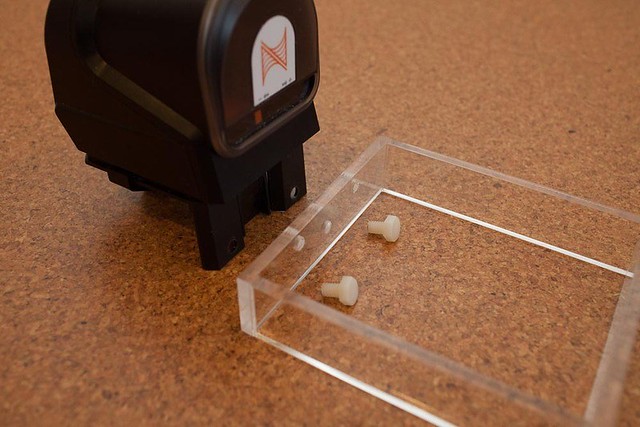 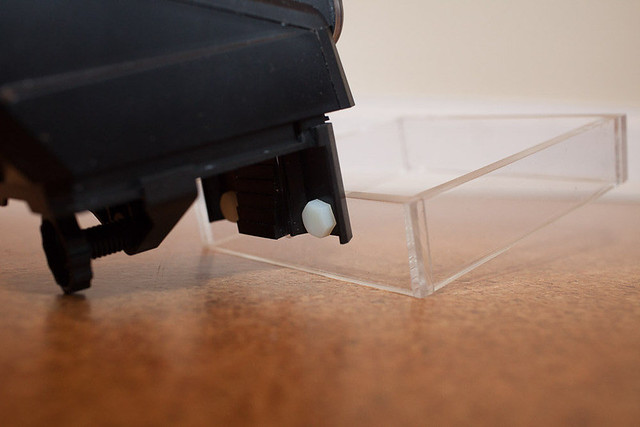 This keeps all the food in place until consumed. 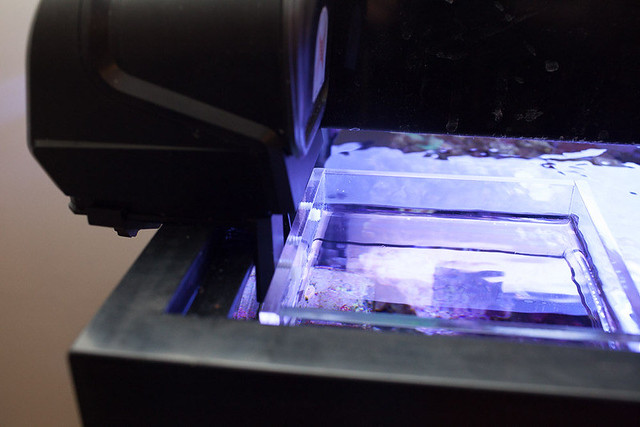 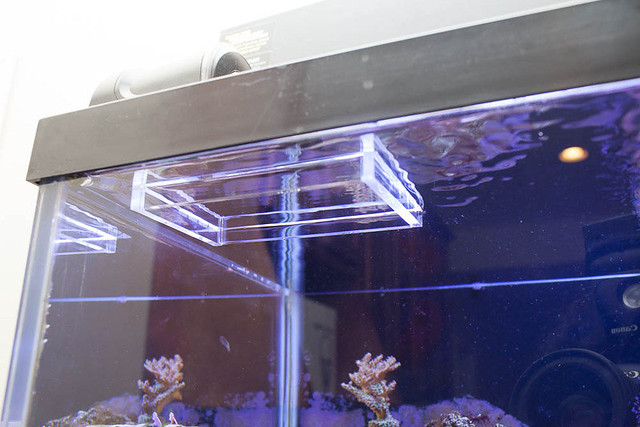 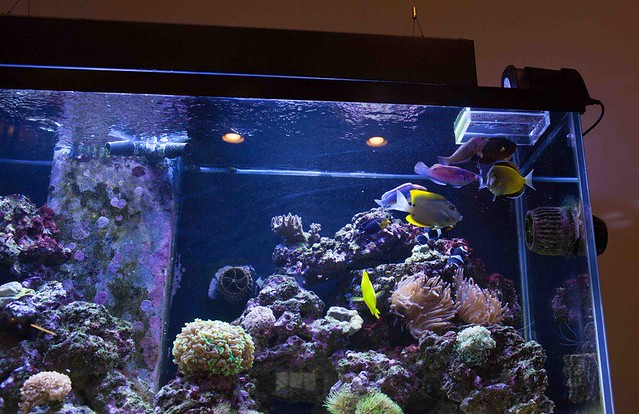
Last edited by rmchoi; 12/29/2017 at 10:33 AM. |
|
|
|
|
11/08/2016, 08:58 PM
|
#122 |
|
Registered Member
Join Date: Mar 2014
Location: Michigan
Posts: 148
|
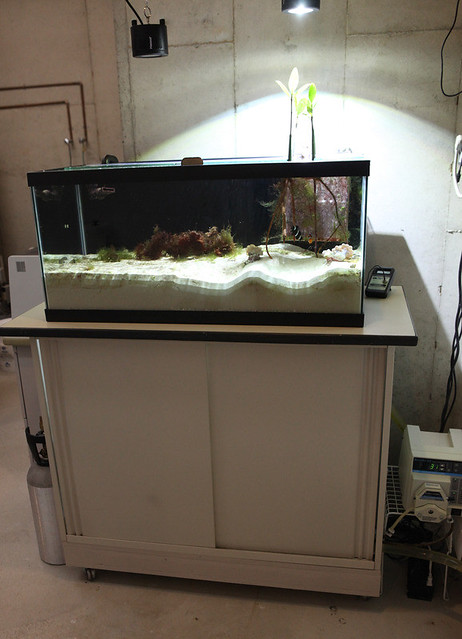
Add Deep Sand Bed Refugium with mangroves
This is one of two refugiums added to the system. Filled a 40G tank with 6" deep sand bed. Then turned the tank into a planter for 4 mangrove trees. Ultimately would like to see these grow into small mature branching trees.
It took many months, but now the deep sand bed keeps nitrates undetectable. Also in the tank are a pair of clowns, red macro algae and bubble corals. 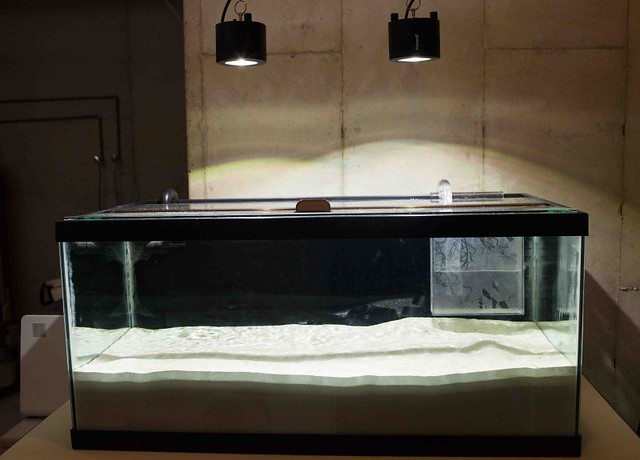 Lifereef overflow: 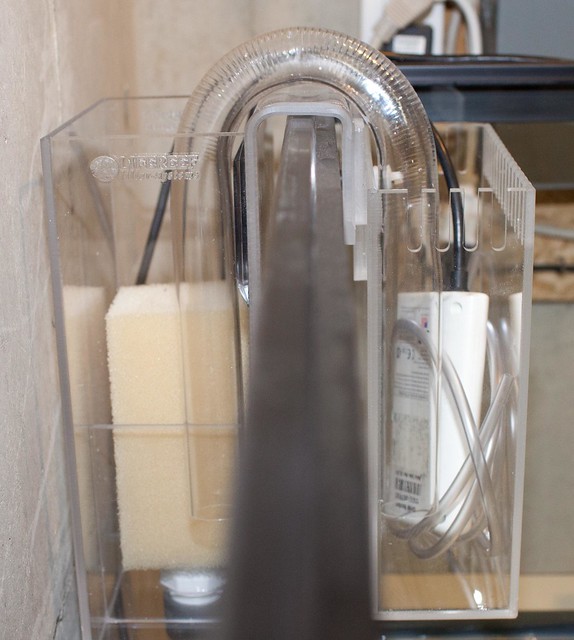 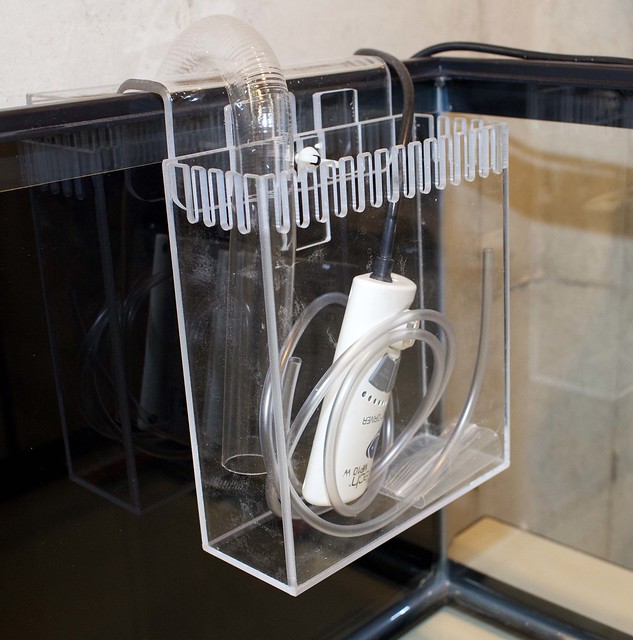 Return: 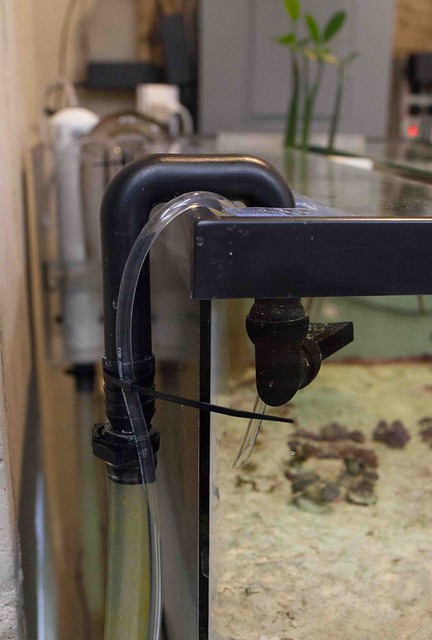 DSB with Mangroves: 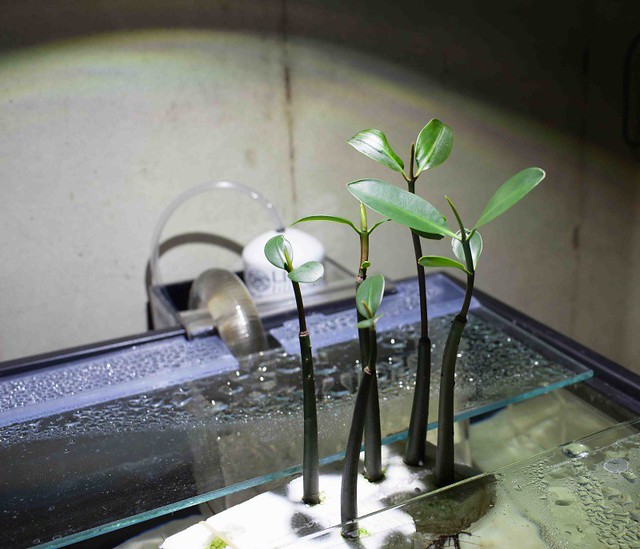 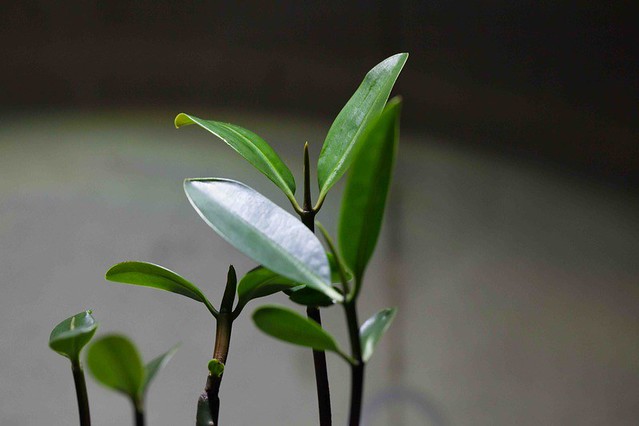 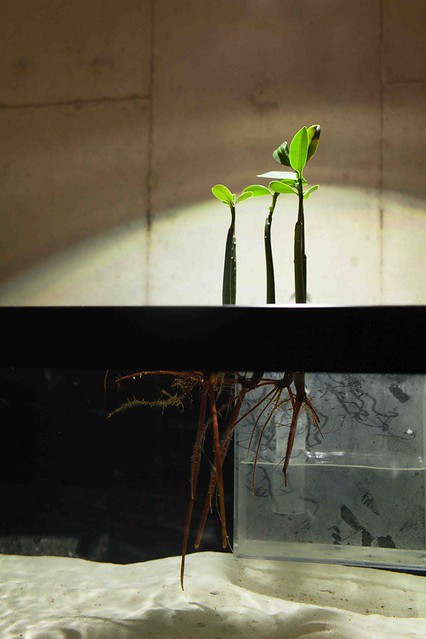 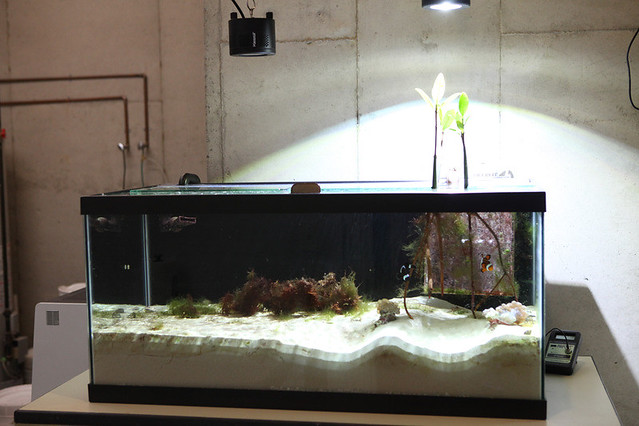 Kessel Tuna Sun LED lights and Lifereef overflow. This refugium resides in the adjacent room about 10' apart. It's supply and return lines are tied into the Lifereef sump under the display tank, expanding the water volume to the system. Last edited by rmchoi; 12/28/2017 at 08:17 AM. |
|
|
|
|
11/08/2016, 09:28 PM
|
#123 |
|
Registered Member
Join Date: Mar 2014
Location: Michigan
Posts: 148
|
Add another Refugium for algae
The second refugium added to the system is a Lifereef 24" refugium. This is designed to be placed adjacent to the sump. Due to lack of space under the display tank, this sits below the DSB refugium in the adjacent room. This too is plumbed back to the Lifereef sump.
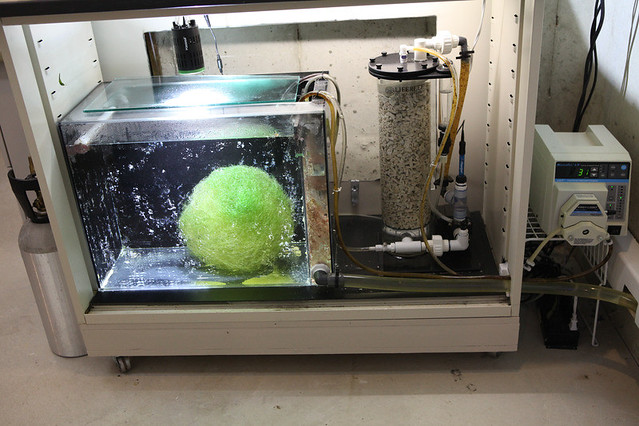
 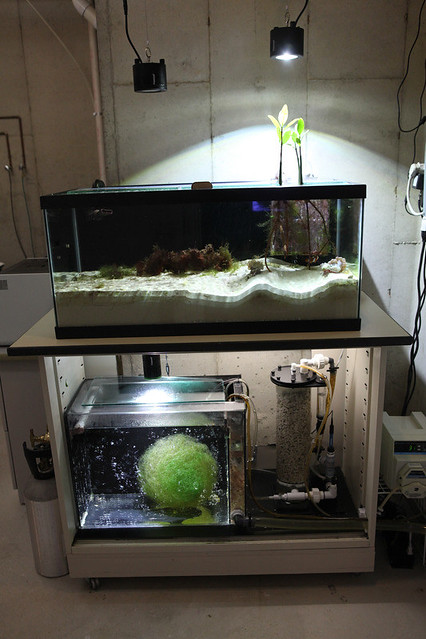 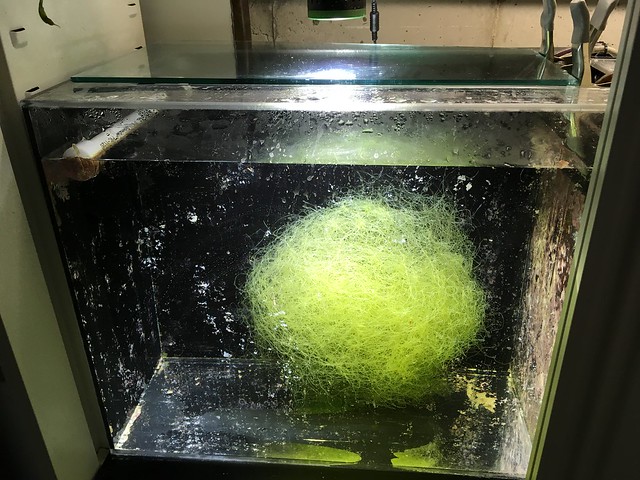 A Kessil Tuna Sun LED lights this refugium filled with chaeto macro algae. The cheat growth was slow at first, but now grows rapid. The flow in the refugium keeps the cheat ball slowly rotating, then stops spinning when it grows too big. So far, this seems to keep my phosphates down, lower than they ever have (.006-.007). I thought this would be easy phosphate management, but it does require harvesting and cleaning the fuge at least monthly. Last edited by rmchoi; 12/27/2017 at 08:41 PM. |
|
|
|
|
11/08/2016, 10:04 PM
|
#124 |
|
Registered Member
Join Date: Mar 2014
Location: Michigan
Posts: 148
|
Calcium Reactor
In lieu of dosing pump and containers, I replaced using two part with a calcium reactor. This is a Lifereef LCR2 filled with Two Little Fishes ReBorn reactor media.
  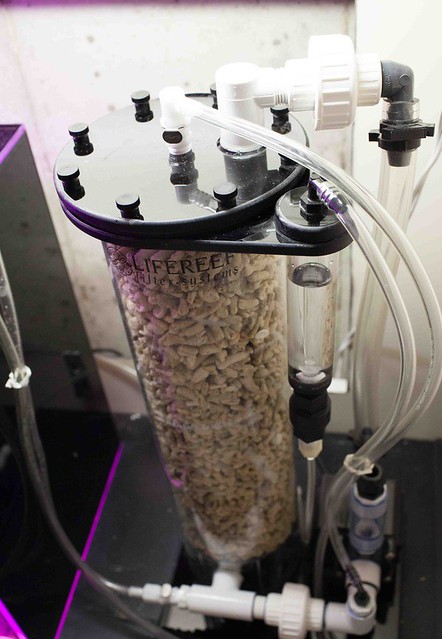 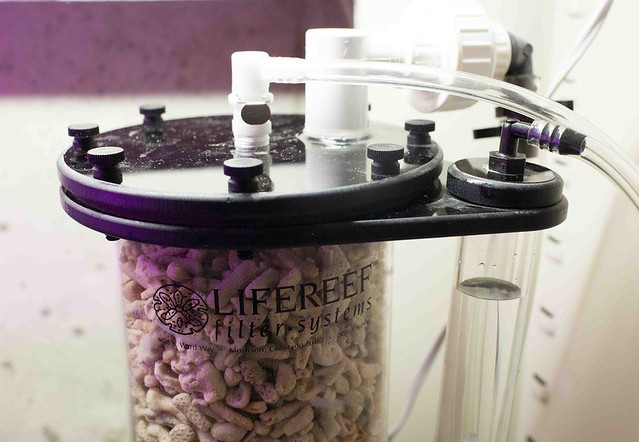 I replaced the stock CO2 Gage/Solenoid/Needle Valve Set with a Victor 2 stage CO2 regulator/Burkert solenoid/Ideal needle valve. 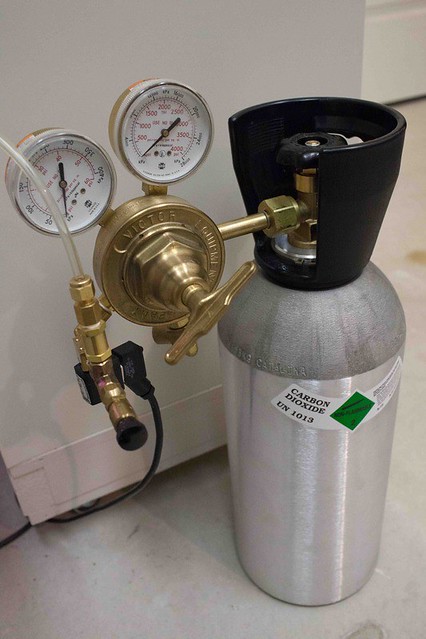 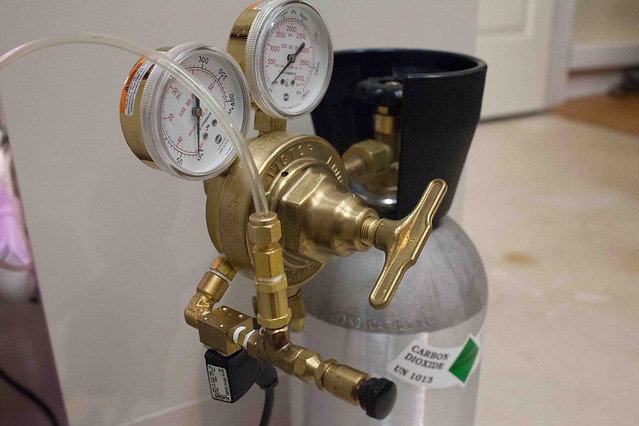 Also replaced the stock effluent valve with A Cole Parmer Masterflex peristaltic pump to regulate the effluent. 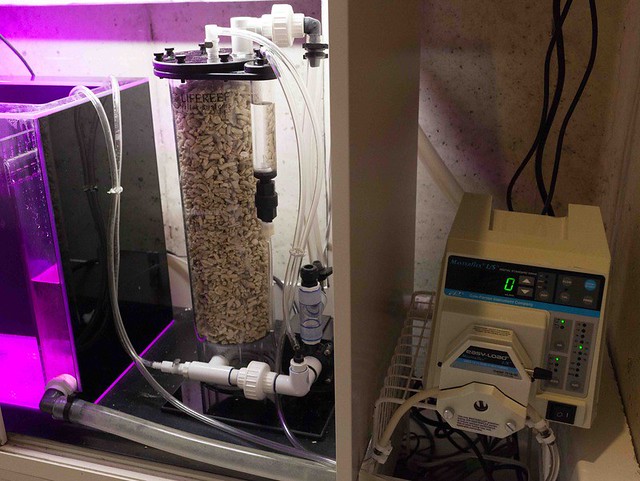 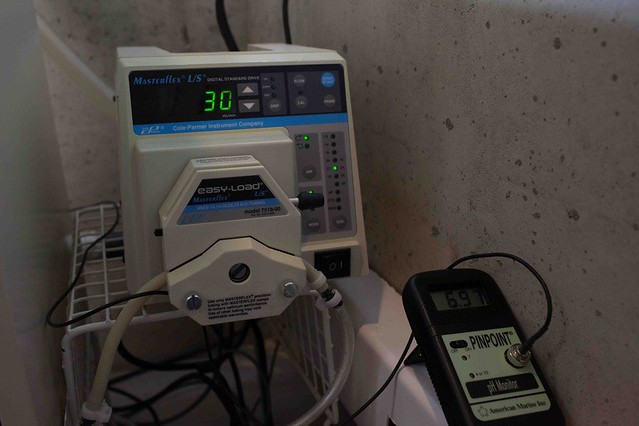 The new CO2 regulator and Masterflex pump is easy to adjust and accurate. 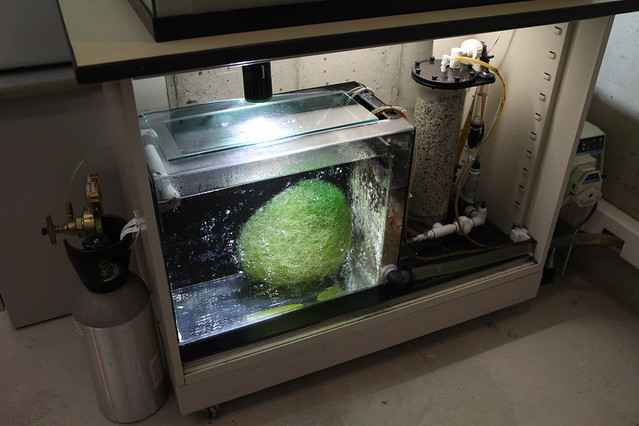
Last edited by rmchoi; 12/27/2017 at 08:53 PM. |
|
|
|
|
11/08/2016, 10:27 PM
|
#125 |
|
Registered Member
Join Date: Mar 2014
Location: Michigan
Posts: 148
|
Tank pics
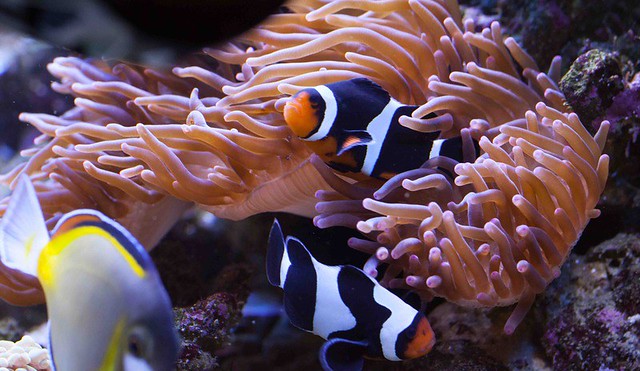
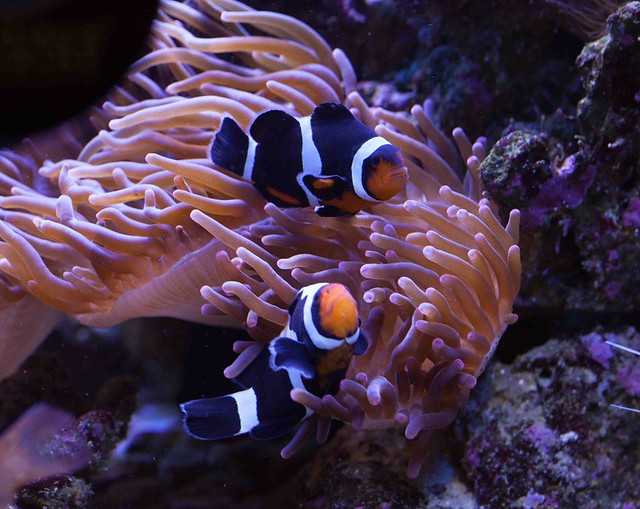
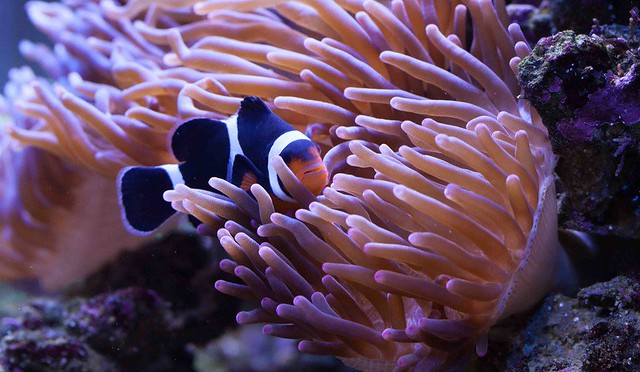
It took almost a year before the pair of clowns would use the RTBA as host. Now they wont leave it. Shortly after they started mating and lay eggs about every 2 to 2.5 weeks. There is nothing fancy about the clowns or RTBA, but still great to watch.
   Here is picture of the clown fish egg developing eyes (silver body with black eyes). [url=https://flic.kr/p/XmgcbN] 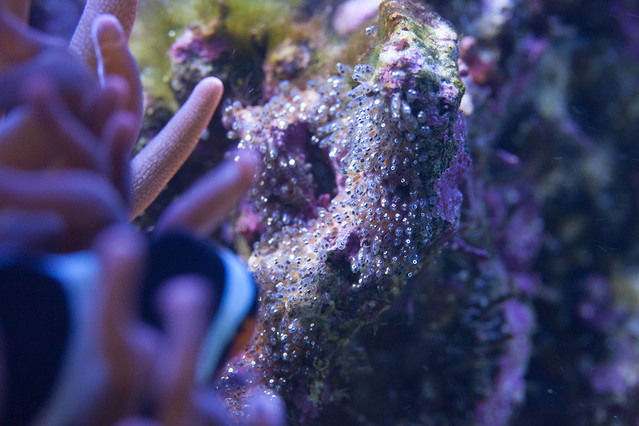 This Wanatabe angel was my favorite fish. Lost her in the last power outage. 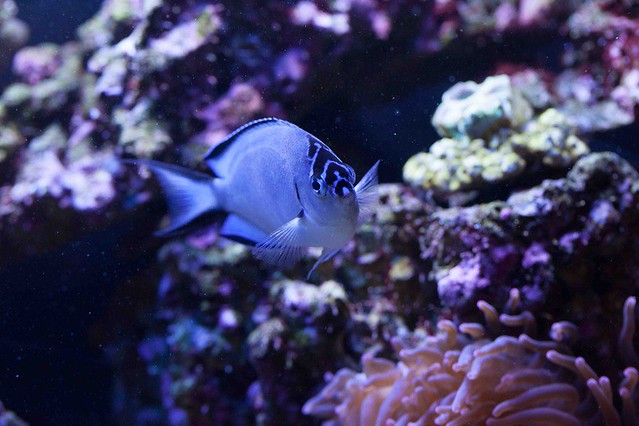
Last edited by rmchoi; 12/27/2017 at 08:57 PM. |
|
|
|
 |
|
|


