
|
|
 02/27/2011, 05:36 PM
|
#1 |
|
Registered Member
Join Date: Mar 2010
Location: Chandler, AZ
Posts: 620
|
Viewpoints A Photographic Journal of my Reef Tank
Viewpoints A Photographic Journal of my Reef Tank
My Personal Experience For as long as I can remember Ive loved aquariums. My first aquarium was a 10 gallon freshwater tank that I setup in Junior High. I followed the hobby into high school where I also found myself working at a local fish store. It was during this time that I decided to make the jump from fresh to salt water. I would eventually grow my passion for the hobby into an aquarium maintenance business that helped to supplement my income through college. After graduating, I left the business and hobby while I worked to establish a family and career. I remained inactive from the hobby for the next 14 years but would never pass up the chance to visit a local fish store or sit and stare at a tank at the doctors office. Two years ago my brother called, raving about a tiny reef tank that he had seen at a customers home. I spent the next 2 months researching nano reefs and the new techniques that had evolved in the 14 years I had been away from the hobby. I decided to reenter the hobby and try my hand at reefing with a 28 gallon Nano Cube. The tank provided me an inexpensive option to determine if my family and work schedule would support the demands of a reef tank. Long story made short, one year later my reef was featured as the Tank of the Month at Nano-Reef.com. In the 16 months that Ive been back in the hobby, Ive realized how much I enjoy the hobby and the creative outlet that reefing provides me. 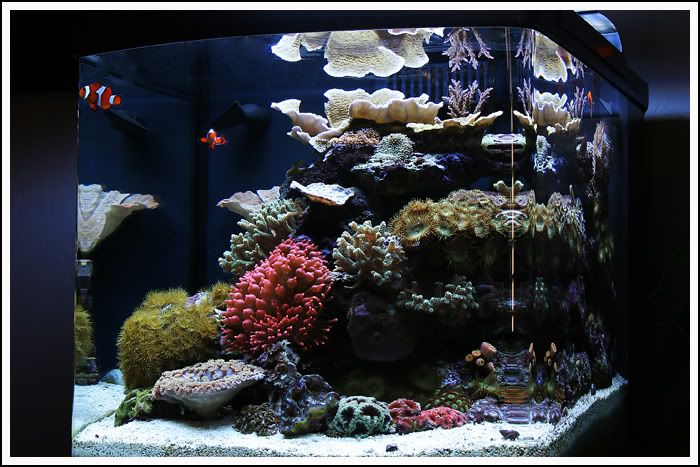 My Nano Cube at 16 Months - December 2010 TOTM at Nano-Reef.com The Next Chapter While my nano reef is great, my desire for a larger tank, better equipment and my obsession with SPS, has led me to a new adventure. Enter Viewpoints, my new reef tank in the making. The new tank will be dominated by SPS with some very select LPS and clams. Im planning on a disciplined bacteria/carbon dosing program. Ive read countless threads on both Zeovit and Vodka dosing and have decided to start with Vodka/MB7. From my research I feel like both programs offer great results but the cost and availability of product makes the Vodka/MB7 a more attractive option. An additional goal for this aquarium is to have a setup that is free from clutter. This means tight wire management, cleanly installed plumbing and a place for everything under the stand. Why Viewpoints? First and foremost, I want to create and photograph a reef that is beautiful from all viewpoints. Through my journal, I hope to pull many different viewpoints on reef keeping from the members, moderators and guests within this community. The journal to follow will be a written and photographic document of my experiences with the new aquarium. I am hopeful that many will join me in the journey, so subscribe, contribute and enjoy! Equipment - Display Tank - 48x30x18, Rimless, Starfire Aquarium - Manufactured by Cad Lights - Lighting 48 Geisemann Infinity 2x250Watt Metal Halides and 4x54Watt T5s - Stand 48x30x30 Artisan Stand Manufactured by Cad Lights - Sump 30x18x16 Acrylic Sump with a built in ATO Reservoir - Skimmer Reef Octopus 150 Pinwheel - Heater Finnex Digital 300 Watts - Return Pump Sicce Syncra 3.0 Rated at 714 GPH - Circulation Pumps (2) Vortechs - MP40W ES with Battery Backup - Controller Neptune Systems Apex Controller  My equipment has arrived 3 weeks ahead of the tank and stand, it's going to be a long 3 week wait |

|

|
|
02/27/2011, 07:58 PM
|
#2 |
|
Moved On
 Join Date: Jul 2010
Posts: 708
|
Nice tank!
|
|
|
|
|
02/27/2011, 09:18 PM
|
#3 |
|
Registered Member
Join Date: Mar 2010
Location: Chandler, AZ
Posts: 620
|
Viewpoints - Equipment Panel
Equipment Panel
As I mentioned one of my goals for this aquarium is to have a setup that is free from clutter. With all of my equipment arriving 3 weeks before the aquarium, Ive had plenty of time to work on a panel to hold and display my equipment. Once the tank and stand arrives, this panel will be mounted to the back wall inside my stand. The equipment panel should keep all of my wiring maintained and easy to work with. 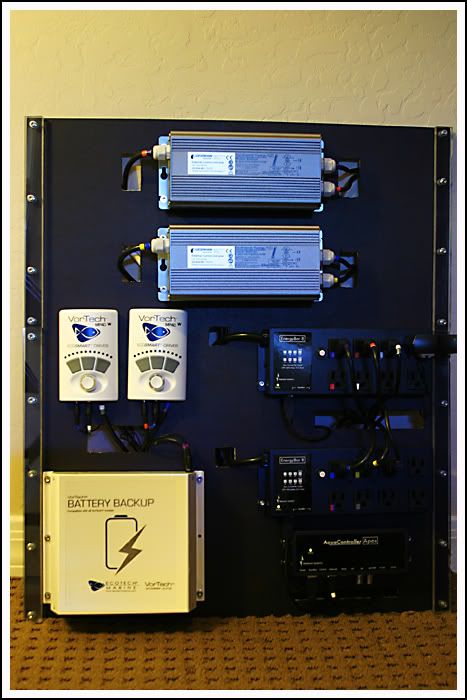 Equipment Panel - Built to Keep the Wire Management Clean and Organized The panel is made out 1/4" MDF Board from Home Depot. Cost on the board was less than $3. The board was cut to accommodate the size of components and inner dimensions of the stand. Once the board was cut to size, a single coat of black paint went on to cover the MDF and match the stand. Once the paint was dry, the equipment was laid out and holes were cut where cords needed to transition to the back of the panel. 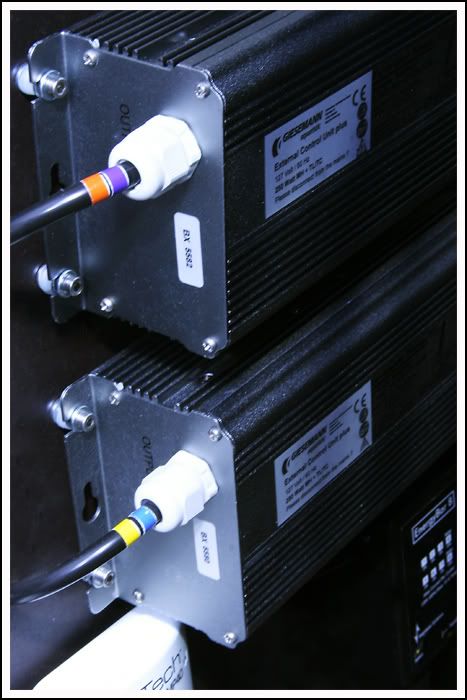 Geisemann Ballasts Mounted to the Panel - Holes Cut to Allow Cords to Transition to the Back of the Panel. I used a #7 metric bolt, 1/4" spacers and matching hardware to mount the equipment to the panel. The 1/4" spacers allow breathing room underneath the equipment. I'm hopeful that this will help with heat dispersement and allow heat to escape from underneath the individual pieces of equipment. 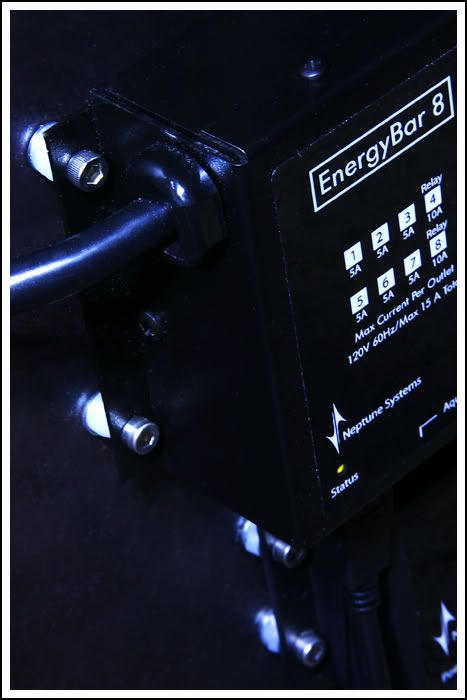 Neptune Energy Bar - Mounted to the Panel. Note 1/4" Spacers Under the Equipment and the Gap it Creates From the Panel I underestimated the total weight of the equipment, especailly the ballasts and battery backup (the weight of the battery back up is 20lbs alone). As a result of the weight, the 1/4" MDF was very flimsy and was not going to last without some modification. Rather than rework the entire board, I used some 3/8" acrylic to create a border around the outside of the panel (see first photo). The acrylic helped to solidify the panel and dresses it up a bit. While I'm happy with the end result, if I had to do it over again, I'd use at least 1/2" MDF. 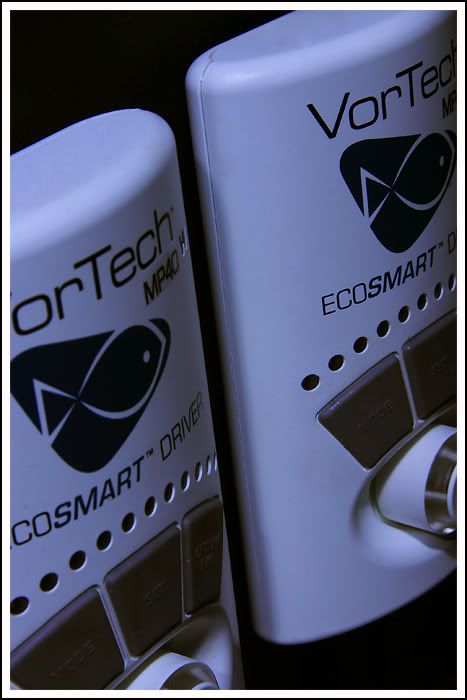 Vortech Controllers - Mounted Mid Height to the Equipment Panel to Allow Easy Adjustments The cost on the panel ended up being under $15 and took me about 5 hours to complete. Most of that time was wire tying the cords to the back of the panel. This was accomplished with zip ties and tie clips. As a finishing touch, I used colored wire labels to label each cord and the corresponding outlet on the controller. This will ensure that cords are plugged back into their programmed outlets on the controller. The colored labels can be seen throughout the photos embedded above. |
|
|
|
|
02/27/2011, 09:35 PM
|
#4 |
|
DID I SOUNDS SMRT??
Join Date: Aug 2005
Location: Ontario, CAN
Posts: 3,690
|
very impressive so far.!
__________________
--DARRYL-- Current Tank Info: 200g SPS dominant Mixed Reef |
|
|
|
|
02/27/2011, 10:16 PM
|
#5 |
|
Registered Member
Join Date: Mar 2008
Location: Dallas,TX.
Posts: 15
|
Wow! very nice , neat and clean
__________________
Paul. Current Tank Info: 140G SPS H&S A150-F2001 2 x 250W HQI 14000K 4 X 65W PC Actinic |
|
|
|
|
02/28/2011, 12:44 AM
|
#6 |
|
Registered Member
Join Date: Jan 2011
Posts: 258
|
GREAT Attention To Detail! I love it.
|
|
|
|
|
02/28/2011, 01:16 AM
|
#8 |
|
Moved On
Join Date: Jan 2011
Posts: 491
|
That's some nice equipment! Hope you like the Apex. The Apex controller is by far the best invested I made on my system.
|
|
|
|
|
02/28/2011, 04:55 PM
|
#9 | ||||||
|
Registered Member
Join Date: Mar 2010
Location: Chandler, AZ
Posts: 620
|
Viewpoints - 2/28 Responses to Feedback
Quote:
Quote:
Quote:
Quote:
Quote:
Quote:
|
||||||
|
|
|
|
03/01/2011, 12:31 AM
|
#10 |
|
Registered Member
Join Date: Mar 2010
Location: Chandler, AZ
Posts: 620
|
Viewpoints - Lighting
Lighting
MH/T5 Combo or LEDs A Difficult Decision Aside from the dimensions of the aquarium, the lighting was my most difficult decision. I had it narrowed down to the Geisemann Infiniti and Aqua Illumination. While the cost for the two lights was very comparable, the pluses and minus could not be more different. Just when I was set with LEDs, I would see another beautiful aquarium with a MH/T5 combination. Then just when I was set on MH/T5, I would flip back to the power consumption and heat concerns. I must have made this decision five different times before placing my order. I ultimately chose the Geisemann for the proven performance, finished look and extensive features. Proven Performance Throughout my research there were three different aquariums that were influential in my lighting decision. Each thread had one thing in common, the Geisemann Infiniti. It was very difficult for me to pull the trigger on LEDs knowing the success that was being had with the Infiniti. In all three aquariums, I felt like the growth and color of the SPS was superior to other fixtures that I had researched. 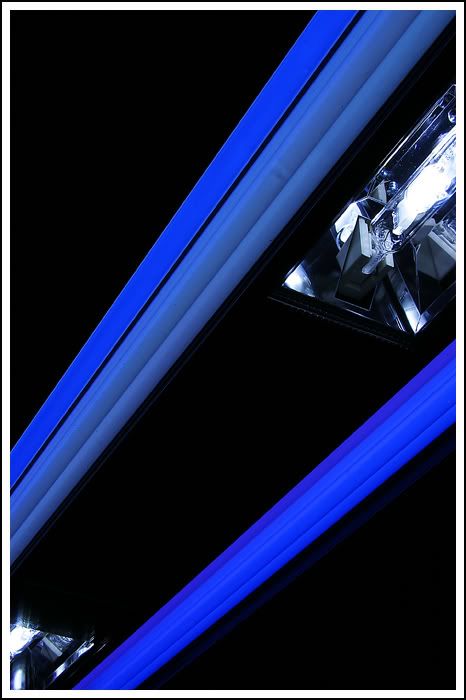 With the 2x250W MH's and 4X54W T5's, the Fixture Offers Countless Color Combinations A Finished Look My aquarium is being installed in a finished library with traditional furniture. With the décor of the room, the finish of the fixture was very important to me. In my opinion, one of the downfalls of the Aqua Illuminations is the unfinished look when mounted to the hanging kit. The Infiniti on the other hand is a beautiful lighting fixture that fits right into the room. From the sleek lines, grated metal, and soft painted finish, Geisemann did an outstanding job finishing this fixture. 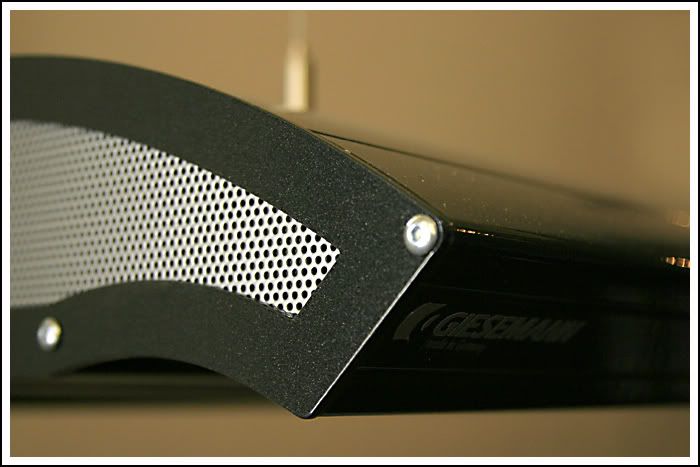 The Finishing Touches on the Infiniti are Outstanding. Geisemann's Attention to Detail is 2nd to None. Extensive Features There are a few other factors that I really liked about the Infiniti. The antiglare properties is one that Im really excited about. My tank will be rimless and the light will be mounted about 10 inches above of the aquarium. The way the Geisemann is built the T5 bulbs point inward and the MH bulbs are slightly recessed. This design keeps the light directed into the tank instead of towards those viewing the tank. I was sold on how quiet the Geisemann operates. The light disperses heat without fans so the actual light operates silently. The only noise that is put out by the Geisemann comes from the ballasts and it will not be heard once they are installed in the stand. Last, I liked that the Geisemann came standard with a hanging kit, one less expense in an already growing equipment bill. 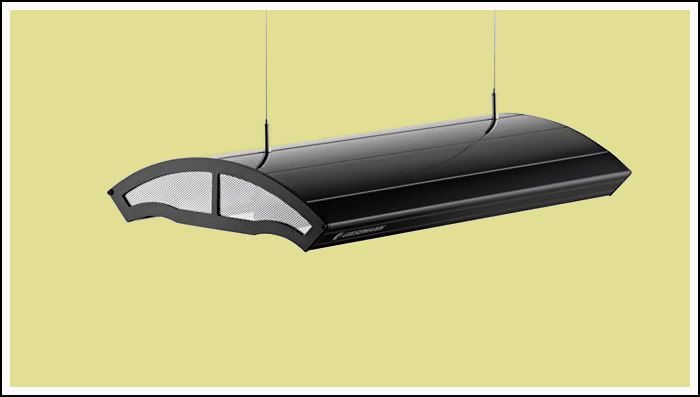 The Geisemann Comes Standard with a Hanging Kit and Operates Silently |
|
|
|
|
03/01/2011, 08:33 AM
|
#11 |
|
Registered Member
Join Date: Jun 2009
Location: Skokie
Posts: 1,345
|
nice setup

__________________
Nano Cube 24 <----- Look at pics in my albums Current Tank Info: SPS Biocube 29 |
|
|
|
|
03/01/2011, 09:45 AM
|
#12 |
|
R.C. Fraternity President
|
Good choice. I'm still on the fence with LED's as well. They have a couple more years of proof before I'm convinced.
__________________
Jimmy MASVC President Dishes are done man! Current Tank Info: 300 in progress |
|
|
|
|
03/01/2011, 05:39 PM
|
#13 |
|
Moved On
Join Date: Feb 2003
Location: Cavitation Bubble
Posts: 776
|
Looks great so far Brad. The equipment panels attention to detail is inspiring, I like how you used the 1/4" spacers and color coded the wires. Not to mention the strategic placement of the ballasts, at the top of the panel, in order to dissipate heat upwards away from all the other components. This is sure to be a killer system, look forward to seeing it
|
|
|
|
|
03/02/2011, 12:25 AM
|
#14 | |||
|
Registered Member
Join Date: Mar 2010
Location: Chandler, AZ
Posts: 620
|
Quote:
Quote:
Quote:
|
|||
|
|
|
|
03/02/2011, 11:37 AM
|
#15 |
|
Ultimate Reefer
Join Date: Apr 2002
Location: London, UK
Posts: 8,540
|
Hi there dude, I'm sure we've posted on each others thread on Nano.reef before. Nice seeing you here.
This is a very nice thread. Subscribed. That panel looks awesome. You really put a lot of thought into all of this. I just know that your tank will be something really great. Good luck with the build and keep us posted regularly. Will be keenly following this build. 
|
|
|
|
|
03/02/2011, 12:18 PM
|
#16 |
|
Registered Member
Join Date: May 2007
Location: Rio - Brazil
Posts: 510
|
Enjoy your thread, specially your devotion to detalis. Will follow it closer.
wish you the best
__________________
- The Little White Ocean - Current Tank Info: 45G Rimless & SPS |
|
|
|
|
03/02/2011, 12:31 PM
|
#17 |
|
Registered Member
Join Date: Mar 2009
Location: Here
Posts: 521
|
Awesome thread! I’m very, very impressed.
__________________
He who knows does not speak, He who speaks does not know Current Tank Info: Old tanks: 37gal mixed, 57 gal mixed, 120 sps. Current tank 18”x18”x18” rimless in the works. |
|
|
|
|
03/02/2011, 12:38 PM
|
#18 |
|
Registered Member
Join Date: Jan 2005
Location: Brooklyn, NY
Posts: 450
|
wow, very clean and professional look...
|
|
|
|
|
03/02/2011, 01:37 PM
|
#19 |
|
Registered Member
Join Date: Oct 2004
Location: New Zealand
Posts: 253
|
Unreal start, cant wait to see the rest of it!
|
|
|
|
|
03/02/2011, 01:54 PM
|
#20 |
|
R.C. Fraternity President
|
Looks like you set the bar pretty high and have a lot of readers following along. I'm pretty confident that you won't let us down. I can't wait to see more progress.
__________________
Jimmy MASVC President Dishes are done man! Current Tank Info: 300 in progress |
|
|
|
|
03/02/2011, 04:25 PM
|
#21 |
|
Registered Member
Join Date: Mar 2010
Location: Chandler, AZ
Posts: 620
|
Viewpoints - Custom Sump
The Search for the Perfect Sump
Early in my research, I came across a sump at my LFS. I was immediately intrigued by it because of its size, built in refugium and integrated ATO reservoir. On the flipside, I was immediately turned off by the price of $370. From this point on, I didnt spend much time researching sumps, however, I spent a great deal of time trying to find a cheaper option that measured up to the gold standard. During my search I found several alternatives with refugiums but never one with a built in ATO reservoir. In the end, I decided to pay the premium and get the custom sump from my LFS. 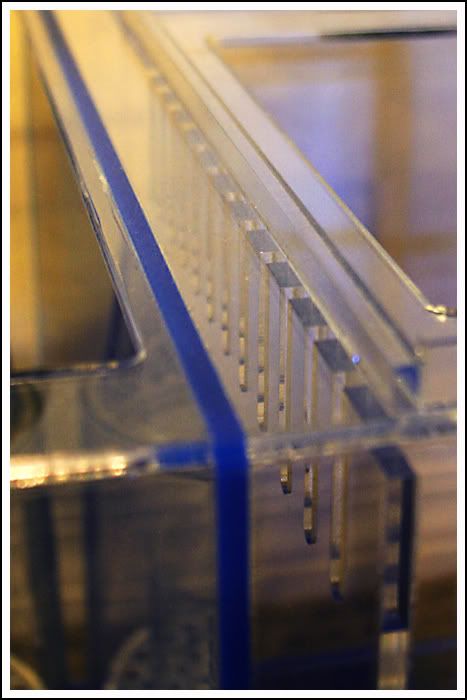 After finding this custom sump at my LFS, nothing else measured up The Details The sump measures 30x18x16 and holds 37 gallons of water when completely full. I estimate that the sump will hold 20 gallons of water when the return pump is running. The skimmer section is 17 long by 18 wide. This section of the sump will easily fit an oversized skimmer and a Zeo Reactor. The ATO reservoir will hold 6 gallons of water. With the reservoir being integrated into the sump, it only takes up an additional 6 under the stand. Without a basement or fish room for my equipment, real estate under my stand is precious. Im hopeful that the reservoir will provide me 10 to 14 days worth of top off water but with the open top, Im thinking seven is more realistic. An additional feature of the sump that initially excited me was the built in refugium. Since finding the sump, Ive decided to use a Vodka/MB7 regiment, which from my research will eliminate the need for the refugium. I will see how my Vodka/MB7 dosing goes, if successful, I will use the refugium chamber as a small frag tank. 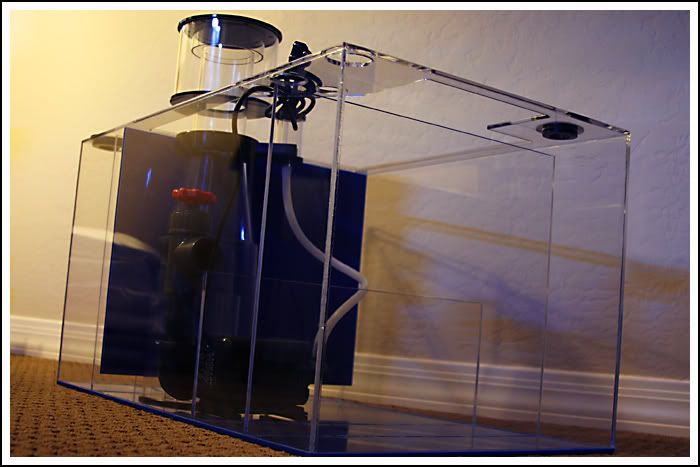 Custom Sump - Built-in Refugium, Integrated ATO Reservoir and a Huge Skimmer Section Sump Layout Water enters the sump through the inlet chamber and is forced through a baffle into the refugium. From the refugium the water is sent through vents and another baffle before it hits the skimmer/reactor section. After the water is skimmed it flows to the return chamber where it sent back up to the display. Due to the multiple baffles, micro-bubbles are supposed to be non existent with this sump. The ATO reservoir is connected to the sump and has a small opening for tubing to be ran between the reservoir and the sump. 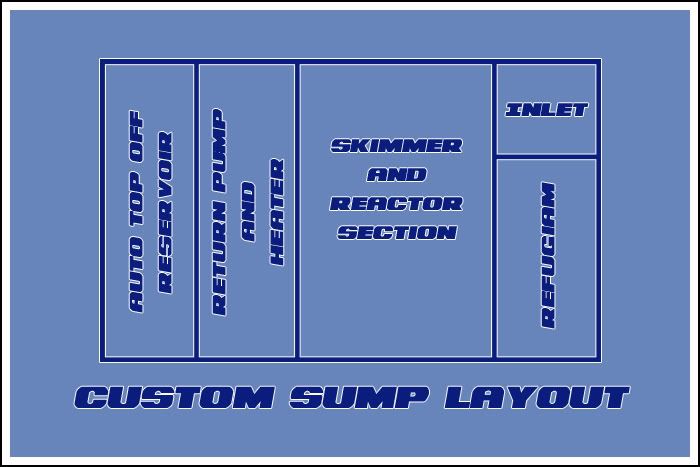 Here is a pictorial representation of how the sump is laid out.
|
|
|
|
|
03/02/2011, 05:20 PM
|
#22 |
|
Registered Member
Join Date: Mar 2009
Location: Here
Posts: 521
|
Nice sump. I like the ATO reservoir. On my 120 (4’x2’x2’) I evaporate at least 5 gallons a week (probably more like 10). Just something’s to keep in mind. Also, is there and reason you went with the octopus skimmer? Thanks.
__________________
He who knows does not speak, He who speaks does not know Current Tank Info: Old tanks: 37gal mixed, 57 gal mixed, 120 sps. Current tank 18”x18”x18” rimless in the works. |
|
|
|
|
03/02/2011, 07:21 PM
|
#23 |
|
R.C. Fraternity President
|
Acrylic sumps seems to be expensive don't they? But that is a real nice one, I like the idea of having an ATO tank incorporated into the design.
__________________
Jimmy MASVC President Dishes are done man! Current Tank Info: 300 in progress |
|
|
|
|
03/02/2011, 07:24 PM
|
#24 |
|
Registered Member
Join Date: Aug 2010
Location: Arizona
Posts: 4,627
|
Nice setup. I also live in Arizona. What LFS did you get the sump from? The best I have seen locally are from About the Reef and Aquarium Arts. You will like the NWB150 skimmer. I have the older NW110 and it is great. I want to upgrade to the new NWB for the cone neck design and bubble plate.
__________________
__________ Current Tank Info: Past reef tanks: 20H softy, 29G mixed reef, 55G mixed reef, 40B sps dominant mixed reef and 75G sps dominant mixed reef. No tank currently |
|
|
|
|
03/02/2011, 07:51 PM
|
#25 |
|
Registered Member
Join Date: Mar 2008
Location: Lake Tahoe, CA
Posts: 552
|
Really like the equipment panel. I keep trying to get mine organized like that but never find the time. Setup looks great
|
|
|
|
 |
|
|
 Similar Threads
|
||||
| Thread | Thread Starter | Forum | Replies | Last Post |
| show off your nano reef tank | Koralyn | Nano Reefs | 21 | 12/24/2010 12:41 AM |
| Can you take fake reef rock and turn it into live rock | aquariumkeeper2 | New to the Hobby | 11 | 08/04/2010 05:44 PM |
| Reef Tank Journal-death of a 125g, birth of a 150g. | thetonyage | Reef Discussion | 35 | 06/01/2010 05:45 PM |
| Sand Maintenance In Reef Tank | SchmittyG | New to the Hobby | 30 | 01/18/2010 11:28 AM |


