
|
|
 07/29/2016, 06:10 PM
|
#1 |
|
Registered Member
Join Date: Dec 2003
Location: Milwaukee, WI
Posts: 1,161
|
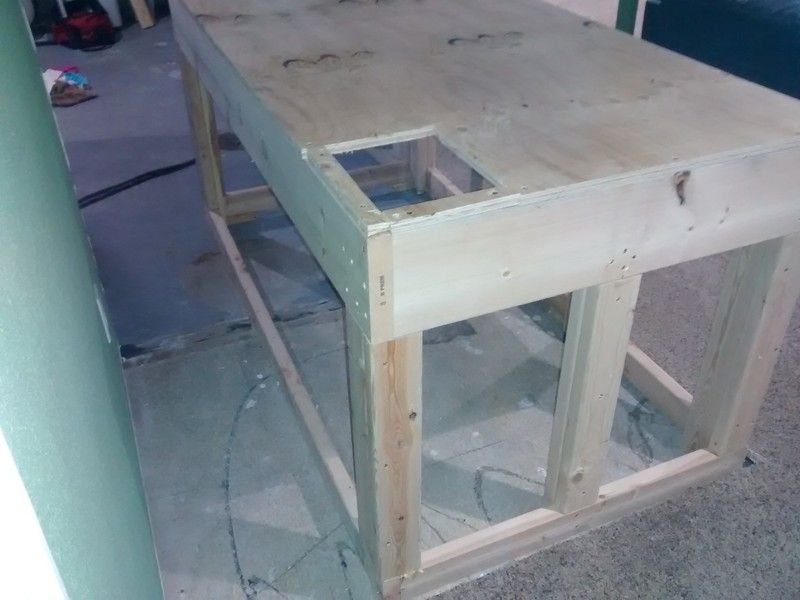
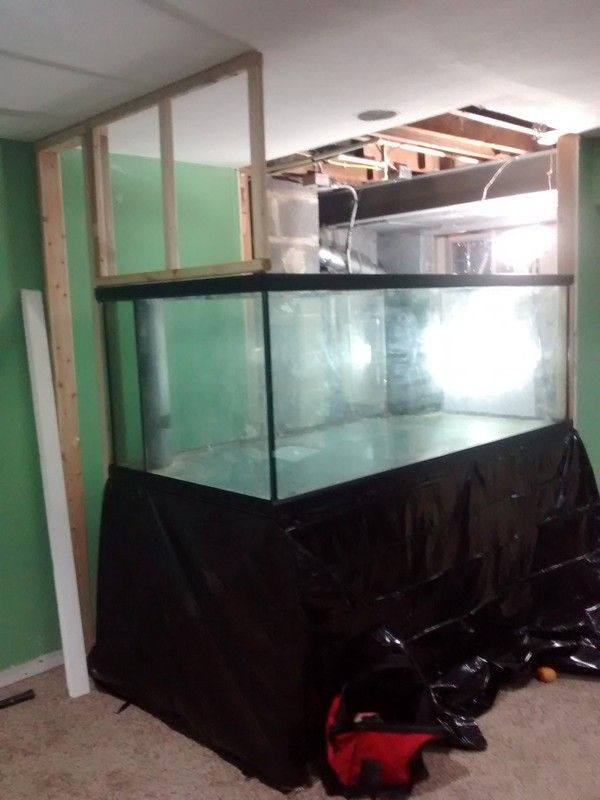
The tank partition/stand build progress
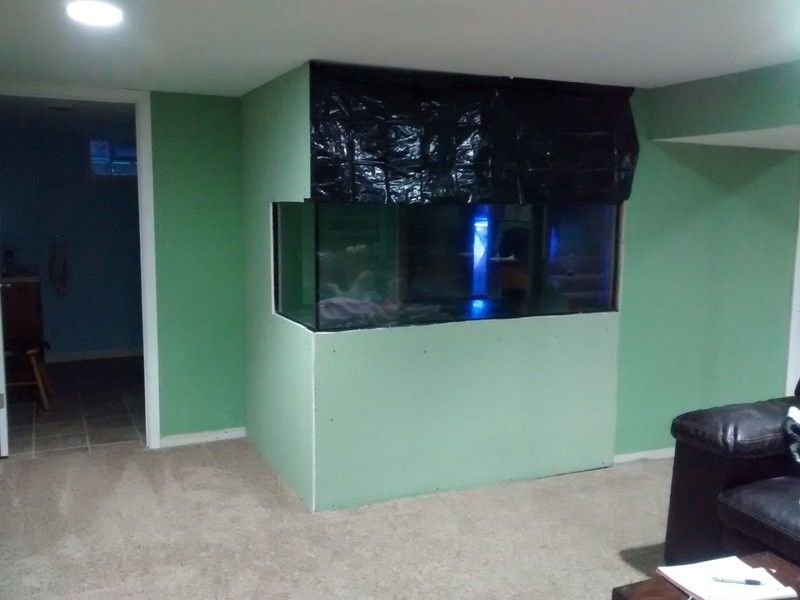 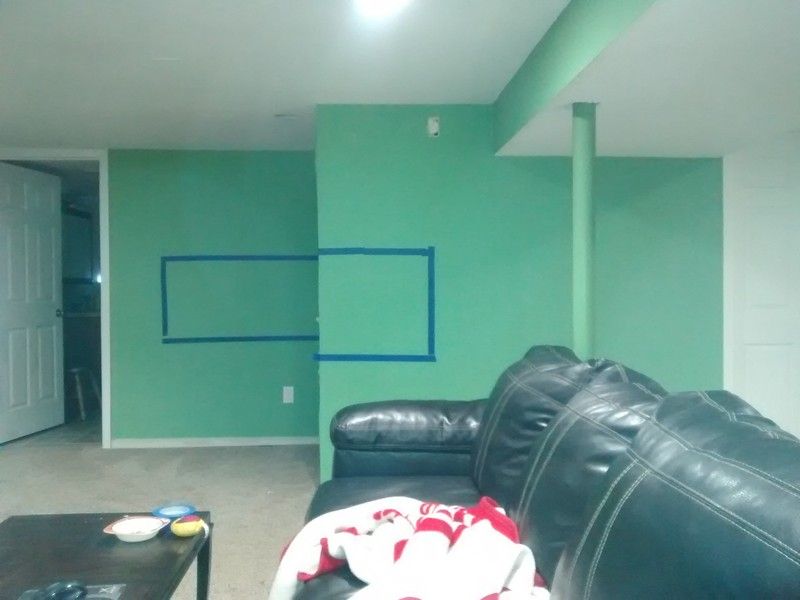 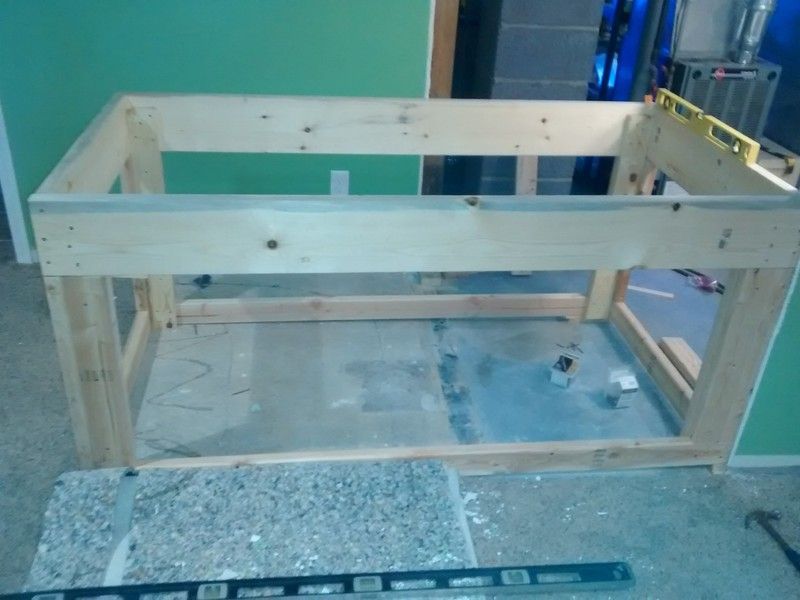 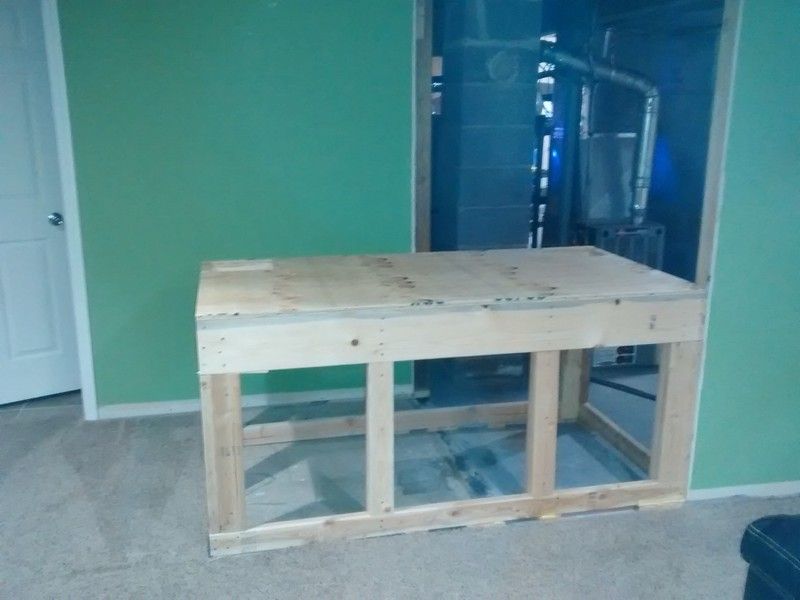 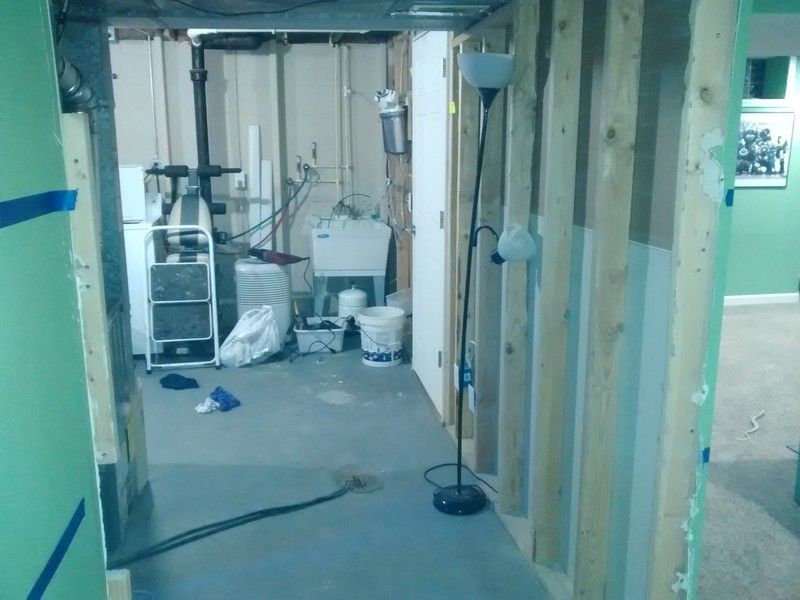  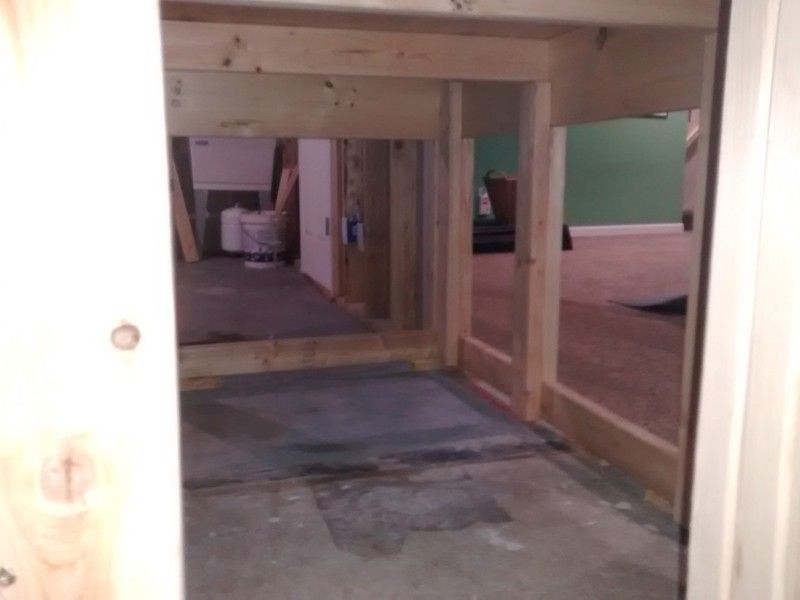  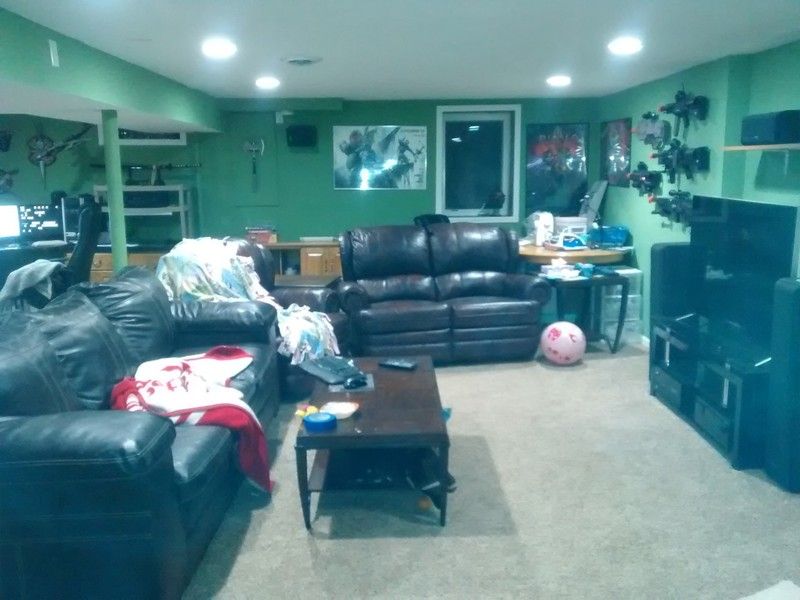 The family room/finished basement is the chosen room. Introduction: I'm an Electrical Engineer living in Milwaukee, Wisconsin, living out my dream job designing laser tag gear for a living! Basically get paid to go in every day and build cool stuff, show said stuff to my boss, watch him lose his mind, then figure out when we can find the time/funds to add it to the production line. We are designing the world's first high end outdoor laser tag gun aimed at the consumer market, it pairs with your smart phone to play high end games, similar to airsoft/paintball but better. I'm also married with a wife, 3 year old daughter and another kid on the way in January. History: Zachtos 240G reef - my old SPS reef that I ran 2007-2014 (google 'zachtos reef') I've had a 240G reef before, so I'm a veteran (and the wife has already dealt with the addiction). I had to tear it down 2 years back to accept this job in another state, but I feel stable enough now to start again. In general, I like to DIY and experiment with many of the new trends in the hobby. I also work hard to keep costs down through energy consumption, full product life cycle analysis and bulk purchasing research. Such as buying carbon in 50 pound bags from a water purifcation plant, using driveway salts to supplement water chemistry, building my own LEDs to keep energy/heat/build costs low, heating with natural gas to keep energy costs low, insulating tanks to keep heat contained and fighting the ongoing battle with humidity control. I enjoy the system design phase more than the coral trimming phase. I am partial to SPS coral, tangs and some angel fish. I like running low nutrient for bright colors and planning for the future. Plans: This time I will improve the design to be more energy efficient, quieter and easier for maintenance. I will try my best to quarantine and have a proper frag system. I am spending money on certain items when I need high quality engineering, and am willing to DIY in other areas where I see room for improvement based on market products. I am still buying some items used to meet the budget of $12,500 (which is already kreeping to $14,000 to date, working to reduce) Tank
Filtration
Flow
Lighting
Controllers
Heating/Cooling
Plumbing
Quarantine
Tank Room
Livestock plans:
Summary The theme of the build is to minimize the tank room this time. Less open bodies of water so I won't have humidity issues. Powerful skimmer this time, instead of a DIY one that I always wondered about. Algae turf scrubber to pickup remaining nitrate/phosphate with natrual nutrient export technique. No expensive chemical filtration like GFO, just carbon in bulk for cheap water clarity. Energy efficiency with LED and gas water heating. I really wanted to try a bean/herbie silent overflow this time, but It's not compatible with drain feeding a turf scrubber because of level inconsistency. I have a feeling the skimmer will be fairly loud anyway, so why bother? The return pumps and flow pumps are all quiet, so should only hear the trickle from the durso and skimmer suck/hissing. I am hoping gravity can do my water changes via ball valve in bottom of sump and then refill via valve from an elevated 55G barrel full of SW, just run out a 25' pool hose as needed. I want to avoid a calcium reactor this time, and try for pure 3 part dosing. I got tired of changing CaReactor media, O-rings, pumps, PH probes/controllers, solenoids, CO2 refills... I think the overall cost for 3 part will be cheaper, and more reliable, but I will find out, and I arleady got 50 lbs of MagFlake - deadsea, Epsom Salt, SodaAsh/pool, CaCl prestone driveway heat.
__________________
300G SPS reef build in progress Current Tank Info: 300G reef under construction |

|

|
|
07/29/2016, 06:19 PM
|
#2 |
|
Registered Member
Join Date: Dec 2003
Location: Milwaukee, WI
Posts: 1,161
|
////////////////
Tank Move 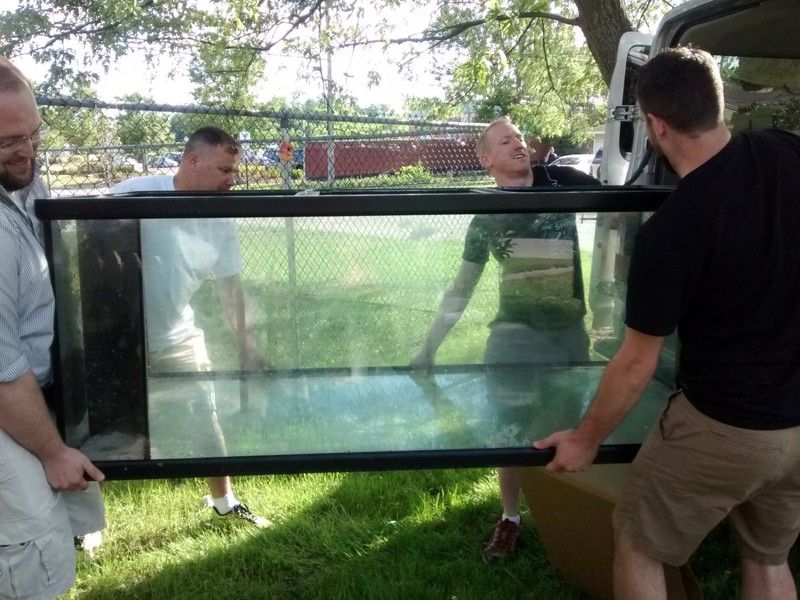  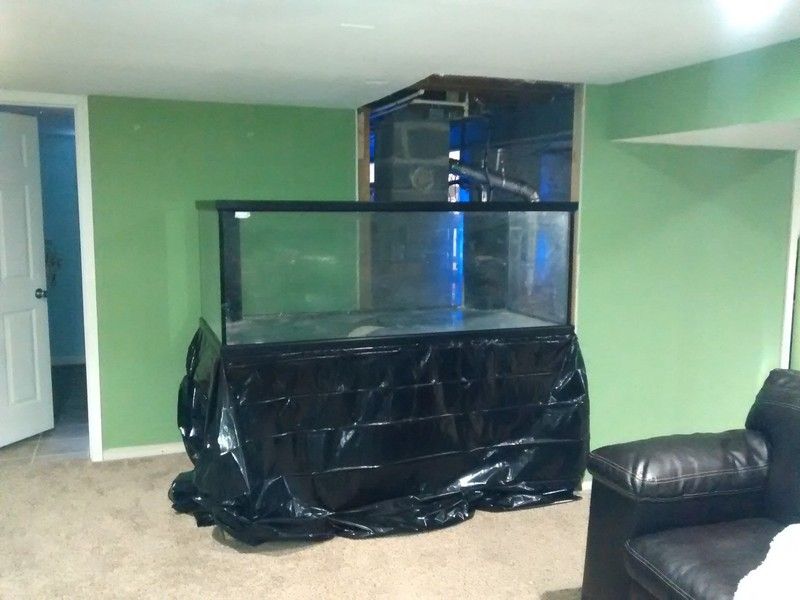 Barebotton starboard/HDPE 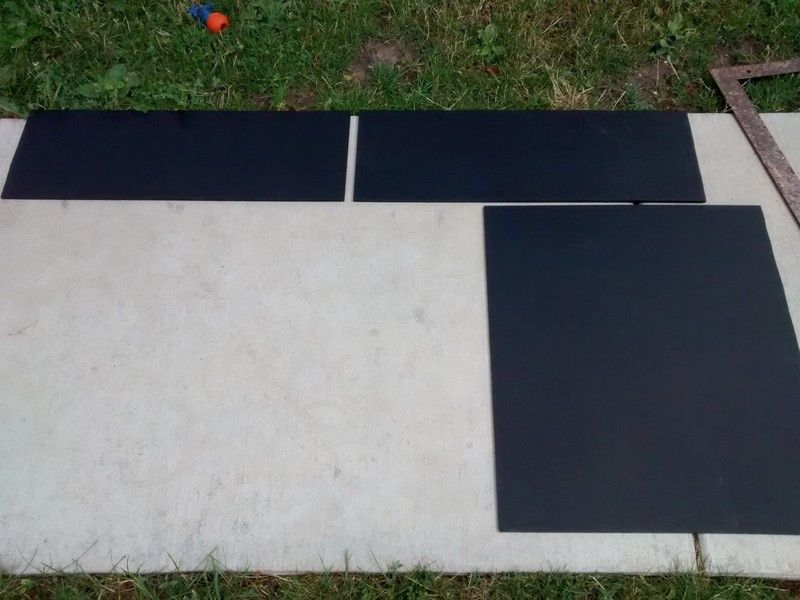 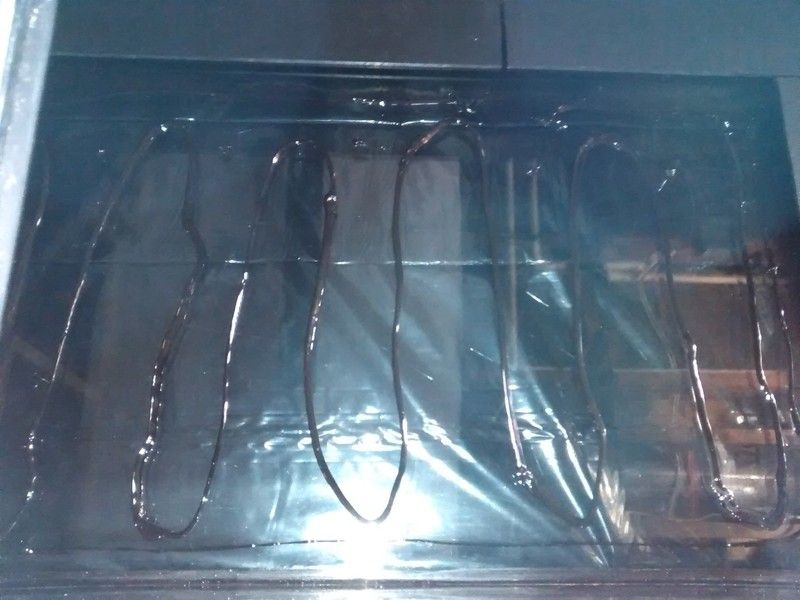 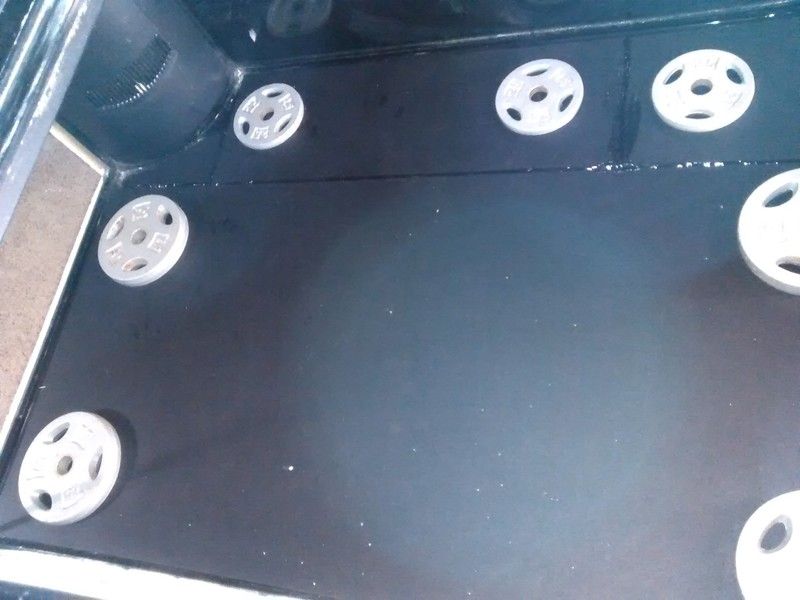 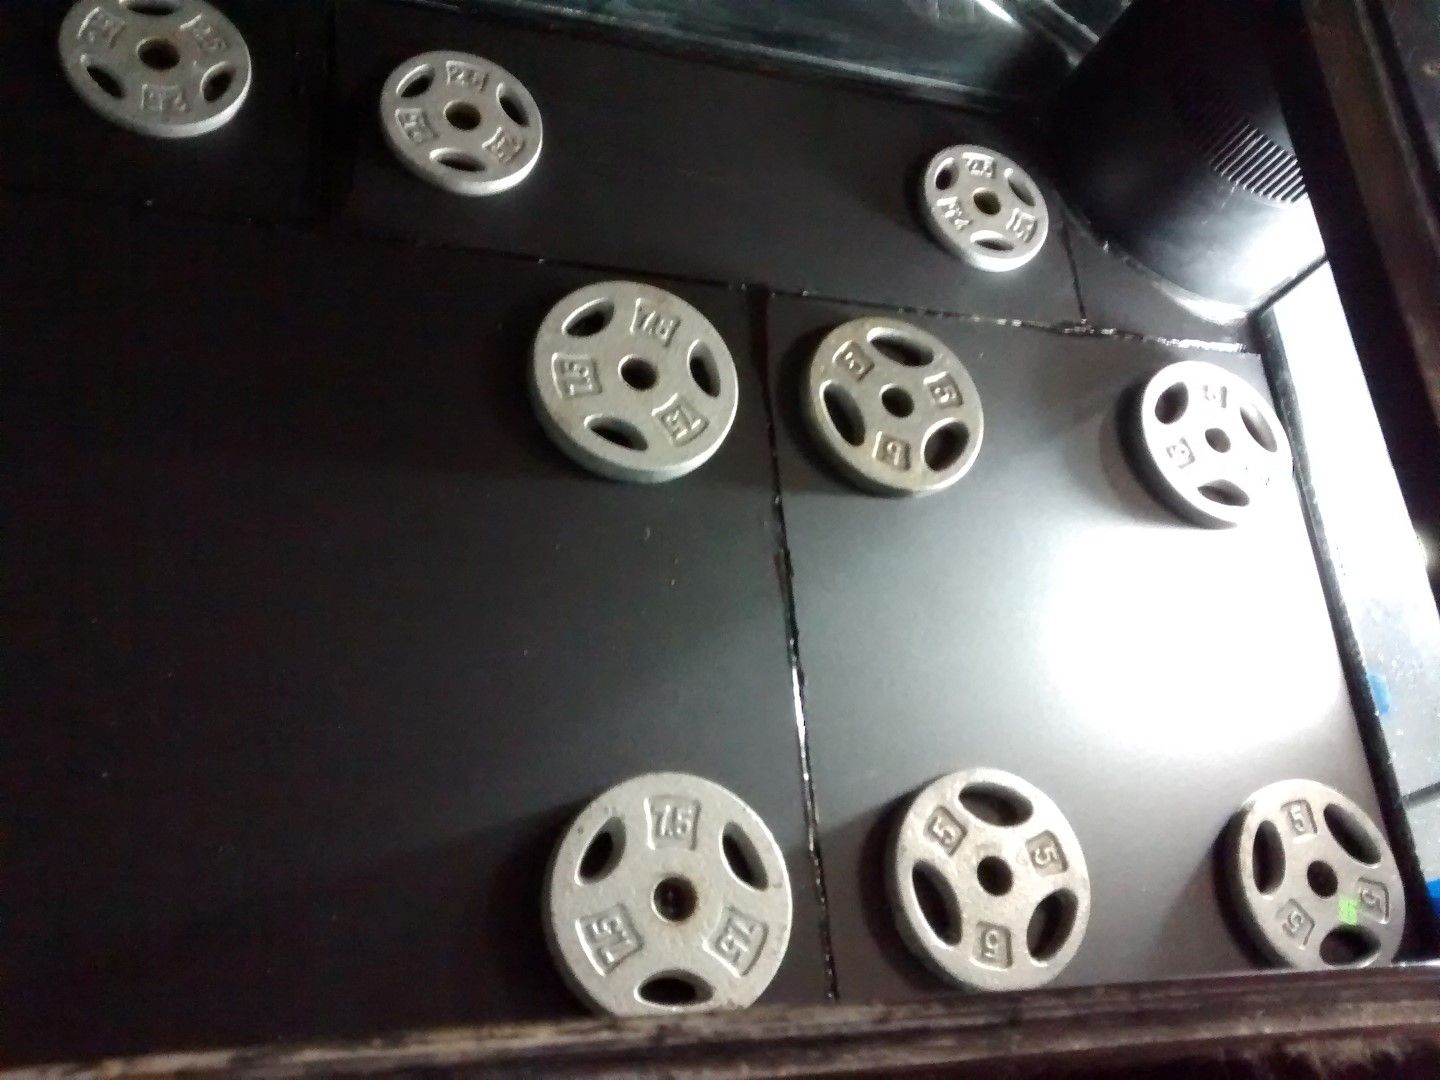 Frag/Quarantine, Wash Basin, Water Change dual barrel stands  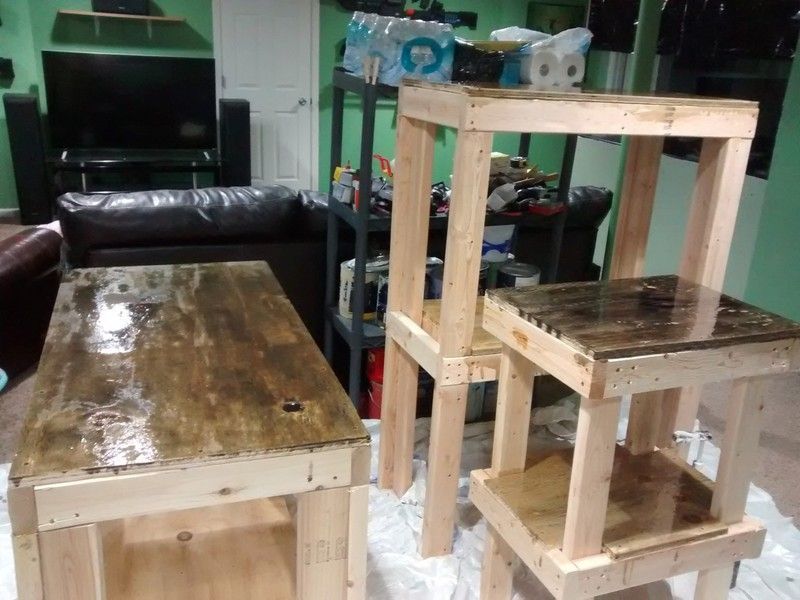 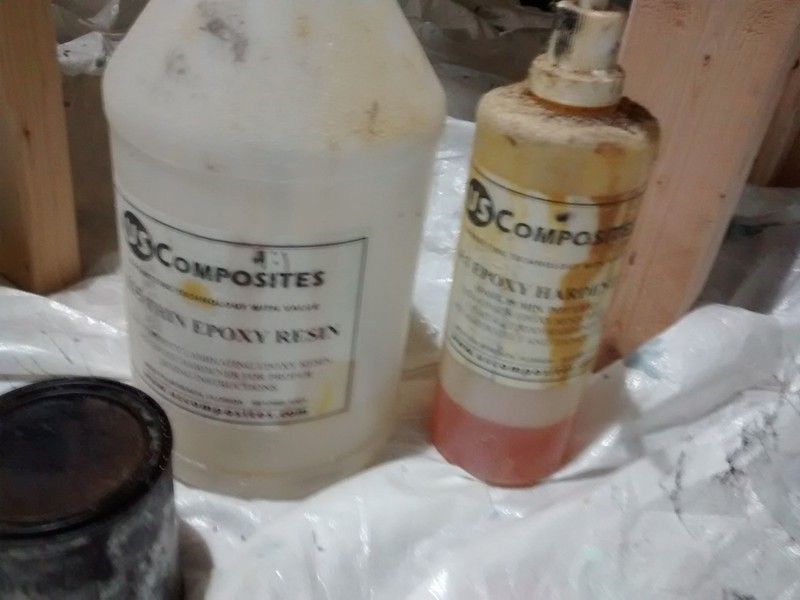
__________________
300G SPS reef build in progress Current Tank Info: 300G reef under construction |
|
|
|
|
07/29/2016, 06:21 PM
|
#3 |
|
Registered Member
Join Date: Dec 2003
Location: Milwaukee, WI
Posts: 1,161
|
Leftovers from my old 240G reef
  Liverock purchased waiting for a tank. Tank room floor Before epoxy: 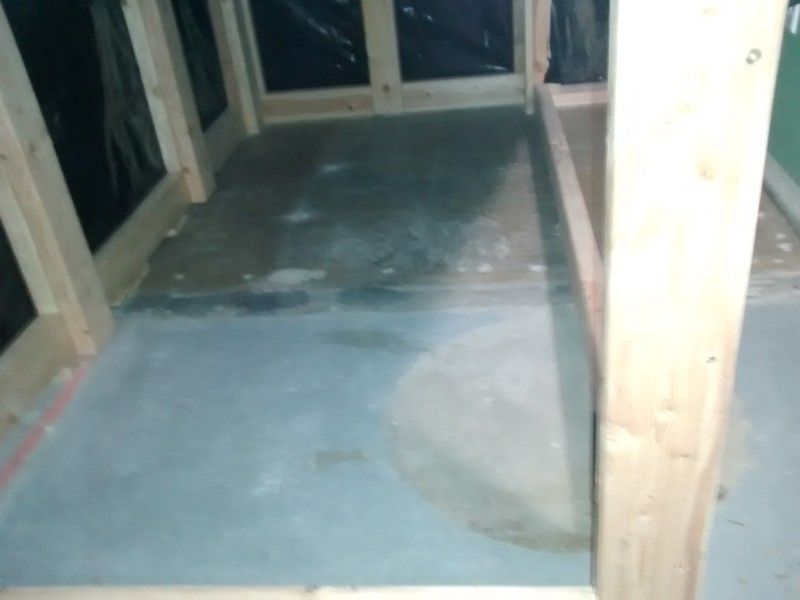 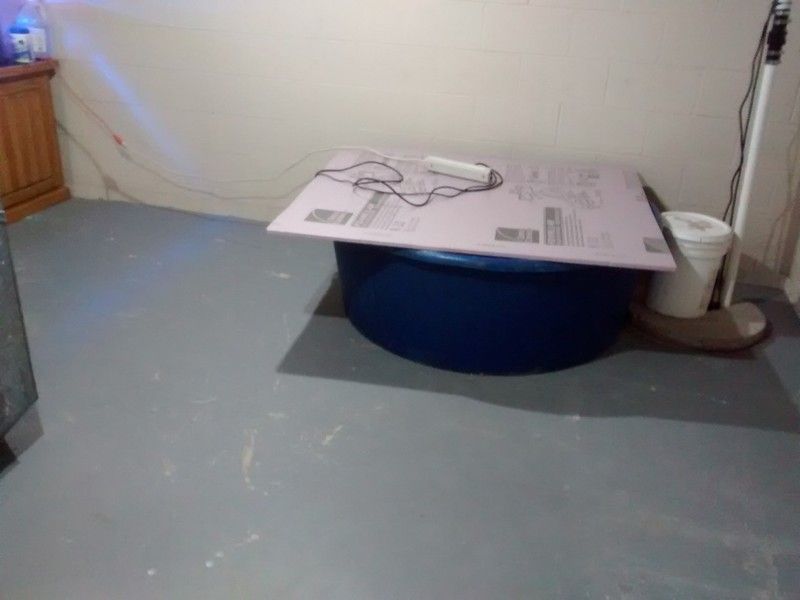 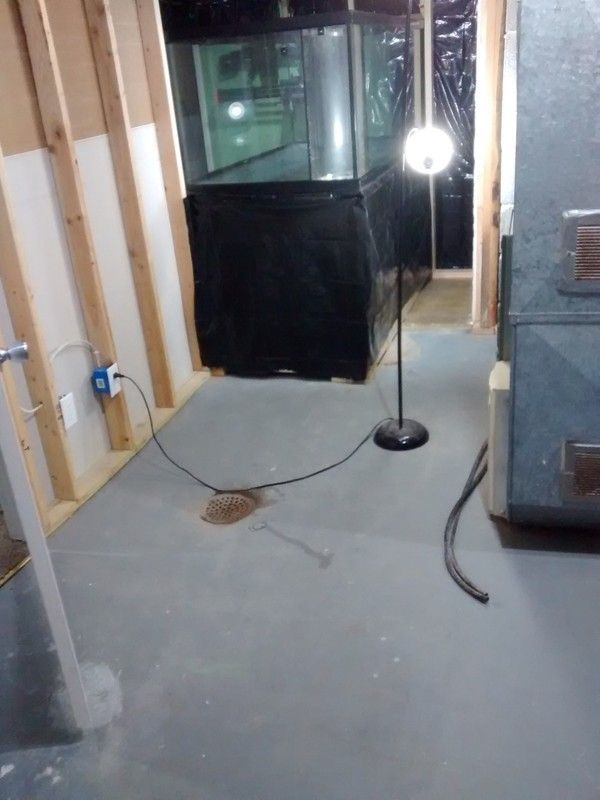 After expoxy: 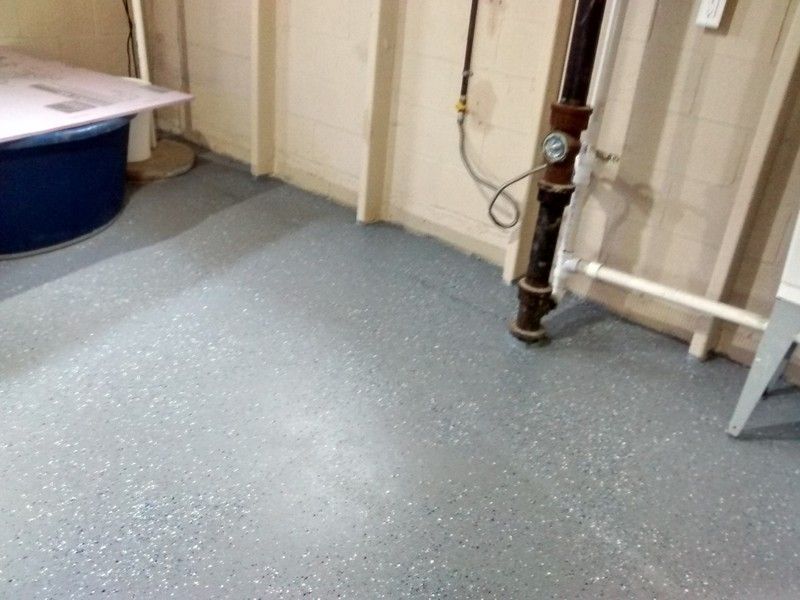 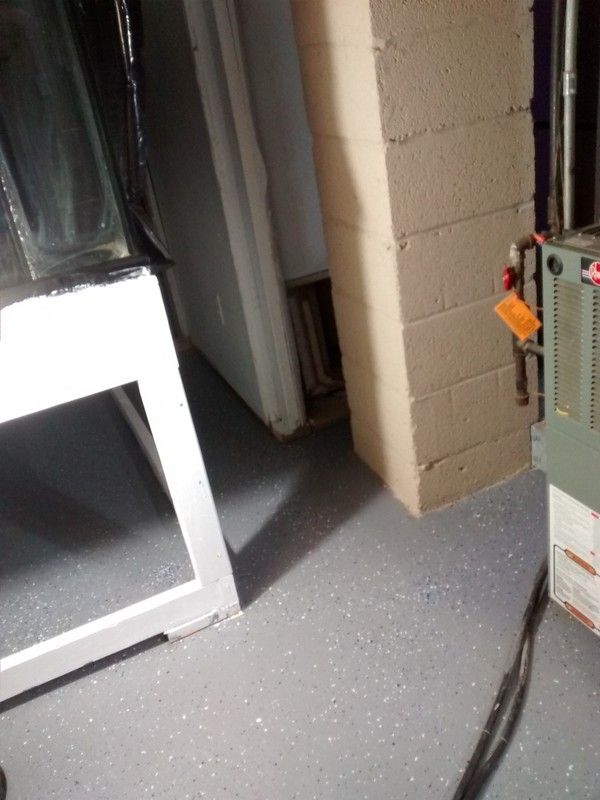 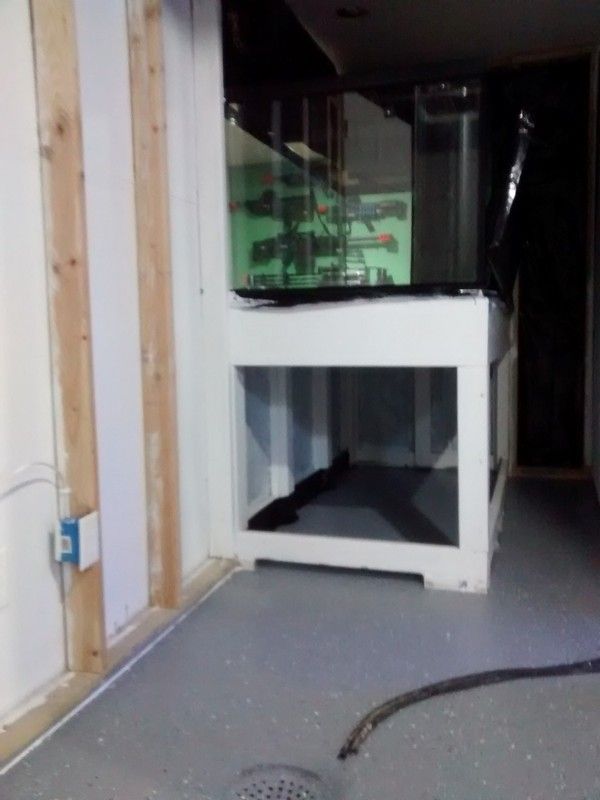 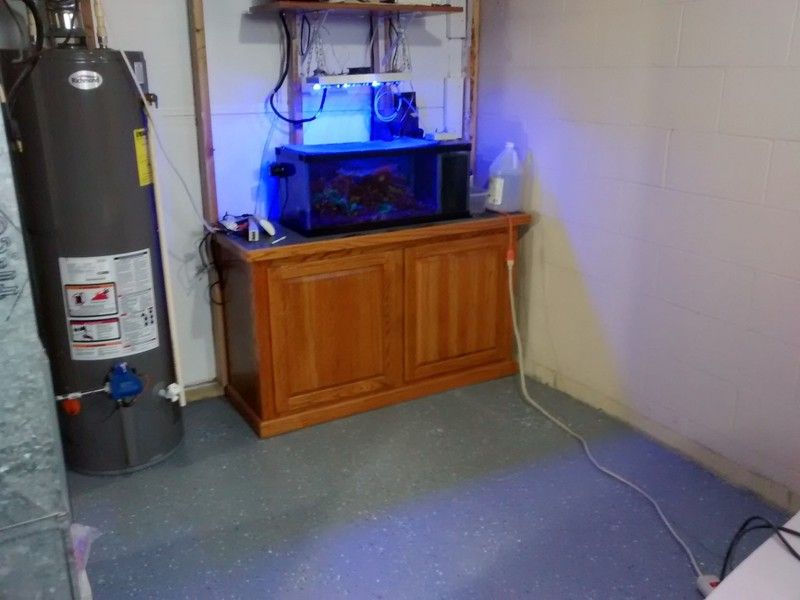 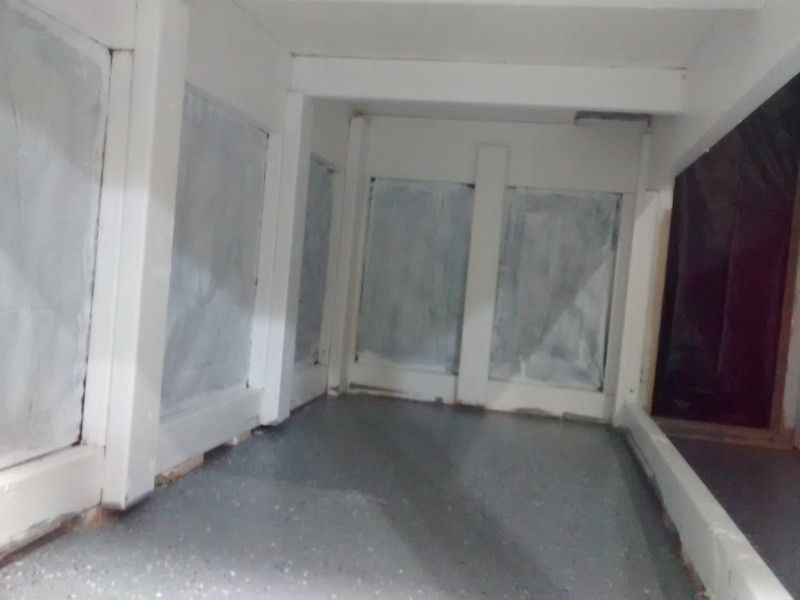
__________________
300G SPS reef build in progress Current Tank Info: 300G reef under construction |
|
|
|
|
07/29/2016, 06:22 PM
|
#4 |
|
Registered Member
Join Date: Dec 2003
Location: Milwaukee, WI
Posts: 1,161
|
 Preliminary Sump 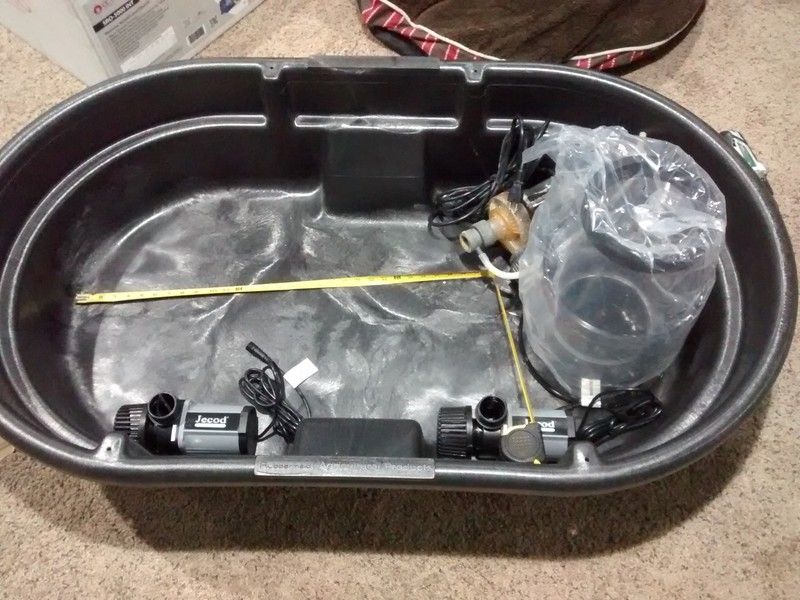 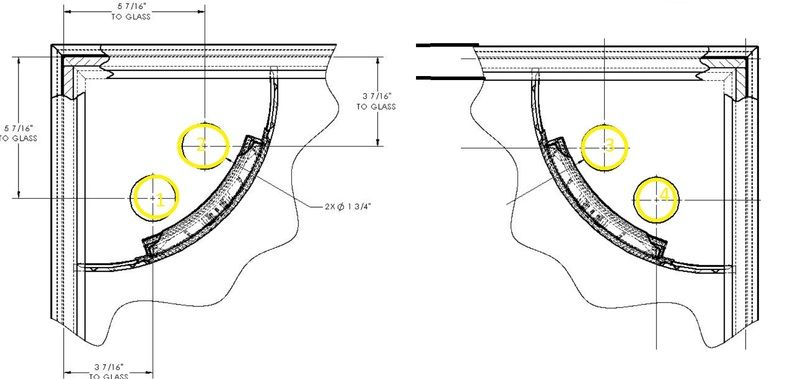 300G DD marineland bulkhead hole schematic. Planning to use all 4 holes for 1 inch durso stand pipes, and 2 returns over the top of the tank
__________________
300G SPS reef build in progress Current Tank Info: 300G reef under construction |
|
|
|
|
07/29/2016, 08:03 PM
|
#5 |
|
Registered Member
Join Date: Mar 2004
Location: 11 54' N, 121 55' E
Posts: 1,836
|
I like your planning/ preparation on this build. This is going to be awesome for sure.
__________________
"To be a successful reefer, one must master the art of mimicry" ~Hawaiianwargod~ [E] levated [L] evel [O] f [S] weetness Current Tank Info: 210+ - "G" Elos 160XL [~] |
|
|
|
|
08/01/2016, 05:35 PM
|
#6 |
|
Registered Member
Join Date: Dec 2003
Location: Milwaukee, WI
Posts: 1,161
|
This weekend I completed all of the electrical installation. I also painted the stands for the quarantine/frag and water change station.
 Wiring of the new panel additions. 20A circuit for main tank (10 AWG feeding 3 strings of #14, I know not to code, but safe if not overload, which I'm not). 15A (#14 AWG) for frag/QT/dehumidifer. 15A for utility room lights and mix tank. 15A for furnace and freezer. I balanced the load out a bit better on the phases too, and tested all connections of course. It's hard with only 100A to do this, but I purposely used gas for water heater, dryer, range, furnace to free up space, and I will heat the tank with gas water heater loop as well. 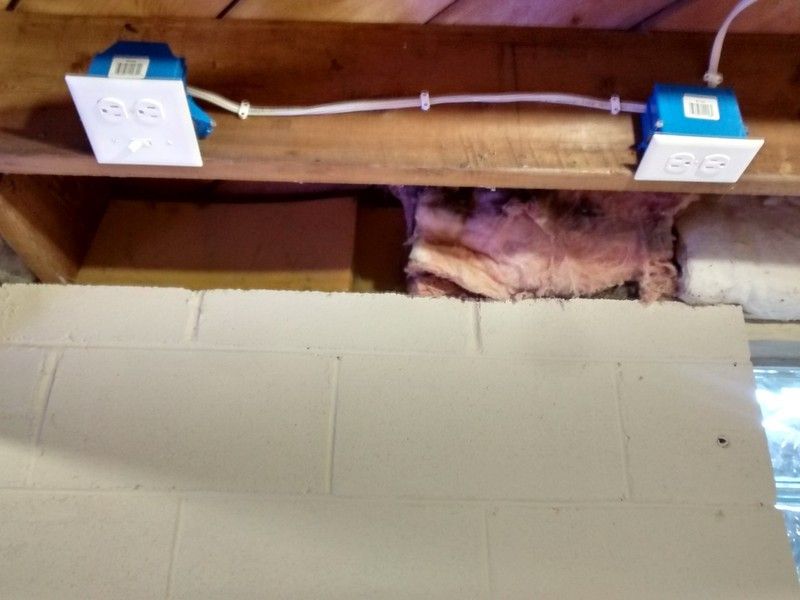 outlets above the water change station on the utility room circuit. I have a toggle switch for mix pump which will use portable GFCI plug if needed. Other plugs are for auto top off.  Display tank outlets ready for termination  Done with terminations, these are all GFCI outlet fed above tank (splashes) Main tank 20A circuit. 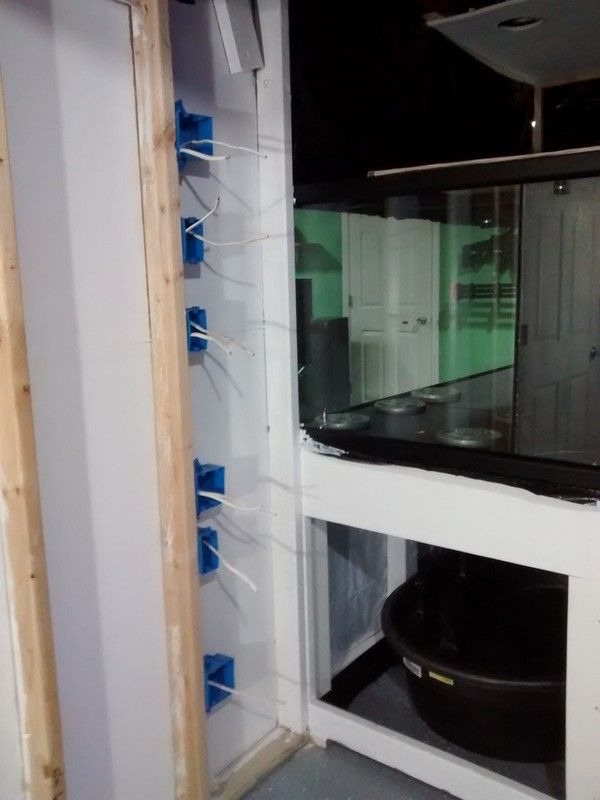 Frag tank outlets ready for terminations  Frag tank wired, one GFCI for light above frag tank, rest are non GFCI for pumps, less safety risk there with submerisble power heads usually. These are on their own 15A circuit, bottom four are Main tank 20A circuit.  Side tank outlets, the one closest is GFCI, others are not (can't have nuisance trip and lose recirculation) Main tank 20A circuit.  Frag tank below, quarantine tank above. Can barely net any fish out due to low clearances, but it will work. Dehumidifer fits under, and the drain is right next to it. All water slopes right to the drain for spills. It is BRIGHT in this room now, I have total of 7 LED daylight bulbs through the room, I hate working in dim lit utlity rooms. I want this to feel more like a labratory.  circuit for the test station and below for the hot water recirculator to display tank. Also what appears to be a belly up dead frog.  Cleaning station and room for extra tank if needed, GFCI washer circuit. Also my RO/DI system in background, new DI membrane 98% rejection I think, DOW brand.
__________________
300G SPS reef build in progress Current Tank Info: 300G reef under construction |
|
|
|
|
08/01/2016, 05:36 PM
|
#7 |
|
Registered Member
Join Date: Dec 2003
Location: Milwaukee, WI
Posts: 1,161
|
 close up of water maker.  Water change station, not plumbed yet, but all nice and neat. Also a new 5.0cf deep freezer for fish/wife food. The desk will be cleared for test station later after I move the frag tank. Here are photos of my 3 part dosing chemcials and bulk granular carbon. I placed them into 5 gallon pails for moisture control and ease of storage.  carbon is cheap this way, $140 for 55 pounds!      Soda ash will be new for me, only ever used baking soda, and this is pool grade, but supposedly safe. 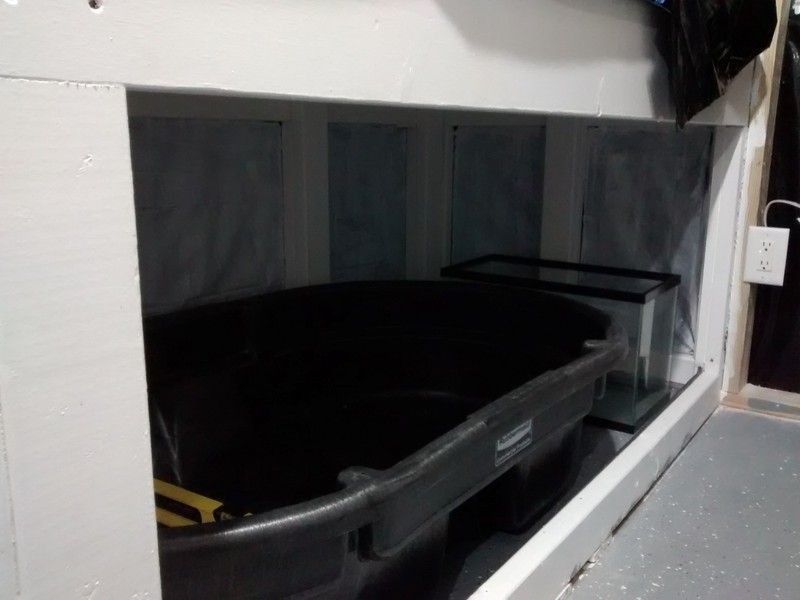 Sump under tank with 3 part top off container (will partition 10G into 3 section). The sump will house skimmer/returns/carbon/turf scrubber. Frag tank will drain into here.
__________________
300G SPS reef build in progress Current Tank Info: 300G reef under construction |
|
|
|
|
08/19/2016, 02:09 PM
|
#8 |
|
Registered Member
Join Date: Dec 2003
Location: Milwaukee, WI
Posts: 1,161
|
DIY foam background build
 Some shots of the build. -10 cans of 'great stuff pond and stone' -4 tubes of DAP window and door 100% silicone -wax paper (under foam) -seran wrap (between edges) -4 pieces of light diffuser/egg crate -hot glue (to hold egg crate in shape before foam) -200 lbs of dry base rock -2 part epoxy (1/8 of gallon) -6 brushes for epoxy (disposable) -argonite sand -knife -foam shaver / rasp -hammer/chisel -angle grinder (shaping rocks/foam) -2x4's for bracing *overall project cost w/o rock = $150, + 200 lbs of base rock (for 2 feet x 7 feet)   Basically I just cut egg crate to the shape of the tank areas I wanted to cover. I used hot glue to hold the overflow sections together in shape, no zip ties. I left 1" above egg crate for overflow and braces. Cut the egg crate in a zig zag to hide the seems. Put seran wrap between the edges and wax paper behind the egg crate. I used box tape on the curved overflow sections. Then lay down rocks in the general jig saw pattern I wanted. I chiseled some rocks to make flat on the back to stick out as ledges for coral mounting. I could not go TOO BIG on the rock or I would not be able to lift up the final product w/o breaking it, I suggest no more than 18" x 24" segments to avoid this problem. Lift up rock, lace a generous amount of foam down under the rock, then put the rock back into the wet foam. I added rocksalt to the foam while wet to create pock marks, this is a waste, just shave the foam when you are done and add epoxy and sand (looks OK even w/o sand). Let cure overnight.       
__________________
300G SPS reef build in progress Current Tank Info: 300G reef under construction |
|
|
|
|
08/19/2016, 02:10 PM
|
#9 |
|
Registered Member
Join Date: Dec 2003
Location: Milwaukee, WI
Posts: 1,161
|
  Zip ties are not needed, the rocks held very well, but you could pry a rock out if you try hard enough. I then added extra foam between all the seems that did not quite have enough coverage. You need 2 spare cans, 1 to fill extra holes on day 2, and another for the seem in the tank after install. I then started the day long process of shaving excess foam with a rasp and knife. Removing the wax paper and tape was easy. The back needed shaving with knife to make flat again. Some rocks needed encouragement to fit back together and flat based with the angle grinder (not hard).        Once all the pieces were back together in a good configuration, I mixed up 2 part epoxy (I also had red and blue dye to make it purple, but that was a wasted effort overall). I painted all the exposed foam on the front sides and then sprinkled generous amounts of fine argonite sand. Let sit overnight. It worked very well. Vacuum up the mess. 
__________________
300G SPS reef build in progress Current Tank Info: 300G reef under construction |
|
|
|
|
08/19/2016, 02:10 PM
|
#10 |
|
Registered Member
Join Date: Dec 2003
Location: Milwaukee, WI
Posts: 1,161
|
   Next was installation into the actual tank itself. Very heavy pieces, maybe 50lbs each, and not easy to lift into the tank w/o breaking any of the egg crate. Test fit, then apply zig zag silicone. I found I needed huge dabs in each corner of the background pieces to make sure it made good contact, as some warpage occured during the foam curing process, which made it not perfectly flat anymore. This was a hard part of the job, running back and forth cutting 2x4's to make perfect sized braces to keep the background pieces smushed against the glass.   Easy to confirm as you can see throught the back glass if the silicone is expanded flat or not good contact. Next day I removed the bracing and added foam to the exposed seems. Next day I shaved that foam down again and added more epoxy and sand. Now that everything is siliconed and foamed together, it is very stable. It will be a nightmare to remove one day if the tank leaks, I move or have to sell it. Final day I let the daughter vacuum up the excess sand. Looks great to me so far.      The only mistakes I made where on the seem where the side panel meets the overflow, had a bit of a gap and had to fill w/ extra foam, but you can't tell. The side wall is mostly for the MP60 pump and tunze wavemaker, so I did not totally cover the wall so I could move as needed. I added some purple paint to exterior glass to make opaque wall for now. Only want visible from the left side and front panel.
__________________
300G SPS reef build in progress Current Tank Info: 300G reef under construction |
|
|
|
|
08/19/2016, 02:11 PM
|
#11 |
|
Registered Member
Join Date: Dec 2003
Location: Milwaukee, WI
Posts: 1,161
|
 Overall, I am very pleased with the project. This is my 3rd and by far, best foam background. 90% rock coverage makes it look amazing, and offers great places for coral shelving. Epoxy/sand are not needed but will fill in while corraline takes over. My tank is probably too heavy to lift now I bet, but I hope that I won't be changing jobs or experiencing a tank failure in the next 5-10 years (PLEASE). Next project I have not posted photos of yet is the plumbing (done but no time to document yet).
__________________
300G SPS reef build in progress Current Tank Info: 300G reef under construction |
|
|
|
|
08/25/2016, 03:31 PM
|
#12 |
|
Registered Member
Join Date: Dec 2003
Location: Milwaukee, WI
Posts: 1,161
|
Salt water mix station plumbing is almost done, more photos of full setup soon.
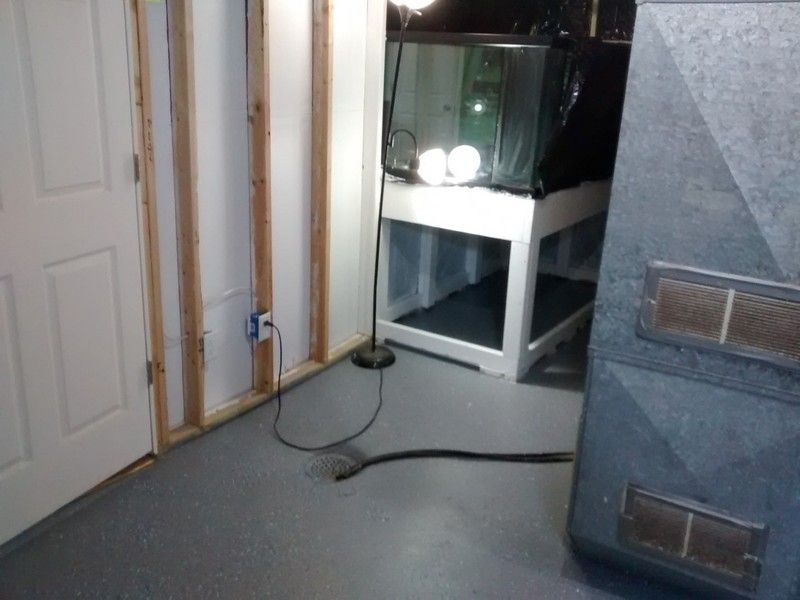
  Natural gas hot water heater closed loop complete. This heats my aquarium with a Ranco controller and a hot water recirculation pump. Typical installation cost is around $250 with all parts/plumbing. It should save someone with a tank like mine (LED lighting), about $10-20 per month in electric heating. Gas is cheaper per BTU vs electric in most areas, especially with the advent of fracking. Plus, no more heaters that fail and shock you or leak stray voltage. Heats much faster than electric heaters based on the coil size.     20G Frag tank is drilled and plumbed into the main tank off the return line. I will use the LED light fixture off my existing anemone tank for now in near future. The top tank is a 40G quarantine tank in progress.   I plumbed basic durso stand pipes for now. I may tinker with herbie overflows later based on how loud it ends up being, I was fine with the last tank though honestly.  
__________________
300G SPS reef build in progress Current Tank Info: 300G reef under construction |
|
|
|
|
08/25/2016, 03:32 PM
|
#13 |
|
Registered Member
Join Date: Dec 2003
Location: Milwaukee, WI
Posts: 1,161
|
 I rigged up the auto top off controller (I built one years ago), and set the depth to about 6-7" for according to the skimmer manual ideal depth.  The dual DCS-9000 jebao returns are rigged up, these are a bit of a gamble, I can switch to something better if they fail. I wanted quiet pumps, not reeflo pumps if I can avoid this time around. I used 1.5" tru unions with some flex PVC, to rigid 1.5" PVC then to 1.5" wye, then reduce down to two 1" spouts into the display (4 total). I also cut a 1.5" bulkhead to drain the sump, not shown, maybe will use for water changes.   I also got preliminary plumbing setup for the algal turf scrubber. I am feeding it off 2 of the 4 stand pipes, and estimate it's flow based off pump curves should be around 900-1200gph. The slot will be 18" long, hopefully giving 50+ gph per inch, above the 35gph minimum recommendation. 3 part doser storage container. Cut some acrylic, siliconed into a 10G tank and water tested OK. will use the jebao doser pump and controller to dose the salts into my tank instead of CaReactor.  I cut the screen to be about 18" x 10" exposed area and roughed it up. It's supposed to be rated for (18"x10" / 12) = 15 'cubes per day. Or in my plans, 3 sheets of 4"x8" nori, 2-3 auto feeder dry pellet feedings and 4 frozen cubes of food. I hope when combined with skimmer, high flow and barebottom, that I will be good to go. I still need to buy parts to build some kind of LED light. I know what I want, but not sure on enclosure and water/splash protection. Also a bit of confusion on LED density and optics.   
__________________
300G SPS reef build in progress Current Tank Info: 300G reef under construction |
|
|
|
|
08/25/2016, 04:47 PM
|
#14 |
|
Registered Member
Join Date: Jan 2004
Location: San Francisco
Posts: 9,103
|
Looking good !
Missed a couple weeks with wife, then baby and now me catching a nasty bug, but looking back man that is a helluva lot of breakers for a 100 amp panel, looks more like a 200 amp panel in size
__________________
Mike |
|
|
|
|
08/25/2016, 05:56 PM
|
#15 |
|
Registered Member
Join Date: Dec 2015
Location: San Antonio
Posts: 69
|
Wow everything looks good coming together, can't wait to see the end result. Keep up the great work!
|
|
|
|
|
08/25/2016, 06:08 PM
|
#16 | |
|
Registered Member
Join Date: Dec 2003
Location: Milwaukee, WI
Posts: 1,161
|
Quote:
__________________
300G SPS reef build in progress Current Tank Info: 300G reef under construction |
|
|
|
|
|
08/25/2016, 06:29 PM
|
#17 |
|
Registered Member
Join Date: Jan 2004
Location: San Francisco
Posts: 9,103
|
Man I cant imagine electri water heater, stove, heat, dryer on a 100 amp panel, you would really need to watch how many of those are used at once, then a tank on top of that, whew... good job switching those gas
__________________
Mike |
|
|
|
|
08/26/2016, 07:58 AM
|
#18 | ||
|
Registered Member
 Join Date: Apr 2012
Posts: 2,258
|
Quote:
Quote:
Luckily it's affordable to put in bigger service out here. You can buy a pretty cheap and decent amp clamp (https://www.amazon.com/Klein-Tools-C...ords=amp+clamp) you can slap around individual circuits or the mains coming into check out your load if you want. Remember though, 100A breakers are only rated for continuous draw of around 80A most of the time with spikes tossed in. Good looking build so far, looks like you've got a good plan! |
||
|
|
|
|
08/26/2016, 07:50 PM
|
#19 |
|
SPS Slave
Join Date: Aug 2003
Location: Richmond, VA
Posts: 3,388
|
Really great build. Thoughtful and original design. Thorough execution. Nice work!!
I'd be paranoid about the vertical rock work being held only with silicone, but I know that stuff is incredibly strong; I would probably fashion some kind of brackets across the top anyway just to help me sleep better. Did you use ball valves for the feeds over to the frag tank? You'll want those to be able to take those things offline when needed.
__________________
- Mike & Terry "Less technology, more biology ... indeed." - Gary White Current Tank Info: 200g temp garage tank |
|
|
|
|
08/26/2016, 10:07 PM
|
#20 |
|
Registered Member
Join Date: Aug 2016
Posts: 9
|
can't wait to see the finished product
|
|
|
|
|
08/27/2016, 01:51 AM
|
#21 | |
|
Registered Member
Join Date: Dec 2003
Location: Milwaukee, WI
Posts: 1,161
|
Quote:
I think the rock work should be fine, others have done the same. It will take a crowbar to get that back off. The entire background is connected together so in that case, it sits like a U on the bottom, so would not fall over anyway. Though maybe a few rocks may fall out in the future if foam does not hold, but I do have the plastic bottom now.
__________________
300G SPS reef build in progress Current Tank Info: 300G reef under construction |
|
|
|
|
|
08/31/2016, 01:41 PM
|
#22 |
|
Registered Member
Join Date: Dec 2003
Location: Milwaukee, WI
Posts: 1,161
|
Lot of work this last week.
  Yes, it's filling, FW only for testing phase. The HDPE sheet on the bottom floated right up, the silicone did not work, or maybe I did something wrong? oils on surface perhaps? 10lbs of weight held it down no problem, so I'm sure 300lbs of rock will nullify the issue, not worth tearing it all apart for minor issue, I know it may slightly warp anyway, and I worried about the glass feeling pressure from warp/expansion.  I finished the drywalling around the tank. Mud/sand/texture/paint. I still need to add baseboard and trim, and my parents will help with building an oak front access panel.   Lighting is temporary until I build my DIY LED fixtures in a few months.   I had to lower the water level in the tank so the wave maker would stop sloshing onto the floor. Now I have about 1.5" to work with from top, just below the plastic lip on the exterior. This was a LOT of work. I had to cut with a angle grinder through rock/foam/plastic to make a nice U in each corner. Then I drilled small holes and added gutter mesh (not pictured) to block fish from the overflows. I am having trouble with the overflows still, trying to keep them quiet and get the main water level down, because my sump floods a few gallons when I cut power.  I'm working on getting the flow in the dursos figured out. There is always way more flow in one vs the other, with adjustable air holes.  I made my own type of herbie overflow, using a durso and herbie. It is just a pipe with a coupling and cap. The coupling has 1/2" holes drilled around it through coupling/pipe. If you twist the coupling, you can adjust the flow, similar to a ballvalve on the end (which I can no longer add w/o heavy mod). It works pretty well so far, seems reliable, not seeing a drawback here.
__________________
300G SPS reef build in progress Current Tank Info: 300G reef under construction |
|
|
|
|
08/31/2016, 01:42 PM
|
#23 |
|
Registered Member
Join Date: Dec 2003
Location: Milwaukee, WI
Posts: 1,161
|
  Algae turf scrubber setup on one of the overflows. This is a pain in the ***. I can't get the flow figured out to keep it even sheet of water. It also sounds like a bath tub filling up. The tank is nearly silent without this. I am not sure what I will do anymore, I do not like the noise.   Frag tank online, tied to main sump, the top tank is QT only. Skimmer dumps into that bucket excess waste. The white is the return and the grey line is the drain from frag to sump. I love the pool hose w/ 1" adapters from aquacave.    Denim insulation for noise reduction, not showing black plastic stapled over it to waterproof, though it is supposed to be mold/water resistant (it's shredded pants!) Seems to help on the noise, but I really need that 3/4" oak lid to really know the final sound levels, it is OK for now, but the ATS is not making me happy.   LEAKS, I had 3 leaks, one in spaflex return, easy fix but needed a trip to store. Other two were bulkheads in slightly rounded sump and barrel. I had a feeling they would leak, uniseals I think are for more curved, but these were very slight. I opened them up and added silicone and let dry. Seems OK, and they are not under pressure, so hopefully will stand the test of time.
__________________
300G SPS reef build in progress Current Tank Info: 300G reef under construction |
|
|
|
|
08/31/2016, 01:43 PM
|
#24 |
|
Registered Member
Join Date: Dec 2003
Location: Milwaukee, WI
Posts: 1,161
|
 pumps and heater coil in place. Also tempertaure probe for the ranco to control pump to the hot water heater. I love the DCS pumps so far, so quiet you literally can't hear them, so powerful too, the flow curve was too conservative! Can only run them at 60% each or it's madness.  My skimmer, the int5000 reef octopus. Quiet with my HY5000 pump. I like it so far. I also bought the auto neck cleaner, pretty neat. I hated cleaning skimmer neck everyday, worth the $200!!!    All the wiring done. Lot of work. Vortech MP60's, waiting for new Quiet drive controllers to RMA, had issue where press mode button they did not work, cycled power instead. Not sure if a used pump hurt them somehow? Also mp60's are a bit loud w/ old controller to me, had to let the used one break in, it was rattling for a reason? Item on bottom is a float charger, the bottom surge strip is a custom uninteruptible power supply I built, attached to 1 of the returns for now. Also hooked up the 3 part doser, but not tried yet. Wave maker is nice, but need 1 more, 1 not enough for my taste, too weak 1/2" wave, not too loud though really.  3 part doser container in place, but not tested  Drain for sump, or future use for external return pump if need. 
__________________
300G SPS reef build in progress Current Tank Info: 300G reef under construction |
|
|
|
|
08/31/2016, 01:43 PM
|
#25 |
|
Registered Member
Join Date: Dec 2003
Location: Milwaukee, WI
Posts: 1,161
|
   The auto top off, I have it dump into the overflow from above rafters, could not figure out how to stop siphon after engaging the top off pump. It's 4' high from ground, so not really a way to stop it flowing into ground level sump. I must dump from above. This was a HUGE pain in *** too, probably 12 hours of labor for just getting the ATO online. Ended up scrapping the 1/4" water line w/ luftpumps, going 1/2" with a maxijet1200 did the trick. Ended up 3' of head with 12' horizontal = 4 to 5' of head loss maybe, but it works OK, comes out good flow. DIY Dual float switch w/ 12V relay setup in the sump, AC cord goes up and over to the return maxijet 12' away.    Oh the custom DIY UPS. This is an older project I did, but basically just a deepcycle battery, true sine wave inverter, float charger and AC power cord w/ relay. Charger and inverter connect to battery always. The inverter has AC out, to a cord which has hot wire broke by NO on relay. Relay has AC input for the switch activated so when power on, keeps relay in closed position, once lose power, it snaps shut, lets power flow on the NO normal open pins, which makes inverter power the AC ouput. So basically this will toggle AC power when power returns to the outlet, or use battery when the outlet loses power. I can plug any device into this under 400 watt total (pumps, maxijets, skimmer, laptop, WIFI, phone charger, whatever). More batteries mean more capacity. No generator planned, I live in the city, so no expectation of natural disaster in Wisconsin pas 8-24 hour tops, which this can keep returns online, and gas water heater keeps tank hot if need, no electric for that one.
__________________
300G SPS reef build in progress Current Tank Info: 300G reef under construction |
|
|
|
 |
| Tags |
| algae turf scrubber, diy led, laser tag, sps reef, zachtos |
|
|


