
|
|
 07/01/2011, 09:31 PM
|
#1 |
|
Back again.

Join Date: Jul 2003
Location: Fairfax VA
Posts: 97
|
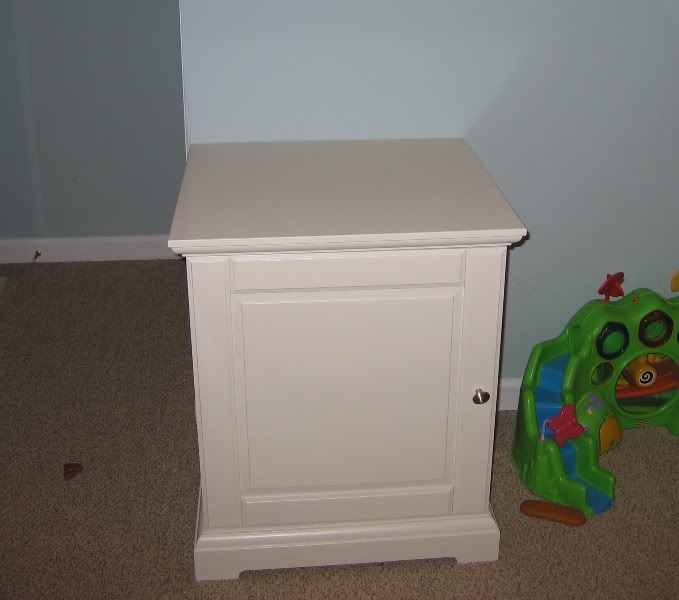
25 Gallon Mr. Aqua build
Hello All,
I've been out of the hobby for a few years and the 65 is long gone. The RC rimless thread and some nudging from my family got me started again. The Plan:
|

|

|
|
07/01/2011, 09:43 PM
|
#2 |
|
Back again.
Join Date: Jul 2003
Location: Fairfax VA
Posts: 97
|
Leak testing the Tank
I can't believe UPS delivered the tank in one piece. They did rip up my lawn though.
Here is the tank being leak-tested before drilling. The class is so clear that it looks like a block of water. It was $50 over the original Mr. Aqua. Glad I paid it. 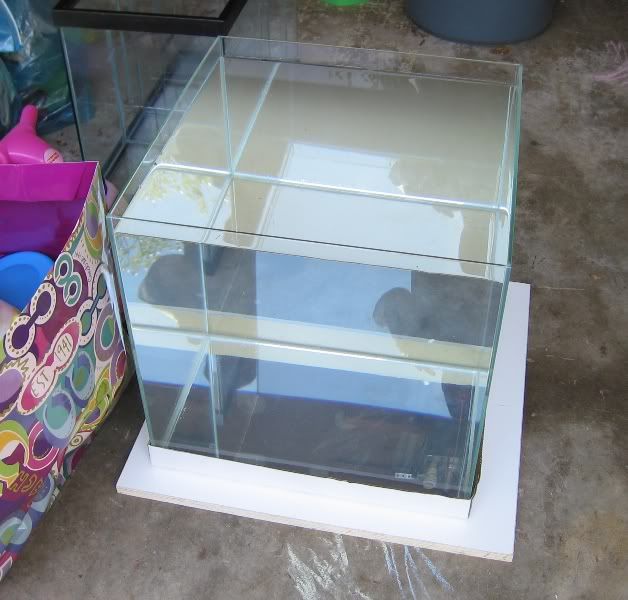
|
|
|
|
|
07/01/2011, 10:14 PM
|
#3 |
|
Back again.
Join Date: Jul 2003
Location: Fairfax VA
Posts: 97
|
Locating the Overflow
I chose the GH 700 and 3/4 return based on several things.
The GH 700 gph kit has all you need along with great instructions. I had no questions. They have instructional videos as well. They even made some custom changes to accommodate me. Did I mention I was going through the wall with the plumbing? I asked that they not drill the 90 elbow. BTW, drilling glass scared the poo out of me. Can I say poo? I had no desire to rebuild or reorder the tank. I intentionally chose to drill on a side that had the wider glass. This way, drilling down will compress the silicone seals and not pry them apart. It's a cube, I had to choose a side somehow. I located the box using the GH recommended minimums and shooting for a water line 2" below the rim. I plan to get a Vortech MP10 in the future. It makes big waves.  I recommend one addition to the GH drilling procedure. Tape the back of glass before drilling. I have almost zero chipout. The tape supports the glass while the bit grids the last mm. 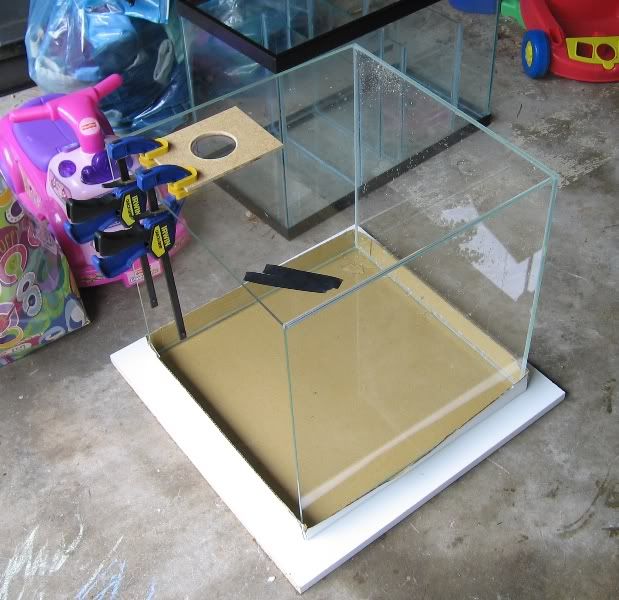 Success! 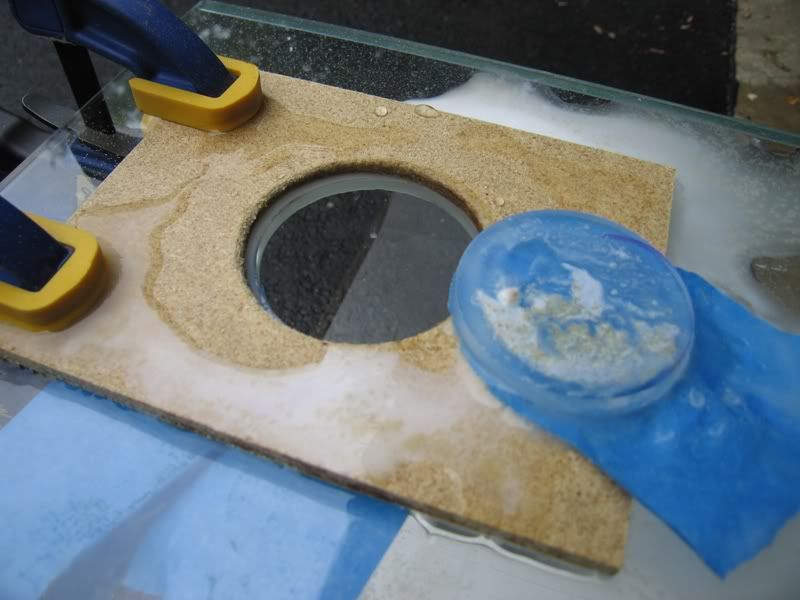 The template for the overflow was supplied by GH. It worked well. I made a smaller one just off to the side for the return. 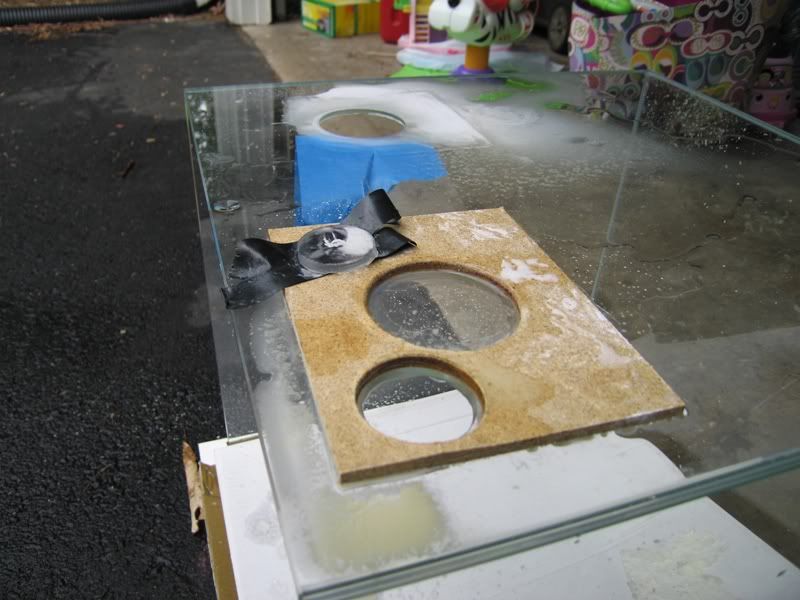 Installed: 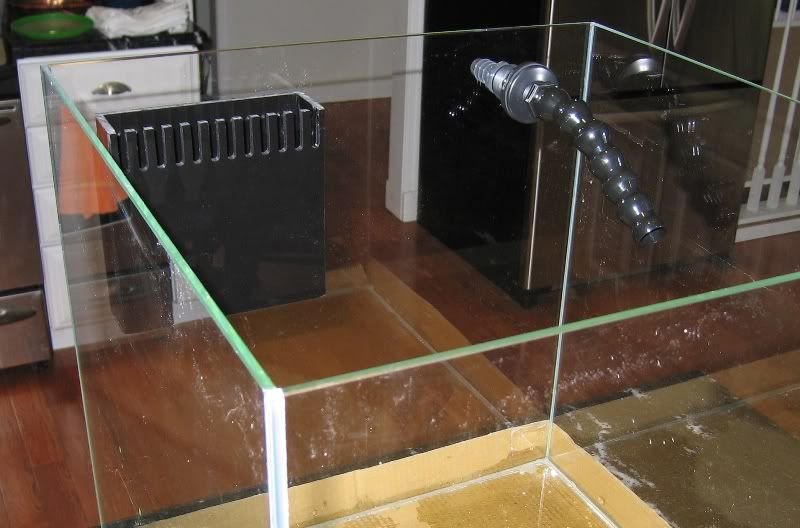
|
|
|
|
|
07/01/2011, 10:25 PM
|
#4 |
|
Back again.
Join Date: Jul 2003
Location: Fairfax VA
Posts: 97
|
Through the wall
So, I'd like to plumb this tank to a remote location. There's never enough room in the stand. Where should I go?
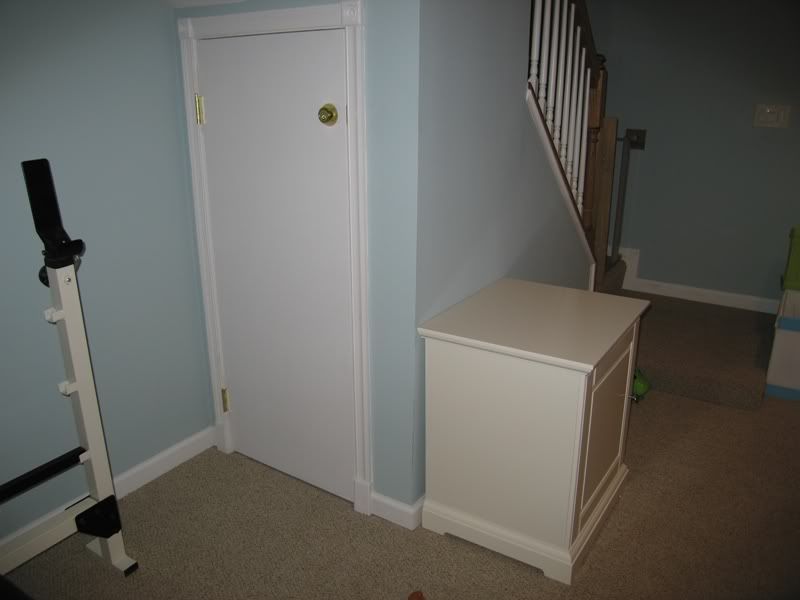 With two tots, better safe than sorry. 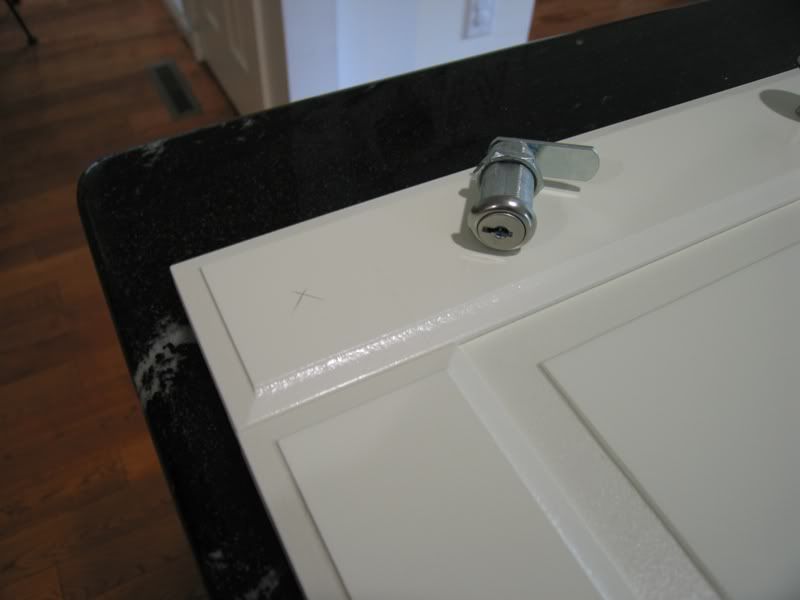
Last edited by obaptista; 07/01/2011 at 10:31 PM. |
|
|
|
|
07/01/2011, 10:40 PM
|
#5 |
|
Back again.
Join Date: Jul 2003
Location: Fairfax VA
Posts: 97
|
Locating the Plumbing
The stand is straight, flat and level. As an extra precaution, I used the ribbed, clear RubberMaid shelf liner that is available at any big box store. Good thing too. When I placed the cube on the stand, the surfaces were so flat, it caused a vacuum and I had to slide the tank to get it off.
Locating the holes for the plumbing through the drywall was interesting. The floor this sits on is carpeted, padded and insulated. It will compress under load and the plumbing is a lever on the glass. When the tank is full, it will sit significantly lower. 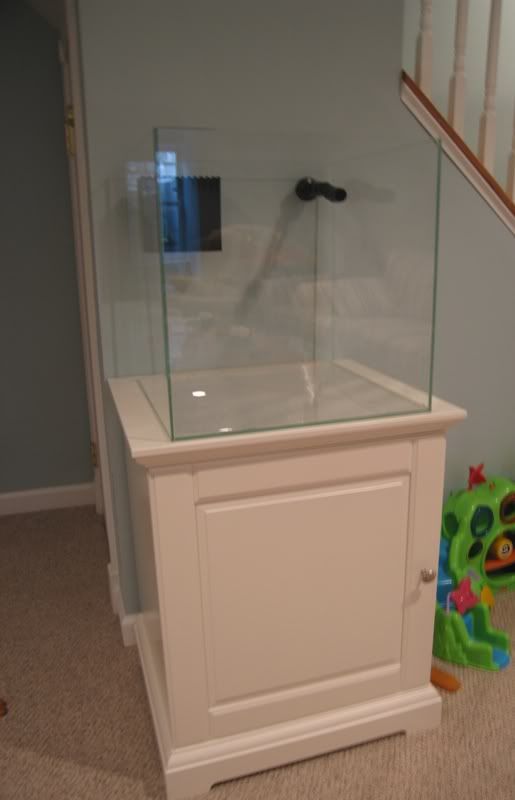
|
|
|
|
|
07/01/2011, 11:35 PM
|
#6 |
|
Keeping it Simple
Join Date: Jun 2004
Location: Greenville, NC
Posts: 2,637
|
Looks awesome so far!
 Very clean, keep up the great work! Very clean, keep up the great work!
__________________
Kasey Current Tank Info: None |
|
|
|
|
07/03/2011, 01:09 AM
|
#7 |
|
Registered Member
Join Date: Aug 2008
Location: Buffalo, NY
Posts: 4,140
|
Looks like you've done your homework on this setup... very cool! Be sure to keep us updated with pictures!

__________________
"...the sea, once it casts its spell, holds one in its net of wonders forever" -Jacques Cousteau |
|
|
|
|
07/03/2011, 05:23 AM
|
#8 |
|
Registered Member
Join Date: Sep 2007
Location: phoenix, arizonia
Posts: 1,283
|
awesome , can't wait t see more .

|
|
|
|
|
07/03/2011, 10:18 AM
|
#9 |
|
Registered Member

Join Date: Oct 2003
Posts: 5,069
|
Excellent work.
__________________
7 Years Reefing and Many Fresh 8 Foot Envisions |
|
|
|
|
07/04/2011, 10:51 AM
|
#10 |
|
Nate
Join Date: Jul 2003
Location: Fresno, CA
Posts: 329
|
Don't hold your breath for that Sol Nano...
|
|
|
|
|
07/06/2011, 09:41 AM
|
#11 |
|
Back again.
Join Date: Jul 2003
Location: Fairfax VA
Posts: 97
|
Yes- AI has not been reliable or forthcoming with the information or timetable of the the AI Sol Nano. As a result, several retailers who are taking "pre-orders" are straining customer relations. I canceled my Nano order and went with another retailer for the Sol Super Blue and controller. I was hoping to get into the AI quality and the sliding controls for $365 or so without paying $620 for the Sol + $79 for the controller.
Looking on the bright side,  , the extra $300+ dollars buy's me twice the light and the ability to scale and thunderstorms , the extra $300+ dollars buy's me twice the light and the ability to scale and thunderstorms . .
|
|
|
|
|
07/06/2011, 10:24 AM
|
#12 |
|
Back again.
Join Date: Jul 2003
Location: Fairfax VA
Posts: 97
|
So I have found that a 20H is quite possibly the perfect sump. Why? 'cause I had one.
The system has a sump configured for high volume and a BM NAS6a skimmer. The skimmer compartment is made as small as possible to accommodate more volume in the adjacent compartment. This will allow me to drain more water from the DT for water changes or whenever the return pump is off. No check valves necessary. Did I mention that the system will be plumbed for bucket-less water changes? Water comes from the skimmer compartment over-under-over. 0 micro-bubbles. I have final weir in place to direct flow in case I want to add a media bag at the bottom of the sump or more live rock. It's short to allow overflow if the bottom gets blocked. The sump weirs are 1/8 " plate glass from a big box store, cut and snapped with a common glass cutter. The edges are sanded with whatever sandpaper was in my garage. The height of the three main weirs is 12" which necessitates a shelf for the skimmer to get it to it's 9" optimum water level. The weirs are attached with aquarium grade, 100% silicone. The space between them is about 1.5" and big enough to get my hand in to smooth the silicone. First I taped the tank to limit silicone creep. It also had the added benefit of being a guide for placing the glass. For each weir, I added a bead on the tank and slid the weir into place. Then I smoothed the bead with a wet finger. Err, mine. I supported the weirs untill they dried using blue tape and pvc fittings. Taped and drying: 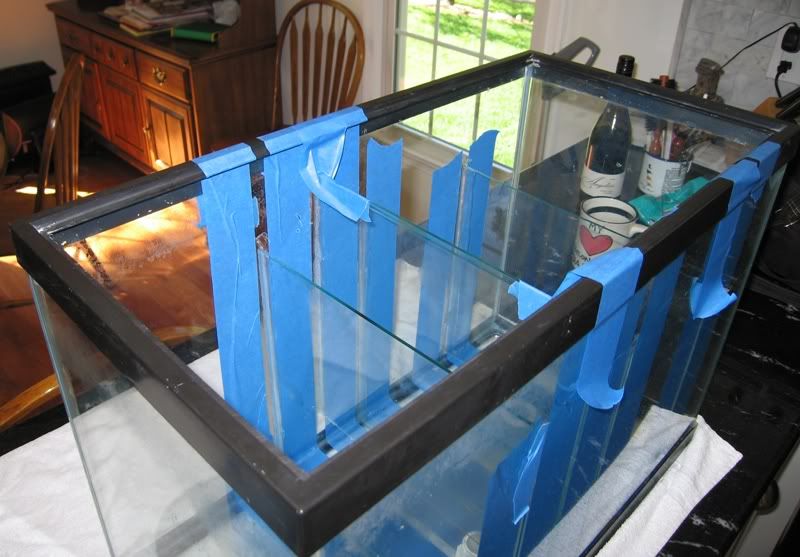 Not wanting to break with tradition, I waited too long to pull the tape. After some work with a razor: 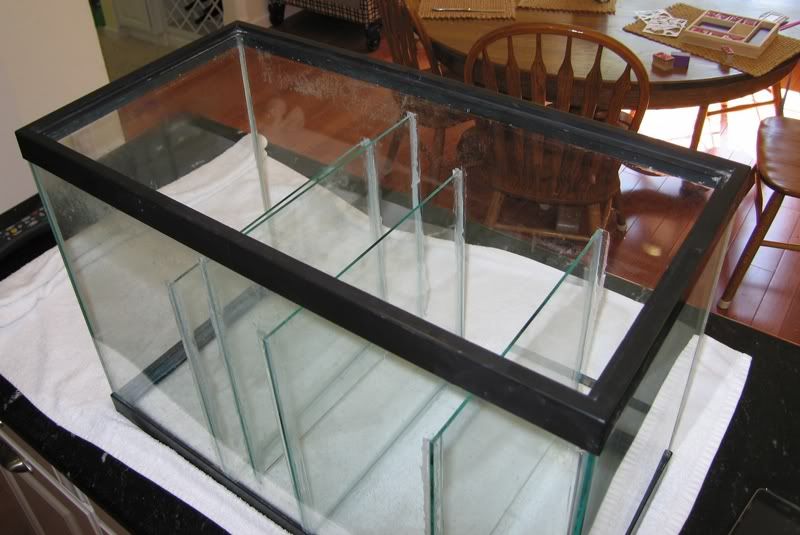
|
|
|
|
|
07/06/2011, 01:59 PM
|
#13 |
|
Registered Member
Join Date: Feb 2011
Location: Florida
Posts: 57
|
Looks like it will look great!! I'll sub
|
|
|
|
|
07/06/2011, 08:41 PM
|
#14 |
|
Back again.
Join Date: Jul 2003
Location: Fairfax VA
Posts: 97
|
thx.
As I mentioned, the basement floor is insulated, padded and carpeted. It will compress under the weight of the tank, but not completely. The tank is not heavy enough. So, the tank will lower a bit more when approached. This would not be an issue if the tank was plumbed into the stand. I am going through a wall. and fastening the plumbing. My solution is to use flex PVC so the tank can float 3/4in up and down. Also, the trim needs to be snug but still look good. A larger hole is not acceptable. Using a hole saw, I drilled a blank wall plate. On the inside, I used a trim protector that is basically a flange that fits the plate. The drywall is cut 1" larger than a typical electrical box but smaller than the plate. Placing the flange on the inside of the drywall and the plate on the outside, allows the whole assembly to float up and down. Therefore, the whole in the plate can be snug. OverFlow: 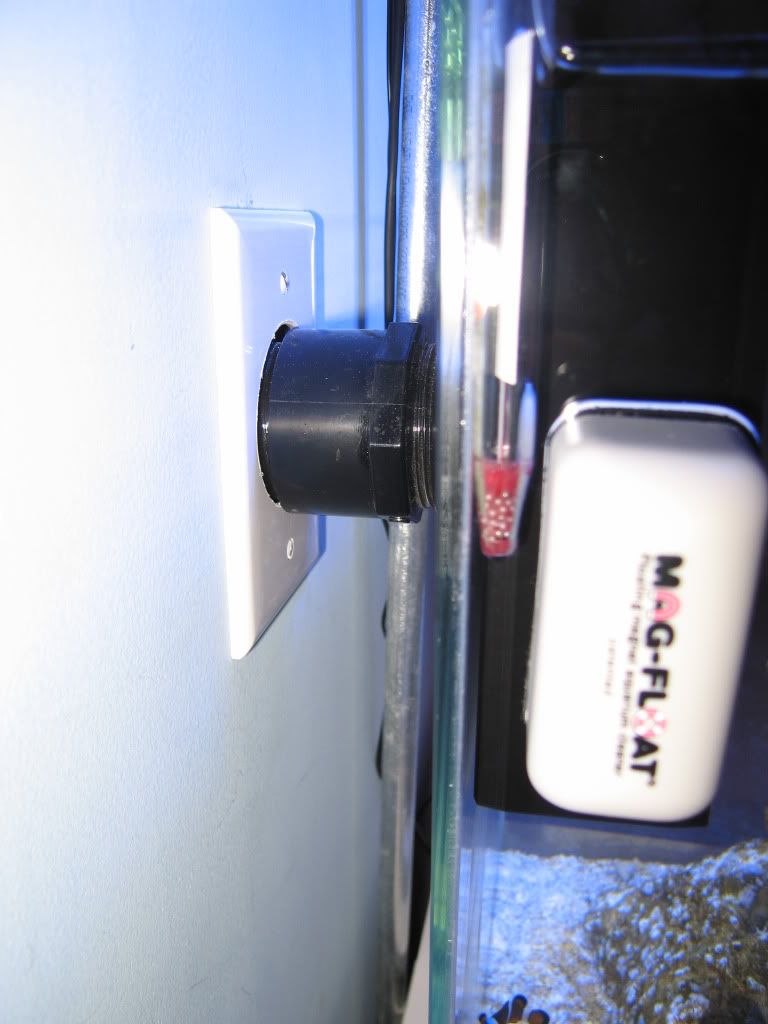 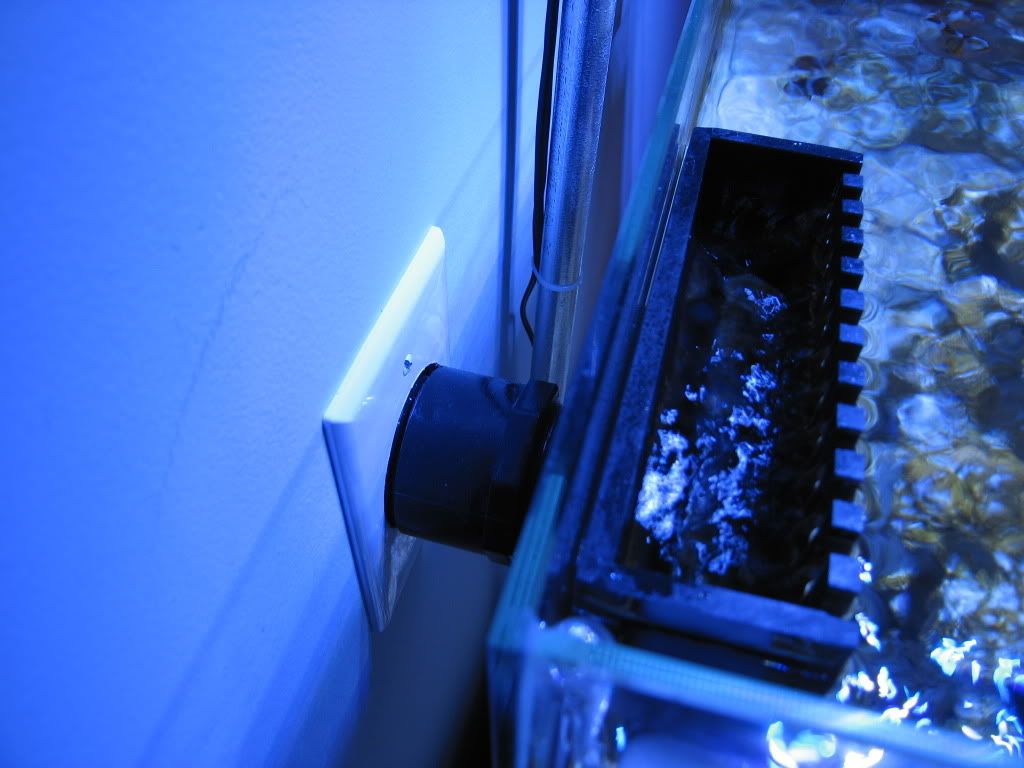 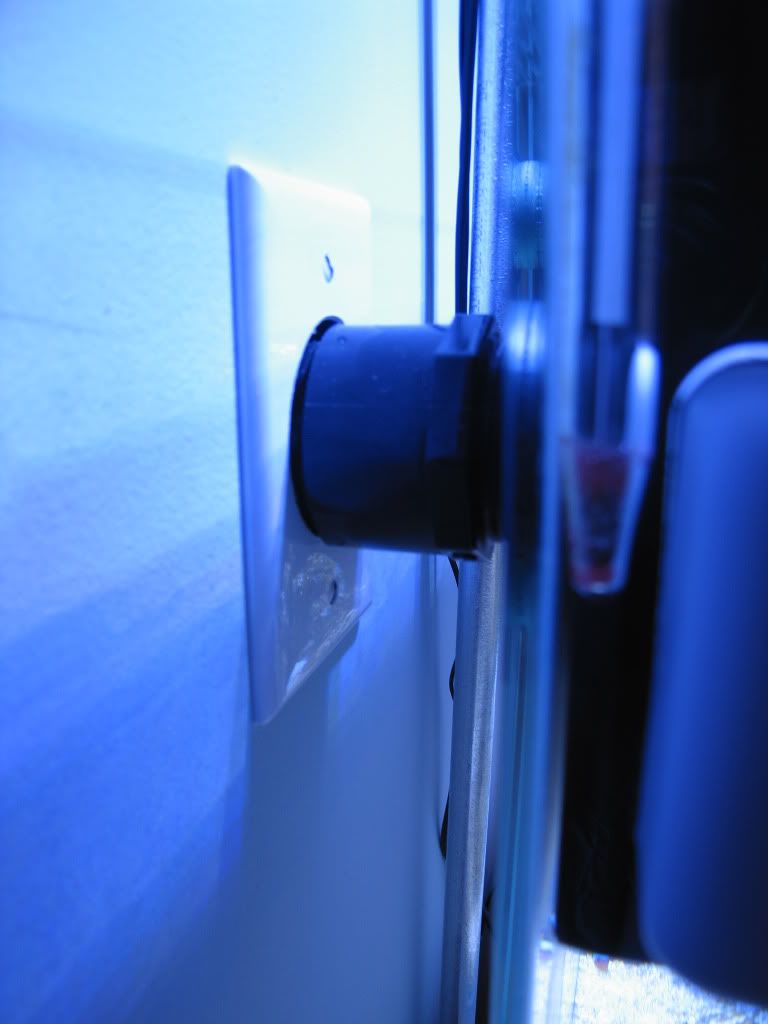 Return: 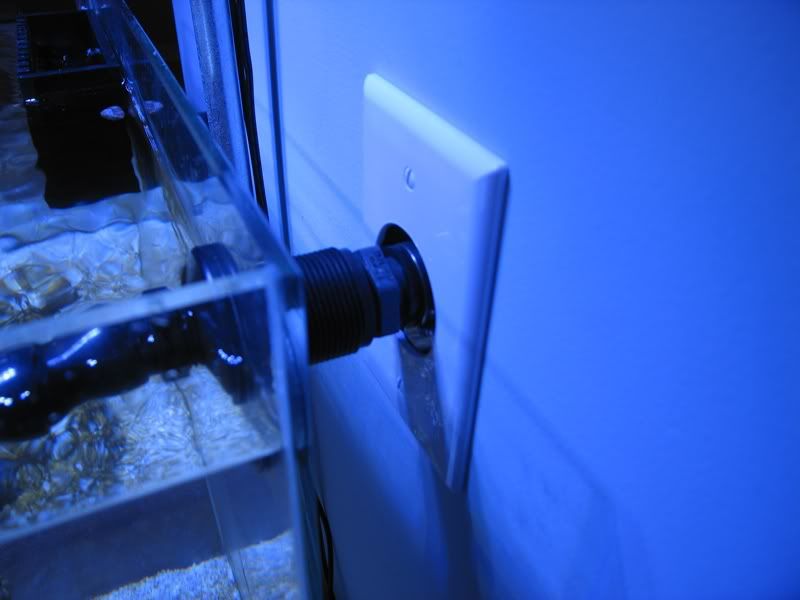
|
|
|
|
|
07/06/2011, 09:14 PM
|
#15 |
|
Back again.
Join Date: Jul 2003
Location: Fairfax VA
Posts: 97
|
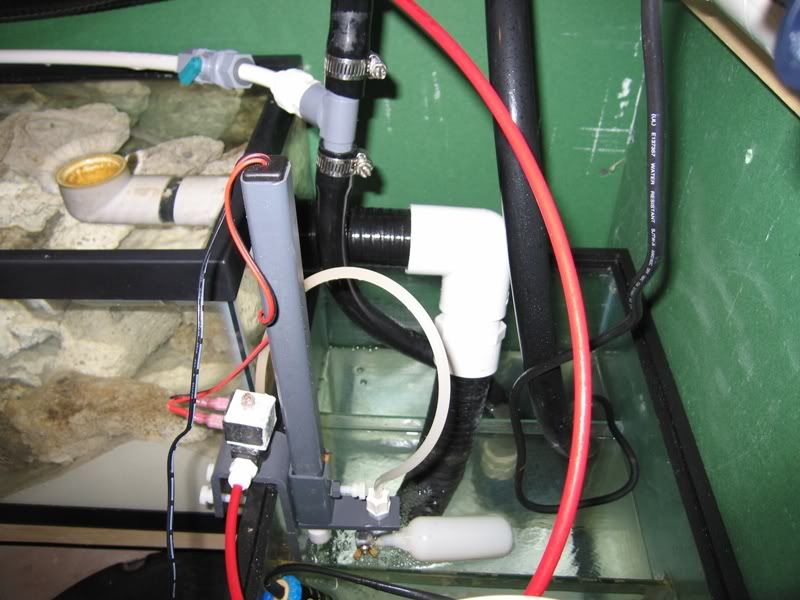
The return splits at a tee where one side feeds the skimmer and the other a 15 gallon Fuge. The union allows me to pull the tank without cutting.
I kept all the plumbing diameter consistent and over-sized. This allows me to take either the skimmer section or the fuge out of service without affecting the flow. The Tee: 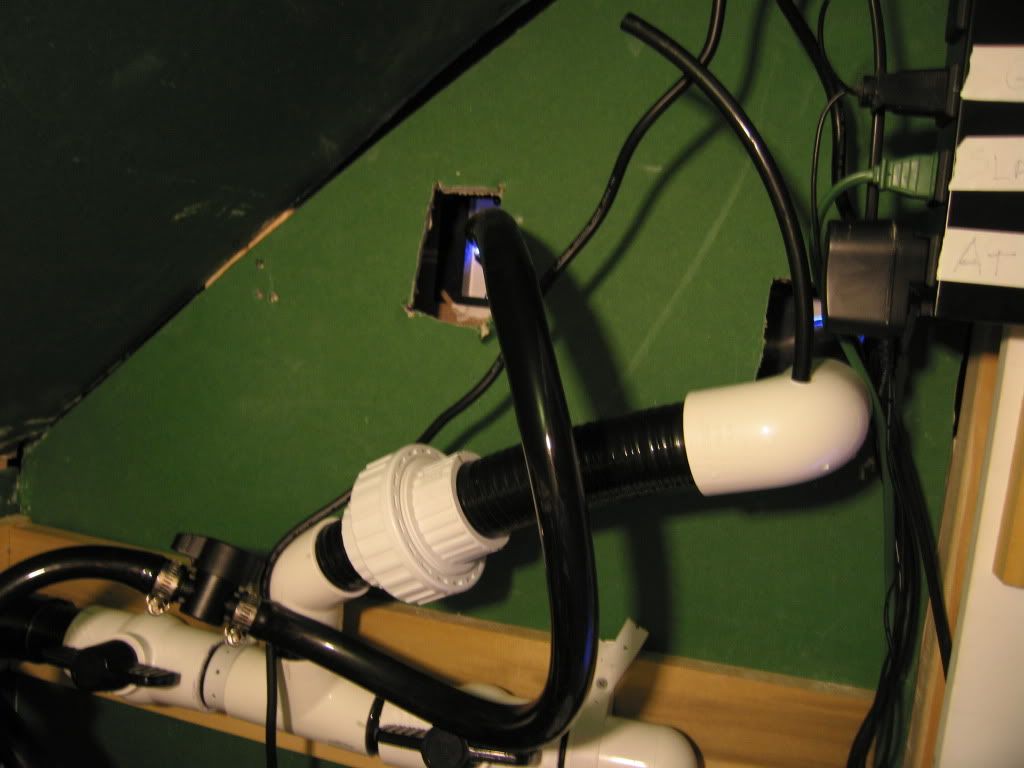 The Skimmer and sump: 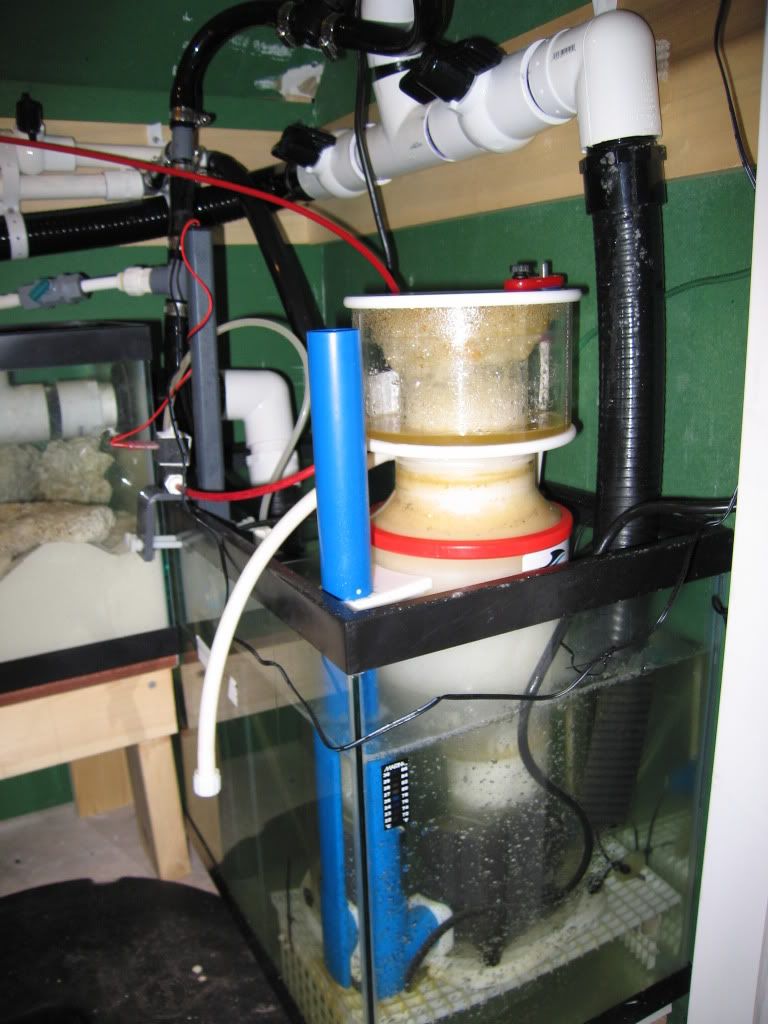 Behind the fuge are two 3/4 in pvc lines. The top one is sloped upwards for inbound fresh saltwater and the lower is sloped downwards and plumbed into a floor drain. The outbound pipe is fed by a tee in the return line. Lastly, the red line is 1/4 in R/O tubing for the remote gravity fed ATO. Pay no attention to the sump pump pipe:-). The Fuge: 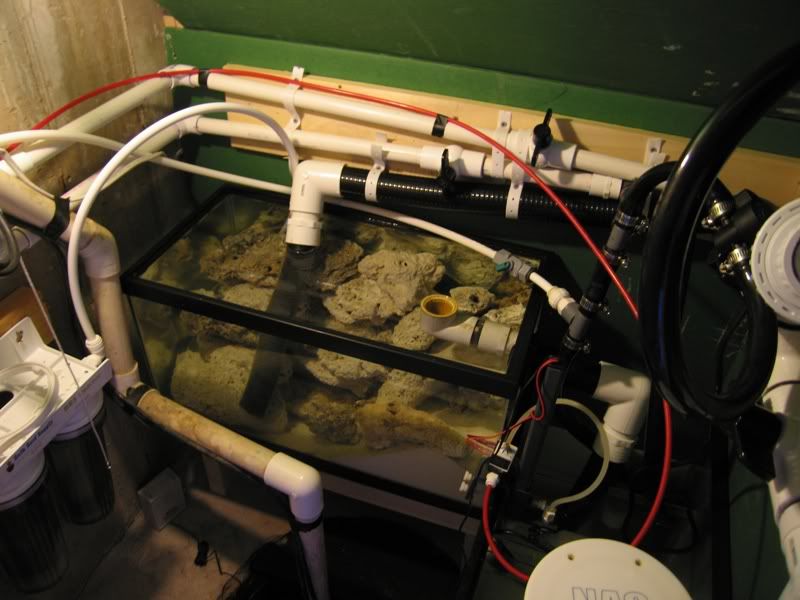 Draining water means simply turning off the pump to allow water to drain from the display. Then, closing the Two Little Fishes valve on the return, opening up the pvc valve on the drain pipe and turning on the pump. A mark on the sump tells me when 6 gallons is drained. |
|
|
|
|
07/06/2011, 09:20 PM
|
#16 |
|
Back again.
Join Date: Jul 2003
Location: Fairfax VA
Posts: 97
|
Here is a pic of my American DJ switch panel. I Love not having to plug and unplug gear. I also know what is on at a glance. It was an ebay special.
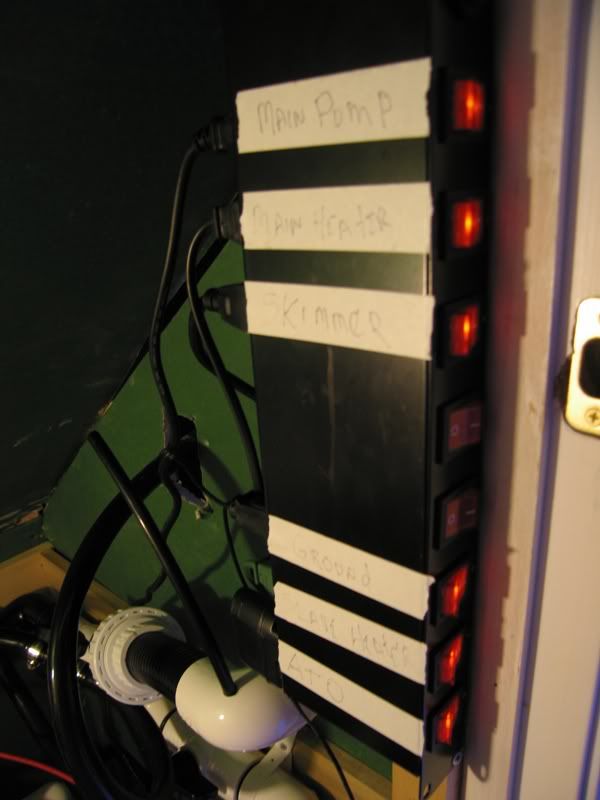 It is so nice not being confined to a stand. The water treatment facility: 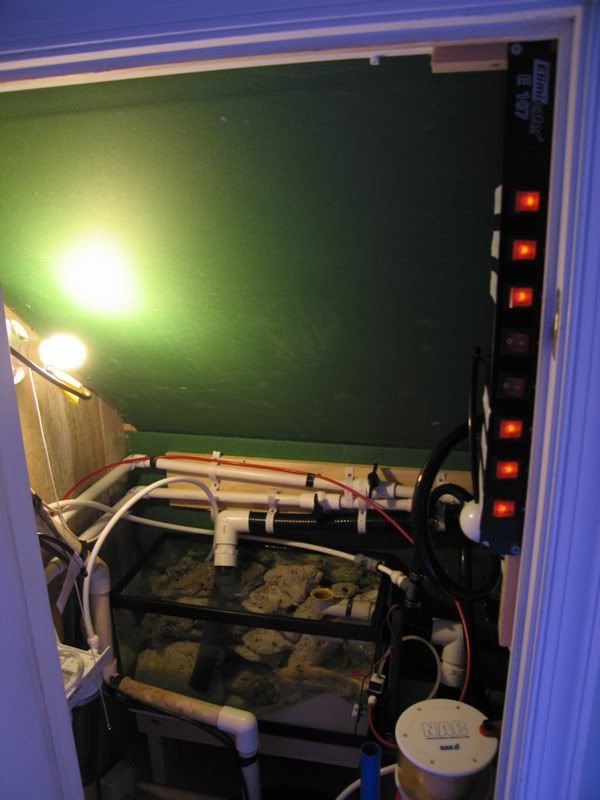
|
|
|
|
|
07/07/2011, 09:20 PM
|
#17 |
|
Back again.
Join Date: Jul 2003
Location: Fairfax VA
Posts: 97
|
My goal is to automate my little system so I can concentrate on husbandry. The first step is the ATO. I came across a level loc on ebay and it worked beautifully. There are several advantages. First, it works on a gravity feed through a 1/4 in tube. So, any failures happen slowly. There is a float for the primary shut-off. Should it fail, a float switch detects a rise in the water level and kills the flow via a solenoid. The solenoid is normal closed, so killing the power shuts it off. The ATO reservoir is a remote 5 gallon bucket with Kalk.
 Here is the remote ATO reservoir, my Brute R/O reservoir and and the water change pipes. The last bucket is mixed SW. I simply put the water change pump in the bucket and turn it on. 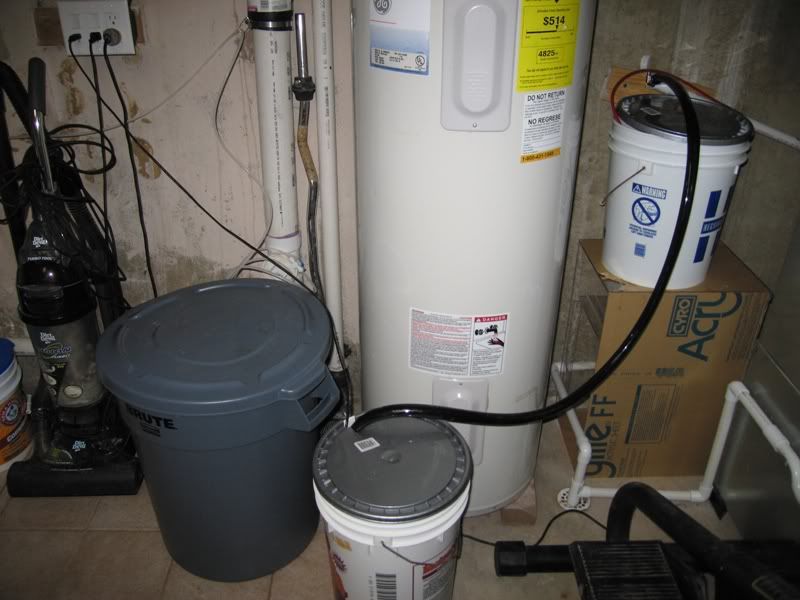
|
|
|
|
|
07/07/2011, 09:46 PM
|
#18 |
|
Back again.
Join Date: Jul 2003
Location: Fairfax VA
Posts: 97
|
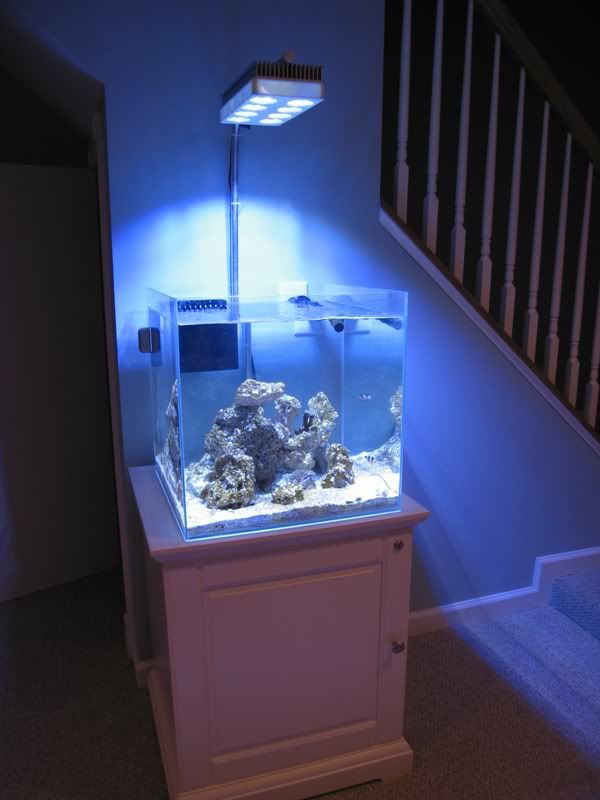
Finally, the AI Sol Super blue is suspended above the tank using a bent 1/2 in EMT conduit. It is drilled to use the original tapped holes and some new longer stainless screws. The ends are capped with white plastic 3/4 in caps.
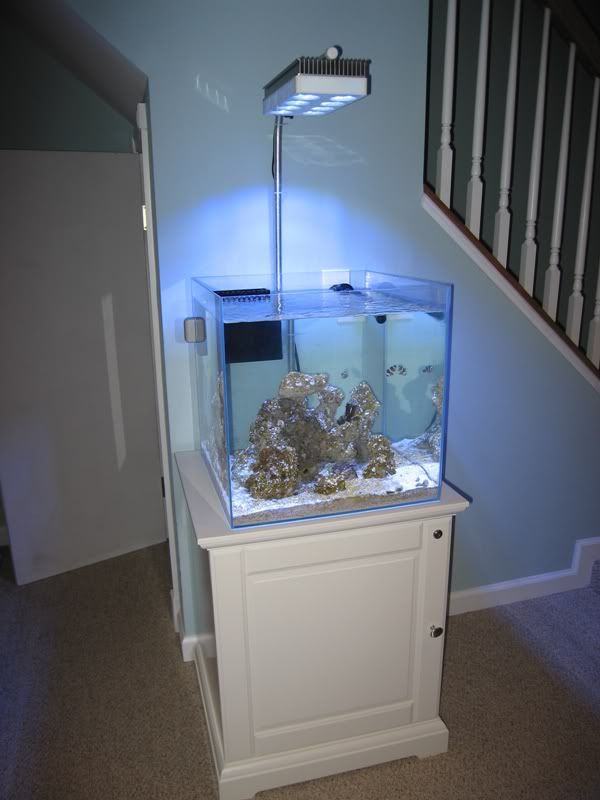  I cleaned and bleached about 80 lbs of old live rock and and also added 20lbs of Argonite. The system cycled in 21 days using Dr. Tim's fishless cycle method and products. I would do it again. Shortly after the cycle, I plumbed a BRS dual reactor into the return, added Carbon and GFO and dialed in the flow. The algae began to die within 24 hrs. At 30 days I am now at the end of the required algae bloom. And tonight's test reveals, pH 8.1, A:0, N:0, N:0, S:1.027 My export solution is MB7 and .2ml Vodka daily. The skimmer is pulling the decomposing algae and bacteria out quickly. The skimmate is black and stinky. I am limiting the dose because the rock is almost white again and the CUC and Blenny need some veggies. 7 Days ago, 2 ORA A.Oce Clowns, Green Polyp frag, a frogspawn frag, the blue legged hermits, 1 margarita and two A snails moved in. Yesterday, a bicolored blenny and a cleaner shrimp joined. 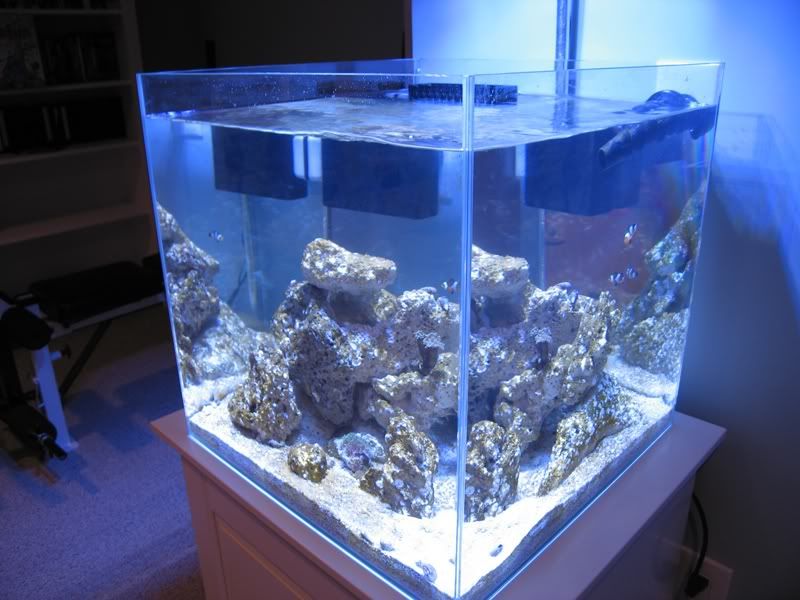
|
|
|
|
|
07/07/2011, 11:32 PM
|
#19 |
|
Registered Member
Join Date: Apr 2002
Location: Arroyo Grande, CA
Posts: 1,338
|
Nice build, i'm doing something similar. And want to get the same light.
http://www.reefcentral.com/forums/sh....php?t=1979001 How high up is the SOL unit, and what intensity are you running it at? |
|
|
|
|
07/08/2011, 12:29 AM
|
#20 |
|
Registered Member
Join Date: Mar 2011
Location: Houston
Posts: 3,223
|
looks awesome, cant wait to see some progress!
__________________
JBJ NC28, Radion, MP10, HOB-1, Mini Arctica, 2LF Phosban 150's - MARSH May 2012 TOTM JBJ 3g Picotope, Panorama Pro, AC70 29g AGA Planted FW |
|
|
|
|
07/08/2011, 06:53 AM
|
#21 |
|
Back again.
Join Date: Jul 2003
Location: Fairfax VA
Posts: 97
|
Nice top mic209. The SOL is 18" off the water and running all leds at 75%. Yo will not be disappointed. BRS was running a sale but may be out of stock. Great customer service.
|
|
|
|
|
07/11/2011, 09:11 AM
|
#22 |
|
Registered Member
Join Date: Dec 2008
Location: plaistow,nh.
Posts: 27
|
Great looking tank!!! I'm thinking of getting one and was wondering what was the exact dims on the tank? I wanna use a marineland montery stand that is 18x18. Thanks in advance, Peter
__________________
25g DT, 75g sump in basement, RKL, LG4, swc bmk150 , 2- AI's Sol blue's Current Tank Info: 25g DT, 75g sump in basement, RKL, LG4, swc bmk150 , 2- AI's Sol blue |
|
|
|
|
07/11/2011, 10:02 AM
|
#23 |
|
Registered Member
Join Date: Feb 2010
Posts: 165
|
Good looking tank ,, Nice job ,, waiting for more pic,,
|
|
|
|
|
02/03/2012, 12:09 AM
|
#24 |
|
Registered Member
Join Date: Mar 2006
Location: Omaha, NE
Posts: 634
|
Any updates?
|
|
|
|
 |
| Tags |
| build, cube, mr. aqua, rimless |
|
|
 Similar Threads
|
||||
| Thread | Thread Starter | Forum | Replies | Last Post |
| Fishdisease's 180 Gallon In-Wall Build | Fishdisease | Reef Discussion | 28 | 12/18/2017 10:02 PM |
| 50 Gallon square (24x24x20) build | the register | Reef Discussion | 1 | 07/19/2012 01:24 PM |
| Aegeon's 25G Cube Build | Aegeon | Nano Reefs | 74 | 03/02/2012 11:05 AM |
| New 55 Gallon Reef Aquarium Build | Coasterfrk | New to the Hobby | 116 | 03/31/2011 01:36 PM |
| Zma21's 25 gallon Rimless Cube build | zma21 | Nano Reefs | 62 | 01/03/2011 04:57 PM |


