
|
|
 10/19/2012, 08:05 AM
|
#26 |
|
Registered Member
Join Date: Aug 2006
Location: Wilmington, NC
Posts: 197
|
Great build. Welcome back to the hobby.
__________________
Is there a reef-addict support group? Hello, my name is Chris, and I have a reefing problem. Current Tank Info: 180 mixed reef, 10 BB Nano Reef, 15 PFW |

|

|
|
10/20/2012, 04:40 PM
|
#27 |
|
Registered Member
Join Date: Sep 2012
Location: San Jose, CA
Posts: 250
|
With the help from some friendly neighbors, we got the tank into the living room and on the stand. I'm glad that part is over. I put a lot of heavy duty felt pads under the tank, which allows me to move the tank plus stand around the room quite easily. This way I can work behind the tank and then move it in place later. Obviously this won't work once the tank is filled with water.
I put the closed loop system in place. I was toying with the idea of using flexible lines, but realized quickly that plumbing PVC is easy enough and I could make accurate enough cuts to make it all fit. The closed loop is quite simple and ended up being exactly like the diagram on page one indicates. I was toying with the idea of alternate flows and SQWD's and such, but decided it is just another thing that can break and considering it is hard to get to the back of the tank, I'll leave the alternate flows to the powerheads/wavemaker. The pump is a Danner Model 9.5 (950gph). I used a union and valve on the inlet and outlet so I can easily replace the pump in case of failure. In this configuration the pump should be able to turn the rank over about 4 times. Add to this a 5x fuge and 20x powerheads and it should be enough flow. 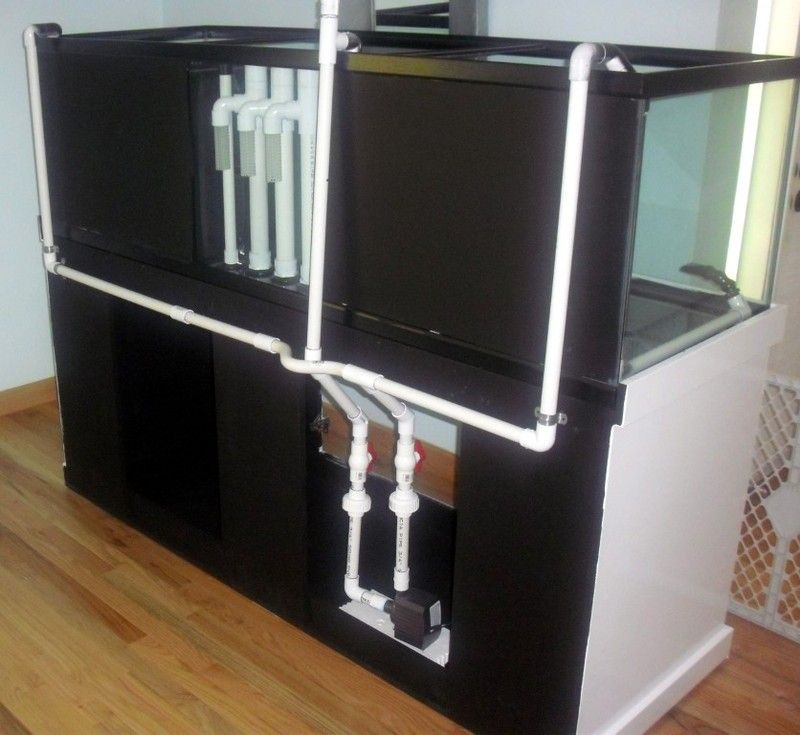 Front view. The middle pipe (inlet) has a threaded cap that is used to prime the system. All I have to do it fill the pipe with water, screw the cap on and start the system. 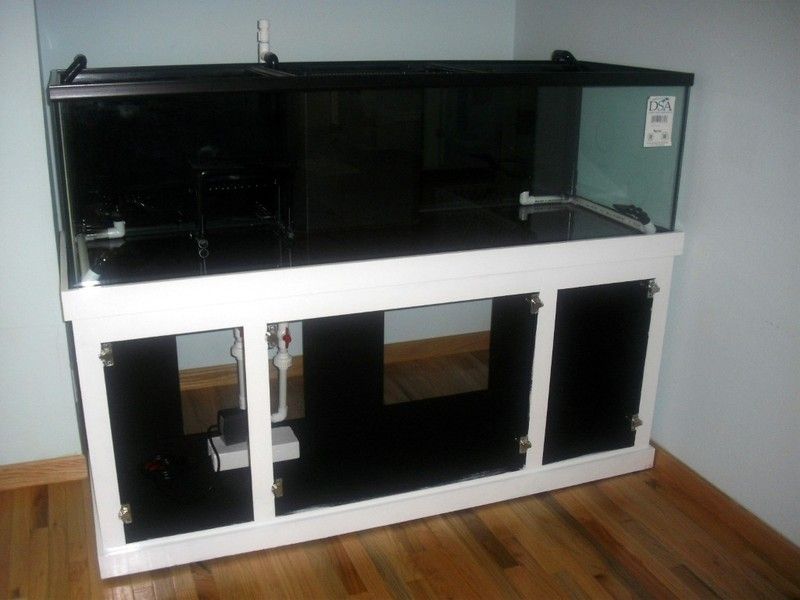 And, specially for Buzz1329, a picture of something sloppy  . I accidentally got my right outlet twisted by 90 degrees and had to recut the pipe and use a coupling to get everything back to normal. Fortunately this will be covered by rock. . I accidentally got my right outlet twisted by 90 degrees and had to recut the pipe and use a coupling to get everything back to normal. Fortunately this will be covered by rock.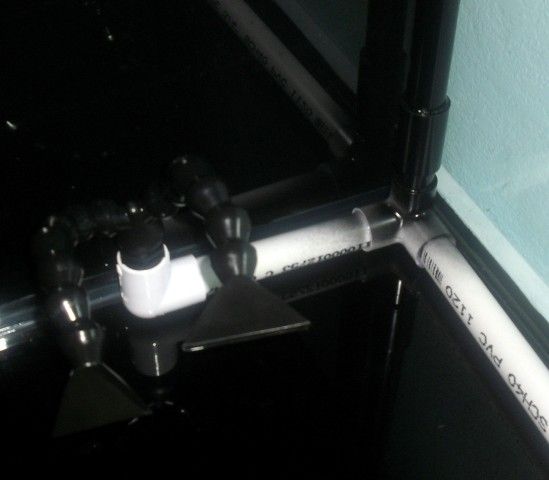
|
|
|
|
|
10/22/2012, 10:09 AM
|
#28 |
|
Registered Member
Join Date: Sep 2012
Location: San Jose, CA
Posts: 250
|
This is where I left it yesterday:
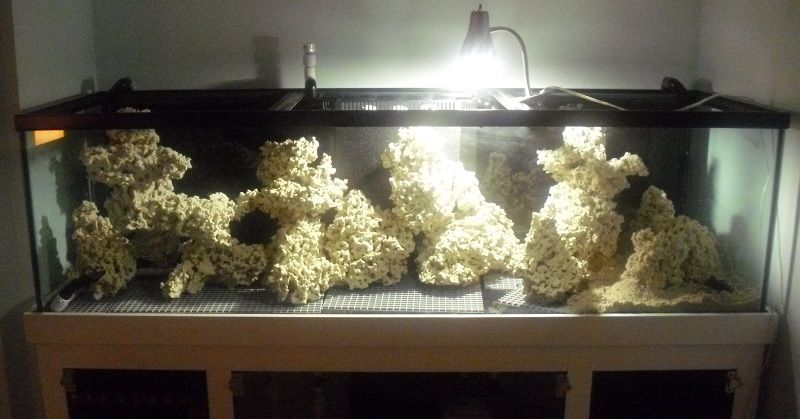 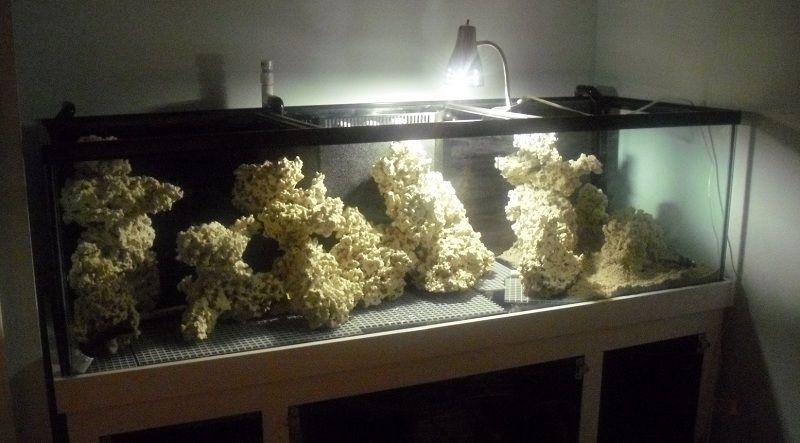 The tank is meant to be viewed from a slight angle due to the way the room is setup and where the chairs are relative to the tank. This is why the aquascape opens up from that angle, but looks rather massive from the front. I am surprised how much rock I have left (almost 20lbs). MarcoRock is really light. Trying to cram in 1lbs/g with that rock is really overdoing it. The closed loop system was tested yesterday. I had some problems with cavitation at max output, so I may need to make some changes. I have a 90 degree elbow less than 8 inches from the intake of the pump which I might have to move to allow for better flow. I also increase the size of the holes on the tank intake to allow for better flow. In the long run I may switch to a 1" intake. Currently I am rinsing sand... rinsing and rinsing and rinsing. The little QT tank is fully cycled and life is emerging everywhere. One of the rocks in particular has a bunch of different life on it. It has white and pink sponges, a lot of serpulids, two types of worms and corraline in all colors. Unfortunately it also houses two types of hydroids (colonial and digitate). Are the beneficial critters worth the trouble or should I just dump the rock? I can scrape off the corraline for seeding. |
|
|
|
|
10/22/2012, 11:39 AM
|
#29 |
|
Registered Member
Join Date: Mar 2000
Location: Reno, NV
Posts: 1,256
|
Looks good! I think your rock towers may be too tall. They almost reach the surface and won't leave much room for growth.
|
|
|
|
|
10/22/2012, 01:22 PM
|
#30 |
|
Registered Member
Join Date: Feb 2012
Posts: 68
|
I love the aquascape! if you decide to go with sps the tabling acros would look amazing if attached to the side of the pillars
|
|
|
|
|
10/23/2012, 06:46 PM
|
#31 |
|
Registered Member
Join Date: Sep 2012
Location: San Jose, CA
Posts: 250
|
It was my intention to have one of the pillars break the surface of the water and the one on the left does that. For the one on the right I thought about exactly what tyler said, table acros. That should create a nice contrast between the brightly lit coral and the dark shadows below.
I am thinking about making the 'laser tower' rock (from page 1) a Zoa garden. I want to keep the unique shape of the rock and give Zoa's the spotlight. Other than that I have not thought it out too much yet. I was too busy with the fundamentals of the tank to pick out corals and livestock. Got a lot of homework to do in the next couple of weeks. The tank is 80% full with water. As soon as the RODI filter is done producing enough water and the sump fills up, I'll transfer the substrate and some live rock from the QT tank to start the cycle. I do not have any livestock or corals yet, so I do not see the need to age the water, am I right in this? |
|
|
|
|
10/25/2012, 09:09 AM
|
#32 |
|
Registered Member
Join Date: Sep 2012
Location: San Jose, CA
Posts: 250
|
Water is in, sump is up and running and the canopy has been painted. It will be placed on the tank tonight after which i will take some more pictures. The water has completely cleared up in less than two days. This morning it was crystal clear.
Some things I need(ed) to change: The Eheim compact+ 3000 was overkill for the sump (it ran the return section dry), I replaced it with a less powerful MaxiJet 1800. I need to rotate the closed loop pump 90 degrees to allow for a straight intake. This should fix the cavitation issue and allow for stronger flow. One of the flexible hoses cracked/split at the bulkhead under the tank. Fortunately I could flip the hose and repair the split with PVC cement on the sump side. The overflow box itself was loud as can be (not the intake pipes, but the water falling in the box). I put a bunch of filter material in the box to dampen the sound. Same for the sump side. |
|
|
|
|
10/25/2012, 08:23 PM
|
#33 |
|
Registered Member
Join Date: Sep 2012
Location: San Jose, CA
Posts: 250
|
Finally, the canopy is up and lights are on.
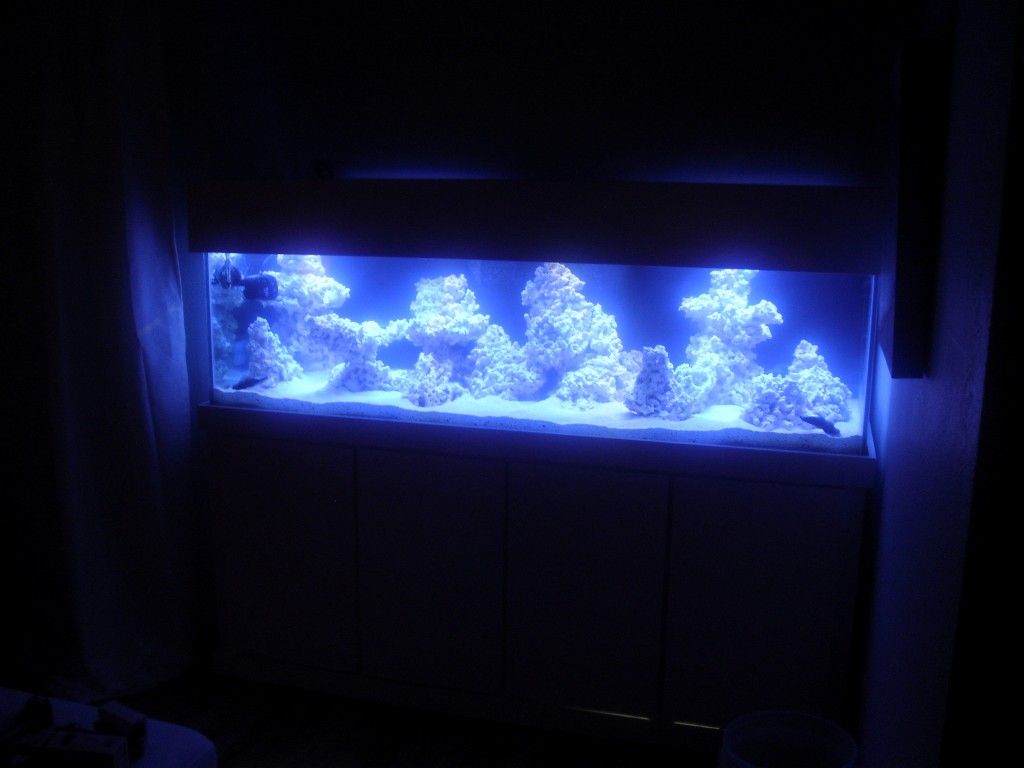 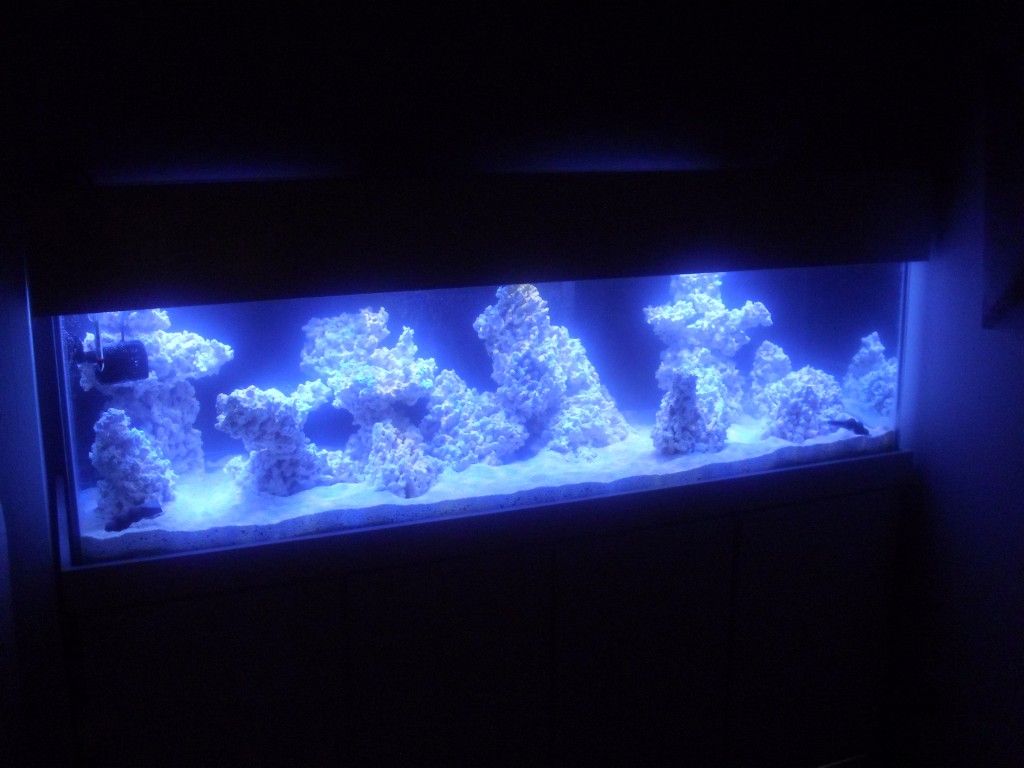 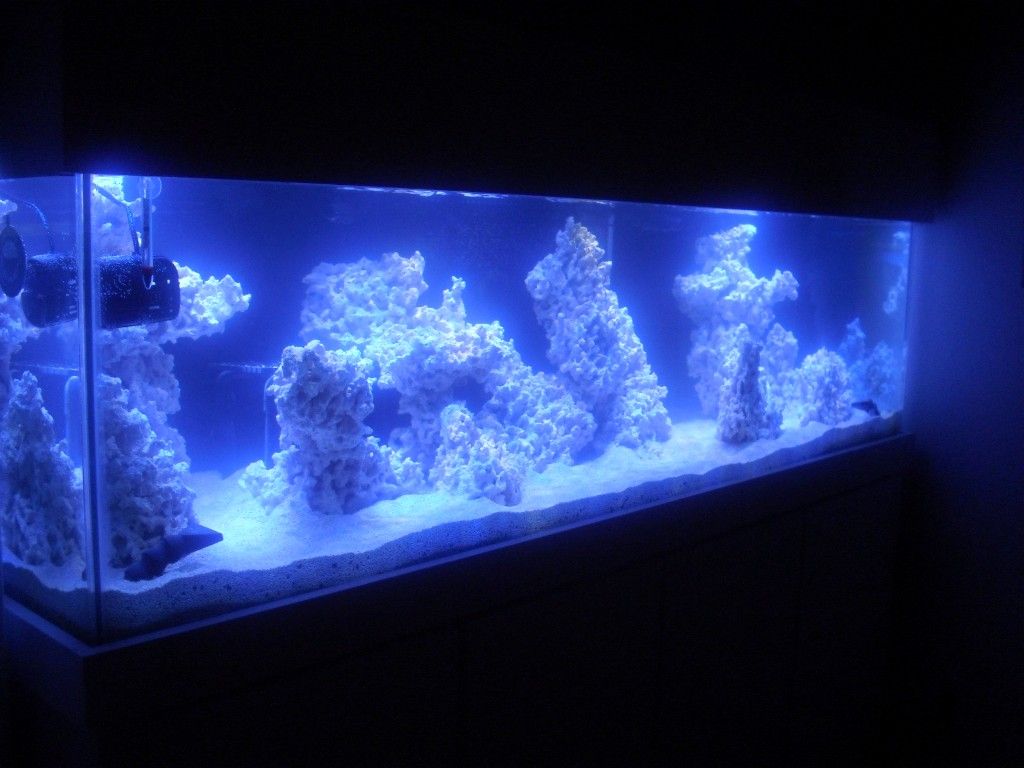 On the left side of the tank you can see the PVC table. This is where the LR from the QT will be put to seed the tank. I need to inspect all rocks first for unwanted hitchhikers before I put them in. The powerhead will not stay there, it will be moved behind the left pillar pointing towards the front. Left side 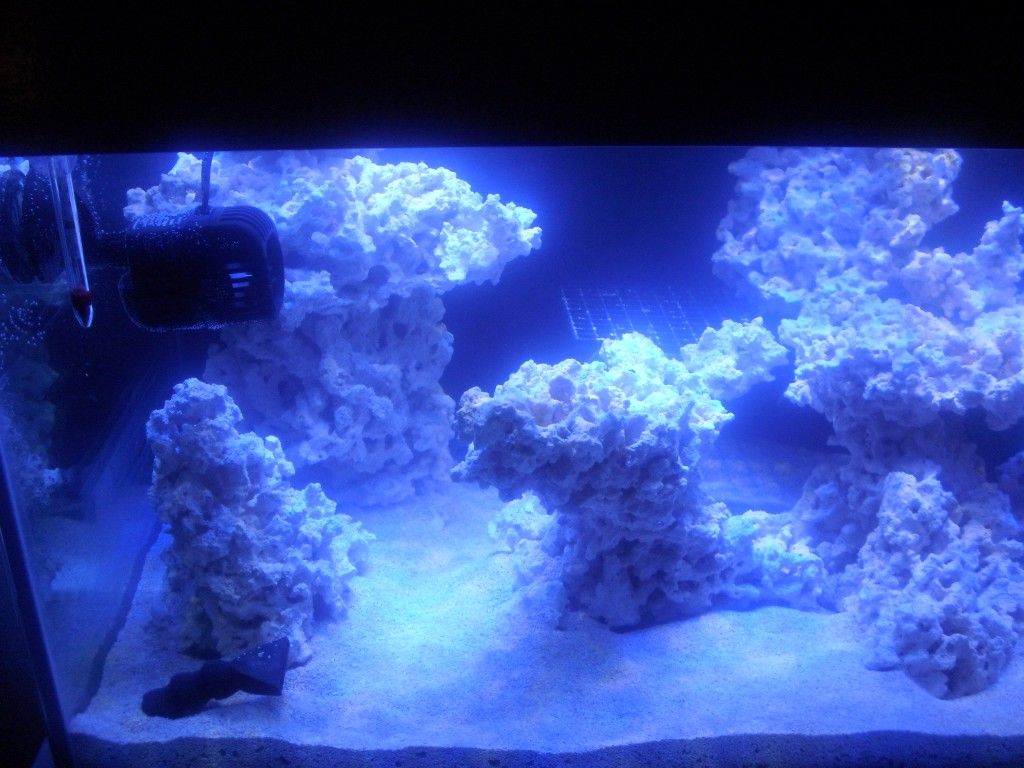 Middle 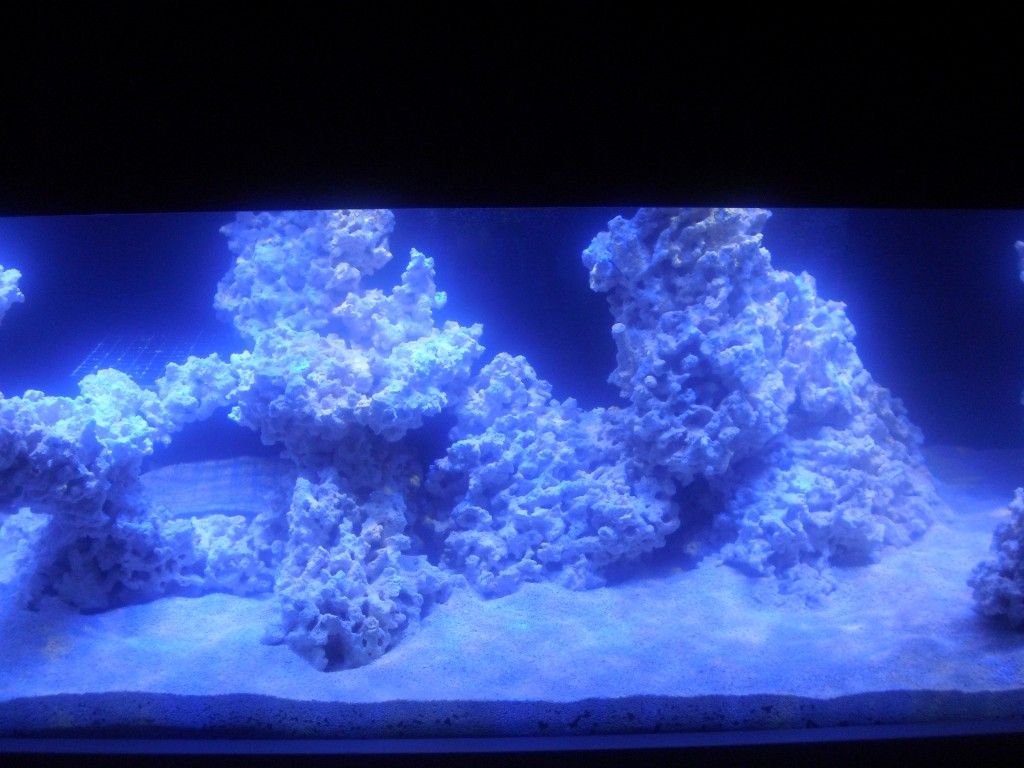 Right side 
|
|
|
|
|
10/25/2012, 09:24 PM
|
#34 |
|
Registered Member
Join Date: Jul 2012
Location: Indianapolis, IN
Posts: 30
|
Very nice, your getting back into the hobby the right way, everything looks very well thought out!
It always help when you have a wife/significant other who supports the hobby! Look forward to seeing more of the progress! |
|
|
|
|
10/25/2012, 11:44 PM
|
#35 |
|
Registered Member
Join Date: Oct 2012
Location: Ventura, ca
Posts: 8
|
Wow, that tank is going to be awesome! I can't wait to see more pictures! Good job!
|
|
|
|
|
10/26/2012, 08:00 PM
|
#36 |
|
Registered Member
Join Date: Sep 2012
Location: San Jose, CA
Posts: 250
|
All components in the stand have been installed and are up and running. I do have a bunch of cleaning up to do. Mostly tying the wires up and out of the way.
I used an American DJ PC-100 switch panel for all components. I had to mount it upside down because that was the only way it would fit. I bought a nice little watertight box for the Typhon controller and then discovered that it did not fit. I'll need to replace the power connector with a 90 degree one. Until then it'll just have to dangle I guess. 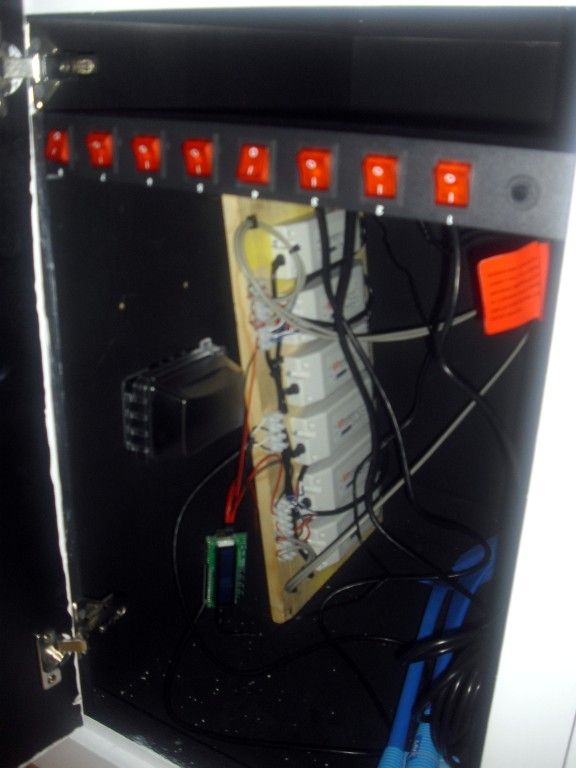 This is the Auto Top Off system reservoir. A simple 5 gallon gas canister with a hole drilled through the cap for the Aqua Lifter tube to go through. I used the A.T.O. top off system. The sump has two Eheim Jager 250W heaters and the Marineland Pro 300 skimmer. 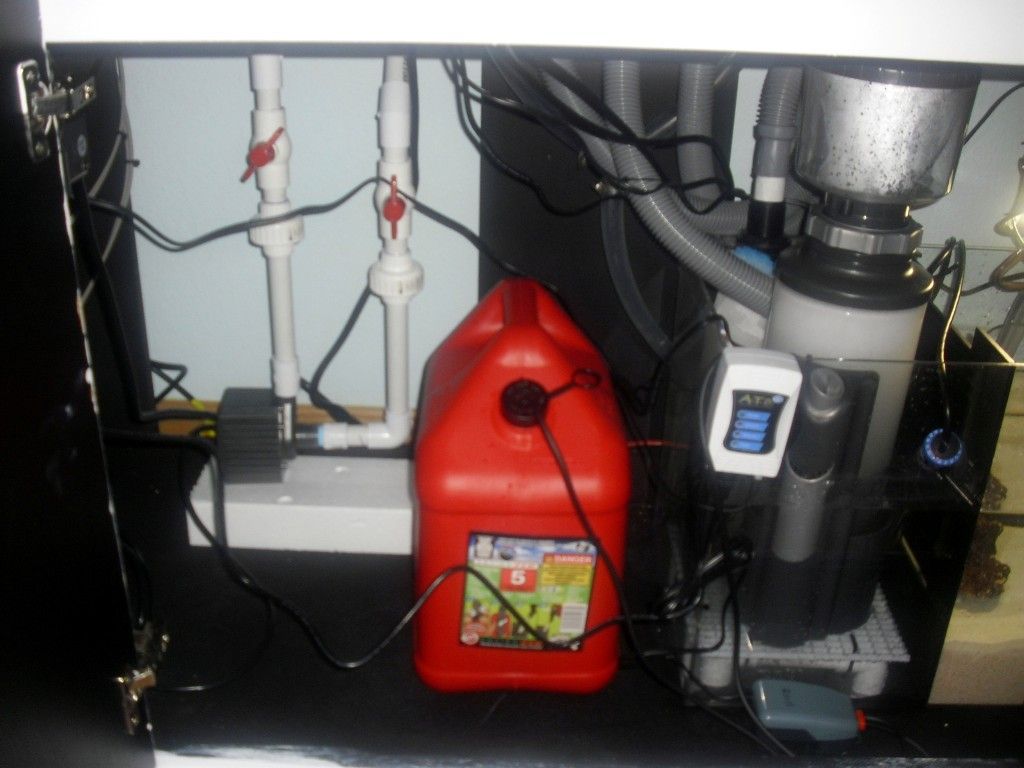 The refugium is lit by a Ecosmart 5000K LED bulb, which runs at 13W and is set to a timer which runs at night. I had an Eheim Compact+ 3000 for the return pump, which I had to replace with a Maxi-Jet 1800 due to the flow being too much for the tank overflow. 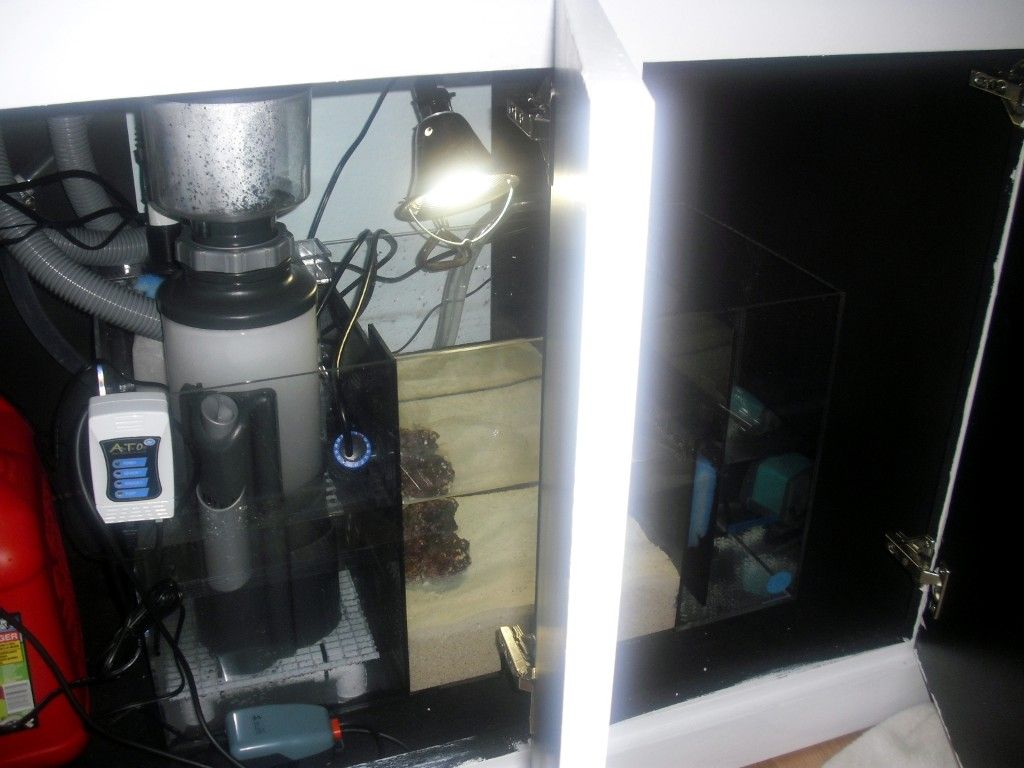
|
|
|
|
|
10/26/2012, 09:48 PM
|
#37 |
|
Registered Member
Join Date: May 2012
Location: Springfield, MA
Posts: 125
|
great thread, i enjoyed reading through it. the scape looks great, both your design and the rock itself. i hear ya on the weeks and weeks of waiting, ive had my bowfront sitting in the garage while i researched and planned since june.
|
|
|
|
|
10/28/2012, 06:34 PM
|
#38 |
|
Registered Member
Join Date: Sep 2012
Location: San Jose, CA
Posts: 250
|
Cavitation problem solved!
I disconnected the Danner Mag 9.5, trying to rotate it 90 degrees. I disconnecte the pump (thank God I installed unions!!) and then found that the 90 degree elbow to the intake had a bunch of PVC cement bleeding into the pipe blocking nearly half the intake. No wonder I had cavitation issues. Then, when I reinstalled I managed to crack the pump cover because I used too much teflon tape..... Ugh. Not wanting to wait days for replacement parts, I figured I might as well put the Eheim Compact+ 3000 to use. Fortunately I had ordered a bunch of 3/4" PVC to barb connectors from FlexPVC.com, so I could make a quick setup with Vinyl tubing like this: 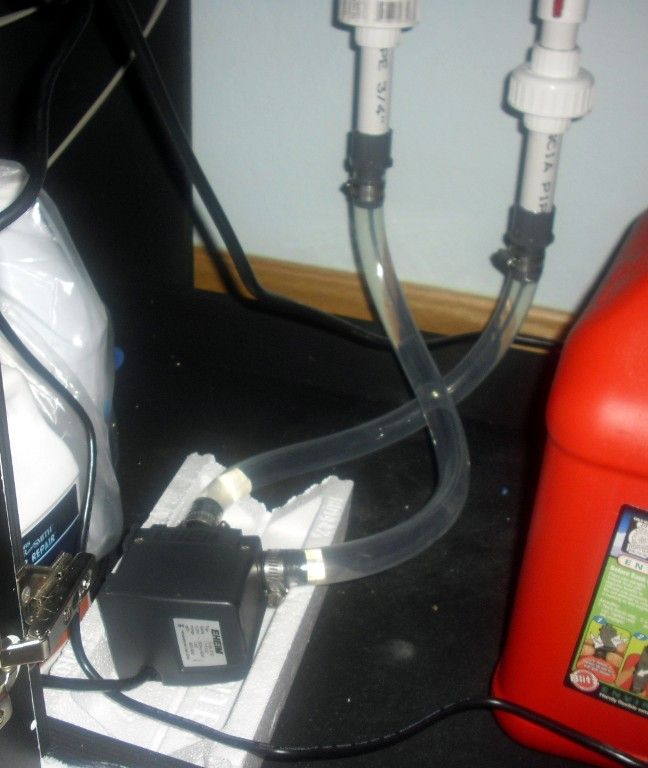 I had no idea the difference it would make. This solution is whisper quiet and it has no problem whatsoever dealing with the full ~800gph (turning tank over more than 5 times per hour). I think I'll leave this solution in place, though I will shorten the PVC as much as I can. Lessons learned from this: - Make sure you have plenty of replacement parts and hard to find PVC parts such as Slip-Barb connectors. You never know when you might need them. - PVC unions are absolutely required. Make sure you put them after/under the ball valve, so you can close the valve, then open the union and not drain your entire tank in the process. - Leave it to 'ze Germans' to design a qood quality pump. And finally another gratuitous tank shot (by day this time). This shows the added live rock that is seeding the tank. 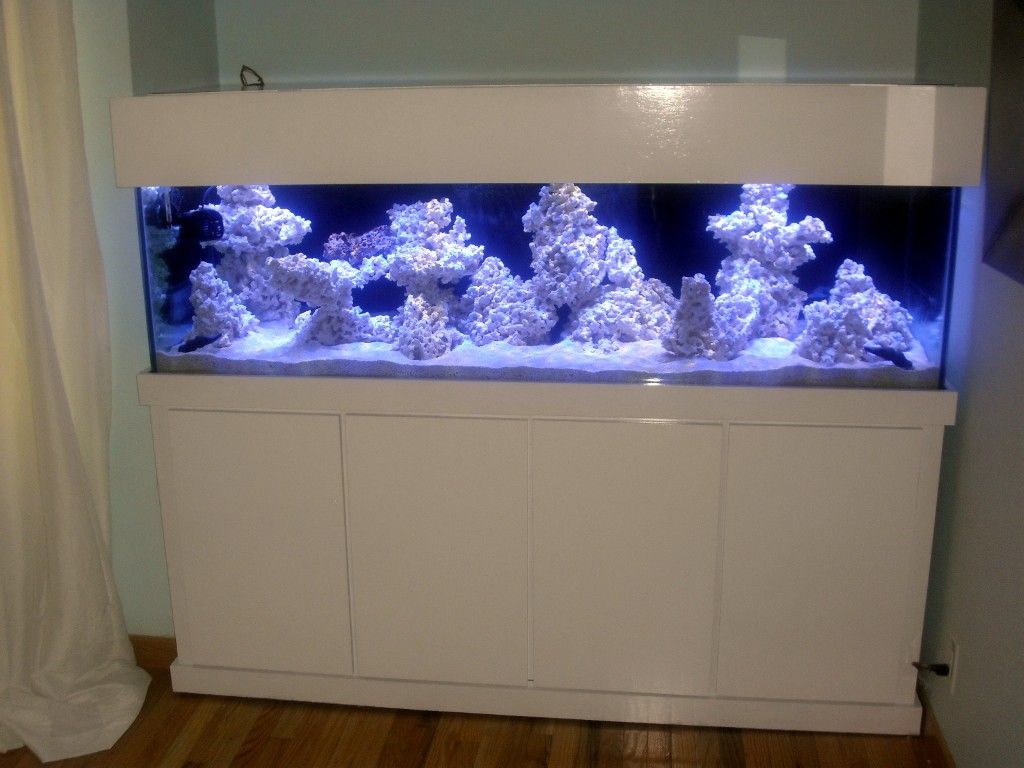 PS. Another (unrelated) lesson learned: - Calibrate your measuring tools. I found out my refractometer was off by almost 0.1!.. and no, it did not forget a zero. |
|
|
|
|
11/08/2012, 09:23 PM
|
#39 |
|
Registered Member
Join Date: Sep 2012
Location: San Jose, CA
Posts: 250
|
Finally another update. The tank finished cycling a couple of days ago after only a minor cycle thanks to the sand and live rock from the QT tank. Diatom bloom came and went in less than a week and all parameters are good.
First batch of snails arrived from reefcleaners.com. Couple of Nerites, Nassarius Vibex and Dwarf Ceriths. Also the Chaeto and pod mix arrived to seed the refugium. I started with some cheap corals to get my feet wet (both Zoa's, not sure what kind exactly). After a quick dip they went into the tank and within minutes the one on the left opened. The one on the right is taking a bit longer, but is getting there. 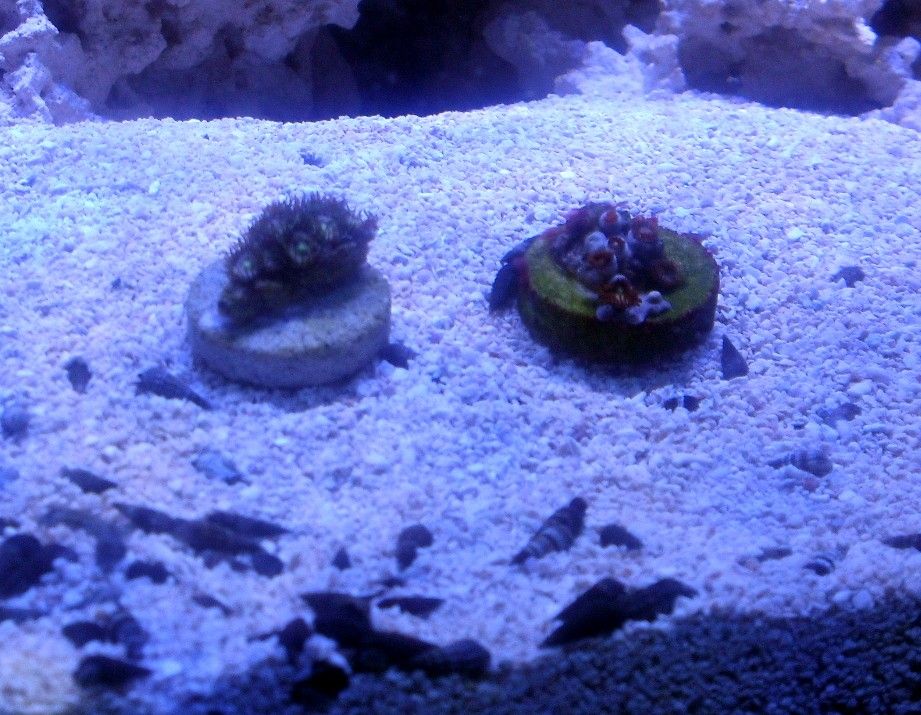 I also added the first fish to QT. Two tiny tank bred Clowns and a yellow watchman. These clowns are fearless! I have never added fish who started begging for food the second they entered the tank. 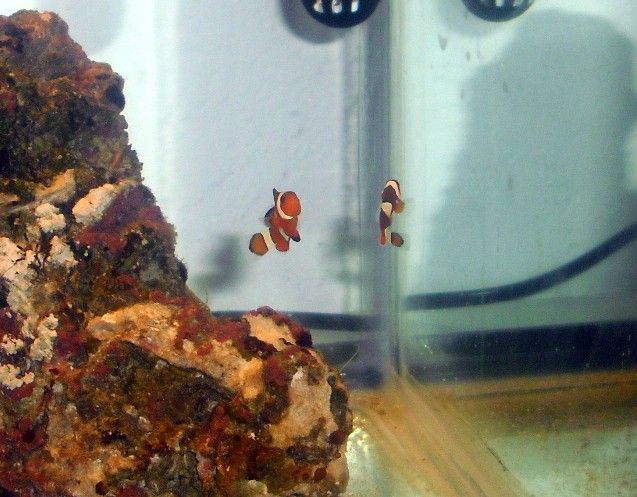 Got a very nice compliment from the guy at the LFS. I picked up some Cupramine and PraziPro 'just in case' and he said that that was the mark of a true fishkeeper. Less than 10% of their customers have QT tanks or any kind of medicine on hand when they start out. Another lesson learned: I need a better camera... this one is not going to do my corals justice.
__________________
72"x24"x21" 155g DSA all glass tank, 35g sump, Reef Octopus POV DC1 Skimmer DIY Lighting with 96x CREE XP-G-R5 and XT-E, UV, Orange/Red and Green LED. |
|
|
|
|
11/13/2012, 10:37 AM
|
#40 |
|
Registered Member
Join Date: Sep 2012
Location: San Jose, CA
Posts: 250
|
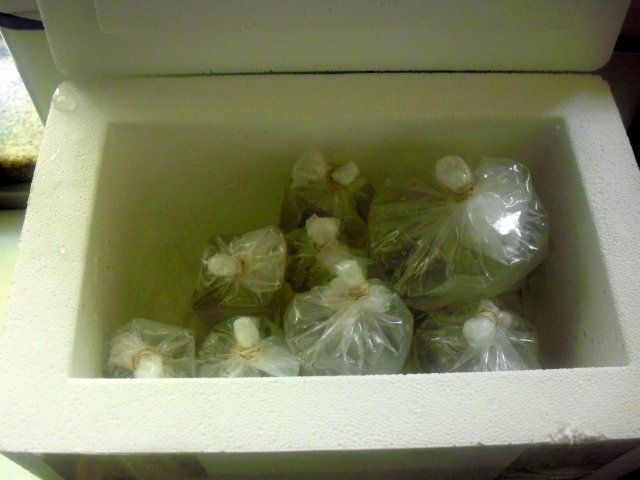
Ordered a bunch of corals from 'myreeftoyours' yesterday:
Also installed the cooling fans in the canopy to cool the heatsinks for the LED's. I did not need them before because I ran the lights at 20% max, but I am slowly moving towards 60%. A set of moonlights will arrive tomorrow. The clownfish are eating like pigs. They were pellet raised, but have taken a liking to frozen foods as well. I am glad I put them in the QT tank, because I honestly have no idea how these tiny fish (.5") would have been able to find food in the 155g without first learning to recognize me as a food source. No sign of any disease. The DT is teeming with life. Copepods everywhere. I discovered one of my Ceriths is actually a hermit crab. Not quite sure what kind, but I'll keep an eye on him. He is tiny (.25") right now. The Nerites have all moved to the back of the tank and have barely moved since, but they are all still alive (I keep track of where they are every day and they move an inch here and there). I have heard that this is not unusual, so I'll leave them be for now. I need to replace my Aqueon 1650's with different powerheads soon. These are simply too powerful for this tank. If I turn both on, even the special grade aragonite will blow all over the tank (note that the tank is only 20" high). Also, when I turn them off, they don't always restart properly. They will be demoted to mixing salt. I am leaning towards a Tunze 7095 controller with 2x6055 pumps. I cannot put Vortechs on my tank, because the outside motor will not fit between the tank and the wall.
__________________
72"x24"x21" 155g DSA all glass tank, 35g sump, Reef Octopus POV DC1 Skimmer DIY Lighting with 96x CREE XP-G-R5 and XT-E, UV, Orange/Red and Green LED. |
|
|
|
|
11/15/2012, 01:15 PM
|
#41 |
|
Registered Member
Join Date: Sep 2012
Location: San Jose, CA
Posts: 250
|
Goodies!
 After a quick dip in CoralRX, the corals were put on their temporary location in the tank. Like the previous batch, the Zoa's started opening minutes after entering the tank. I noticed an Aiptasia that I need to kill though  A piece of the torch coral had come loose from the plug in shipment, but fortunately I bought a propagation kit which contained reef glue, so no harm done. Also, I spent a long time watching the reef tank under the new moonlights yesterday evening and I have to ask: Is there anything more beautiful than a reef tank under moonlight?
__________________
72"x24"x21" 155g DSA all glass tank, 35g sump, Reef Octopus POV DC1 Skimmer DIY Lighting with 96x CREE XP-G-R5 and XT-E, UV, Orange/Red and Green LED. |
|
|
|
|
11/16/2012, 02:44 PM
|
#42 |
|
Registered Member
Join Date: Sep 2012
Location: San Jose, CA
Posts: 250
|
A Canon EOS 20D Digital SLR camera is on the way! Once it arrives (and I figure out how to operate it), I will a upload a bunch of much higher quality pictures.... I hope
__________________
72"x24"x21" 155g DSA all glass tank, 35g sump, Reef Octopus POV DC1 Skimmer DIY Lighting with 96x CREE XP-G-R5 and XT-E, UV, Orange/Red and Green LED. |
|
|
|
|
11/17/2012, 10:48 AM
|
#43 |
|
Registered Member
Join Date: Sep 2012
Location: San Jose, CA
Posts: 250
|
ICH!
Dammit.. Both clows have white specks on their fins. They're still very active and eat like crazy, so I am hopeful they will be fine after the treatment.
__________________
72"x24"x21" 155g DSA all glass tank, 35g sump, Reef Octopus POV DC1 Skimmer DIY Lighting with 96x CREE XP-G-R5 and XT-E, UV, Orange/Red and Green LED. |
|
|
|
|
11/17/2012, 12:09 PM
|
#44 |
|
Registered Member
Join Date: Sep 2003
Location: San Jose, CA
Posts: 6,499
|
Nice build. Did you QT the fishes before introducing to display?
|
|
|
|
|
11/17/2012, 12:33 PM
|
#45 |
|
Registered Member
Join Date: Sep 2012
Location: San Jose, CA
Posts: 250
|
@scuzy, hey, I see you're from San Jose, what area?
Yes, they are still in QT. I am actually not so sure if it is Ich after having observed them for a day. There is only one speck left on one of the clownfish and it looks a lot like a microbubble that's stuck in its tailfin. The speck is very bright and almost shimmers. The yellow watchman's fins are completely clean. The specks appeared several hours after a water change.. coincidence?
__________________
72"x24"x21" 155g DSA all glass tank, 35g sump, Reef Octopus POV DC1 Skimmer DIY Lighting with 96x CREE XP-G-R5 and XT-E, UV, Orange/Red and Green LED. |
|
|
|
|
11/17/2012, 05:55 PM
|
#46 |
|
Registered Member
Join Date: Sep 2003
Location: San Jose, CA
Posts: 6,499
|
yeah I am in San Jose as well, near Milpitas. I am in the process of building my new 180 system and I am impress by your setup of the inline that I am going to copy it
but my inline pump will be a water blaster 7000.
|
|
|
|
|
11/17/2012, 07:04 PM
|
#47 |
|
Registered Member
Join Date: Sep 2012
Location: San Jose, CA
Posts: 250
|
Cool, I am in Alum Rock, pretty much around the corner.
Good luck on your build. Let us know how your inline works for you. If I could do it over again, the only thing I would have changed is to make the intake pipe 1" instead of 3/4" and possibly make the outlet also 1" until the split where I'd go 3/4". (Surface area of 1" diameter is 0.78"^2 and the surface area of 3/4" is 0.44, so a split of 1" to 2x 3/4" matches up perfectly) Ich update: the speck came off.. It's been on the tail for less than a full day, so it is unlikely that it is Ich. I also went to the LFS to see if any other clownfishes of the same batch were showing signs and all of them looked perfectly clean. Fingers crossed.
__________________
72"x24"x21" 155g DSA all glass tank, 35g sump, Reef Octopus POV DC1 Skimmer DIY Lighting with 96x CREE XP-G-R5 and XT-E, UV, Orange/Red and Green LED. |
|
|
|
|
11/17/2012, 09:36 PM
|
#48 |
|
Registered Member
Join Date: Jan 2011
Location: San Gabriel Valley, Ca
Posts: 427
|
Great tank and build. Nice and shallow with good depth. My only question would be ..........why didn't the tank come pre drilled for the close loop? How much do they charge for drilling a couple of holes ??????????
|
|
|
|
|
11/17/2012, 11:26 PM
|
#49 |
|
Registered Member
Join Date: Sep 2012
Location: San Jose, CA
Posts: 250
|
That was my bad. My freshwater former self had never dealt with closed loops, refugiums and so on. I did not plan this until after I had ordered the tank. Overall I do not think I lose much by not having holes. The tank had a closed canopy, so the pipes are hidden and this two extra feet of pipe to go over the top does not cause a whole lot of additional head-loss.
__________________
72"x24"x21" 155g DSA all glass tank, 35g sump, Reef Octopus POV DC1 Skimmer DIY Lighting with 96x CREE XP-G-R5 and XT-E, UV, Orange/Red and Green LED. |
|
|
|
|
11/19/2012, 07:20 PM
|
#50 |
|
Registered Member
Join Date: Sep 2012
Location: San Jose, CA
Posts: 250
|
Toys!
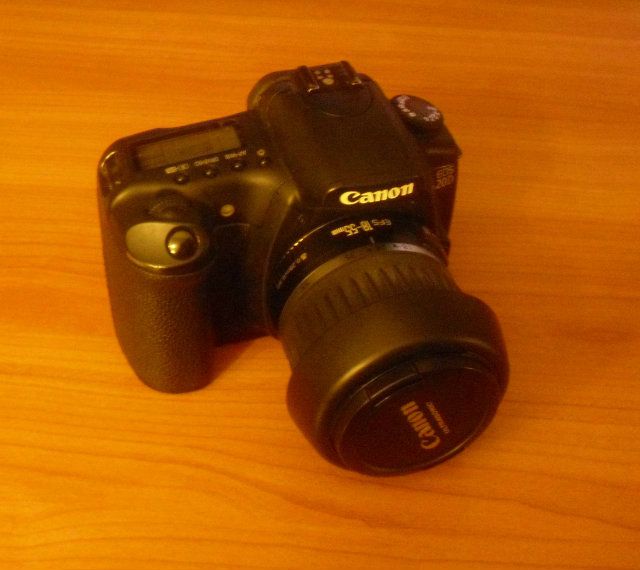 The new camera arrived. Got a good deal for this one on ebay. I will have to do some research on how to operate it, but until then full auto-mode it is .
__________________
72"x24"x21" 155g DSA all glass tank, 35g sump, Reef Octopus POV DC1 Skimmer DIY Lighting with 96x CREE XP-G-R5 and XT-E, UV, Orange/Red and Green LED. |
|
|
|
 |
|
|


