

|
 |
|
|
#26 |
|
Registered Member
Join Date: Dec 2005
Location: Jackson Hole Wy
Posts: 3,430
|
still debating on the stand I am now back to my orgenal idea of T slot 80/20 running the numbers today but should be around the same as a welded stand but with the benefits of being able to take apart if i should need to.
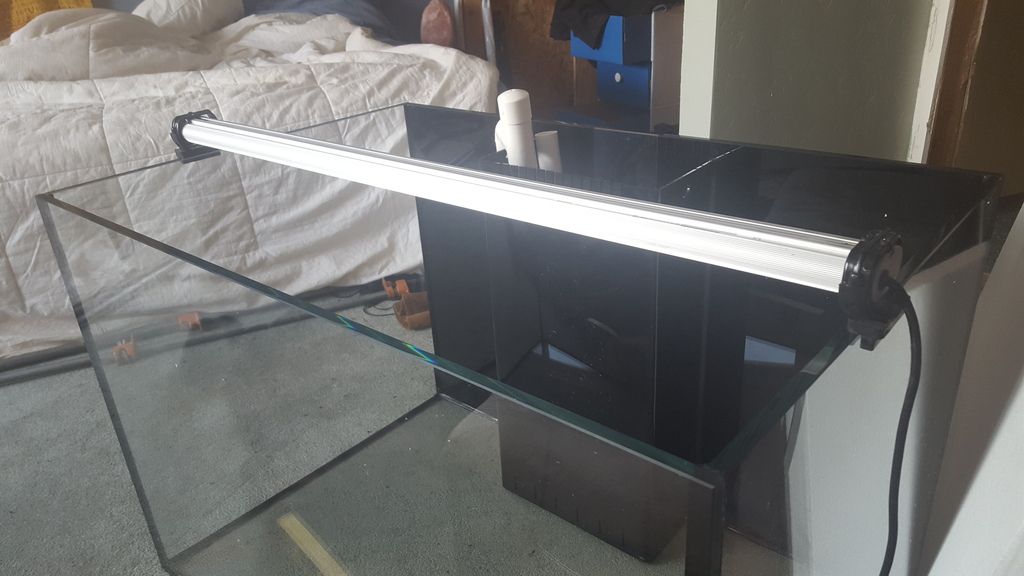
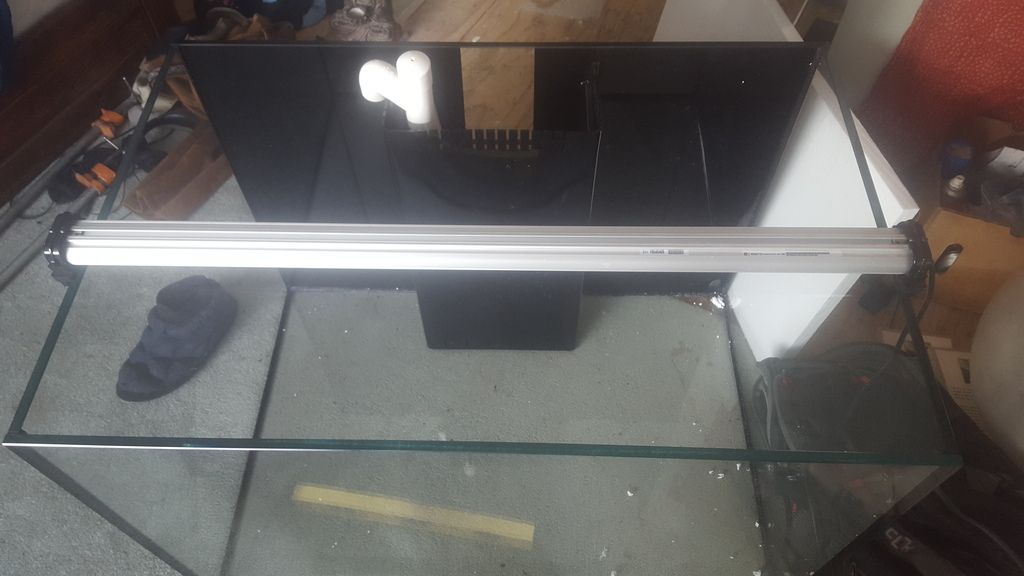
the only think I having trouble on is what connectors to use. got a design request in. prob. hear back on mon. or tue. in other news I was on the fence on my lighting. I got an offer on my new 36" BML MC 2oK so i took it. here is the light on the tank before packing up to be shipped out.   it is a supper sexy light. but had to make a choice..so I sold it. |
|
|

|
|
|
#27 |
|
Registered Member
Join Date: Mar 2015
Location: Upstate NY
Posts: 5,313
|
Just bought an SCA 80G PNP setup(12mm glass 32x24x24).
Following along. 
__________________
80G SCA Build: http://reefcentral.com/forums/showthread.php?t=2560256 Originally posted by der_wille_zur_macht: "He's just taking his lunch to work" |
|
|

|
|
|
#28 |
|
Registered Member
Join Date: May 2013
Posts: 0
|
 My new SCA 75...love love love it! Good luck |
|
|

|
|
|
#29 |
|
Registered Member
Join Date: Dec 2005
Location: Jackson Hole Wy
Posts: 3,430
|
^nice bud i al most got the PNP but had every thing except the stand..
|
|
|

|
|
|
#30 |
|
Registered Member
Join Date: Dec 2005
Location: Jackson Hole Wy
Posts: 3,430
|
Mcgree, looking good! I almost went with the 75...I went back and forth for days...haha
|
|
|

|
|
|
#31 |
|
Registered Member
Join Date: Jan 2009
Posts: 504
|
whats the dimensions of the 75?
|
|
|

|
|
|
#32 |
|
Registered Member
Join Date: Dec 2005
Location: Jackson Hole Wy
Posts: 3,430
|
it's 4" shorter than the 90
90 = 36x 24x24 75= 36 x 24x20 so only 4 " on the height but I decided on the 90 just for more h20 volume. |
|
|

|
|
|
#33 |
|
Registered Member
Join Date: Jan 2009
Posts: 504
|
cool thanks for the info. I didn't notice that size on their website, am I missing something? Awesome build btw
|
|
|

|
|
|
#34 |
|
Registered Member
Join Date: Jan 2004
Location: Marietta, GA
Posts: 5
|
I just bought a SCA 50 rimless and am following the posts.
|
|
|

|
|
|
#35 |
|
Registered Member
Join Date: Dec 2005
Location: Jackson Hole Wy
Posts: 3,430
|
^ nice I want one of those too..haha I better not.
Ok so I little update. took a few days to slow down and really think some things over. I was debating on a 1" square metal stand custom built or go back to my original idea of 80/20 T slot. if $$ was not an issue I would drop $400 on the T slot with ABS top and bottom sheets for tank and sump. the metal stand would run me around $250ish..so I had to do some thinking. in the end I decided to just go with my DIY wood stand. and set up the 20L macro tank I have been wanting for a year +. not a bad idea hey! I tryed to set up a 40br macro display fuge on my last build of the 75 a few years ago but life took a turn and had to move and take the tank down before I got it up a running.  even since I really wanted to to a planted SW macro tank. even since I really wanted to to a planted SW macro tank. just did a lille work on the stand off to get some plywood and jig saw for the top and bottom then stand and seal it! pics to come this eve.. |
|
|

|
|
|
#36 |
|
Registered Member
Join Date: Nov 2005
Location: San Diego, CA
Posts: 14,655
|
I actually had to move twice after getting my SCA120g, and it sat dry for over a year, staring at me, calling my name lol
Yeah, know the feeling. I also have a Mr. Aqua 17g planted FW I'm thinking of turning into a planted macro tank, maybe a semi QT tank for newcoming anthias
__________________
There's a fine line between owning your tank and your tank owning you! Current Tank Info: SCA 120g RR Starfire, Tunze silence 1073.02 return, 40g sump w/ fuge, SWC Extreme 160 cone skimmer,Geismann reflexx 4xT5, 2x Panorama Pro LED strips, Vortech MP40QD |
|
|

|
|
|
#37 |
|
Registered Member
Join Date: Dec 2005
Location: Jackson Hole Wy
Posts: 3,430
|
do it! macro tanks are so underrated IMHO
|
|
|

|
|
|
#38 |
|
Registered Member
Join Date: Dec 2005
Location: Jackson Hole Wy
Posts: 3,430
|
|
|
|

|
|
|
#39 |
|
Registered Member
Join Date: Mar 2015
Location: Upstate NY
Posts: 5,313
|
I'm totally jealous of your snow!
I live in upstate NY(supposed snow country), and we have 0 snow this year. Makes it tough to make a living when you live in a tourist town that depends on snow for the winter. Nice picture by the way!
__________________
80G SCA Build: http://reefcentral.com/forums/showthread.php?t=2560256 Originally posted by der_wille_zur_macht: "He's just taking his lunch to work" |
|
|

|
|
|
#40 |
|
Registered Member
Join Date: Dec 2005
Location: Jackson Hole Wy
Posts: 3,430
|
yeah I do know how that it weather does play a big part in town like ours.
on average we get about 475" yearly. this pic was interesting as it was at jenny lake boat doak so on one side you have a frozen lake and flowing water on the other side. now back to my build! |
|
|

|
|
|
#41 |
|
Registered Member
Join Date: Dec 2005
Location: Jackson Hole Wy
Posts: 3,430
|
well another set back. I staining job was just down right shitty
 I forgot to wipe off the stain with a rage so it looked like crap all uneven and blotchy. I forgot to wipe off the stain with a rage so it looked like crap all uneven and blotchy. so I am going to sad it it comes off pretty easy was pealing off with a rag. so gonna sad it off and try again. on the good news tho I did fit test the tank plumbing by putting it on the stand and adding the bulkheads.. and it was all good. so just some sanding and staining and drying and coating.. one of these days i'll get her done. |
|
|

|
|
|
#42 |
|
Registered Member
Join Date: Dec 2005
Location: Jackson Hole Wy
Posts: 3,430
|
|
|
|

|
|
|
#43 |
|
Registered Member
Join Date: Dec 2005
Location: Jackson Hole Wy
Posts: 3,430
|
oh and if your wondering why the center brace is not center, its because it was going to be right in the middle of my plumping. so I had to move it. ws going to add another one but they really don't to to much anyway.
|
|
|

|
|
|
#44 |
|
Registered Member
Join Date: Feb 2016
Location: Cincinnati, OH
Posts: 22
|
Nice work. Don't you love DIY trial and error. How many coats of poly? Hurry up and wait. That's how I feel each step of the way. Been following along.
|
|
|

|
|
|
#45 |
|
Registered Member
Join Date: Jan 2016
Posts: 14
|
Making great progress!
|
|
|

|
|
|
#46 |
|
Registered Member
Join Date: Dec 2005
Location: Jackson Hole Wy
Posts: 3,430
|
thanks guys!
yeah I hear up about hurry up and wait..my garage has no lights and its dark by 630 so its has added a few extra days. just applied my 3rd coat of poly. now to order the pitina for the skin..and get that done. |
|
|

|
|
|
#47 |
|
Registered Member
Join Date: Dec 2005
Location: Jackson Hole Wy
Posts: 3,430
|
|
|
|

|
|
|
#48 |
|
Registered Member
Join Date: Dec 2005
Location: Jackson Hole Wy
Posts: 3,430
|
hurry up and wait sums up my last few days..
so I was about to start the plumbing and decided I would go ahead and paint the back of the 40br sump. 1st coat on yesterday eve. let dry overnight 2nd coat on at 9am will get another one this afternoon. then let it dry again overnight. its chilly in my garage so things are taking there try to dry... |
|
|

|
|
|
#49 |
|
Moved On
Join Date: Mar 2011
Location: PSJ, FL
Posts: 2,235
|
Wow great build so far. That stand looks great. Love how much detail the stain give out on the wood.
|
|
|

|
|
|
#50 |
|
Registered Member
Join Date: Dec 2005
Location: Jackson Hole Wy
Posts: 3,430
|
^ thanks if coming along. thae last week was all about letting the poly dry then I decided to pain the back of the sump so that added 2 days as well. its barly above freezing in my garage/barn so it took a while for things to dry.
but back at it today with some plumbing. let dry for 24hrs or so then fresh water test time! |
|
|

|
 |
| Thread Tools | |
|
|