
|
|
 07/28/2012, 11:30 PM
|
#1 |
|
Moved On
Join Date: Jan 2012
Posts: 465
|
Commercial tank build...
Well as some of you may know, I have started my own business and things are really starting to take off. So we need to setup more systems to supply more stock.
I started my build 2 weeks ago on 3 tanks made of 3/4 PVC foam board that I purchased from Faulkner Plastic. I purchased 3-8x4 foot sheets and had them cut to to size to make Tanks that are 74x24x10. I screwed the tanks together with stainless steel screws (they don't come in contact with the water) and then sealed. Tanks were also braced on the inside with 1in pieces to make an extra seal. We tested them today and all three passed, no leaks We also build all 3 stands out of 2x4 and painted them with satin black waterproofing stain. They look great. Tomorrow we will continue to run all the electrical and move the 2-60 gallon frag tanks to the other side of the garage( that's going to be fun) . Haven't made up my mind on lighting but I would like to setup up LEDs on all tanks but that would be pricey, so for now I may just go with a some MH on light movers on each tank. Tanks will be setup with a auto water change system. more updates to come..... 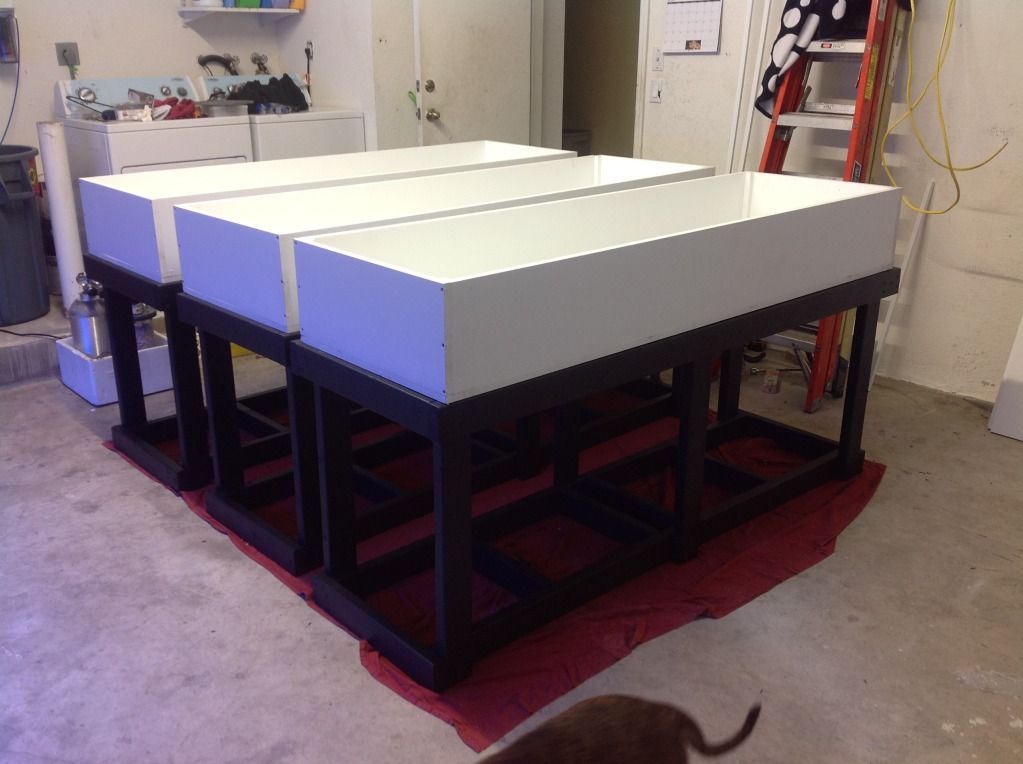 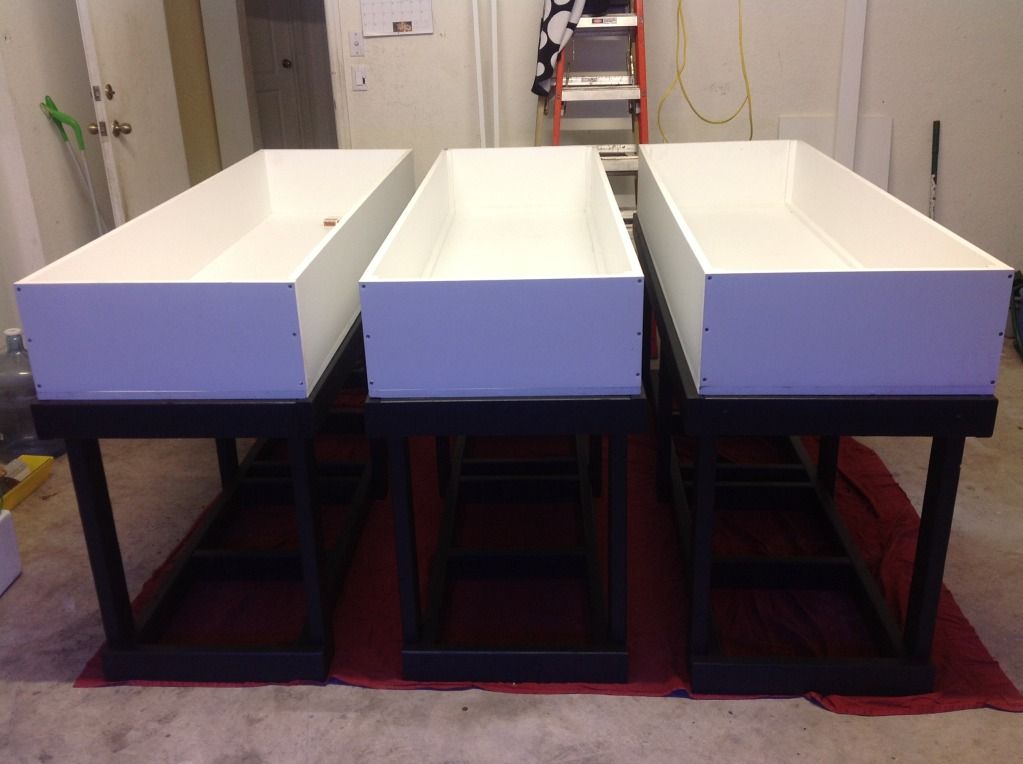
|

|

|
|
07/29/2012, 12:50 PM
|
#2 |
|
Registered Member
Join Date: May 2012
Location: Louisiana
Posts: 160
|
Good luck with the business! LED's would be a wise investment in my opinion.
__________________
-Taylor Shank Current Tank Info: 29g Pre-Reef |
|
|
|
|
07/30/2012, 02:21 AM
|
#3 |
|
Registered Member
Join Date: Jul 2010
Location: Tucson,AZ
Posts: 430
|
nice!! are the PVC foam boards pricey?
|
|
|
|
|
07/30/2012, 10:00 AM
|
#4 |
|
Registered Member
Join Date: Dec 2011
Posts: 66
|
Cool setup hope all goes well
|
|
|
|
|
07/31/2012, 10:58 PM
|
#5 | |
|
Moved On
Join Date: Jan 2012
Posts: 465
|
Quote:
|
|
|
|
|
|
07/31/2012, 10:59 PM
|
#6 |
|
Moved On
Join Date: Jan 2012
Posts: 465
|
So i finally got back to working on the tanks, after having to take a break due to being slammed with work, and finding out that I'm going to be a daddy...
 I'm happy to see the progress. Everything is coming along very well, each tank and sump filled with about 120g of water. I started the tanks from scratch with dry rock and sand and will add about 10lbs of LR from my DT to seed the new systems.I originally was going to do the tanks bare bottom, but I decided to go with 1 inch of small gravel/pebbles(50 lbs/each) in the main tanks to see how I like it.If im not happy with this style ill toss the gravel. We built the sumps with chambers (filter socks-LR/skimmer/fuge/Return pump) each sump has about 75lbs of LR and about 100lbs of sand in the fuge (6in). I got a pretty good deal on some internal cap-5000 pumps(1200gph) so I am running 1 on each tank.I chose to run 1 tank on a single 120g system which will be strictly Sps and the other 2 in a joined system 240g system with 2 sumps connected to each other with a valve so I can split the system if I choose to.Marke gave me very good advice on how to setup a Auto water change system, So I went with it. so far I have the drains hooked up but I still have to setup my new mixing station to finish it up. (thanks buddy for the great ideas)Tanks are filled with salt water and starting the cycle as of yesterday. Plz leave feedback positive or negative. I would like to hear what y'all have to sayHere's some teaser pics... EnjoyPlz excuse the mess. I'm happy to see the progress. Everything is coming along very well, each tank and sump filled with about 120g of water. I started the tanks from scratch with dry rock and sand and will add about 10lbs of LR from my DT to seed the new systems.I originally was going to do the tanks bare bottom, but I decided to go with 1 inch of small gravel/pebbles(50 lbs/each) in the main tanks to see how I like it.If im not happy with this style ill toss the gravel. We built the sumps with chambers (filter socks-LR/skimmer/fuge/Return pump) each sump has about 75lbs of LR and about 100lbs of sand in the fuge (6in). I got a pretty good deal on some internal cap-5000 pumps(1200gph) so I am running 1 on each tank.I chose to run 1 tank on a single 120g system which will be strictly Sps and the other 2 in a joined system 240g system with 2 sumps connected to each other with a valve so I can split the system if I choose to.Marke gave me very good advice on how to setup a Auto water change system, So I went with it. so far I have the drains hooked up but I still have to setup my new mixing station to finish it up. (thanks buddy for the great ideas)Tanks are filled with salt water and starting the cycle as of yesterday. Plz leave feedback positive or negative. I would like to hear what y'all have to sayHere's some teaser pics... EnjoyPlz excuse the mess. |
|
|
|
|
08/01/2012, 07:05 PM
|
#7 |
|
Registered Member
Join Date: Aug 2010
Posts: 13
|
I think those tanks are really neat. is it hard stuff to work with ? I like the idea that the white color will help make good use of light.
|
|
|
|
|
08/01/2012, 08:57 PM
|
#8 | |
|
Moved On
Join Date: Jan 2012
Posts: 465
|
Quote:
|
|
|
|
|
|
08/01/2012, 09:45 PM
|
#9 |
|
Registered Member
Join Date: Dec 2006
Location: Shreveport
Posts: 114
|
The tanks look good. Did you use PVC glue to seal the seams when you screwed them together same
as plumbing with PVC? Or did you seal them with something else after they were assembled? |
|
|
|
|
08/02/2012, 08:24 AM
|
#10 |
|
Moved On
Join Date: Jan 2012
Posts: 465
|
I used weld on solvent wich is a liquid you squirt in the the seams befor tightening the screws all the way. Thant melts the board together. Then you use regular PVC glue you would use on you plumbing but with no primer. And after all that if you would want to be extra sure it holds you can line it with silicone
|
|
|
|
|
08/02/2012, 01:19 PM
|
#11 | |
|
Registered Member
Join Date: Nov 2011
Location: Maui, Hawaii
Posts: 521
|
Quote:
__________________
Current Tank Info: 50 G Tall Last edited by Da Maui life; 08/02/2012 at 01:45 PM. Reason: Left out #4 |
|
|
|
|
|
08/02/2012, 05:30 PM
|
#12 |
|
Moved On
Join Date: Jan 2012
Posts: 465
|
Number 4 I think. I will double check when I get home
|
|
|
|
|
08/06/2012, 12:12 AM
|
#13 |
|
Registered Member
Join Date: Aug 2010
Location: camden ohio
Posts: 55
|
can you tell me more about the foam bored is it close cell how thick 3/4 how much it was i am looking in to building 2 frag tanks my self you can pm me if you like thanks brad
|
|
|
|
|
08/08/2012, 09:30 AM
|
#14 | |
|
Moved On
Join Date: Jan 2012
Posts: 465
|
Quote:
|
|
|
|
|
|
08/08/2012, 09:35 AM
|
#15 |
|
Moved On
Join Date: Jan 2012
Posts: 465
|
So I pre ordered 2 lights for one of the tanks to see how I light it. If I am satisfied I will order 4 more. And start to distribute them as well .
They are from prestige led. **A mix of 48CREE leds. **4xT5 lamps **Special ''W'' Shaped T5 reflectors reflect 99% of light into the tank **Advanced control board **3channels for the leds with 0-99% inputs per channel **9settings per channel **24hr clock with minute-by-minute adjustability. **Independant on/off switches and plugs for each pair of T5's and the LED panel. **Wireless remote control** Attachment 199264 Attachment 199265 Attachment 199266 |
|
|
|
|
08/08/2012, 09:37 AM
|
#16 |
|
Moved On
Join Date: Jan 2012
Posts: 465
|
ImageUploadedByTapatalk1344440223.040929.jpg
ImageUploadedByTapatalk1344440237.514894.jpg ImageUploadedByTapatalk1344440265.168003.jpg |
|
|
|
|
08/08/2012, 06:03 PM
|
#17 |
|
Registered Member
Join Date: Jun 2012
Location: Florida
Posts: 203
|
Just wondering if you got to pick the LEDs that went in there
if so what are they i also use Cree LEDs on my DT and did you pick the reds i have been told that they really don't do nothing for corals but that is just what i was told |
|
|
|
|
08/08/2012, 08:32 PM
|
#18 |
|
Registered Member
Join Date: Mar 2008
Location: Effort PA
Posts: 1,067
|
like how you used the pvc board to build the tanks. have you noticed any bowing down the sides of the tanks like you get with acrylic?
__________________
80 gallon Blue Line rimless tank, 40 gallon breeder sump, DIY ATS, SWC 160 cone skimmer, ocean revive LED. Current Tank Info: 80 gallon blue line rimless tank |
|
|
|
|
08/08/2012, 10:43 PM
|
#19 |
|
Registered Member
Join Date: Jun 2011
Posts: 118
|
thats a cool set up!
|
|
|
|
|
08/10/2012, 11:40 AM
|
#20 | |
|
Moved On
Join Date: Jan 2012
Posts: 465
|
Quote:
|
|
|
|
|
|
08/10/2012, 10:08 PM
|
#21 | |
|
Registered Member
Join Date: Mar 2008
Location: Effort PA
Posts: 1,067
|
Quote:
__________________
80 gallon Blue Line rimless tank, 40 gallon breeder sump, DIY ATS, SWC 160 cone skimmer, ocean revive LED. Current Tank Info: 80 gallon blue line rimless tank |
|
|
|
|
|
08/11/2012, 07:38 AM
|
#22 |
|
Registered Member
Join Date: Feb 2007
Location: Cape town, south africa
Posts: 56
|
Interesting material to use for building a tank. The fact its all white should be quite nice for light reflection within the tank
|
|
|
|
|
08/11/2012, 11:28 AM
|
#23 |
|
Registered Member
Join Date: Oct 2011
Location: NJ
Posts: 766
|
That material is really cool. I have always been worried about using cause its 50% air %05 solid.. Can you explain your gluing process again? Weldon 3 into the space followed by pvc and then screw it together? Did you protect the surface with anything. Thanks and good luck with everything. Love the lights btw
|
|
|
|
|
08/13/2012, 12:18 PM
|
#24 |
|
Registered Member
Join Date: Jul 2012
Posts: 115
|
Carlos, great build! i cant wait to get down that side and check out your farm!
|
|
|
|
|
08/13/2012, 05:28 PM
|
#25 |
|
Moved On
Join Date: Jan 2012
Posts: 465
|
Thanks for the kind word every one..first I drilled all the screws thill the was a minor gap between the boards. Then I used squirted the weld on with the an applicator, then quickly finished tightening the screws. Then I had the fall out that was left over from the boards cut in to 1x1x10 pieces and used that as an extra seal, I glued these with PVC cement and laced more glue on top.just to be sure.
|
|
|
|
 |
| Thread Tools | |
|
|


