|
|
|
|||||||
 |
| Thread Tools |
 02/25/2015, 11:20 AM
|
#26 |
|
Registered Member
Join Date: Jul 2002
Location: Wheatland, NY
Posts: 2,585
|
You're right - but I am curious how a pro would make this cut. Would they disassemble the tank and use water jet? Or are there hand tools out there that they would use to do the job?
Also, I can't see this costing less than several hundred $ if you took it to the pro, which to me, makes it a great DIY project. |

|

|
|
02/25/2015, 03:59 PM
|
#27 |
|
Registered Member
Join Date: Aug 2013
Posts: 300
|
This sort of thing is a good path to a 3AM blowout, day 1 or 1000.
__________________
--John AALSO Level III |
|
|
|
|
02/25/2015, 04:05 PM
|
#28 | |
|
Registered Member
Join Date: Aug 2013
Posts: 300
|
Quote:
Rounded corners, good. Did you grind it all the way or cut out a piece and then grind? Are you planning to finish the edges up?
__________________
--John AALSO Level III |
|
|
|
|
|
02/25/2015, 08:11 PM
|
#29 | |
|
Registered Member
Join Date: Jan 2014
Location: Alsip, IL
Posts: 1,133
|
Quote:
__________________
Four legs good. Two legs better. Current Tank Info: 50G SPS/NPS Reef, 120G Mixed Reef, 120G FOWRL, 29G Seahorse tank, 20G Observation tank, |
|
|
|
|
|
02/26/2015, 09:19 AM
|
#30 |
|
Registered Member

Join Date: Dec 2005
Location: Denver, PA
Posts: 425
|
Once the overflow box is attached (using silicone adhesive) to the outside of the tank, where is the blowout going to happen? If anything were to happen, I would think it would be contained inside the overflow box....
|
|
|
|
|
02/26/2015, 10:34 AM
|
#31 |
|
Registered Member
Join Date: Jul 2002
Location: Wheatland, NY
Posts: 2,585
|
I guess I thought this was the DIY section...
 To the OP: any progress on a plan for this? |
|
|
|
|
02/26/2015, 11:18 AM
|
#32 | |
|
Registered Member
 Join Date: Nov 2011
Location: Santa Rosa, CA
Posts: 2,727
|
Quote:
 One of the valuable parts of the DIY section is the experienced/pros suggesting that the user might be in over his/her head. There are times when we should hold 'em and times when we should fold 'em.  Without experience, it's difficult to know when 'when' is. It is also not a desertion of the DIY creed to sub out part of the job. It's not only about skills it's also about tools. The right tools DO help.
__________________
John DT 120G. mixed reef w/ lots of automation + assorted FW and SW tanks. |
|
|
|
|
|
02/26/2015, 11:48 AM
|
#33 |
|
Registered Member
Join Date: Jul 2002
Location: Wheatland, NY
Posts: 2,585
|
I hear ya
|
|
|
|
|
02/26/2015, 10:09 PM
|
#34 | |
|
Registered Member
Join Date: Mar 2003
Location: Lancaster, CA
Posts: 290
|
Quote:
|
|
|
|
|
|
02/27/2015, 02:39 PM
|
#35 | |
|
Registered Member
Join Date: Aug 2011
Location: Fort Lauderdale, FL
Posts: 988
|
Quote:
Whether it'd actually happen is a bit impossible to say. Theoretically, it could. Theoretically, everything could be fine. Theoretically a meteor could smash through the ceiling and destroy the tank, making all the work for nothing. Hard to predict these things. Hence why some people like to take a hard stance when it comes to caution. |
|
|
|
|
|
02/27/2015, 04:03 PM
|
#36 |
|
Registered Member
Join Date: Dec 2005
Location: Denver, PA
Posts: 425
|
My thoughts:
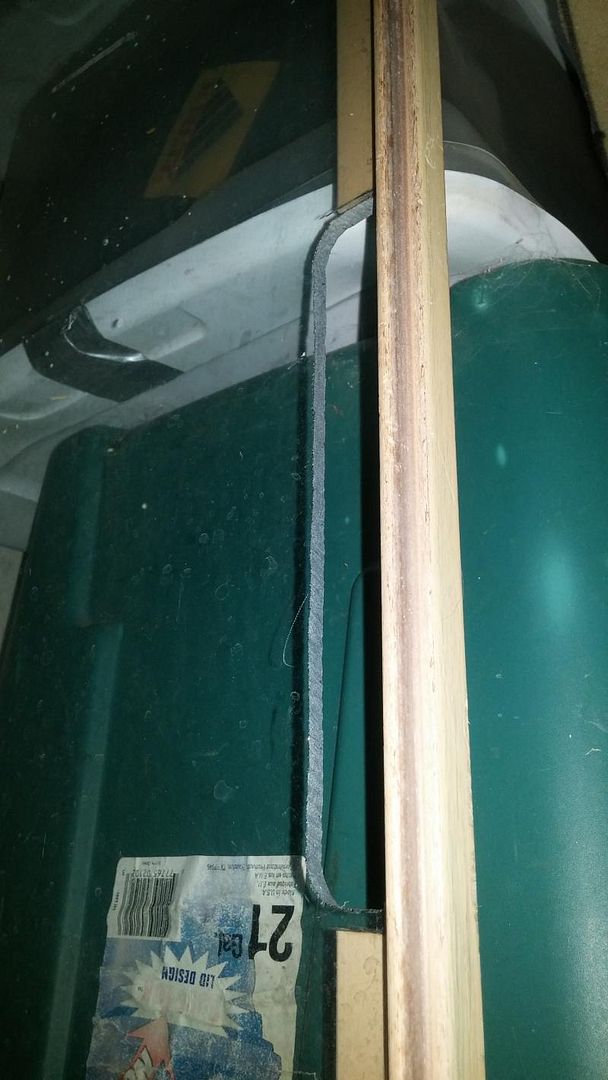
It doesn't matter if the cut out is done with a water jet or with diamond coated hand tools, the pane of glass will see the same pressure when filled with water. The water jet method will result in less micro-fractures on the "as cut" edges. These micro-fractures are the most likely starting point for failure regardless of method used. Finishing work done after the cut is the key to longevity. The installation of an external overflow or "scupper" box will add rigidity and reduce the ability of the cut pane to flex or bow, thus minimizing any integrity possibly lost due to the cut out. I'm at over 100 days and have not lost a wink of sleep over this. Take a close look, I even compromised the top brace too! In 880 days or after the meteor strike, I'll post pics of the catastrophic failure   
|
|
|
|
|
02/27/2015, 04:41 PM
|
#37 |
|
Registered Member
Join Date: Jul 2002
Location: Wheatland, NY
Posts: 2,585
|
very cool!
|
|
|
|
|
03/03/2015, 06:14 PM
|
#38 | |||
|
Drug Enthusiast
Join Date: Oct 2007
Location: Rochester, MN
Posts: 2,958
|
Quote:
 This is very sage advice, that sometimes we should go for it and other times we should hire a professional. However, it should be said that I do often find that my barometer for when to DIY is less conservative than some. This is very sage advice, that sometimes we should go for it and other times we should hire a professional. However, it should be said that I do often find that my barometer for when to DIY is less conservative than some. Quote:
I completely agree here as well. Specific to this project, I still fail to see how using a diamond blade (which was made to cut glass to begin with...) to very slowly, carefully, and purposefully cut a slot and then proceed sand it out to finish the edge work, using the time and care that only a hobbyist working on his or her pet project would, carries any greater risk than using a glass hole cutter. Quote:
But my sump plans are now almost equally outlandish; I just placed the order for the glass today, the sump itself will have the bizarre dimensions of 9.5" long x 8" wide x 18" tall.  I will put up a build thread when the whole thing is up and running. I will put up a build thread when the whole thing is up and running.
|
|||
|
|
|
|
04/25/2015, 08:41 AM
|
#39 |
|
Registered Member
Join Date: Mar 2011
Location: Calgary, Canada
Posts: 231
|
Hawk, did you use a diamond disk with your dremmel? What did you use to cut the glass?
|
|
|
|
|
05/02/2015, 05:39 AM
|
#40 |
|
Registered Member
Join Date: Apr 2011
Posts: 53
|
I like dremel choice better for cutting glass for baffles and other small projects
|
|
|
|
|
10/21/2015, 03:22 PM
|
#41 |
|
Registered Member
Join Date: Dec 2005
Location: Denver, PA
Posts: 425
|
At 330 days, no meteor strike or catastrophic failure yet
|
|
|
|
|
01/23/2016, 04:58 PM
|
#42 |
|
Registered Member
Join Date: Dec 2005
Location: Denver, PA
Posts: 425
|
420 days...still running like a champ

|
|
|
|
|
06/25/2016, 05:56 PM
|
#43 |
|
Registered Member
Join Date: Dec 2005
Location: Denver, PA
Posts: 425
|
570 days, no meteor strike or catastrophic failure yet
|
|
|
|
|
03/07/2018, 06:16 PM
|
#44 |
|
Registered Member
Join Date: Dec 2005
Location: Denver, PA
Posts: 425
|
3 years later...still running like a champ and no meteor strike or catastrophic failure yet
|
|
|
|
|
03/07/2018, 06:41 PM
|
#45 |
|
Registered Member
Join Date: Nov 2006
Location: Vancouver
Posts: 210
|
I had a glass shop do mine last week, cost $40 Canadian. It was a rectangle in middle top 6" x 2". Then I added a weir I got on ebay which is 1" solid and 1" weir at top. . They drill a hole at each corner and then slice towards each hole. End up with round inside corners. Vey nice proficiently straight/smooth lines. It was just the back piece of glass though not a complete tank. Then I assembled.
It would be difficult on an already put together tank. Glass is cut on a table horizontally for stability, which would be difficult to do on a complete tank. I would suggest taking the back piece off and taking that to glass shop, then reattach. Much easier. Half inch deep doesn't seem enough though. Your water level would be at 1/4" from top or less and if you have and water waves it would constantly spill over edge. At my 2" depth half is solid piece of weir which leaves 1" at top for water. My water level is at around 3/4" from top which gives me some wave action ability. Last edited by mkj; 03/07/2018 at 06:51 PM. |
|
|
|
|
03/08/2018, 08:16 AM
|
#46 | |
|
Registered Member
Join Date: Jun 2014
Location: Saint pete
Posts: 12
|
The pictures don't show up?
Quote:
|
|
|
|
|
|
03/08/2018, 07:03 PM
|
#47 |
|
Registered Member
Join Date: Mar 2006
Location: Ottawa, Canada
Posts: 101
|
I've actually had exactly the described blowout hapoen.
I had drilled a series of 1" holes in the back panel of a 65 gal. It was surrounded by a glass overflow box, siliconed all around. It didn't stop the crack that started at one hole and went right down to the bottom. The tank had been in use for about 3 years with no issues, then one day it blew. I didn't round or polish the edges of the holes, and I'm not sure if that would have helped prevent it. |
|
|
|
|
03/09/2018, 09:00 AM
|
#48 |
|
Registered Member
Join Date: Sep 2013
Location: Louisville Kentucky
Posts: 3,110
|
The best way to do this is either with a wet saw or grinder with a high quality diamond blade, a Diamond drill bit... and diamond grit sanding/ budding pads..
The key is to avoid chips.. If you have any chips grind them down then buff them out smooth . this will keep them from becoming fractures... If your not skilled with using power tools and cutting super hard surfaces let someone who is more skilled do it for you... I have cut a picture frame from glass in the past on my radial arm wet saw.
__________________
240+G Mixed BB Reef tank.. 350 G Marine Pond. And the expensive stuff that runs it. Chic's are for Chic's You silly men Go Fishing or something... Current Tank Info: 240= gal Reef /550 Gallon Saltwater pond 72 G Bay front Tropical aquarium |
|
|
|
|
03/09/2018, 03:46 PM
|
#49 |
|
Registered Member
Join Date: Dec 2005
Location: Denver, PA
Posts: 425
|
+1
As noted in post #36 "Finishing work done after the cut is the key to longevity." |
|
|
|
|
|
|