

|
 |
|
|
#1 |
|
Registered Member
Join Date: Dec 2013
Posts: 2,062
|
DIY overflow box
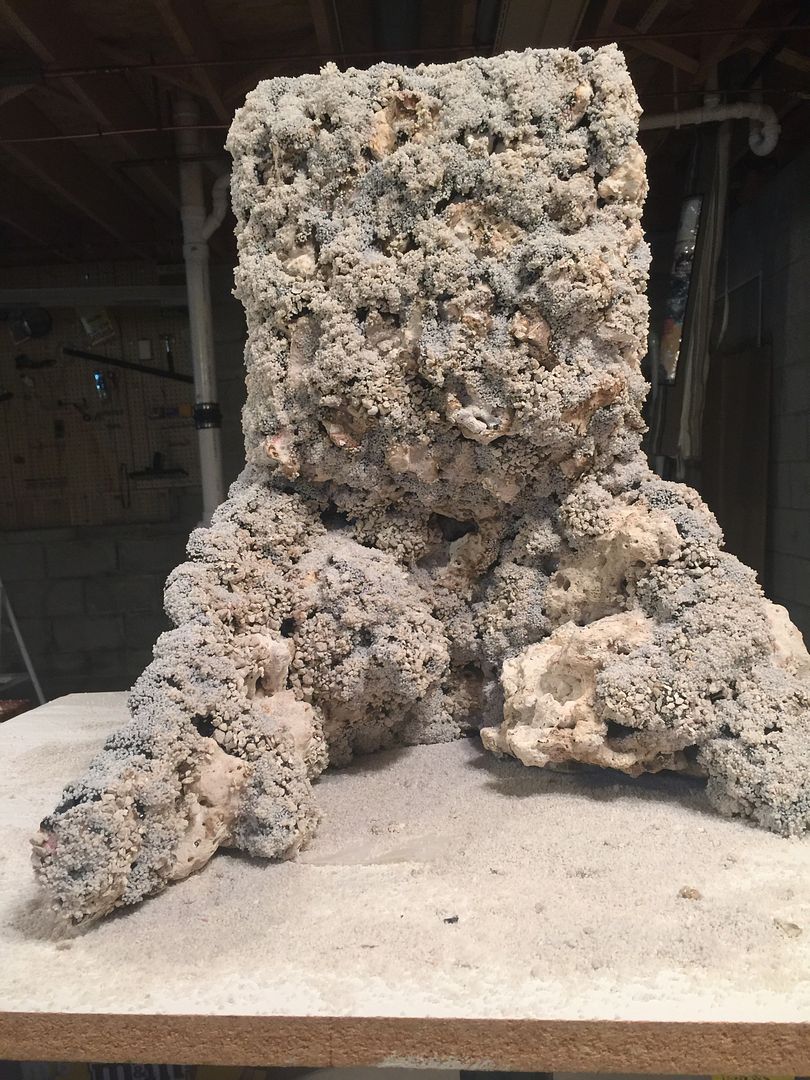
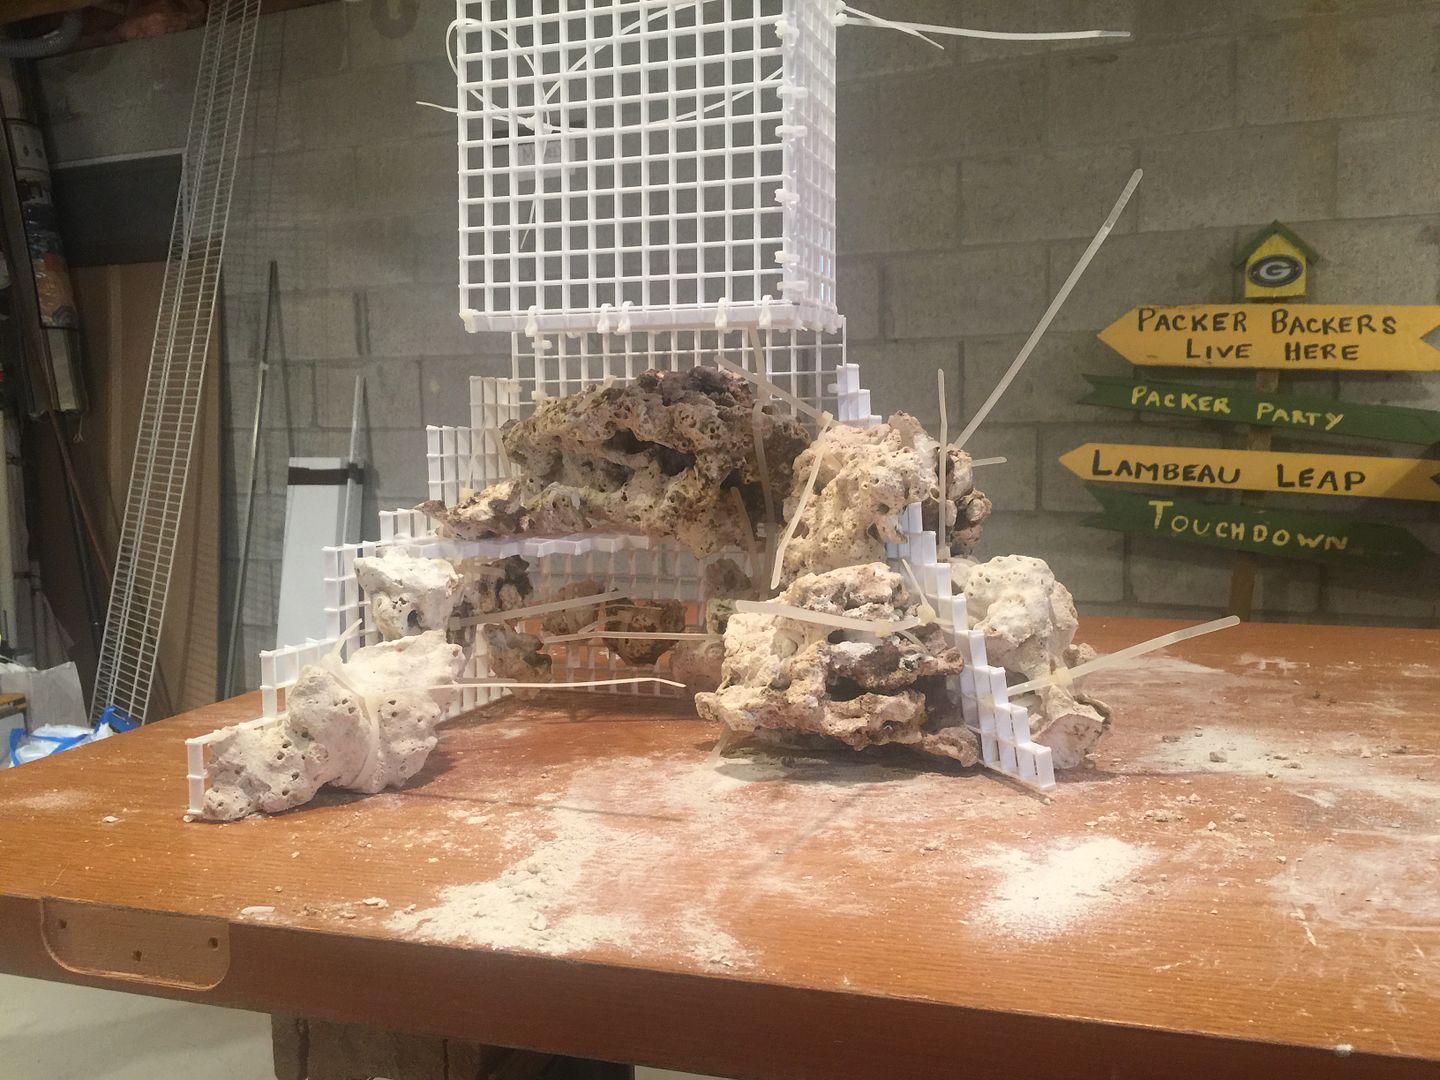
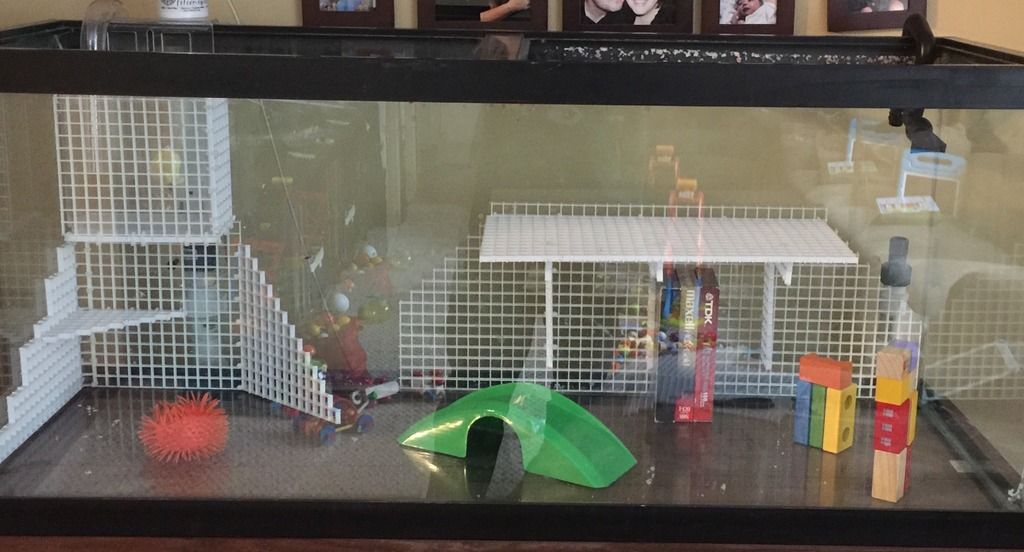
Looking into making an overflow box. I'm looking to run 500gph. My DT is a 75gal. I have 1" pvc on the return line. The tank has trim on it. From the outside the trim is 1 3/4" wide. Because of my 3D wall the overflow box needs to be the size of what I have now roughly. What I have now is 7 1/4" L x 3" W x 5/8" on the outside of the box. My guess is the box wouldn't be big enough for PVC 90's to fit inside so I would need an internal and external box. I was thinking of using two 4 sided boxes and using a bulkhead to hold them together. Because of space I thinking to put a herbie style overflow.
The box I have now from a HOB overflow that is made to fit in the 3D wall  The 3D wall    You can see the wall will be bonded to the back and side of the tank. |
|
|

|
|
|
#2 |
|
Registered Member
Join Date: Dec 2013
Posts: 2,062
|
Ok so questions
1) what size bulkhead should I use to connect the internal and external box together? 2) would I have to use 1 1/2" PVC to go from the external box to the sump then? 3) would I need to use two 90's to make one of these or do I not need that U shaped pipe?  4) will a bulkhead be ok supporting the weight of the boxes? 5) about how big do you think I would have to make the external box? 6) how far from the top of the trim should the internal box be? 7) about where should the hole be that connects the two boxes in relation to the internal box? Do I want the top of the hole just below the teeth of the overflow? Last edited by SFish; 12/08/2016 at 02:50 PM. |
|
|

|
|
|
#3 |
|
Registered Member
Join Date: Dec 2013
Posts: 2,062
|
I would just drill the box I have but that tab on the back sticks out so the box would not go flat against the glass.
|
|
|

|
|
|
#4 |
|
Registered Member
Join Date: Dec 2013
Posts: 2,062
|
No one with any advice or links to look at? What do people do when they install an internal overflow?
|
|
|

|
|
|
#5 |
|
Registered Member
Join Date: May 2016
Location: Possum Kingdom Lake, TX
Posts: 78
|
I built my internal overflows on my tank out of 1/4" blue acrylic. I wanted a tank that could be viewed from both sides. I'll try to remember to take some pics when I get home. But other than that I'm not much help to you.
Sent from my SAMSUNG-SM-G870A using Tapatalk |
|
|

|
|
|
#6 |
|
Registered Member
Join Date: Dec 2014
Location: Houston, TX
Posts: 352
|
This is what I'm doing right now on my 24" x 18" 37 gallon. I'm attaching a 9" x 4" x 6.5" glass box to the exterior, and a Modular Marine low profile acrylic internal box. For aesthetics, the internal box was sized to completely cover the outer silicone seams and outer box. The outer box will be set up with a herbie drain. The internal is a 11" low profile design which really helps on this small tank.

__________________
Slowly Building: 38 Gal. DT Cube | DIY Sump | DIY Stand |
|
|

|
|
|
#7 | |
|
Registered Member
Join Date: May 2016
Location: Possum Kingdom Lake, TX
Posts: 78
|
Quote:
  this is my internal overflows the top of the pvc is a T with a cap on the top that has a 3/16" hole drilled in it and a 90 that is pointed down. It's very quiet. You don't have the waterfall noise that most tanks have. In fact I can barely hear it with the lid open on my aquarium. this is my internal overflows the top of the pvc is a T with a cap on the top that has a 3/16" hole drilled in it and a 90 that is pointed down. It's very quiet. You don't have the waterfall noise that most tanks have. In fact I can barely hear it with the lid open on my aquarium.Sent from my SAMSUNG-SM-G870A using Tapatalk |
|
|
|

|
|
|
#8 | |
|
Registered Member
Join Date: Dec 2013
Posts: 2,062
|
Quote:
|
|
|
|

|
|
|
#9 |
|
Registered Member
Join Date: Dec 2013
Posts: 2,062
|
Quote:
|
|
|

|
|
|
#10 |
|
Registered Member
Join Date: Dec 2013
Posts: 2,062
|
I been looking at Ghost overflows trying to get an idea of how they are put together to give me something to kind a go off of.
|
|
|

|
|
|
#11 |
|
Registered Member
Join Date: Dec 2014
Location: Houston, TX
Posts: 352
|
I'm not using a bulkhead, there is 2, 1.75" holes. Just finished drilling the holes.
__________________
Slowly Building: 38 Gal. DT Cube | DIY Sump | DIY Stand |
|
|

|
|
|
#12 |
|
Registered Member
Join Date: Dec 2013
Posts: 2,062
|
Oh so your bonding the outside box to the tank on your set up. You hole size is in between a 1 and 1 1/4" bulkhead hole.
Last edited by SFish; 12/09/2016 at 04:04 PM. |
|
|

|
|
|
#13 |
|
Registered Member
Join Date: Dec 2014
Location: Houston, TX
Posts: 352
|
Yep using RTV108 for the outer glass box. The 1.75" hole is what Lifegard Aquatics specifies for their 1" bulkhead, which is why I had that size bit.
__________________
Slowly Building: 38 Gal. DT Cube | DIY Sump | DIY Stand |
|
|

|
|
|
#14 |
|
Registered Member
Join Date: Dec 2013
Posts: 2,062
|
Thanks
|
|
|

|
|
|
#15 |
|
Grizzled & Cynical
 Join Date: Apr 2006
Location: Stamford, CT
Posts: 17,319
|
When I did this some years ago, I used an acrylic inside weir box and an external glass scupper box. I'd suggest using a bulkhead to help hold the internal box as silicone doesn't bond plastic very well and you don't want to accidentally knock it off. When I did mine, I used a 1 1/2" bulkhead. I also drilled the external glass pieces for the drains before assembly and I just did a 4 piece box siliconed to the back of the tank.
__________________
Simon Got back into the hobby ..... planned to keep it simple ..... yeah, right ..... clearly I need a new plan! Pet peeve: anemones host clowns; clowns do not host anemones! Current Tank Info: 450 Reef; 120 refugium; 60 Frag Tank, 30 Introduction tank; multiple QTs |
|
|

|
|
|
#16 |
|
Registered Member
Join Date: Dec 2013
Posts: 2,062
|
Thanks
Yeah I'm going to use a bulk head to hold both boxes on. The same way a ghost overflow does. From what I can tell I think I can get away with 1 1/4". For the emergency I read a 1" pipe can handle 330gph and I'm going to be running 500gph so 1 1/4" should be fine as far as I can tell. How big did you have to make your outside box? Is the bulkhead and silicone the only thing holding it on? Last edited by SFish; 12/11/2016 at 09:26 AM. |
|
|

|
|
|
#17 |
|
Registered Member
Join Date: Dec 2014
Location: Houston, TX
Posts: 352
|
On a ghost overflow, the bulkhead is what holds both the inner/outer box to the tank. The set up uses 2 gaskets per BH, one on each side of the tank glass.
__________________
Slowly Building: 38 Gal. DT Cube | DIY Sump | DIY Stand |
|
|

|
|
|
#18 | |
|
Registered Member
Join Date: Dec 2013
Posts: 2,062
|
Quote:
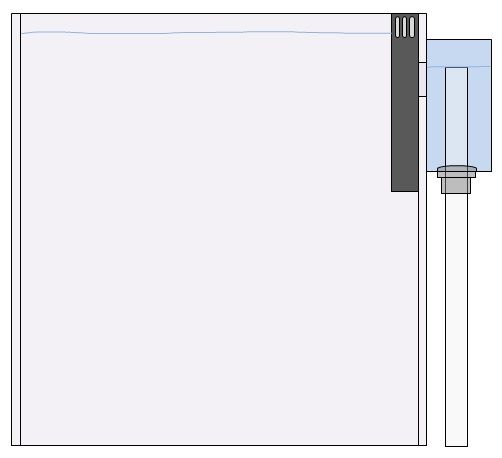
This is the design i'm shooting for. Not sure but it looks like the emergency drain goes to about the top of the bulkhead. |
|
|
|

|
|
|
#19 |
|
Registered Member
Join Date: Sep 2016
Location: Wi
Posts: 61
|
Go Pack
|
|
|

|
|
|
#20 |
|
Registered Member
Join Date: Dec 2013
Posts: 2,062
|
Huh?
|
|
|

|
|
|
#21 |
|
Registered Member
Join Date: Mar 2016
Location: Florida
Posts: 782
|
DIY overflow box
I am in the process of trying the same thing for my 180g. The person I bought the tank from give me a HOB OF he used for the tank. I had a HOB when I first got in the hobby and flooded once when the siphon broke because of a snail. I will never do that again LOL.
So far I have cut the tops off and added a third 1" drain hole in the outside box. Waiting on the 1.5" bulkheads, gaskets and glass hole saw to get in before I cut the holes in the boxes. 
__________________
"I chop up animals and glue them to rocks" Current Tank Info: System 1 Mixed Reef: 180g DT,180g Fuge, 120g Sump http://www.reefcentral.com/forums/showthread.php?t=2611735 |
|
|

|
|
|
#22 |
|
Registered Member
Join Date: Mar 2016
Location: Florida
Posts: 782
|
Also nice job on the foam wall. It will be covered with Coraline algae after 6 months or so. I did the same thing for my current 180g tank to cove the huge OF.

__________________
"I chop up animals and glue them to rocks" Current Tank Info: System 1 Mixed Reef: 180g DT,180g Fuge, 120g Sump http://www.reefcentral.com/forums/showthread.php?t=2611735 |
|
|

|
|
|
#23 |
|
Registered Member
Join Date: Dec 2013
Posts: 2,062
|
|
|
|

|
|
|
#24 |
|
Registered Member
Join Date: Mar 2016
Location: Florida
Posts: 782
|
The ghost OF I am working on is for my new 180. I will drill the holes about a inch or so below the plastic trim. Just where ever works for the two boxes and tank. My bulkheads will be here this week so I will be able to really plan further once I have them in hand. I want both boxes to be snug against the rim and the holes close to center on the inside OF box.
|
|
|

|
|
|
#25 |
|
Registered Member
Join Date: Dec 2013
Posts: 2,062
|
My only concern is the amount of space between the emergency drain and the top of the external box. You want the hole to be just below the teeth on the internal box right?
|
|
|

|
 |
|
|