
|
|
 09/29/2014, 05:41 PM
|
#1 |
|
Registered Member
Join Date: Jan 2008
Location: Portugal
Posts: 267
|
New 265g from Portugal
Hello all,
Finally I decided to post my new build here after being inspired by Bilk thread. So first a little introduction. I am in the hobby since I was 8 years old keeping guppys and neons. From there I evolved to harder species and finally I gave my self up to reefs after maintaining and reproducing discus. This was 12 years ago. I started with a 24g and due to several house movements (total of 5) I had also 5 tanks. The last one was this 130g reef.  Unfortunately this project died due to 3 days without power due to a power outage. That's why I am going to buy an APEX. I was happy with this project as I have a 35 square meter room for my home office and aquarium stuff until my wife came one day and said to me "honey ... we need to do something about this space". I think she hadn't finished her sentence and I was designing the ultimate project. It will talk a few more months until everything is ready. I have no experience in construction although I really like wood working, electricity, plumbing, etc. The project started last July and I am building everything for my self except for the tanks as I don't have the confidence to build this monster. It will also take several post to update everything until the present date as I have lots of fotos and several hic hups along the way. My profession does not give me a lot of free time. So I grabbed Sketchup and started drawing to show to my other half what should look like the finished product. Overall view.  Aquarium View (200x80x60cm visible)  Aquarium. 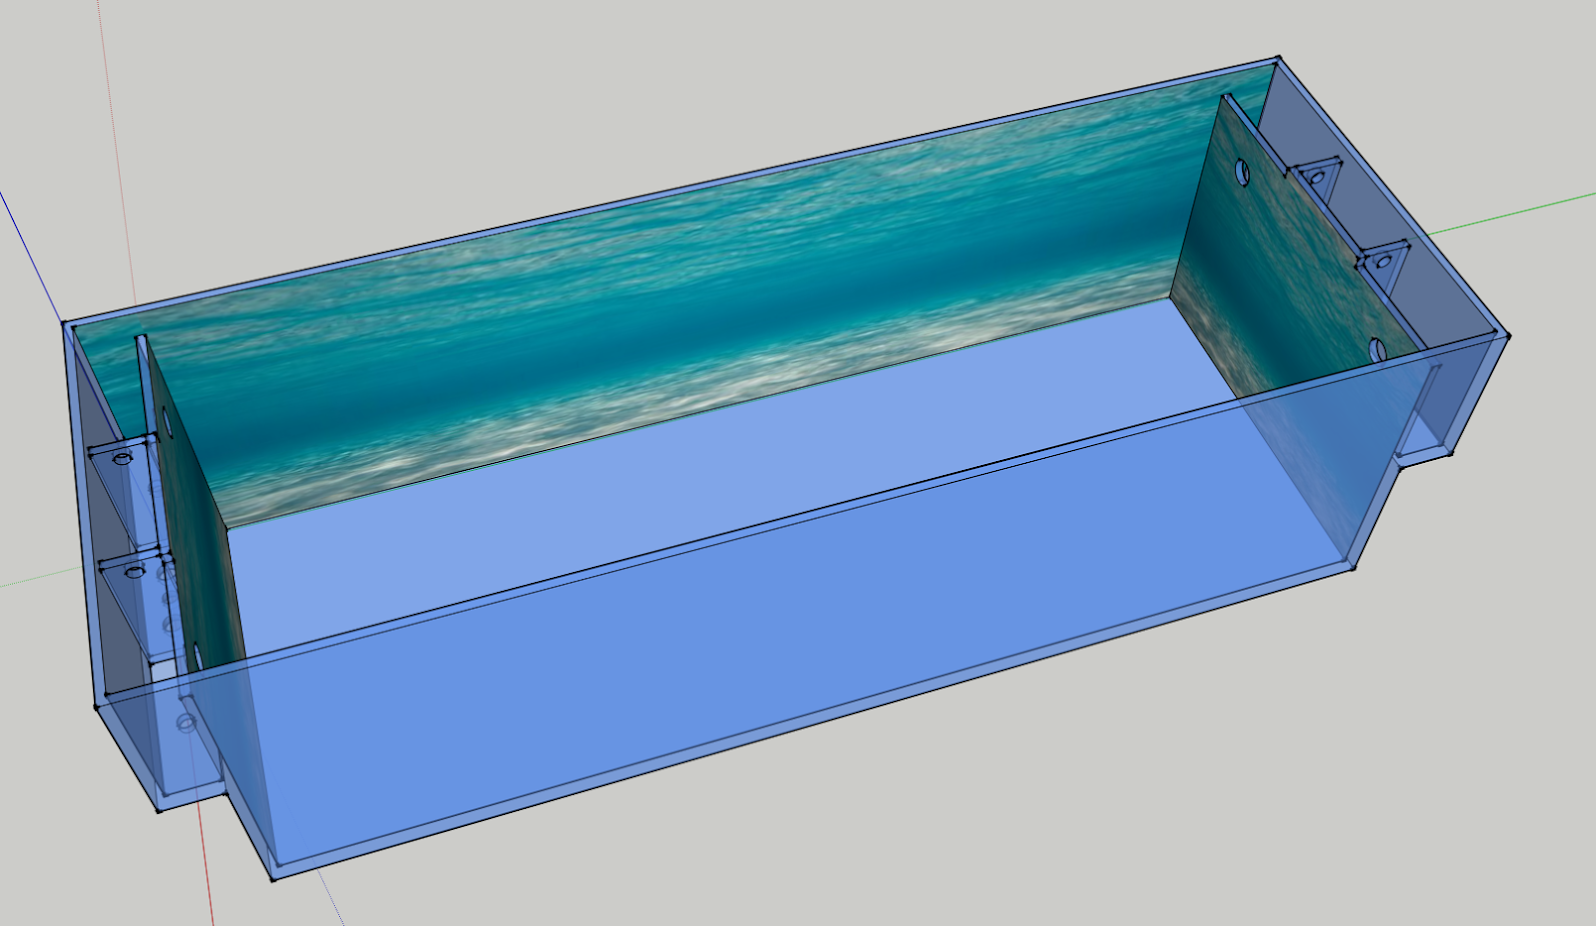 Detail of the overflow (this would change with time and I will post updated pictures ahead) 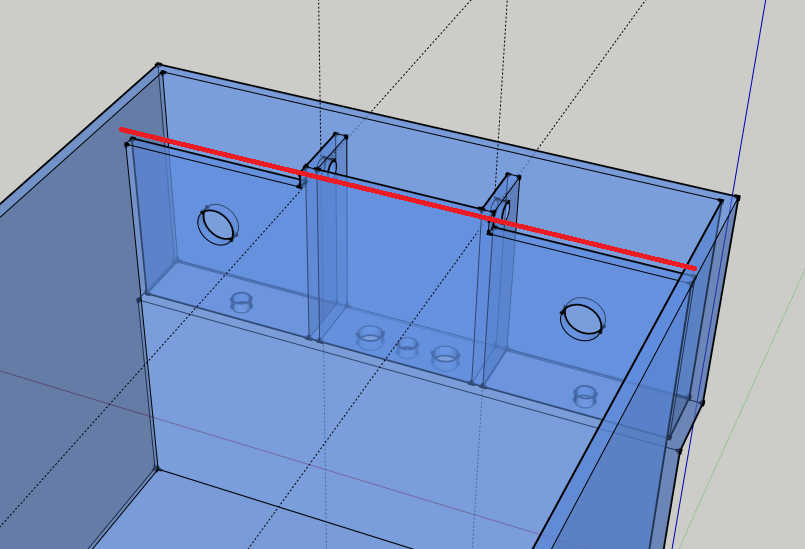 The red line represents the water level in the event the return line gets offline. One of the main objectives is to have zero visible pumps inside the tank. Since I don't like Vortech because of the noise I use Tunze and I build some boxes for them. There are two holes in the bottom of the Tunze boxes to be used only for cleaning. Also I will use a Bean Animal design I simplified so I use only two holes instead of 4. I use this design for the past 2 years and it's fail proof. For the setup of the aquarium I have: Skimmer: ATI PowerCone 250iS Circulation: 3x Tunze 6095 + 1x Tunze 6055 (will be replaced for another 6095) Return: Jebao DC12000 that will feed the reactors Reactors: 2x Vertex RX-Z (for carbon when needed and anything else) Reactors 2: One DIY Kalk Reactor and Calcium Reactor (it's too expensive to go balling with this volume of water) Heating: 3x Jagger 300W Light: 4x 165W chinese leds (will be replaced by Kessil A360W) + one bar 1.8m of 40 Prolight 5W Leds (it's a DIY fixture I build in the past) It appears that any post can have only a maximum number of 10 images ... Continues on post #2 All the best, Rui |

|

|
|
09/29/2014, 05:42 PM
|
#2 |
|
Registered Member
Join Date: Mar 2014
Location: Seattle, WA
Posts: 358
|
Sweet!
|
|
|
|
|
09/29/2014, 05:42 PM
|
#3 |
|
Registered Member
Join Date: Jan 2008
Location: Portugal
Posts: 267
|
Continuing ...
Sump design  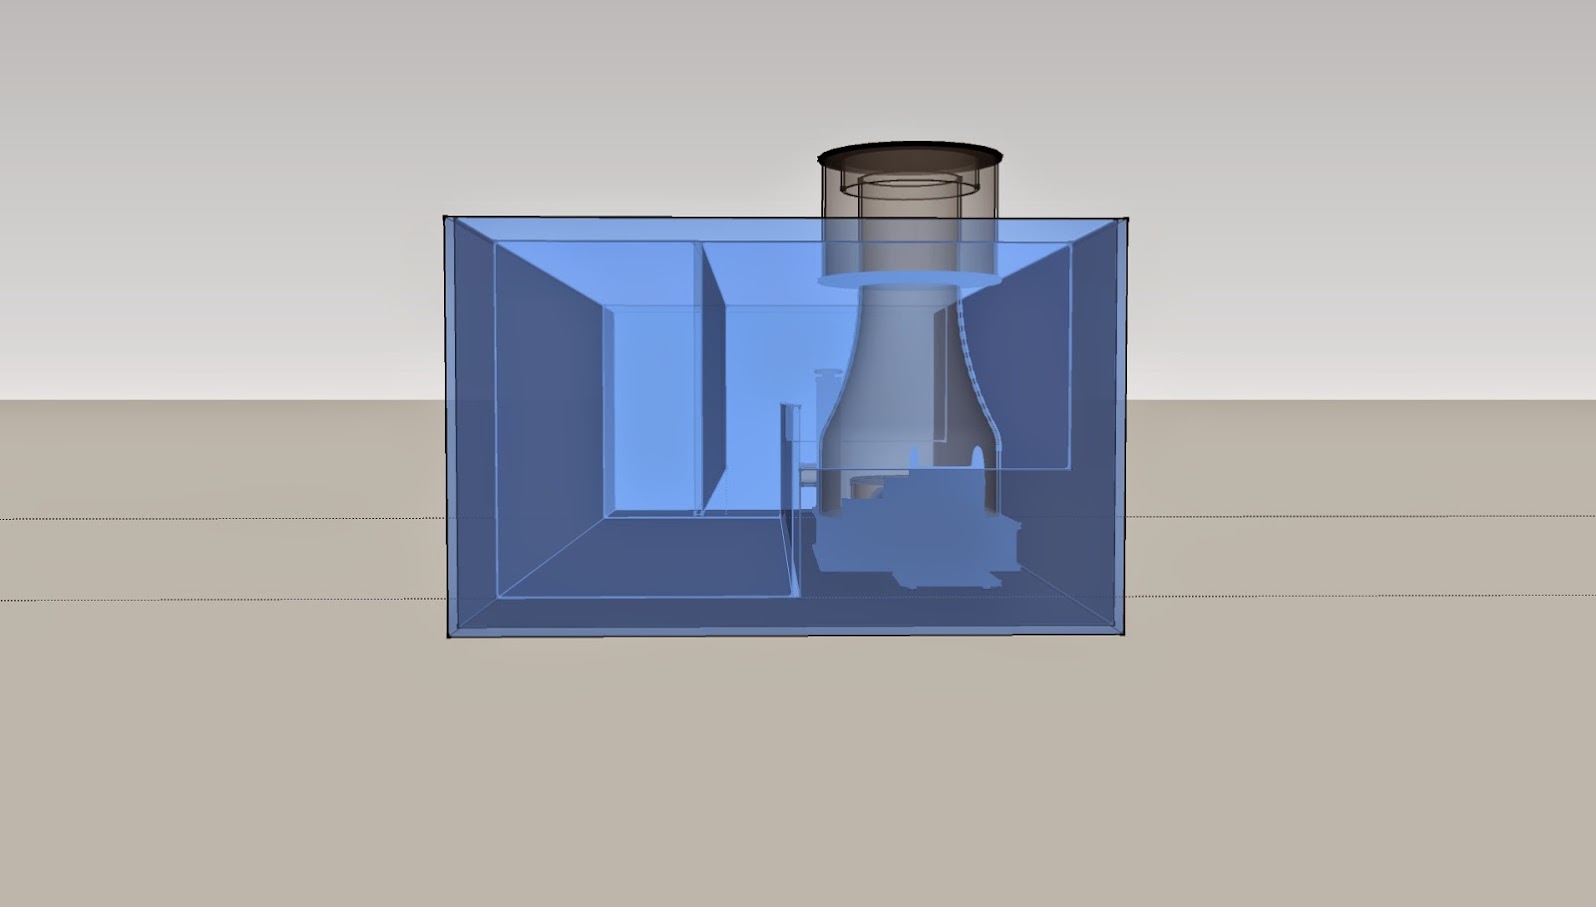 It need to take 100l so I can do the water change and heat the water before sending to the aquarium again. BTW I use NSW. Also another feature is that all the water passes trough the heaters before returning to the aquarium as I have some problems heating the water. Even in summer it still fires the heaters to get the water to 25º. [IMG] 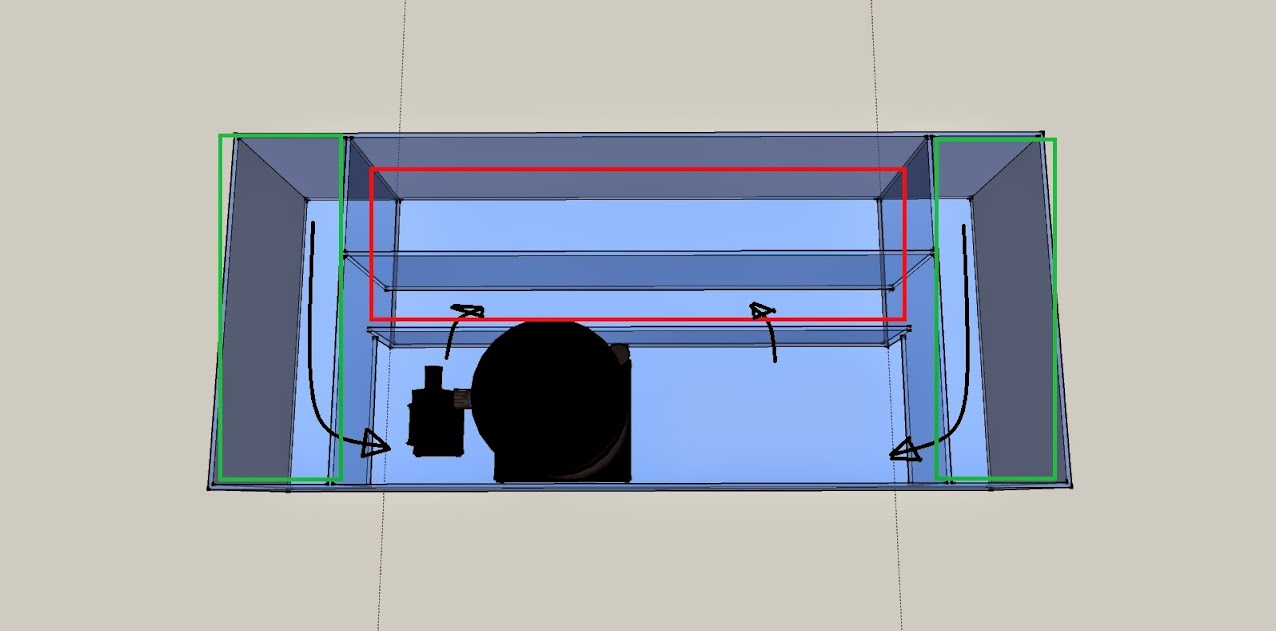 [/IMG] [/IMG] The green boxes will receive the water from both overflow boxes, goes thru the skimmer and then the red box where it will be pumped to the aquarium again. So in the meantime I asked for several proposal for drywall build and I had values from 1500 to 2000 just for 14 square meters of wall and 30m of ceiling. I decided to buy myself the tools and material. I spent 500 and a lot of head aches ----  So in August I started cleaning the space, moved the aquarium with the help of a good friend to my madness. 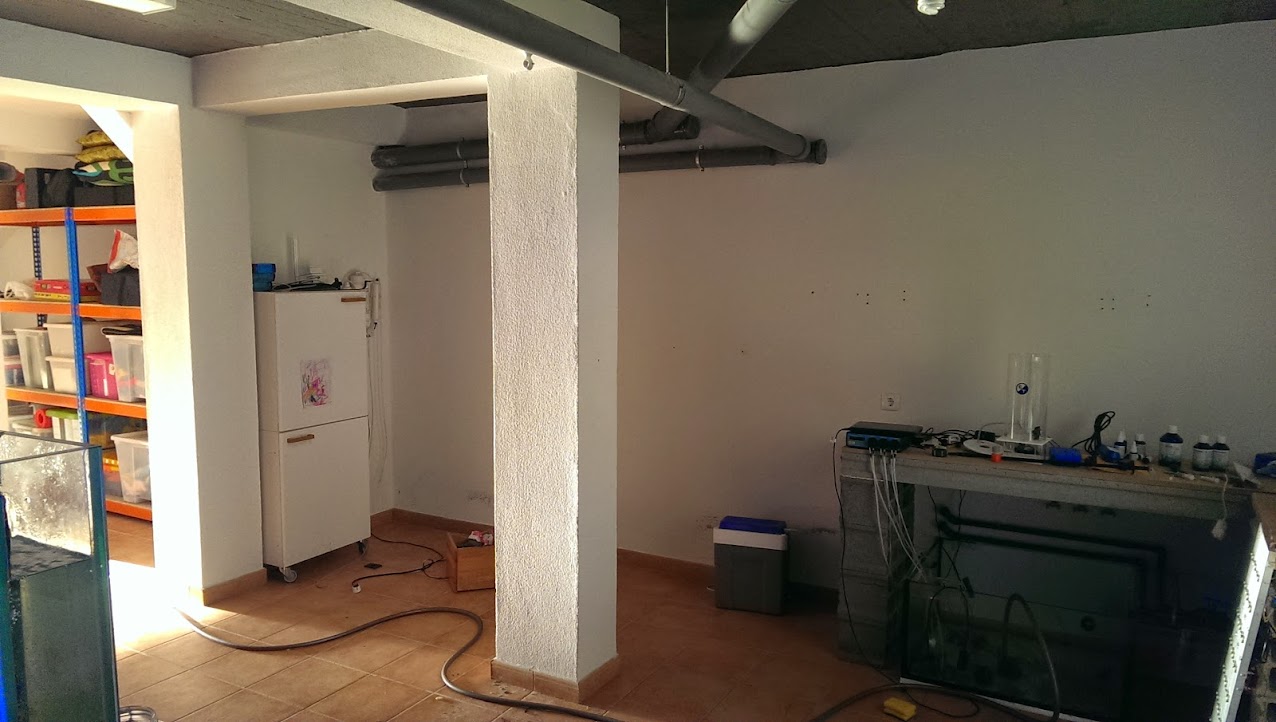 The concrete structures will be used to create the frame for the aquarium.  On August 6th I started ...  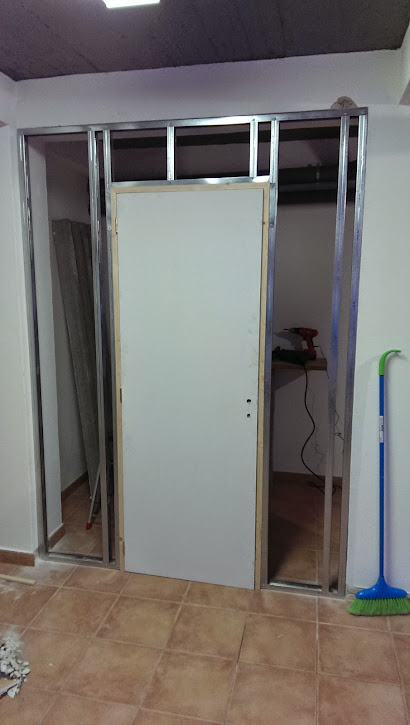 Very easy to build the frame ... It's late and I have to work tomorrow ... I will continue this post. Any advice, suggestion or comment is welcome. All the best, Rui |
|
|
|
|
09/29/2014, 06:49 PM
|
#4 |
|
Registered Member
Join Date: Dec 2006
Location: Cebu, Philippines
Posts: 763
|
I'm looking forward to following your progress. It's nice to see someone do a lot of their own construction.
|
|
|
|
|
09/30/2014, 05:17 AM
|
#5 | |
|
Registered Member
Join Date: Jan 2008
Location: Portugal
Posts: 267
|
Hello
Quote:
So the worked progressed slowly ...   and in the end I was ready for a bath ... This is nothing compared to the sanding part ...  The days after the progress continues. Slow ... very slow ... sooo very slow. It will take forever to have things done. At this stage I was so sorry not to award the work to others ... 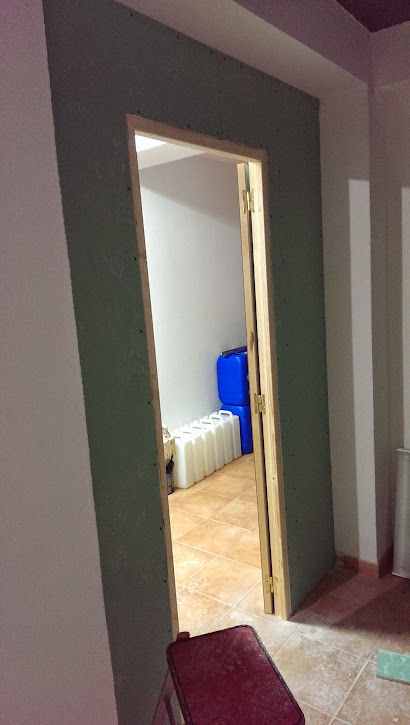 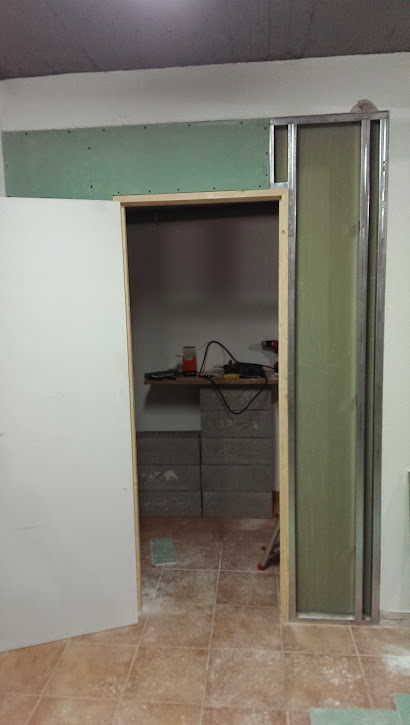  And another day .... I feel tired. 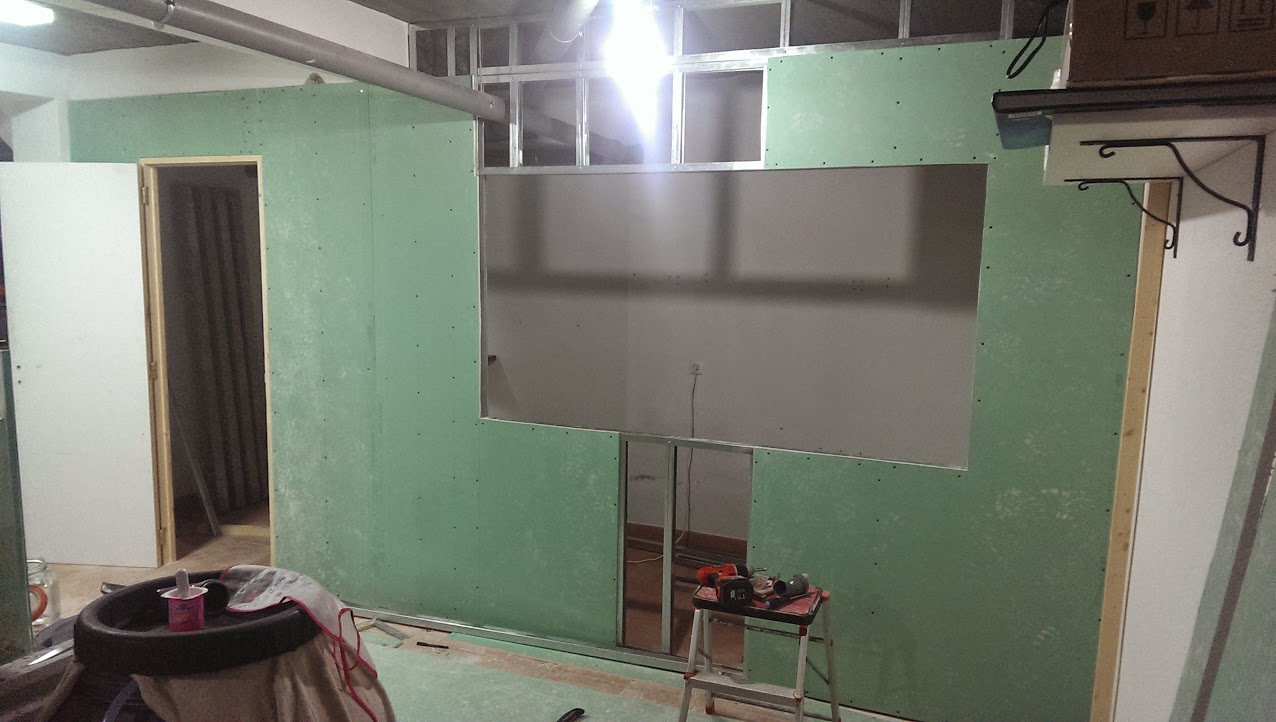 Inside view 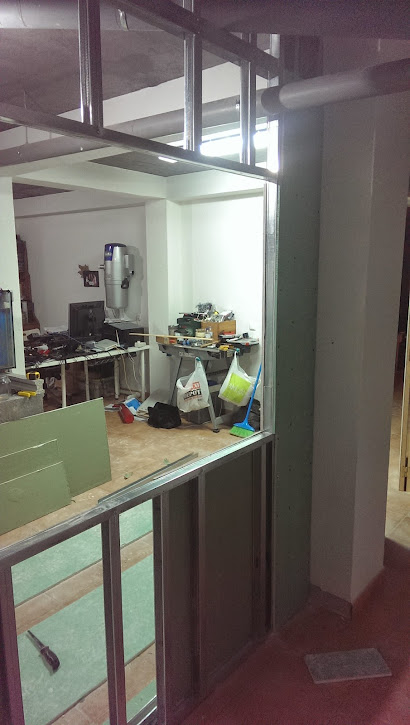 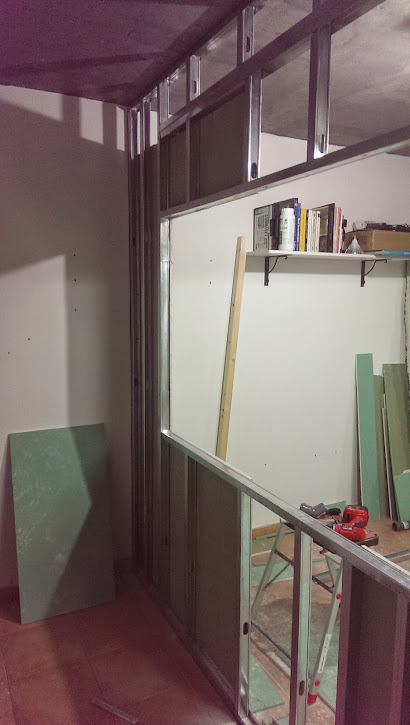 Continues ... |
|
|
|
|
|
09/30/2014, 05:27 AM
|
#6 |
|
Registered Member
 Join Date: Sep 2014
Location: USofA
Posts: 61
|
get er done...Looking great!
|
|
|
|
|
09/30/2014, 05:28 AM
|
#7 |
|
Registered Member
Join Date: Jan 2008
Location: Portugal
Posts: 267
|
So ...
The bad thing is that all the walls and columns are not straigh. So I had a drawback.  The gap was huge and I had to remove the board and do it again. The day after ... and after 30 drill holes in the column this was the final result.  You might notice the tube for the main sewer of the house. I have to take that thing off otherwise I will end up with a two meter from floor to ceiling. I was able to move that up and gained almost 40cm. I also took the time and whenever I can't make drill noise I leverage other tasks. This was the electrical one. I had a major short circuit and since I had to replace the electrical bus I used the power outage to create a new dedicated circuit for the aquarium.  In here you can also see the vent straight to the street. I will put a S&P air blower to help circulate the air inside the false ceiling and in this small room.  I got the necessary courage and removed the main drain of the house. Stupid enough the tube was 90mm but the feed from the house to this tube is only 50mm so I replaced everything with 50mm tubing.  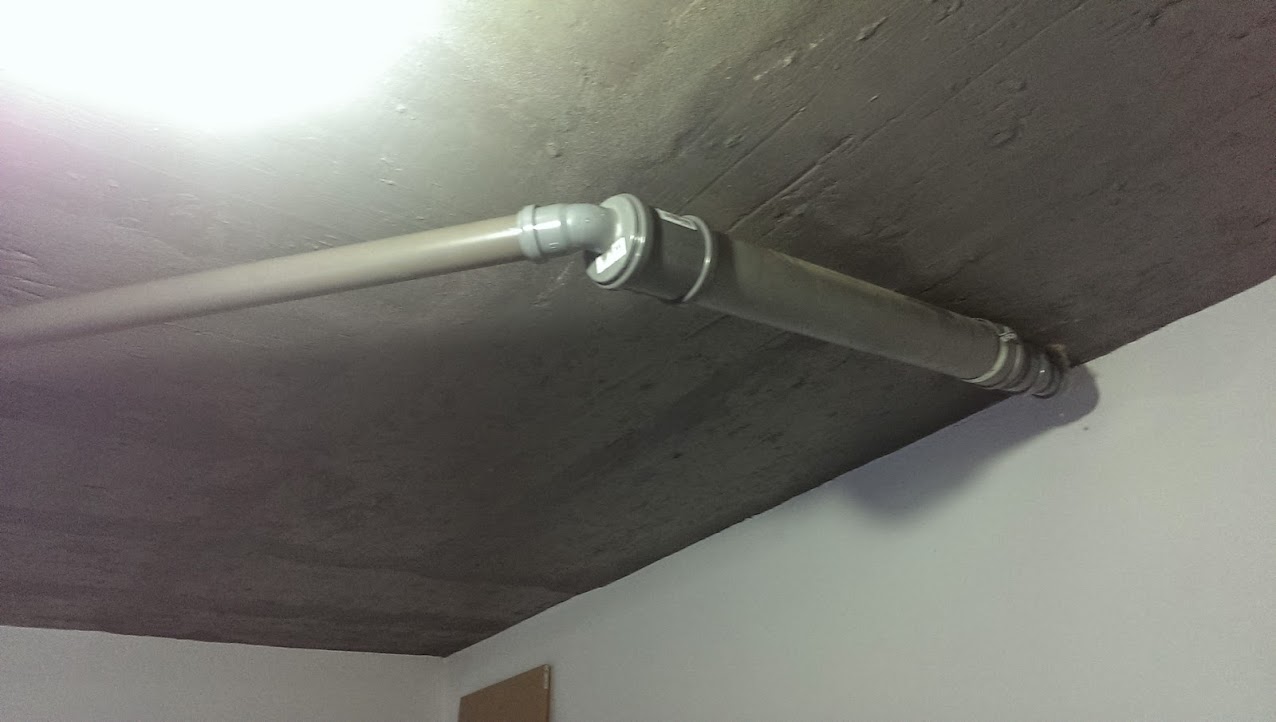 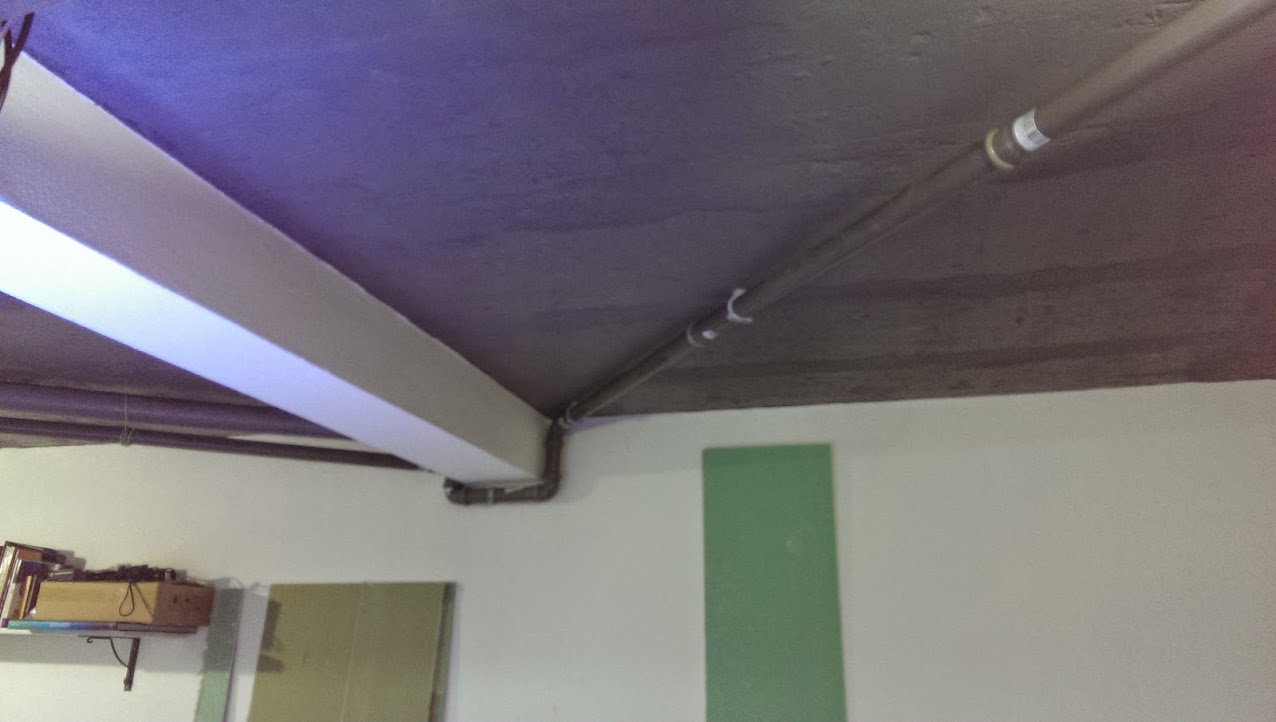  Continues .... |
|
|
|
|
09/30/2014, 06:17 AM
|
#8 |
|
Registered Member
Join Date: Jan 2008
Location: Portugal
Posts: 267
|
So here we are again ...
At this stage I was deeply engaged to get married so the work stopped for about a month. Meanwhile I was back to the planning phase. Remember the initial image of the aquarium with the nice sea bed image? This was to be done with 12mm glass, vinil image and another 4mm glass on top. Well a friend of mine that actually did it that told me that there was problems with water getting between the two sheets of glass so I moved to an alternative. I used laminated 6+6mm glass with vinil in the middle build at factory for the front of the overflow and designed the aquarium with 15mm glass. 230cm x 80cm x 60cm and the two black glasses at 15cm from the border. The tank will have euro bracing on the top and in the bottom. I went for the 15mm glass to avoid the central bracing. It's not "Man in Black" ... it's Tank in Black coming to a cinema near you ...  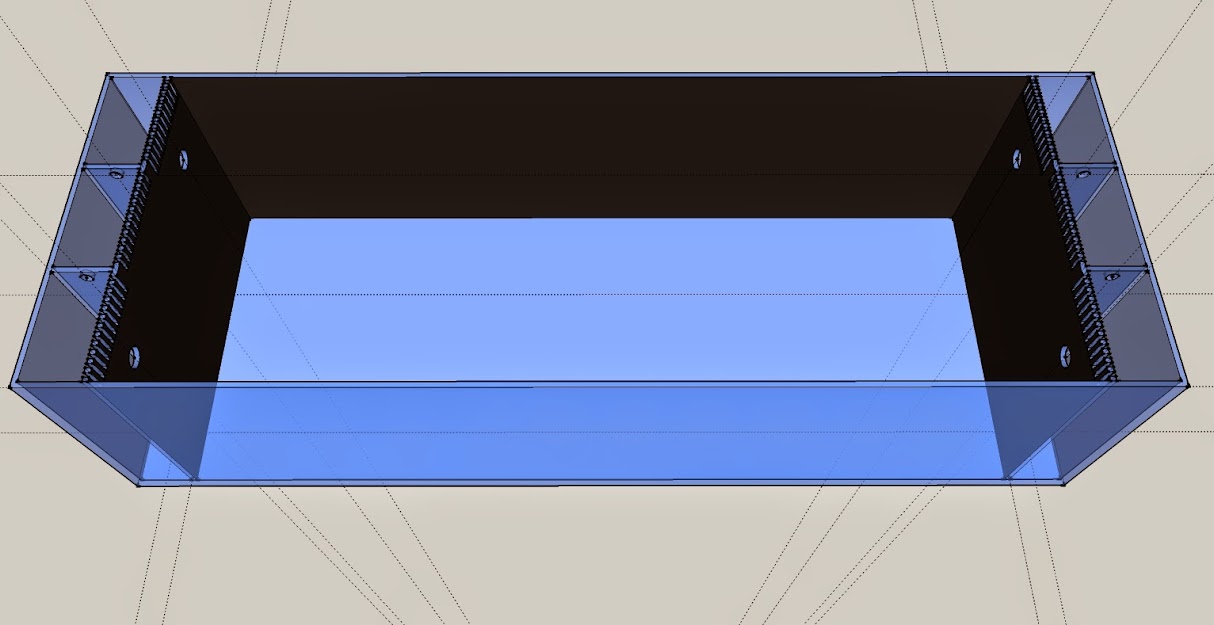 Without the black to see the overflow boxes. 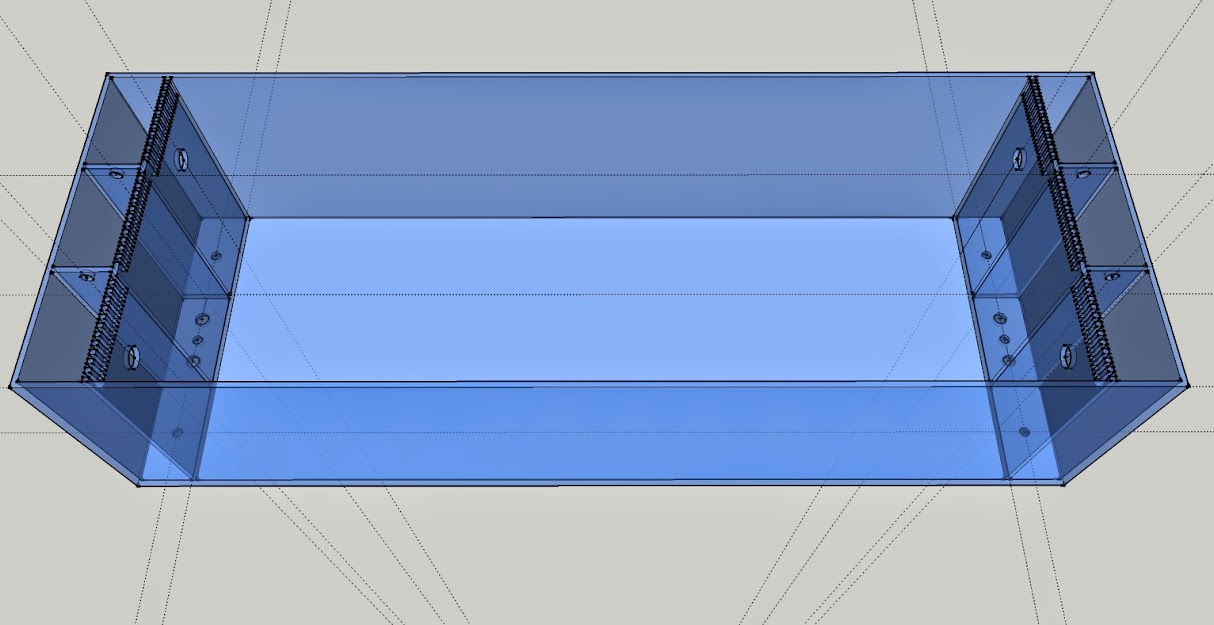 Return calculated so even if the return pump stops the tunze cases will still hold water. The returns will also fall inside the tunze boxes ensuring that all the returned water spreads rapidly thru the tank.  Detail of the overflow ... this will change my friends ... it's not the last drawing ...  Continues |
|
|
|
|
09/30/2014, 06:17 AM
|
#9 |
|
Registered Member
Join Date: Jan 2008
Location: Portugal
Posts: 267
|
And again ...
At this stage I was having electrical problems. Every time I connected a lamp to the outlets the differential blowed. The good thing with this hobby is that there are so many people skilled and willing to help that I was able to solve the problem in no time  Actually I was connecting the neutral to the wrong bus ....  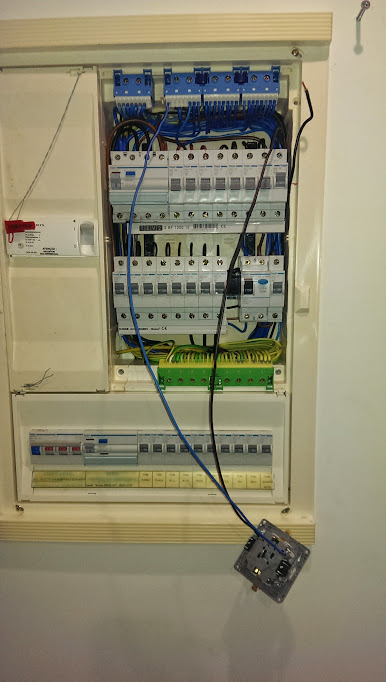 Meanwhile to collect NSW in Portugal you have to have a special license otherwise you risk a 3000 fine. After one year and two month trying to figure out who was responsible to issue the license it came ...  And finally the big day arrived .... NOOOOO not the Tank in place ... where do you have your priorities?????? The wedding .... LOL   Continues ... |
|
|
|
|
09/30/2014, 06:24 AM
|
#10 |
|
Registered Member
Join Date: Jan 2008
Location: Portugal
Posts: 267
|
And again ...
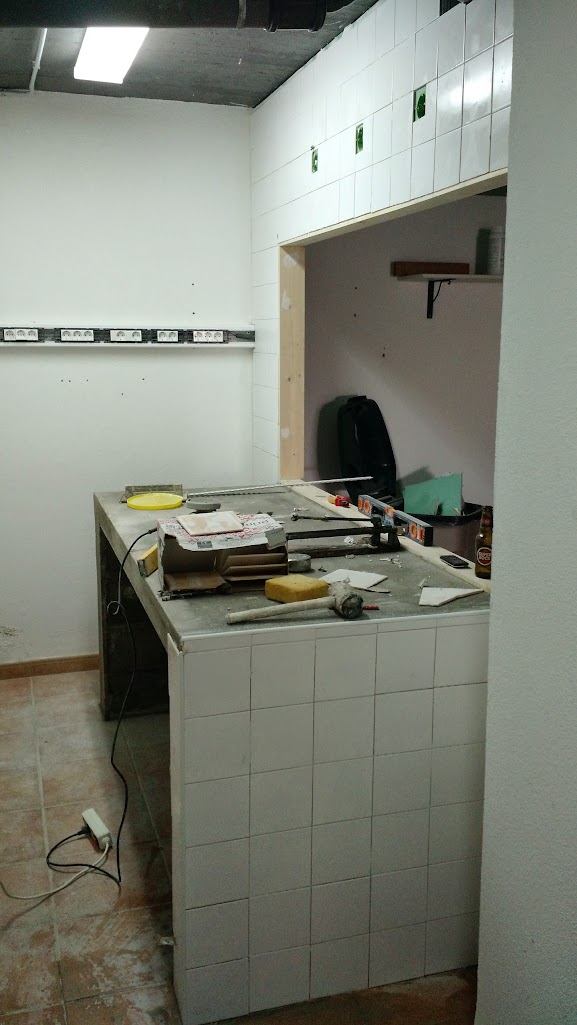
So ... I hate the overflows with all those teeth ... I was dwelling to find an alternative and finally I think I nailed. This are the final drawing sent to the aquarium construction company. Tank 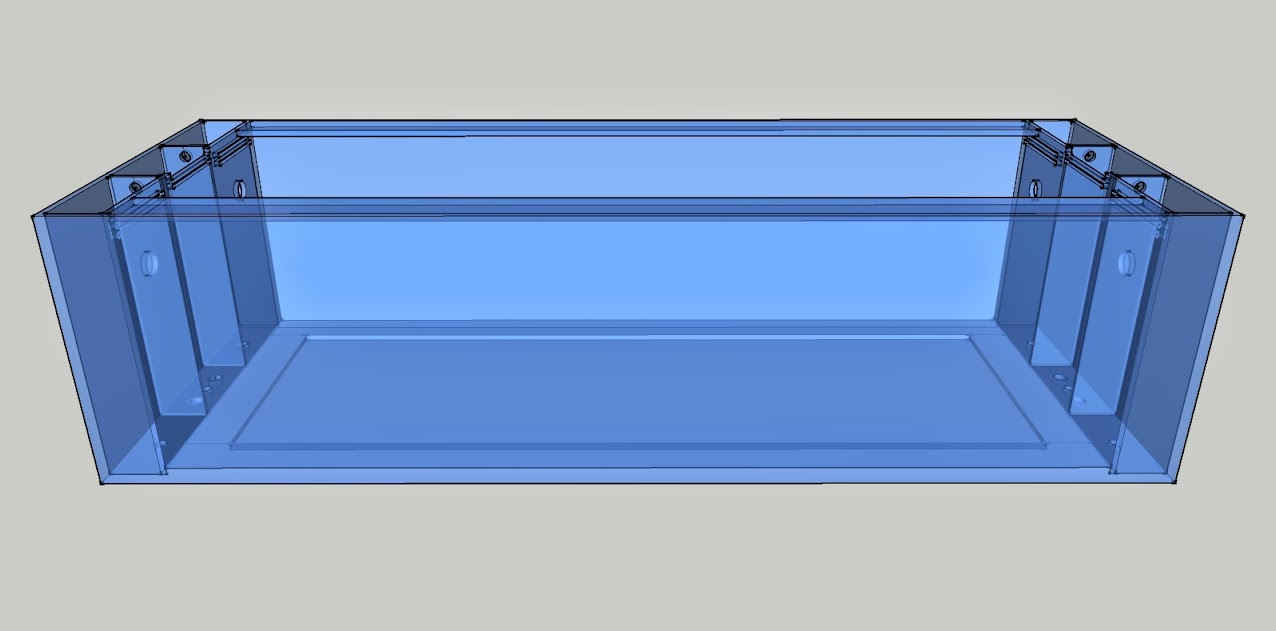 Tank in Black 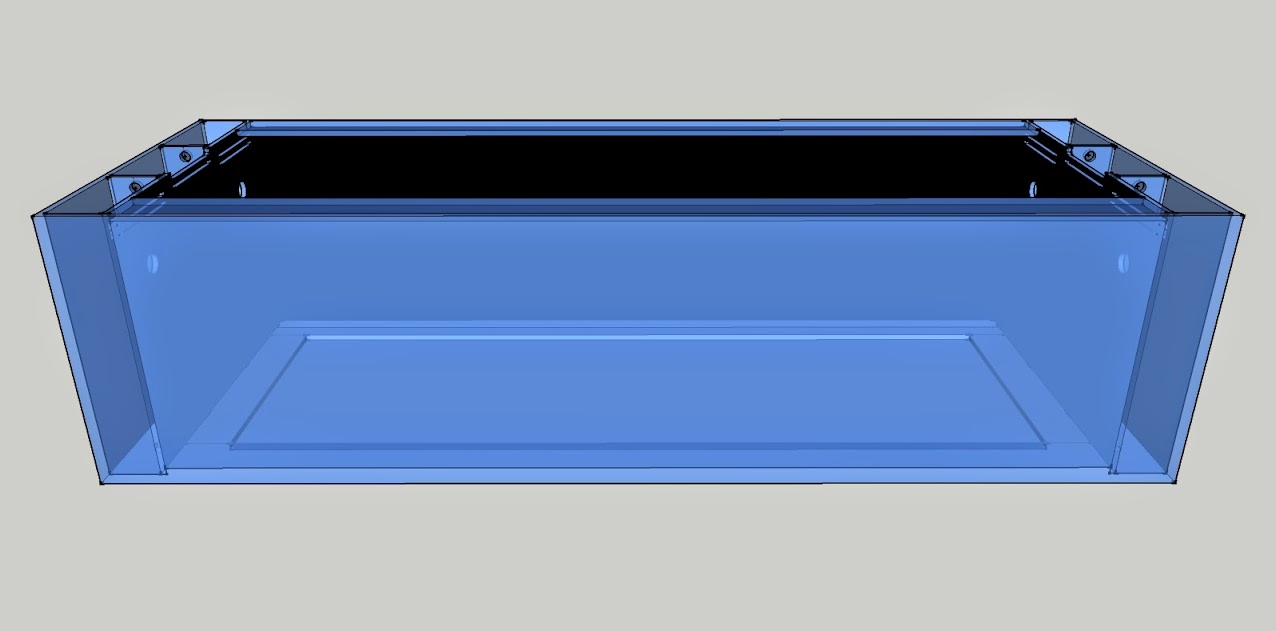 Overflow and Tunze boxes 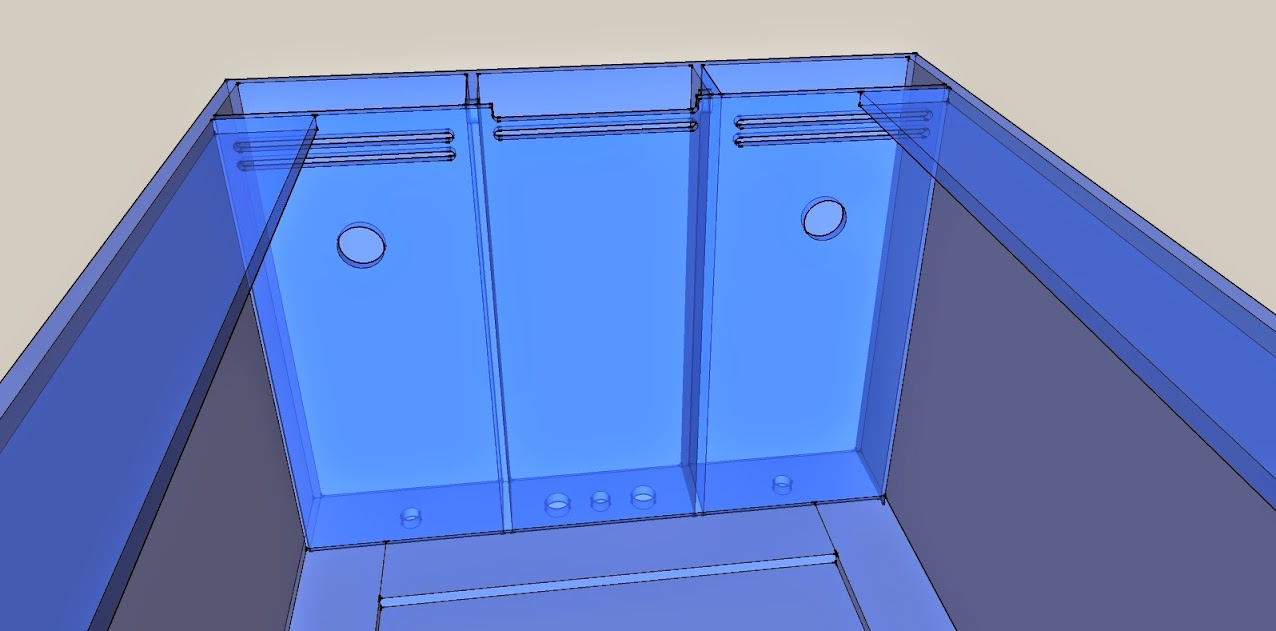 The overflow holes and return drills. 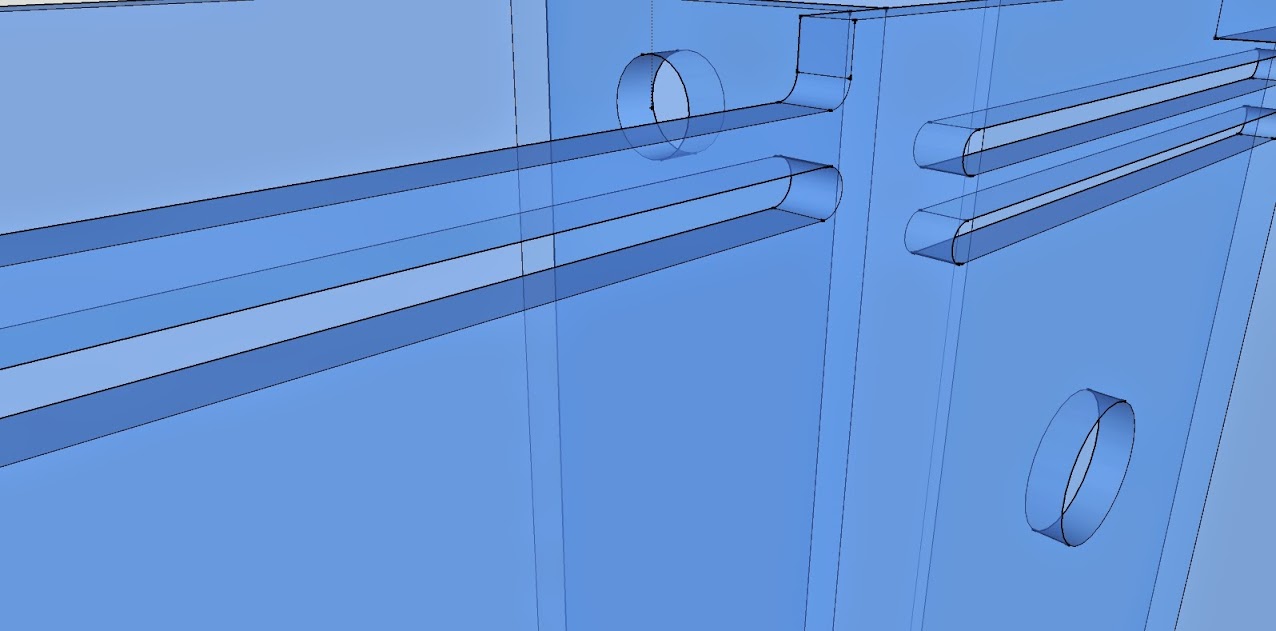 And this takes us to TODAY ... 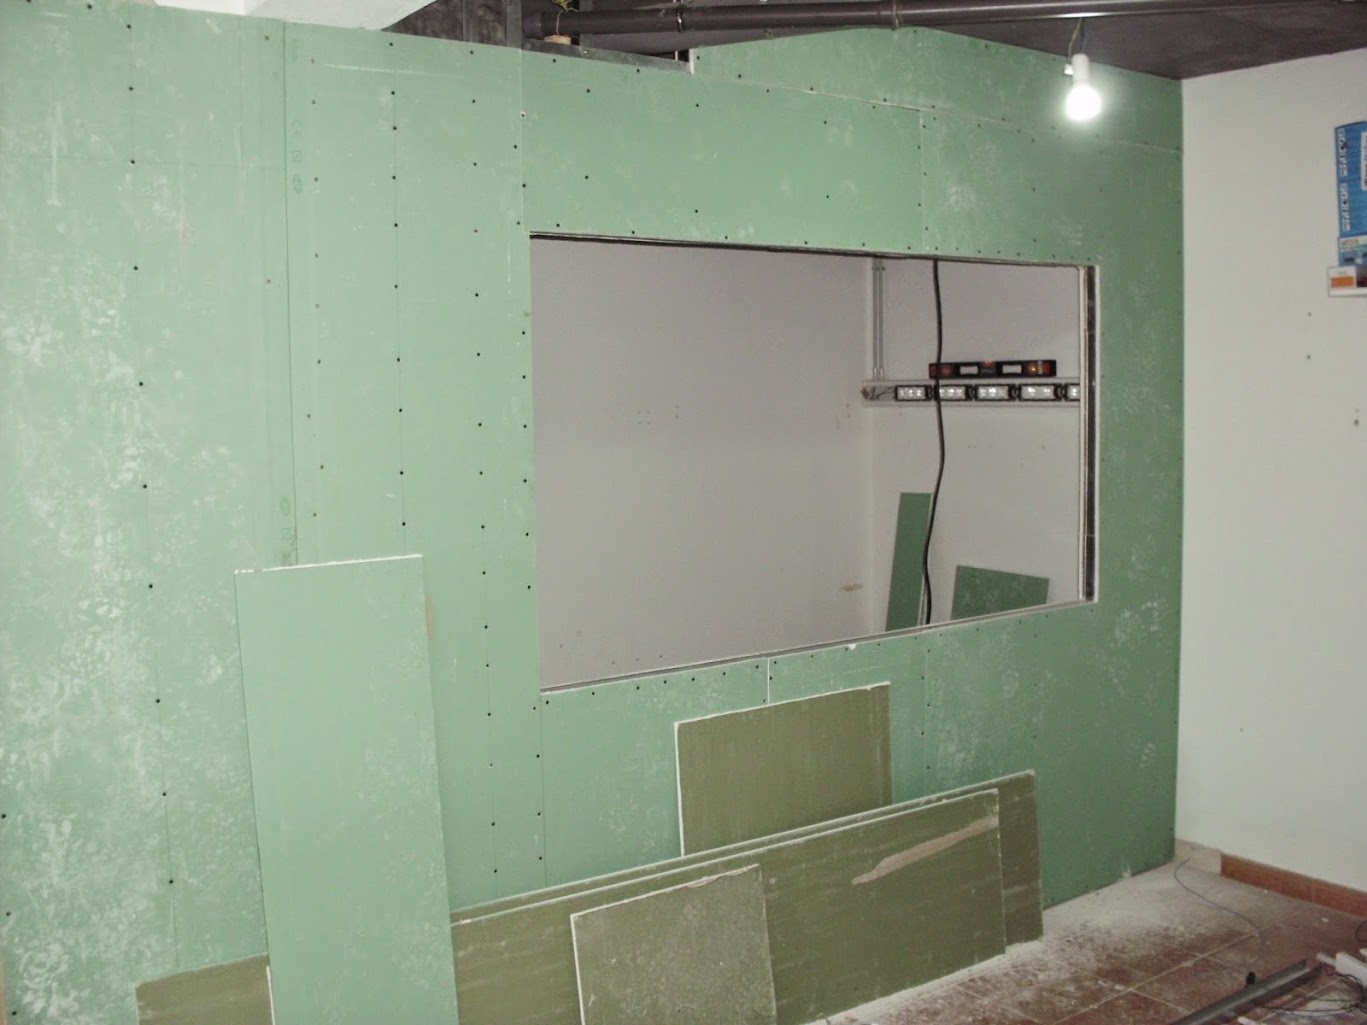 The level indicates its straigh but either the ceiling of the visual efects of the two electrical lines to the left ... looks off bubble. 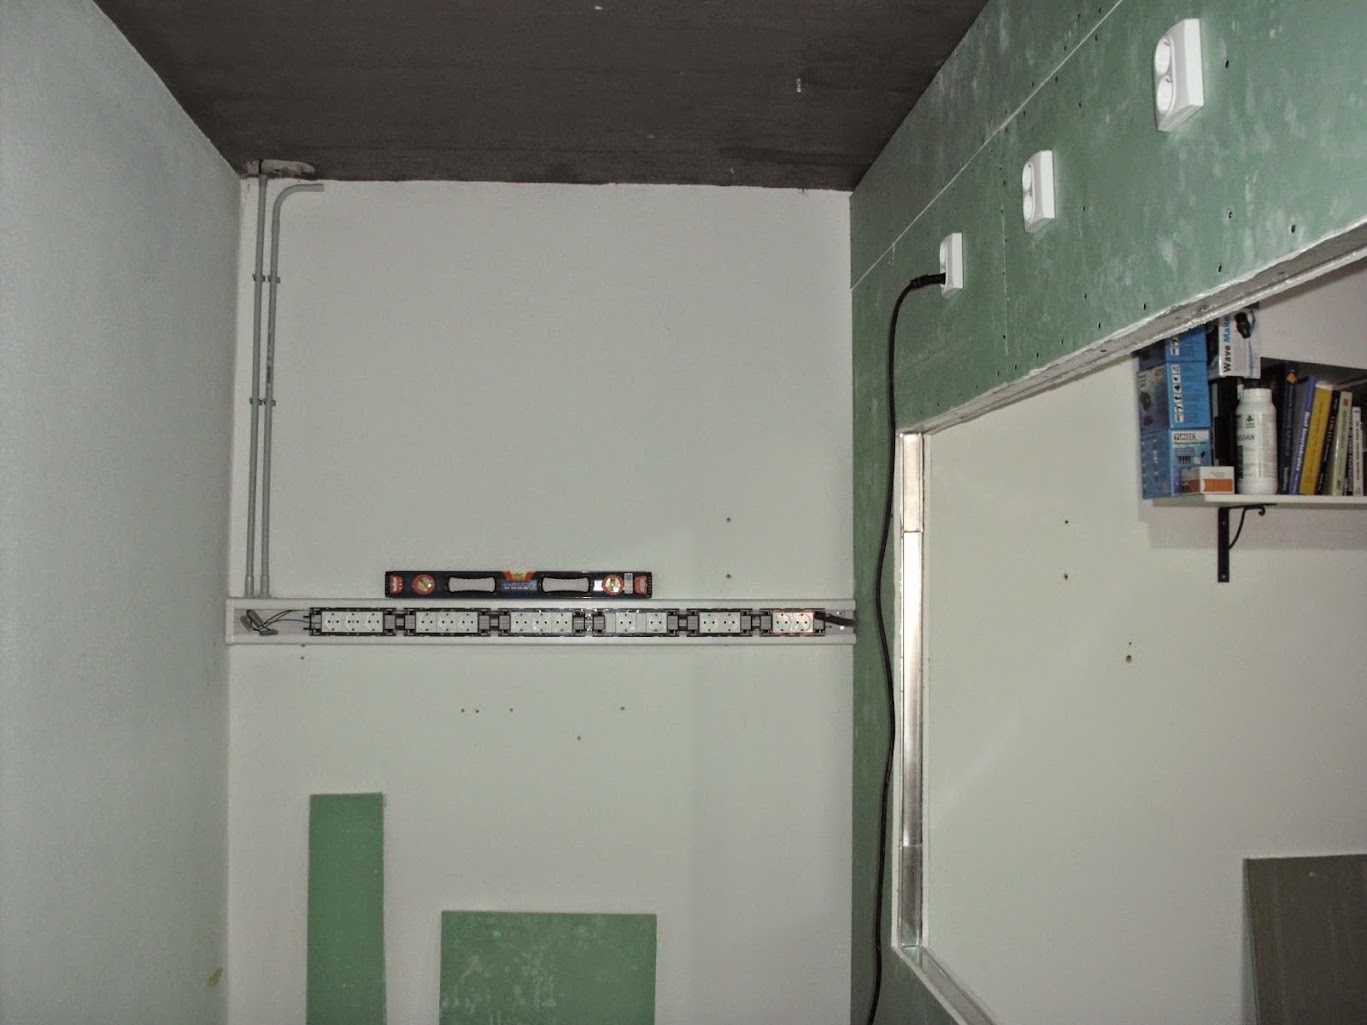  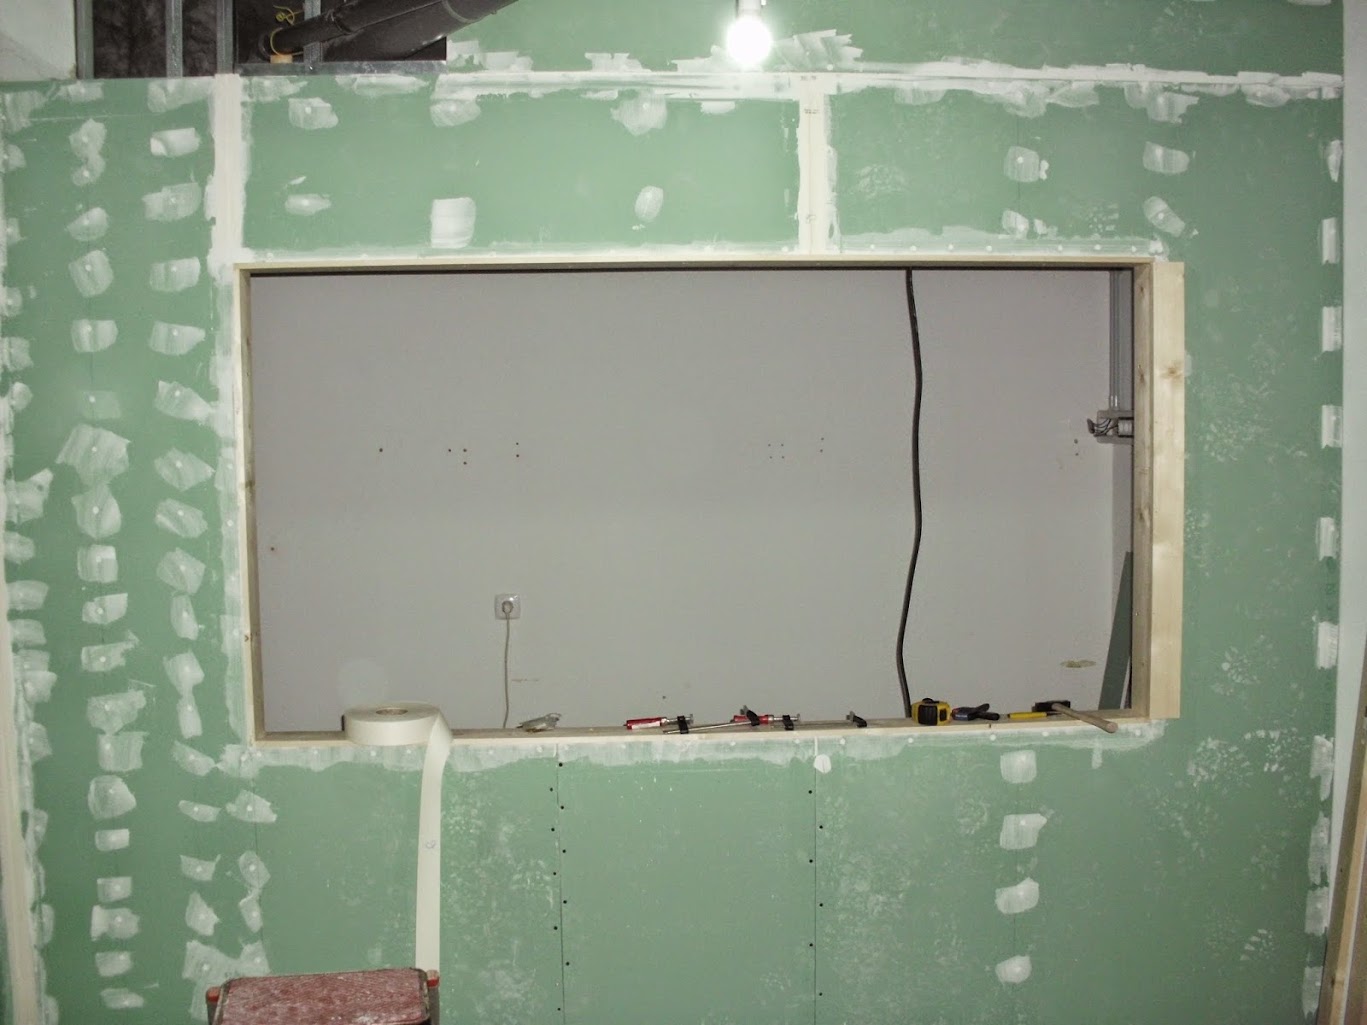 Meanwhile I bought in ebay a 10m led strip to try to do the same as Bink  This. I hope it's ok to copy your idea and to use your photo ... and Thanks for the inspiration.  That's all for now! I will keep this topic current to my best availability. All the best, Rui |
|
|
|
|
09/30/2014, 07:57 AM
|
#11 |
|
STAG HORN DOMINATE REEF
Join Date: Oct 2006
Location: Irvine, California
Posts: 3,348
|
congrats on your wedding, I hope your wife like the fish tank since all lady want attention to them self. I have a same size tank as yours good luck with the build.
__________________
SDR STAGHORN DOMINATE REEF Feature Reef of November 2019 GHL TOTM FEB 2020 ABC corals Current Tank Info: 360g Peninsula sps |
|
|
|
|
09/30/2014, 09:26 AM
|
#12 | |
|
Registered Member
Join Date: Jan 2008
Location: Portugal
Posts: 267
|
Hello,
Quote:
We married on civil record 7 years ago and now we did the catholic cerimony. An although she is not very fun she fully supports my madness.  Do you have a link to you build? All the best, Rui |
|
|
|
|
|
09/30/2014, 10:53 AM
|
#13 | |
|
STAG HORN DOMINATE REEF
Join Date: Oct 2006
Location: Irvine, California
Posts: 3,348
|
Quote:
http://www.reefcentral.com/forums/sh....php?t=1241098
__________________
SDR STAGHORN DOMINATE REEF Feature Reef of November 2019 GHL TOTM FEB 2020 ABC corals Current Tank Info: 360g Peninsula sps |
|
|
|
|
|
10/06/2014, 10:15 AM
|
#14 |
|
Registered Member
Join Date: Jan 2008
Location: Portugal
Posts: 267
|
Hello,
The work progresses very slowly ...  But today I had a wonderful surprise. A good friend of mine was able to cut the overflow glass and brought to me today. Now two more month before I order the tank. My objective to hide the pumps will be achieved ....  The overflow glass:  Overflow openings. The central one is for overflow and the side ones for Tunze boxes:  With Tunze 6095 protection. Just like I wanted it.  I will have to stop everything for two weeks now. Duty calls ...  All the best, Rui |
|
|
|
|
10/06/2014, 10:38 AM
|
#15 |
|
Registered Member
Join Date: Feb 2011
Location: NYC
Posts: 1,374
|
Hi Rui,
First off, congratulation on your nuptials! You have a very beautiful wife! I hope you prepared her for a life with a reef fanatic LOL Thanks for taking interest in my system. I'll be following your journey as well  Looks like you're off to a super beginning! Looks like you're off to a super beginning!
__________________
Bill > Tank: 200g mixed reef (66Lx29Wx24D) > 50g sump > Royal Exclusive BKing 300 ext skimmer |
|
|
|
|
10/06/2014, 03:30 PM
|
#16 | |
|
Registered Member
Join Date: Jan 2008
Location: Portugal
Posts: 267
|
Quote:
SUPER BEGINNING???? you mean SLOW ... Right? All the best, Rui |
|
|
|
|
|
10/06/2014, 06:50 PM
|
#17 | |
|
Registered Member
Join Date: Feb 2011
Location: NYC
Posts: 1,374
|
Quote:
Slow is good but not fun when you are in a hurry to see the finish line I really love the tank and sump. I had thought about using either a single ended overflow or a double as you have, however the space I had, really wouldn't work well for that. I needed the space at the sides of the tank for the water station and electronics. Maybe on my upgrade. I already have plans to expand the fish room Keep up the good work Rui!
__________________
Bill > Tank: 200g mixed reef (66Lx29Wx24D) > 50g sump > Royal Exclusive BKing 300 ext skimmer |
|
|
|
|
|
10/21/2014, 05:35 PM
|
#18 | |
|
Registered Member
Join Date: Jan 2008
Location: Portugal
Posts: 267
|
Hello again,
So .... Two weeks without working in construction and lots of nights spend in hotels ... gave time to think. Perhaps a little to much.  Thinking of cost of the tank and reading a lot in RC and in other forum with a dedicated section I started looking at plywood tanks! The question is that a wood tank would cost me less than half the price of a glass one. The difference makes enough to buy an APEX computer. I will leave here a reply I had so that I can track the whole story without consuming other peoples thread. Quote:
There is someone in Portugal that builds wood aquariums with fiber glass and epoxy paint here that I will try to visit. I really like the "pour method" but it's more expensive from what I can see. For anyone interested just look at a post called "mountains of sawdust" Opinions up or down are appreciated as it will help me decide ... Meanwhile hope to get back in business this week and the next as after that ... lots of travel again. All the best, Rui |
|
|
|
|
|
01/09/2015, 03:46 PM
|
#19 |
|
Registered Member
Join Date: Jan 2008
Location: Portugal
Posts: 267
|
Hello everyone ... long time with no news ...
Things evolved slowly. Very slowly due to my line of work. I spend a lot of time out of home. So lot of people advised me not to build the aquarium with plywood. I went to talk with the tank builder and after seeing my design he agreed that the tank would be feasible with 12mm glass. If necessary it will have a center bracing. I don't mind to much. The good thing is that I was able to leverage on a 20% discount promotion and got the tank for 500€. They are still waiting for the order to build that should happen by the end of this month. The work proceeds ... 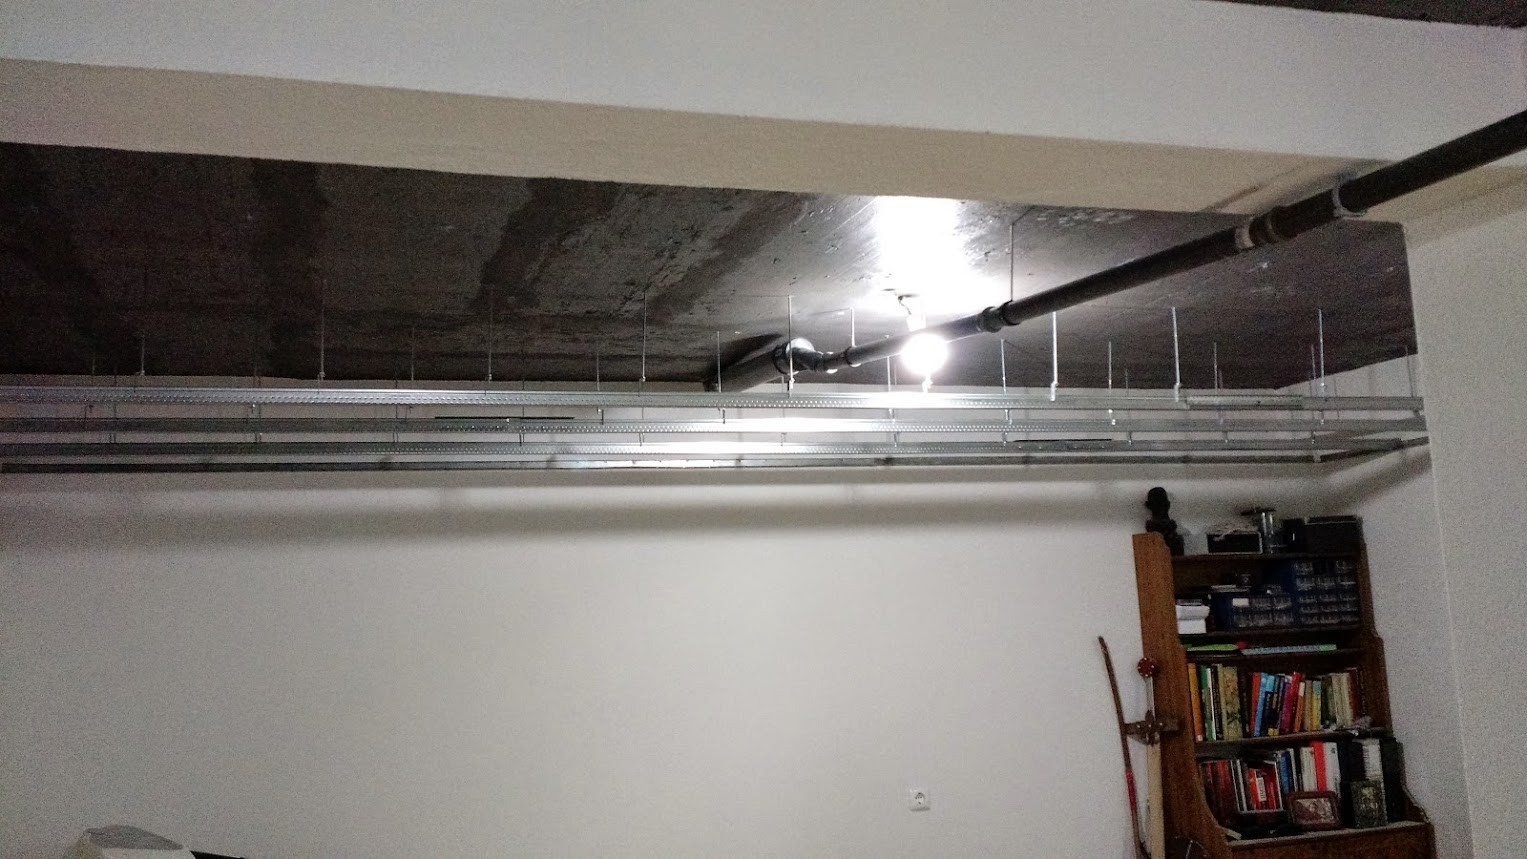 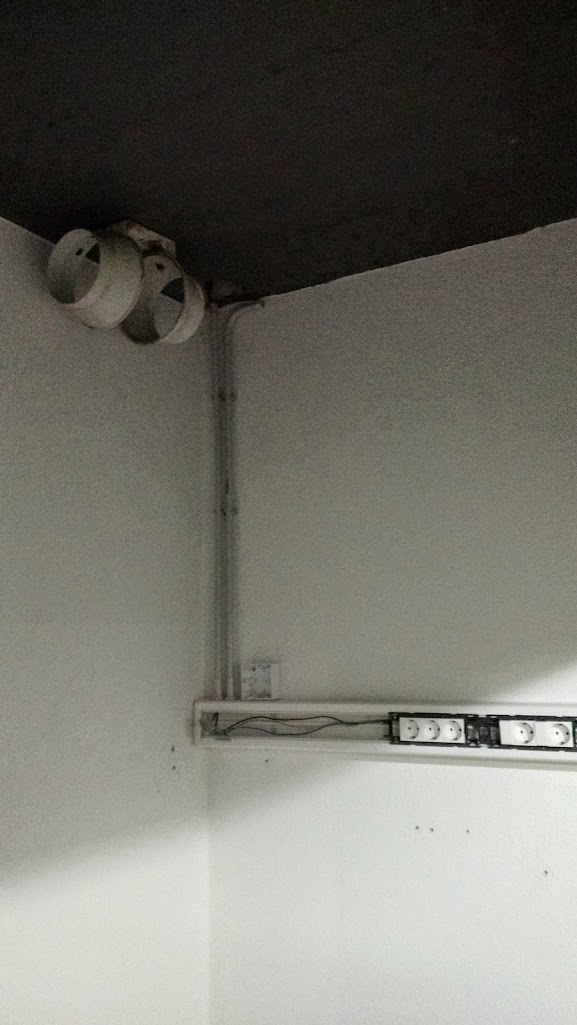 I had to change the drain pipe to a straight line. 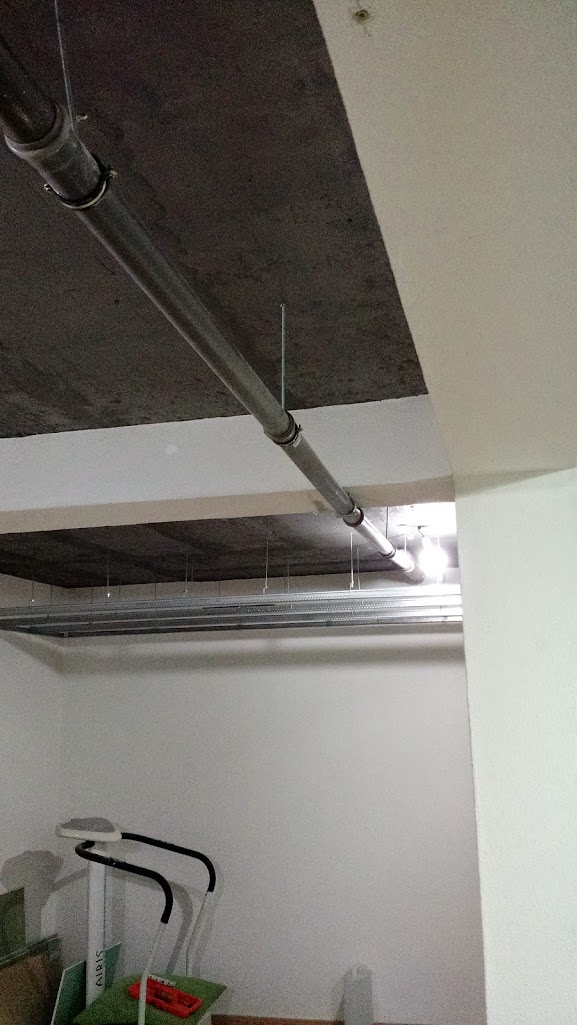 And the light in the fish room as I need that to start working the drywall. 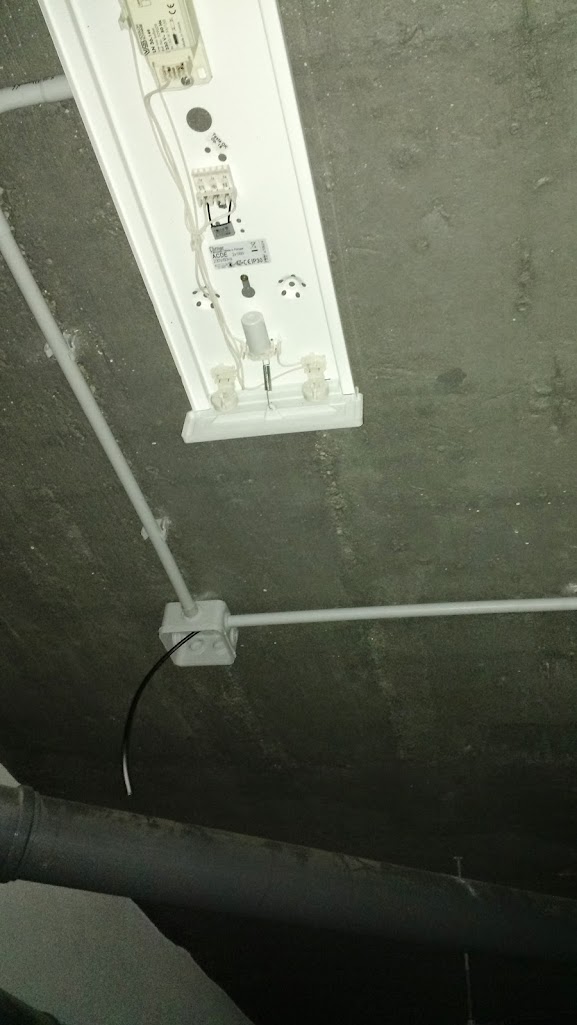 Leveraging one of my trips to California I brought some toys while I wait for the APEX. 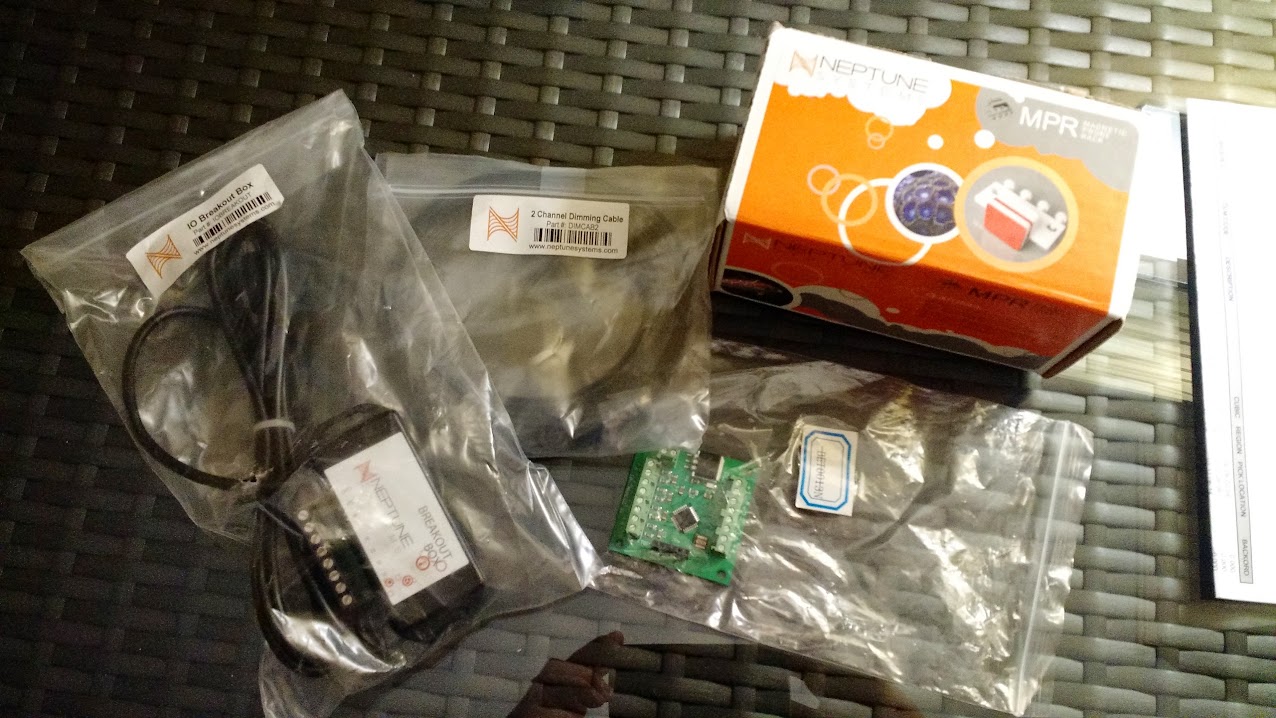 Meanwhile my APEX arrived. It took me almost two weeks before I could plug it in. But is now configured with all the features I want given the equipment I have.  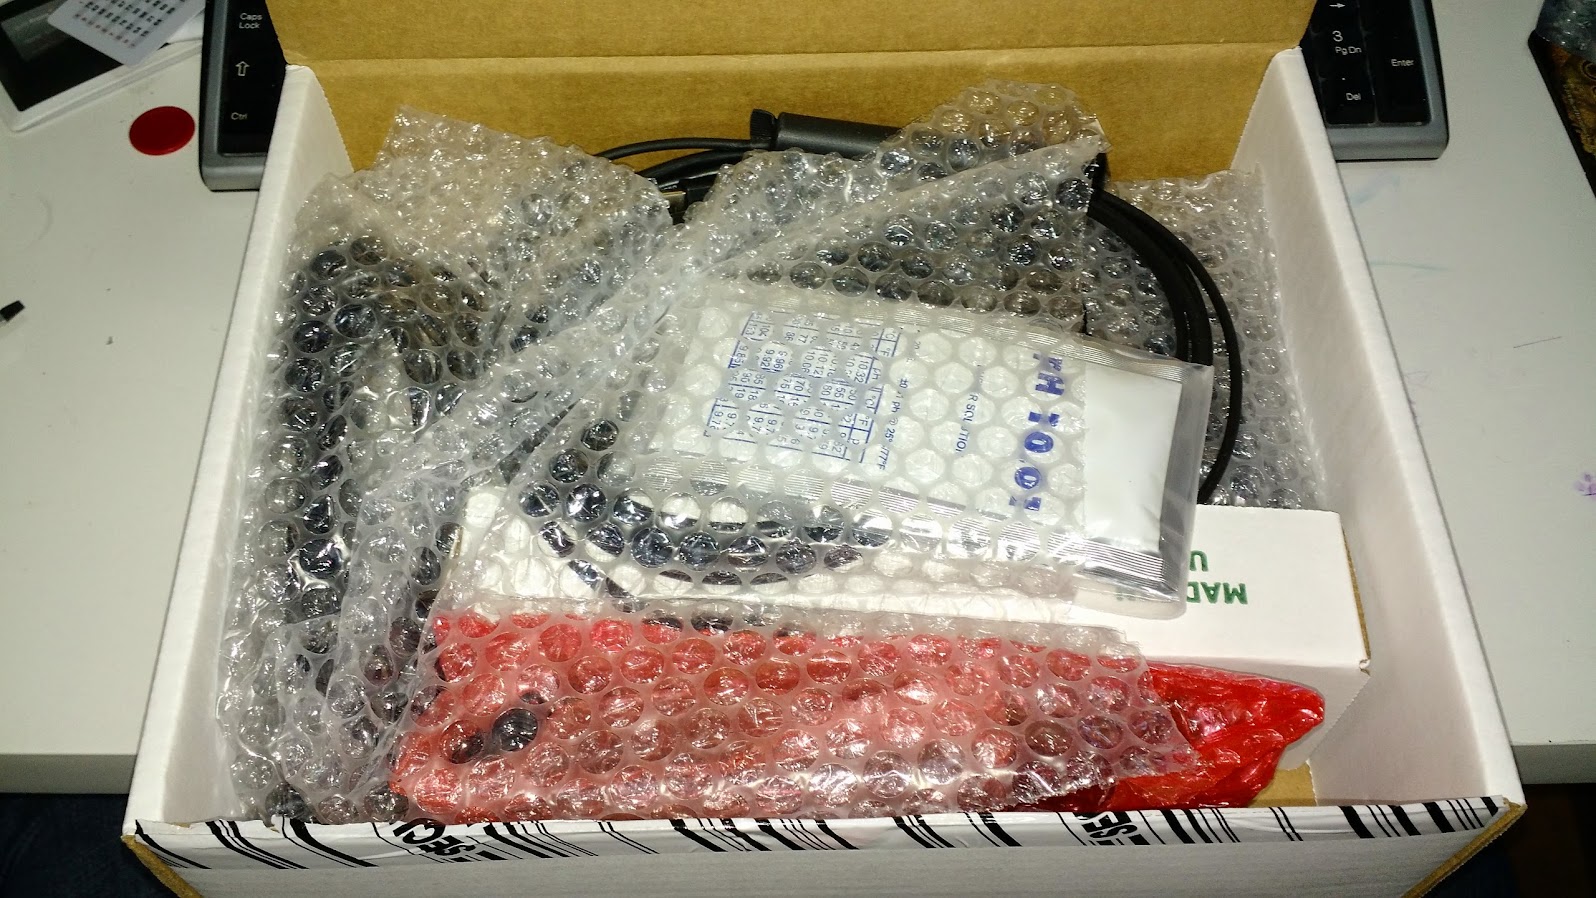   
|
|
|
|
|
01/09/2015, 03:47 PM
|
#20 |
|
Registered Member
Join Date: Jan 2008
Location: Portugal
Posts: 267
|
Working slowly but at this stage ... one week away to put the ceiling in place.
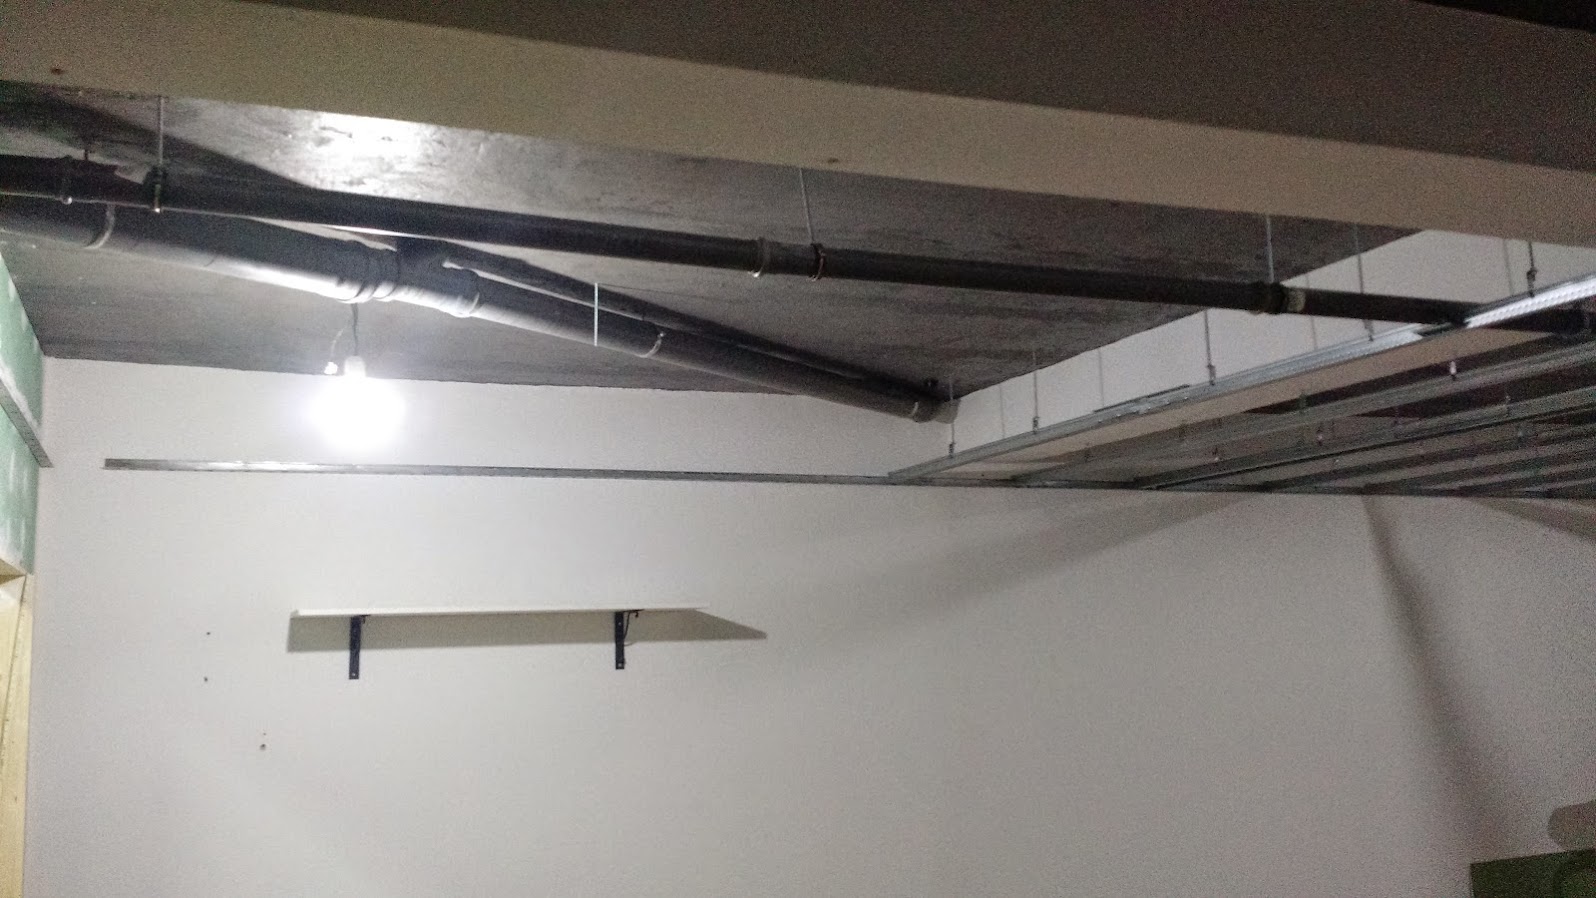 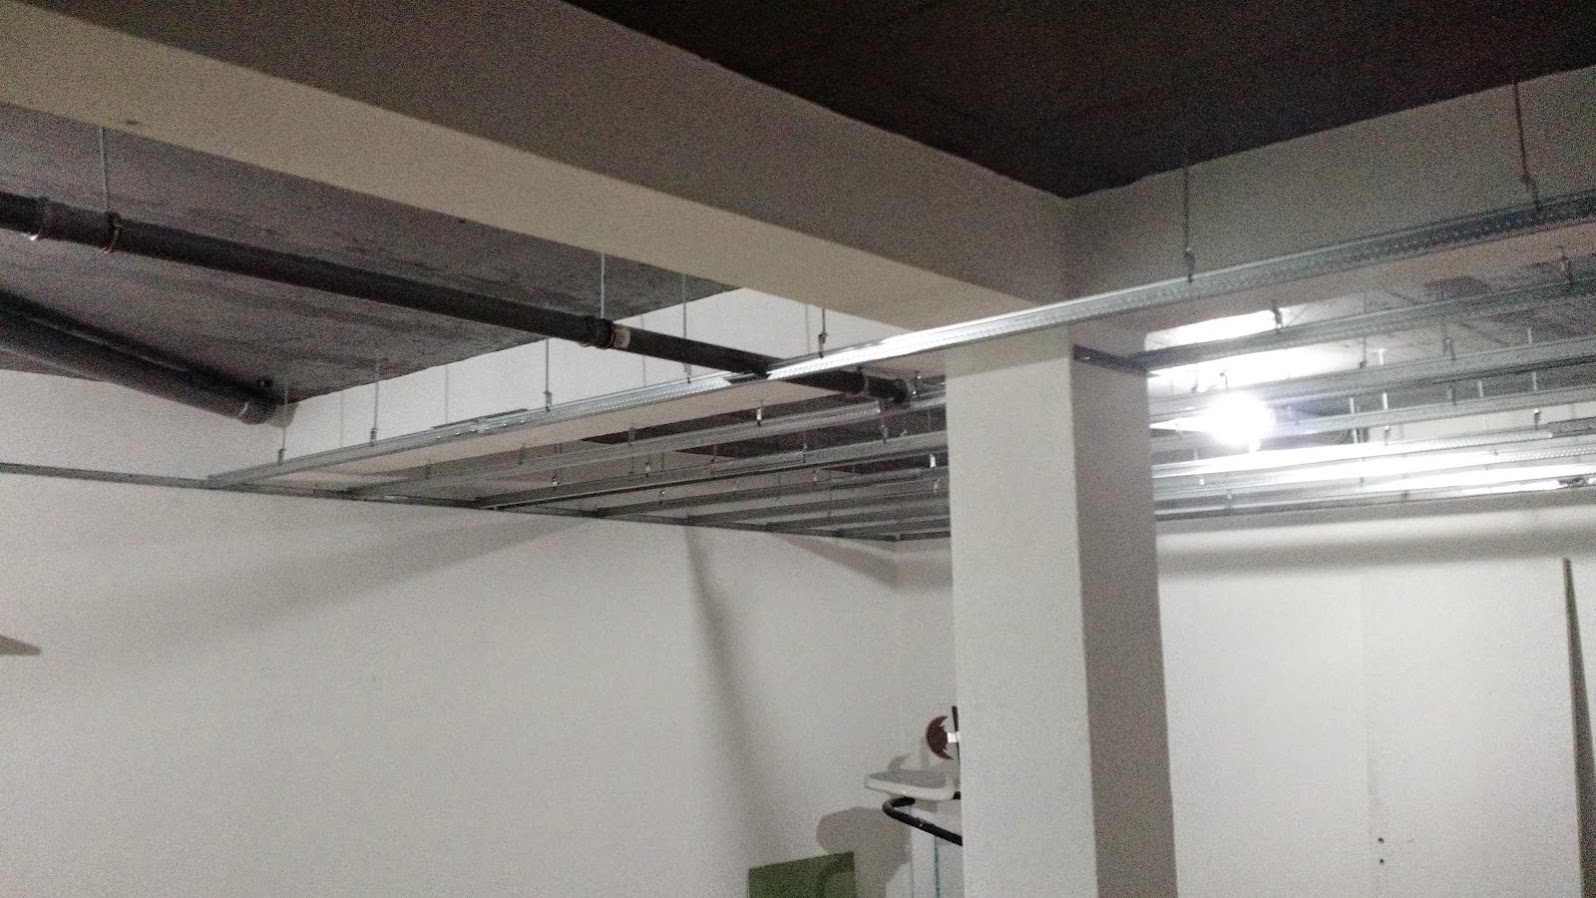 So last week two of my good friends came and we were able to put all the ceiling in place. 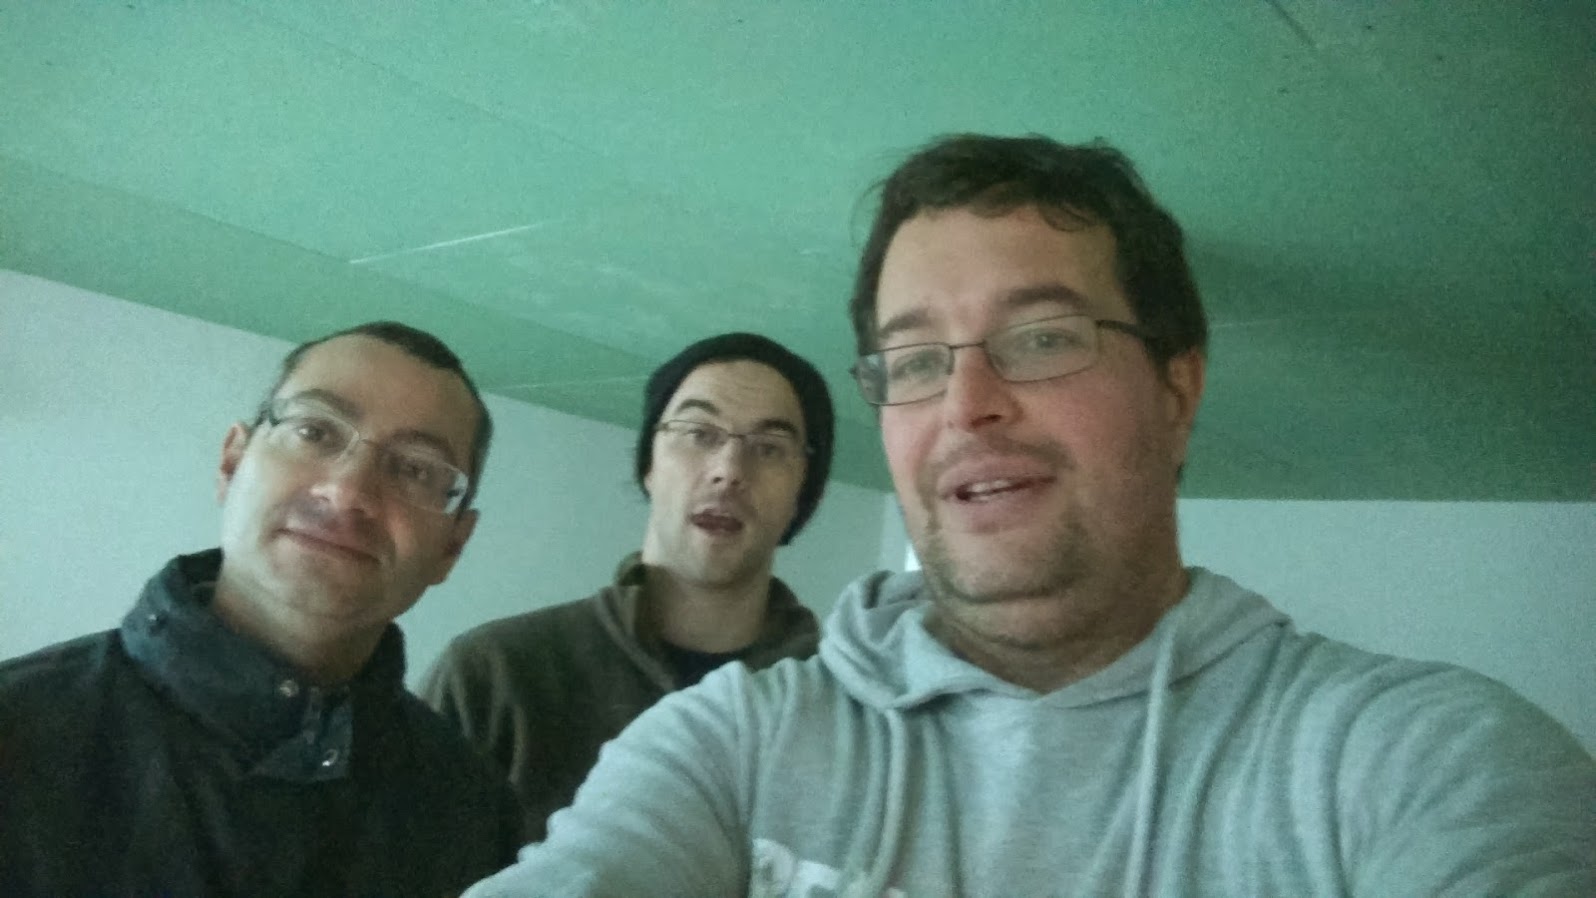 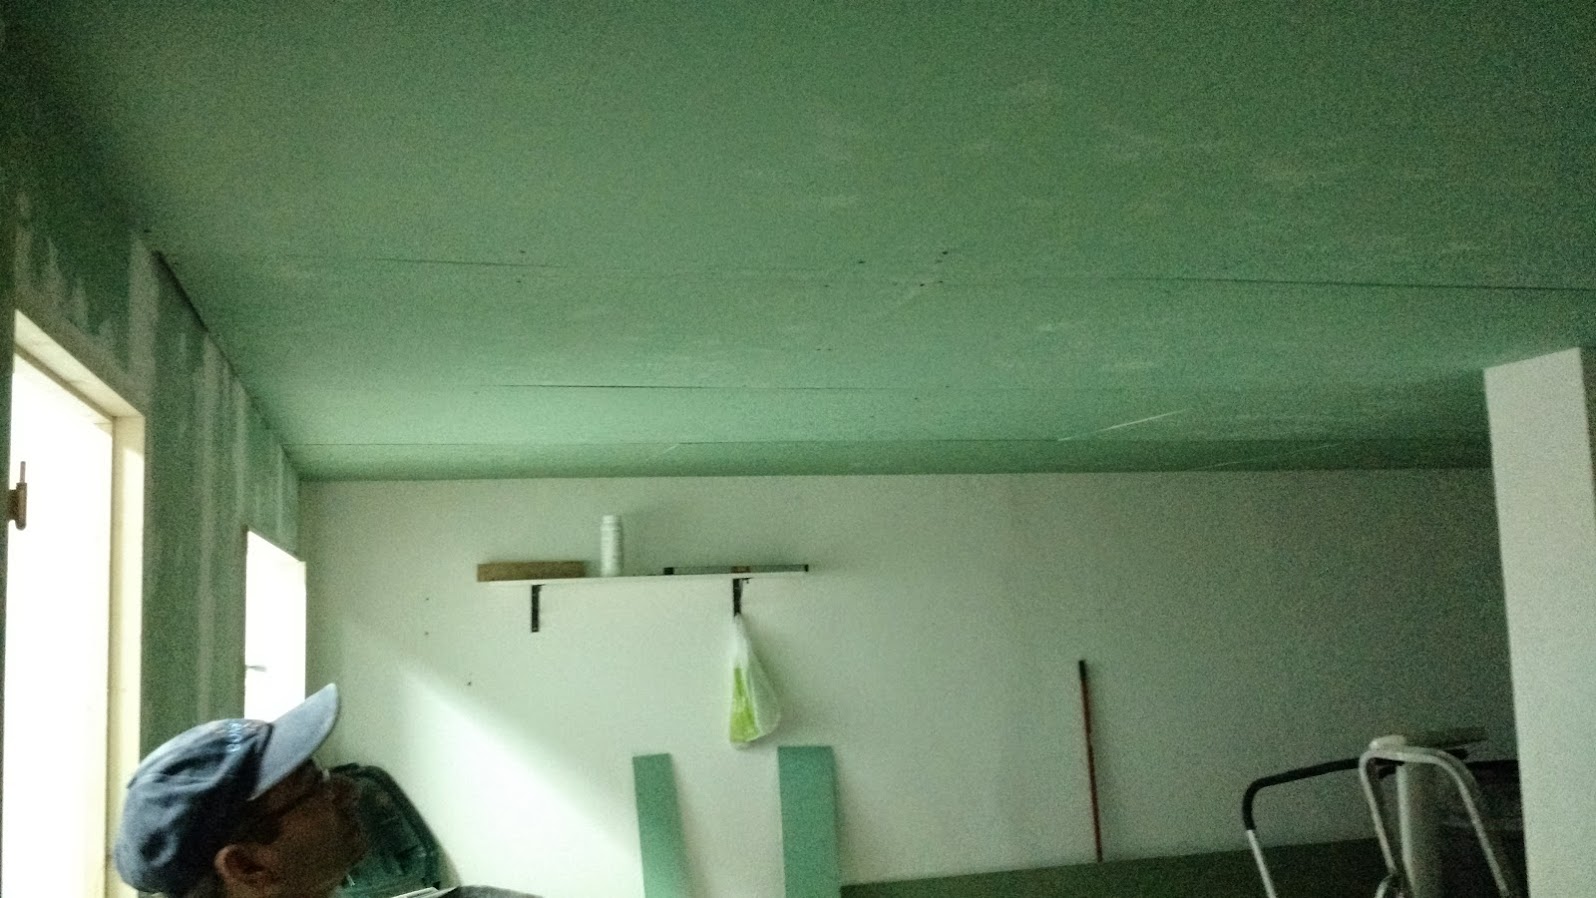 and this week was the time to build the structure to support the "brute" ... 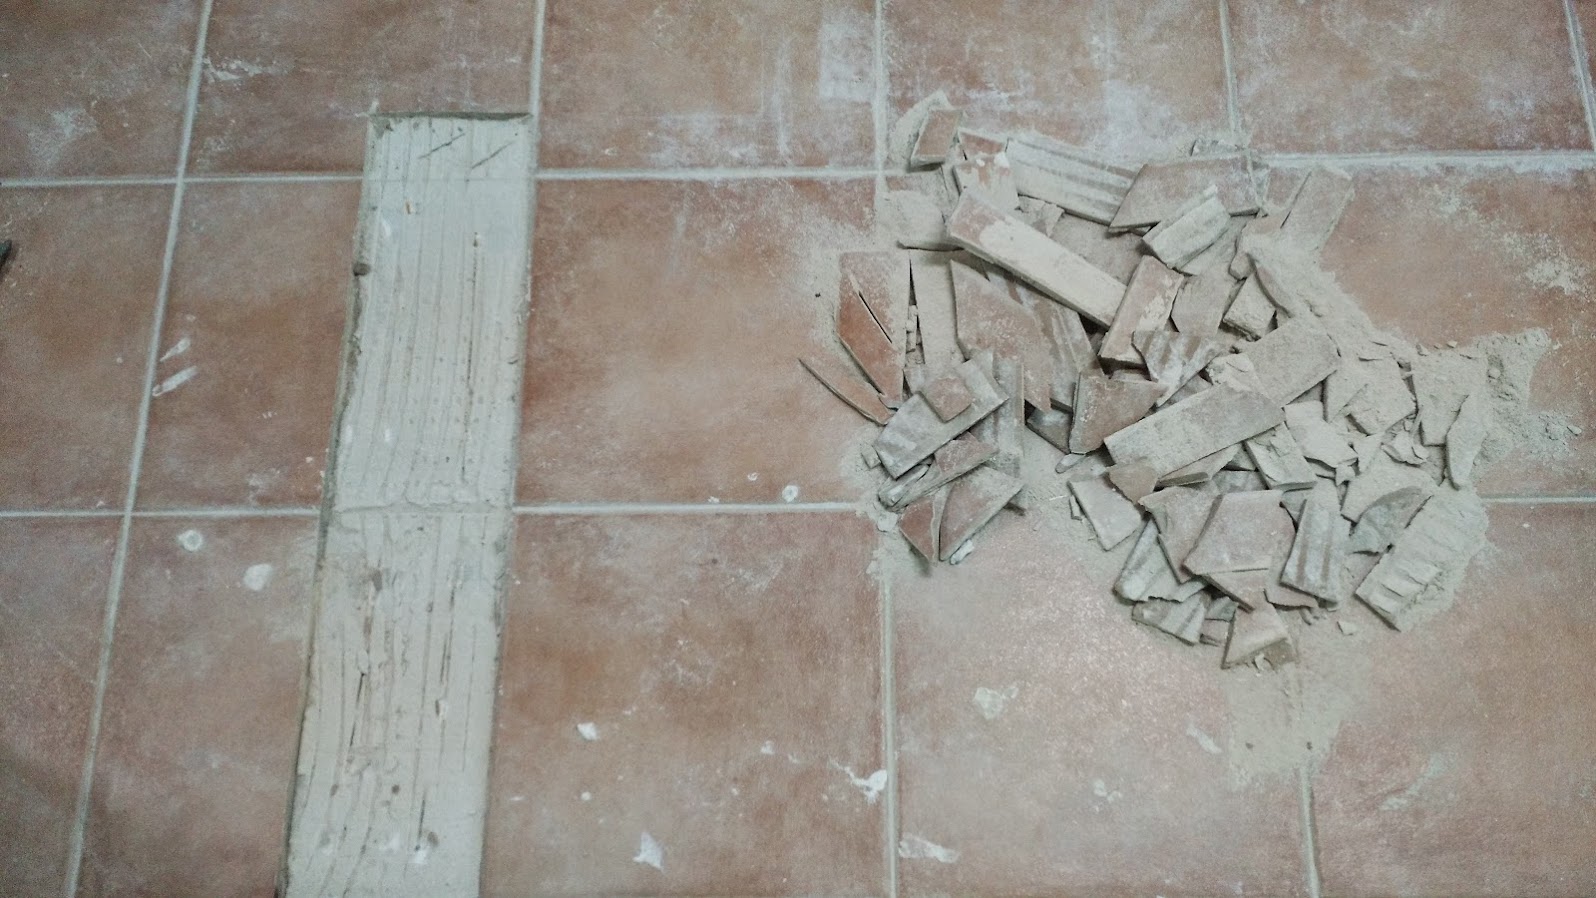 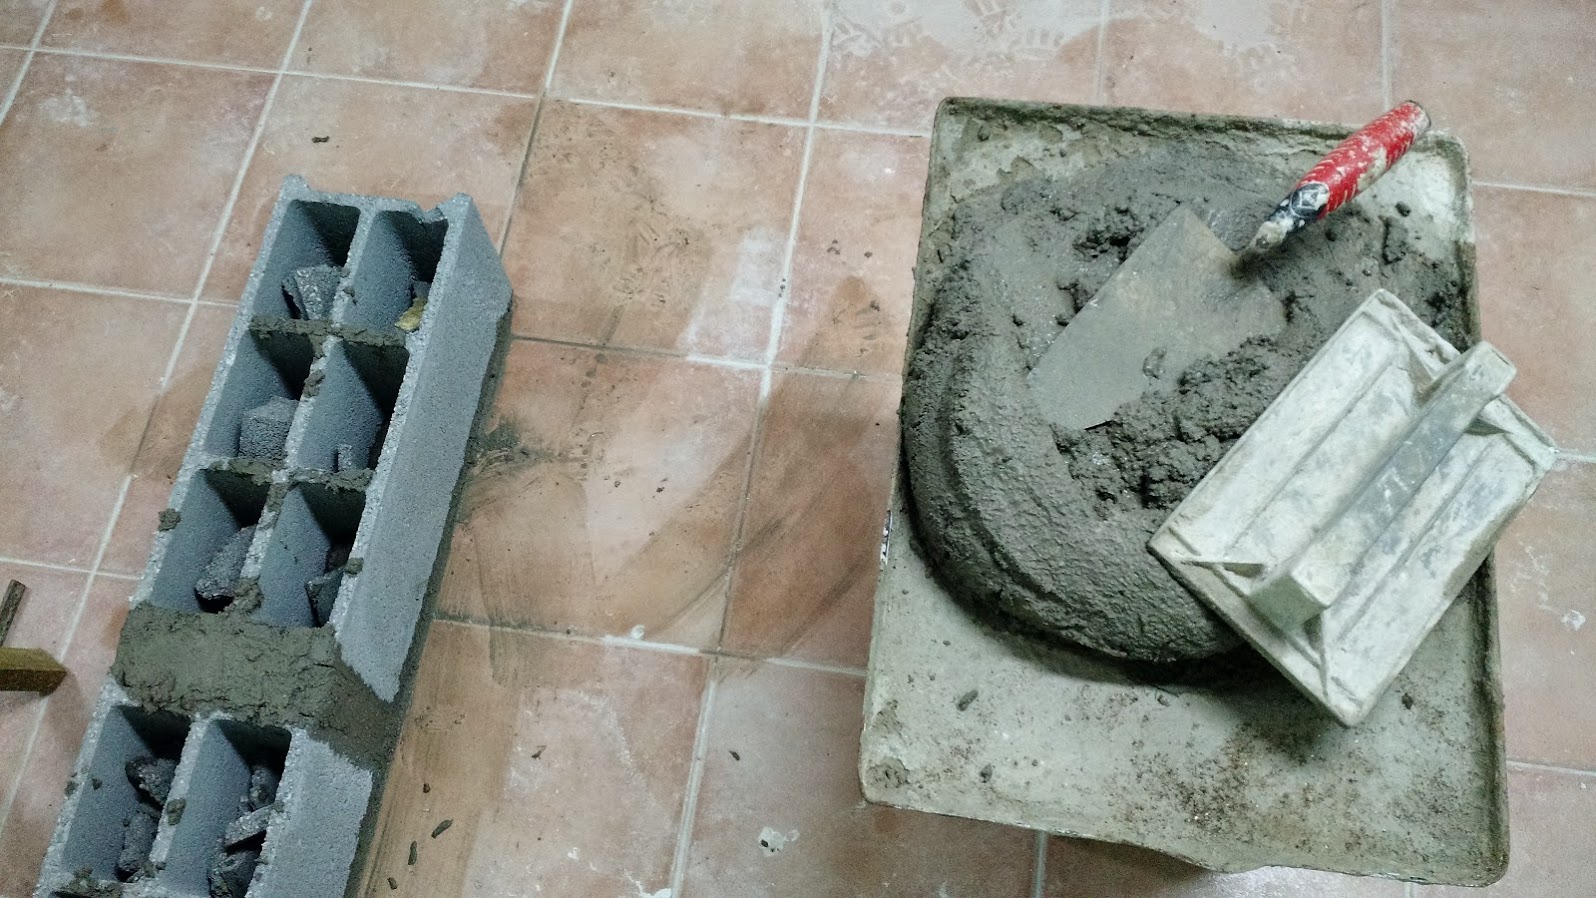 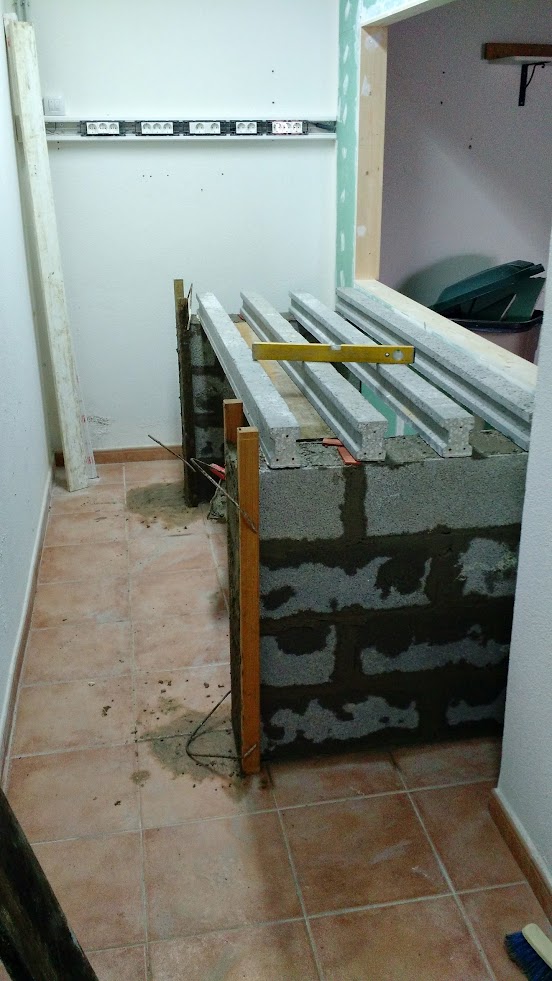   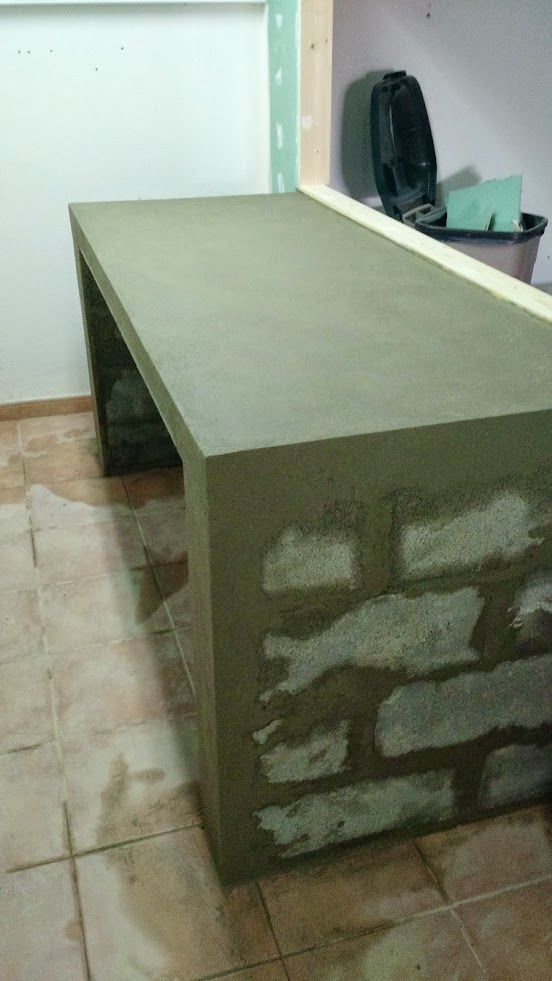
|
|
|
|
|
01/09/2015, 03:48 PM
|
#21 |
|
Registered Member
Join Date: Jan 2008
Location: Portugal
Posts: 267
|
   Done. So now the challenge is to level this. 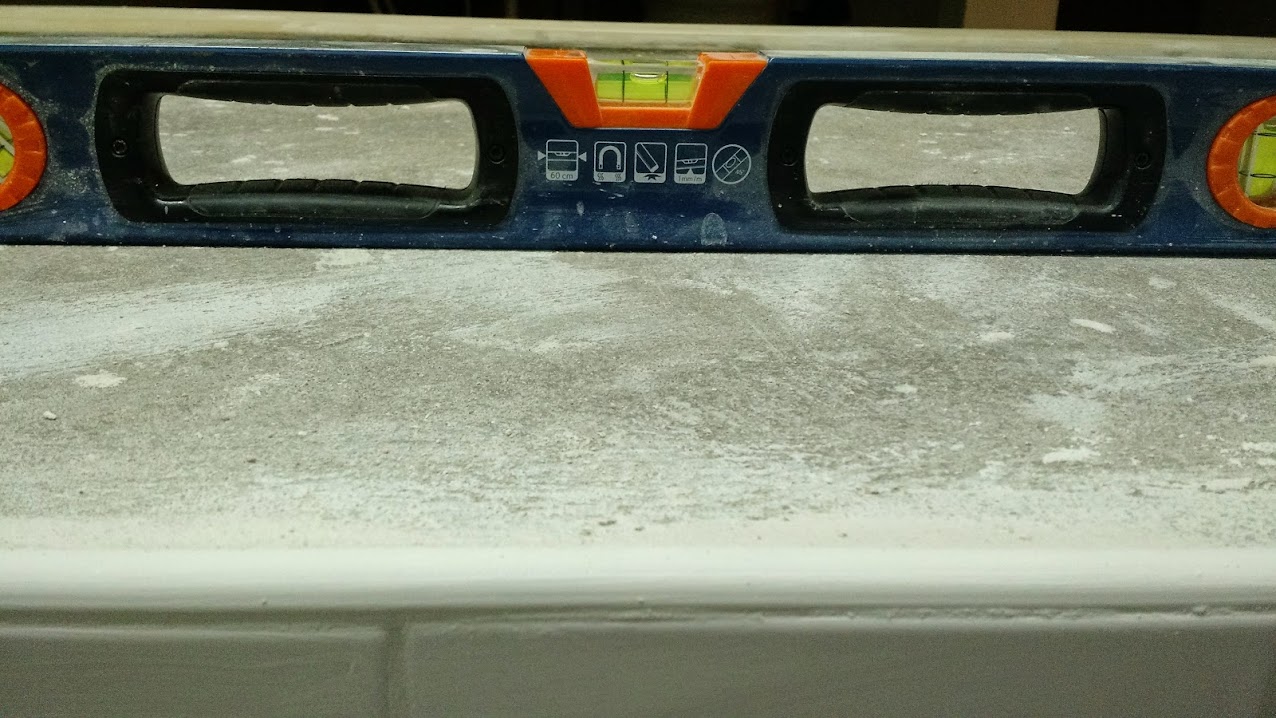 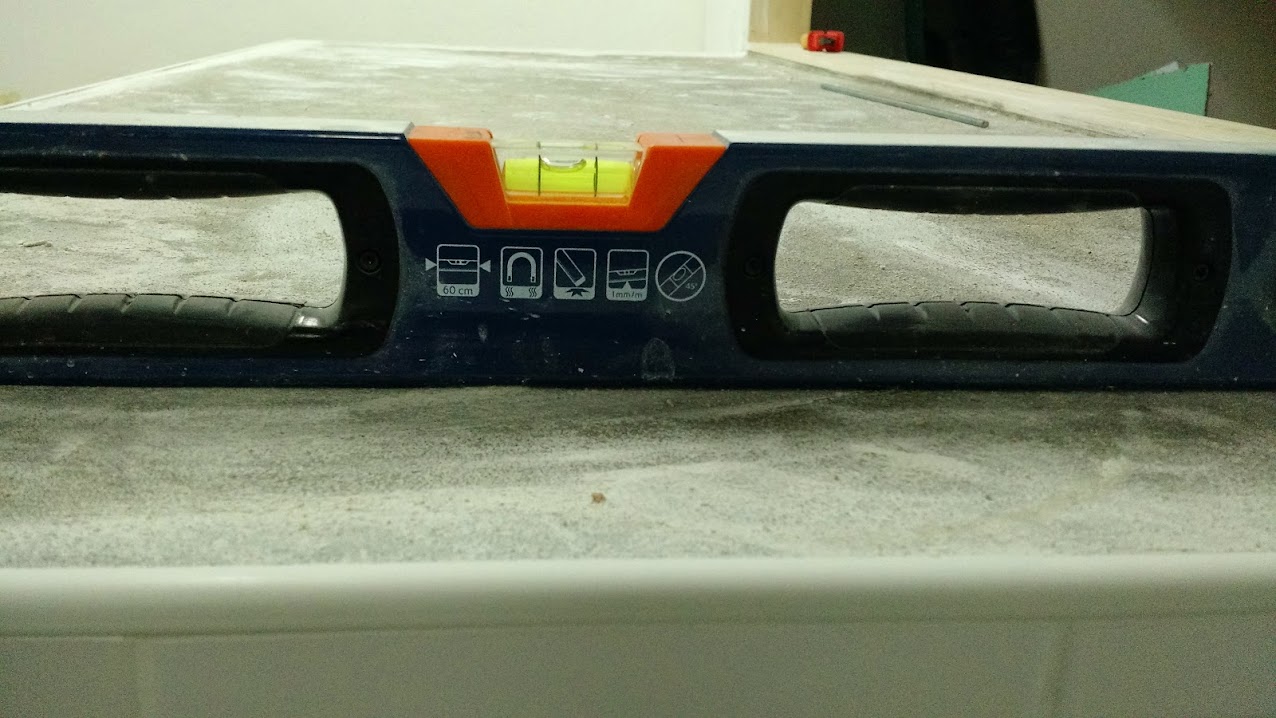 I will use a special resin (auto leveling) used in parking lots to create a smooth surface for the aquarium. That will happen in three weeks time frame I hope. Meanwhile at night in the hotels I saw tons of images of layouts to decide what I was going to do and finally I came to a layout I really like.  And that's it for now. At least two or three weeks doing nothing. If I am lucky I want to have the tank in place by the end of February. Meanwhile I ordered three Radion Gen3 to light the tank ...  All the best, Rui |
|
|
|
|
01/11/2015, 06:59 AM
|
#22 |
|
Registered Member
Join Date: Oct 2011
Location: Burlington, Ontario
Posts: 88
|
It's coming along really nice so far. I really like that layout. Where in Portugal are you from?
|
|
|
|
|
02/19/2015, 04:51 AM
|
#23 | |
|
Registered Member
Join Date: Jan 2008
Location: Portugal
Posts: 267
|
Hello Everyone !!!
Quote:
Anyway, I was able to take 3 day vacation and prepared the fish room to receive the tank that is going to arrive hopefully by the end of next week. I got in the meanwhile the lightning for the aquarium. three Radion XR30 Pro with 120º lenses.   Also got my quarantine system. three 100x30x40cm aquariums. The top one for Corals and the two bottom ones for fishes. They are going to be completely independent of each other. 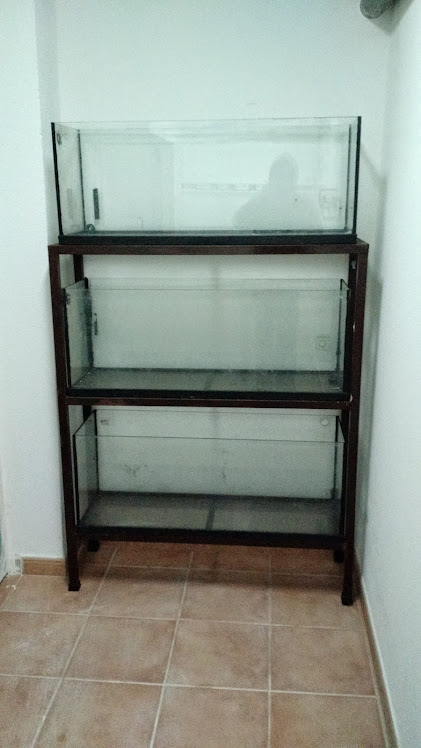 Next thing was to wash all the equipment. Everything into 1:10 muriathic acid bath. 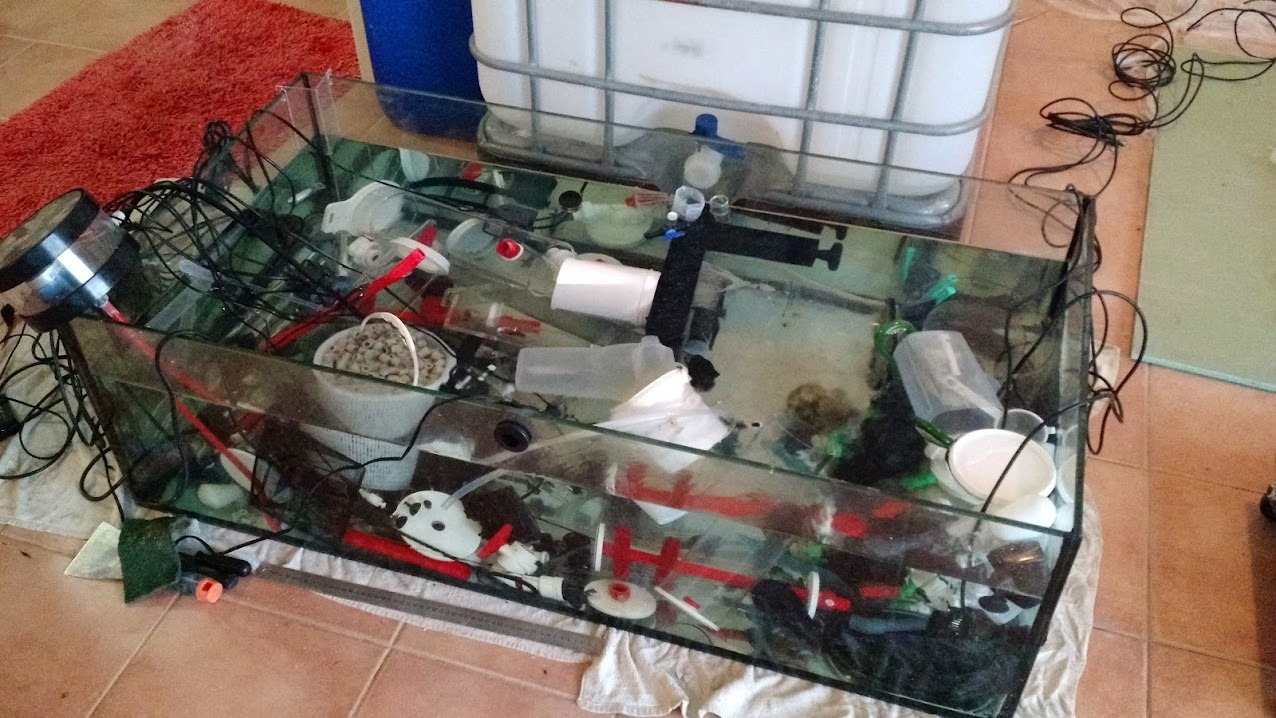 Also the quarantine aquariums to check for leaks as these were bought 2nd hand. 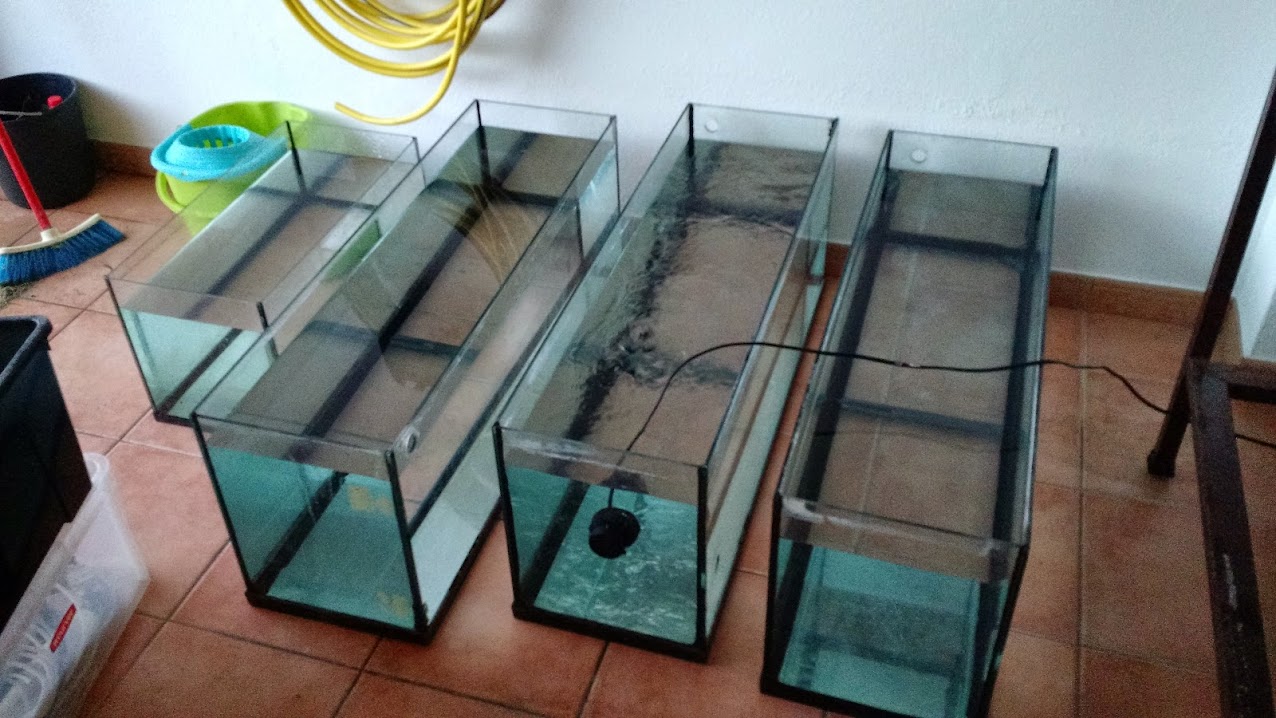 All the best, Rui |
|
|
|
|
|
02/19/2015, 04:57 AM
|
#24 |
|
Registered Member
Join Date: Jan 2008
Location: Portugal
Posts: 267
|
Continuing ...
I bought also the Rock. All death rock that is going to be treated with leach, muriathic acid and agent green (almost like sea Klear but from ATM) 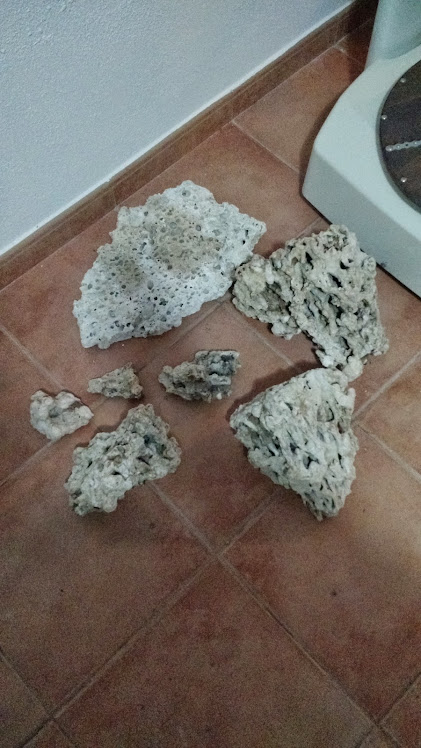 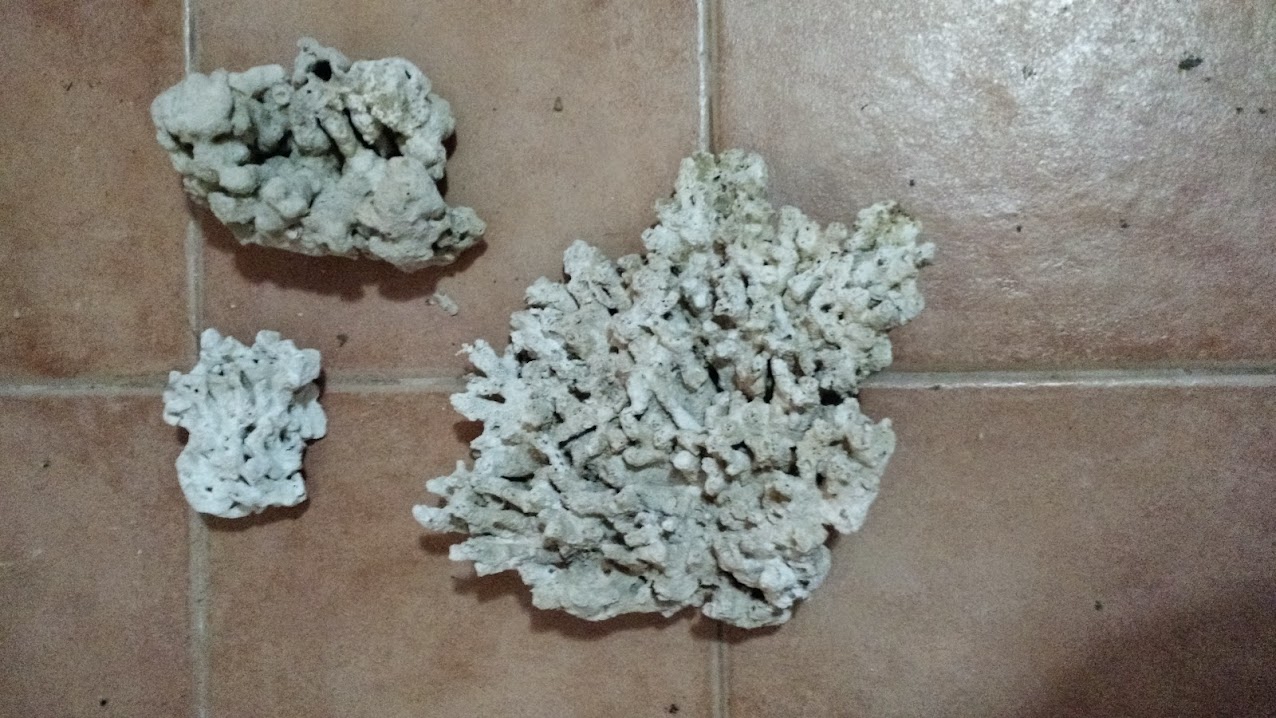 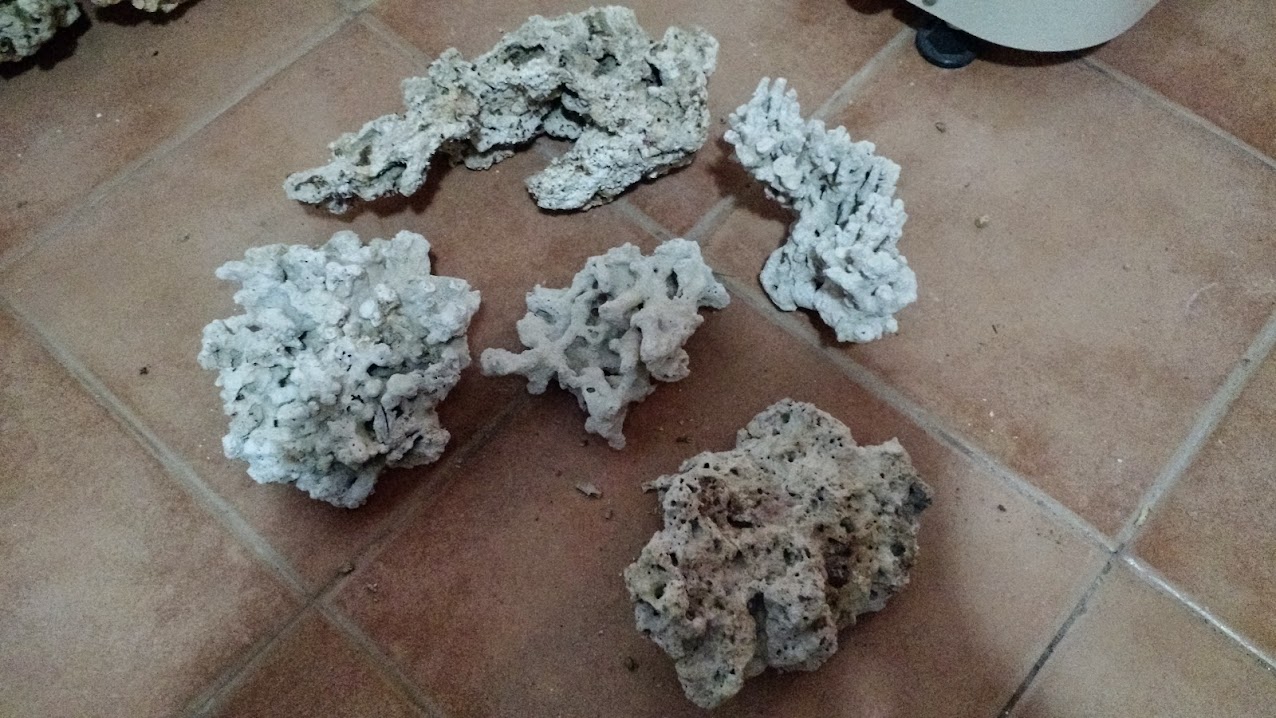 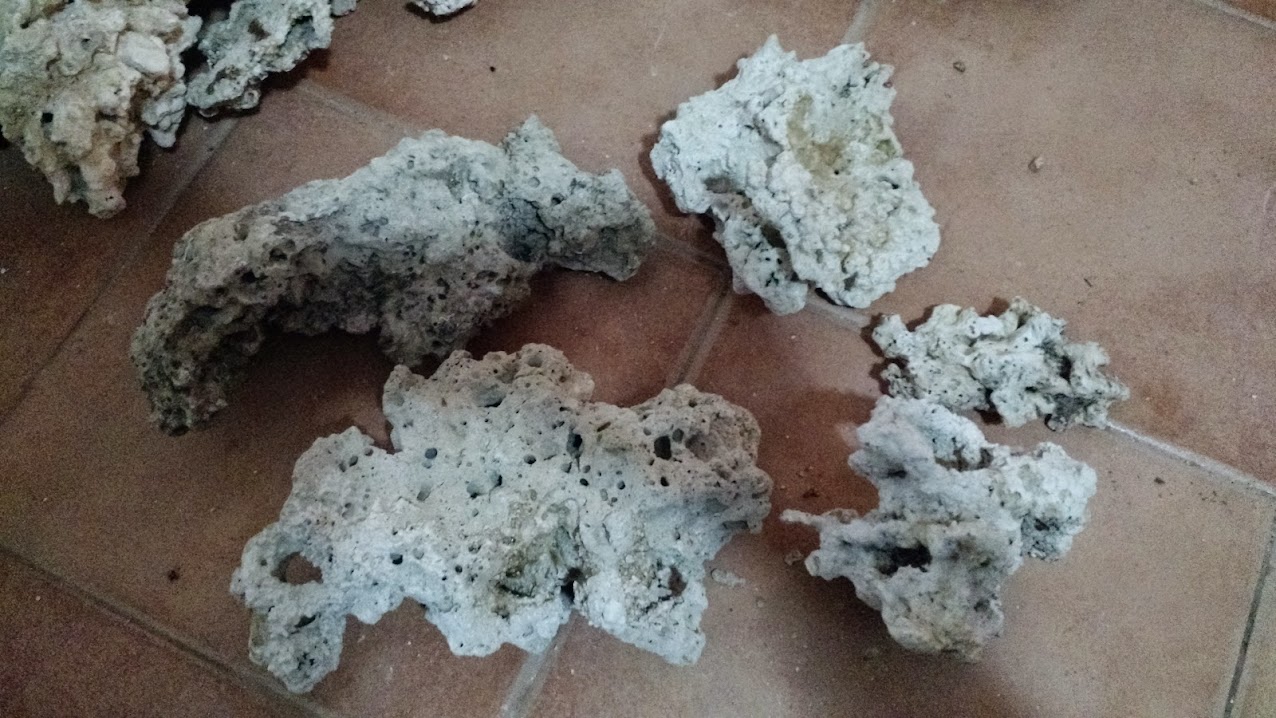 And finally the work is done inside the fish room. Almost ready do receive the aquarium  This is just a small system to control Osmose and Quarantine 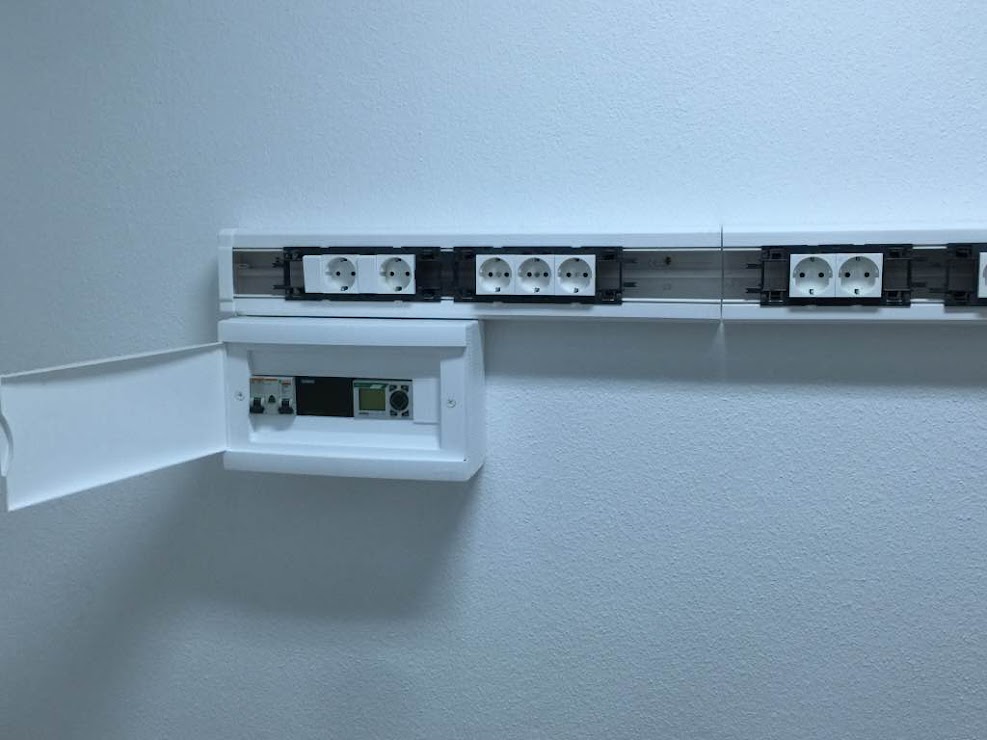 And the final looks ... I am very happy with the result. 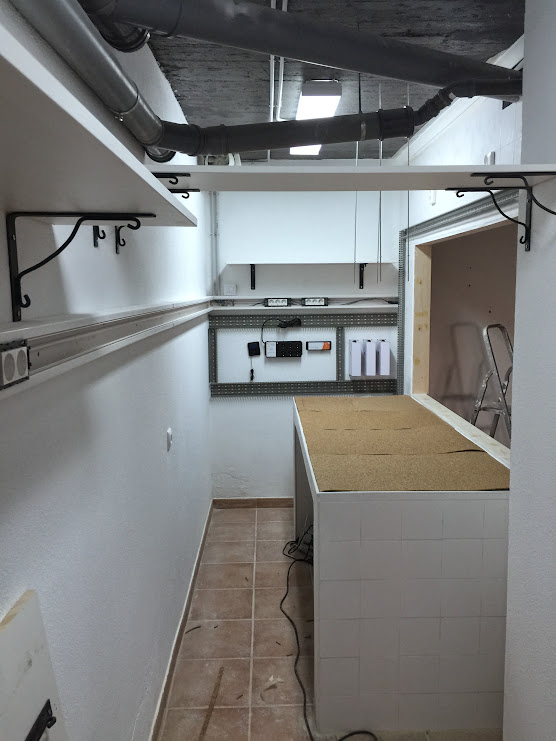 Hope you like it. It's almost finished a construction work journey that started August 5th last year. All the best, Rui |
|
|
|
|
02/19/2015, 09:09 AM
|
#25 |
|
Registered Member
Join Date: Jan 2010
Location: Canadia
Posts: 4,276
|
Beautiful work!
Dave.M
__________________
My Gawd! It's full of corals! Current Tank Info: None. Nil. Zip. Nada. |
|
|
|
 |
|
|


