
|
|
 04/09/2012, 09:31 PM
|
#1 |
|
Registered Member

Join Date: Dec 2007
Location: Texas
Posts: 185
|
I'm in the process of building a 25g rimless cube. I plan on keeping softies, LPS, and a few SPS. I'm doing a lot of DIY and I hope to document it here.
A few details: 25 gallon rimless cube. Mr. Aqua low iron Maxijet MJU 1800 return pump DIY LEDs DIY acrylic sump DIY stand Aqua C EV-120 with Mag5 DIY internal overflow box with a Herbie overflow Still need to decide what I am going to do about flow. I have two old Koralia 4s but I think one might be a little much. Here are a few pics of the work done so far: 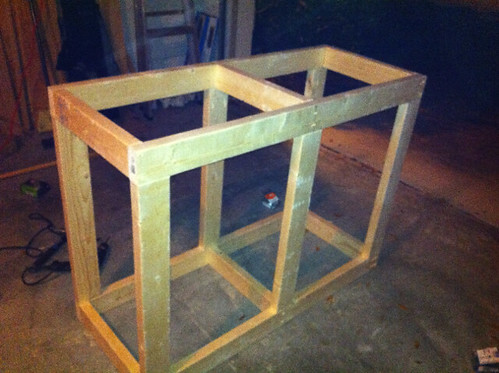 The frame of the stand. Before starting this build I made sure I learned from my mistakes in the past. My old tank had a very cramped stand and it was very difficult to service. As a result, I decided to make an oversized stand. I know its a little unconventional to have this big of a stand for a cube but its what I was looking for. I also added a side door to give me easier access to the back of the sump. Additionally, I decided to do the "legs" a little differently than most DIY stands. Instead of placing two 2x4s in each corner and taking up a little more space in the stand I connected the boards using pocket screws. This turned out pretty good. 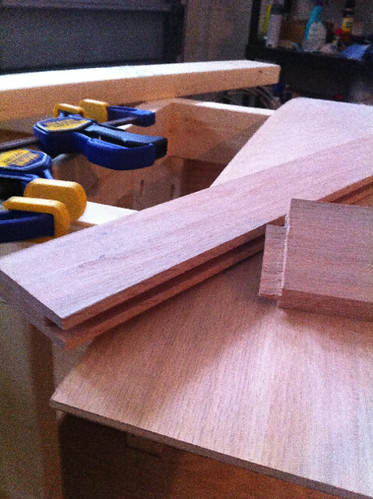  For the doors I did a Shaker door. 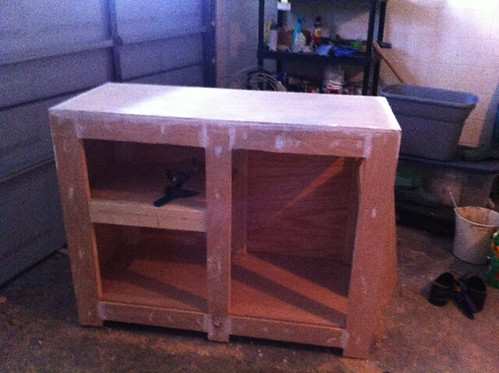 Here is the stand after I covered the frame with oak plywood and filled the gaps.  The final product 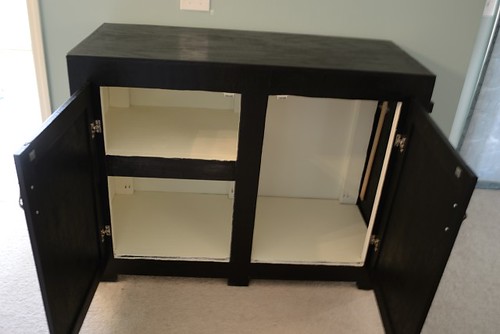 Doors open. You can see the side door kickstand on the right side  Side view. 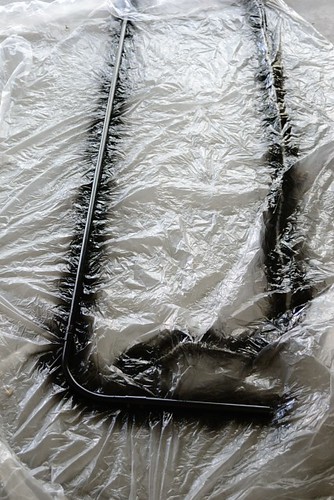 I'm using electrical conduit spray painted black to hold my light fixture. |

|

|
|
04/09/2012, 09:34 PM
|
#2 |
|
Registered Member
Join Date: Dec 2007
Location: Texas
Posts: 185
|
 Package from RapidLED arrived. 24 Cree LEDs (14 XTE RB, 10 XGP CW), 92mm fan, black anodized tapped and drilled heatsinc, hanging kit, and two Meanwell 60-48Ds  XTE royal blues are in.  All the LEDs secured with screws and thermal grease 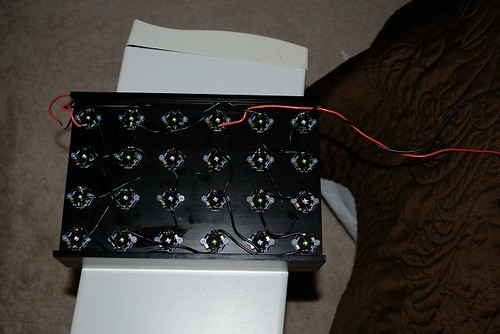 Wiring completed 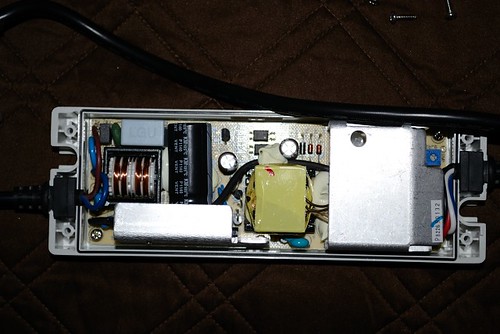 Meanwell popped open. Nothing fancy here. Just thought it was a cool pic. 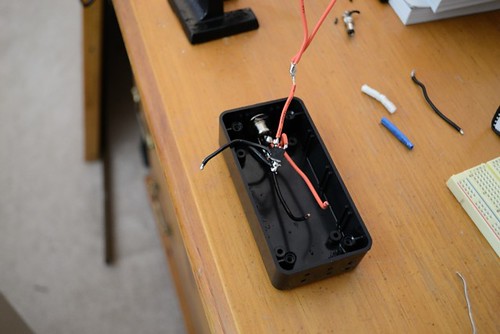 I made my own dimming box. I wanted to avoid using two wall wart, one for the dimming circuit and one of the fan, so I found a 12v AC adapter in my parts bin and wired a voltage regulator into my box. This allows for an output of 12v for my fan and 0-10v for the dimming circuit while only using one outlet. 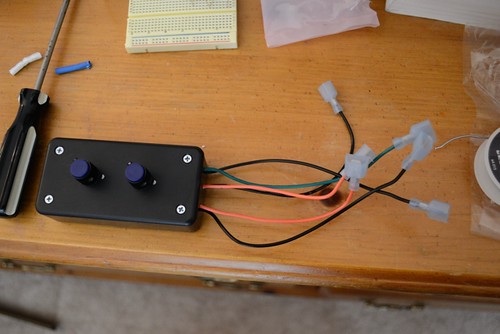 Finished dimming box. I'm probably going to change the connectors to something else before all is said and done. 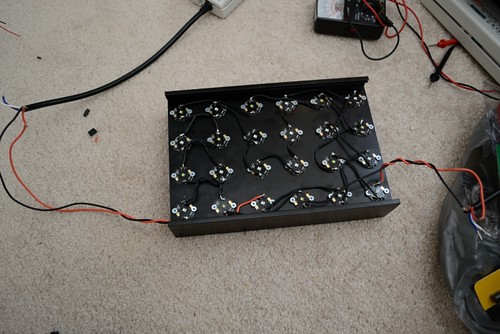 Hooked up to Meanwells for testing. Three of the RBs would not light when hooked up. Oddly, they were in the middle of the string and still worked when I used the LED tester. I messed around with it for a while and figured out that one of the screws was touching the extra contact plates on one of the LEDs. Fixed this by adding little spacers. Now they all light.  Dialing in the Meanwells. XPGs running at 1.3A. I think I'm supposed to stay "man, these are bright!" here. They definitely are. |
|
|
|
|
04/09/2012, 09:36 PM
|
#3 |
|
Registered Member
Join Date: Dec 2007
Location: Texas
Posts: 185
|
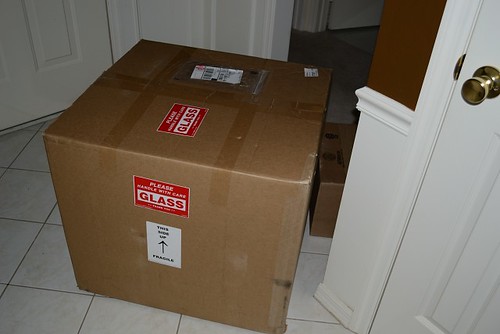 Tank arrived  Heavy duty packing thanks to MarineDepot.com Tank arrived without a scratch  Now on to the sump. Planning on a 22x16.5x13 inch sump. It will be divided into a front and back section. The back section will have the skimmer section and the return section separated by a bubble trap. The front will be a fuge. The sketches bubble trap is all messed up but it will have three baffles.  Cut the acrylic today.  Frame of the sump And that's were I am now. I plan on finishing the sump this week and then starting on the overflow box. I would have gone with a gl*******s one but I wanted to do a Herbie overflow and I don't think there's enough room in their boxes for this. I did order a bunch of stuff from them anyway including some hole saws. Super fast shipping and awesome customer service. |
|
|
|
|
04/10/2012, 07:20 AM
|
#4 |
|
Registered Member
Join Date: Apr 2012
Location: Chicago
Posts: 12
|
cool, I just recently set up a 50g acrylic with a built in overflow. Making a stand yourself is the way to go, I spent under 200$ on mine and probably would have paid around $600 for it in a store. lookin good so far
|
|
|
|
|
04/10/2012, 01:05 PM
|
#5 | |
|
Registered Member
Join Date: Dec 2007
Location: Texas
Posts: 185
|
Quote:
|
|
|
|
|
|
04/10/2012, 02:01 PM
|
#6 |
|
Registered Member
Join Date: Jul 2011
Location: Martinez, CA
Posts: 1,116
|
The stand came out great, I definitely hear you on running out of space and wanting an extra big stand. My tank is on a biocube stand and it is very cramped with all the test kits, power strips, top off water, controller, dosing liquids, food etc.
__________________
Red Sea Max 250 |
|
|
|
|
04/10/2012, 04:55 PM
|
#7 | |
|
Registered Member
Join Date: Dec 2007
Location: Texas
Posts: 185
|
Quote:
|
|
|
|
|
|
04/10/2012, 07:51 PM
|
#8 |
|
Registered Member
Join Date: Dec 2007
Location: Texas
Posts: 185
|
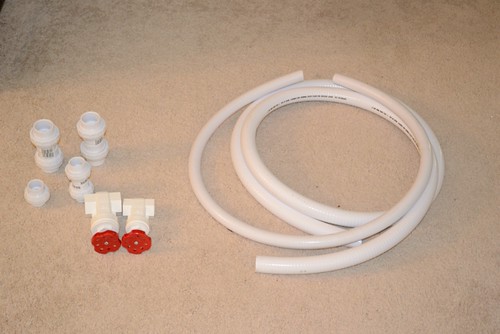
Got my flexible PVC, unions, and gate valves from Savko today. I've still got some work to do before starting the plumbing. Anyone have experience with the flexible PVC? It seems like a good choice but definitely has some memory to it. I'm hoping that doesn't make it to difficult to work with.
|
|
|
|
|
04/10/2012, 10:02 PM
|
#9 |
|
Registered Member
Join Date: Jan 2012
Location: U.S.A.
Posts: 324
|
Looks awesome so far, I like the fact you are building everything yourself. A man after my own.
__________________
Barroom Hero |
|
|
|
|
04/10/2012, 10:48 PM
|
#10 |
|
Registered Member
Join Date: Sep 2008
Location: El Paso, Texas
Posts: 1,340
|
nice start man!!
__________________
rpjaws Current Tank Info: 500 glln system/ Reef |
|
|
|
|
04/11/2012, 08:41 AM
|
#11 | ||
|
Registered Member
Join Date: Dec 2007
Location: Texas
Posts: 185
|
Quote:
Quote:
|
||
|
|
|
|
04/12/2012, 09:12 PM
|
#12 |
|
Registered Member
Join Date: Dec 2007
Location: Texas
Posts: 185
|
 Got my plumbing supplies in. Savko has an awesome selection, cheap prices, and a website reminiscent of 1992.   Also drilled my tank. Damn, that made me nervous! Luckily it came out completely fine. Drilled two holes for the drain and one for the return 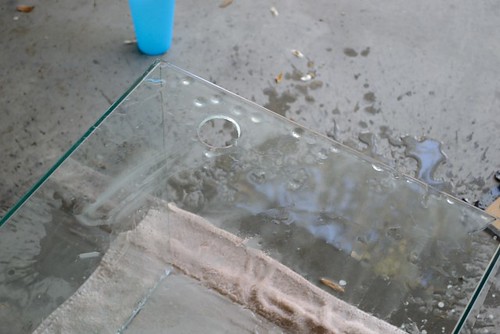 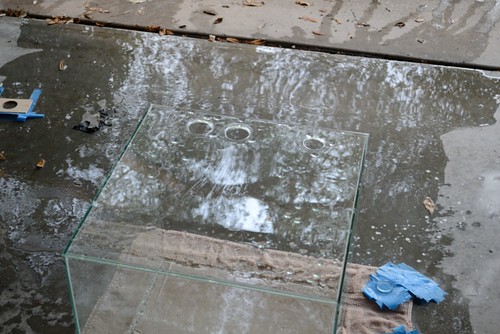  Success! 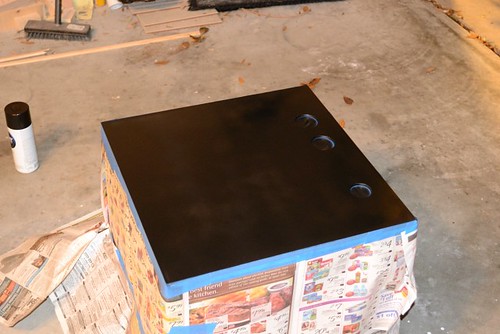 Painted the back of the tank black too  The sump is done as well. Tested it and found a small leak that I fixed with Weldon 16. |
|
|
|
|
05/05/2012, 12:04 PM
|
#13 |
|
Registered Member
Join Date: Dec 2007
Location: Texas
Posts: 185
|
Finally an update. I've got everything put together. Only thing that's missing is the water.
  Used Aqua C EV-120. Free thanks to my brother. You can also see my American DJ switchs installed 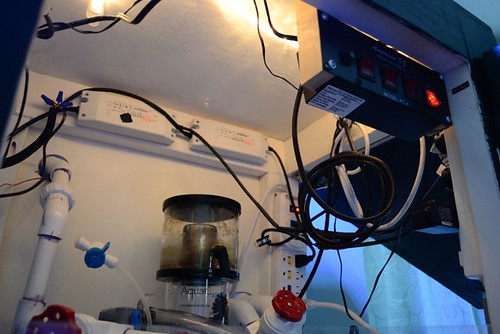 Shot looking up into the stand. Meanwells mounted on the back and rope lighting. Rope lighting was $3 at Home Depot  Another shot inside the stand 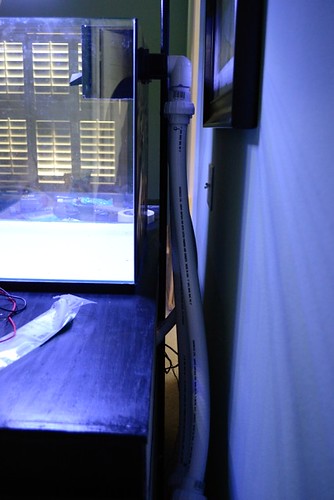 Drain lines on the back with unions on each end to allow for easy removal.  DIY overflow box. Made the cuts with my tablesaw. I just used my regular wood blade and it shows. Lots of chip out but I think I was able to hide it mostly. I'm sure it will be harder to tell once algae is growing on it too. I just couldn't justify spending $50 on a blade I'd use once. 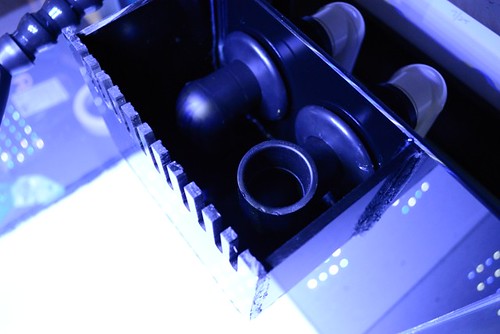 Inside the box. I'm doing a Herbie overflow. Hope it works. Thats it for now. Gotta make 50 gal of saltwater and get some sand. I'm also going to redesign the light box. I hate the way it looks right now with the electrical conduit and RapidLED hanging kit. I think I'll put it all inside a box or something. |
|
|
|
|
05/05/2012, 03:16 PM
|
#14 |
|
Registered Member
Join Date: Dec 2007
Location: Texas
Posts: 185
|
I guess I should point out that the lights are turned way down in these pictures. Turning them up causes the colors to wash out.
|
|
|
|
|
05/12/2012, 10:56 PM
|
#15 |
|
Registered Member
Join Date: Dec 2011
Posts: 77
|
I am doing a similar build its a 24X24 rimless and made my own stand too, i agree much better way to go and also staining it black, where did you buy the acrylic sheets for you sump from and how much was it all?
|
|
|
|
|
05/12/2012, 11:08 PM
|
#16 |
|
Registered Member
Join Date: Jun 2008
Location: U.A.E.
Posts: 52
|
Very nice setup. I love the cabinet finish.
|
|
|
|
|
05/12/2012, 11:14 PM
|
#17 |
|
Registered Member
Join Date: Aug 2011
Location: Suffolk, Long Island
Posts: 652
|
nice setup! love them cubes

__________________
65g sps tank, 20L sump, Apex, ATI Sunpower 6x39/Reef brite, SSA CS1, 2xMP10wes & 1 MP40wes, Eheim 1260, Tunze Osmolator, Two-part, GFO/Gac |
|
|
|
|
05/13/2012, 03:51 PM
|
#18 | |
|
Registered Member
Join Date: Dec 2007
Location: Texas
Posts: 185
|
Quote:
|
|
|
|
|
|
05/13/2012, 03:54 PM
|
#19 | ||
|
Registered Member
Join Date: Dec 2007
Location: Texas
Posts: 185
|
Quote:
Quote:
Filling with water now. My big trash can has a hole in it so I'm having to do it 5 gallons at a time with a bucket. |
||
|
|
|
|
05/13/2012, 04:07 PM
|
#20 |
|
Registered Member
Join Date: Dec 2010
Posts: 284
|
Looks nice, you won't be dissapointed with the herbie, changed everything for me, all you can hear is the slight vibration of the pump
|
|
|
|
|
05/14/2012, 06:04 PM
|
#21 |
|
Registered Member
Join Date: Dec 2007
Location: Texas
Posts: 185
|
 Filled with water. Tuned in the Herbie. Dead silent. Now the cycle begins. |
|
|
|
|
05/14/2012, 06:12 PM
|
#22 |
|
Registered Member
Join Date: Oct 2010
Location: Norwich, CT
Posts: 1,532
|
Looks great so far. Good luck with the cycle.
__________________
Red Sea Max 130D Mixed Reef: ReefKeeper2, Rapid-LED retrofit, MiniMaxx Reactor, Tunze 9001 Skimmer, 2x Jebao RW-4, 2x Maxi-Jet 600 returns, 2x Koralia Nano 425 |
|
|
|
|
05/14/2012, 06:15 PM
|
#23 |
|
Registered Member.
Join Date: Jan 2006
Location: South FL
Posts: 3,027
|
Looks nice, plenty of space for your chemicals and stuff.
|
|
|
|
|
05/14/2012, 09:15 PM
|
#24 |
|
Registered Member
Join Date: Dec 2007
Location: Texas
Posts: 185
|
This Aqua C is LOUD. I've gotta figure out a way to silence it. I can hear it sucking air and the bubbles in the tower. It sounds like someones blowing bubbles in their drink with a straw...
|
|
|
|
|
05/14/2012, 10:25 PM
|
#25 |
|
Registered Member
Join Date: Aug 2010
Posts: 60
|
Awesome build!
|
|
|
|
 |
| Tags |
| acrylic, diy, diy stand, leds, rimless cube |
| Thread Tools | |
|
|


