
|
|
 09/18/2009, 10:55 AM
|
#1 |
|
Registered Member
Join Date: Sep 2007
Location: Tijuana
Posts: 114
|
1st Time Nano BioCube 14g
So I had been in the hobby for a while until I had to take down my 72g bowfront about a year ago. I was starting to build my house and had big plans for a bigger and better tank. I wanted a rimless shallow tank, even bought a light fixture and other equipment for it in anticipation. Several things came up during the building of my house that made those plans be put on hold and made me have to tear down the 72g.
 Now I have been living in my new house for about 2 months even though its not finished 100% yet. It seems like an endless list of things that need to get done. The rimless tank will have to be put on hold for a while but I do have a 14g BioCube that I have been itching to set up. I did keep some things from my old tank that I will be using for this one. I started working on the rock work yesterday and here are some pics of what I have been doing: 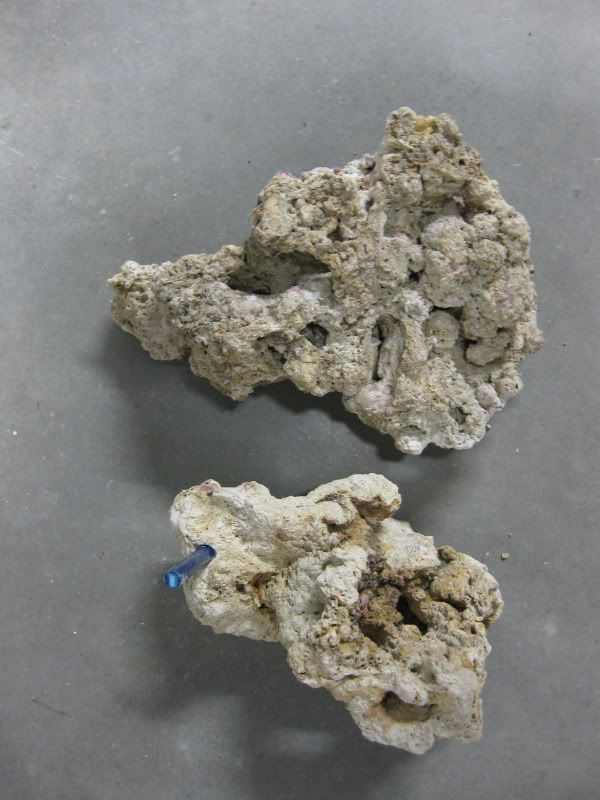 I drilled holes in two pieces of rock so that I will be able to join them together with pieces from a plastic coat hanger to make more of the type of structure that I want. I am doing this because I would like to place a shrimp and goby pair and I do not want them to topple the rock work. 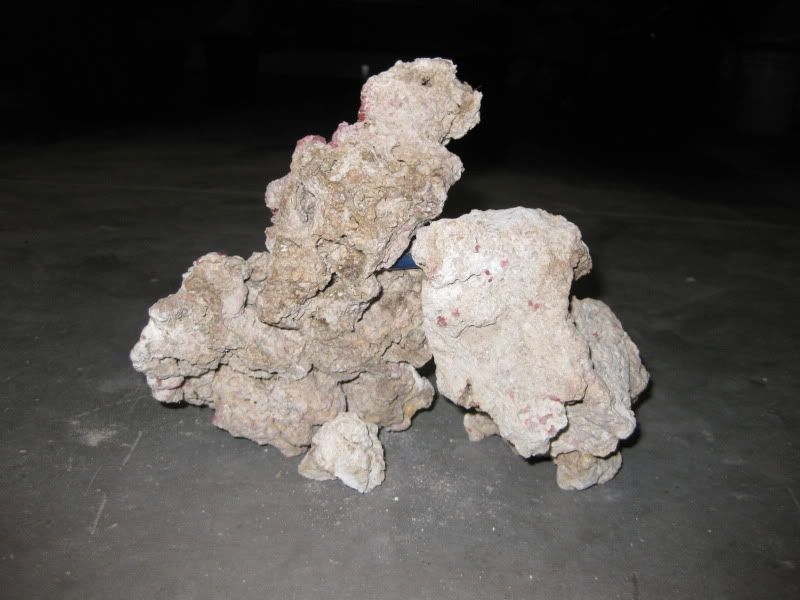 This is how they come together when they are joined 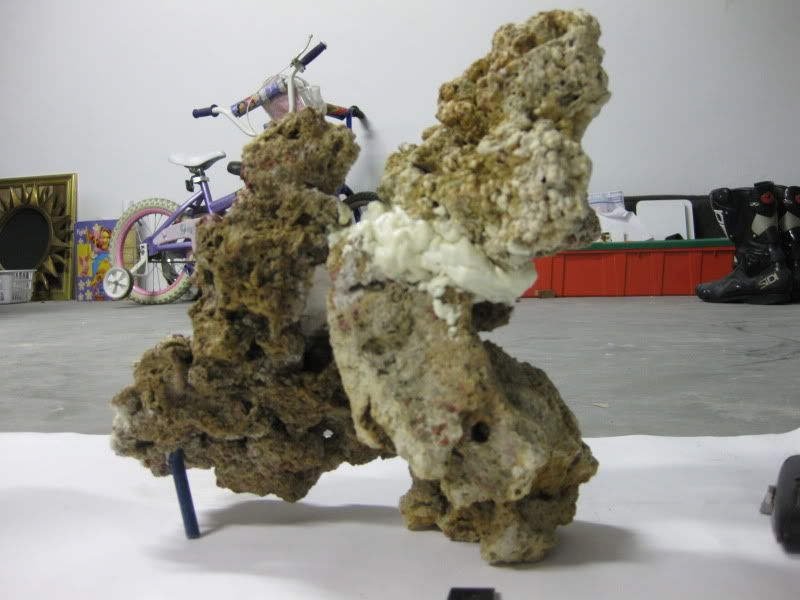 Aside from the piece of coat hanger, I placed 2 part epoxy putty and expanding foam to help keep them together. This makes for a very strong joint. 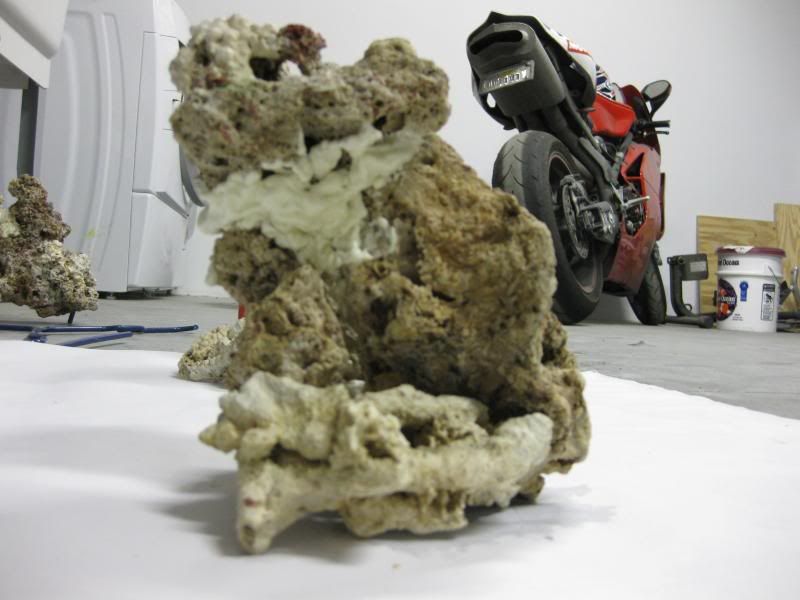 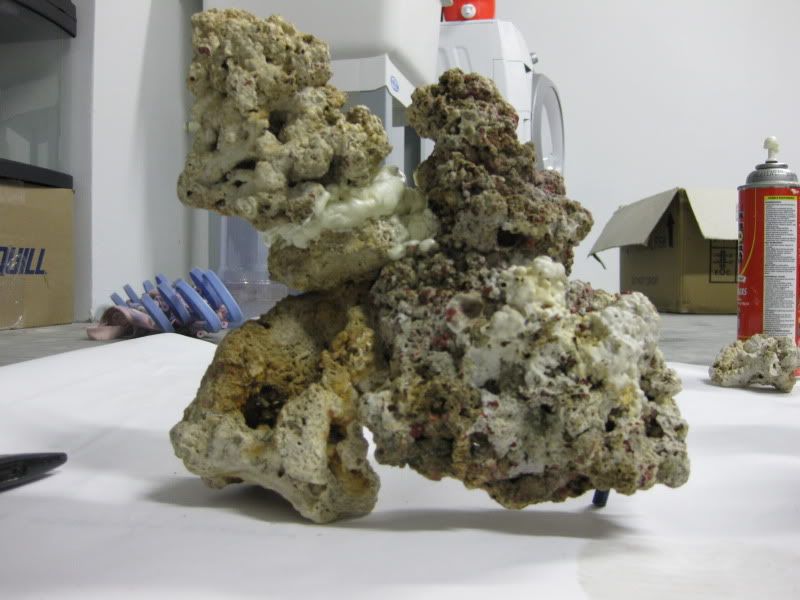 This way I made most of the rock structures. I also placed pieces of coat hanger on the bottom so that the rocks will not be sitting on the sand itself thus elevating them a little bit. 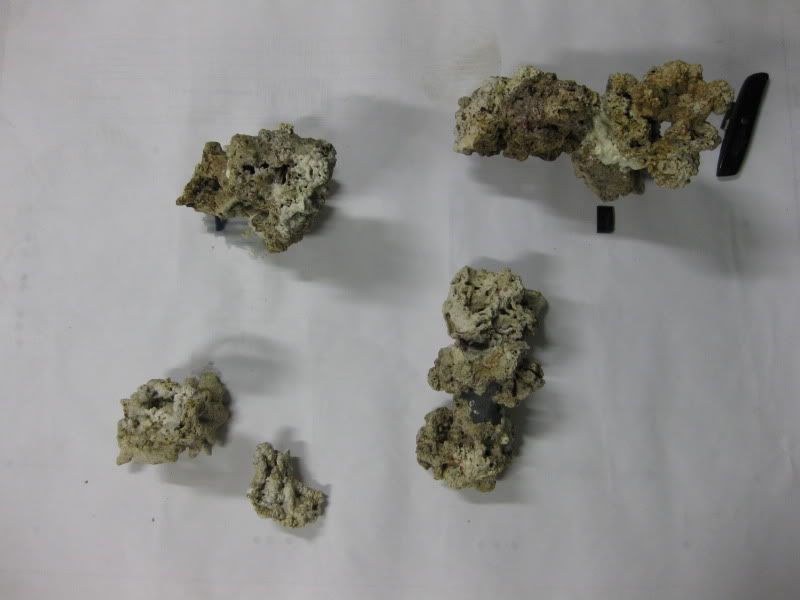 I have already done the basic modifications to my tank which are: Replaced stock pump with a Maxi-Jet 900 Y-fitting with a Hydor Flo on the outlet Removed internal baffles from chambers 1 and 2 Scraped the paint off from the back panel behind chamber #2 for a light so I can use it as a fuge and place cheto in there. Blocked all but 3 of the lower intake slots on chamber #1 with a piece of plastic that I superglued on there. I only put a couple of drops on opposite corners just in case I need to remove it. Removed all filters and sponges. Cut the tab from chamber 1 to chamber 2 to increase the flow Thanks to everyone who has posted in these wonderful forums, without them our lives would be much more difficult.
__________________
WSMC #616 Cuanto? Pedro... Current Tank Info: (in the works):65 gal. 72" long x 14.5" tall x 15" wide rimless, Bubble Magus NAC6A Skimmer, LED lighting 40gal. sump/refugium |

|

|
|
09/18/2009, 09:14 PM
|
#2 |
|
Registered Member
|
Did you save any livestock from the bowfront?
__________________
pairo chero Thanks for looking at my build thread and subscribe to it if you already haven't yet! Current Tank Info: thirty rimless |
|
|
|
|
09/19/2009, 06:33 PM
|
#3 |
|
Registered Member
Join Date: Sep 2007
Location: Tijuana
Posts: 114
|
I still have the clowns and the Tang all other livestock was given to friends. I have been busy trying to finish my rock work and today I was able to set it all up. I used (2) 5lbs bags of CaribSea Ocean Direct, 1 original grade and the other Oolite. Here are some pics.
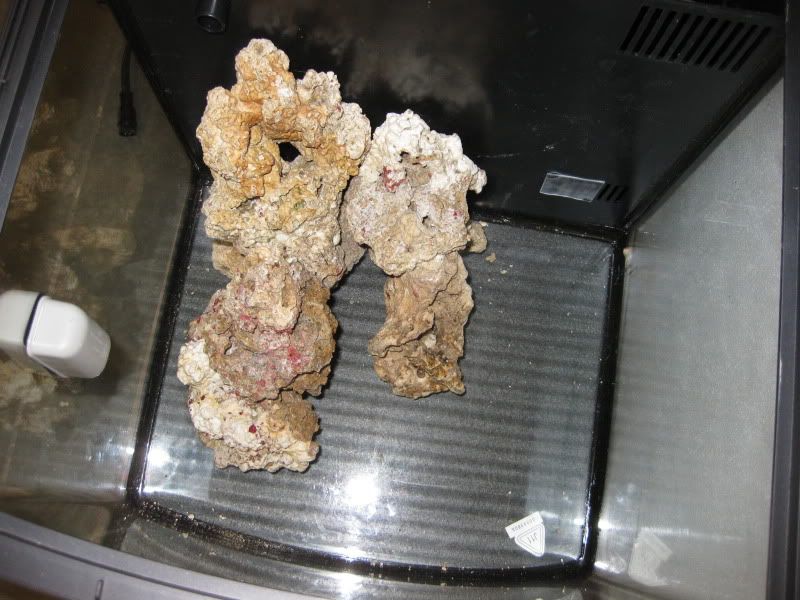 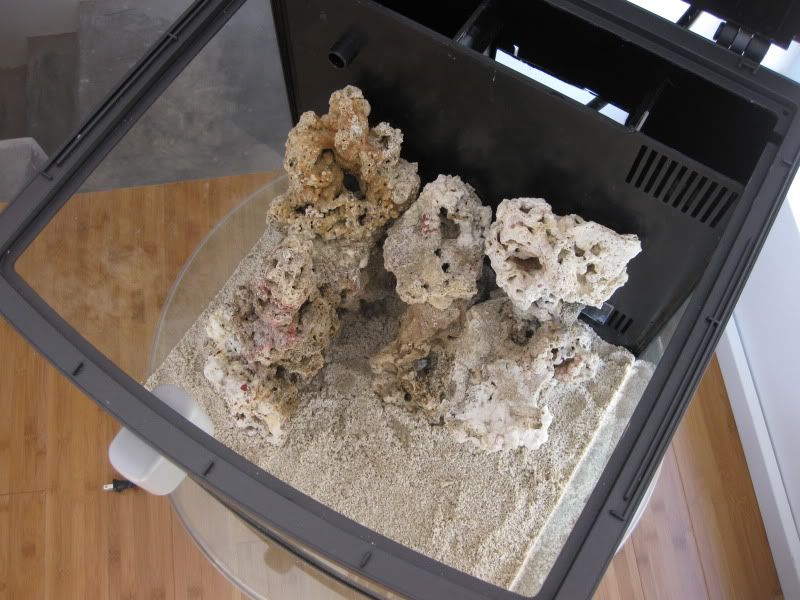 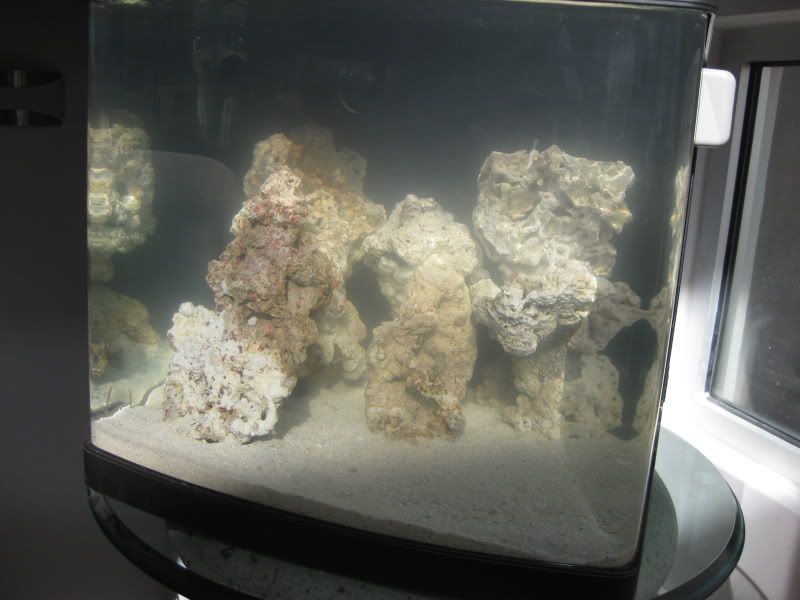 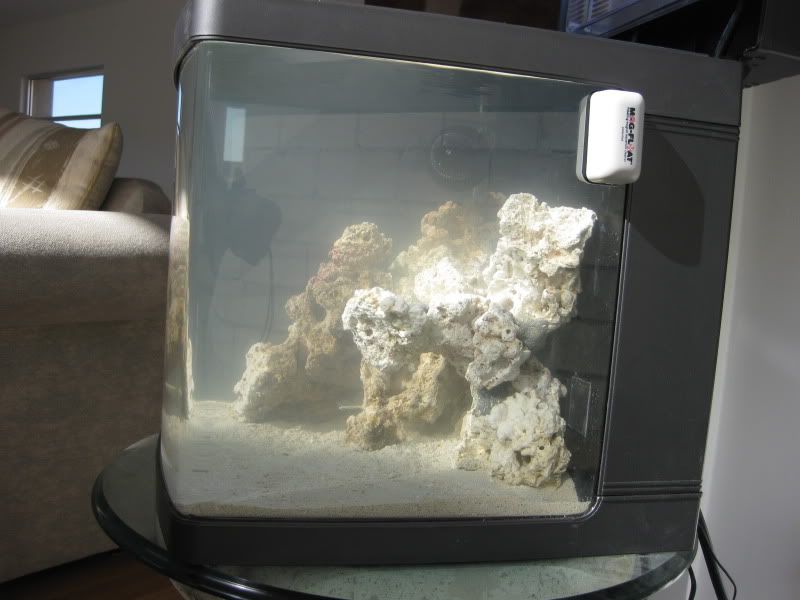   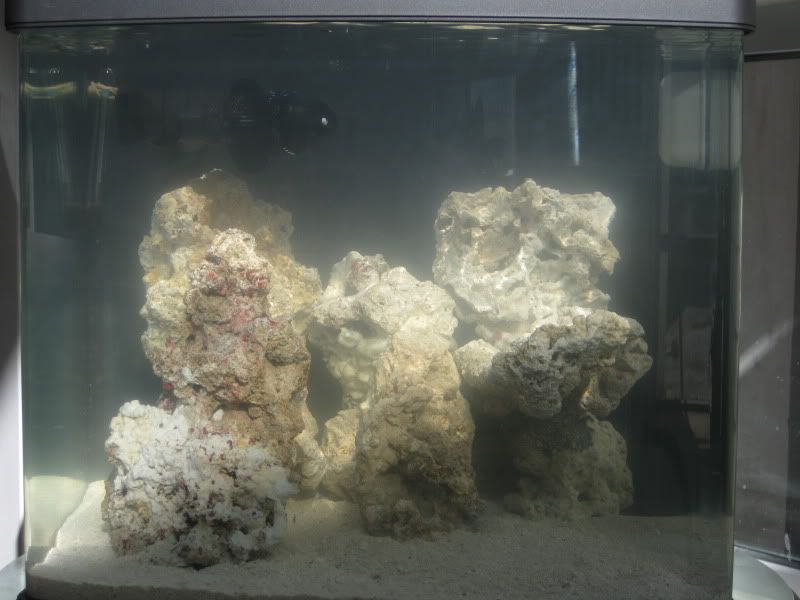 Now we just have to wait out the cycle!
__________________
WSMC #616 Cuanto? Pedro... Current Tank Info: (in the works):65 gal. 72" long x 14.5" tall x 15" wide rimless, Bubble Magus NAC6A Skimmer, LED lighting 40gal. sump/refugium |
|
|
|
|
09/20/2009, 02:43 PM
|
#5 |
|
Moved On
Join Date: Aug 2009
Location: Colorado
Posts: 224
|
What are your stocking plans for the tank?
|
|
|
|
|
09/20/2009, 03:25 PM
|
#6 |
|
Registered Member
Join Date: Nov 2007
Location: murfreesboro
Posts: 51
|
like the rock work!
|
|
|
|
|
09/20/2009, 08:02 PM
|
#7 |
|
Premium Member
 Join Date: Feb 2000
Location: Ft. Hood, TX, USA
Posts: 2,252
|
Are you running a skimmer? If so is it internal or HOB? I agree the back chambers and overflow design was horrible. I completely covered the bottom vents but not glued. I used a piece of plastic with tabs that insert in each end then placed a rock up against it. I also filled that first chamber with sand up to the top of the vent.
I run the CPR 2r HOB skimmer with the Rio 800vlt pump and two 4' skimmer air stones powered by the Tetra Whisper 60. It does a pretty good job despite not getting all the top water. I was also able to mod a Maxijet MJ1100 (needle wheel prop mod and connected the air hose right at the intake vice the umbrella thing). It did pretty well also but was noisey so went back to the 800 and the air stones. Do you have any pictures of the back of your tank looking in to see how it is setup? I thought about trying something like that but have too many pumps (chiller and GAC reactor). I also run my water about 1-2" above the max line. I really like your rock work. I needed to do something to mine, but it is too late now that I have critters in it.
__________________
Honey, put down the bleach and step away from the tank. I promise we will spend more quality time together. Current Tank Info: 14-gal Oceanic BioCube (see homepage link for current status) |
|
|
|
|
09/21/2009, 05:13 PM
|
#8 | ||||
|
Registered Member
Join Date: Sep 2007
Location: Tijuana
Posts: 114
|
Quote:
Quote:
Quote:
Quote:
All I did to the back of my tank was to scrape the paint off the 2nd chamber. This is where I am going to put an external light and I will place cheato inside the chamber. I will take a picture tonight after getting back home from work.
__________________
WSMC #616 Cuanto? Pedro... Current Tank Info: (in the works):65 gal. 72" long x 14.5" tall x 15" wide rimless, Bubble Magus NAC6A Skimmer, LED lighting 40gal. sump/refugium |
||||
|
|
|
|
10/19/2009, 11:02 AM
|
#9 |
|
Registered Member
Join Date: Sep 2007
Location: Tijuana
Posts: 114
|
After reading all the great threads on the LED retrofit I decided to take the plunge. I want to thank all that created all of those awesome threads.
Basically I had a stock BioCube 14g. and I want to keep some of the more light demanding corals and hopefully a clam. I also wanted to get the shimmer and much better color out of my corals than the stock lighting was able to provide. My project included the following items: (6) CREE XR-E White LEDs (XREWHT-LI-0000-00D02 BIN #WG-Q5) http://www.etgtech.com/ (6) CREE XR-E ROYAL BLUE LEDS (XREROY-LI-0000-00A0I BIN #D3) http://www.etgtech.com/ (2) 1000Ma BuckPuck with Potentiometer (3023-D-E-1000P) http://ledsupply.com/03023-d-e-1000p.php (1) Heatsink 8.5 x 5 http://heatsinkusa.com/ (2) MPJA Potrans 6.5A 24v power supply (FS -15024-1M) http://www.mpja.com/prodinfo.asp?number=17436+PS Arctic Silver 5 Thermal Paste http://www.frys.com/product/3820817?...H:MAIN_RSLT_PG 4-40 Tap and Drill Bits (4) Computer power cords 18 AWG stranded wire (several colors) 4-40 Stainless Steel Screws #4 Nylon Washers Connectors (male and female pairs) Template and Wiring Diagram: 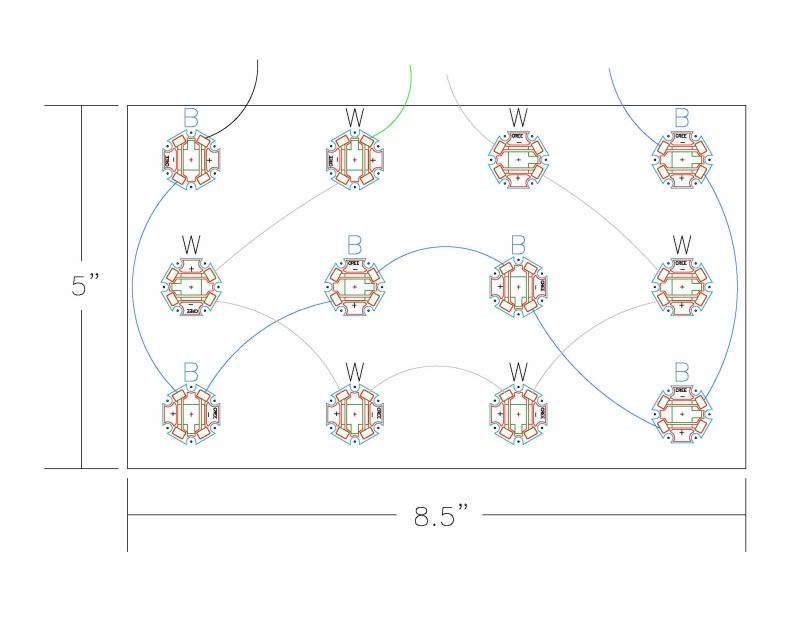 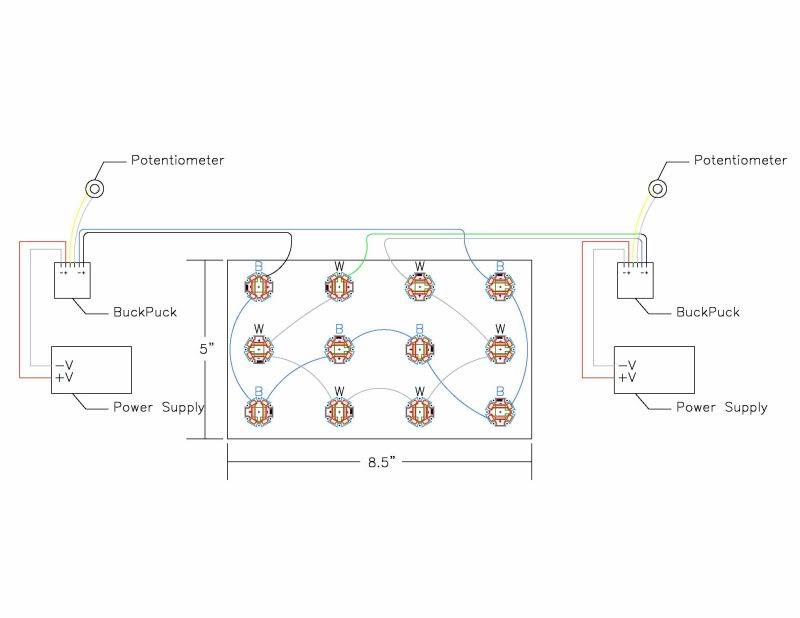 I laid out my template over the heatsink so that I could mark with a punch where I had to drill the holes to mount the LEDs. 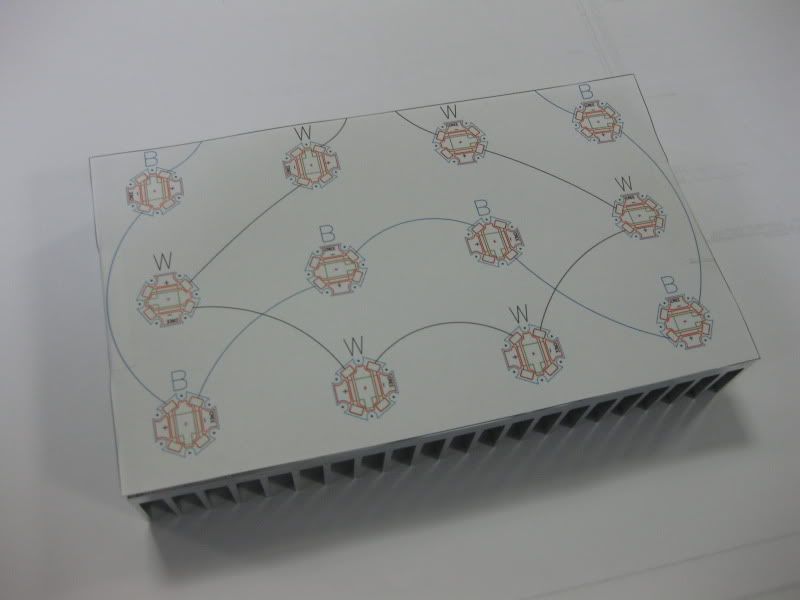 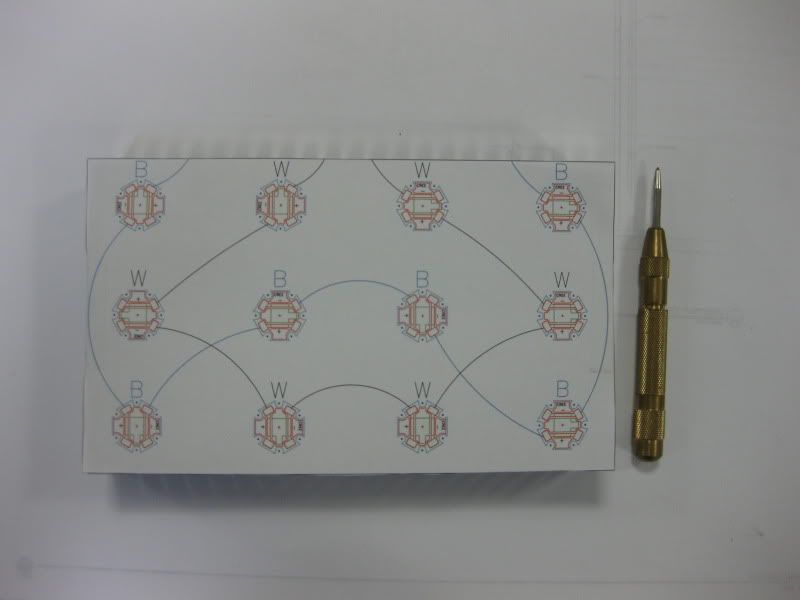 Here they are after I drilled and taped all the holes in the heatsink. Remember to use some cutting oil when drilling and tapping and to go slow, that way you can avoid breaking bitts and taps. When tapping the holes for threads and you notice that it starts to get difficult to turn all you have to do is give it a half turn back and then keep going slowly. 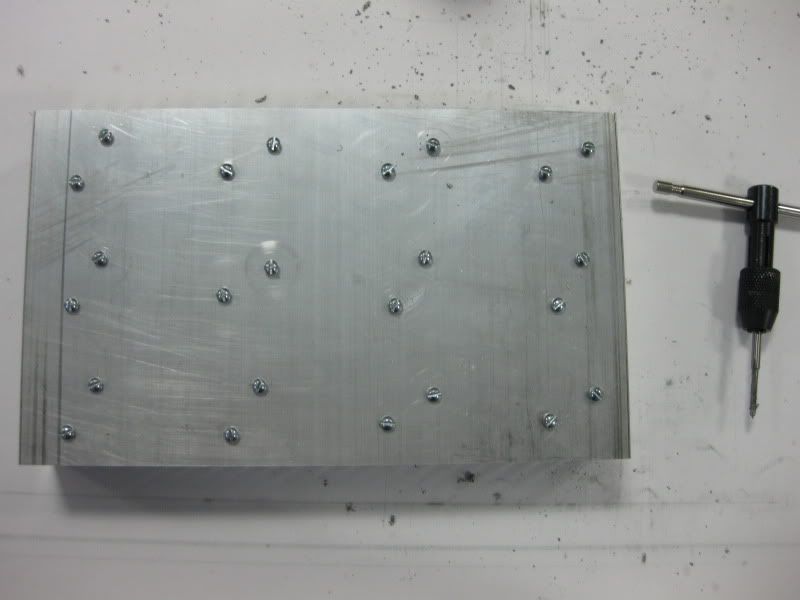 I screwed down my LEDs with the template in place so that I could follow the wiring diagram I had previously made. This allowed me to get the correct wire lengths and to also not screw up the wiring. Notice you have to go from positive to negative connections on the LEDs. It is a good idea to pre-tin all your wires and the pads on the LEDs, that way when you go to solder the wire to the LED it will make life easier. Use a good soldering iron, the one I used was a 40w Weller model and it worked quite well. 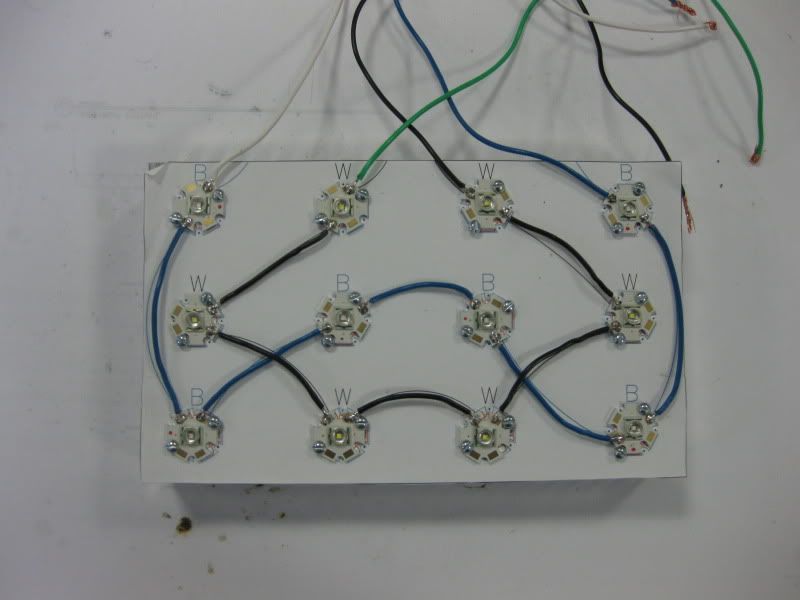
__________________
WSMC #616 Cuanto? Pedro... Current Tank Info: (in the works):65 gal. 72" long x 14.5" tall x 15" wide rimless, Bubble Magus NAC6A Skimmer, LED lighting 40gal. sump/refugium |
|
|
|
|
10/19/2009, 11:03 AM
|
#10 |
|
Registered Member
Join Date: Sep 2007
Location: Tijuana
Posts: 114
|
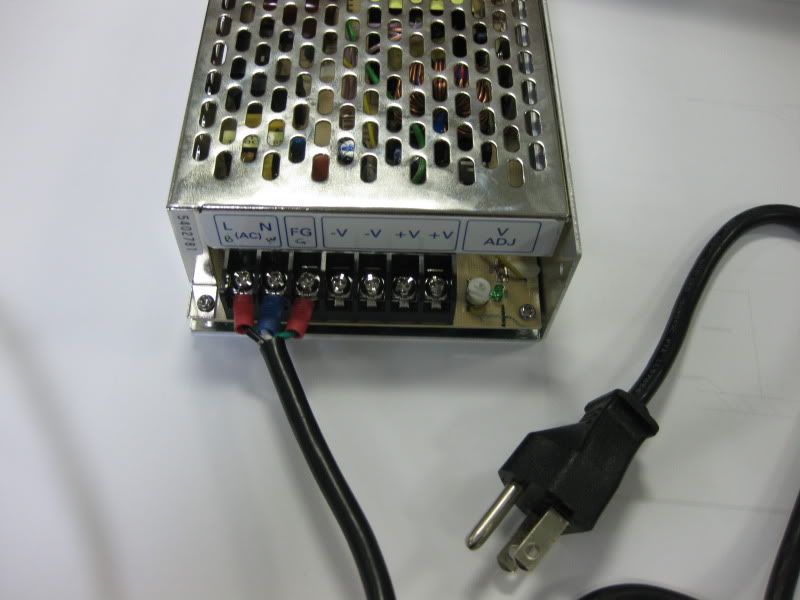
I used some old computer power cords that I had laying around to power up my power supplies and the BuckPucks
 Here they are all wired up, excuse the use of tape but I ran out of electrical connectors so I had to improvise just to test them out. Thermal paste was used on each of the LEDs prior to screwing them down with the 4-40 stainless steel screws and #4 nylon washers. I used 2 power supplies so that I could have the blues and the whites on different lighting schedules. All I can say is wow, these things are supper bright and I love that you can control the different color temperatures through the use of the potentiometers. These things are awesome! 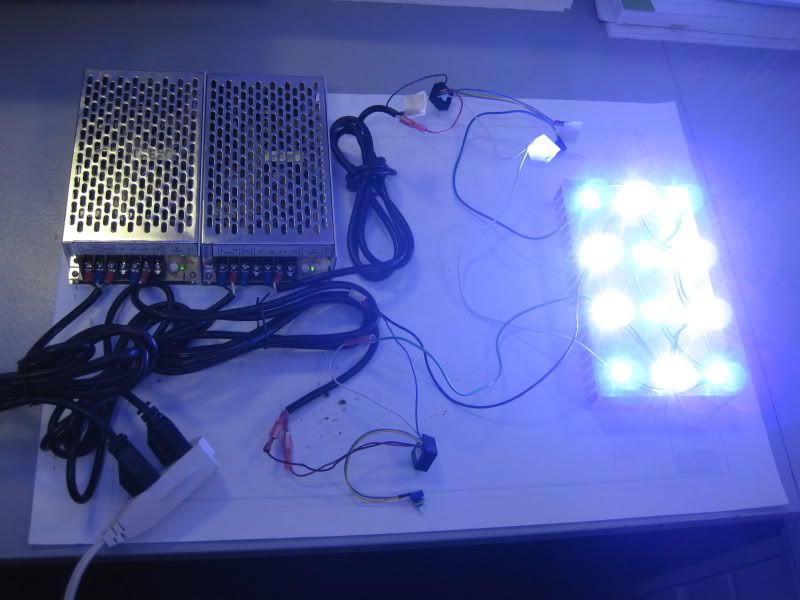 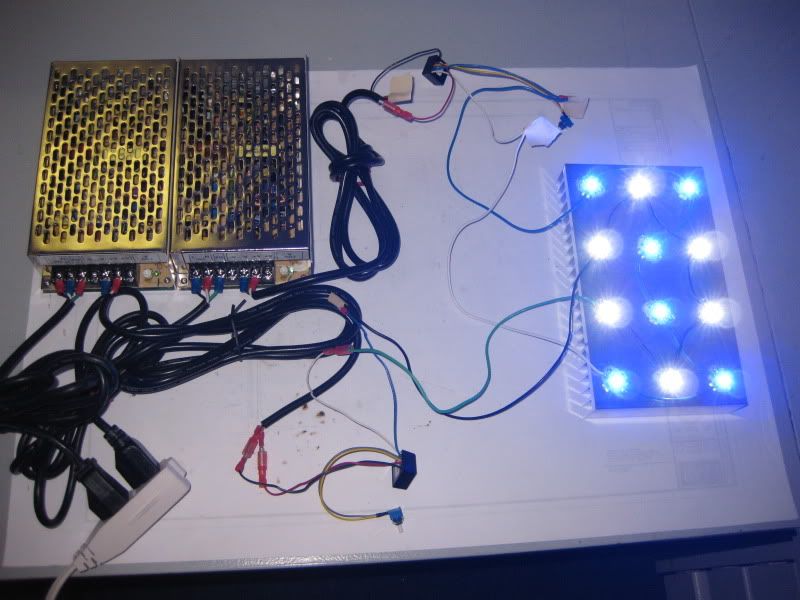 For the brackets to mount the Heatsink to the hood is used some old aluminum paint chip samples. Drilled a couple of holes to match the mounting posts on the hood and then another couple of holes on the sides to attach to the Heatsink.  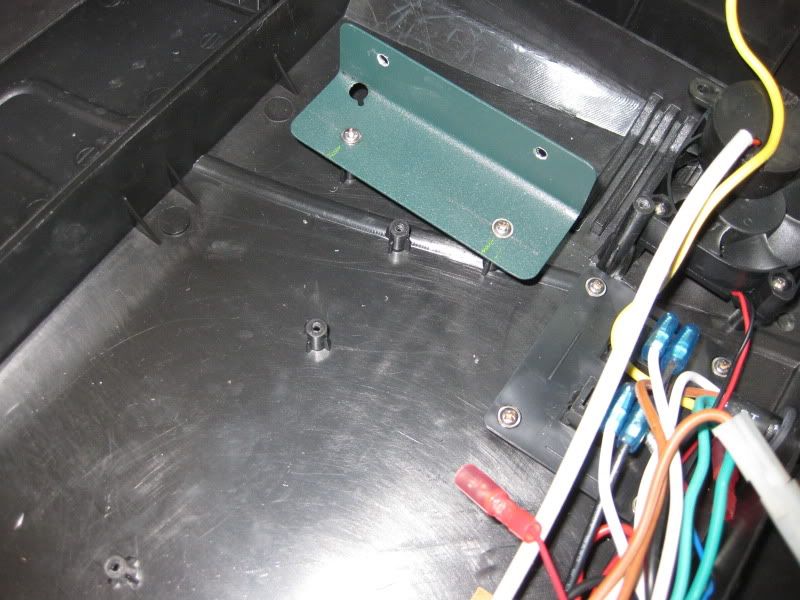  On the Heatsink I also drilled and tapped the holes for the mounting screws. You can also see in this picture that I left most of the stock wiring inside the hood and the moon lights. I did this so that I would still have power for the stock fans (I will take them out soon and replace with a bigger fan) and I wanted to keep the stock moon lights. I drilled a couple of holes on the back of the hood to get the wires from the power supplies to the BuckPucks. The BuckPucks are in there in that whole mess of wires. The potentiometers where mounted to the back of the hood, you can see the yellow and grey wires running to the back (sorry but I dont have a picture of the mounting, will take one later). 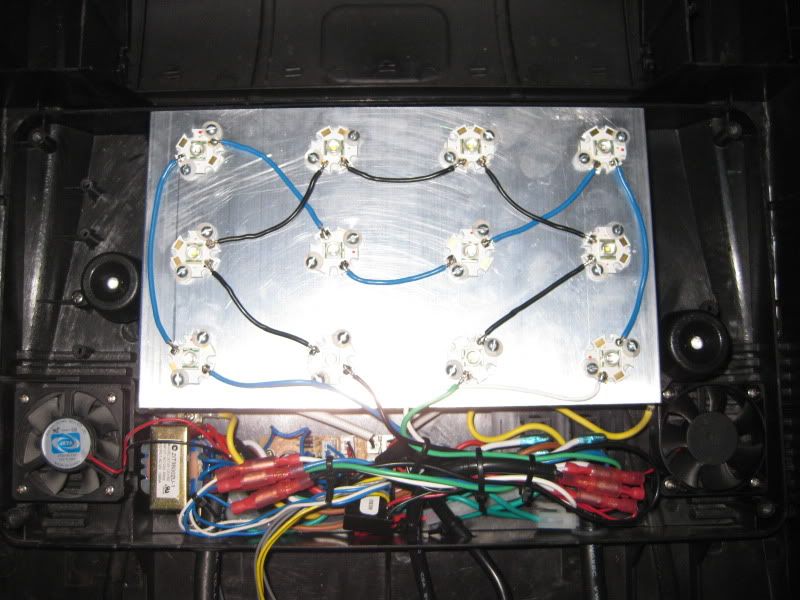 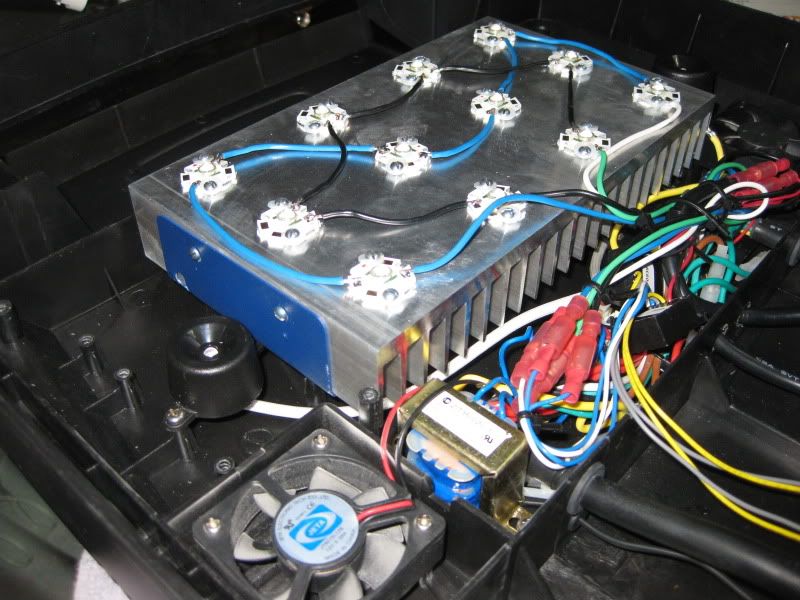  The way I have it set up now allows me to have my moon lights on all the time, I can also control the on off time of the blues and whites independently. Blues come on 1 hour before and go off 1 hour after the whites and my fans come on with the blues.
__________________
WSMC #616 Cuanto? Pedro... Current Tank Info: (in the works):65 gal. 72" long x 14.5" tall x 15" wide rimless, Bubble Magus NAC6A Skimmer, LED lighting 40gal. sump/refugium |
|
|
|
|
10/23/2009, 08:56 PM
|
#11 |
|
Registered Member
Join Date: Sep 2007
Location: Tijuana
Posts: 114
|
Here is the picture of the hood installed back on the tank
 I mounted the potentiometers on the back of the hood so the kids would be less able to play with them. 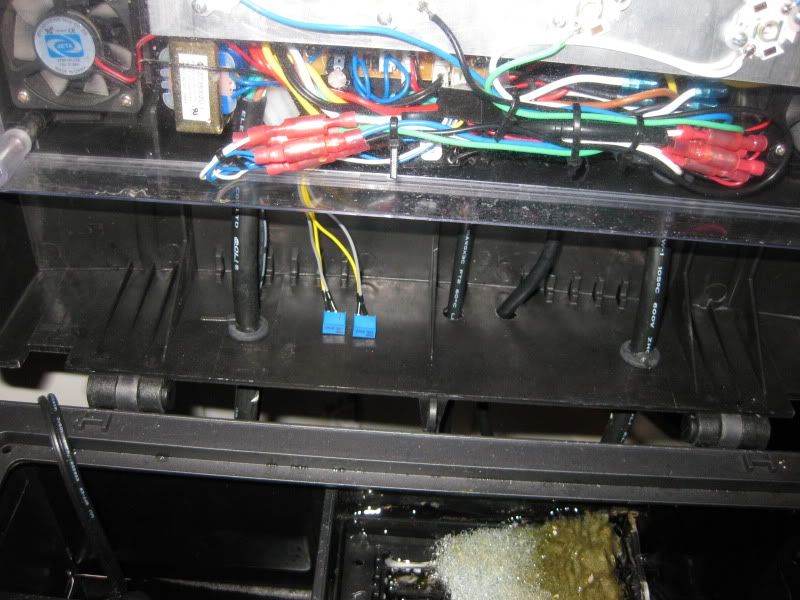 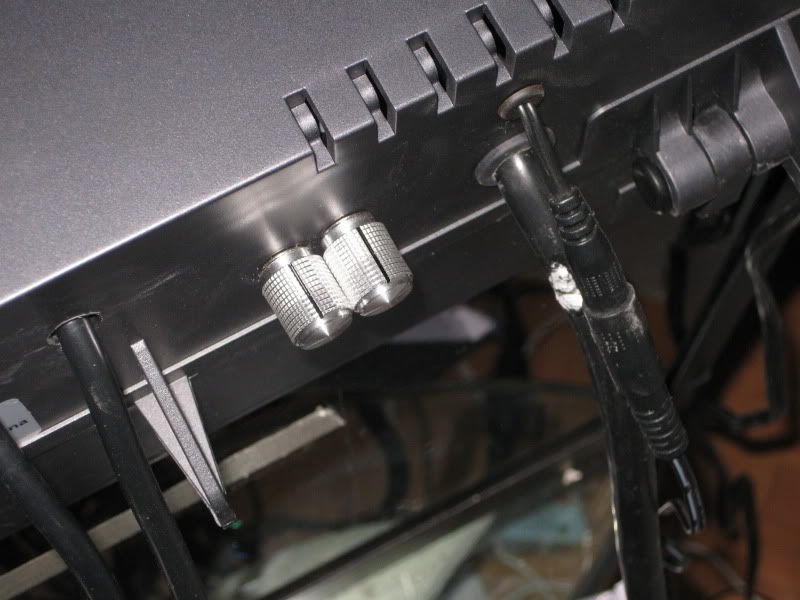 Royal Blues Only 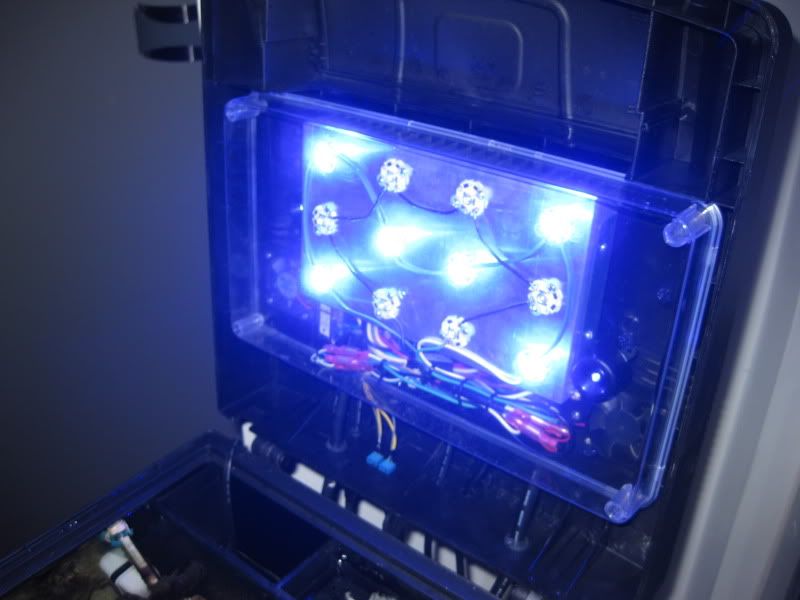 Full bright on both the Royal Blues and Whites, first picture without flash and second with flash. When I have the hood up I can light up my whole living room, they are that bright! 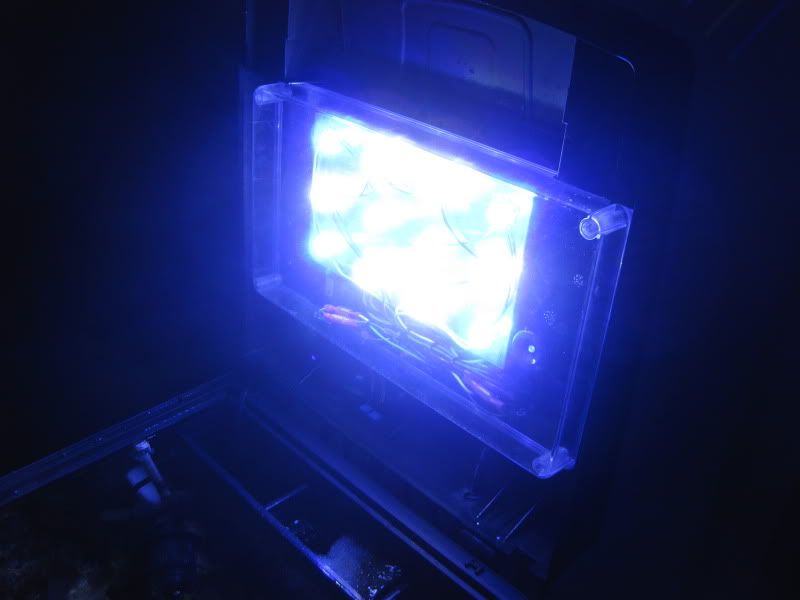 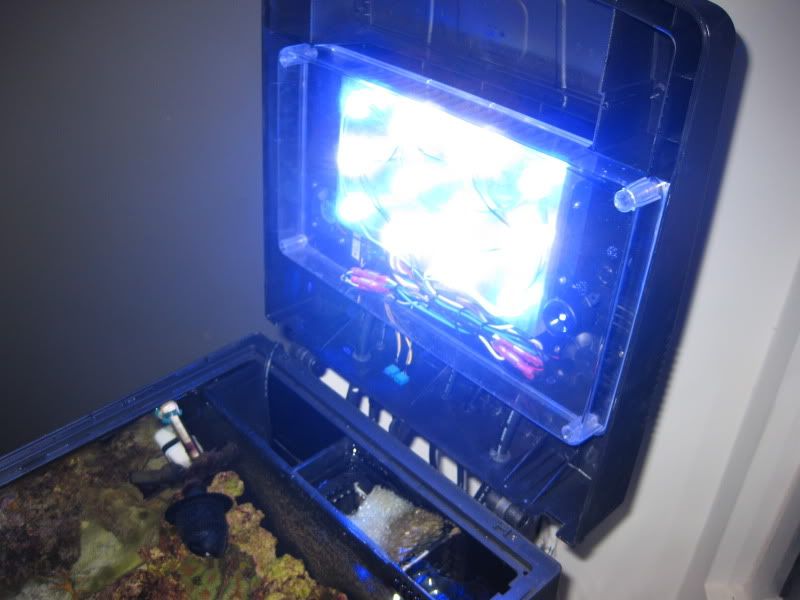
__________________
WSMC #616 Cuanto? Pedro... Current Tank Info: (in the works):65 gal. 72" long x 14.5" tall x 15" wide rimless, Bubble Magus NAC6A Skimmer, LED lighting 40gal. sump/refugium |
|
|
|
|
10/24/2009, 08:40 AM
|
#12 |
|
Registered Member
Join Date: Dec 2007
Location: Grand Bay, NB,Canada
Posts: 155
|
Great work
 What do you estimate your total cost? What do you estimate your total cost?
|
|
|
|
|
10/24/2009, 07:16 PM
|
#13 |
|
Registered Member
Join Date: Jul 2008
Posts: 194
|
how bout a pic of the tank with the LEDs?
|
|
|
|
|
10/25/2009, 09:11 AM
|
#14 |
|
Registered Member
Join Date: Sep 2007
Location: Tijuana
Posts: 114
|
Keyvan S:
Total cost was around $200.00 not including some of the miscelaneous things I had laying around. CoralKingdom: I have some, I will post them up later tonight.
__________________
WSMC #616 Cuanto? Pedro... Current Tank Info: (in the works):65 gal. 72" long x 14.5" tall x 15" wide rimless, Bubble Magus NAC6A Skimmer, LED lighting 40gal. sump/refugium |
|
|
|
|
10/25/2009, 09:13 AM
|
#15 |
|
Registered Member
Join Date: Sep 2007
Location: Tijuana
Posts: 114
|
Corals or an MP10???
I am debating getting a Vortech MP10 for my tank. I feel I need a bit more flow than what I currently have. I can either buy and MP10 or I can buy a Koralia 1 and use the rest of the money to buy different Acans. I need your help to decide this; do you feel that the MP10 is worth the money for such a small tank???
__________________
WSMC #616 Cuanto? Pedro... Current Tank Info: (in the works):65 gal. 72" long x 14.5" tall x 15" wide rimless, Bubble Magus NAC6A Skimmer, LED lighting 40gal. sump/refugium |
|
|
|
|
10/28/2009, 01:59 PM
|
#16 |
|
Registered Member
Join Date: Sep 2007
Location: Tijuana
Posts: 114
|
Wooohooo my new MP10 showed up right now
 . Ordered it on Sunday and got it right now, in just 2.5 days, awesome! I will post some pics of this after I do the install at home tonight. . Ordered it on Sunday and got it right now, in just 2.5 days, awesome! I will post some pics of this after I do the install at home tonight.Maybe I should just sneak out of work now 
__________________
WSMC #616 Cuanto? Pedro... Current Tank Info: (in the works):65 gal. 72" long x 14.5" tall x 15" wide rimless, Bubble Magus NAC6A Skimmer, LED lighting 40gal. sump/refugium |
|
|
|
|
10/28/2009, 06:07 PM
|
#17 |
|
Registered Member
Join Date: Jan 2004
Location: massachusetts
Posts: 4,972
|
Those leds are amazing , nice job! I have been extremely happy with stock lighting in my 14g biocube . I am curious how your new lights will do for you. Eagerly awaiting those pics!
__________________
55g Tank - 216W T5's Foxface, tomato clown, yellow tailed damsel, Starrie Blennie, LPS and softies 29G Biocube- 120W LED's 2 percular clown, Six line Wrasse , LPS and softies Current Tank Info: 55 gl. Reef tank ,29g biocube Reef |
|
|
|
|
10/29/2009, 08:18 AM
|
#18 |
|
Registered Member
Join Date: Sep 2007
Location: Tijuana
Posts: 114
|
Sexiness!!!!!
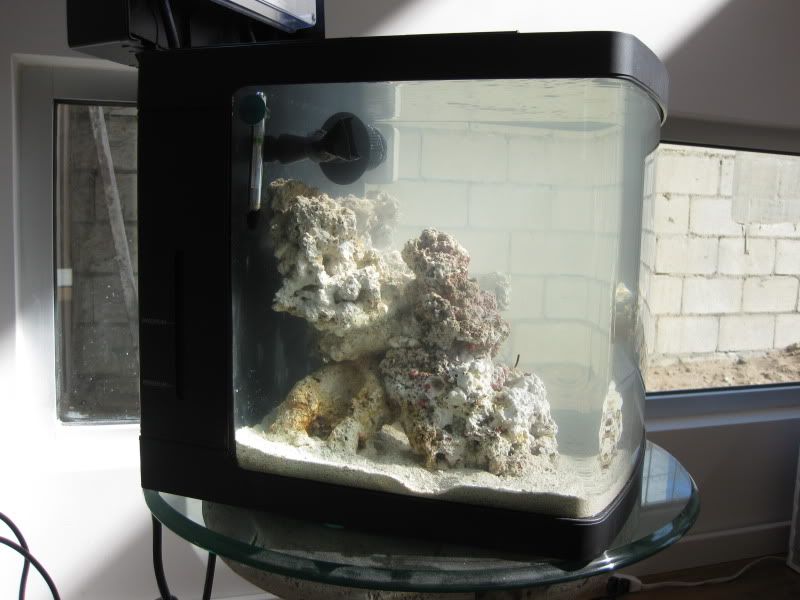
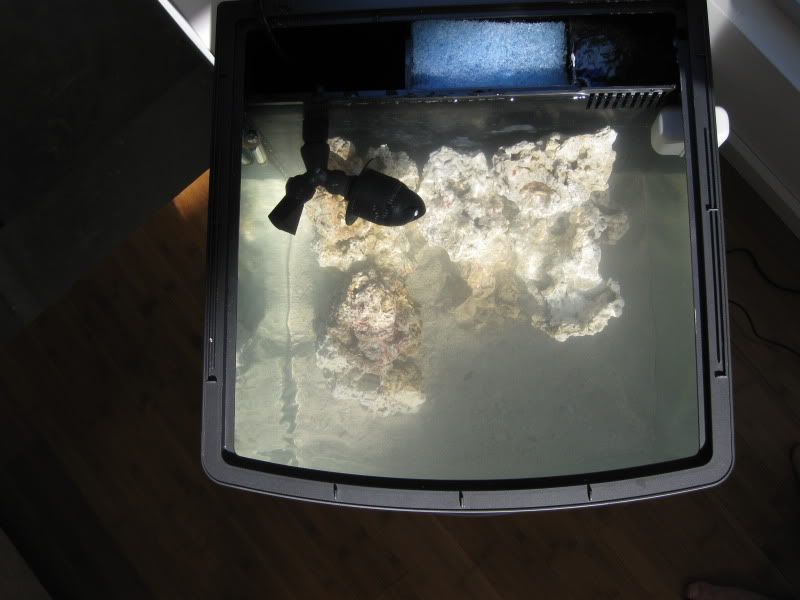
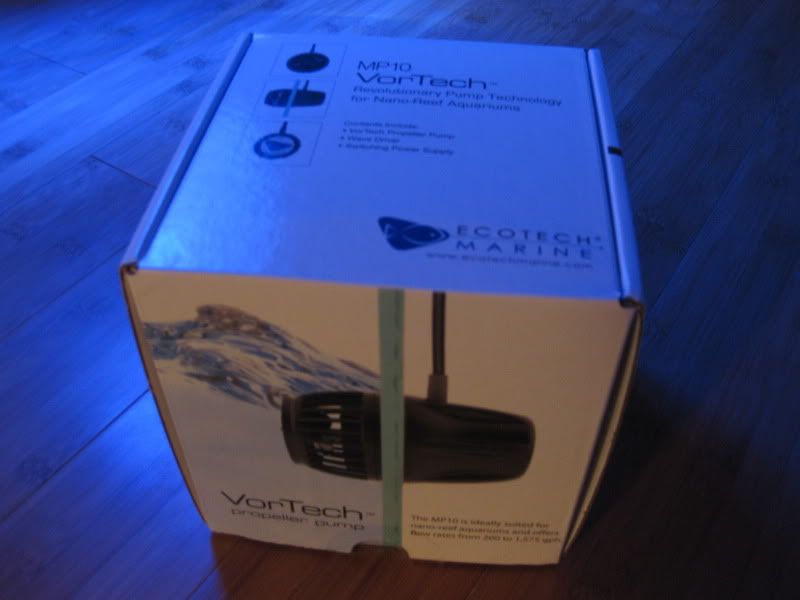 This is what comes in the box 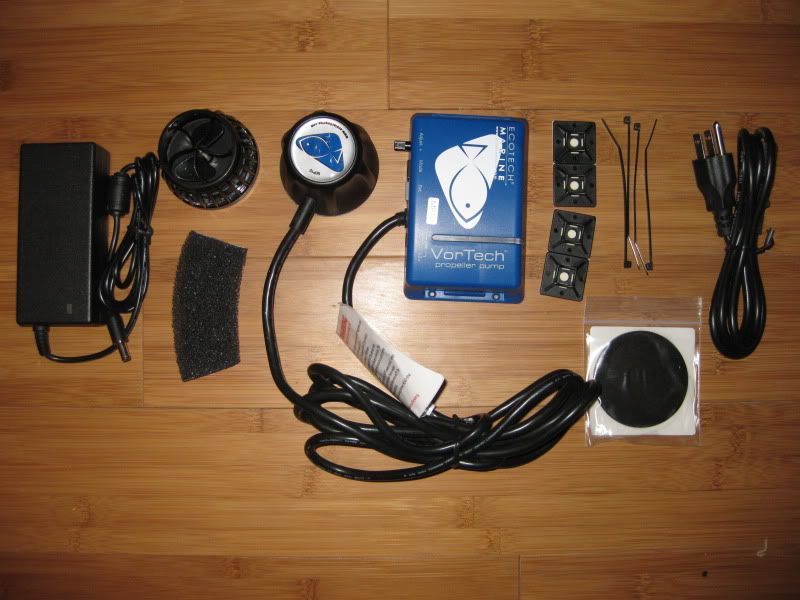 Installation took all but 5 minutes. Super simple, you just have to make sure that both parts are aligned properly to reduce vibration. 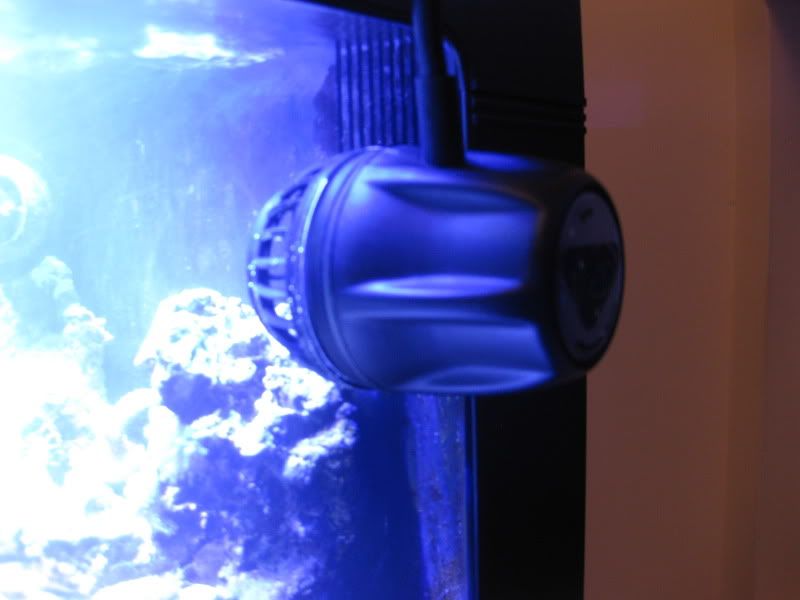 Here it is running in Lagoon mode 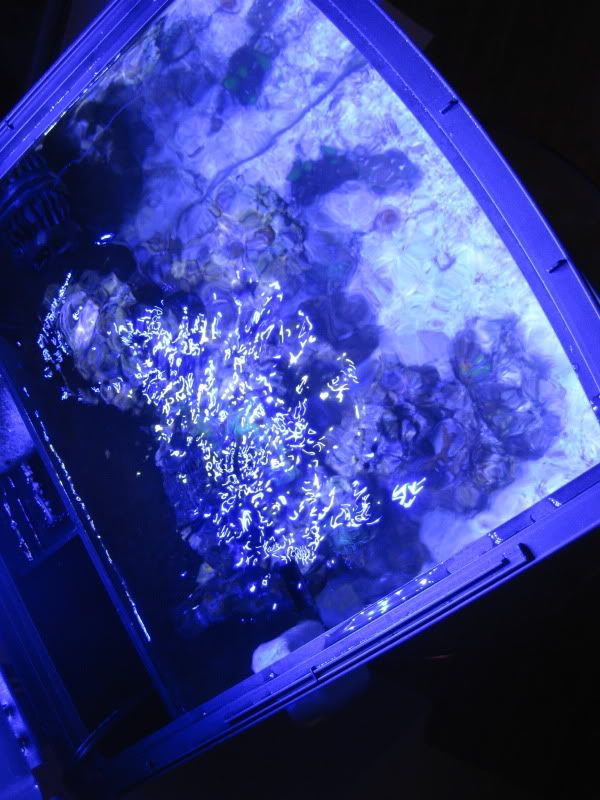 As soon as I started this pump I could see all kinds of stuff getting stirred up. Even with the Maxi jet 900 and the HydorFlo I could see that there was not enough flow to get to all areas of the tank, especially to the sandbed. With the MP10 I can definitely see the flow, I dont have it turned all the way down but I would say I have it at about 25% right now. I had to move it around a bit to see where the best position for it was, where I first placed it; it was blowing too hard on some Duncans that I have so I moved it around and now it works perfect. I was playing around with all the different modes but since I did not have that much time I really couldnt get a feel for them yet. I did like the lagoon mode since it offers a variety of speeds and it is very random, I could see everything in the tank swaying back and forth. Water was very cloudy before I went to bed but by this morning it looked very clear. I can see now that my maintenance will be greatly reduced since I feel detritus will be kept in suspension longer with this much more flow. Before when I would blast my rocks some of the detritus would float around and then just settle back down on the rocks or sandbed. The only thing that has bothered me so far with this MP10 is that it is a bit noisy, this even after the fact of following the instructions to reduce vibration and to make sure that both sides where aligned properly. The instructions say that after running it for a week it will quiet down, we shall see. Here is the full tank shot that I had promised. 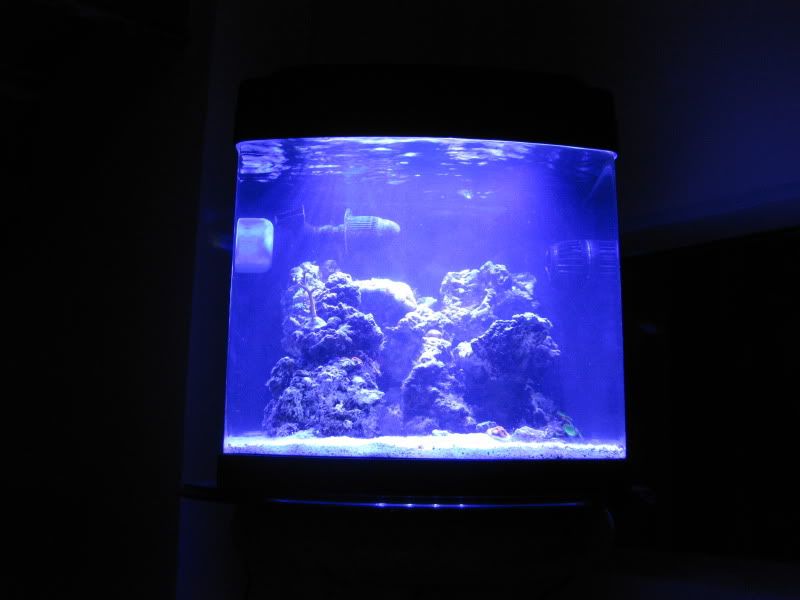 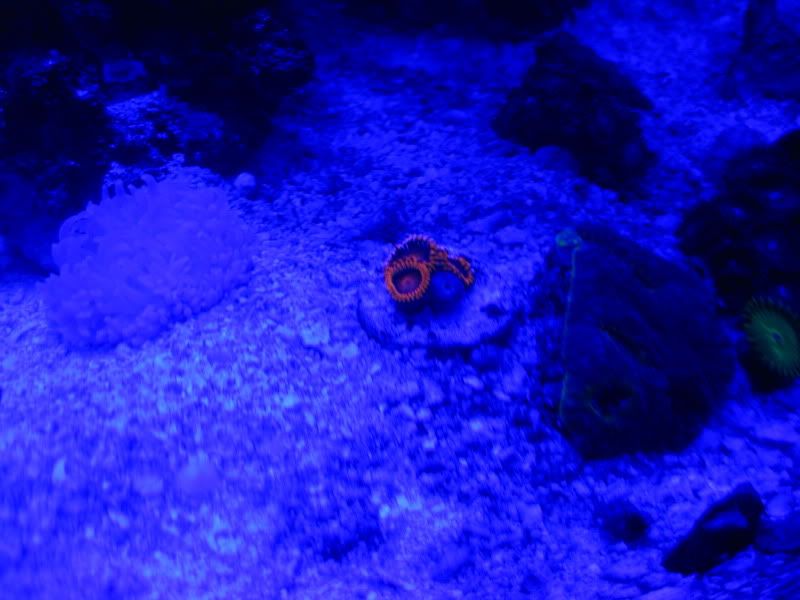 
__________________
WSMC #616 Cuanto? Pedro... Current Tank Info: (in the works):65 gal. 72" long x 14.5" tall x 15" wide rimless, Bubble Magus NAC6A Skimmer, LED lighting 40gal. sump/refugium |
|
|
|
|
10/29/2009, 05:44 PM
|
#19 |
|
Registered Member
Join Date: Nov 2008
Location: Connecticut
Posts: 709
|
Cool project! I love the colors of corals under LED's, they really pop!
__________________
"The incoming bullet has the right of way..." - Unknown |
|
|
|
|
10/30/2009, 01:46 AM
|
#20 |
|
Registered Member
Join Date: May 2001
Location: Los Angeles
Posts: 286
|
Sweet Ducati!
|
|
|
|
|
10/30/2009, 04:35 AM
|
#21 |
|
Registered Member
Join Date: Jun 2009
Location: mccalla,alabama
Posts: 273
|
WOW. I was impressed by your handiman skills building the rockwork. Then I got to the lighting... Awesome. But what the heck is a "potentometer"? It sounds like you just made that up. LOL
|
|
|
|
|
10/30/2009, 02:43 PM
|
#22 | |
|
Premium Member
Join Date: Apr 2004
Location: Kansas City, KS
Posts: 265
|
Quote:
Last edited by Achapman; 10/30/2009 at 02:50 PM. |
|
|
|
|
|
10/30/2009, 03:14 PM
|
#23 |
|
Registered Member
Join Date: Jan 2009
Location: Fort wayne, IN
Posts: 823
|
looks great so far, great choice on the mp10
__________________
-Kevan Current Tank Info: 34g Mixed Reef Solana (2 years old). 12g jbj nanocube dx (retired at 2 years old) |
|
|
|
|
10/30/2009, 03:44 PM
|
#24 |
|
Registered Member
Join Date: Nov 2008
Location: S.W. VA
Posts: 89
|
Simply incredible set up! Great job. Keep the pics coming. This is making me want to take down our 29 Bio Cube and start over.
Dave |
|
|
|
|
11/02/2009, 09:16 AM
|
#25 | |||||
|
Registered Member
Join Date: Sep 2007
Location: Tijuana
Posts: 114
|
Quote:
Quote:
 Quote:
Quote:
__________________
WSMC #616 Cuanto? Pedro... Current Tank Info: (in the works):65 gal. 72" long x 14.5" tall x 15" wide rimless, Bubble Magus NAC6A Skimmer, LED lighting 40gal. sump/refugium |
|||||
|
|
|
 |
|
|


