
|
|
 01/15/2010, 03:38 AM
|
#1 |
|
Registered Member
Join Date: Jul 2008
Location: Cheektowaga, NY
Posts: 975
|
158 gallon bow front build cost efficient and DIY when possible
Hi everyone, This is the start of my 158 bow-front oceanic build. Most of the project will be DIY from the stand, lighting, sump etc. Trying to make everything as economical as possible as my housemate and brother has recently returned from Afghanistan and I am layed off. hopefully everything will turn out very low cost on energy and cost. First off we recently purchased the tank and stand from a fellow reefer. This reefer will remain anonymous until I have his permission to reveal his name or ID name. First we got the tank and stand at an unbelievable price. Unfortunately the tank needed a serious make over and re haul in order to be fit to hold a 160 gallon tank. 160 is a slight over estimate. The tank was purchased at a steal due to the very large amount of scratching that was done to the (stage right) or front left side of the tank. Also the stand was highly damaged and completely unsuitable for the amount of weight it was suppose to support. Not sure if the reefer that we purchased the tank from was the one who thought they could remove the deep scratches with low grade sand paper but whom ever it was, inevitably made the scratching worse. wither way it was quite bad. (which will be shown in the future with a few photos) but my brother and I after resurfacing and re framing the stand ordered some Cerium oxide and immediately began to buff away most of the scratches in the tank.
A few pic of the frame somewhat after the initial restore: All the white pine is new wood and framing from my brother and I re framing the stand. more was done afterword just lacking the photos. 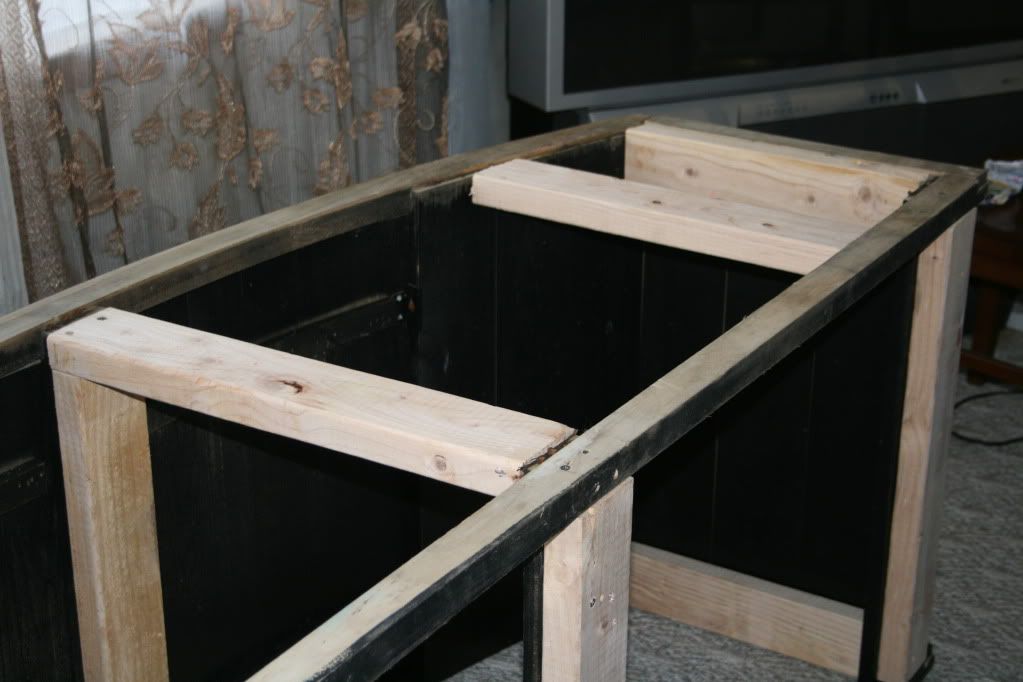 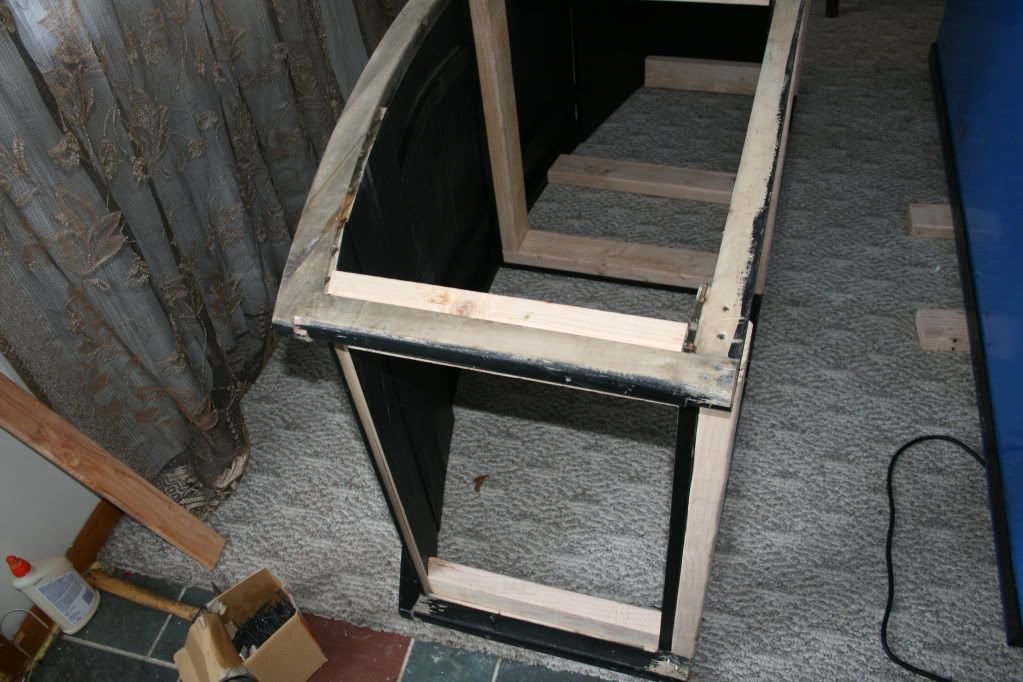 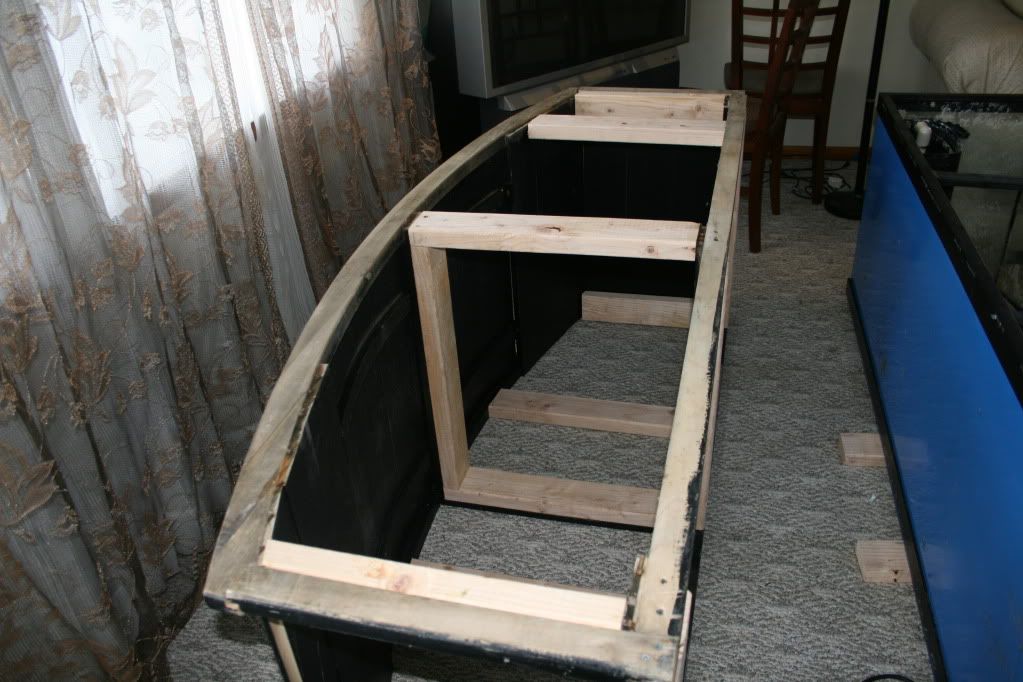 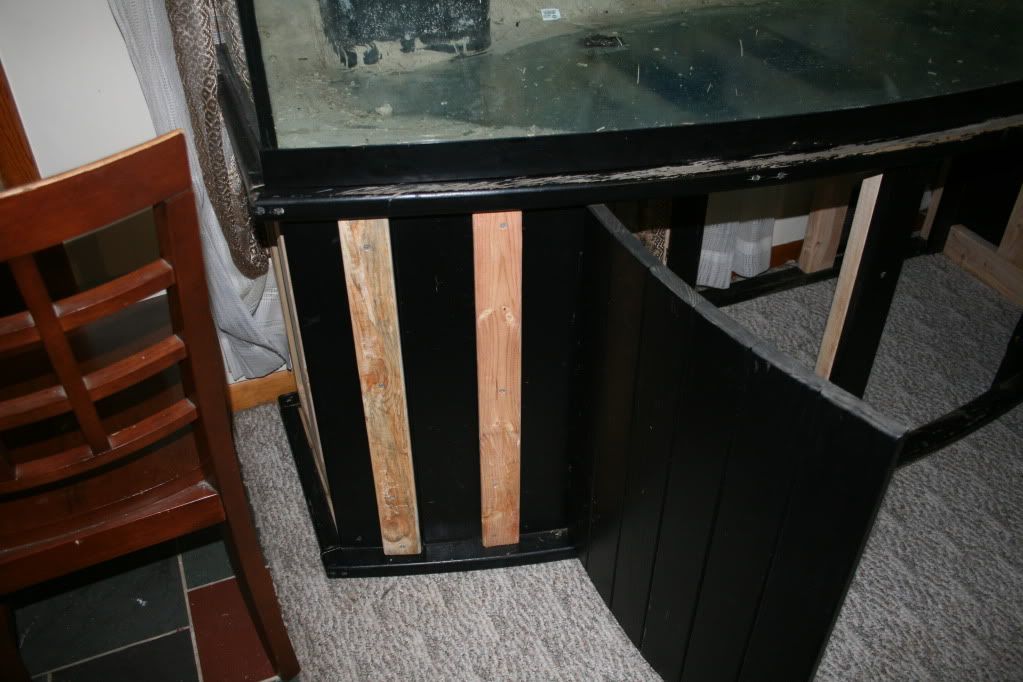 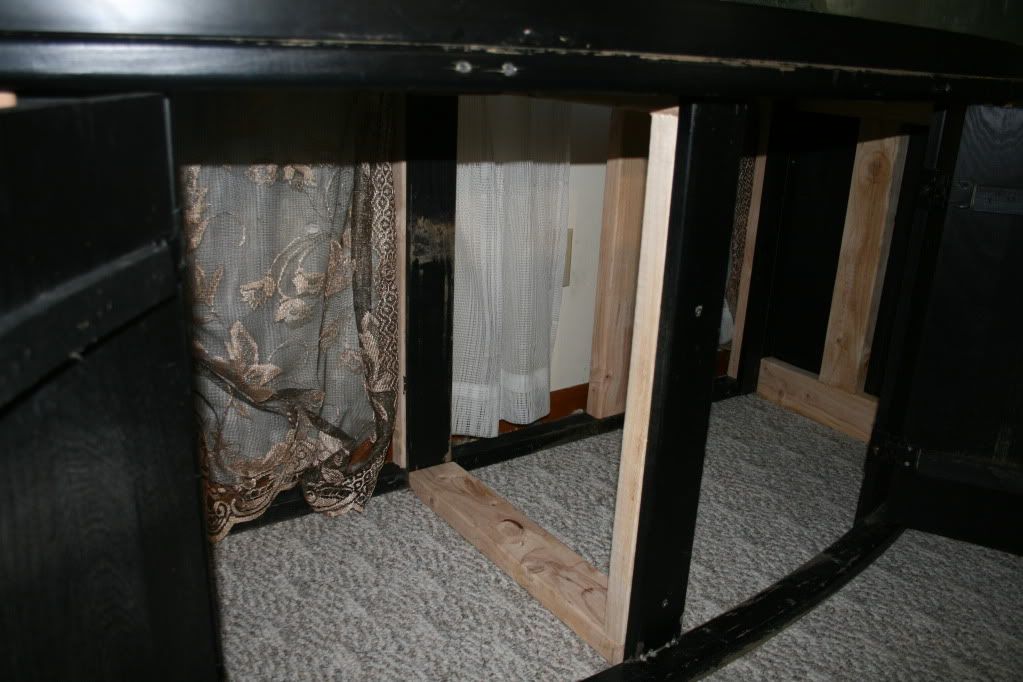 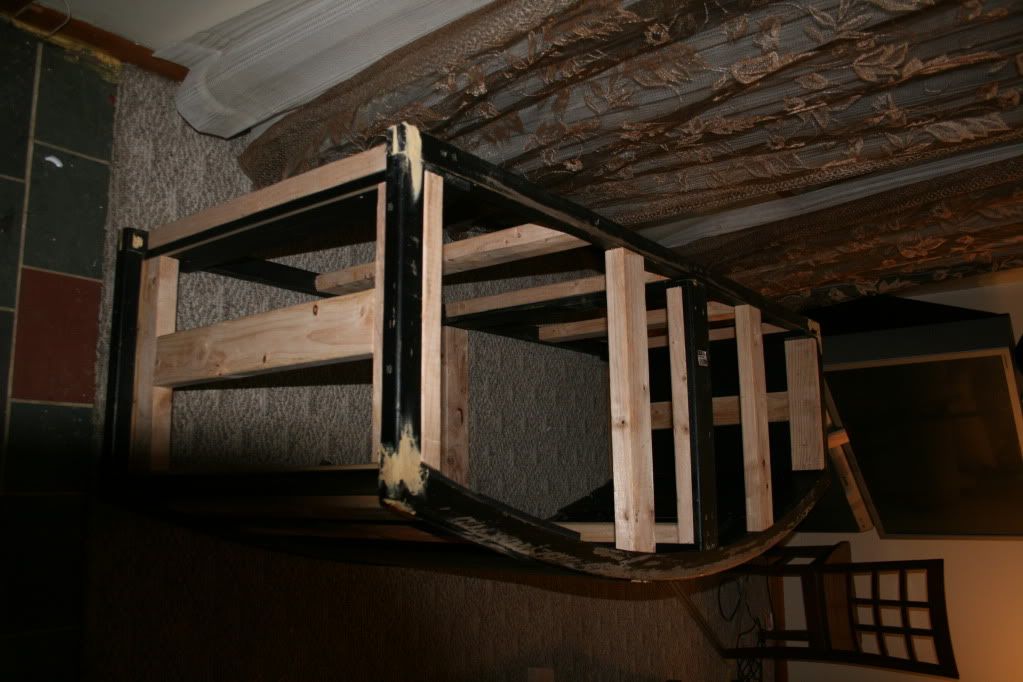 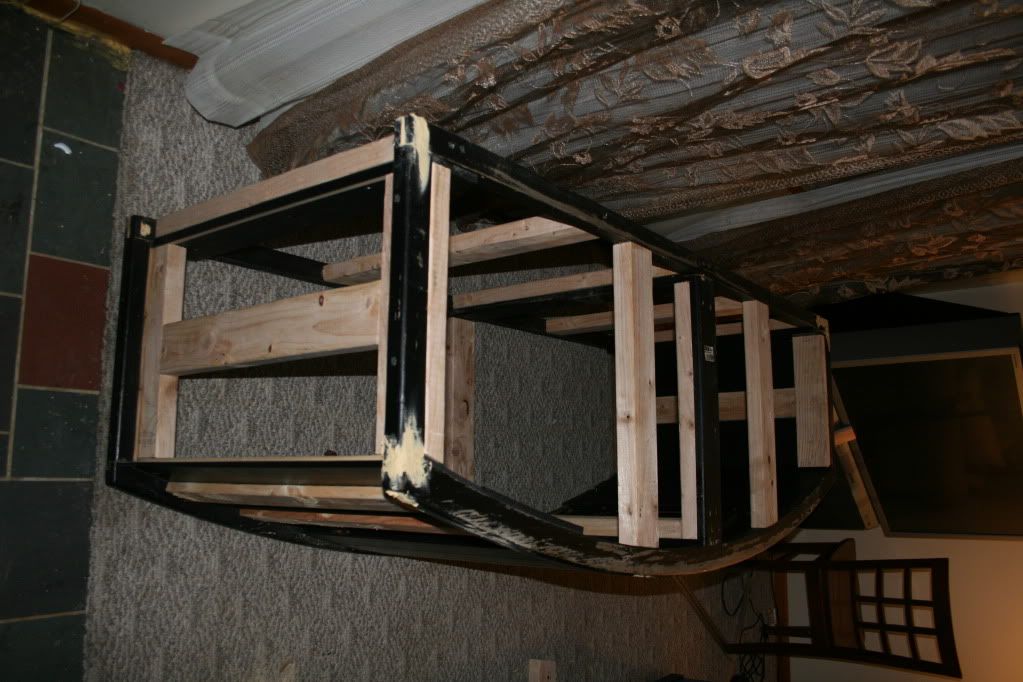
Last edited by aww_419; 01/15/2010 at 03:45 AM. |

|

|
|
01/15/2010, 09:54 AM
|
#2 |
|
Registered Member
Join Date: May 2009
Location: lancaster ny
Posts: 554
|
My light fixture and light hangers are diy if you want to come check them out. 6 bulb 48" aquactinic t5 slr's, with temp fans, moon lights. Its def a frankenlight but still pretty sleek.
|
|
|
|
|
01/15/2010, 11:17 AM
|
#3 |
|
Registered Member
Join Date: Feb 2004
Location: syracuse, ny
Posts: 1,420
|
great start, am always a fan of DIY
 looking much better than mines looking much better than mines  is that wood putty in the corner? if so how well does that work? is it sandable? does it cure hard? |
|
|
|
|
01/15/2010, 12:55 PM
|
#4 |
|
Registered Member
Join Date: Feb 2008
Location: spencerport ny
Posts: 2,619
|
bondo works really well,and is paintable. looks like a fun build.
|
|
|
|
|
01/15/2010, 01:46 PM
|
#5 | |||
|
Registered Member
Join Date: Jul 2008
Location: Cheektowaga, NY
Posts: 975
|
Quote:
Quote:
Quote:
|
|||
|
|
|
|
01/15/2010, 03:25 PM
|
#6 |
|
Registered Member
Join Date: Apr 2008
Location: Syracuse,NY
Posts: 1,790
|
Hey looks nice so far. I'm a diyer all the way as have 3 daughters to put through college.If it wasn't for diy I probably wouldn'thave a tank.
I made a kalk reactor,my sump, a modified old venture skimmer I bought for 18 dollars plus shipping on ebay into one that will rival a asm g-3. Built my stand ect..Pretty much anything I can do to save some of the costs. I adimre your approach and have subscribed to your thread,keep the progess updated with pics its interesting to see it come together. Goodluck -Graves |
|
|
|
|
01/15/2010, 07:11 PM
|
#7 |
|
Registered Member
Join Date: Jul 2008
Location: Cheektowaga, NY
Posts: 975
|
put in a 4 outlet box today. It works and has been running my drill, arm saw all day. I put in a new 20 amp breaker and ran a short line to the box. I will run 2 gfic power strips off of the box. I doubt I will need that many outlets but I figure that a couple timers will take up some space. I am hoping to keep this very basic. My idea is that I will only need 8 or 9 outlets. 2 for the lights, 2 for the heaters, 2 for the pumps, 1 for a DIY GFO reactor and 1 for a small DIY skimmer. I plan to use 10 micron filter bags which should eliminate the need for a large skimmer. Then when the 10 micron bags are a little old and been washed a few times and act more like 100 micron filter bags Ill use them for my 75 mixed reef. Recycle reduce reuse and close the loop LOL
Heres a pic of the outlet. I still have to put the access panel back over the box but I figure Id wait until im completely done. who knows if ill need to change something. 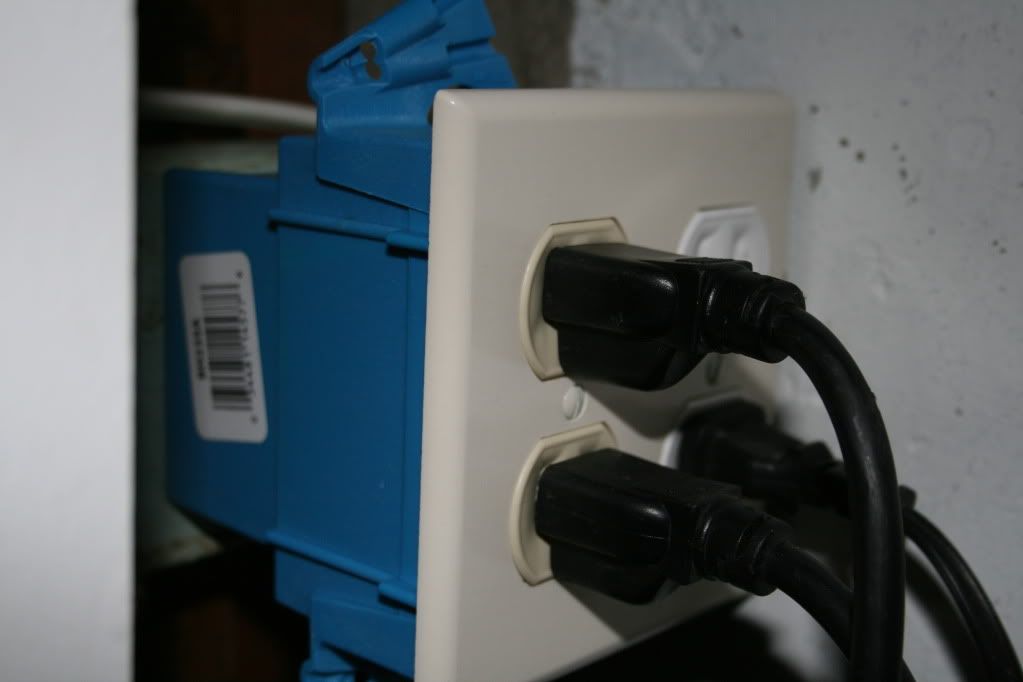
|
|
|
|
|
01/15/2010, 11:58 PM
|
#8 |
|
Registered Member
Join Date: Jul 2008
Location: Cheektowaga, NY
Posts: 975
|
ok Heres a pic of the stand all painted and ready for the tank.
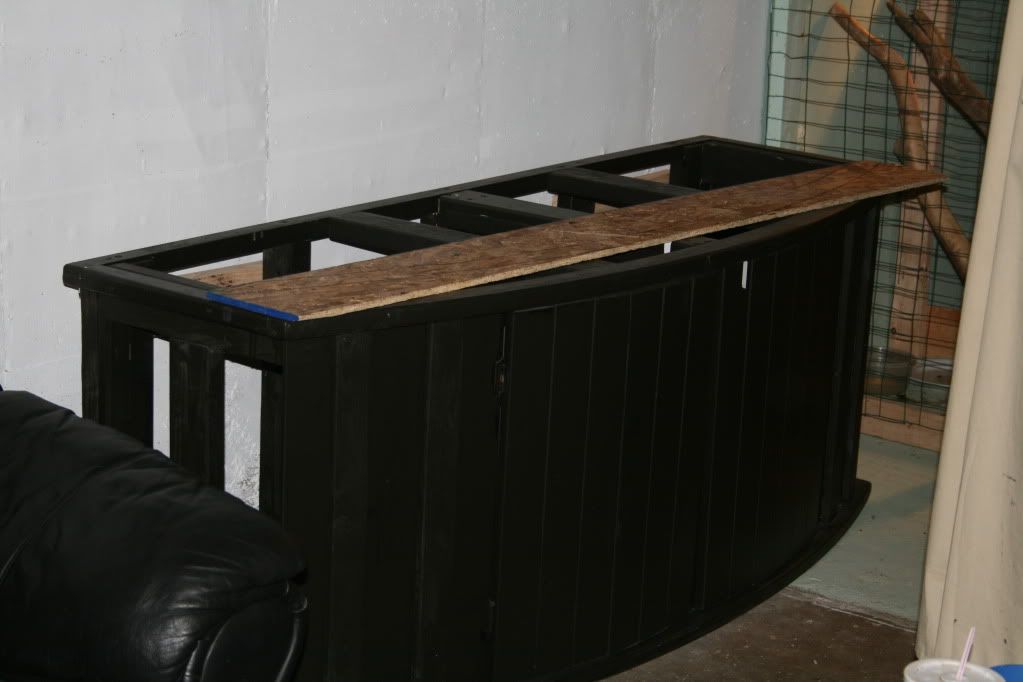 and heres a pic of the tank and stand The fuzzy haze to the left of the picture is the mass of swirled scratches. 
|
|
|
|
|
01/16/2010, 05:02 AM
|
#9 |
|
Registered Member

Join Date: Dec 2009
Location: 15 miles from Buffalo near alden
Posts: 171
|
wow ...what a now thats a big change ...way to go... im in the process of building a stand right now ... the building and figuring out stuff is the fun part .. the mantinence and buying stuff is not ... cant wait to see it up and running .... peace
|
|
|
|
|
01/16/2010, 05:04 AM
|
#10 |
|
Registered Member
Join Date: Dec 2009
Location: 15 miles from Buffalo near alden
Posts: 171
|
sorry about that first line i wrote ...i think the old lady spiked my coffee ..lol
|
|
|
|
|
01/16/2010, 07:54 AM
|
#11 |
|
Registered Member
Join Date: Apr 2007
Location: Tampa
Posts: 3,455
|
Wow! Nice work to get that stand looking so sharp!!
|
|
|
|
|
01/16/2010, 08:47 AM
|
#12 |
|
Registered Member
Join Date: Jul 2008
Location: Cheektowaga, NY
Posts: 975
|
Thanks ben its come a long way, wait till I get the close up shots of the scratches up on the PC.
|
|
|
|
|
01/19/2010, 11:15 AM
|
#13 |
|
Registered Member
Join Date: Jul 2008
Location: Cheektowaga, NY
Posts: 975
|
Ok ive got a couple before and after pics of the scratches
As you can see they were pretty bad 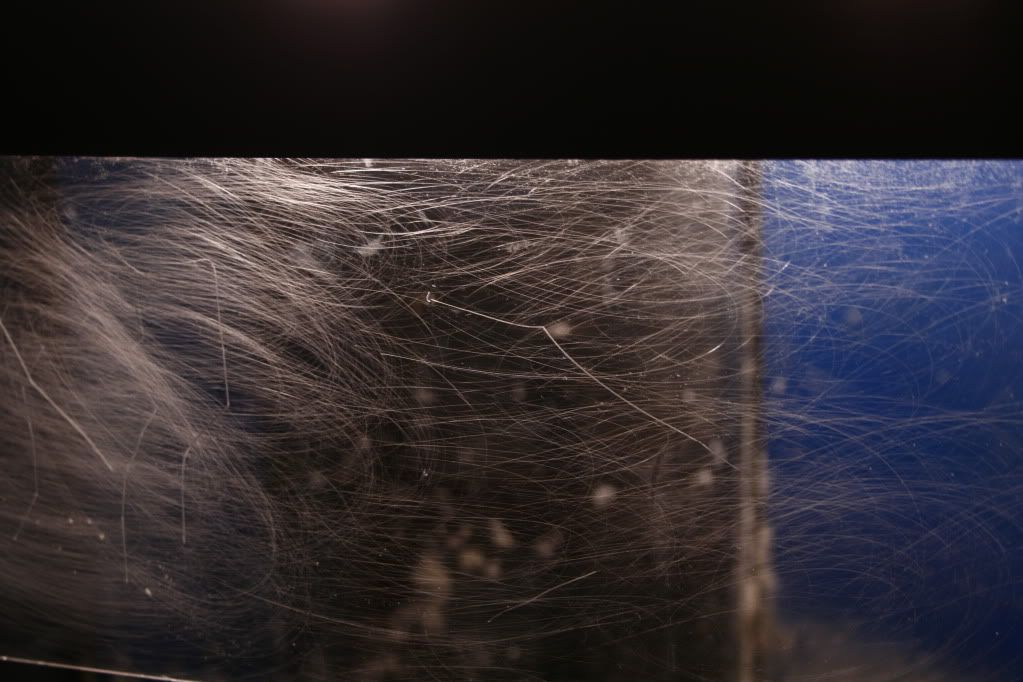 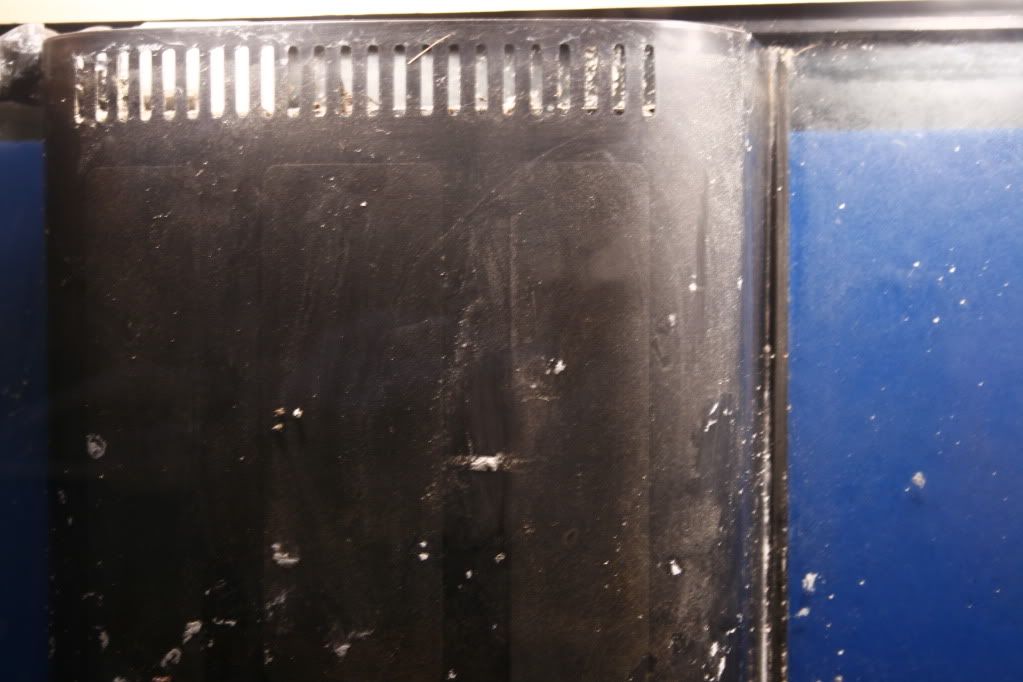 I was able to actually focus on the glass instead of the back of the tank in this one. 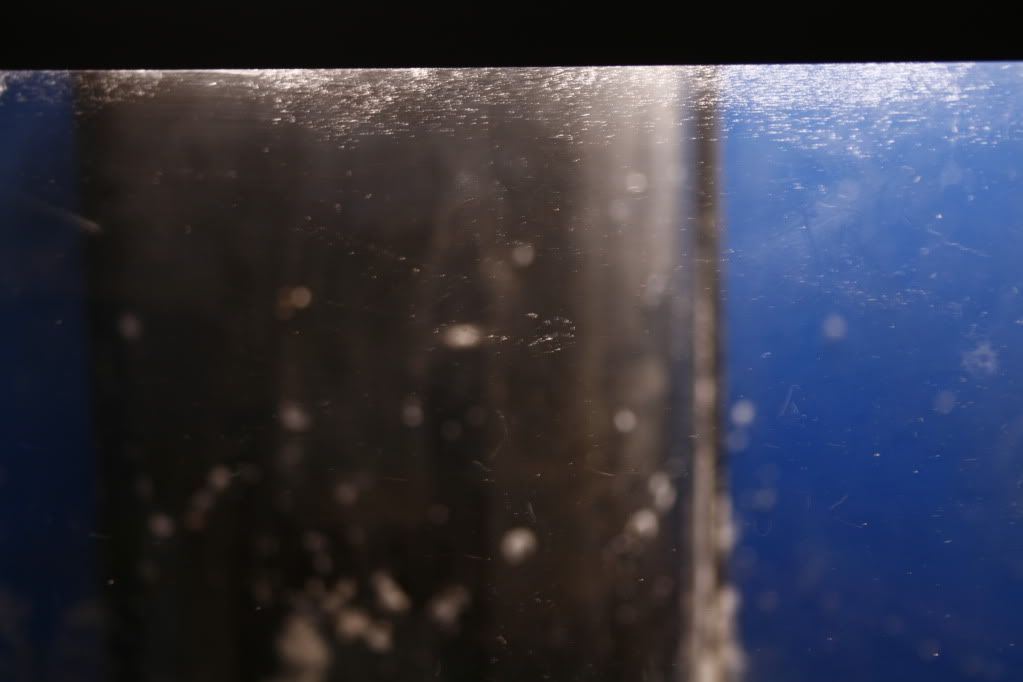 My bro did most of the buffing so him and chico are taking a nap and watching the sabres game. Tough work!!!  The deep scratches are still slightly noticeable. there are some other small scratches around the the rest of the tank but nothing noticeable. The deeper one around where we buffed will have some white crust inside them from the cerium oxide that makes them more noticeable but the white will fade in time. Perhaps in a year or so if we decide to go full reef well get the rest of the scratches out. |
|
|
|
|
01/19/2010, 05:18 PM
|
#14 |
|
Registered Member
Join Date: May 2009
Location: lancaster ny
Posts: 554
|
wow.. great job!
|
|
|
|
|
01/19/2010, 06:47 PM
|
#15 |
|
Registered Member
Join Date: Jul 2008
Location: Cheektowaga, NY
Posts: 975
|
Thanks, the fine scratches were easy. after using a technique I found online we could get a 8 inch circle of them out with about an hour of buffing. it was the deeper ones that were a pain.
|
|
|
|
|
01/19/2010, 06:55 PM
|
#16 |
|
Premium Member
 Join Date: Oct 2005
Location: Conesus, NY
Posts: 3,897
|
That's impressive!

__________________
Scott Friends don't give friends Kenya tree... |
|
|
|
|
01/19/2010, 07:25 PM
|
#17 |
|
Registered Member
Join Date: Jun 2009
Location: Rochester NY
Posts: 89
|
Wow!!! Great Job!!! I can't wait to see the light setup.
|
|
|
|
|
01/20/2010, 06:31 AM
|
#18 |
|
Registered Member
Join Date: Feb 2004
Location: syracuse, ny
Posts: 1,420
|
unbelievable! what does buffing do? fill in the scratches? or does it remove very little glass, like fine sanding?
about the wood putty, after the my first application, it seem when the putty cured overnight it shrank, is this right? |
|
|
|
|
01/20/2010, 06:40 AM
|
#19 |
|
Registered Member
Join Date: Dec 2008
Location: Buffalo NY
Posts: 1,442
|
Every time ive used the putty I put extra on to counter your problem solRNY. Then when it drys sand off the extra.
__________________
Always aim at complete harmony of thought and word and deed. Always aim at purifying your thoughts and everything will be well. Mohandas Gandhi Current Tank Info: 90RR with custom stand, canopy and cabnet. More to be added |
|
|
|
|
01/20/2010, 11:01 AM
|
#20 |
|
Registered Member
Join Date: Jul 2008
Location: Cheektowaga, NY
Posts: 975
|
+1 jon. Just like with drywall always easier to put more on and sand than to reapply and wait.
Hey SolNRY, the cerium oxide actually removes very small layers of the glass. Since there is no plastic film on our tank glass like there is on auto glass the risk of warping the image through the glass is much much less. |
|
|
|
|
01/20/2010, 11:24 AM
|
#21 |
|
Registered Member
Join Date: Feb 2004
Location: syracuse, ny
Posts: 1,420
|
thanks for the info guys, going to put a lot more putty on from now on.
|
|
|
|
|
01/20/2010, 11:42 AM
|
#22 |
|
Registered Member
Join Date: Jul 2008
Location: Cheektowaga, NY
Posts: 975
|
was it a large hole or crack your trying to fill? the more you put on the the longer it takes to dry and the more it shrinks. Small cracks, seams, or screw holes only take an hour or so to be sandable.
|
|
|
|
|
01/20/2010, 04:04 PM
|
#23 |
|
Registered Member
Join Date: Feb 2004
Location: syracuse, ny
Posts: 1,420
|
being new to table saws, i cut some panels to skin my frame, the cuts did not come out squared, actually, no cuts were identical!!! i am horrid at this. so when i went to install the panel skins there was a slight gap at each corner, so i am filing it with putty.
|
|
|
|
|
01/20/2010, 05:03 PM
|
#24 |
|
Registered Member
Join Date: Jul 2008
Location: Cheektowaga, NY
Posts: 975
|
LOL i have been there before. Gotta do what ya gotta do. With a good sand it will look fine im sure.
|
|
|
|
|
01/25/2010, 10:09 AM
|
#25 |
|
Registered Member
Join Date: Jul 2008
Location: Cheektowaga, NY
Posts: 975
|
Ok the light is finished. I will put up some pics of the proto type first and then some newer pics.
The light is made using white pine, hole saw, 12 standard socket receptacles for spiral compact florescent bulbs, (2) 3 wire 20 amp rated electrical cable wires than run to 6 sockets each, (6) 12k 13 watt spiral CF bulbs, (6) Blue party style CF spiral bulbs, water sealer and silicone around the electrical components, and a 6 foot by 12 inch mirror I got on craigs list as the reflector. and black paint 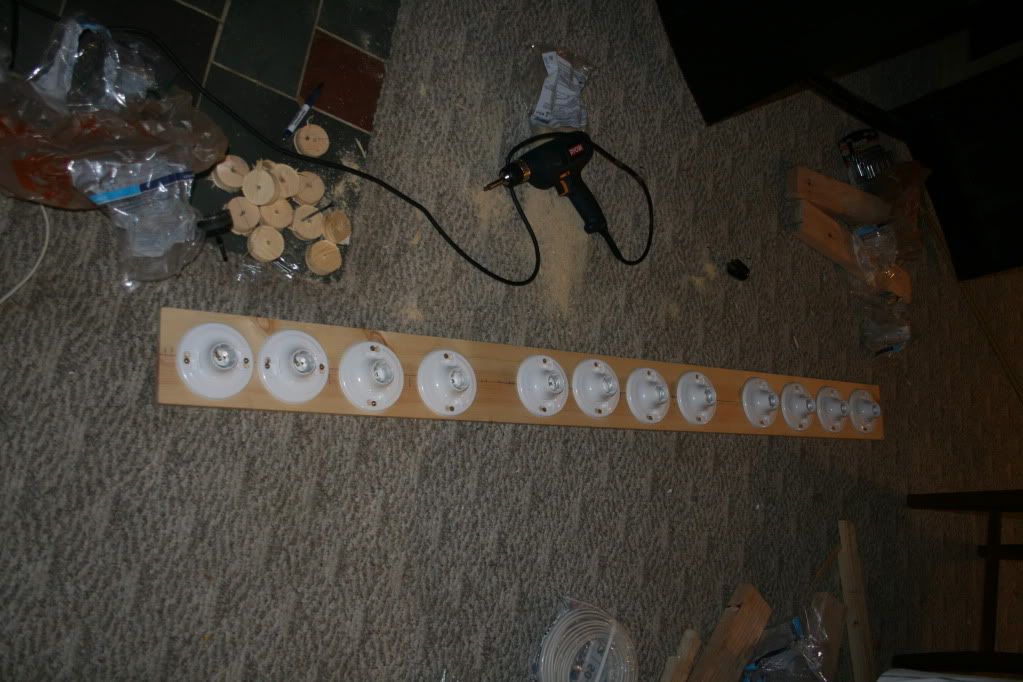 just testing it out here with a cuple regular bulbs here 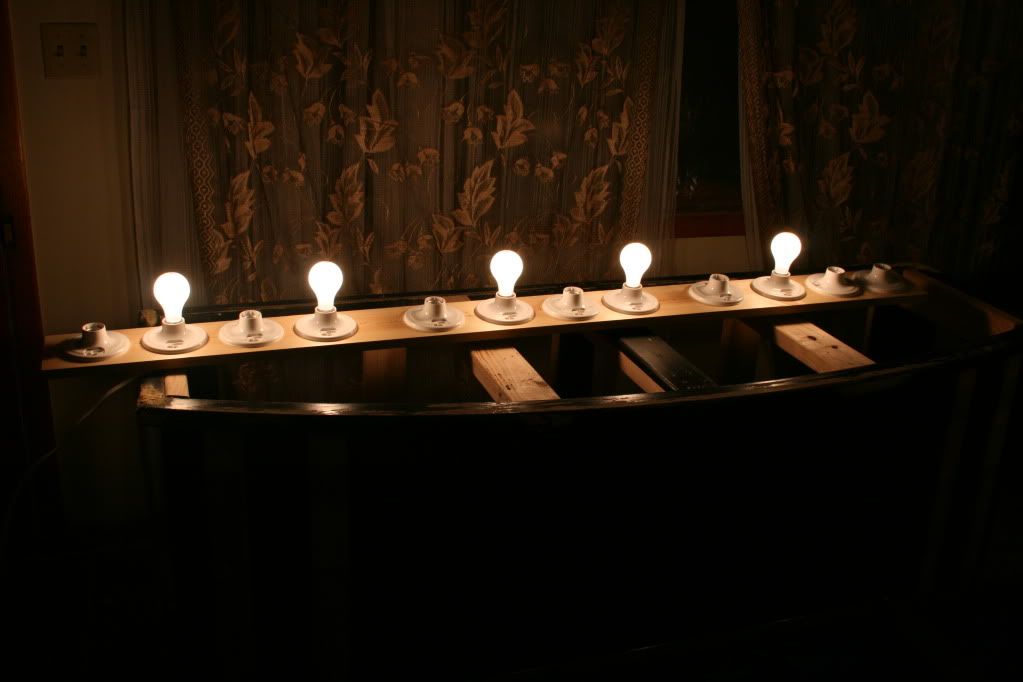 Had to darken the picture and increase shutter speed so you could see the bulbs 
|
|
|
|
 |
|
|


