|
|
 09/07/2010, 04:38 PM
|
#1 | |
|
Registered Member
Join Date: Sep 2003
Posts: 275
|
Bring on the CONE
Well, this will be my build log for a DIY cone skimmer. Troylee's builds and some of the others...along with outrageous prices have driven me to build my own. I like to build stuff, and Im cheap...do DIY goes hand in hand.
Anyways, this thread will probably be updated daily. Hoping to build this thing in the next week or so. Acrylic is ordered off ebay, started my prototype cone and made my beginnings of a mold to bend the cone over. Inspiration thread: http://reefcentral.com/forums/showthread.php?t=1872302 The beginnings from my skimmer pump recommendation thread: Quote:
No more premade skimmer cup...I will have more than enough acrylic to build a cup. |
|

|

|
|
09/07/2010, 04:40 PM
|
#2 |
|
Registered Member
Join Date: Sep 2003
Posts: 275
|
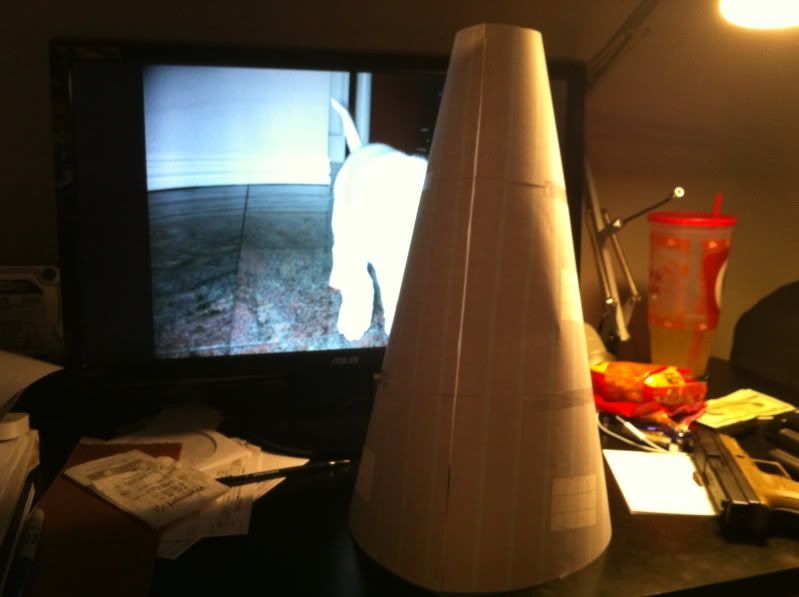
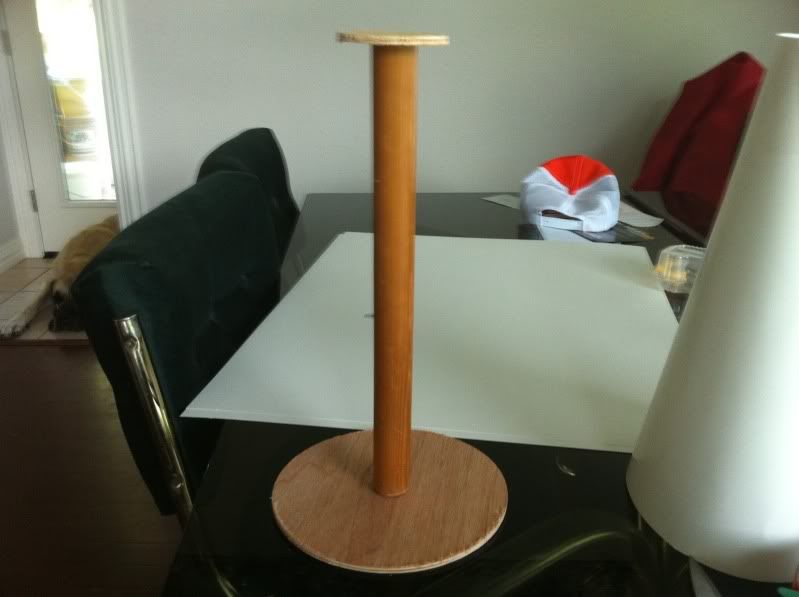
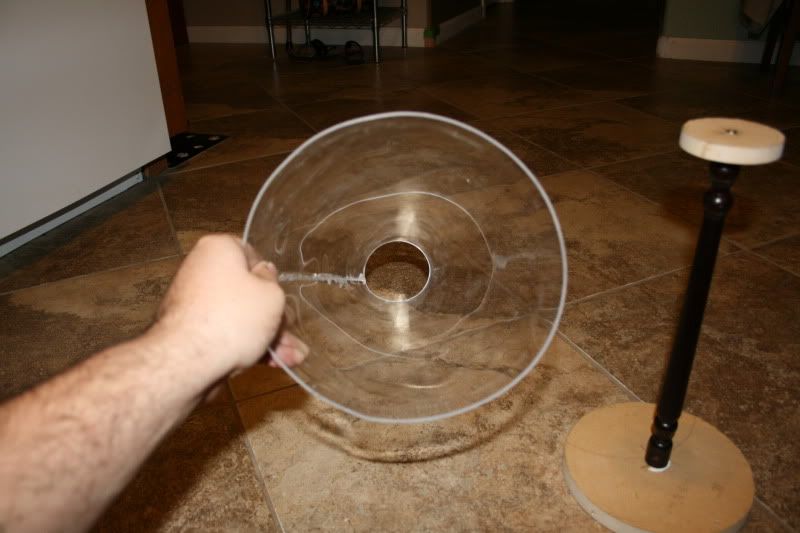
All the clear acrylic (for the cone and tube sections) will be 1/8" acrylic, and the flat circles as well as bubble plate will be 3/16" black acrylic. I needed a cone to mold the acrylic over...not finding anything that would work (well that was cheap and would work) I decided to recycle.
From this:  to this: 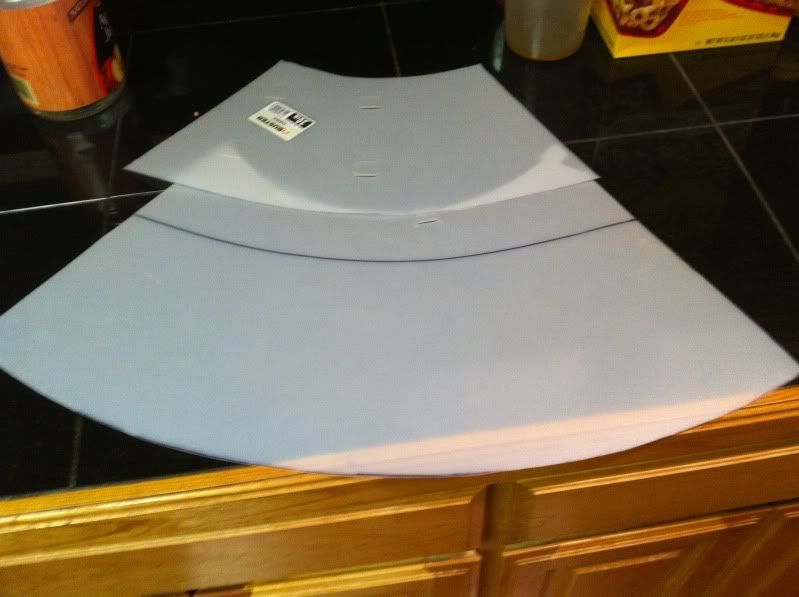 to this: 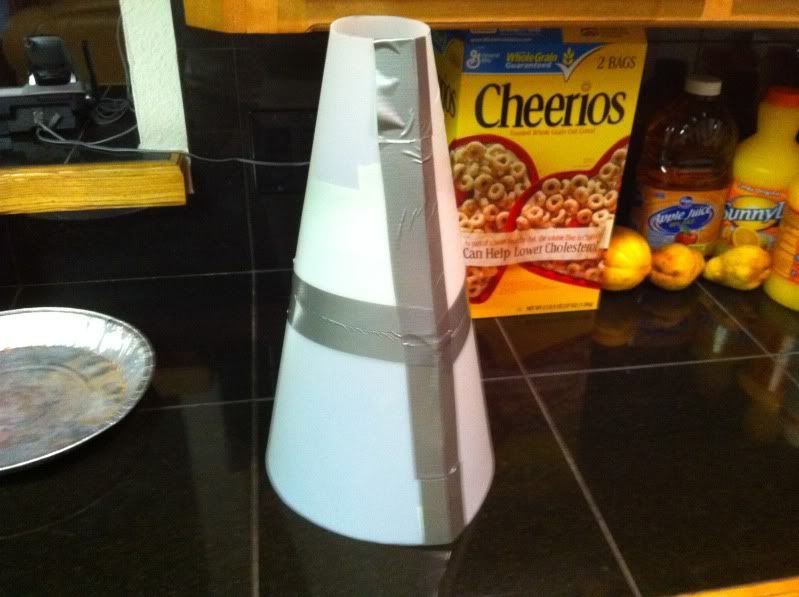 The new toy comes in tomorrow... Dewalt DW660. Its the same concept as a Dremel or Rotozip... same price range but 5 x the power  Im planning on cutting wood circles out of some 1/4" MDF or similar to brace the inside of the cone and brad nailing the plastic cone to it. Should be nice and strong. The e-collar is a 30" neck collar. Might find one at the pet store. They put a 30" and 15" together to make Koda's at the pet hospital Im planning on cutting wood circles out of some 1/4" MDF or similar to brace the inside of the cone and brad nailing the plastic cone to it. Should be nice and strong. The e-collar is a 30" neck collar. Might find one at the pet store. They put a 30" and 15" together to make Koda's at the pet hospital
|
|
|
|
|
09/08/2010, 02:53 PM
|
#3 |
|
Registered Member
Join Date: May 2007
Location: Lambertville, MI
Posts: 140
|
Tagging along, I'd like to see this one complete.
|
|
|
|
|
09/08/2010, 03:38 PM
|
#4 |
|
Registered Member
Join Date: Sep 2007
Location: wi
Posts: 243
|
He's got some soda, apple juice, and SunnyD!
Good luck on the build.
__________________
After this the tank will be finished I swear. Current Tank Info: I use everyones left overs |
|
|
|
|
09/08/2010, 08:36 PM
|
#5 |
|
PROP member
Join Date: Sep 2005
Location: San Tan Valley, AZ
Posts: 2,516
|
i just made a cone skimmer this weekend the same size, only 15" tall. it was tricky, and you have the right idea, but you will need to make another cone to slip over that one, kind of like a two part molding process.an inner cone and outer cone. this will allow you to hold the hot acrylic in place as is cools down and hold it together when its time to glue the seam.
if you dont mind i could post up some pictures of mine to help you out. also dont forget to mesure the angle of the slope. you will need to cut a bevel in the MDF to match the cone so is not to distort it. its most likey an 81 degree slope like mine. -jesse
__________________
It is the mark of an educated mind to be able to entertain a thought without accepting it. -Aristotle Current Tank Info: 58 gallon with 2 MP20's and DIY LED lighting |
|
|
|
|
09/08/2010, 09:07 PM
|
#6 |
|
Registered Member
Join Date: Sep 2003
Posts: 275
|
More than welcome to post pics. I'm really doing a write up because most threads here don't really have a good step by step for a skimmer much less a cone. Lots of after but nothing I have found to hold my hand on building one. So I decided to do one. I think we are taking bit different approach for the cone as well. We will see how mine works out before I post it
 . . Tim |
|
|
|
|
09/09/2010, 01:17 AM
|
#7 |
|
PROP member
Join Date: Sep 2005
Location: San Tan Valley, AZ
Posts: 2,516
|
well here are some, i didnt take any more after that but will be making another one this weekend and will get the rest of the shots.
   i found this to be the easiest way to make the cone template. first you figure out your base size then neck size. second you figure out your height third build a "lamp" to those specs forth wrap it in poster board and trim it flush. remove the poster board and you have a template. there is more to it after that, but this late at night that's all i'm typing. -jesse
__________________
It is the mark of an educated mind to be able to entertain a thought without accepting it. -Aristotle Current Tank Info: 58 gallon with 2 MP20's and DIY LED lighting |
|
|
|
|
09/09/2010, 11:11 AM
|
#8 |
|
Registered Member
Join Date: May 2004
Posts: 120
|
|
|
|
|
|
09/09/2010, 11:46 AM
|
#9 | |
|
Registered Member
Join Date: Sep 2003
Posts: 275
|
Quote:
http://pulserate.com/  It will print the layout over multiple pages and you just cut it out and tape it together. After a paper one, a posterboard one, and the plastic one above...it just doesnt work perfectly with the circles taht are cut for the wood stand. The one thing to keep in mind is acrylic thickness. Using 1/8" thickness, the template that the program spits out will be an OUTER dimension when you wrap the cone. So either the circles have to be 1/4" smaller than the planned 3", or you must add to the cone layout. So my top circle was 3" and the bottom was 8". The program dimensions would be 3.25" and 8.25" to have inner dimensions of 3" and 8". Off to the store for more cardboard. Last edited by 8mpg; 09/09/2010 at 11:56 AM. |
|
|
|
|
|
09/09/2010, 02:00 PM
|
#10 |
|
Registered Member
Join Date: Sep 2003
Posts: 275
|
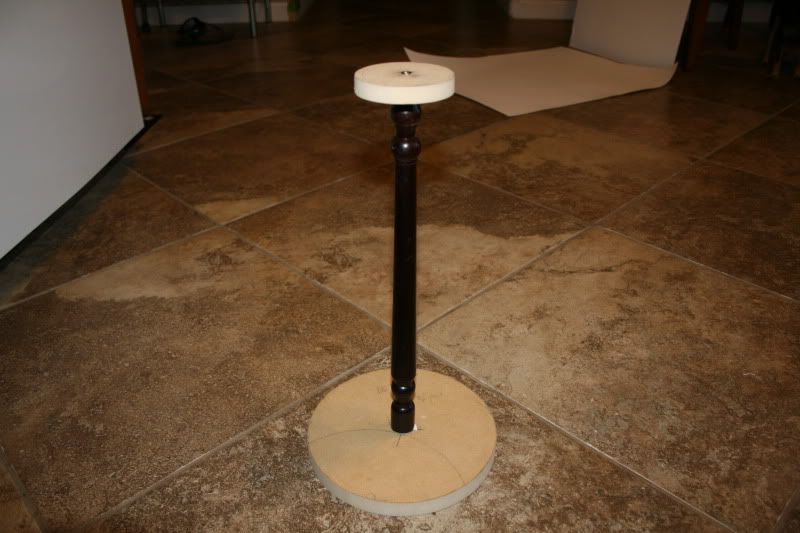
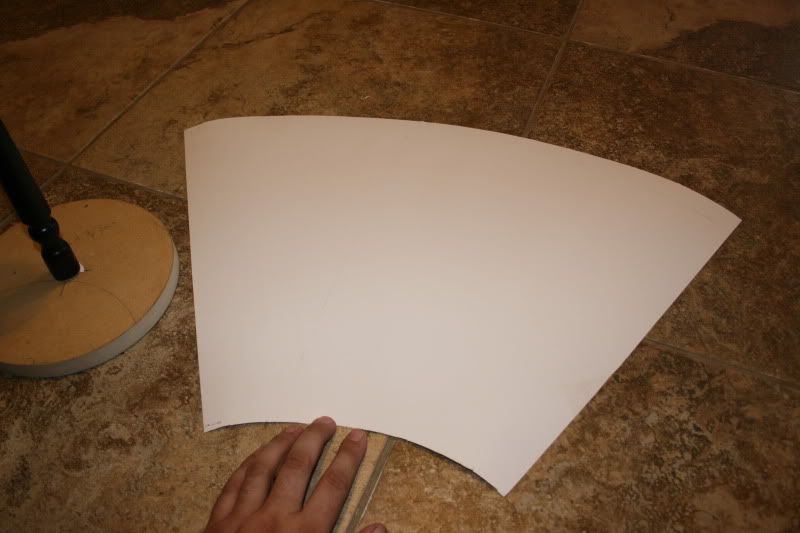
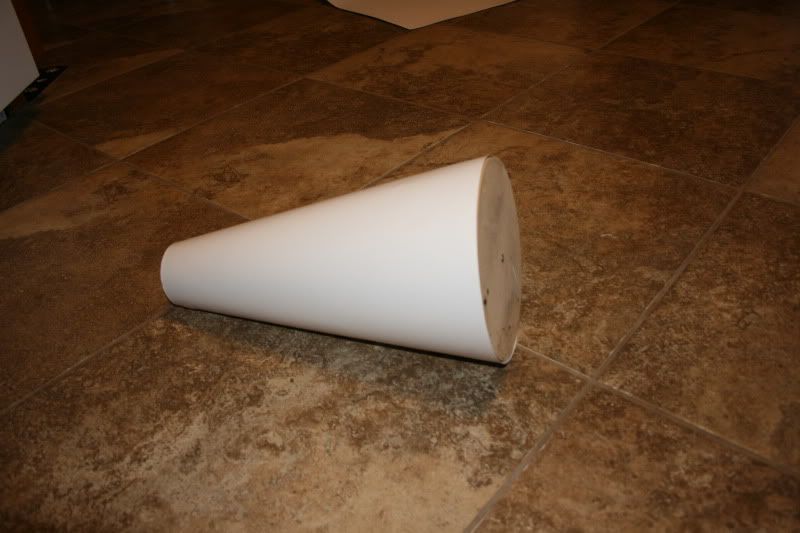
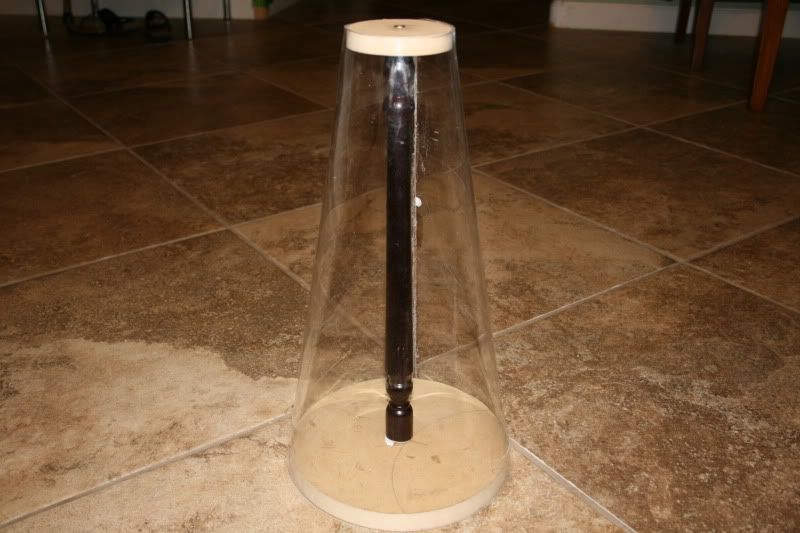
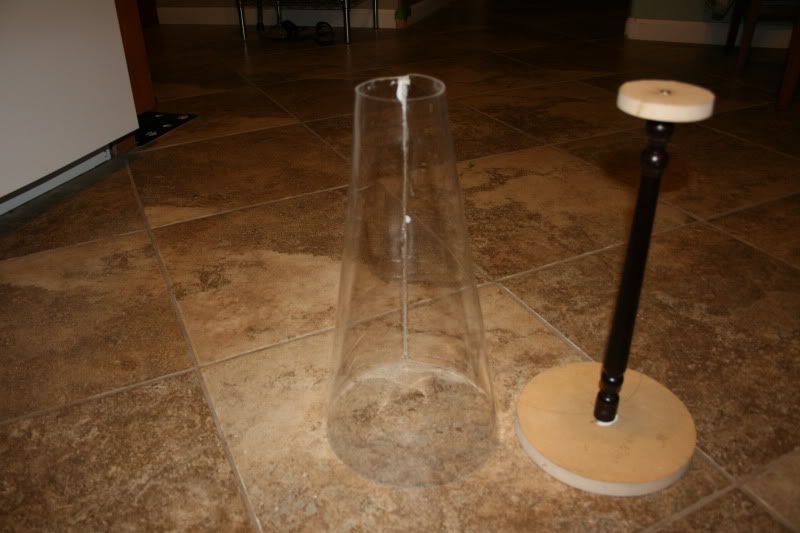
Ok.. got the wood stand done from some scrap wood layin in the garage.
 Just rolled it in posterboard for the first layer and taped it together. Not a smooth surface so I made another later, but this time marked the edges and cut it nicely. 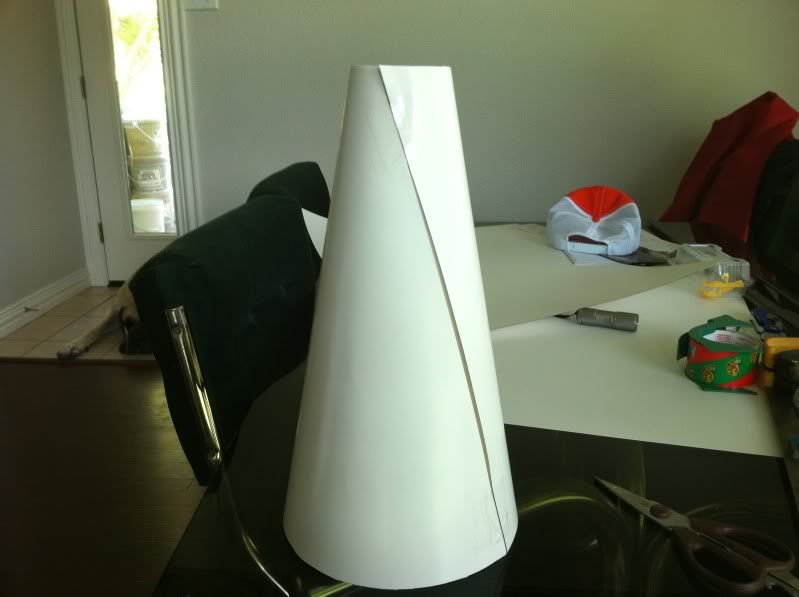 This is not from a paper template, but actually rolling it on the wood setup and tracing it. THe line is not vertical, so if I used this as a template for the acrylic, it will have a spiral line where the flat sheet is glued.  I think I will be using the cone program and trying a good layout now that the mold is done. The top came out to a 3" outer diameter like I wanted it to. The bottom on the other hand is about 8.125" (8 1/8").. so this will modify the dimensions in the cone layout program. So my program measurements should be 3.25", 8.375" and its 15" tall (late change) Last edited by 8mpg; 09/09/2010 at 02:07 PM. |
|
|
|
|
09/09/2010, 03:09 PM
|
#11 |
|
Rejisturd Mimbur
Join Date: Oct 2005
Location: Brevard County, FL
Posts: 1,346
|
I'm interested to see how this turns out. I'm planning on making my own as well, so this will be nice to reference later. I like that you keep your Springfield next to it. I guess if it doesn't work out, you can blast away your frustrations!
__________________
Ummmm... yeah... don't touch the Mag Float. Sorry kids, your college fund is gone, but the tank looks SWEET right? Current Tank Info: 150gal mixed reef. ER CS135, 65gal sump/fuge with a Mag12 return. (2) Korillia 4s, (1) modded MJ1200, two SunSun 3200gph powerheads. 250+lbs LR. |
|
|
|
|
09/09/2010, 04:23 PM
|
#12 |
|
Premium Member
 Join Date: May 2004
Location: Longmont, Co
Posts: 4,566
|
I am most interested in how everyone plans on heating such a large sheet of acrylic.....
And "I like that you keep your Springfield next to it" Good thing it wasn't a Beretta 93R Stu
__________________
Some people think that I have Attention Deficit Disorder. They just dont understand that........ Hey! Look a chicken! Well, We KNOW GOD exists, but for US to exist without a GOD is preposterous .Umm wait a minute . Sounds a bit circular to me Current Tank Info: 125 Gal. display w/80 gal mud/caulerpa sump. Basement sump w/ LED Grow Light,Gravity fed Reeflo200 skimmer w/ ORCA Recirc, DIY calc reactor & kalk stirrer. Inline plumbed 75 Gal frag/settling tank. |
|
|
|
|
09/09/2010, 04:27 PM
|
#13 | |
|
Registered Member
Join Date: Sep 2003
Posts: 275
|
Quote:
I will be heating and molding it there. Anyone could make this into a 2 piece cone though and it should fit in a home oven. THe cone layout program shows that the overall piece is 25"x16". If someone were to build a bigger cone skimmer, they could probably get away with a 12" base, 6" neck and 20" tallWell, I ordered a Sedra 5000 pump and some flatback mesh from meshmod.net. I believe that site is one of our board members Magvi that is selling the mesh...could be wrong. |
|
|
|
|
|
09/10/2010, 01:56 AM
|
#14 |
|
PROP member
Join Date: Sep 2005
Location: San Tan Valley, AZ
Posts: 2,516
|
here is a picture of the first cone made. the seam was the hardest part, getting to to meet up correctly but i think i got it figured out this time.
   it looks smaller then it is in the photos but it is 15" tall with a 8" base and 3" neck. if you "skin" the lamp in a hard material like that e-collar then make another cone to fit around the outside of the finished cone it will keep it from distorting and deforming. this is how im going to do the second cone this weekend. -jesse
__________________
It is the mark of an educated mind to be able to entertain a thought without accepting it. -Aristotle Current Tank Info: 58 gallon with 2 MP20's and DIY LED lighting |
|
|
|
|
09/10/2010, 02:03 AM
|
#15 | |
|
PROP member
Join Date: Sep 2005
Location: San Tan Valley, AZ
Posts: 2,516
|
Quote:
if you make a vertical mark on the lamp, then line up the factory edge of the poster board when you wrap it around it will give you the marks to cut the other side straight. look at my template and you can see my seam is a straight vertical. -jesse
__________________
It is the mark of an educated mind to be able to entertain a thought without accepting it. -Aristotle Current Tank Info: 58 gallon with 2 MP20's and DIY LED lighting |
|
|
|
|
|
09/10/2010, 02:10 AM
|
#16 | |
|
PROP member
Join Date: Sep 2005
Location: San Tan Valley, AZ
Posts: 2,516
|
Quote:
next one will be in the oven. -jesse
__________________
It is the mark of an educated mind to be able to entertain a thought without accepting it. -Aristotle Current Tank Info: 58 gallon with 2 MP20's and DIY LED lighting |
|
|
|
|
|
09/10/2010, 12:42 PM
|
#17 | |
|
Registered Member
Join Date: Sep 2003
Posts: 275
|
Quote:
|
|
|
|
|
|
09/11/2010, 06:39 AM
|
#18 |
|
Registered Member
Join Date: Jan 2009
Location: Charleston, SC
Posts: 971
|
I'm tagging along for this build.

|
|
|
|
|
09/11/2010, 08:30 AM
|
#19 |
|
Registered Member.

Join Date: Jun 2002
Location: Montgomery, Illinois
Posts: 1,465
|
What kind of pump are you going to use? What do you think the skimmer will be rated to?
|
|
|
|
|
09/11/2010, 12:40 PM
|
#20 | |
|
Registered Member
Join Date: Sep 2003
Posts: 275
|
Quote:
Its really hard to say what its rated to, but if I had to compare, Id say its in the realm of the 3 skimmers above. I know the cone wont be perfect but I dont think small deviations in the cone shape will hurt the ability of the skimmer. Im putting it on a 55gal bare bottom with 40gal sump. It should be overkill but allows for some tank upgrading later in life. |
|
|
|
|
|
09/13/2010, 01:01 PM
|
#21 |
|
Registered Member
Join Date: Sep 2003
Posts: 275
|
Note to self... It is probably cheaper to just buy a DIY kit, or just buying a decent skimmer. Dont really want to tally up the numbers...but so far:
Sedra 5000 = $85 Mesh mod = $7 Acrylic $60 Fleece and fiberglass resin $25 Scrap wood = free ----------------------------- $170 and counting. Still need PVC parts, but those are cheap. Cant really count the tool...but $90 on Dewalt Rotary tool (used to cut circles) Right now Im making a fiberglass mold of the cone. I just didnt like the posterboard stiffness, so Im doing the subwoofer box building method of fiberglass. wrap it in poylester fleece 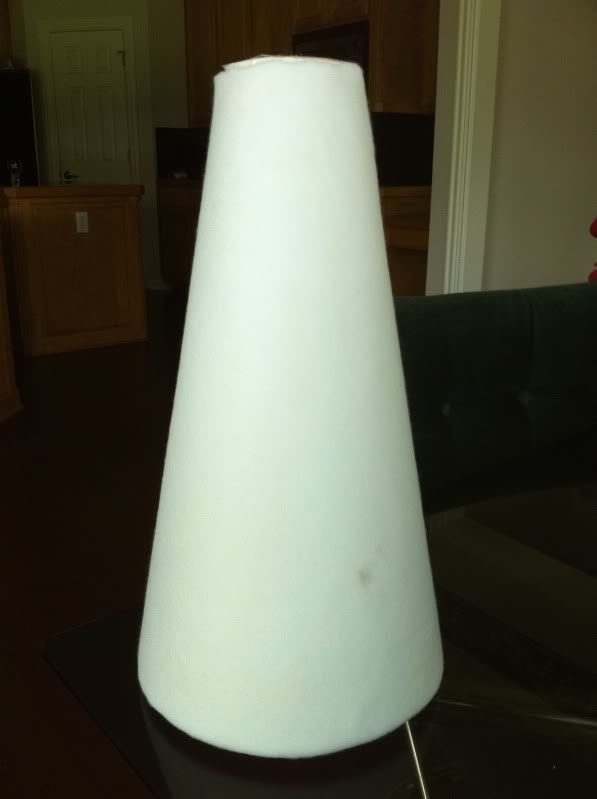 Using spray adhesive 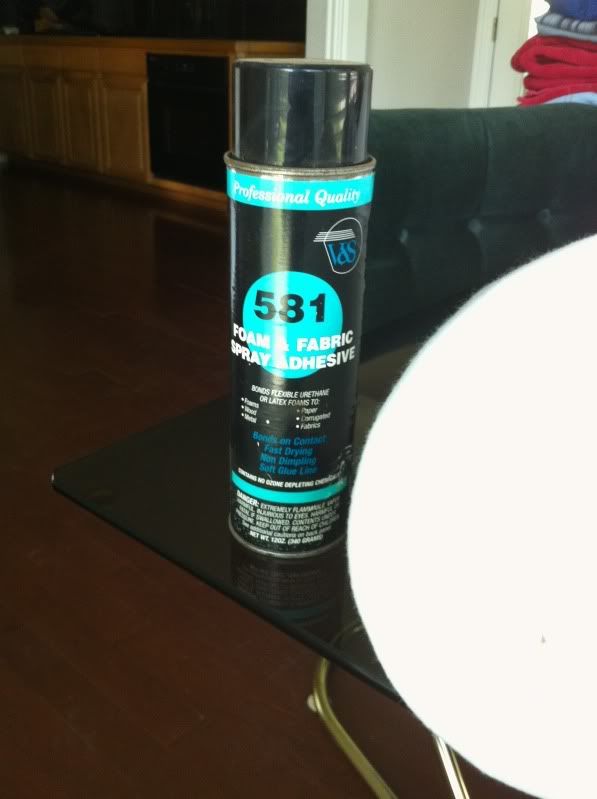 Scale to properly measure the resin. At $15/qt...its not cheap. But that is what you pay for when you buy at lowes. Would have been cheaper online. 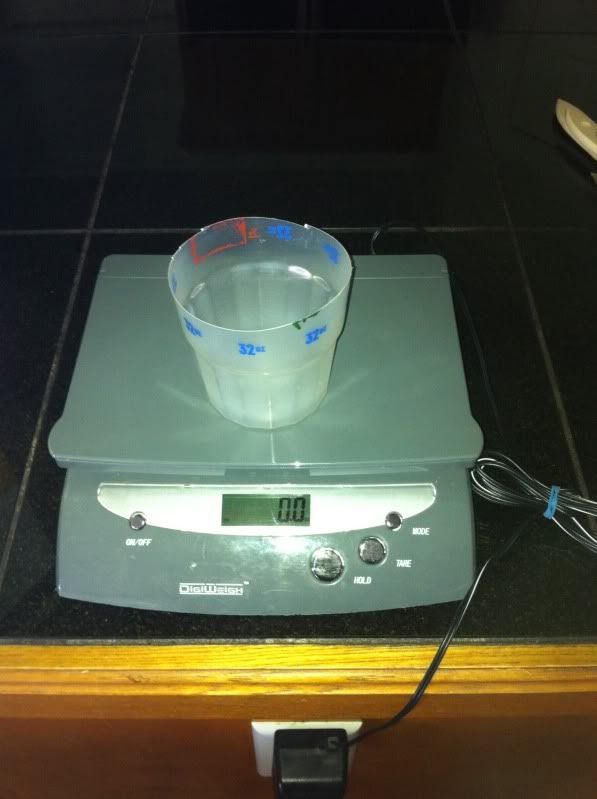 I used about 7 ounces of resin for the fleece. Might need a 2nd coat. Its very absorbent. |
|
|
|
|
09/13/2010, 01:31 PM
|
#22 |
|
Registered Member
Join Date: May 2004
Posts: 120
|
unless you are building a very custom cone, the cost of the avast marine kit is justifiable
plus the headaches of having to figure out all the measurements are gone |
|
|
|
|
09/13/2010, 01:42 PM
|
#23 |
|
Registered Member
Join Date: Sep 2003
Posts: 275
|
LOL... round 2 = fail... Just cant fiberglass well inside a small cone. Next step is expandable spray foam. I just need a solid core. Hopefully foam will do it.
|
|
|
|
|
09/13/2010, 06:25 PM
|
#24 |
|
aka John K
Join Date: Mar 2002
Location: Sudbury
Posts: 2,367
|
Hey, props to you for trying and documenting the process here
__________________
my reef ate my wallet Current Tank Info: 57G, RBTA's Zoa's and softies |
|
|
|
|
09/14/2010, 09:18 AM
|
#25 | |
|
Plumbing Engineer
Join Date: Feb 2004
Location: Atlanta GA
Posts: 3,260
|
Quote:
Im getting my sister(teacher) to laminate some posterboard for me and Im just going to fiberglass right over that and install a small viewing window in it. If you still want to make it out of acrylic, just do the above and sand the outside nice and smooth before you form the acrylic around it. |
|
|
|
|
 |
| Thread Tools | |
|
|
 Similar Threads
|
||||
| Thread | Thread Starter | Forum | Replies | Last Post |
| Dying to ask... Beckett cone skimmer | psychostieg | Do It Yourself |
0 | 09/07/2010 12:23 PM |
| Which Cone, Which Cone | Kurt03 | Lighting, Filtration & Other Equipment | 0 | 05/14/2009 10:24 AM |
| Forget what frags you are bringing to CFM, how much CASH are you bringing? | ZoaFan08 | Southern California Reefers | 27 | 02/25/2009 11:17 PM |
| KZ cone VS. ATB cone skimmers | SolidDetail808 | Lighting, Filtration & Other Equipment | 7 | 06/20/2008 02:00 PM |