
|
|
 12/20/2006, 02:17 PM
|
#1 |
|
Registered Member
Join Date: Apr 2001
Location: Holly Springs, NC
Posts: 1,703
|
Sabodish's 170 gallon cube build thread
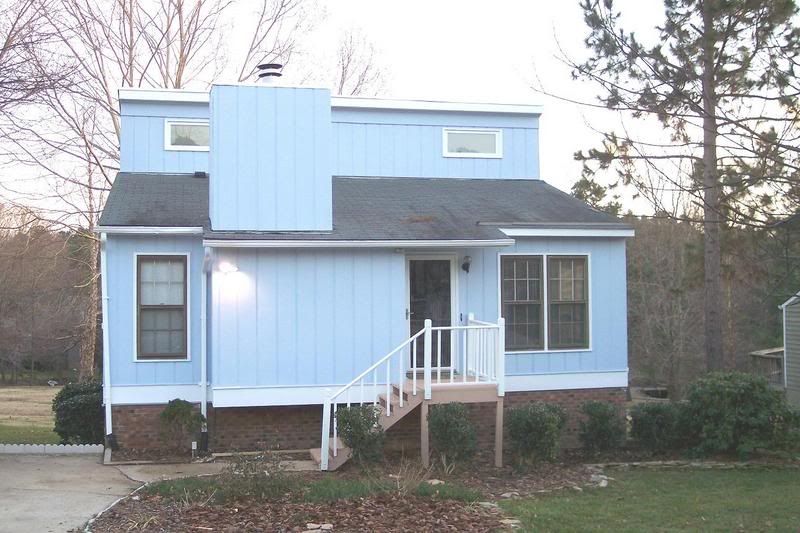
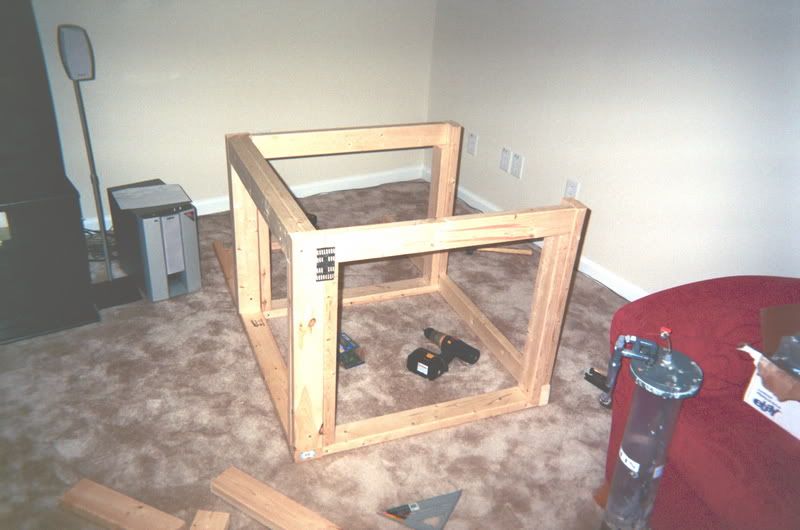
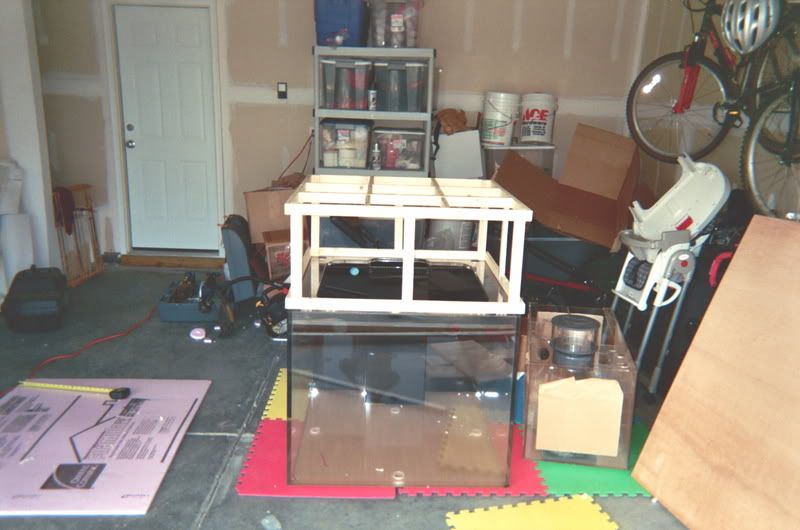
Well, the wife and i had a baby about a year ago, so this became too small
 and we had to buy this. 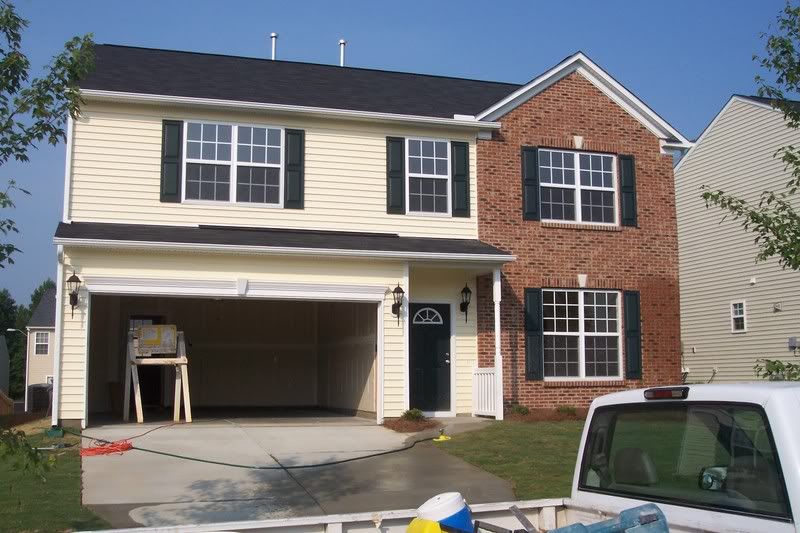 so, that means this (360 gallon) had to go.  and replaced by this 170 gallon cube.  due to the house being on a slab, i will lose my dedicated fish room and have to house all the equipment under the stand. or in this case, a small closet attached to my stand, more on this later. tank specs: -36"x36"x30"x3/4" acrylic cube built by andy at myreef creations. - sump, my reef creations standard reef sump, with fuge -DIY stand and hood. -euroreef 8-3, which i converted to a recirculting skimmmer -circulation, (2) OM 4 ways, water being provided by 2 sequence darts. once closed loop is returned through the bottom 4 holes, while the other loop is returned through bulkheads in the corners at the top through the eurobracing. CL intakes are on the rear wall, covered with large spa strainers. -return pump is a small mag 7, which feeds my skimmer also. -lighting will consist of (2) 400W DE metal halide icecap horizontal pendants being powered by icecap electronic ballasts. i will also be running (4) 3' VHO actinics powered by an icecap 660. tank will be bare bottom and house a mixed reef. so now..on to the construction pics. please share comments, critiques, or anything else. -mike |

|

|
|
12/20/2006, 02:21 PM
|
#2 |
|
Registered Member
Join Date: Apr 2001
Location: Holly Springs, NC
Posts: 1,703
|
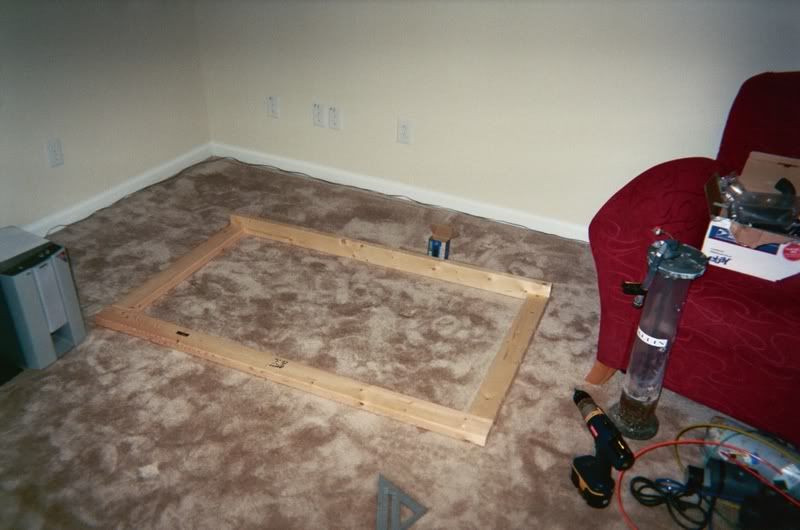
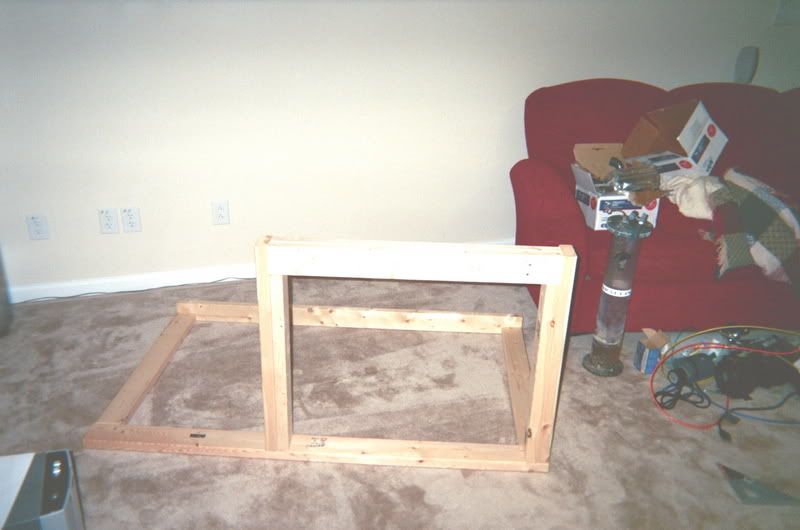
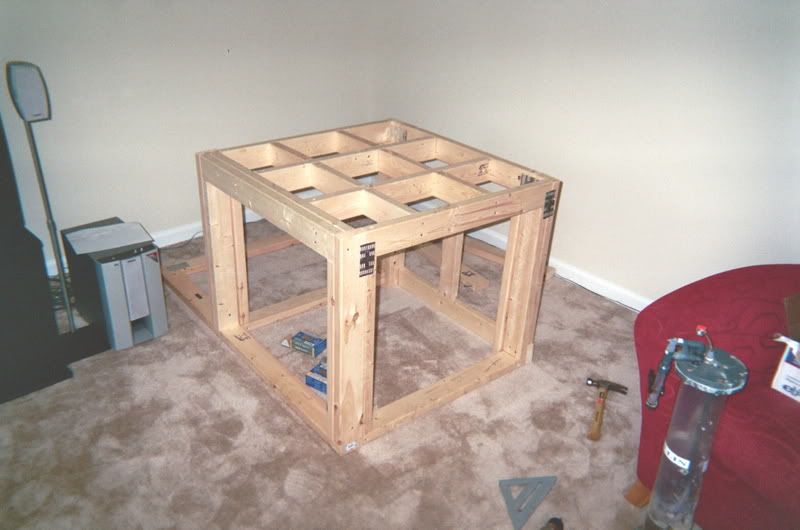
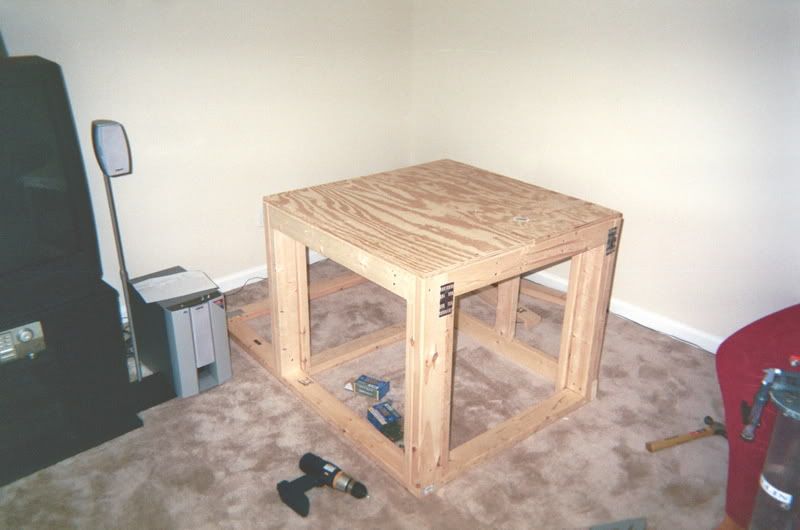
in stand building, i had admired the stand that "sonofgaladrial" built for his 48x48x24 cube, so i wanted to use his basic idea, but i needed to tweak it a bit to fit my needs. the stand frame is built out of 2x4's and then covered in 3/8" sanded plywood. i painted the entire stand with 3 coats of kilz and then 2 coats of white paint.
|
|
|
|
|
12/20/2006, 02:24 PM
|
#3 |
|
Registered Member
Join Date: Apr 2001
Location: Holly Springs, NC
Posts: 1,703
|
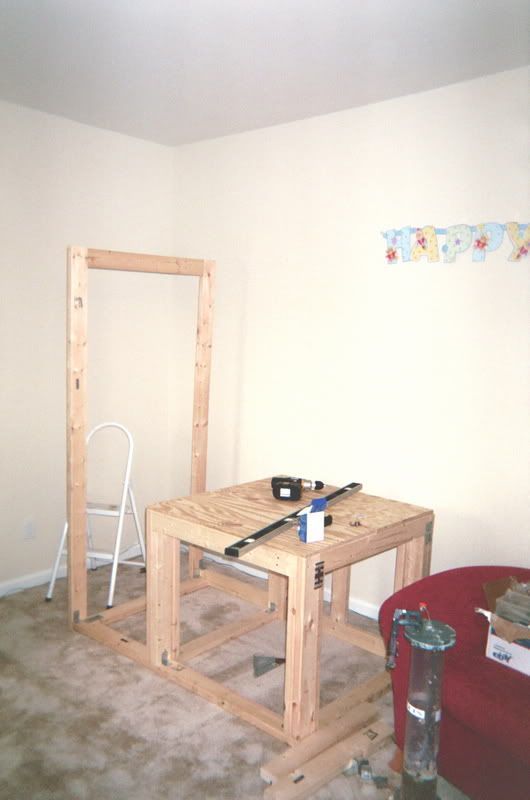
now, as i mentioned before, i needed some extra room as i was losing my fishroom, so i decided to build a little closet on the left side of the tank to house equipment.
  painted...but still a long way to go 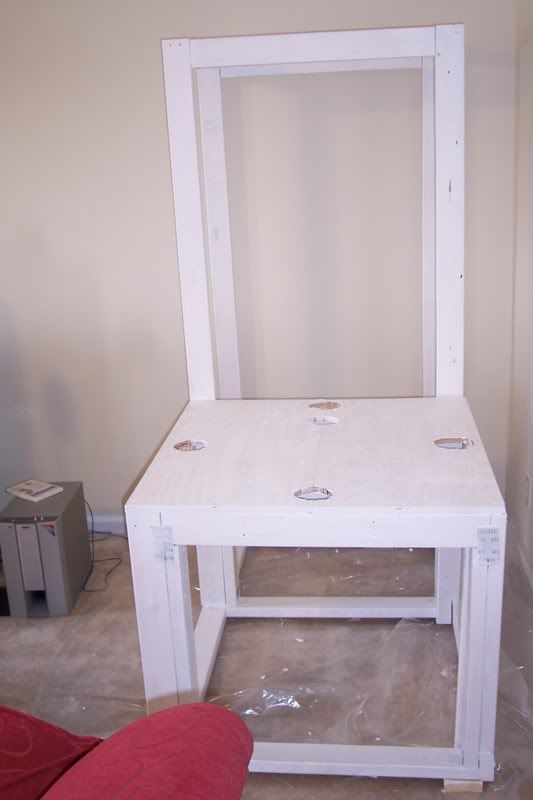 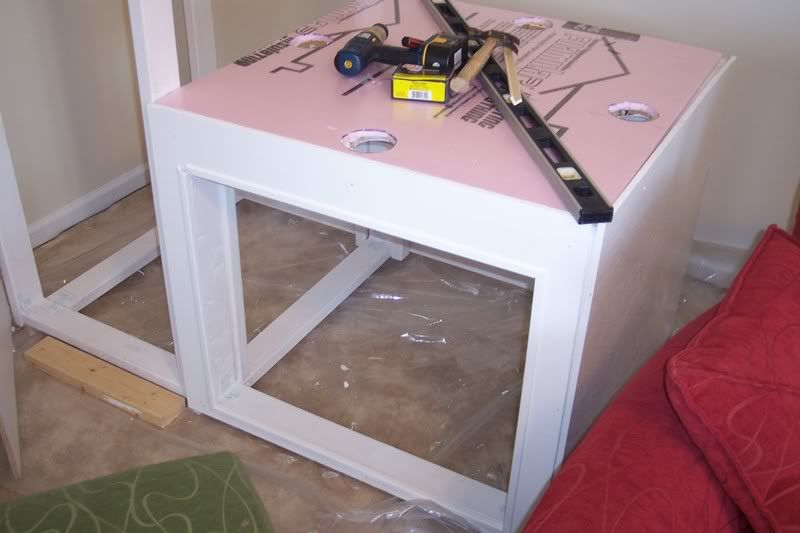 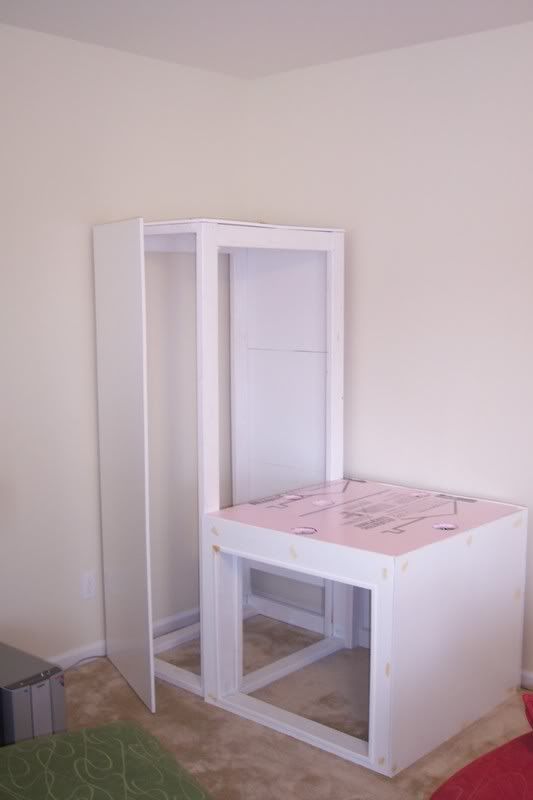
|
|
|
|
|
12/20/2006, 02:27 PM
|
#4 |
|
Moved On
Join Date: Nov 2006
Location: oregon
Posts: 825
|
Bummer you had to go with suck a smaller tank, bigger house smaller tank?? I dont understand. Anyway looks like things are commiing along great
|
|
|
|
|
12/20/2006, 02:28 PM
|
#5 |
|
Registered Member
Join Date: Oct 2005
Location: Pittsburgh, PA
Posts: 647
|
The MRC cube looks good. .first one I have seen a pic of.
What do you plan on skinning the stand in? |
|
|
|
|
12/20/2006, 02:29 PM
|
#6 |
|
Registered Member
Join Date: Apr 2001
Location: Holly Springs, NC
Posts: 1,703
|
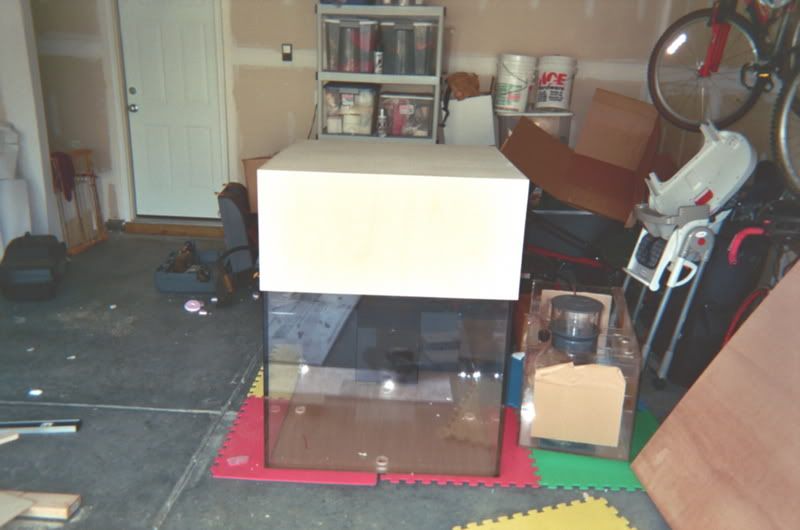
it was now time to turn my attention to the hood, i needed somthing that would be able to lift on a piano hinge as my wife did not like the idea of putting hooks int he ceiling and using a electric hoist like i wanted, so this is what i came up with. the hood is built from 1" stock if i remember right and was then covered in 1/4" sanded plywood and painted with kilz and white paint just like the stand.
|
|
|
|
|
12/20/2006, 02:34 PM
|
#7 |
|
Registered Member
Join Date: Apr 2001
Location: Holly Springs, NC
Posts: 1,703
|
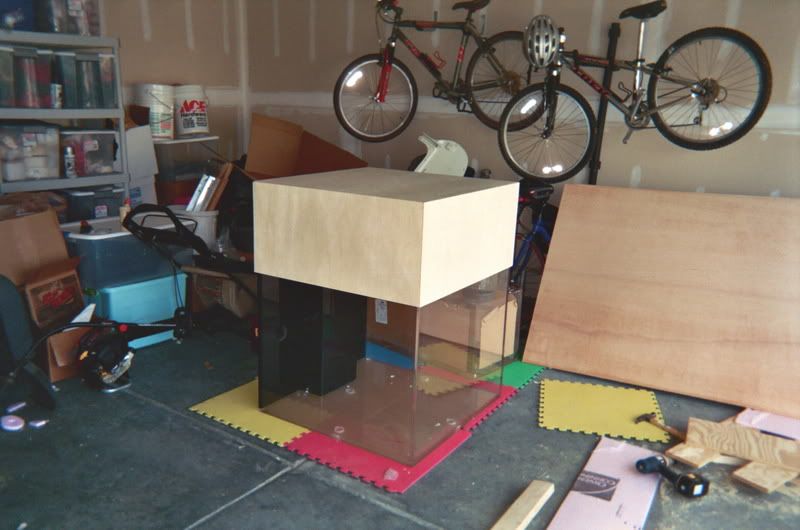
now, the fun part...my wife and i about killed ourselves trying to lift this tank onto the stand. thank god she works out and was able to help a ton.
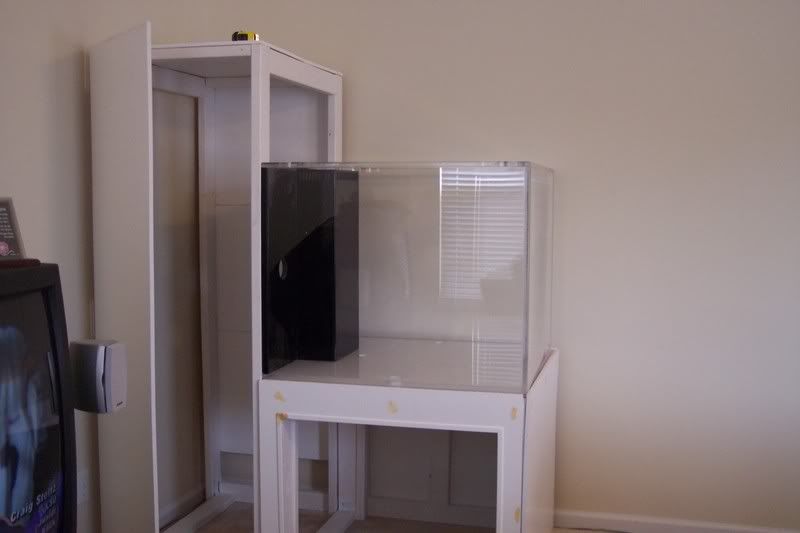 i decided to throw down some linoleum the builders were nice enought to leave me. just there to prevent little spills, if something major should happen, it wont really help. 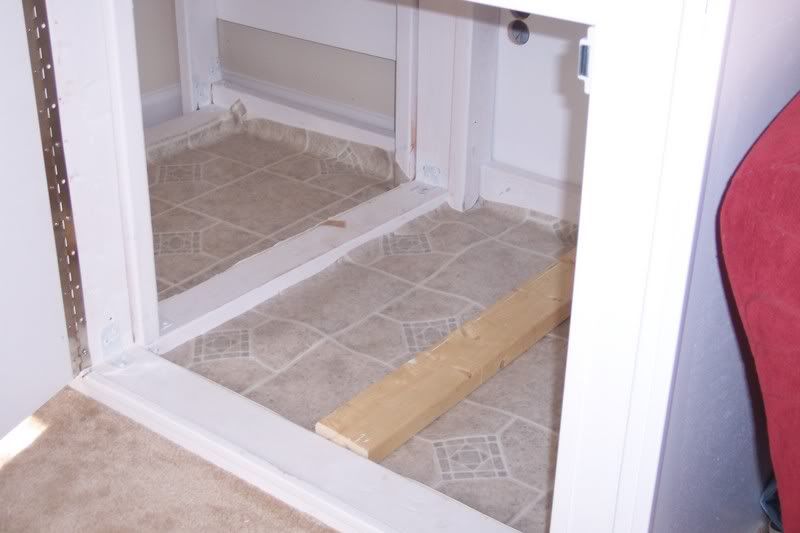  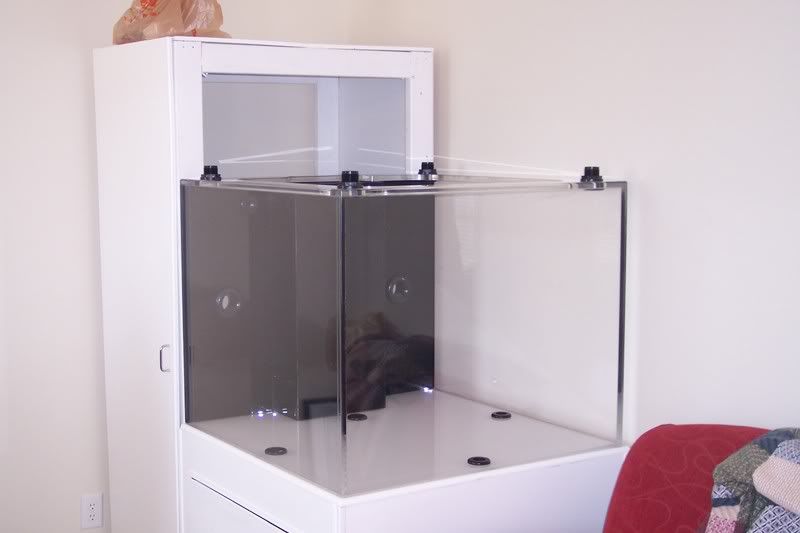 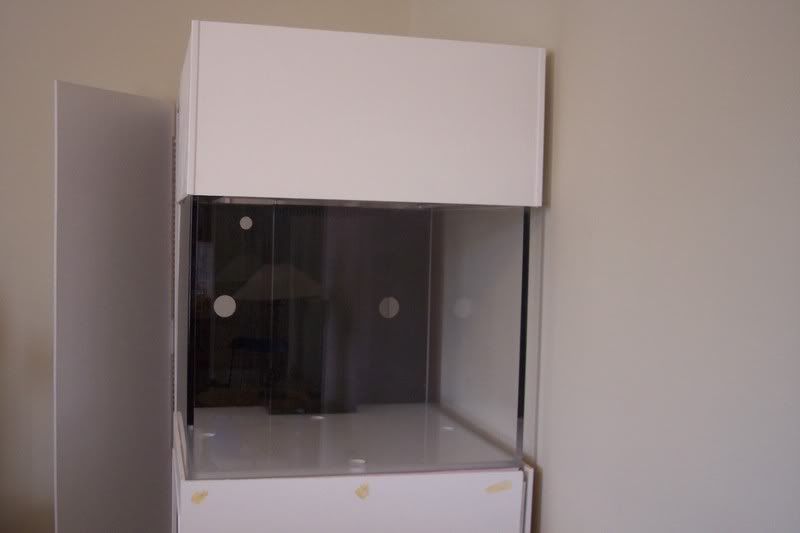 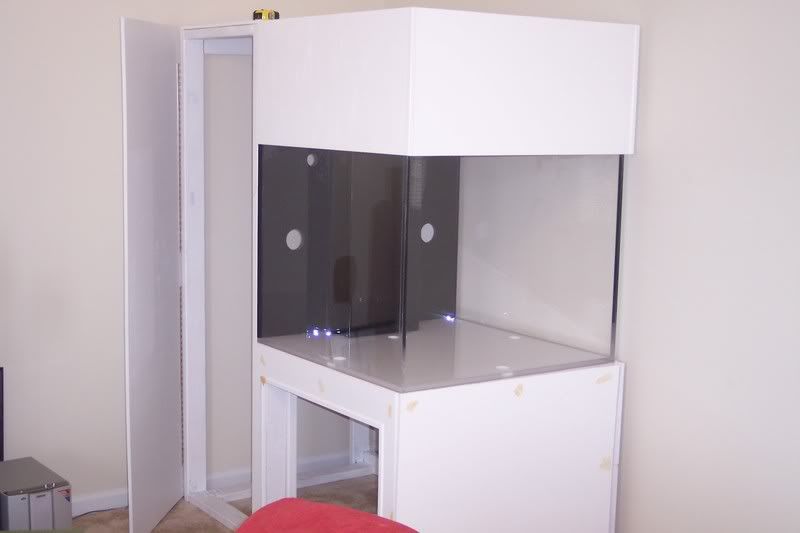 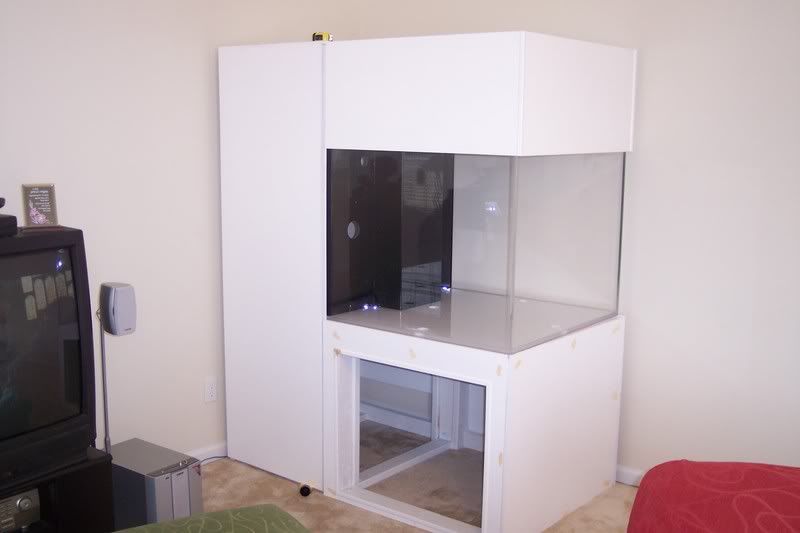 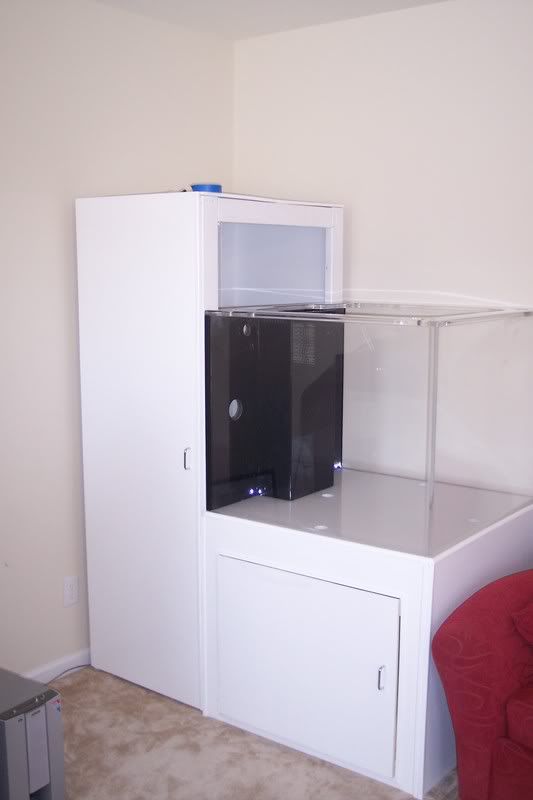 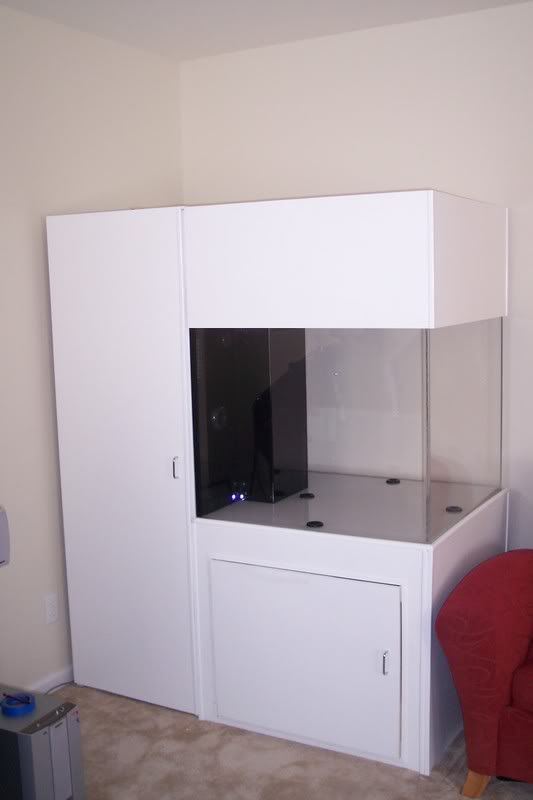
|
|
|
|
|
12/20/2006, 02:43 PM
|
#8 |
|
Registered Member
Join Date: Apr 2001
Location: Holly Springs, NC
Posts: 1,703
|
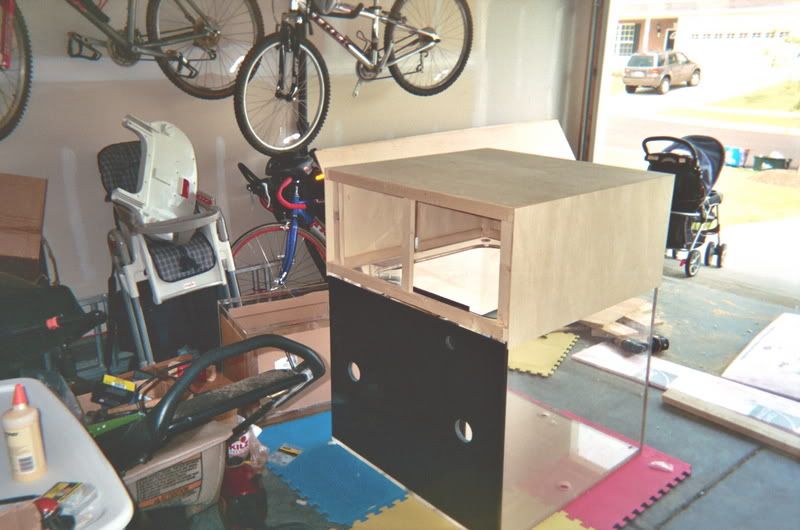
now for a few equipment pics...not really much to see her except some pipe, and pumps, but i know how you equipment junkies are..i still need to get some pics of my skimmer. i also purchases 2 american DJ power strips to make things a little easier.
heres the plumbing in the closet..you can see the intakes from the tanks to each closed loop pump and one of the OM 4 ways. in addition, you can see the sump how it will sit. its a tiiight fit in there. 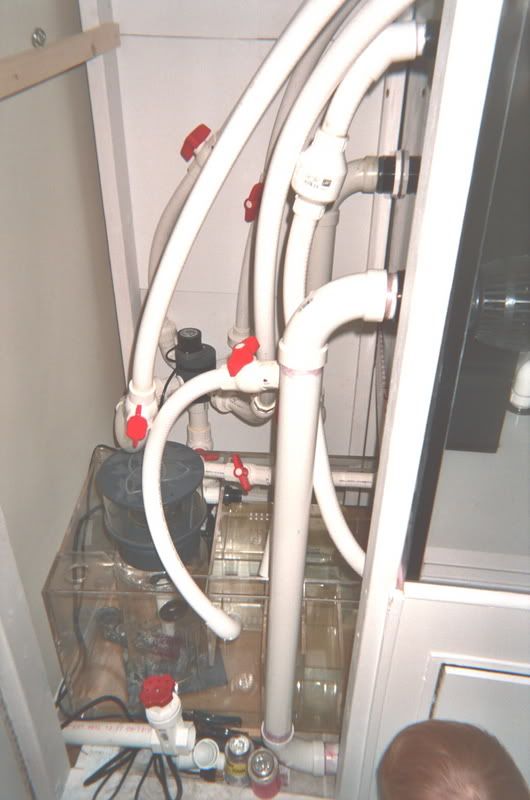 just a close up of how is plumbed the 4 way 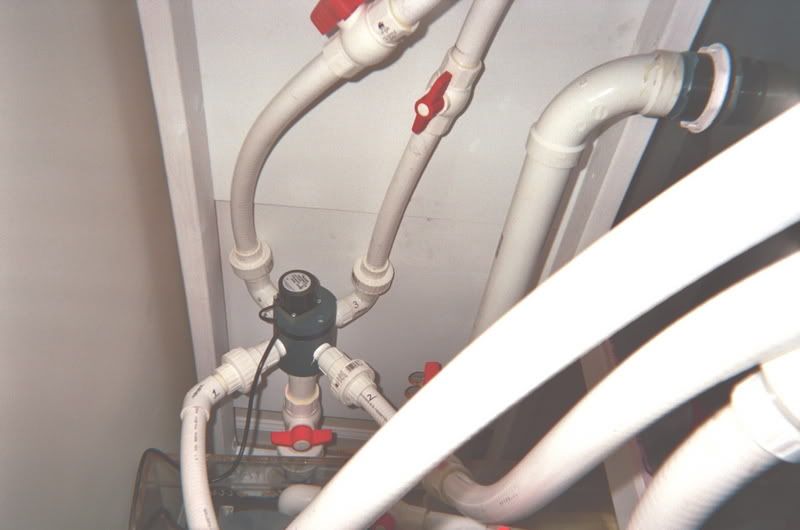 under the tank pump and OM 4 way  close up of under tank 4 way 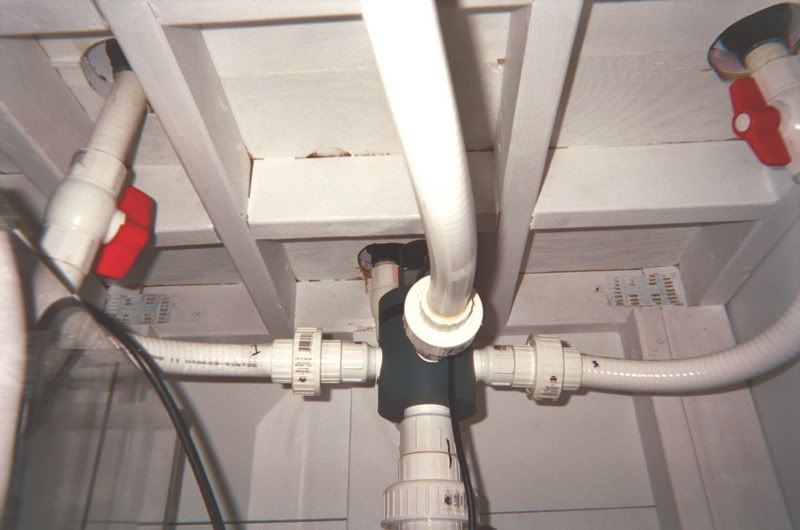 thats it for now...i will begin making RO/DI water this week and hopefully will be adding about 150 pounds of either fiji LR or Pukani LR, still havent decided. but before that, i have to get my electric straight. shouldnt be too bad, i had my electrician install (3) 20 amp GFCI outlets right behind the tank during house construction....only problem i foresee is where to put an auto top off bucket... |
|
|
|
|
12/20/2006, 02:44 PM
|
#9 |
|
Registered Member
Join Date: Sep 2003
Location: Downey, CA
Posts: 1,430
|
Wow. Very nice.
__________________
"Ok you Primitive Screwheads, listen up! You see this? This... is my BOOMSTICK! " -Army of Darkness |
|
|
|
|
12/20/2006, 02:45 PM
|
#10 |
|
Registered Member
Join Date: Apr 2001
Location: Holly Springs, NC
Posts: 1,703
|
thanks...it will be getting better shortly!
|
|
|
|
|
12/20/2006, 02:52 PM
|
#11 |
|
Registered Member
Join Date: Aug 2005
Location: Kansas
Posts: 1,534
|
Looking good, nice work!
__________________
GUNDO |
|
|
|
|
12/20/2006, 02:55 PM
|
#12 |
|
*Zoa Freak*
Join Date: Jun 2006
Location: Sioux City, IA
Posts: 752
|
Very nice! I'm staying with this thread!
 -Chris- |
|
|
|
|
12/20/2006, 02:57 PM
|
#13 |
|
Registered Member
Join Date: Sep 2006
Posts: 4
|
Very Impressive...Great Attention to detail and super clean looking...Only question: Closet looks a bit narrow: Would you have preferred it a bit wider?
|
|
|
|
|
12/20/2006, 02:58 PM
|
#14 |
|
Registered Member
Join Date: Apr 2001
Location: Holly Springs, NC
Posts: 1,703
|
i preferred it ALOT wider...the original plan was for a 48x48x30 tank with a closet, but once i laid it out on the floor it got vetoed by the boss..the final dimnsion ended up being 5 feet for the tank and closet.
|
|
|
|
|
12/20/2006, 03:38 PM
|
#15 |
|
Moved On
Join Date: Apr 2006
Location: TX
Posts: 1,643
|
what did you do with the old tank, and all the stuff in it?
|
|
|
|
|
12/20/2006, 04:06 PM
|
#16 |
|
Registered Member
Join Date: Apr 2001
Location: Holly Springs, NC
Posts: 1,703
|
sold it all to fund the new tank and equipment...i had to sell all the old stuff and get rid of the tank as the wife didnt want hte house on the market with a huge fishtank in the basement. so, there was about a 6 month lag from taking down my old tank, to having this one to where it is.
|
|
|
|
|
12/20/2006, 04:16 PM
|
#17 |
|
Moved On
Join Date: Apr 2006
Location: TX
Posts: 1,643
|
yikes, that sis a long time to go without having a fish tank, sorry to hear it, but at least your new one will have all that you want , and more! BTW, congrats on the new house and baby!
|
|
|
|
|
12/20/2006, 04:28 PM
|
#18 |
|
Registered Member
Join Date: Dec 2006
Location: North Miami, Fl
Posts: 38
|
That is going to be a beautiful tank! Be sure to keep us informed with updates!
|
|
|
|
|
12/20/2006, 06:49 PM
|
#19 |
|
Registered Member
Join Date: Apr 2001
Location: Holly Springs, NC
Posts: 1,703
|
i will try and update as soon as i get the LR in..maybe late next week.
|
|
|
|
|
12/21/2006, 09:43 AM
|
#20 |
|
Registered Member
Join Date: Mar 2005
Location: Stoneville, NC
Posts: 6,169
|
thats going to be an awesome tank. any chance to get a vid of the OM in action once the water is in there?
__________________
Never ask a girl over to see your crabs!! <-Tony-> Current Tank Info: NONE currently |
|
|
|
|
12/21/2006, 10:04 AM
|
#21 |
|
Registered Member
Join Date: Apr 2001
Location: Holly Springs, NC
Posts: 1,703
|
yeah, i had freshwater in it last week and it was like a tsunami in there. i can take a short video with my camera and post it next week most likey.
|
|
|
|
|
12/21/2006, 10:32 AM
|
#22 |
|
Registered Member
Join Date: Mar 2005
Location: Stoneville, NC
Posts: 6,169
|
that would be cool.
__________________
Never ask a girl over to see your crabs!! <-Tony-> Current Tank Info: NONE currently |
|
|
|
|
01/05/2007, 10:14 PM
|
#23 |
|
Registered Member
Join Date: Apr 2001
Location: Holly Springs, NC
Posts: 1,703
|
well, its update time...i was finally able to get my lights working, live rock is in, and its all running. i added 140 pounds of pukani LR that i purchased from kevin at downunder in garner. lighting currently consists of 2 400W DE icecap pendants with 10k krystal star bulbs on icecap ballasts. i am planning to add 300 W of vho actinic in the coming weeks. as for the aquascaping, i was trying to creat a few swimming channels down low as well as show the depth of the tank. i especially like the tall pillar, just stacked rock, no dowels. its very stable. i know the tank is a bit dirty, but i havent bought a magnet good on acrylic yet. so..on to the pics
i have everything running into 2 of these american DJ strips. first time i ever used them, gotta say, i love them 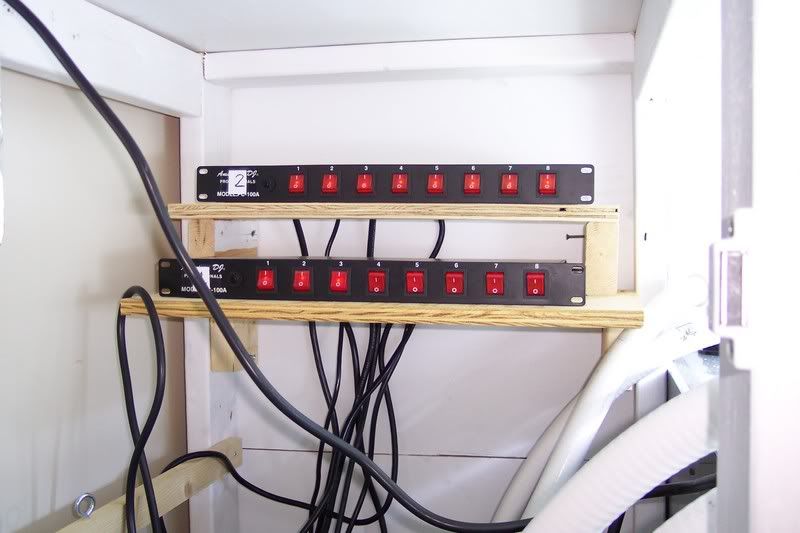 heres a front view of the tank 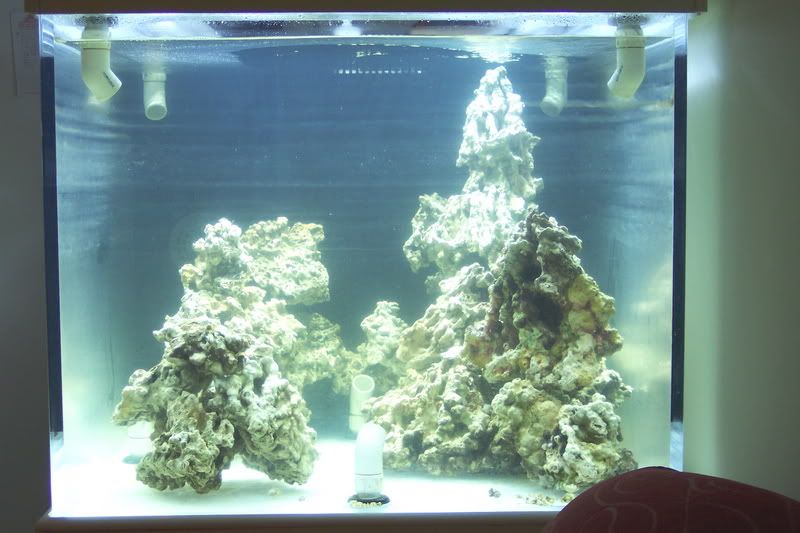 and the side view 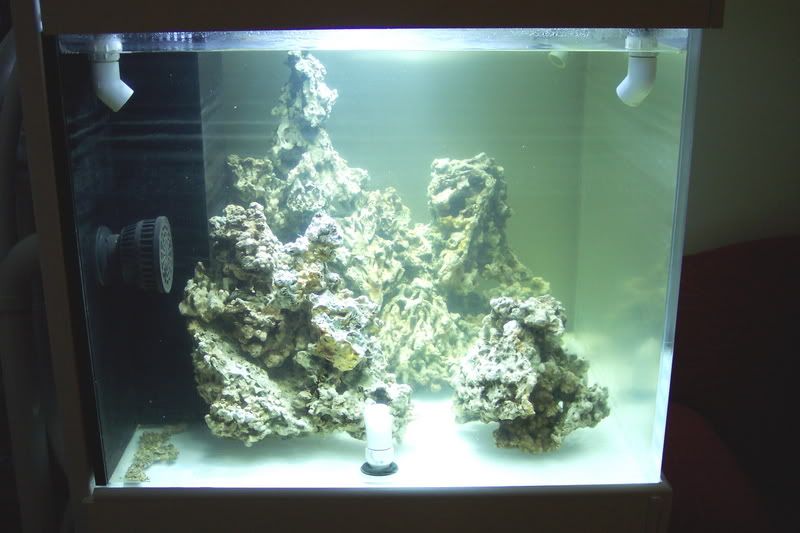 and for those who asked, a short quick time movie of the OM in action 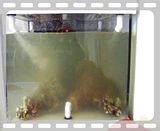 any comments, questions and suggestions are always welcomed! -mike |
|
|
|
|
01/05/2007, 10:21 PM
|
#24 |
|
Registered Member
Join Date: Mar 2005
Location: Stoneville, NC
Posts: 6,169
|
sweet!!
__________________
Never ask a girl over to see your crabs!! <-Tony-> Current Tank Info: NONE currently |
|
|
|
|
01/05/2007, 10:26 PM
|
#25 |
|
Registered Member
Join Date: Feb 2006
Location: Dutchess County, New York
Posts: 1,377
|
Looking real good. Nice, clean setup.
__________________
Red House=My 90 build. Matt. Current Tank Info: 90 rebuild |
|
|
|
 |
|
|


