
|
|
 05/23/2012, 11:55 AM
|
#1 |
|
Registered Member
 Join Date: Sep 2009
Location: Brighton, MI
Posts: 1,230
|
CSQ Variable-PAR Frag Rack
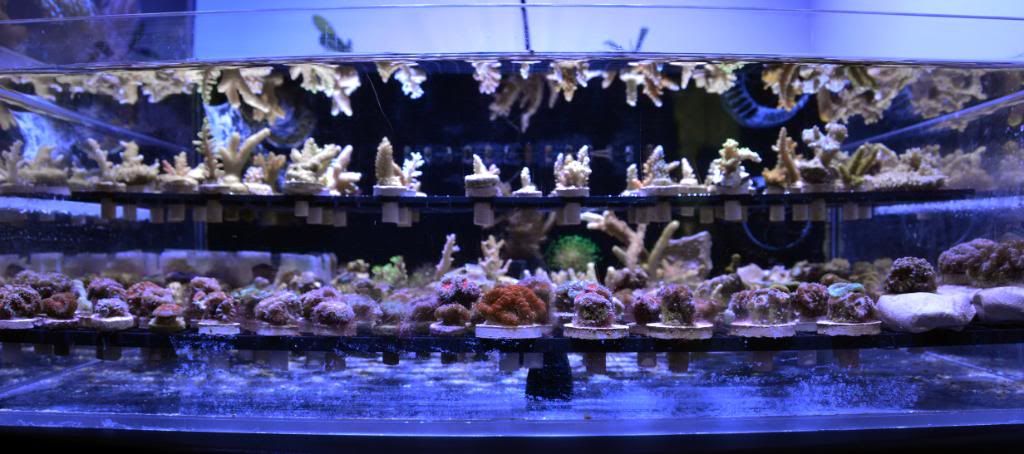
I converted my tanks over to LEDs about ~3 years ago. Since that time, I've faced a challenge maintaining both light loving SPS and lower light LPS and softies within a single, shallow Frag tank. Normally, in a deeper tank, lower light corals are placed toward the bottom of the tank and the top, higher PAR areas are used for SPS. In a shallow Frag tank, this option is not available. This is compounded by the fact LEDs are very good are producing and delivering very large amounts of PAR to depth.
Some PAR variability is possible by placing lower light corals along the perimeter of the tank, but depending on the size and type of lighting used, this may still not provide enough range. You can vary the height of the fixture above the tank, or lessen the PAR output through dimming or in the case of T5s, turning off certain tubes, but this lowers the PAR at the top of the tank as well. I came up with a very simply, DIY solution. First let me apologize for the poor quality photos. I had left my DSLR at my office and had to use my cell. Although I really like the Galaxy Nexus, the camera leaves much to be desired. This is a shot of my tanks prior to the new racks. The DT is a 24"X20"X20" Cadlights and the FT is a 24"X20"X8" Advanced Acrylic sharing a common sump. The DT is lit by AI LEDs. The FT uses a MaxSpect G-2 160. 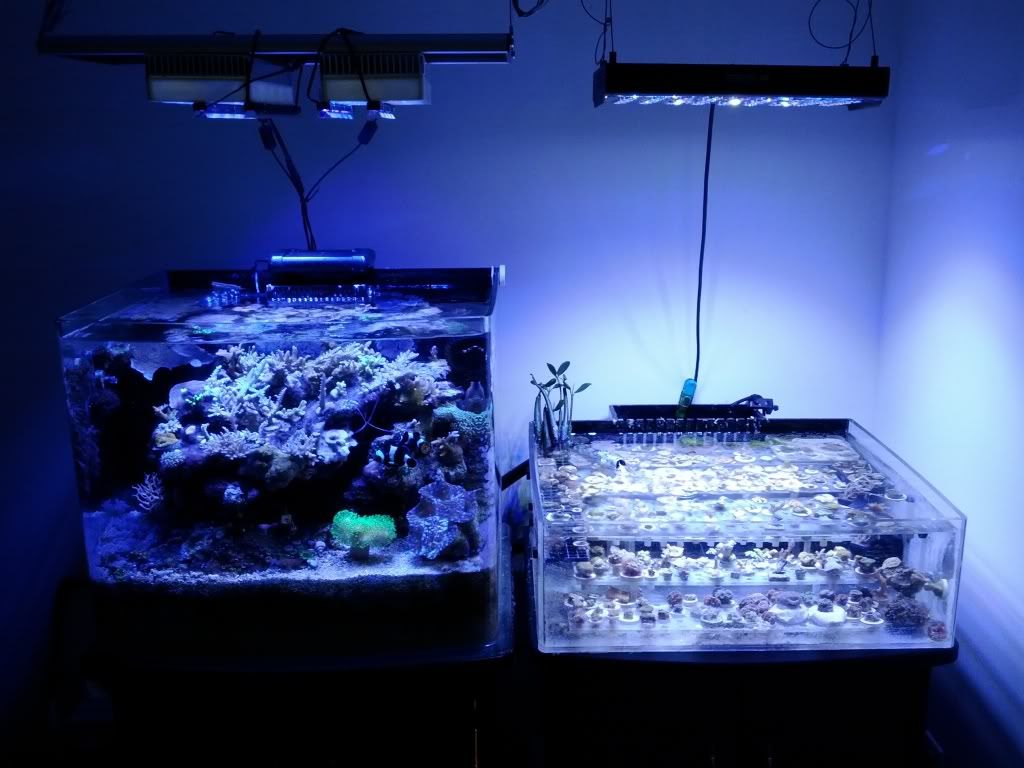 I've been using Blue Glow frag racks which are very well designed and built, but don't offer the ability to vary PAR as much as I wanted. To complicate matters, my Frag tank holds about 240 individual ***s (I had to add 3 magnetic Frag racks to hold everything) so the racking system had to be very space-efficient. 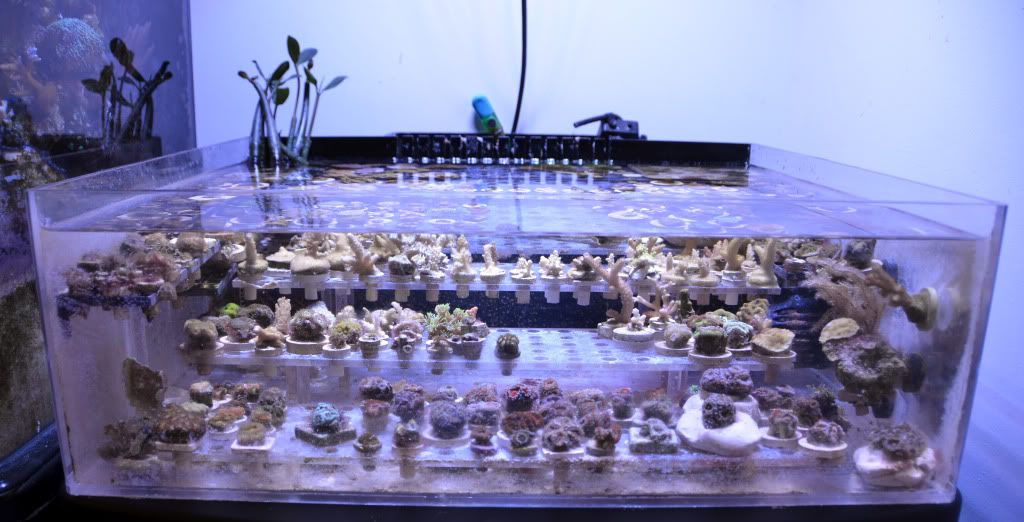 I removed the existing Blue Glow and magnetic racks and installed 1/4" square acrylic rails along both sides of the tank using Cyanocrylate. The rails were placed at 1 1/2" and 4 1/2" above the bottom of the tank. 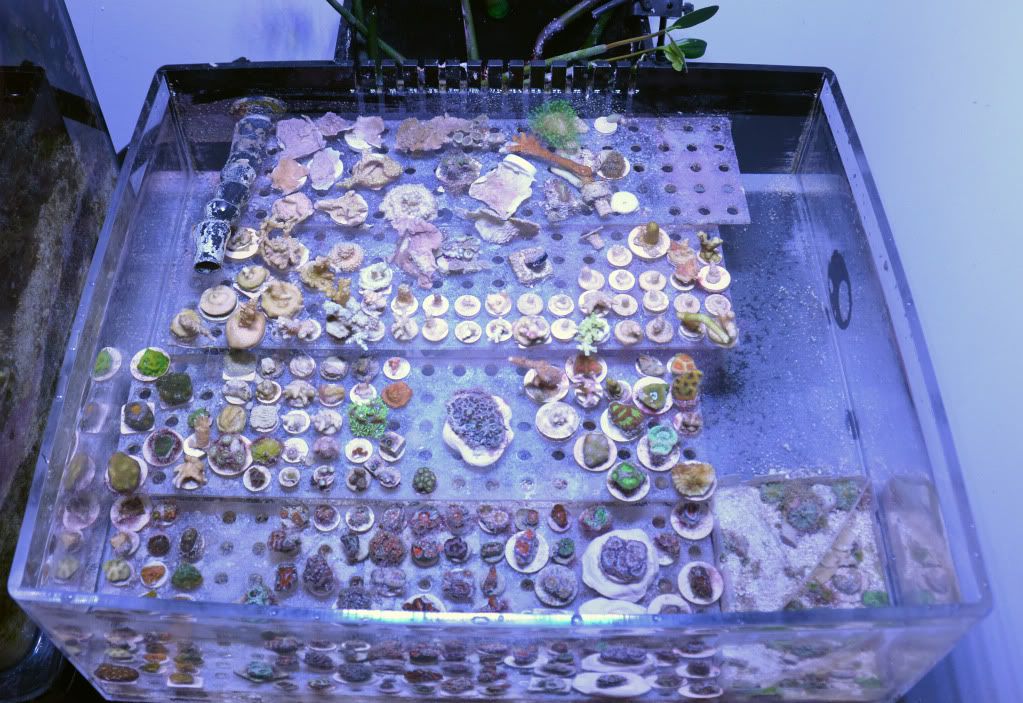 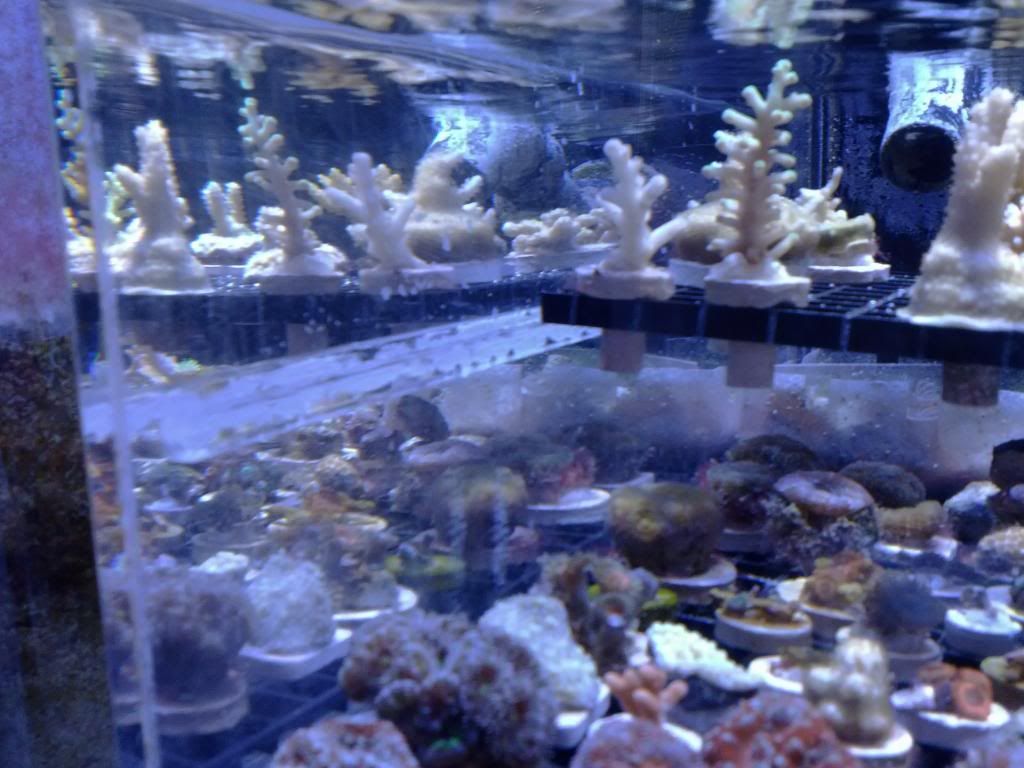 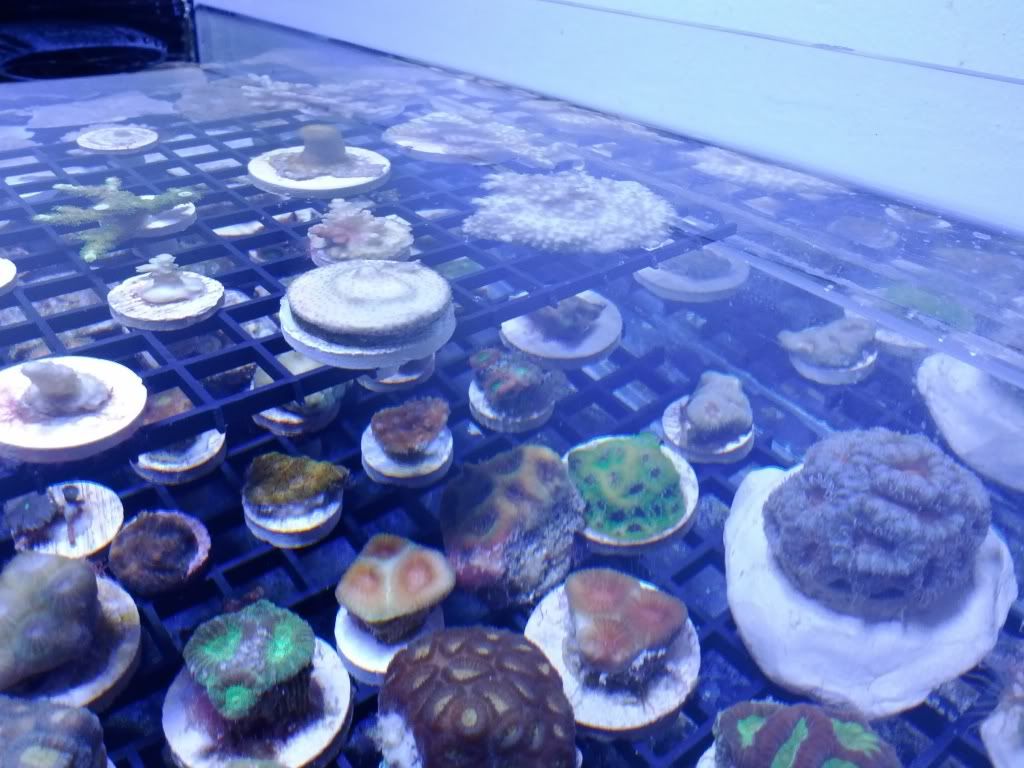 I then cut black egg-crate so that it would rest on the rails... 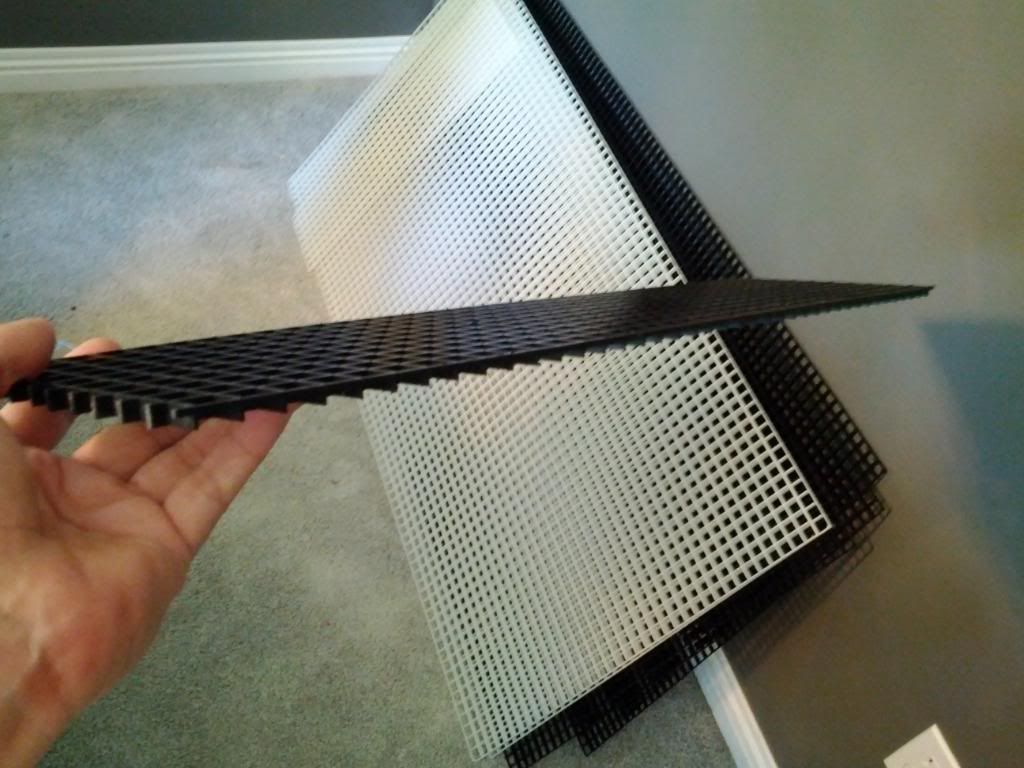 I divided the bottom section into 3 pieces, each 6" in depth for ease of removal and cleaning. The top "shelf" was fashioned from a single 6" egg-crate section allowing room for it to slide back and for to adjust the PAR/shading for the lower light corals placed below the top shelf. The ability to move the shelf also provides easy access to Frags on the lower level. Further PAR fine tuning is done by varying the number, size and placement of Frag (or empty Frag plugs if desired) in the top shelf. I fashioned small pylons to support the bottom shelves as they bow under the weight of many Frag plugs and corals... 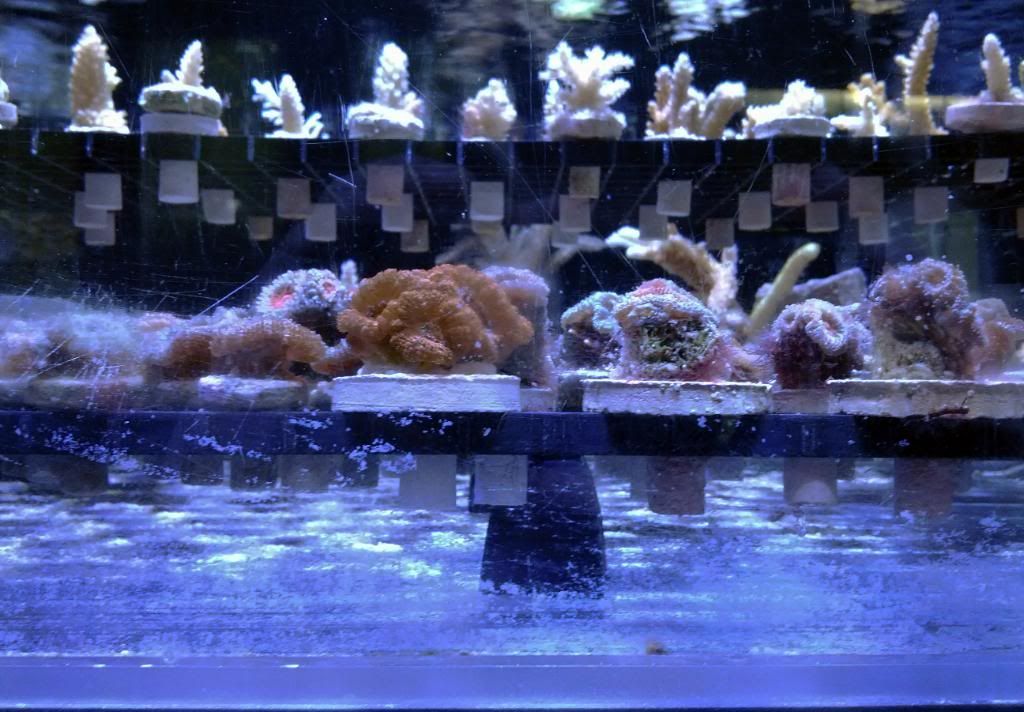 The top shelf bows slightly, but not enough to warrant additional supports as they contain far fewer corals and smaller plugs to allow light to reach the corals on the lower level. 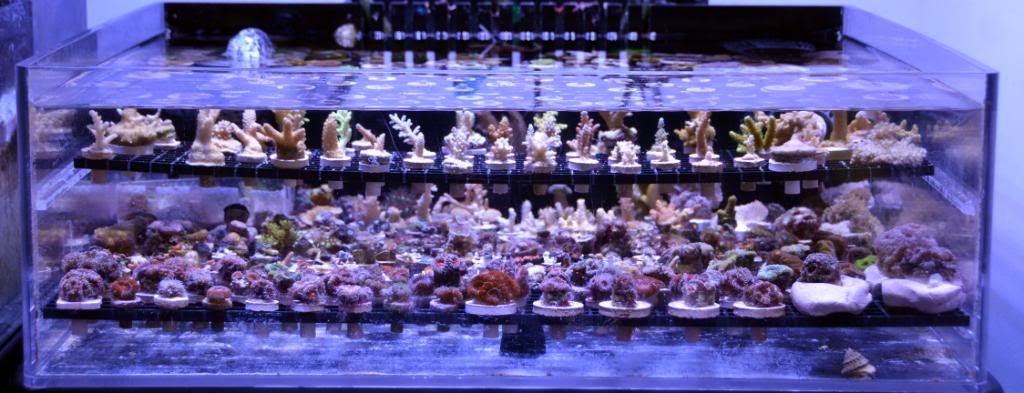  This has only been in place for a day, but I'm already seeing benefits,
Ultimately time will tell, but thus far I'm very excited about the results.
__________________
-Tom The reasonable man adapts himself to the world; the unreasonable one persists in trying to adapt the world to himself. Therefore, all progress depends on the unreasonable man. - George Bernard Shaw Current Tank Info: 96X30" 270Gal, Kessil 360WEs, BK250 Double Cone, 400 gal ASW station with continuous water change |

|

|
|
05/23/2012, 08:06 PM
|
#2 |
|
Registered Member
Join Date: May 2012
Posts: 3
|
I like it
It looks very good. Thanks for the good ideas
|
|
|
|
|
05/24/2012, 06:10 AM
|
#3 |
|
Registered Member
Join Date: May 2006
Location: Streamwood,IL
Posts: 677
|
looks preety cool, i love ur setu , i was readin your other thread couple days ago!
when we will move i will run a frag tank of the same sump also!
__________________
48x36x20h tank & 40x20x16h Sump - NanoSeaCreations 2x MP40 Quiet Drives, SKIMZ SM161 , Water Blaster HY-7000 Return ATI T5/LED 48"Powermodule, Apex with all the goodies,2 BRS Reactors |
|
|
|
|
05/24/2012, 06:51 AM
|
#4 | ||
|
Registered Member
Join Date: Sep 2009
Location: Brighton, MI
Posts: 1,230
|
Quote:
Quote:
 I'm very pleased with the additional control and modularity this provides. Now I have the ability to more closely match the ideal environment of each coral type i.e. Many Acros residing top-center basking in high PAR and flow while providing partial shade for the lower-light loving Zoanthid and Palythoa directly below. Before this, I was able to fully accommodate only one those, so both ended up having to compromise. I've ordered heavier, 1/2" black egg-crate to eliminate (or at least minimize) the bowing in the top shelf which will also be slightly increased in size. I believe the additional thickness will also provide more stability for taller SPS Frags in the higher flow areas. So far, So good
__________________
-Tom The reasonable man adapts himself to the world; the unreasonable one persists in trying to adapt the world to himself. Therefore, all progress depends on the unreasonable man. - George Bernard Shaw Current Tank Info: 96X30" 270Gal, Kessil 360WEs, BK250 Double Cone, 400 gal ASW station with continuous water change |
||
|
|
|
|
05/24/2012, 09:17 AM
|
#5 |
|
Registered Member
Join Date: Sep 2009
Location: Brighton, MI
Posts: 1,230
|
A few photos that demonstrate why I'm so pleased with the results...
 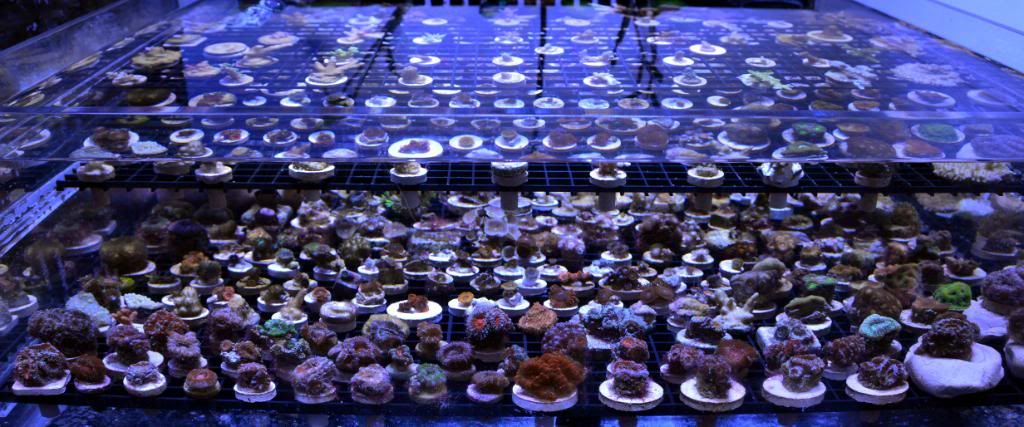 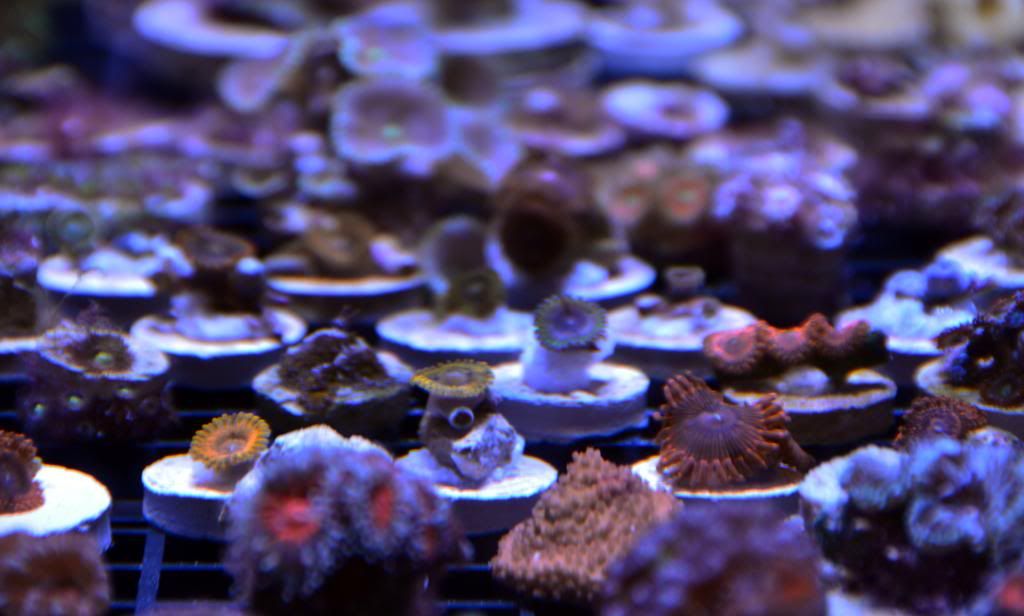 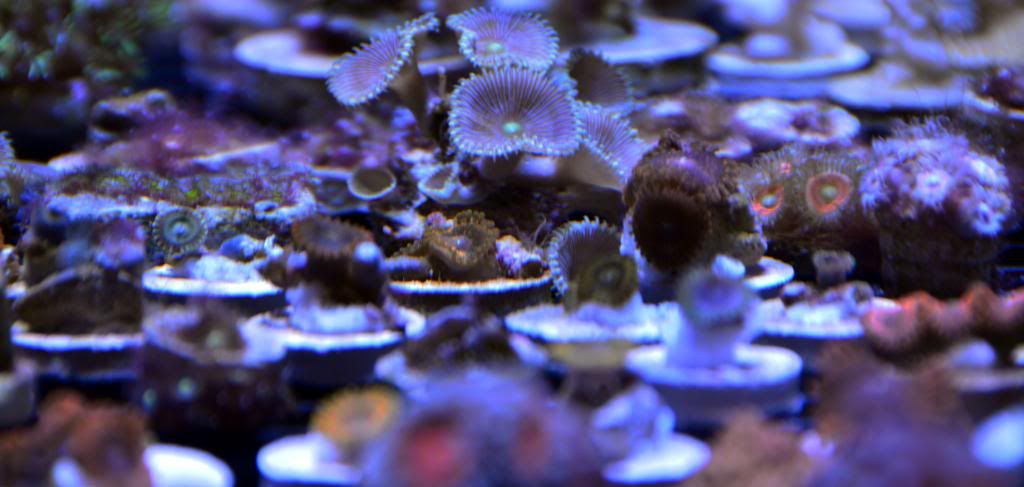 These SPS, Zoas and Palys are occupying virtually the same horizontal space within the Frag tank... 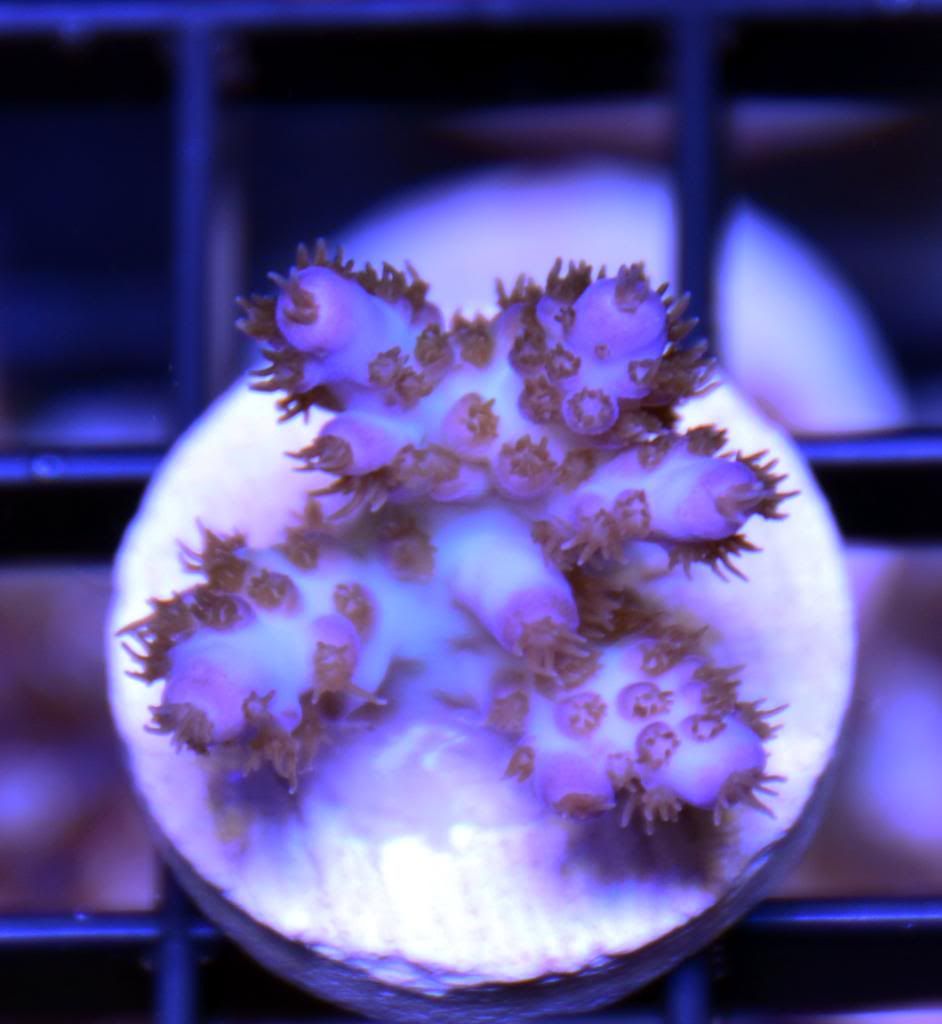 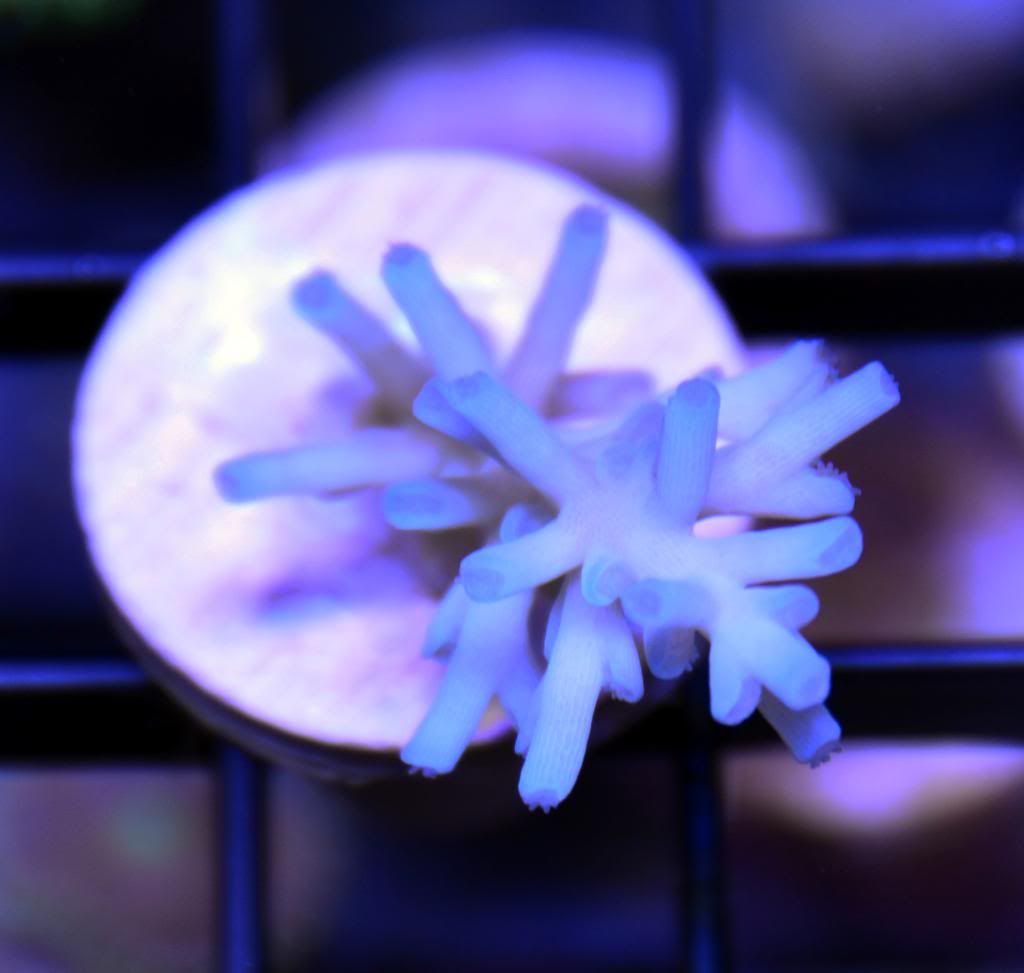 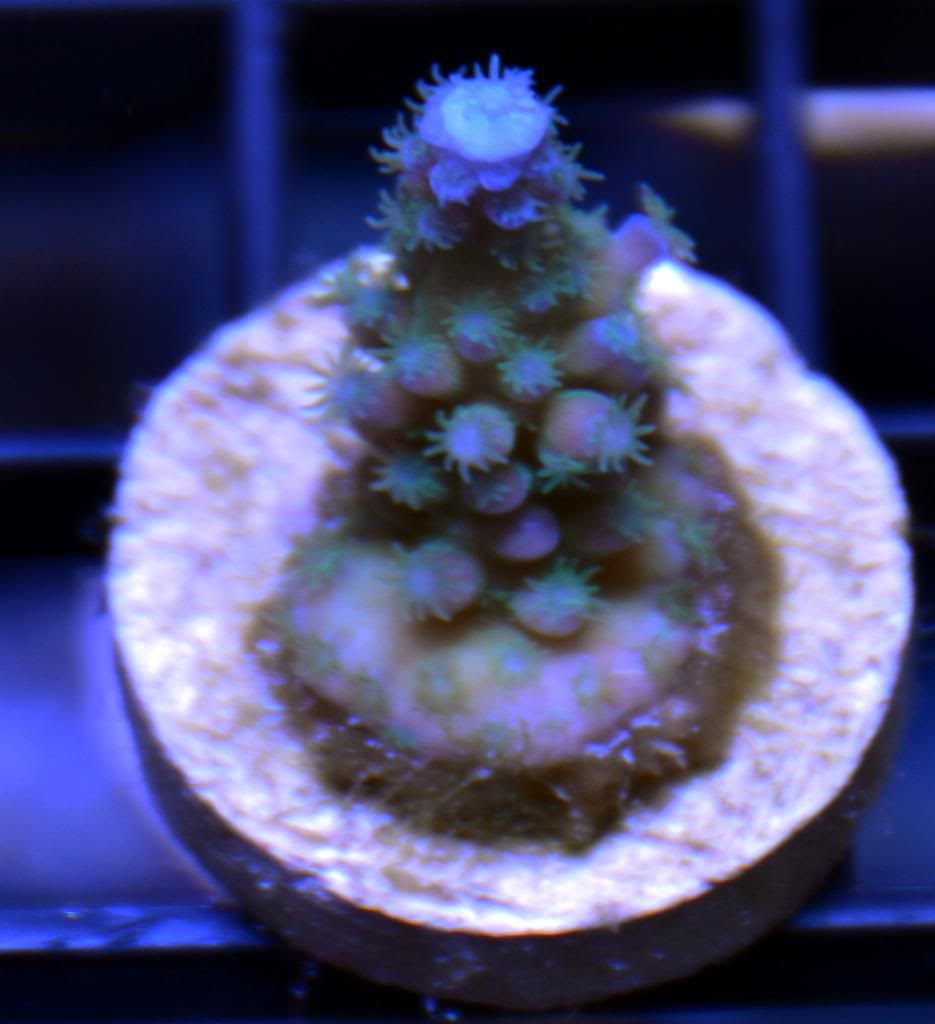 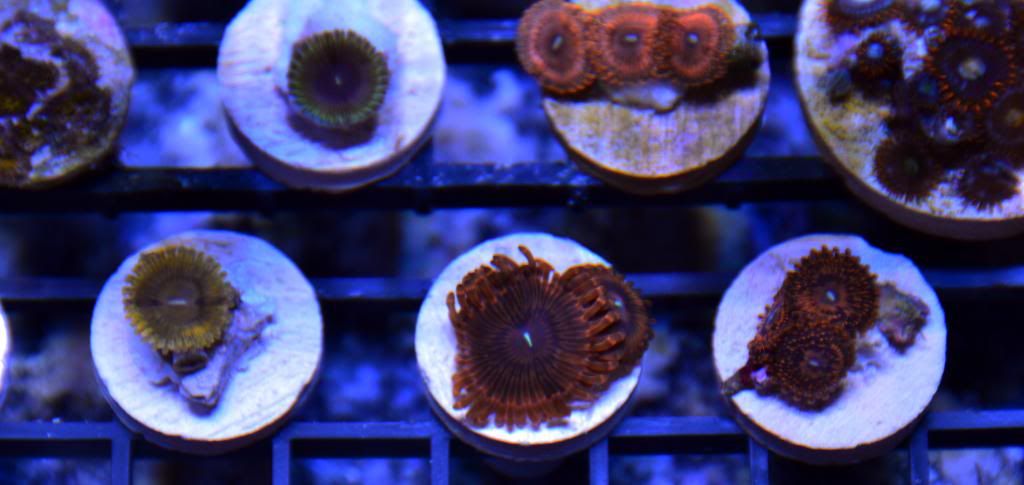 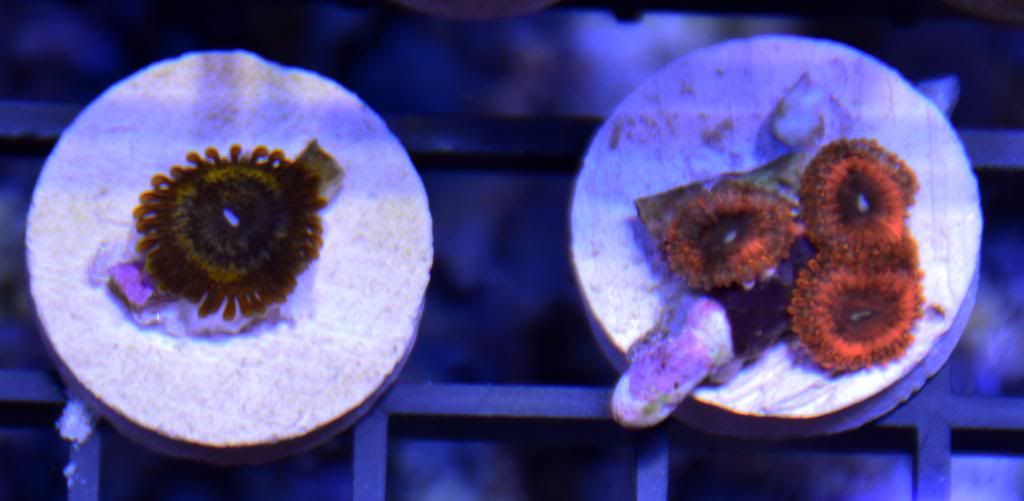 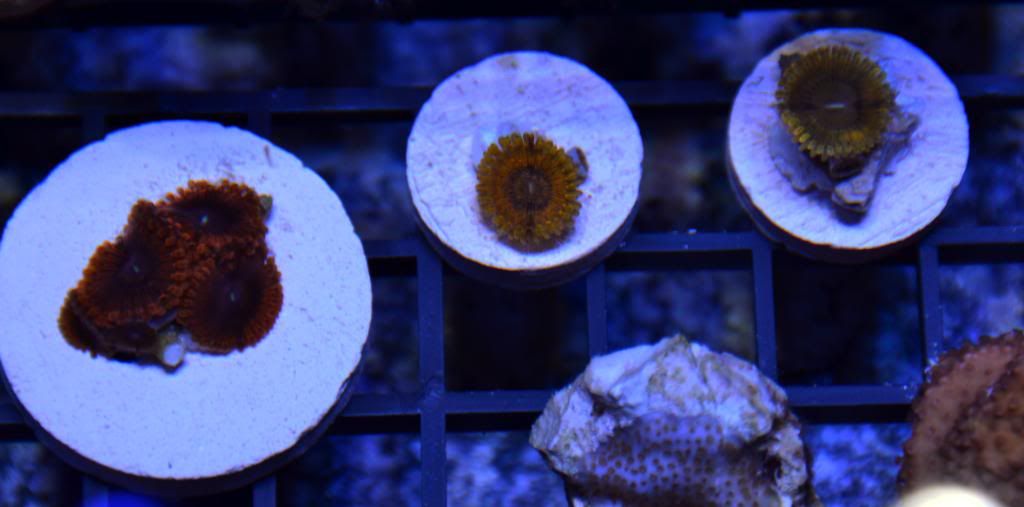
__________________
-Tom The reasonable man adapts himself to the world; the unreasonable one persists in trying to adapt the world to himself. Therefore, all progress depends on the unreasonable man. - George Bernard Shaw Current Tank Info: 96X30" 270Gal, Kessil 360WEs, BK250 Double Cone, 400 gal ASW station with continuous water change |
|
|
|
|
05/24/2012, 11:39 AM
|
#6 |
|
Registered Member
Join Date: Apr 2011
Location: Pittsburgh
Posts: 2,174
|
You, my friend, have impeccable timing. I just bought my frag tank and was trying to decide how I was going to design my racks for just this purpose. Thanks for saving me some work.
__________________
Jer Current Tank Info: 40b basement sump, 40b refugium, 30g frag |
|
|
|
|
05/24/2012, 07:42 PM
|
#7 | |
|
Registered Member
Join Date: Sep 2009
Location: Brighton, MI
Posts: 1,230
|
Quote:
A few other thoughts...
Good luck and post pictures!
__________________
-Tom The reasonable man adapts himself to the world; the unreasonable one persists in trying to adapt the world to himself. Therefore, all progress depends on the unreasonable man. - George Bernard Shaw Current Tank Info: 96X30" 270Gal, Kessil 360WEs, BK250 Double Cone, 400 gal ASW station with continuous water change |
|
|
|
|
 |
| Tags |
| csq, frag rack, frag tank, par |
|
|


