
|
|
|
|||||||
 |
| Thread Tools |
 03/12/2008, 07:34 PM
|
#26 |
|
Registered Member
Join Date: Dec 2005
Posts: 477
|
This is going to be a great build, judging by the DIY skills I can see!
__________________
Ignore the smoke and smile... |

|

|
|
03/12/2008, 08:11 PM
|
#27 |
|
Registered Member
 Join Date: Dec 2003
Location: Denver, Colorado
Posts: 9,579
|
Thanks so much everyone.
Please stay tuned, as I am just getting going!!
__________________
Make it a Great Day!!!! Current Tank Info: 60 gal SPS cube, with 25 gal refugium, 400W MH, DIY Lumenarc III, DIY skimmer, DIY stand and canopy. 40 breeder LPS with 40 gallon sump, DIY stand, 250W MH |
|
|
|
|
03/12/2008, 11:05 PM
|
#28 |
|
Registered Member
Join Date: Dec 2003
Location: Denver, Colorado
Posts: 9,579
|
This is the clear I used:
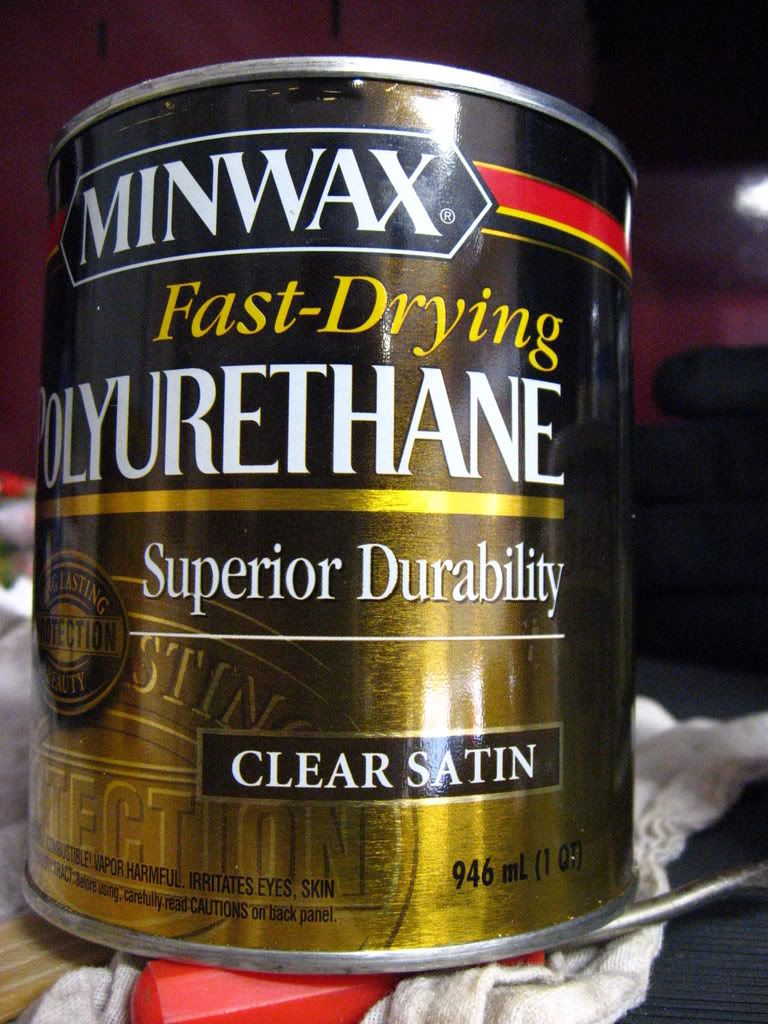 Stain and clear together 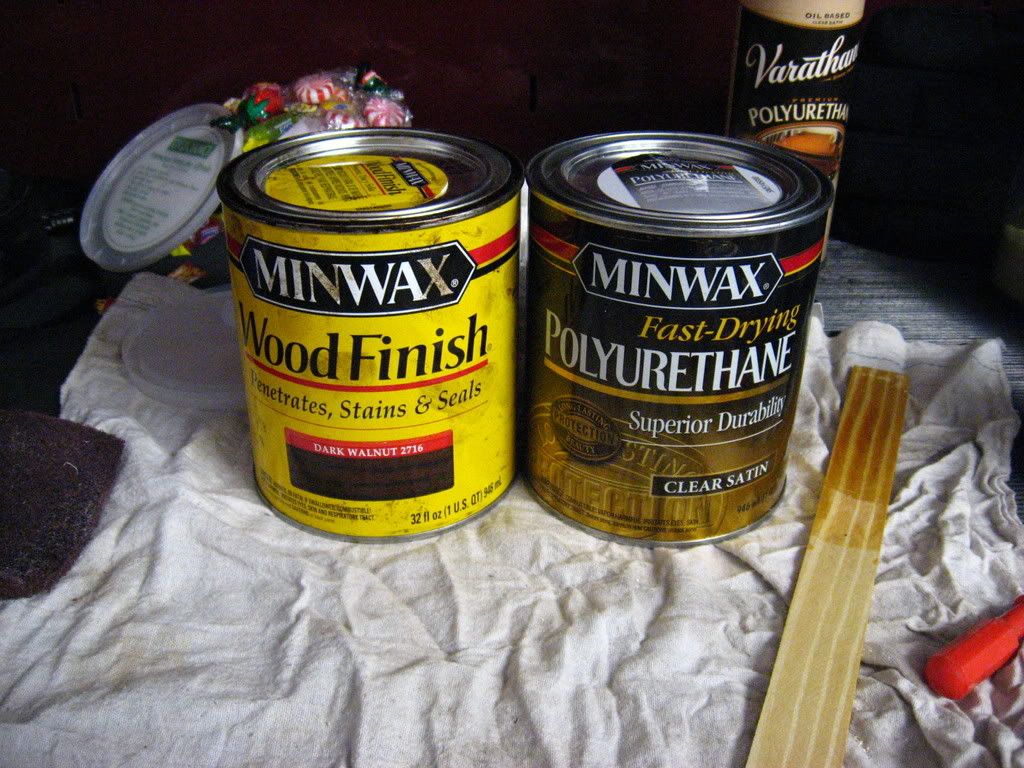
__________________
Make it a Great Day!!!! Current Tank Info: 60 gal SPS cube, with 25 gal refugium, 400W MH, DIY Lumenarc III, DIY skimmer, DIY stand and canopy. 40 breeder LPS with 40 gallon sump, DIY stand, 250W MH |
|
|
|
|
03/16/2008, 08:05 PM
|
#29 |
|
Registered Member
Join Date: Dec 2003
Location: Denver, Colorado
Posts: 9,579
|
Ok, I've made some progress this week. Sorry I havn't had time to update.
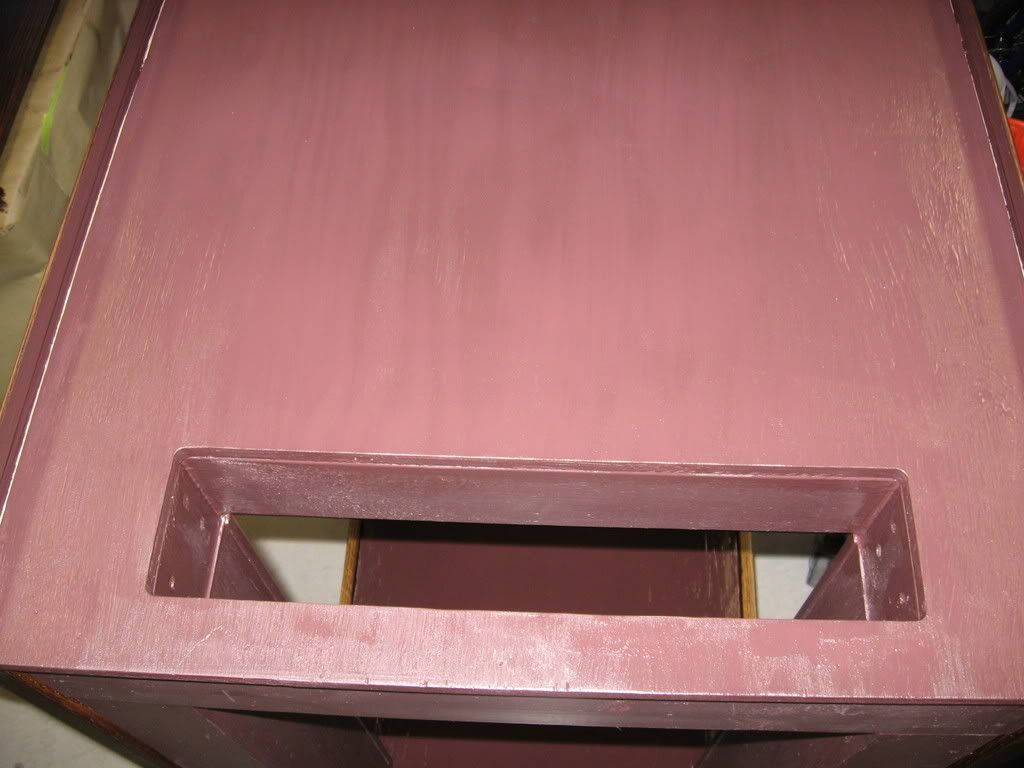
Here is the stand with the fourth coat of clear on it. I did some touch ups on the inside where it needed. I recoated the bottom, for some extra protection. 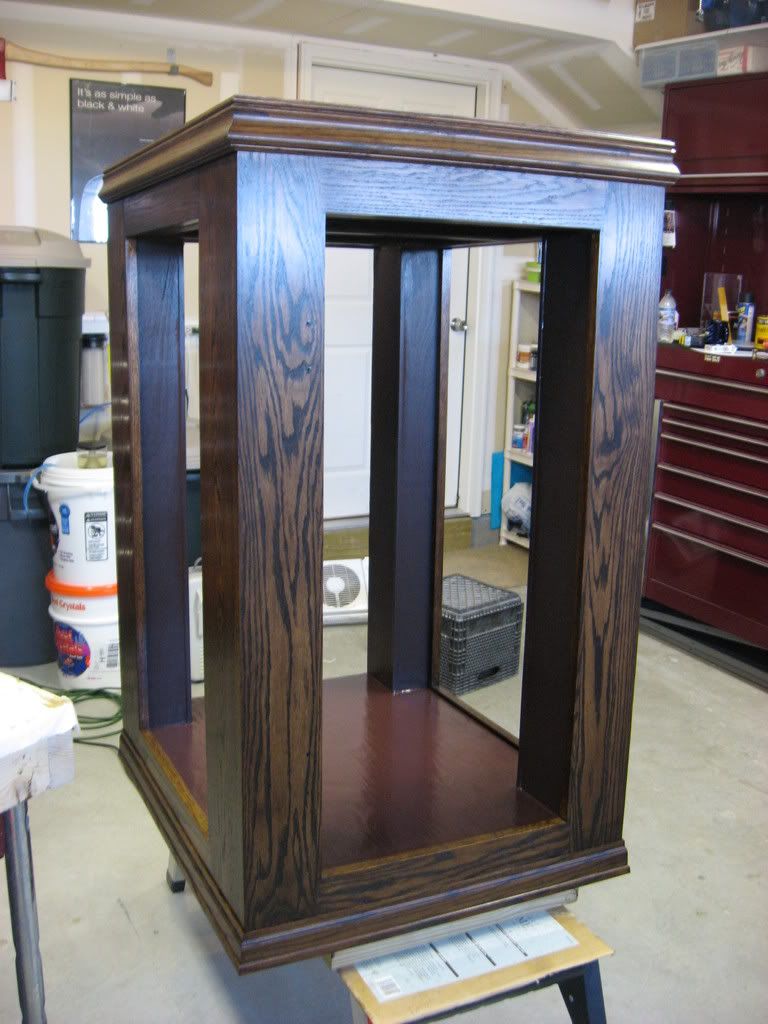 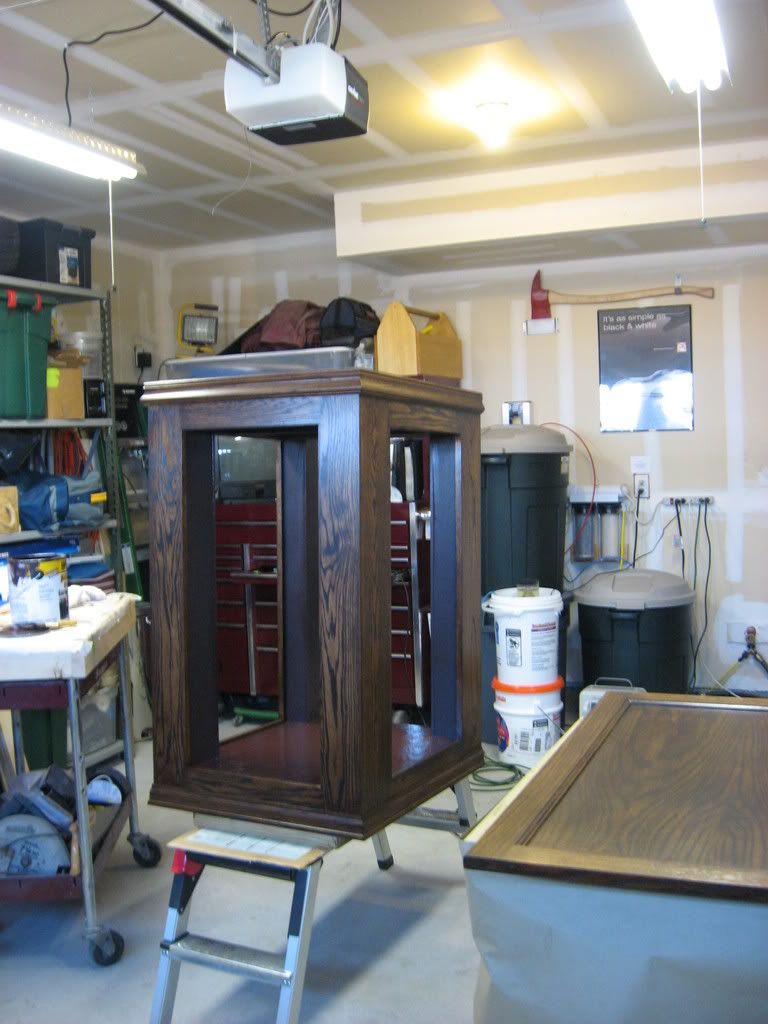 Here is the top. I needed to make an opening for all the plumbing and wires I drilled a 9/16" hole. 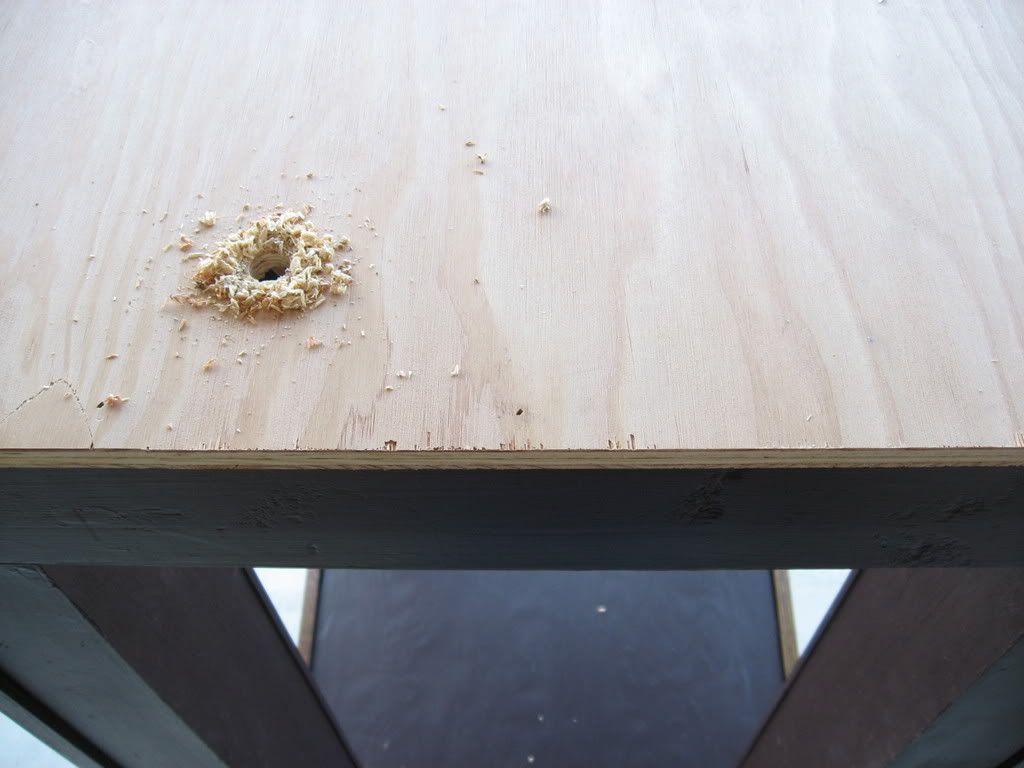 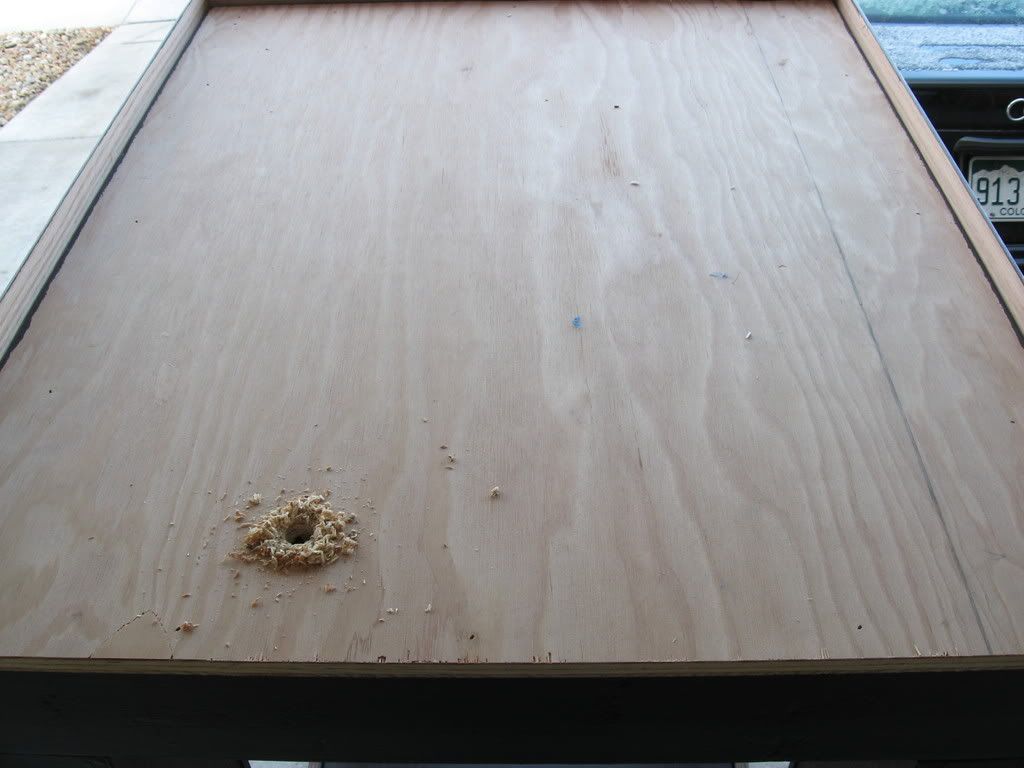 I set up the router with a 1/2" flush mount bit. Dropped it in the hole, and went to town. 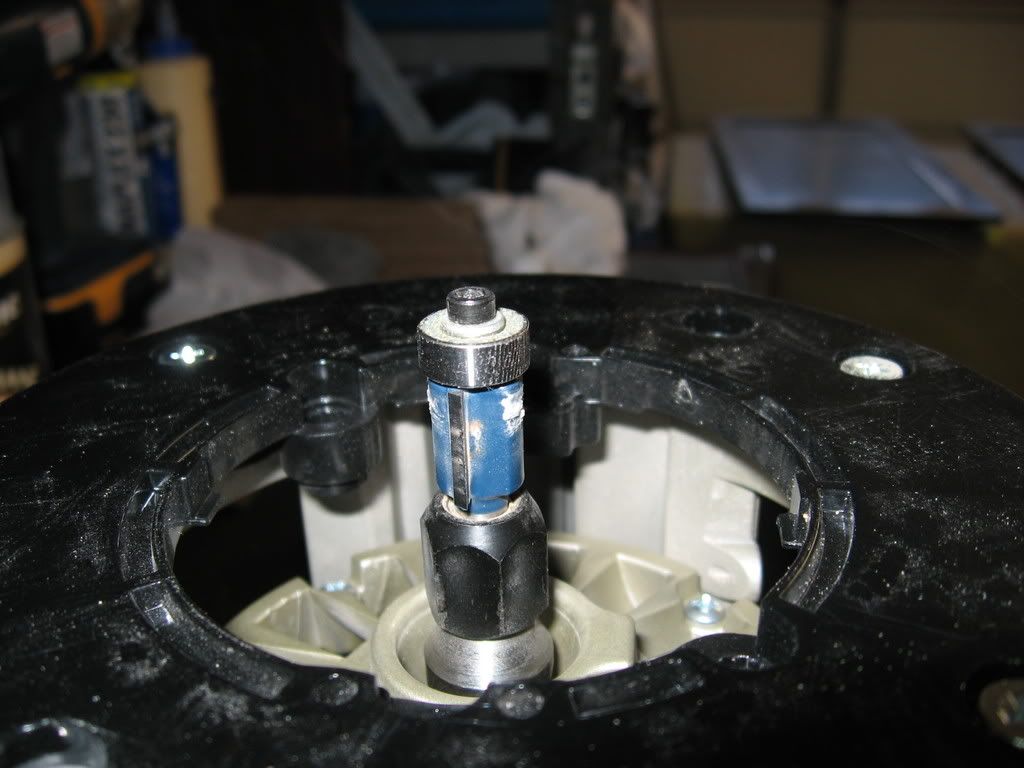 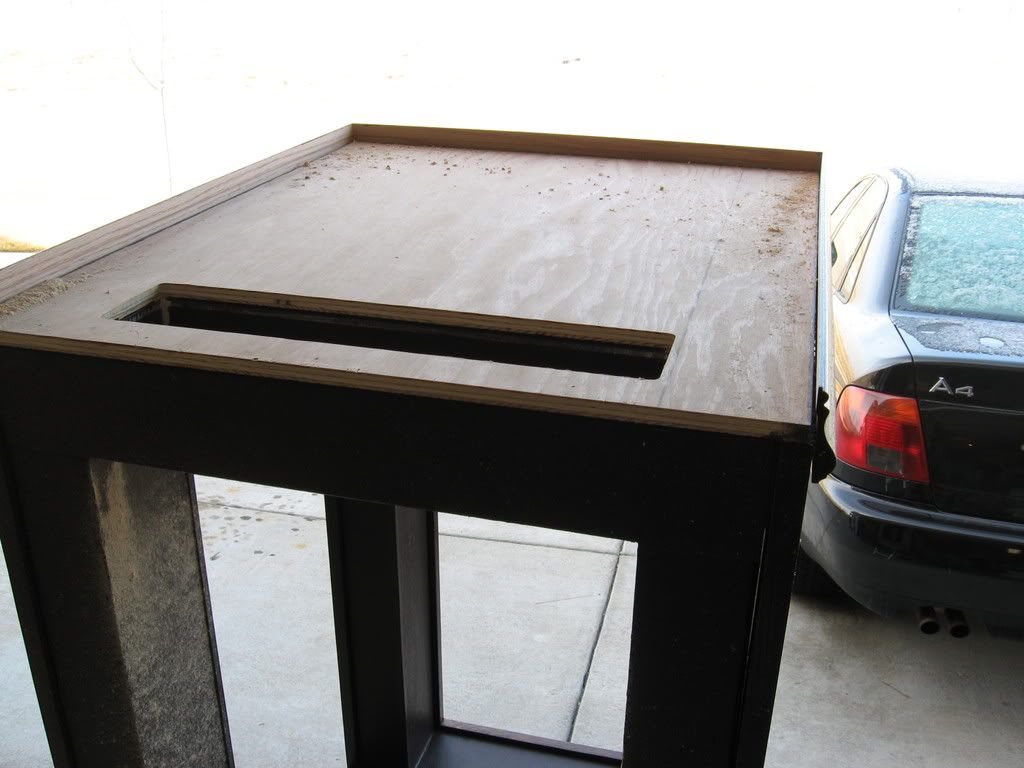 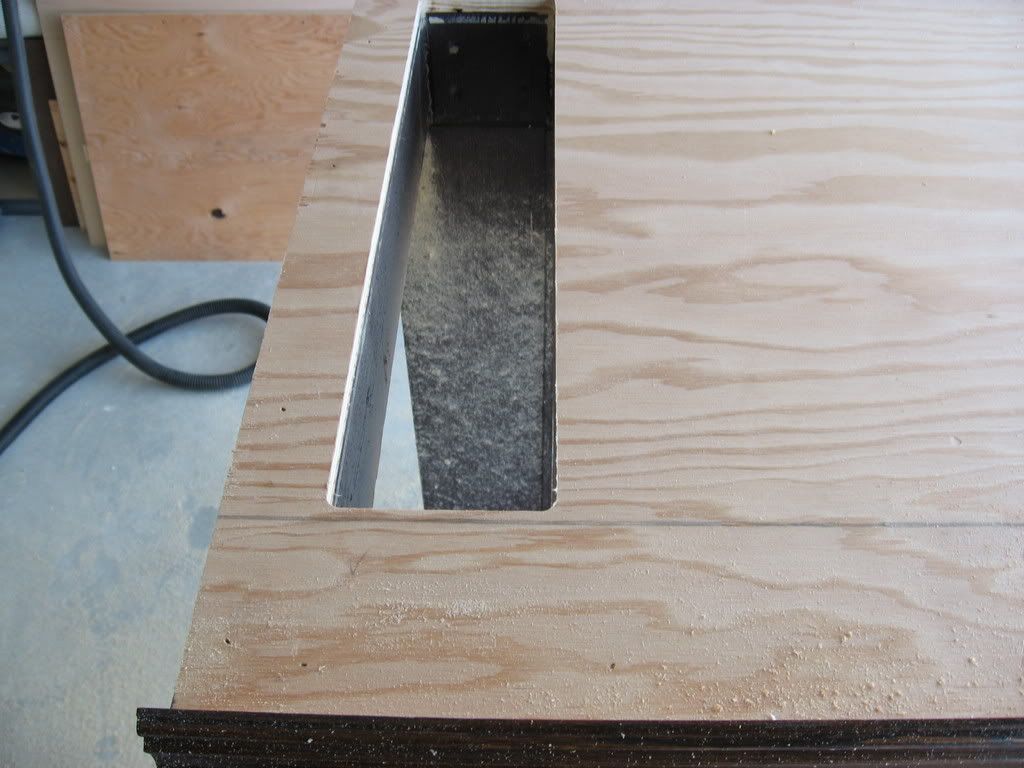 Lookin up.... 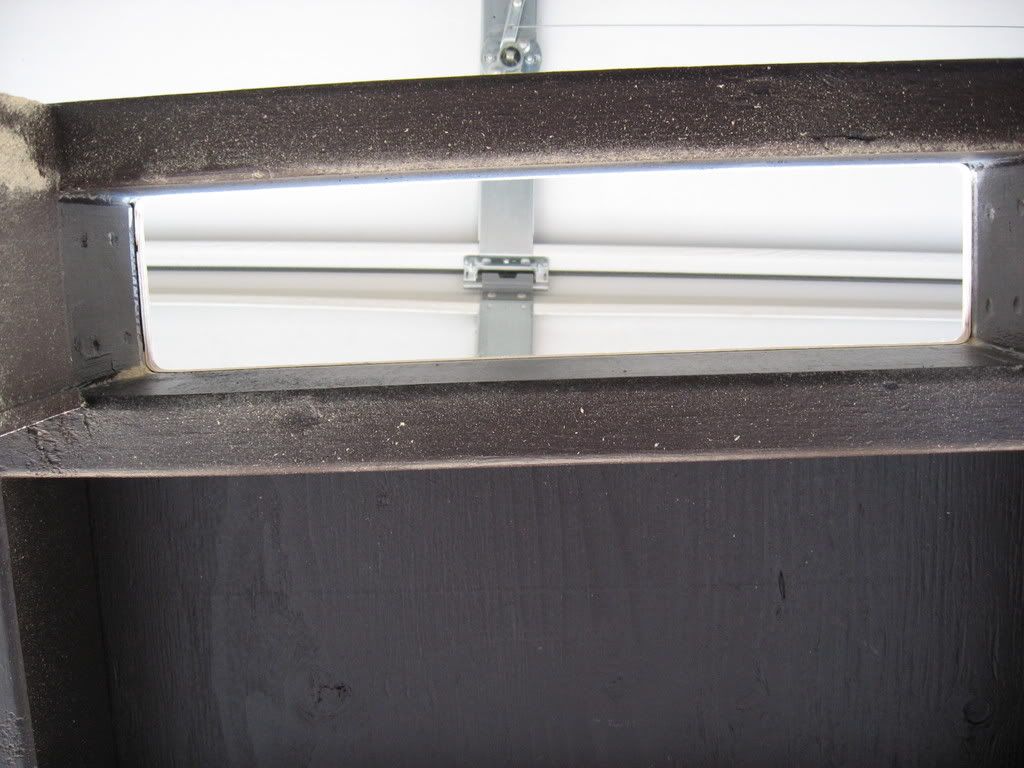
__________________
Make it a Great Day!!!! Current Tank Info: 60 gal SPS cube, with 25 gal refugium, 400W MH, DIY Lumenarc III, DIY skimmer, DIY stand and canopy. 40 breeder LPS with 40 gallon sump, DIY stand, 250W MH |
|
|
|
|
03/16/2008, 08:09 PM
|
#30 |
|
Registered Member
Join Date: May 2005
Location: Never,Never Land
Posts: 7,061
|
Super job man.
__________________
We the few have done so much,for so long,for so little.That we are now qualified to do anything with nothing. ____________________________________________________________________________ Current Tank Info: RR 90 Maganvore sump,250w Hamilton fixture,VorTec's ASM skimmer. |
|
|
|
|
03/16/2008, 08:15 PM
|
#31 |
|
Registered Member
Join Date: Dec 2003
Location: Denver, Colorado
Posts: 9,579
|
I then gave it a little sanding, and softened up the edges. Then coated the top.
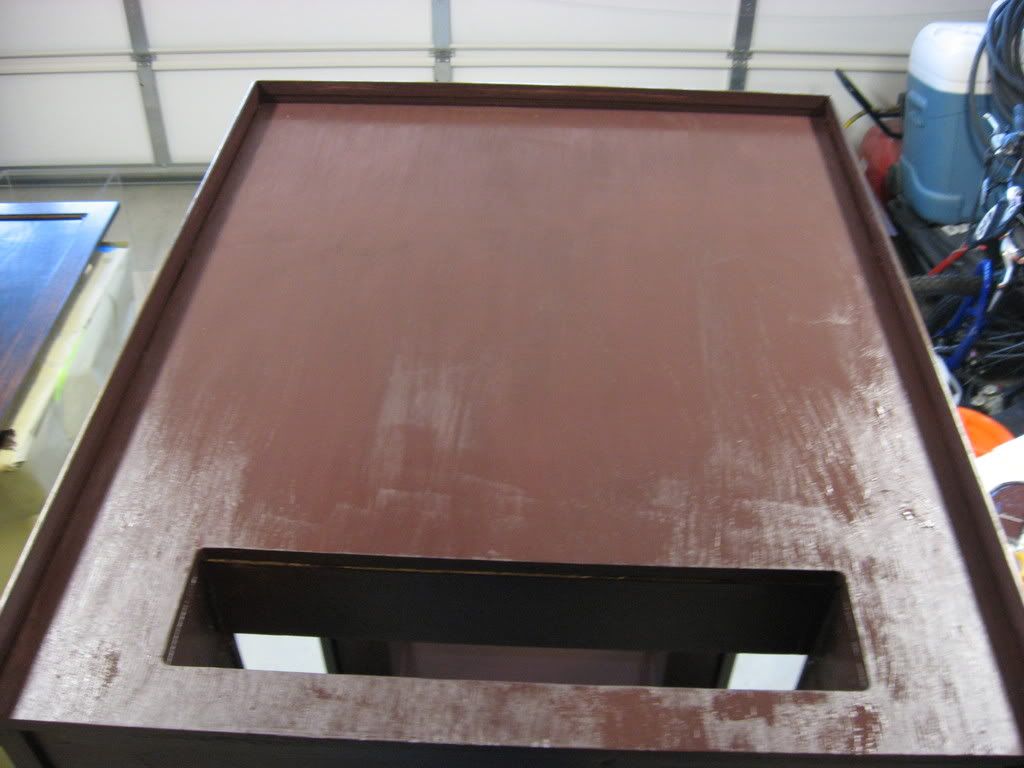 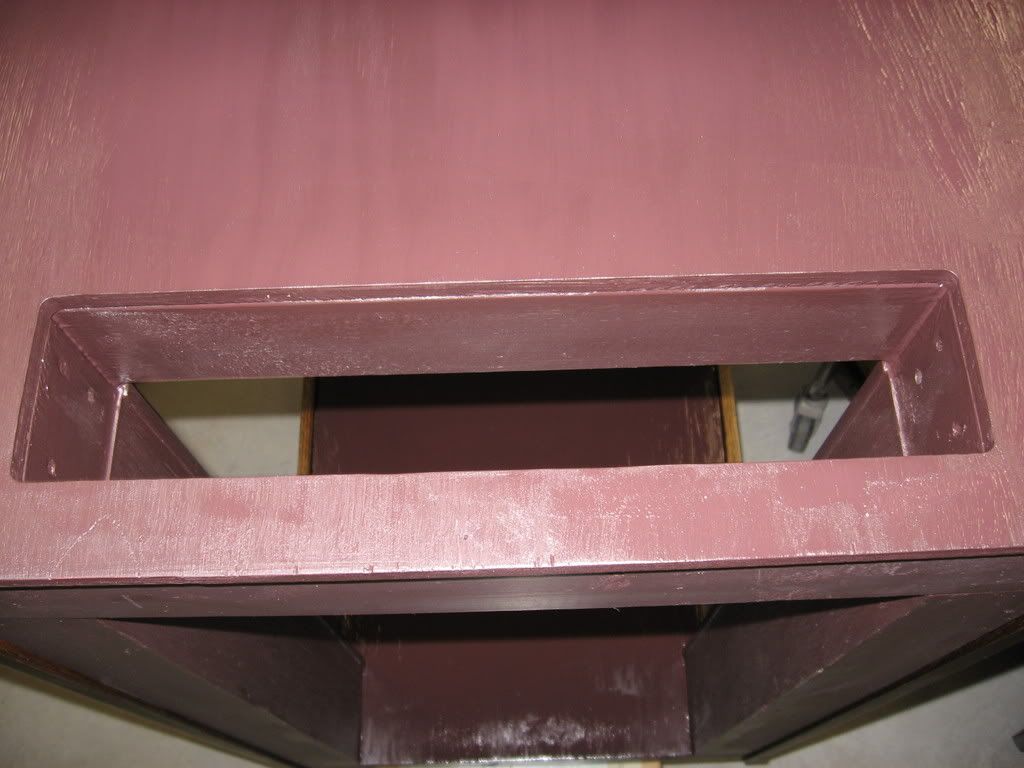  Here is the back panel, I gave it a little scuff also. 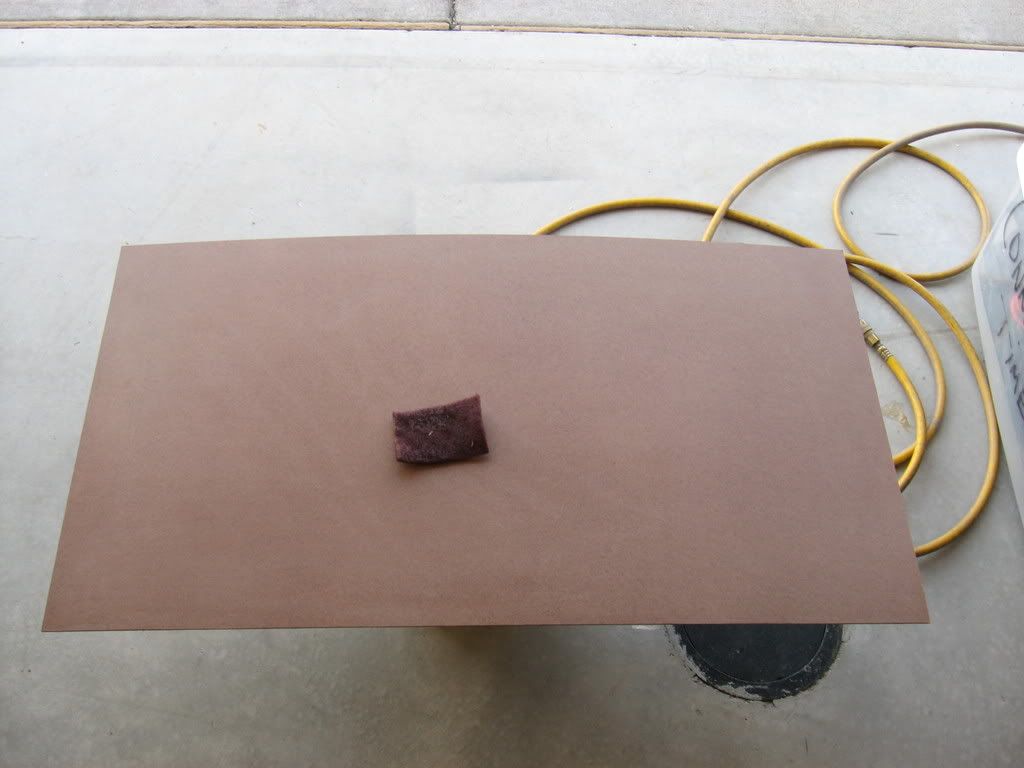 I used a 3M red scotch brite pad. 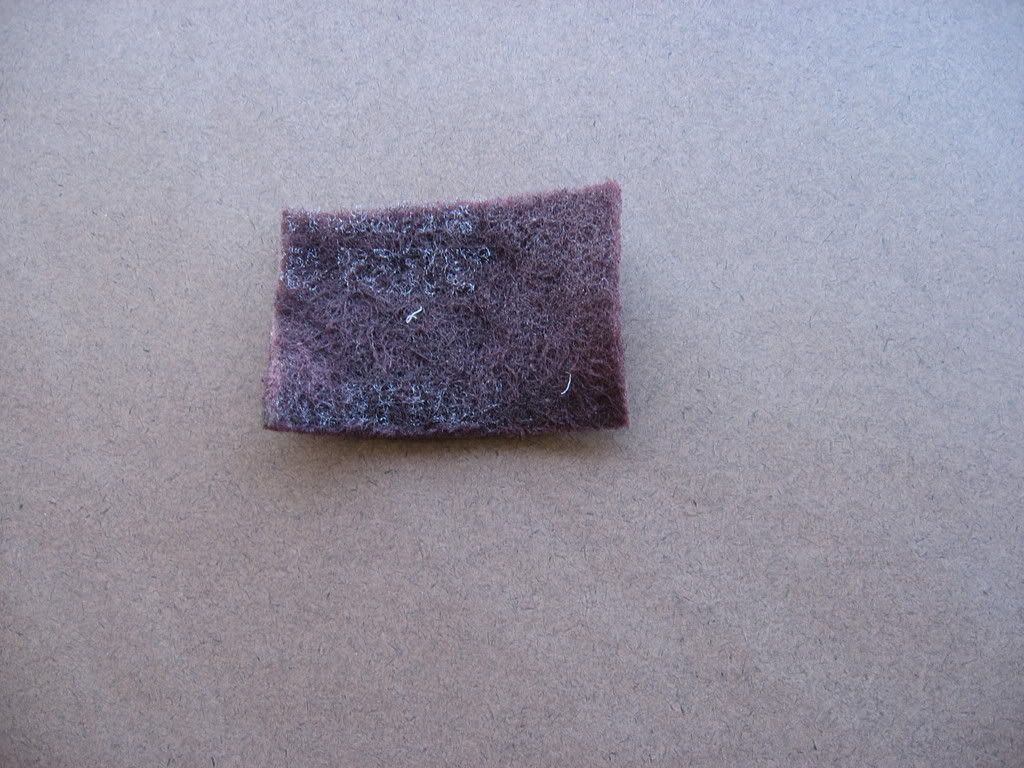 Then I coated the back also. 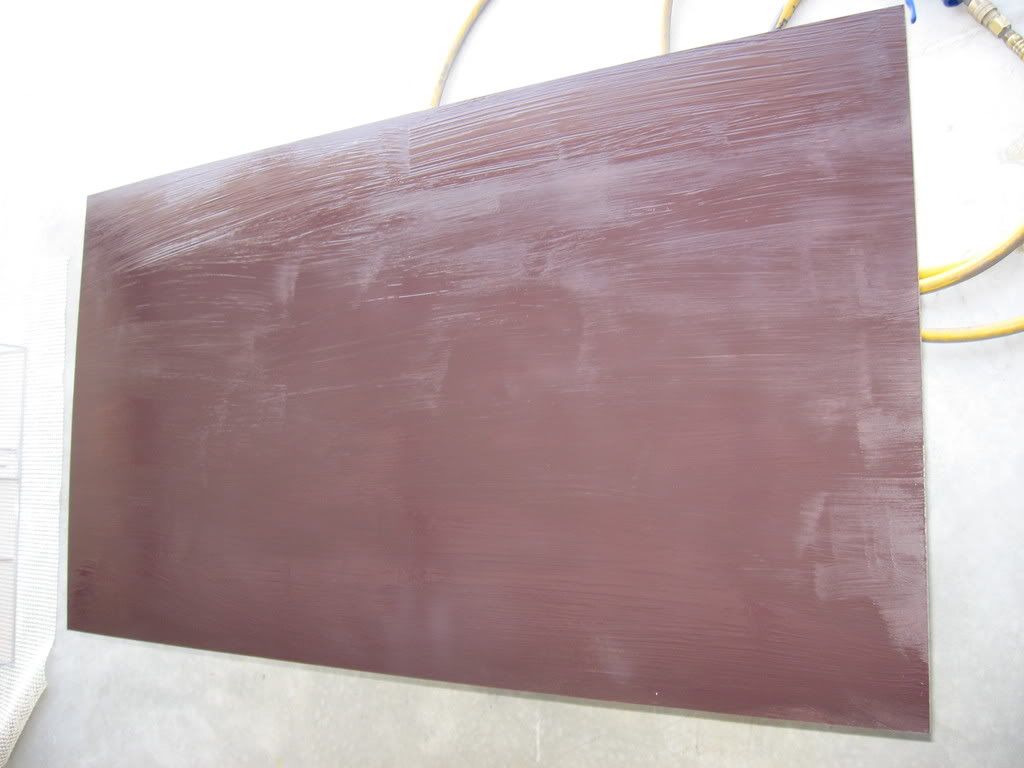 Again, this is the paint I used on it. I put the stick in it to show how thick it was, this stuff is like tar. I love it!! 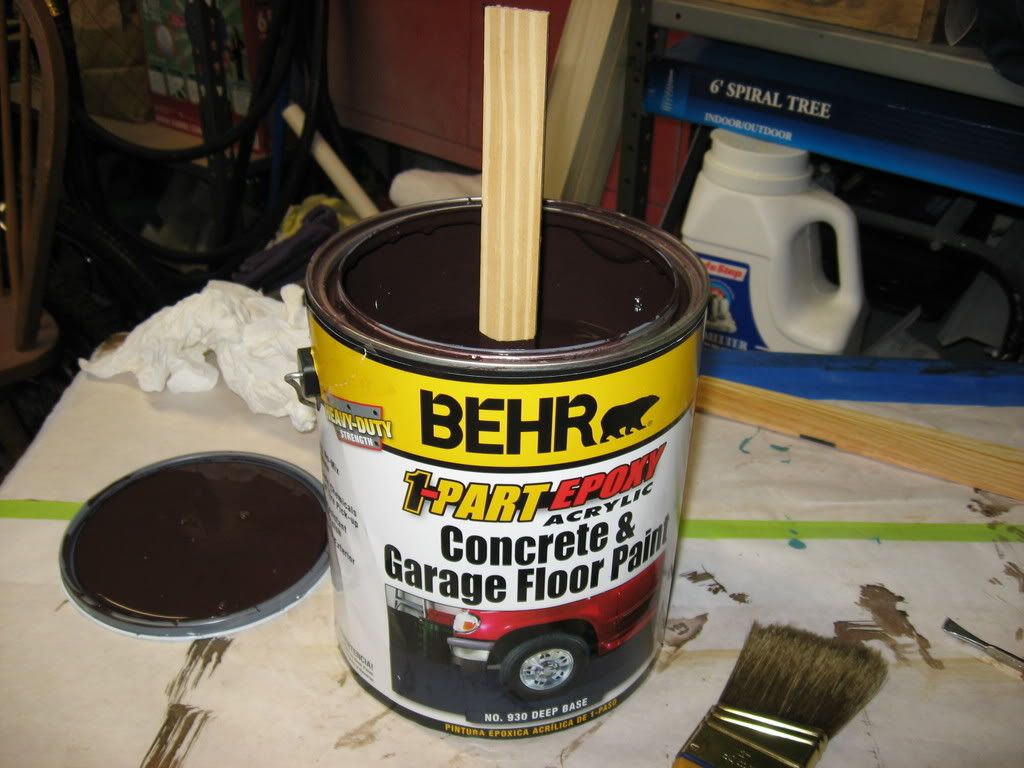 
__________________
Make it a Great Day!!!! Current Tank Info: 60 gal SPS cube, with 25 gal refugium, 400W MH, DIY Lumenarc III, DIY skimmer, DIY stand and canopy. 40 breeder LPS with 40 gallon sump, DIY stand, 250W MH |
|
|
|
|
03/16/2008, 08:32 PM
|
#32 |
|
Registered Member
Join Date: Dec 2003
Location: Denver, Colorado
Posts: 9,579
|
So, because the sump is going to be 20" tall I needed to make a riser for my skimmer.
I took some light defuser (egg crate) and cut it to desired size. 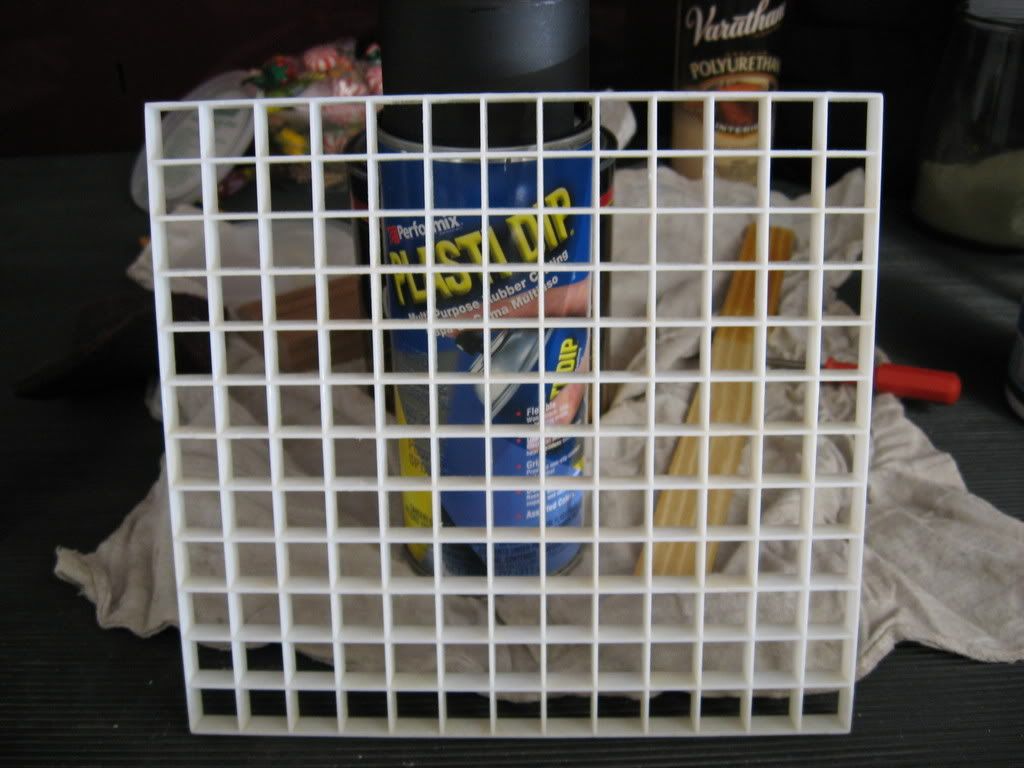 I took my angle grinder and softened up the ends. 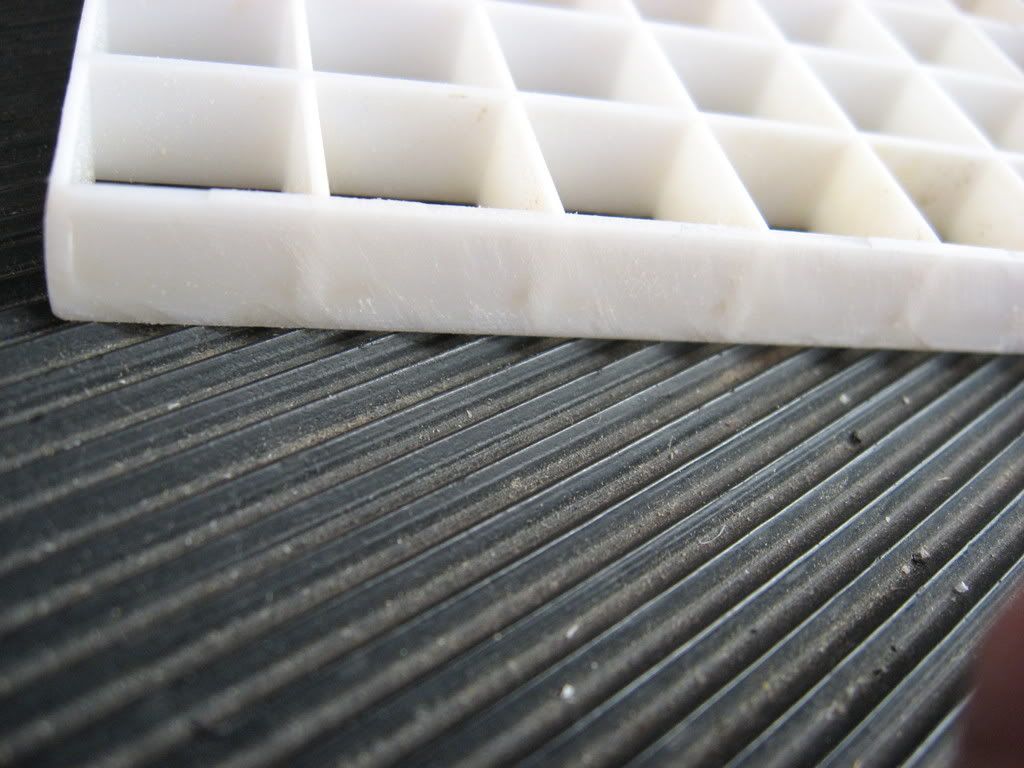 I used PVC, and drilled holes in it so it would sink, and not float. 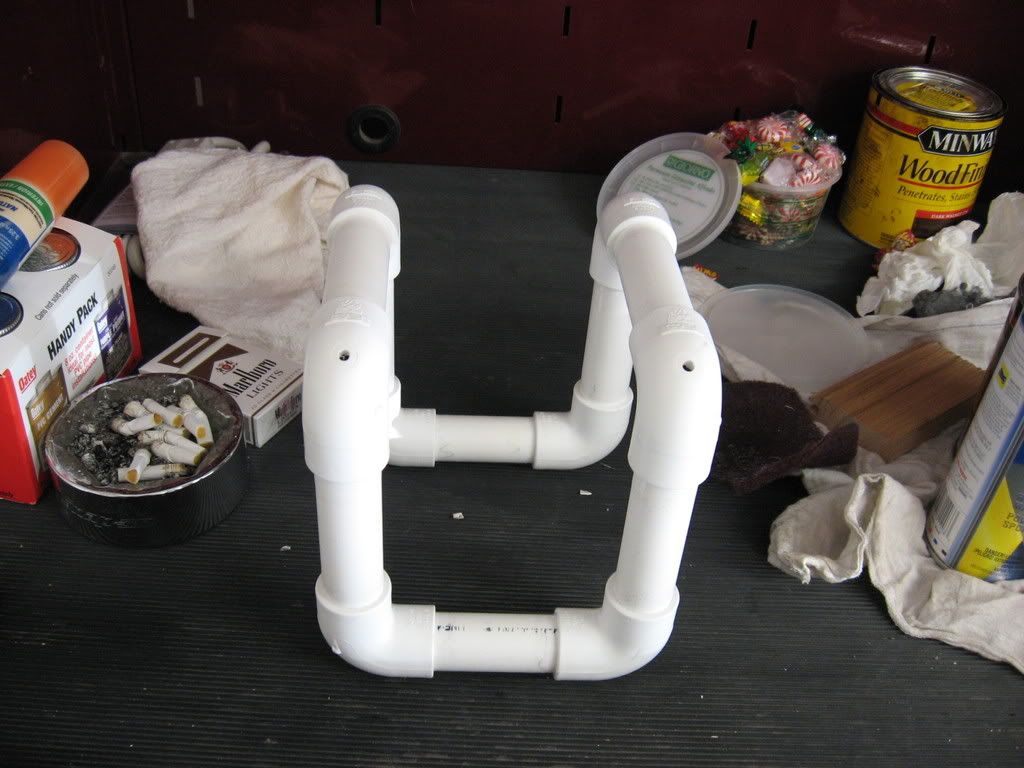 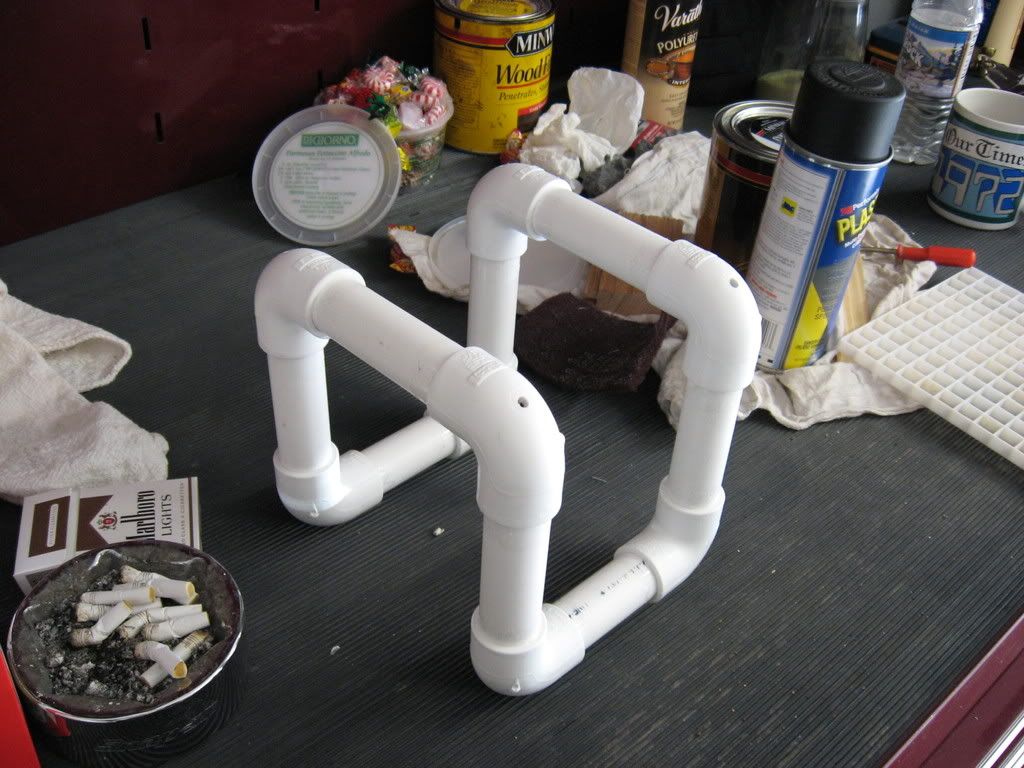 This is how it will sit. 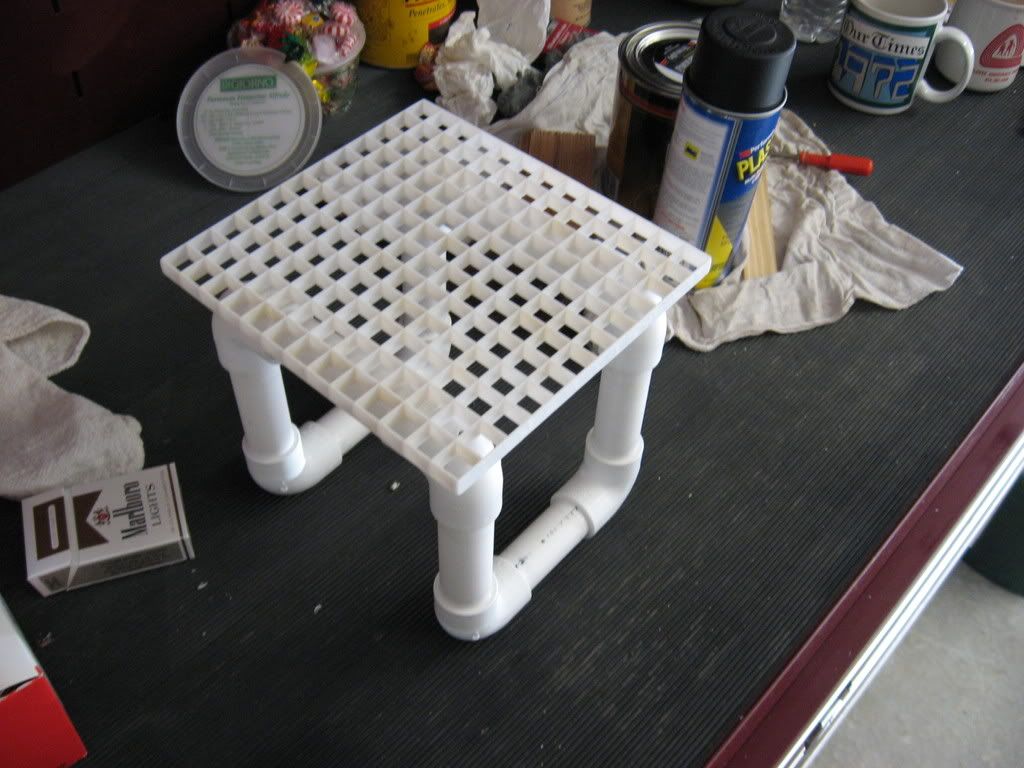 Well, I don't like the look of the white PVC. So I couldn't just leave it like the, so I coated it with Plasti-Dip rubber spray coating.   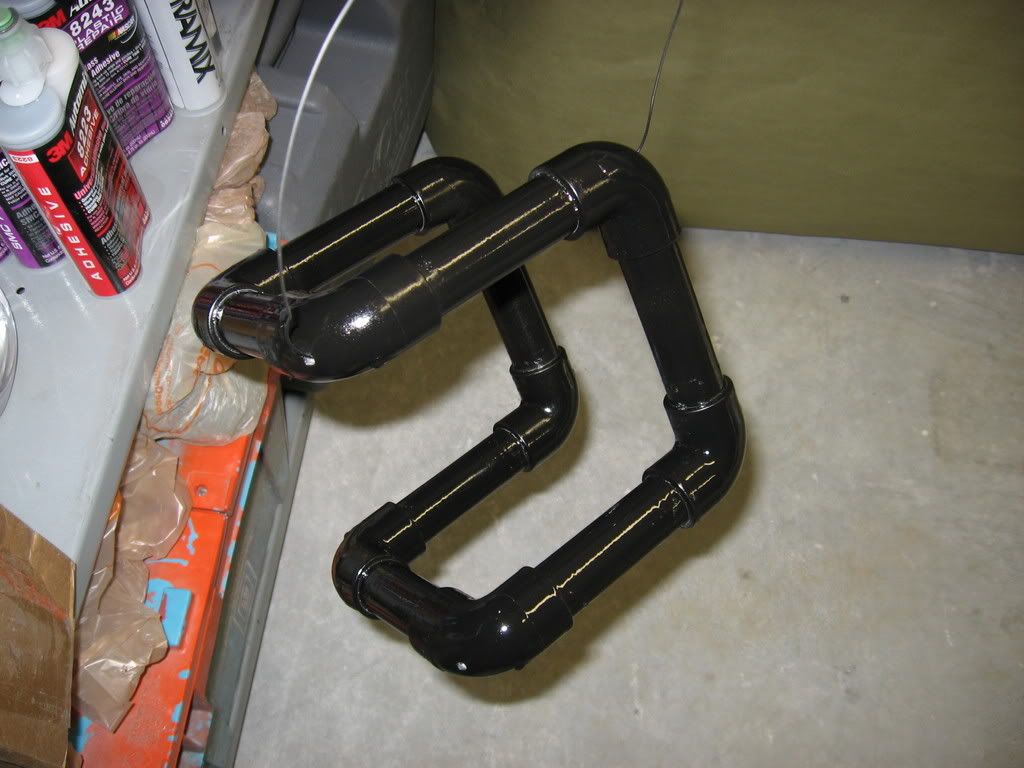 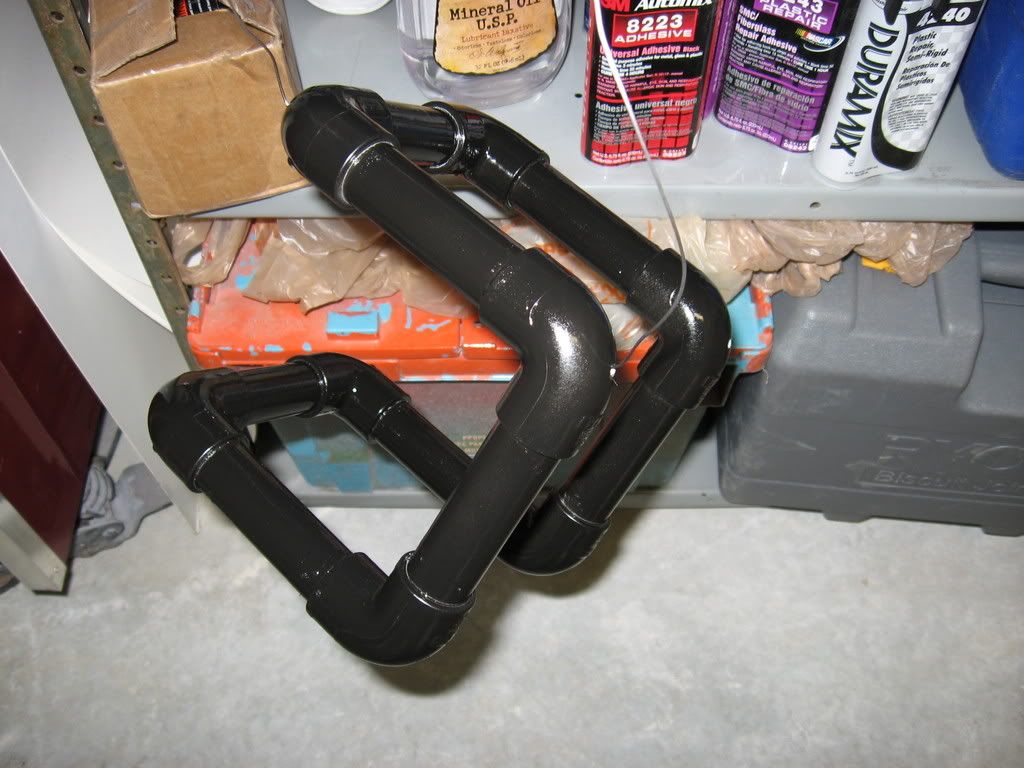 It dries to a satin finish, and is super durable. And is saltwater safe once fully cured.
__________________
Make it a Great Day!!!! Current Tank Info: 60 gal SPS cube, with 25 gal refugium, 400W MH, DIY Lumenarc III, DIY skimmer, DIY stand and canopy. 40 breeder LPS with 40 gallon sump, DIY stand, 250W MH |
|
|
|
|
03/16/2008, 08:52 PM
|
#33 |
|
Likey the bikey
Join Date: Dec 2004
Location: Colorado
Posts: 3,371
|
Leif - you have mad skills!
What's the ETA on the tank delivery?
__________________
Mike On hiatus. I'm either out riding my bicycle, playing with my family, or throwing ferts in my planted tank. Or working. I hope I'm not doing that though. Current Tank Info: 140 DIY Cube |
|
|
|
|
03/16/2008, 08:58 PM
|
#34 |
|
Registered Member
Join Date: Dec 2003
Location: Denver, Colorado
Posts: 9,579
|
I decided to make a DIY lumenarc II. I found the plans online, I took them to a OfficeDepot and had them blown up. I wanted them to be 14" so it was blown up 281%.
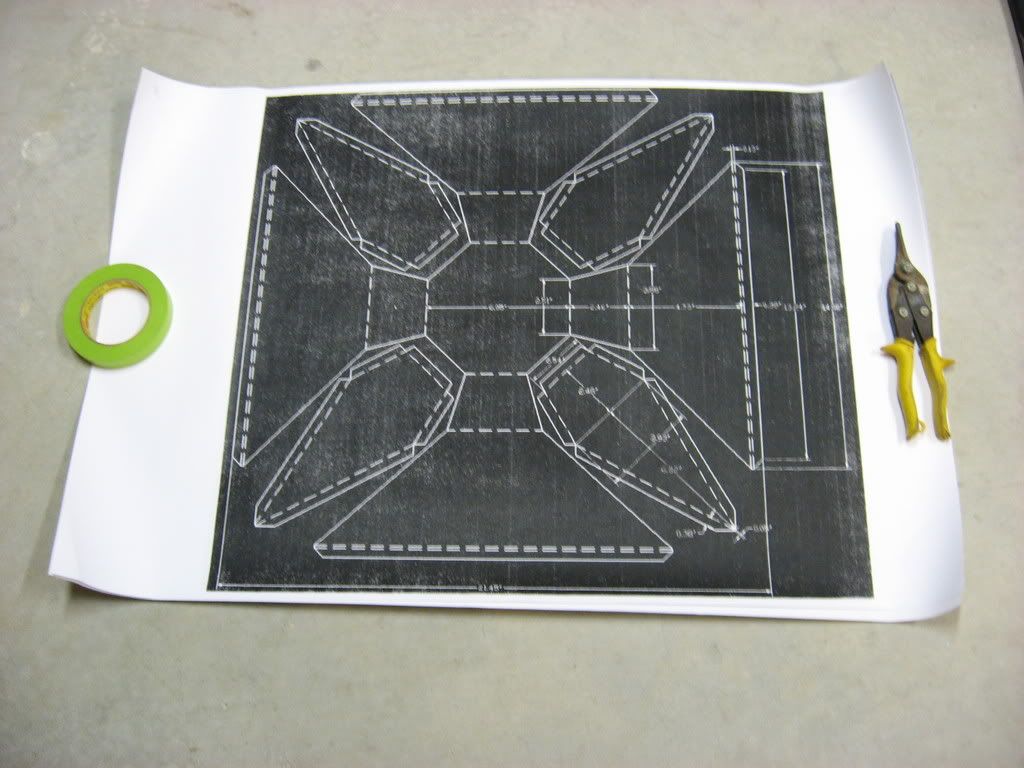 I cut out the pieces and taped them down on the piece of sheet metal. I just used a sheet of tin I found in the heating section at HD. 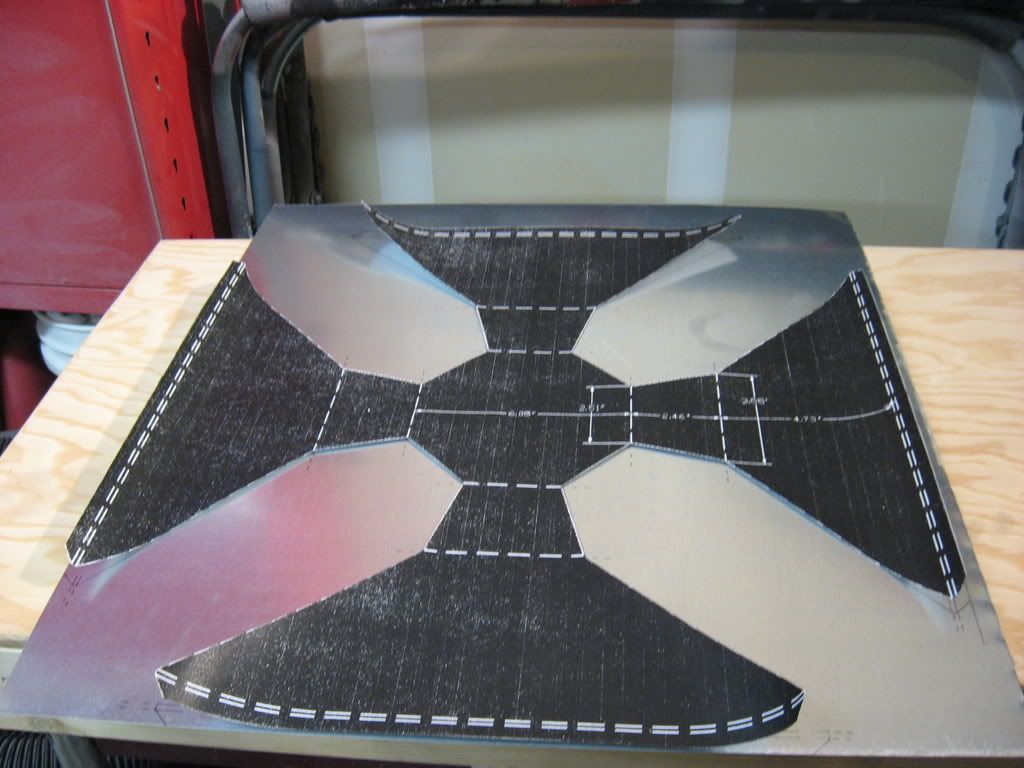 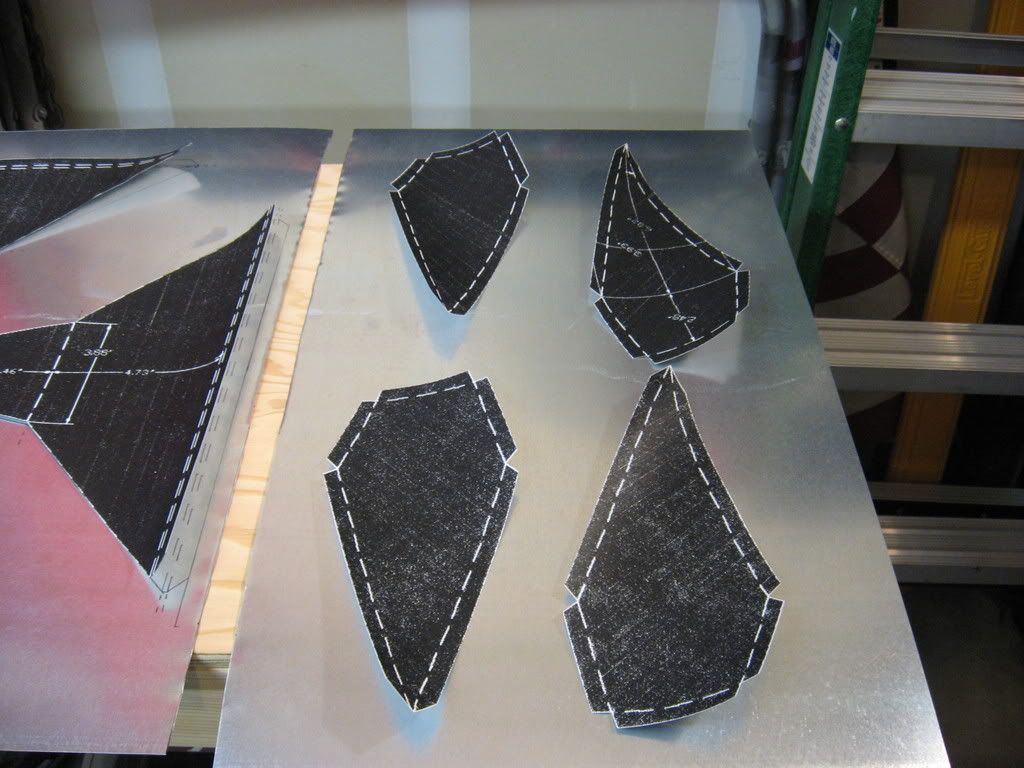 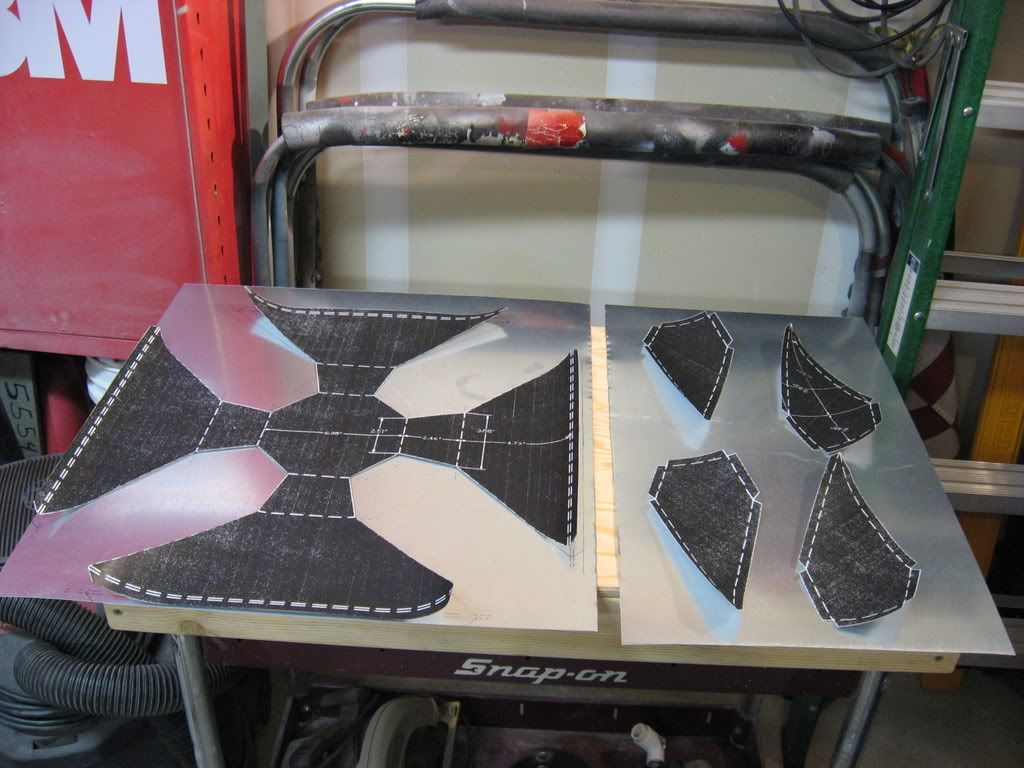 I traced out the pieces on to the sheet metal. 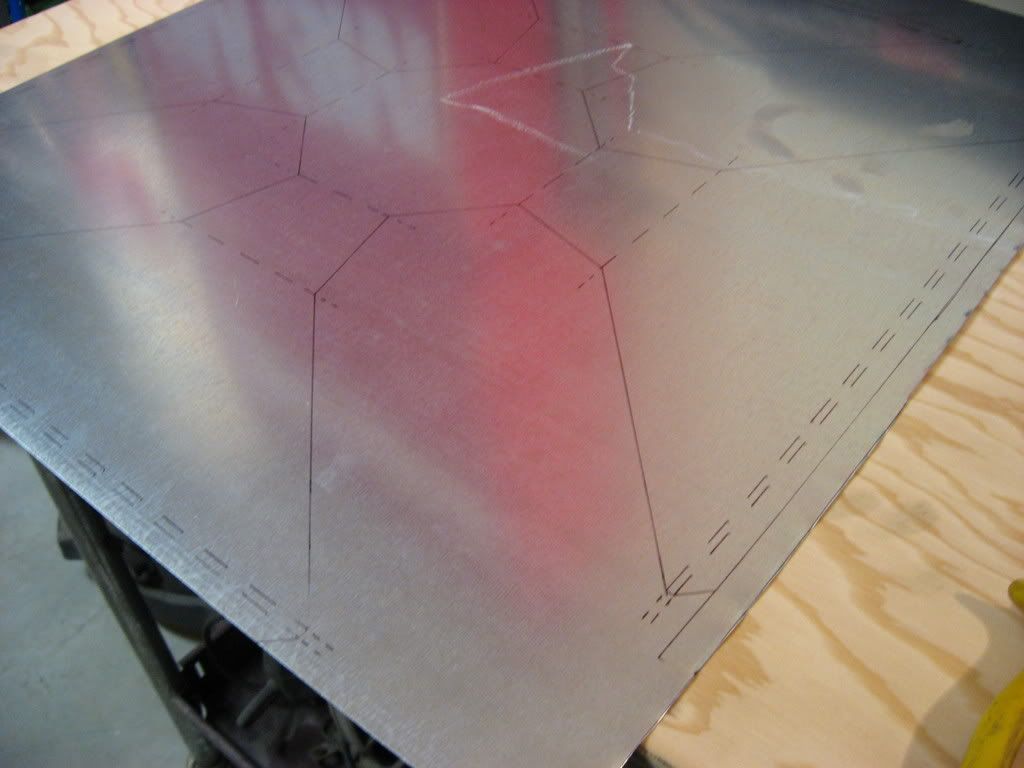  Then I used some tin snips and cut them all out on my marks. 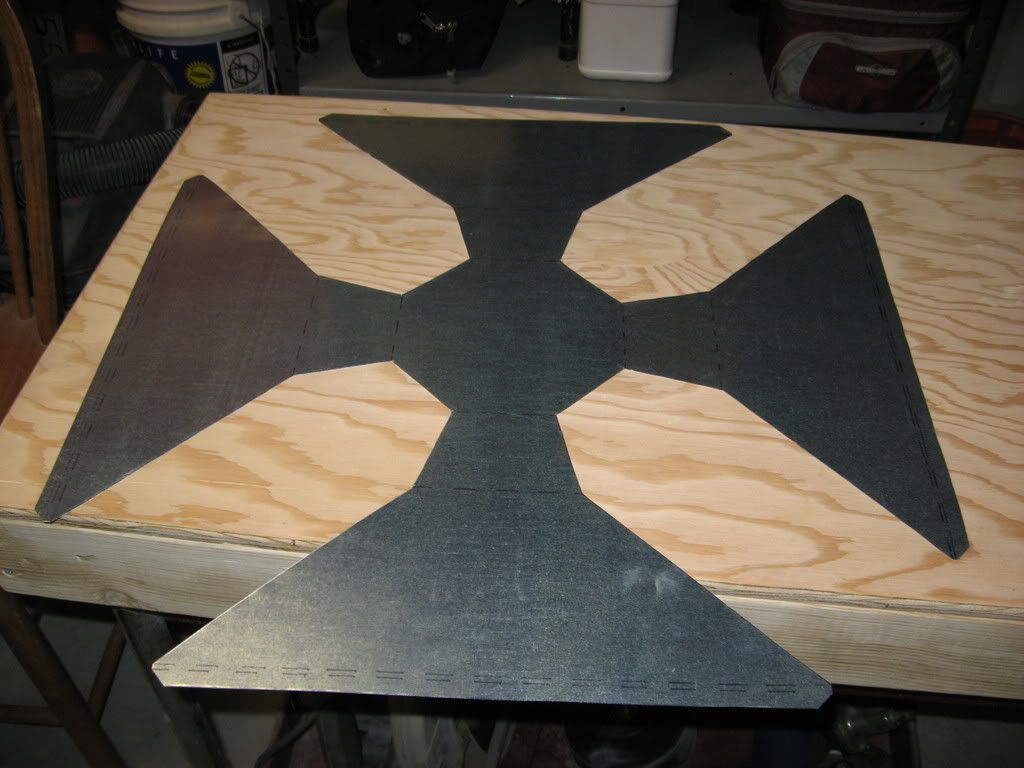 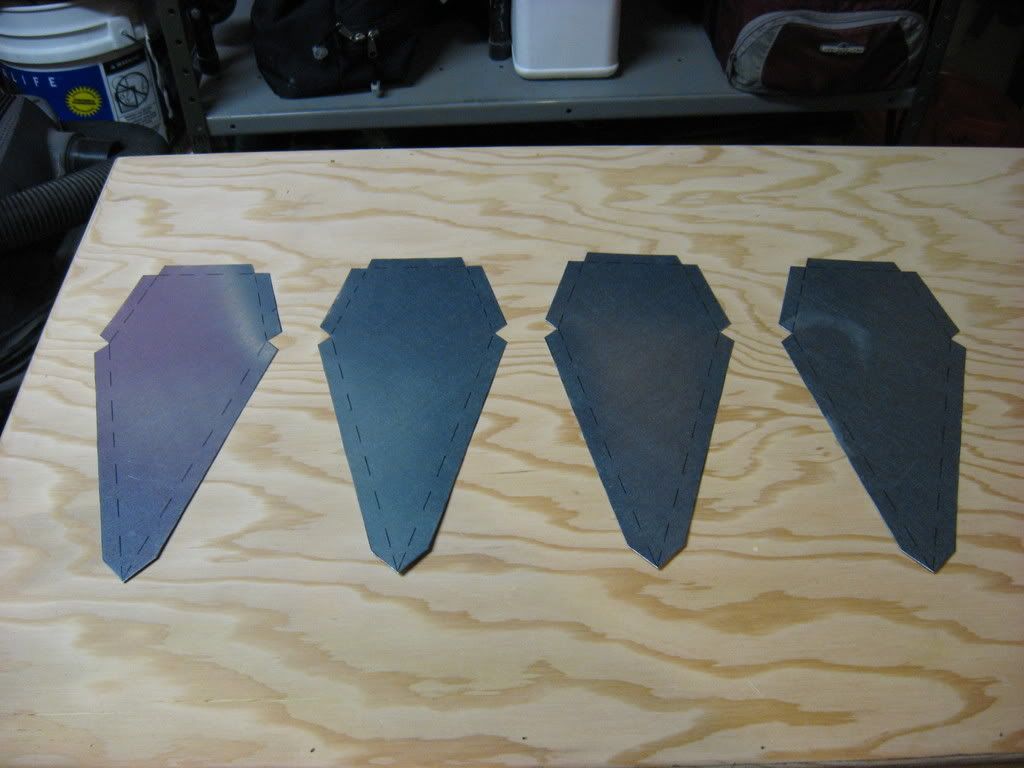 When I was done cutting all the pieces, I took a hammer and dolly and banged all the pieces flat again.
__________________
Make it a Great Day!!!! Current Tank Info: 60 gal SPS cube, with 25 gal refugium, 400W MH, DIY Lumenarc III, DIY skimmer, DIY stand and canopy. 40 breeder LPS with 40 gallon sump, DIY stand, 250W MH |
|
|
|
|
03/16/2008, 08:59 PM
|
#35 |
|
Registered Member
Join Date: Dec 2003
Location: Denver, Colorado
Posts: 9,579
|
Thanks BLKTNG.
Thanks Mike, Tank should be done in a week or two.
__________________
Make it a Great Day!!!! Current Tank Info: 60 gal SPS cube, with 25 gal refugium, 400W MH, DIY Lumenarc III, DIY skimmer, DIY stand and canopy. 40 breeder LPS with 40 gallon sump, DIY stand, 250W MH |
|
|
|
|
03/16/2008, 09:09 PM
|
#36 |
|
Registered Member
Join Date: Dec 2003
Location: Denver, Colorado
Posts: 9,579
|
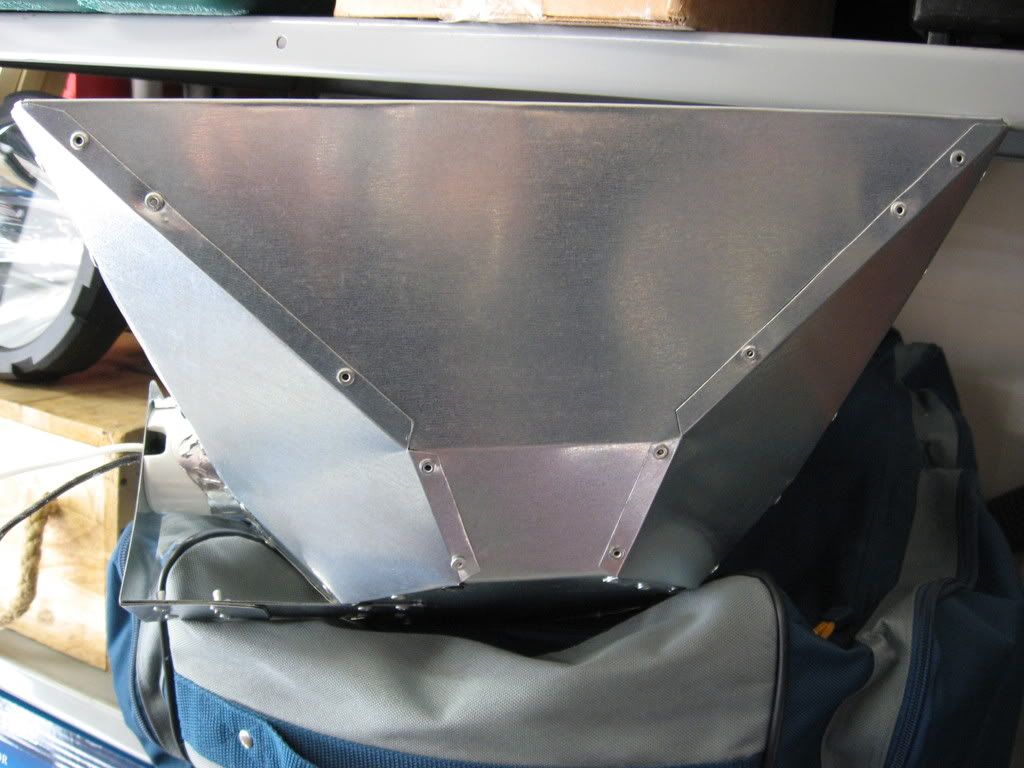
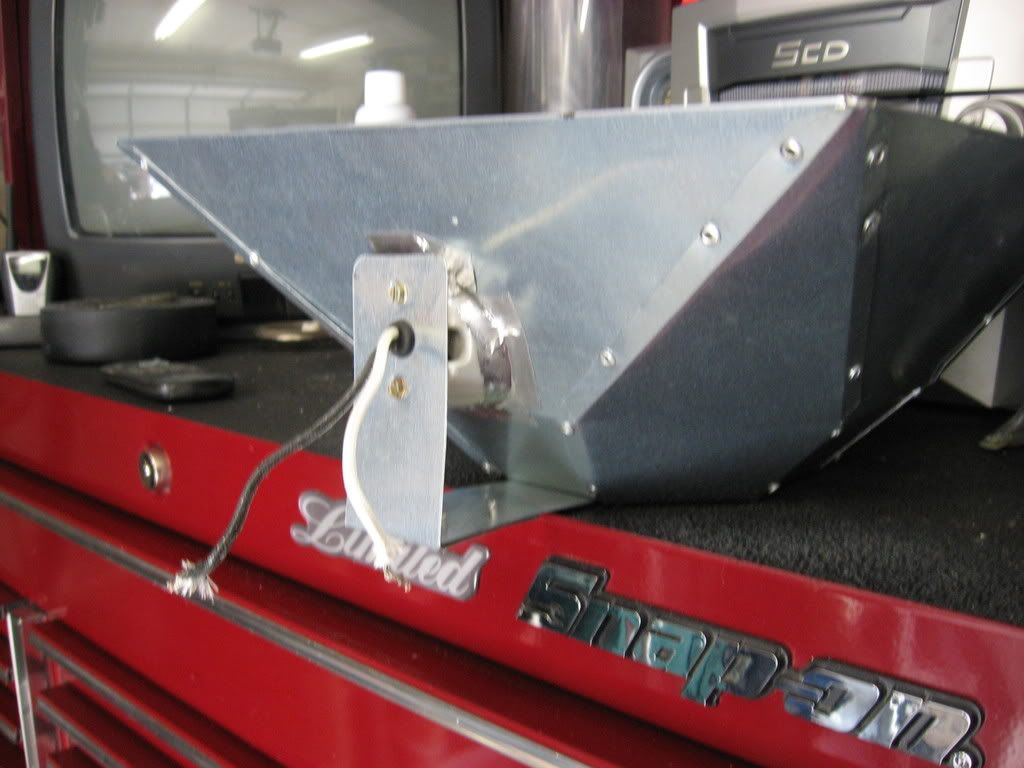
When it was all cut out I took 2 metal rulers and attached them to a "duck bill" vise grip, and made all the bends. I drilled 1/8" holes and used 1/8" aluminum rivets to put the light together.
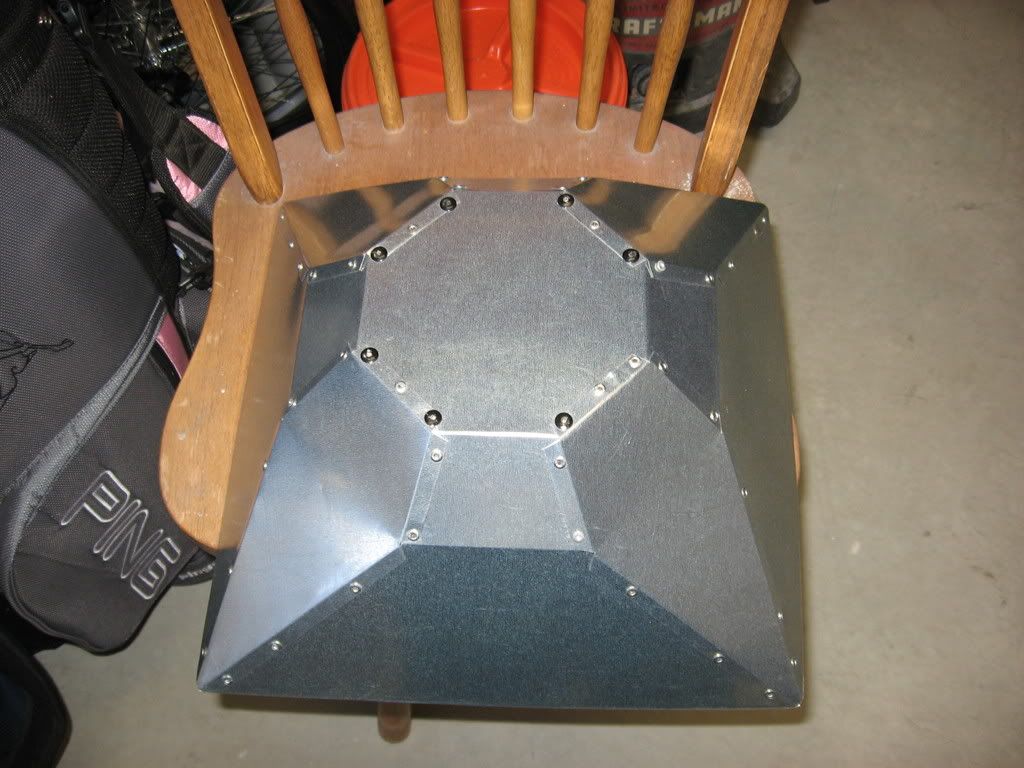 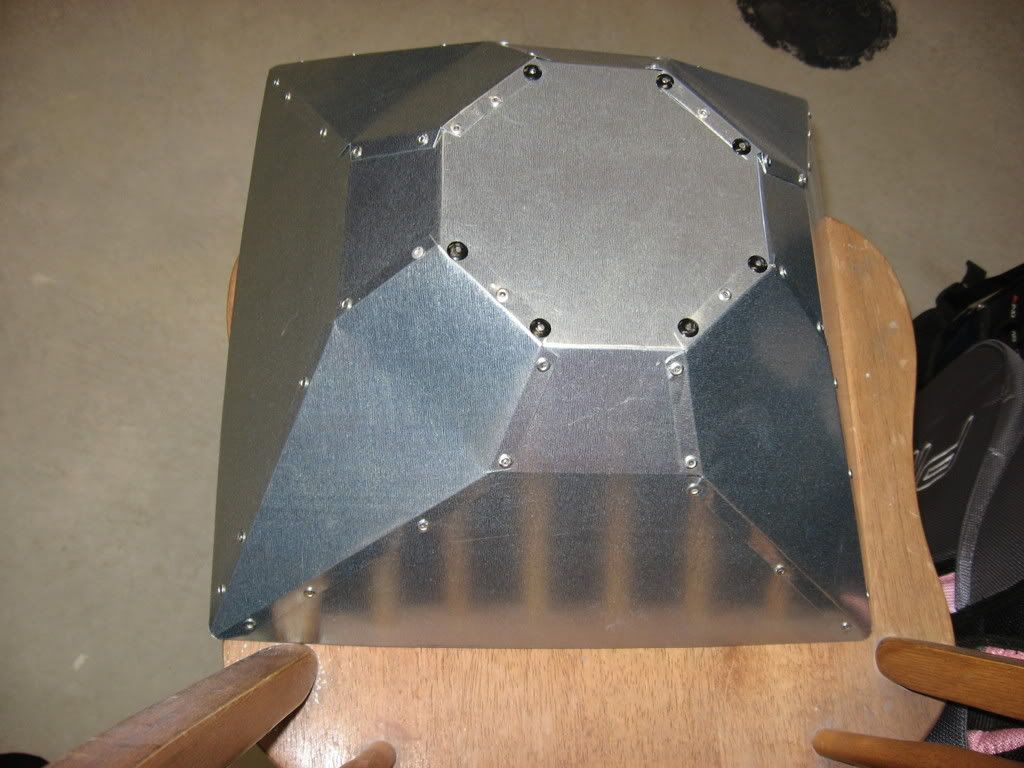 I took some aluminum body mans tape and put a layer on the inside of the fixture. 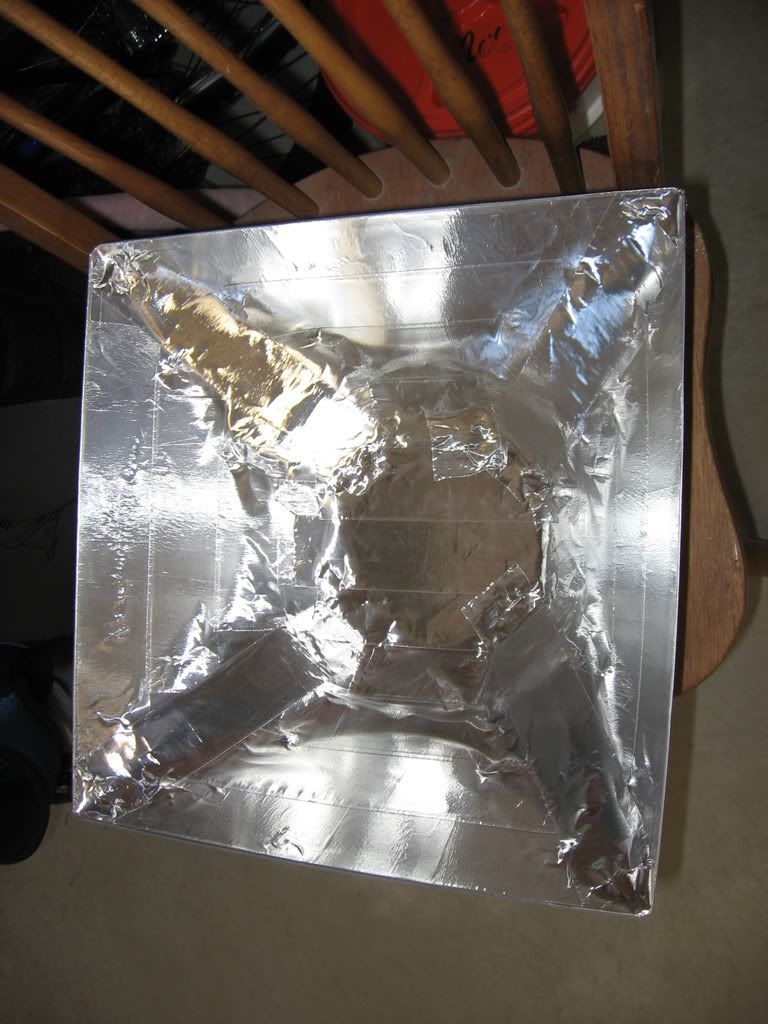 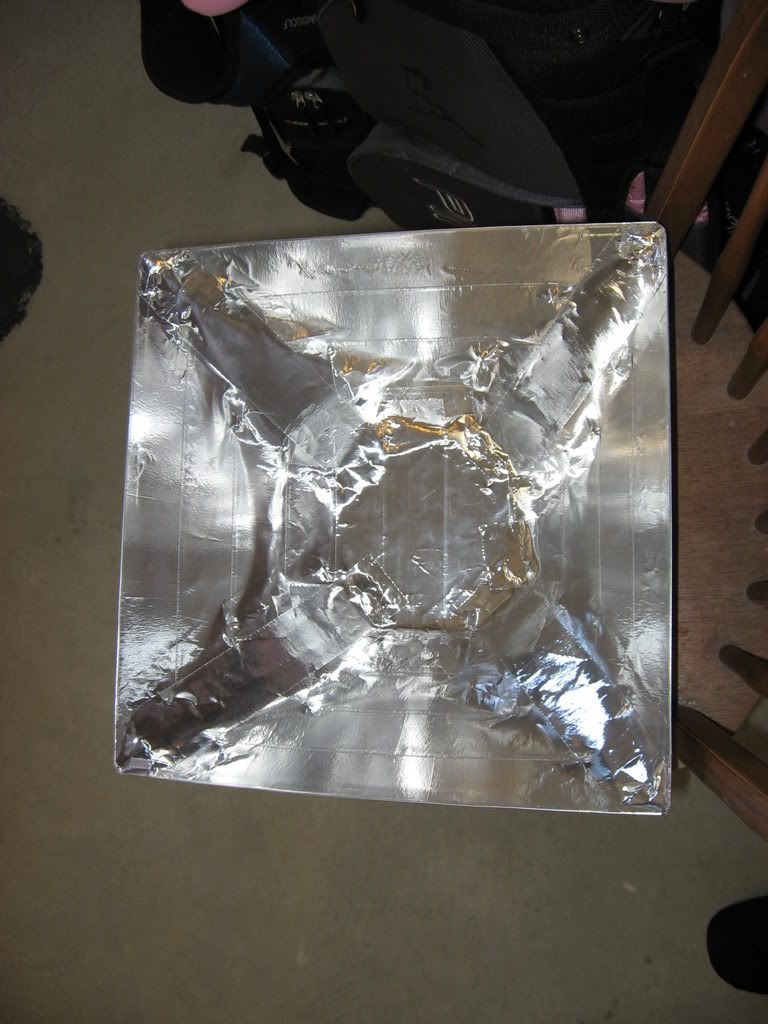 Mogul socket installed: 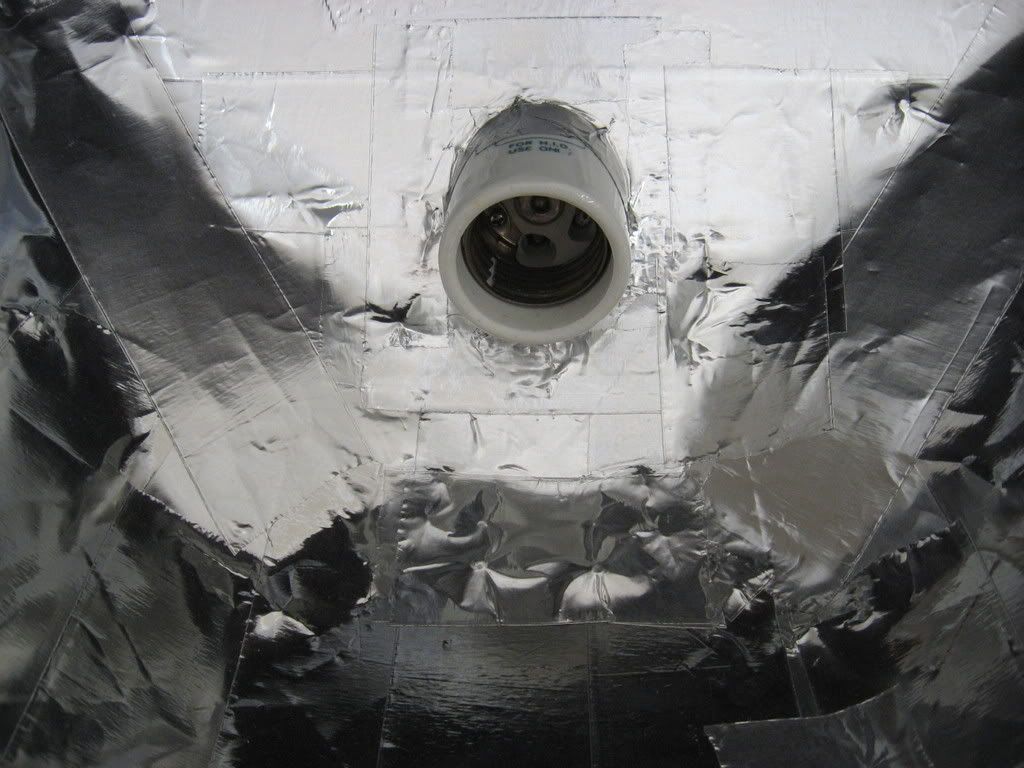  And the bracket I made to hold the mogul and wires 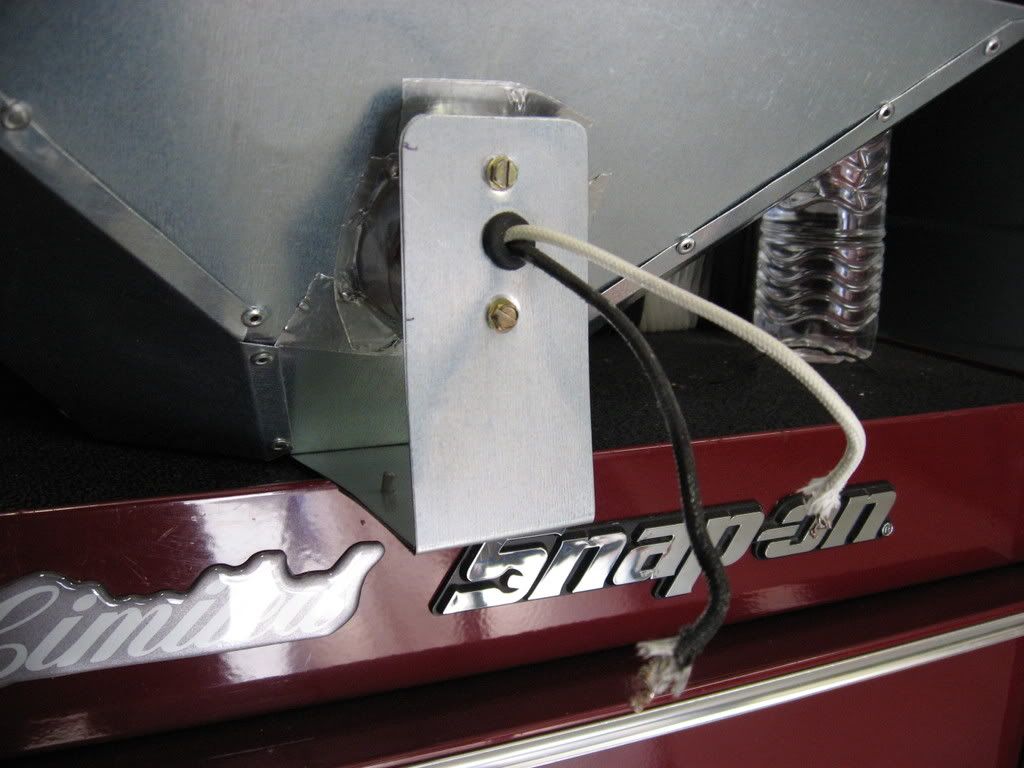
__________________
Make it a Great Day!!!! Current Tank Info: 60 gal SPS cube, with 25 gal refugium, 400W MH, DIY Lumenarc III, DIY skimmer, DIY stand and canopy. 40 breeder LPS with 40 gallon sump, DIY stand, 250W MH |
|
|
|
|
03/16/2008, 09:11 PM
|
#37 |
|
Registered Member
Join Date: Dec 2003
Location: Denver, Colorado
Posts: 9,579
|
__________________
Make it a Great Day!!!! Current Tank Info: 60 gal SPS cube, with 25 gal refugium, 400W MH, DIY Lumenarc III, DIY skimmer, DIY stand and canopy. 40 breeder LPS with 40 gallon sump, DIY stand, 250W MH |
|
|
|
|
03/16/2008, 09:46 PM
|
#38 |
|
Registered Member
Join Date: Dec 2003
Location: Denver, Colorado
Posts: 9,579
|
On my current skimmer I did a mesh mod on it, and it was an awesome upgrade. So I decided to add one to the skimmer for the new tank. The skimmer had a needle wheel impeller, but wanted more!!
I used needle point mesh for it.  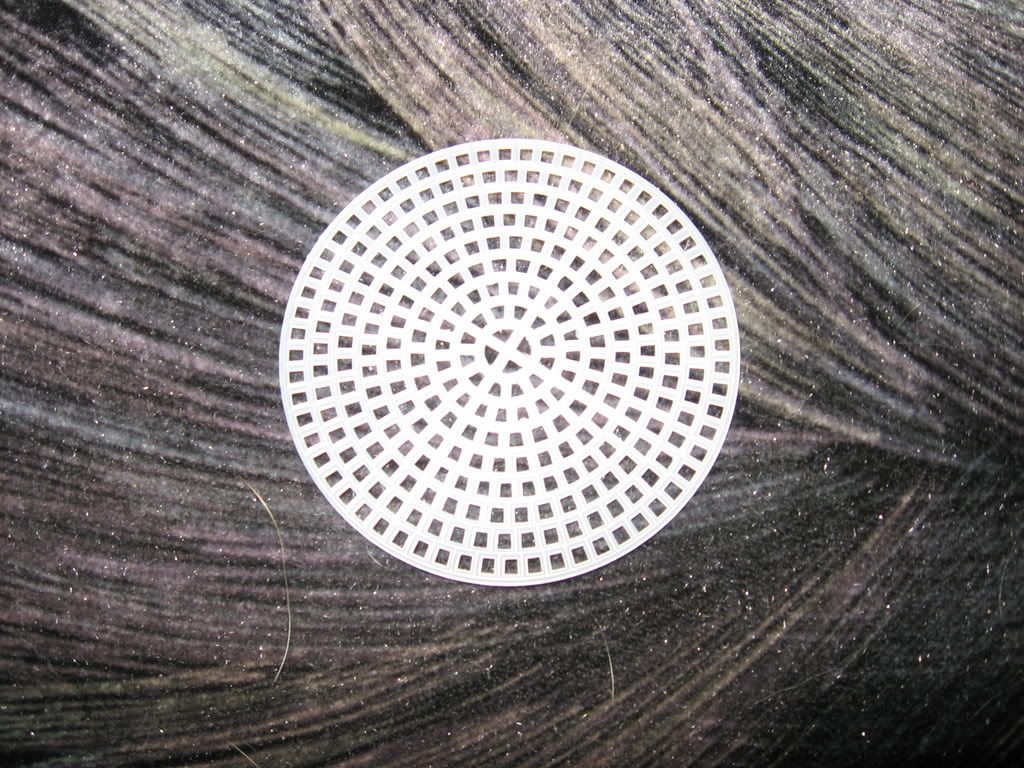 I measured it and cut it down to size. 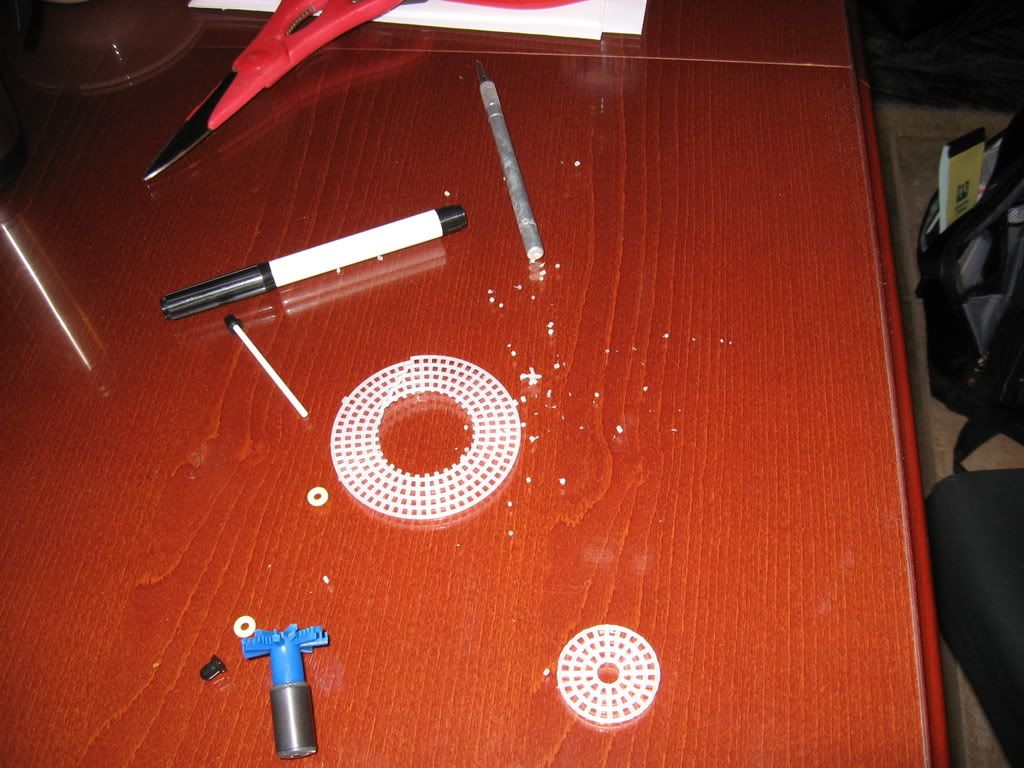 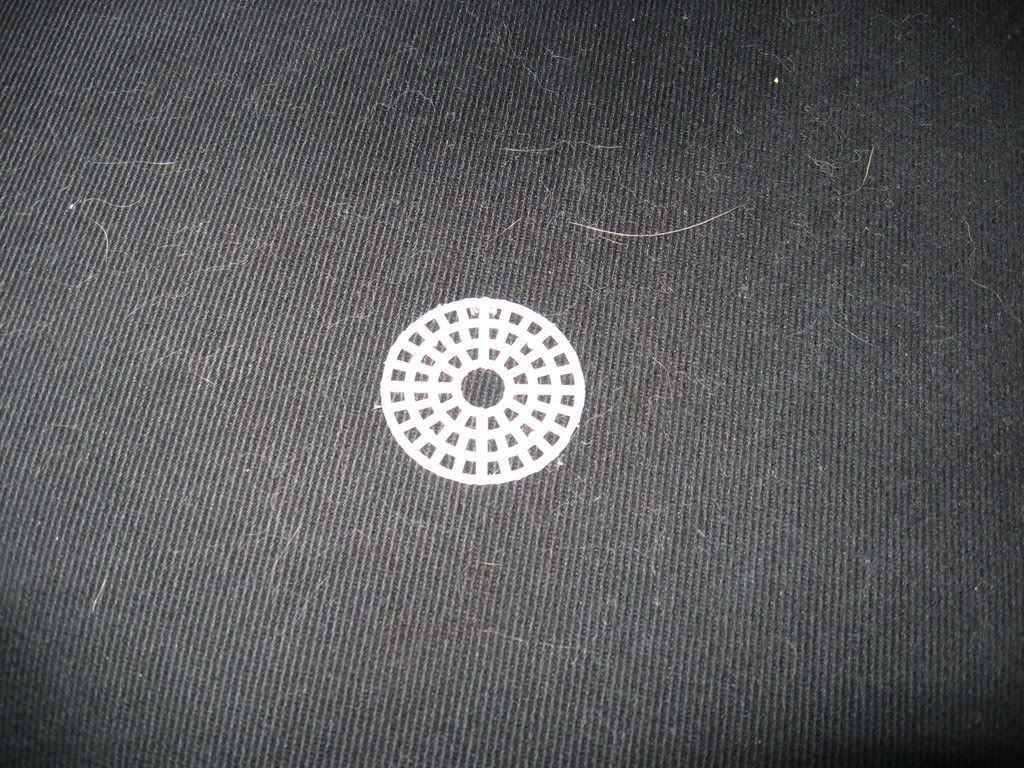 Here is the impeller. 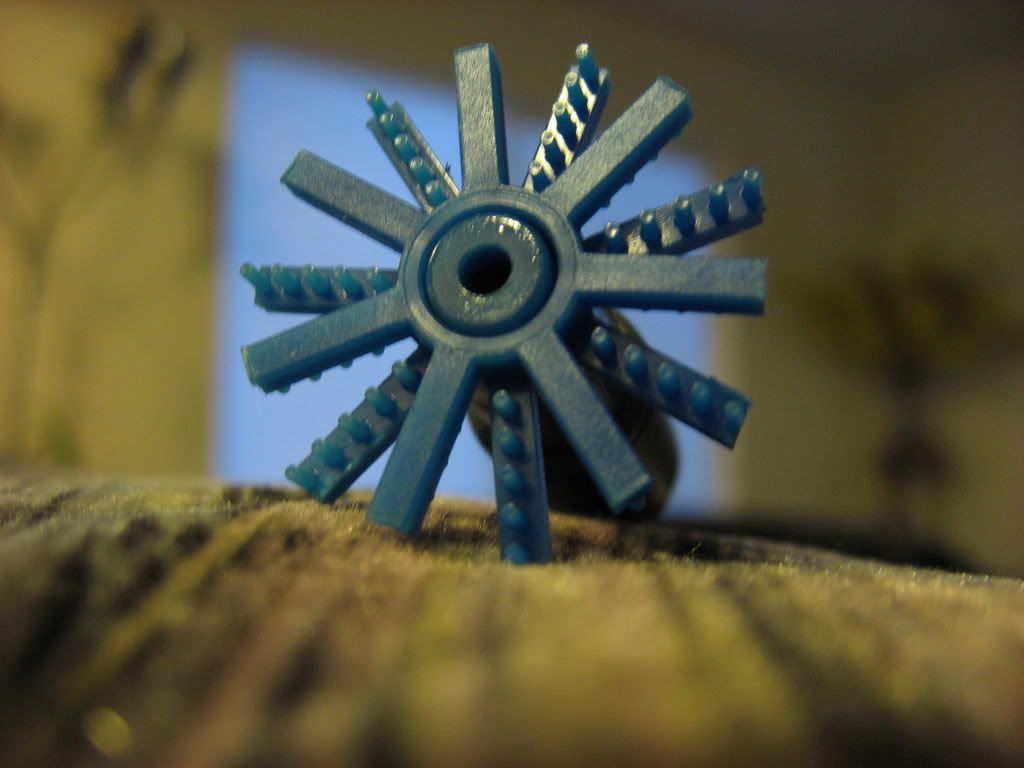 Then I used nylon fishing line to attach it  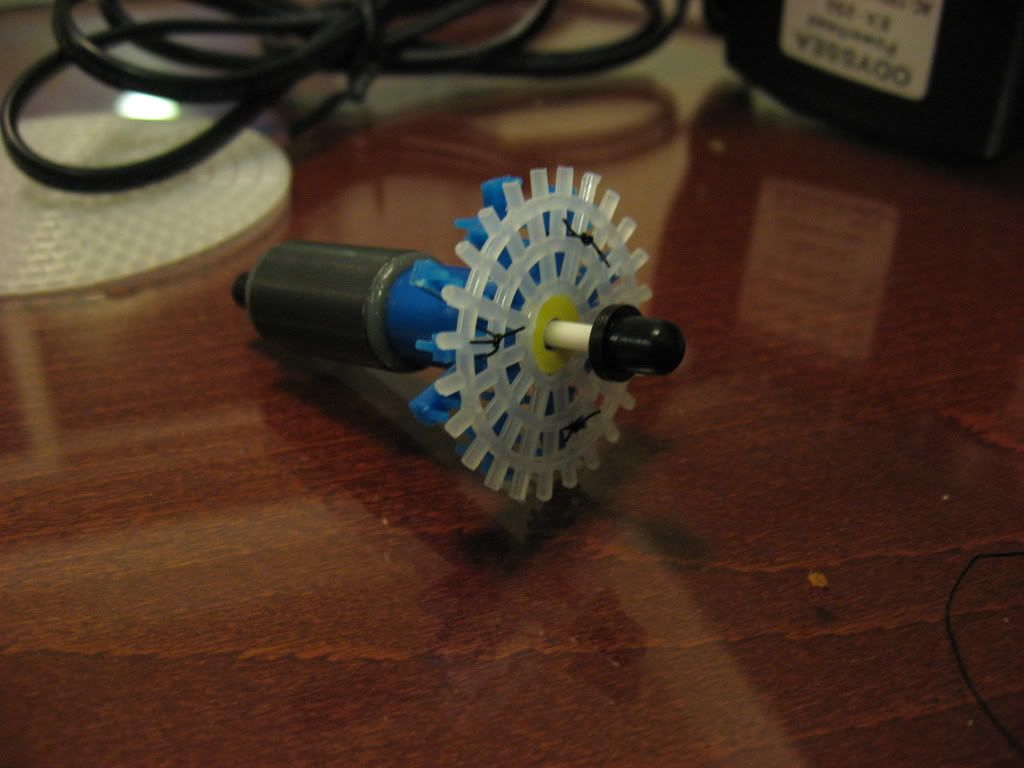 Here is the skimmer being tested and broke in. I put it in a bucket with some salt water and poured in the skimmate from my other tank. It was pulling out skimmate like crazy, I had to dump it once already by this photo. 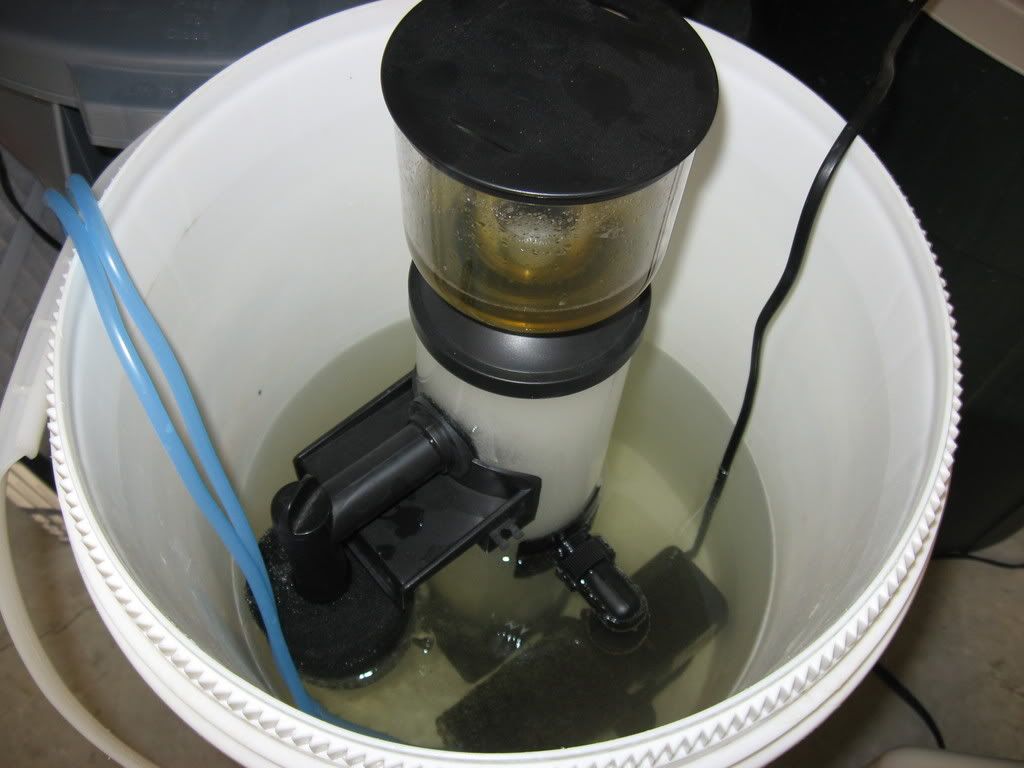
__________________
Make it a Great Day!!!! Current Tank Info: 60 gal SPS cube, with 25 gal refugium, 400W MH, DIY Lumenarc III, DIY skimmer, DIY stand and canopy. 40 breeder LPS with 40 gallon sump, DIY stand, 250W MH |
|
|
|
|
03/17/2008, 08:19 AM
|
#39 |
|
Registered Member
Join Date: Dec 2003
Location: Denver, Colorado
Posts: 9,579
|
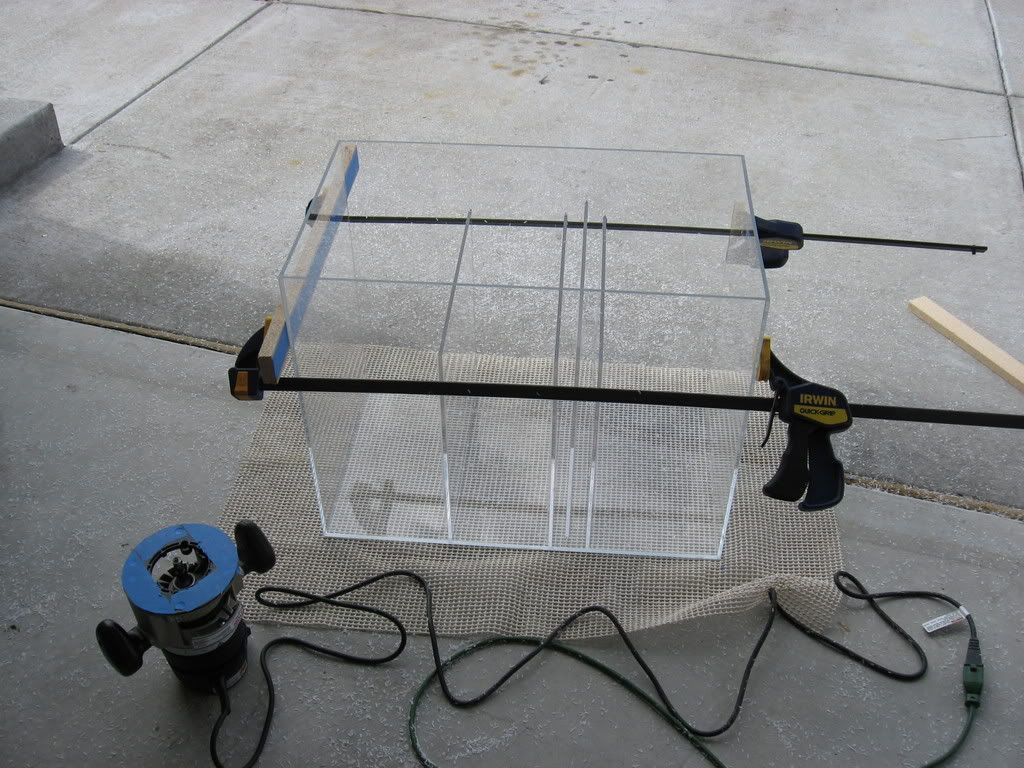
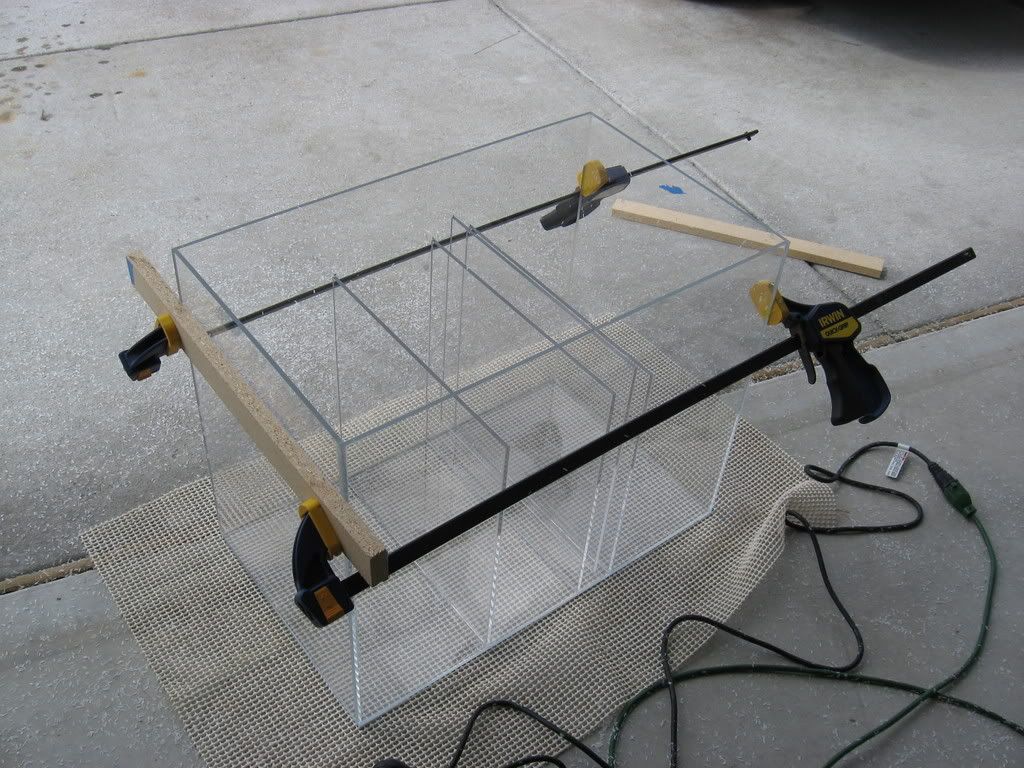
All right, on to the sump/refugium.
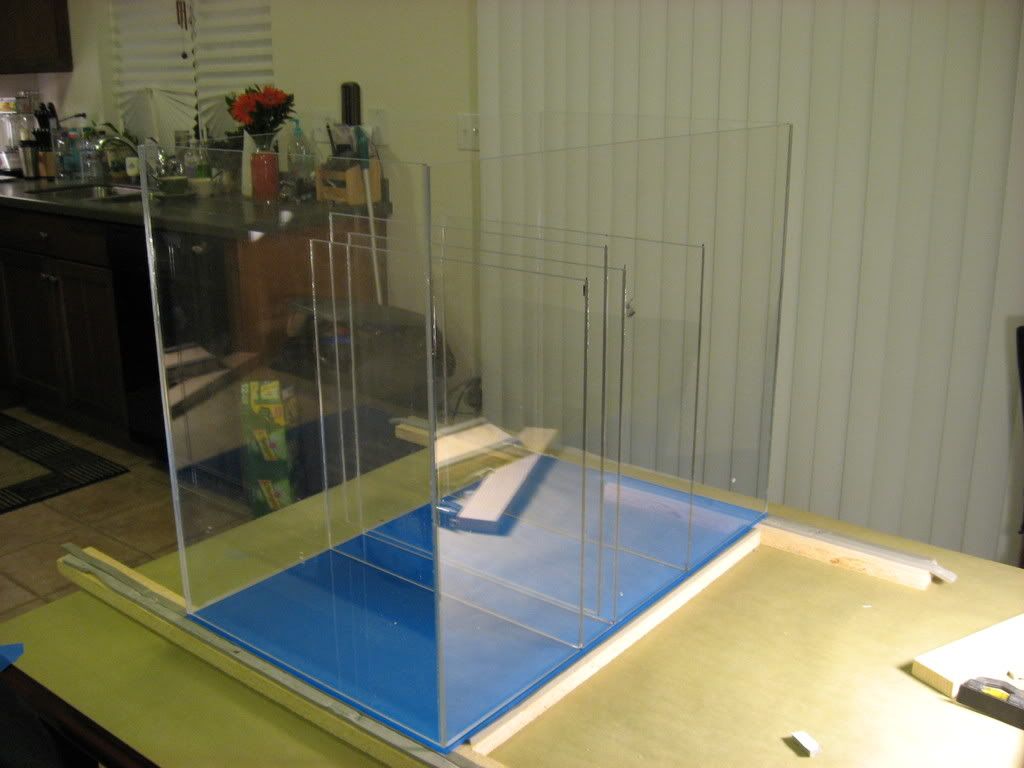
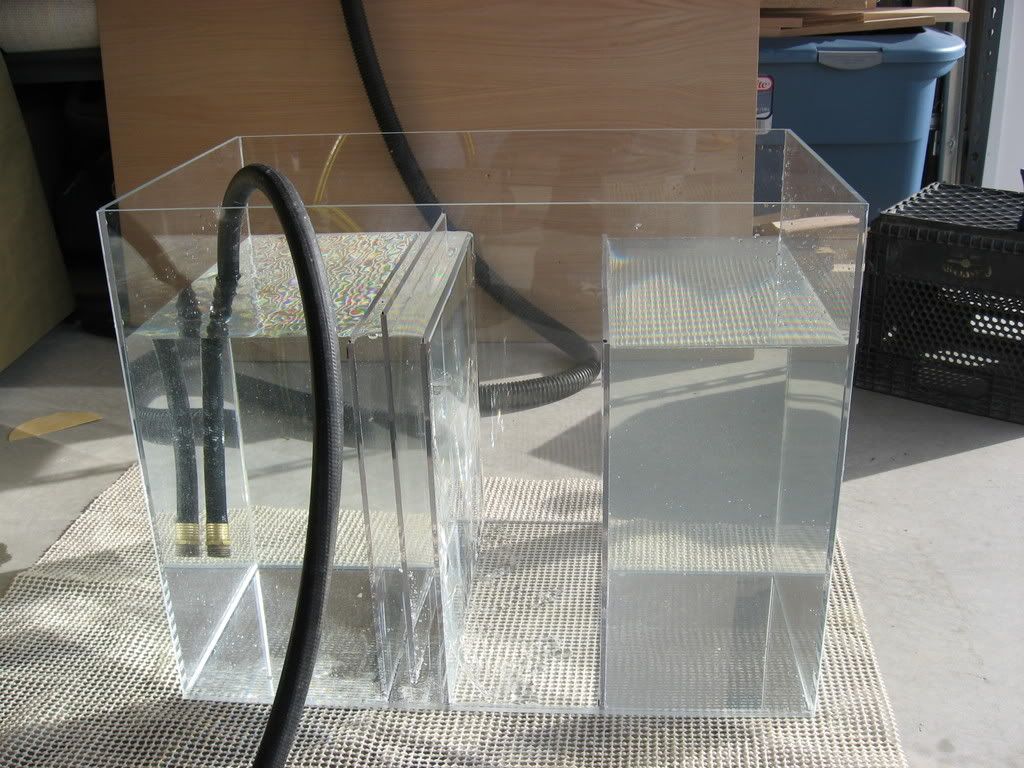
I used 1/4" acrylic. The dimensions of the sump are 15W X 25L X 20 H. First chamber will be 8" and will house the skimmer. There are 3 baffles, equally spaced at 1" apart. A center section for some sand, LR and Chaeto, is about 7". Then there is the return section, about 8". The baffles are 15" tall, for a total water volume in the sump of 23 Gal. I had help from another local reefer with this, who is in the process of building his 140 cube right now, miwoodar, Thanks a million Mike. I started here 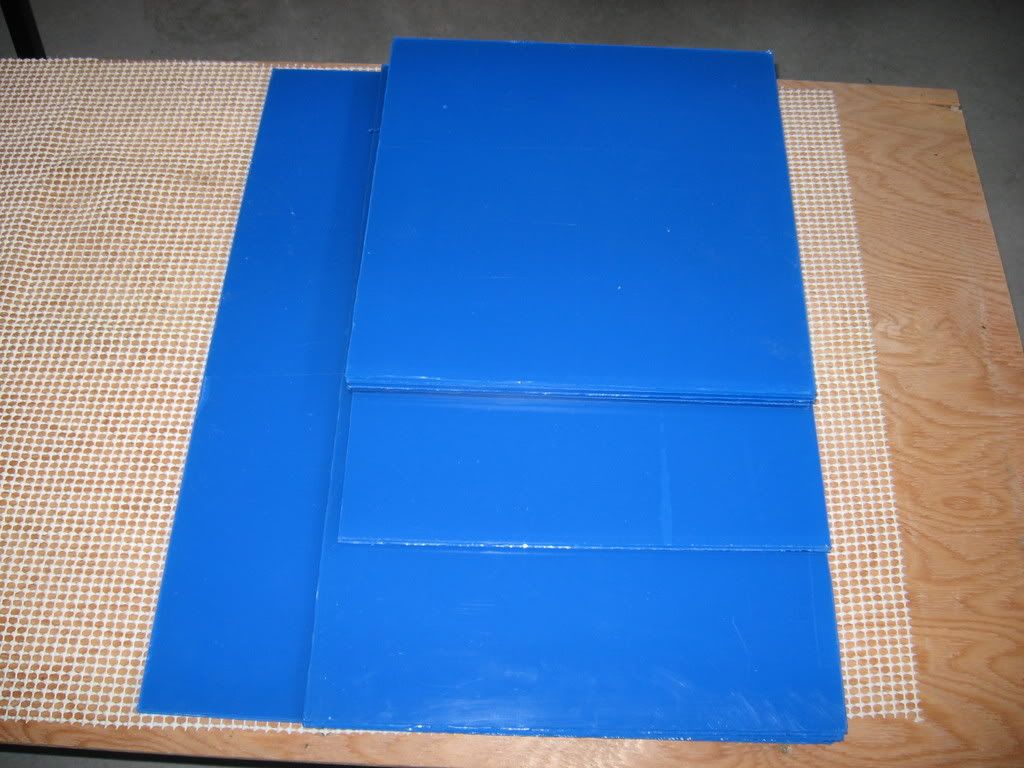 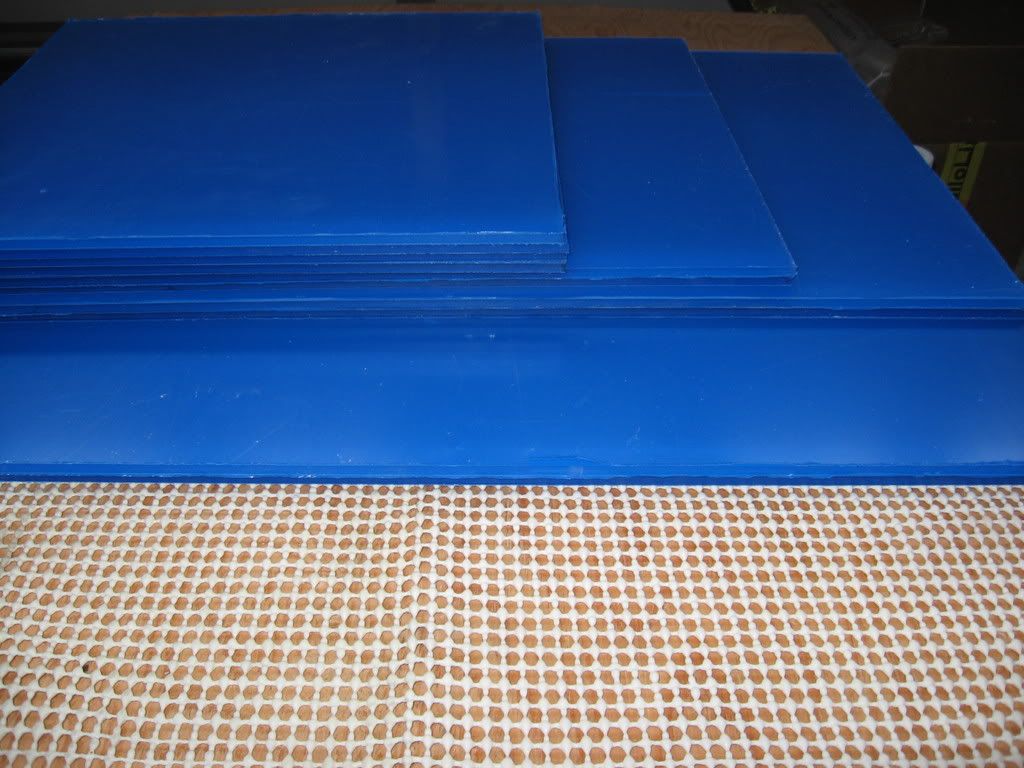 I used some blue painters tape to mock it up, and see what size I was going to make the different chambers, and to see how things fit. 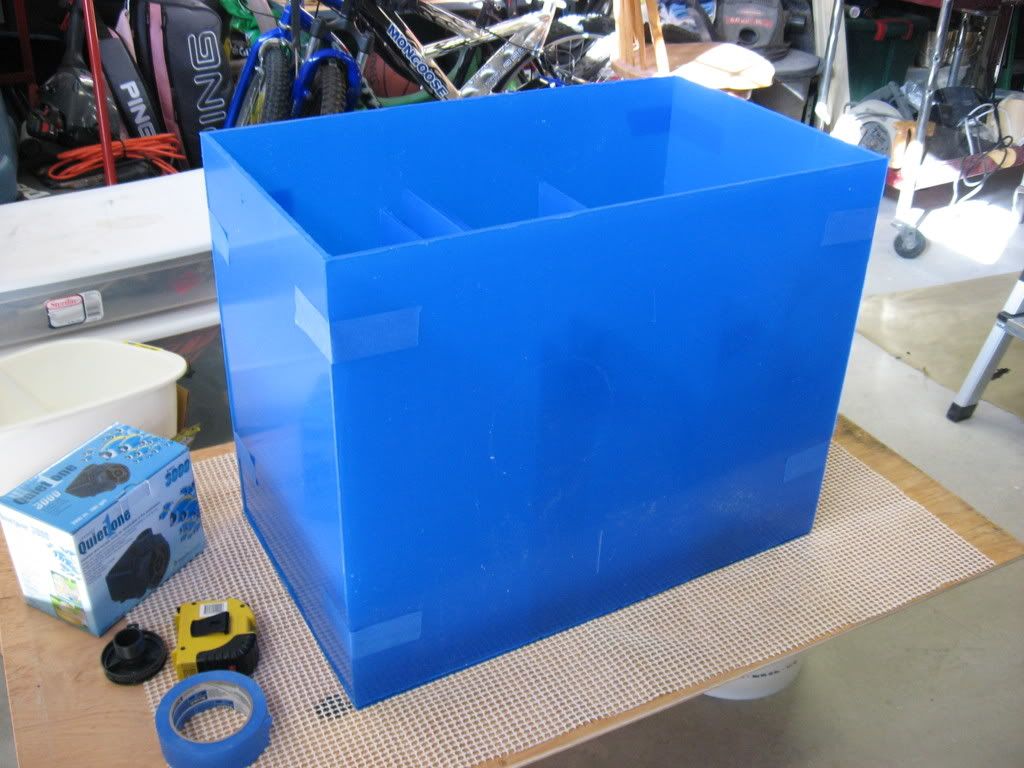 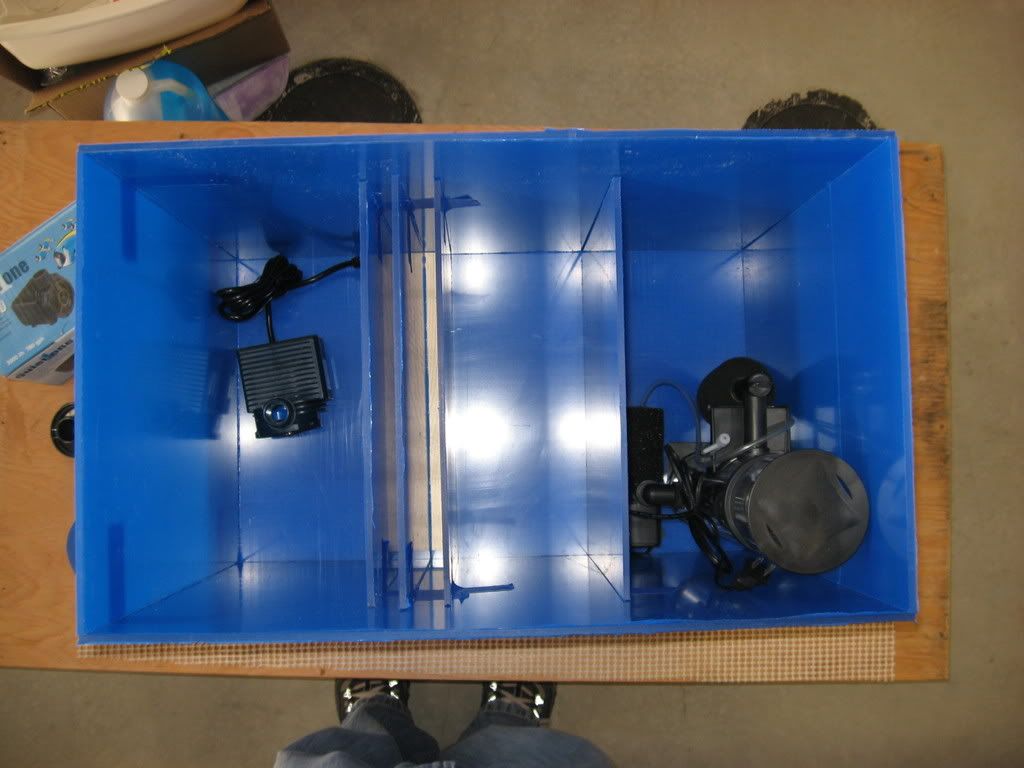 Dry fitting it in the stand 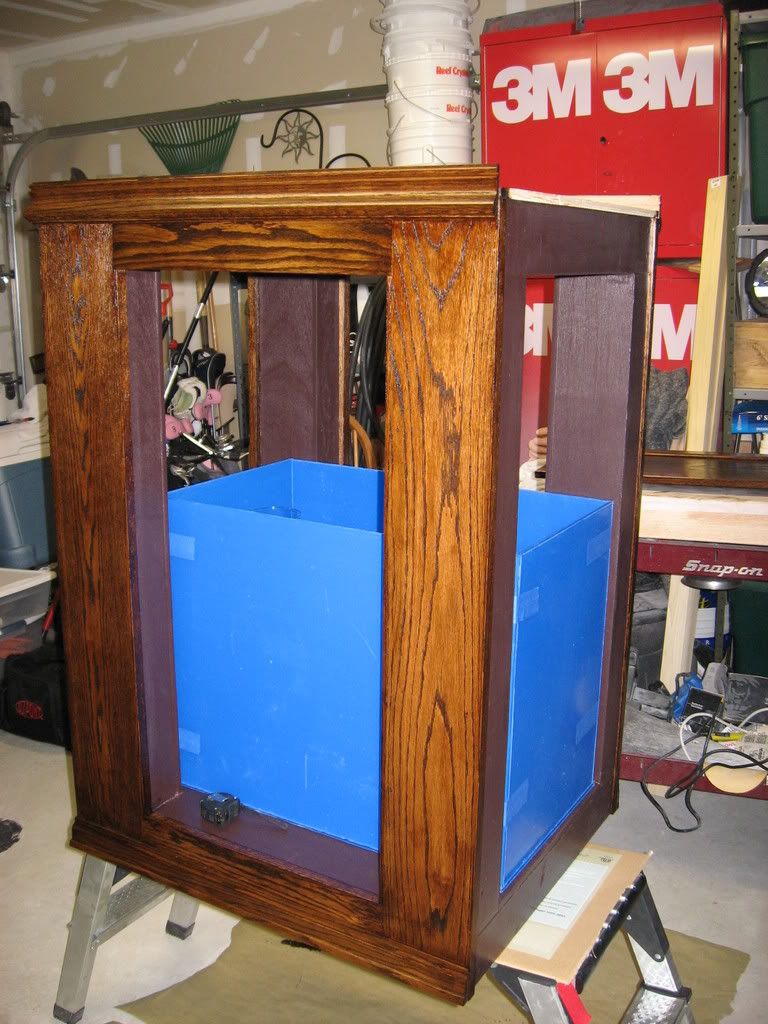 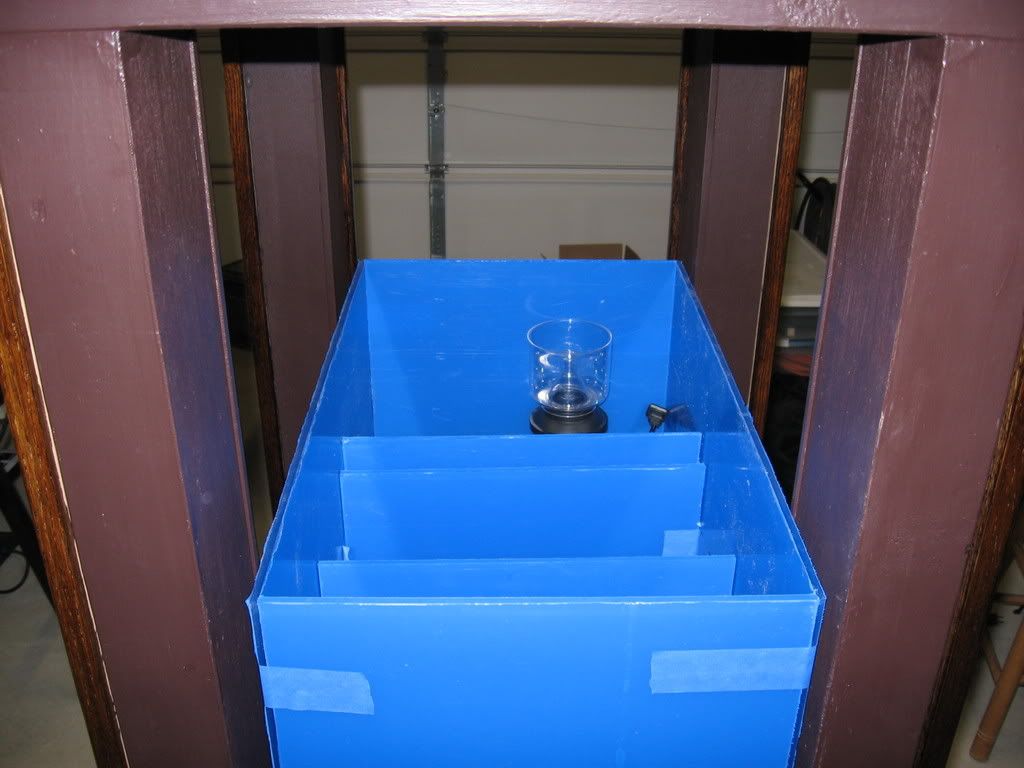 Time to start gluing 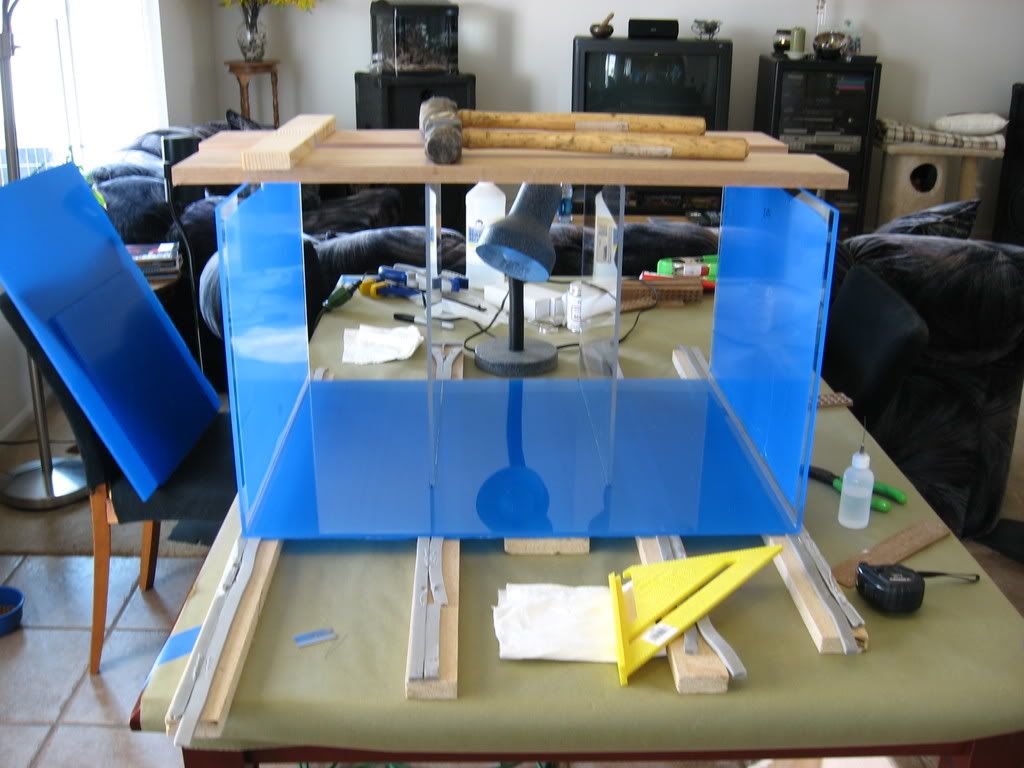 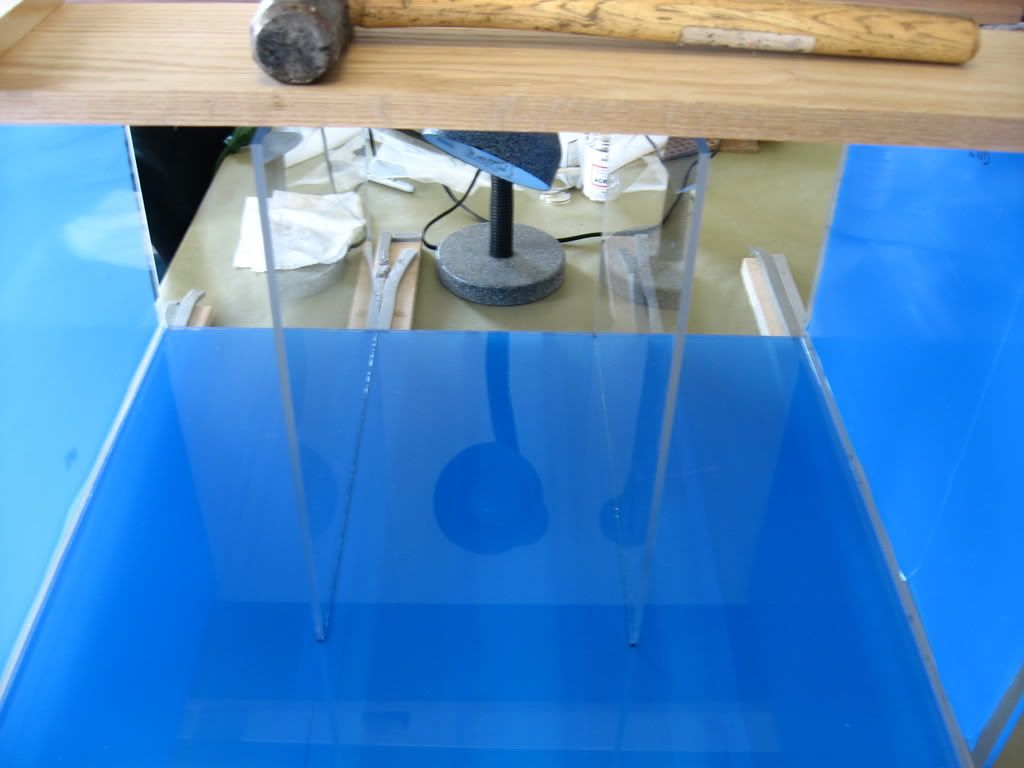 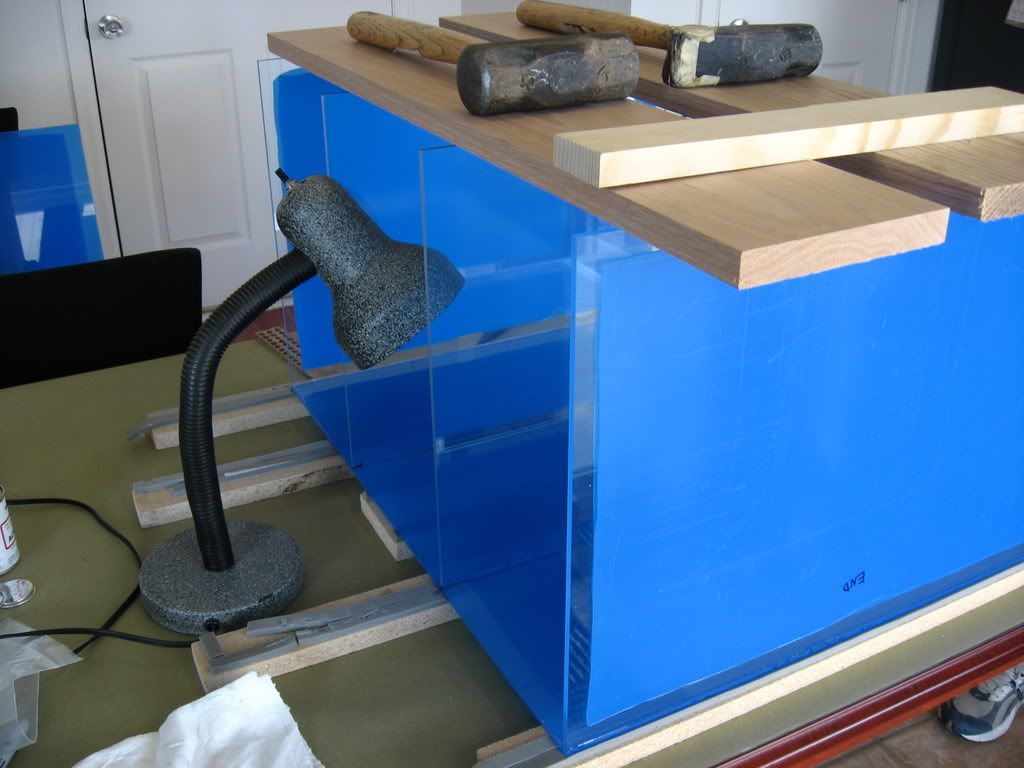
__________________
Make it a Great Day!!!! Current Tank Info: 60 gal SPS cube, with 25 gal refugium, 400W MH, DIY Lumenarc III, DIY skimmer, DIY stand and canopy. 40 breeder LPS with 40 gallon sump, DIY stand, 250W MH |
|
|
|
|
03/17/2008, 08:33 AM
|
#40 |
|
Registered Member
Join Date: Dec 2003
Location: Denver, Colorado
Posts: 9,579
|
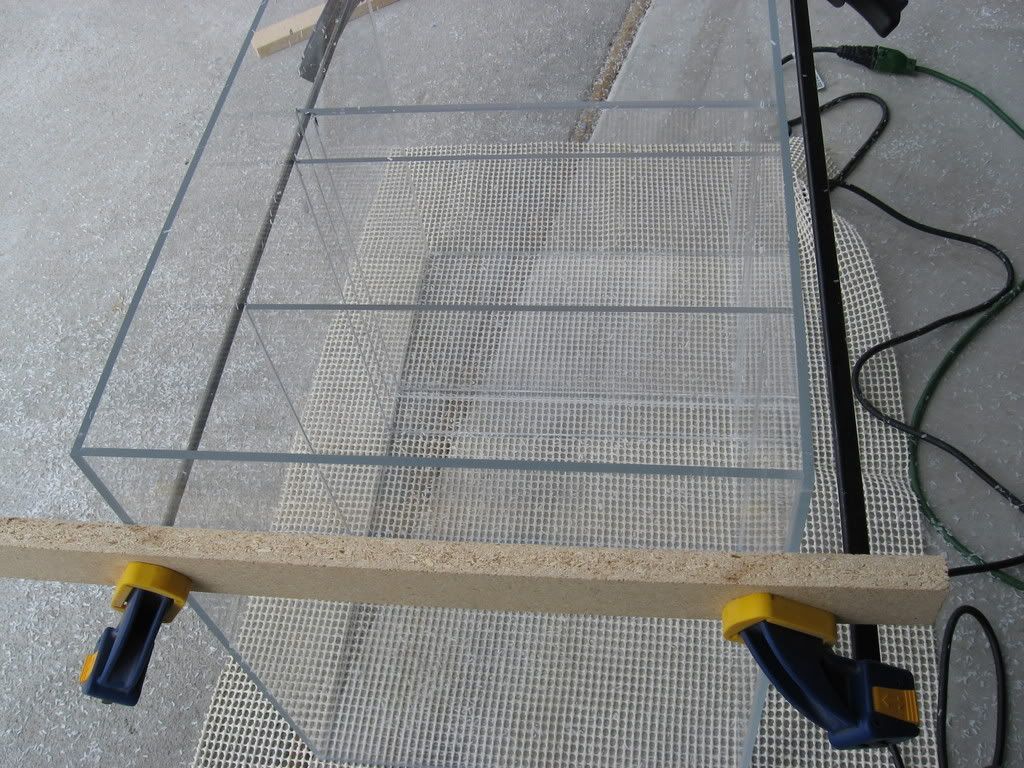
Here you can see how we applied the solvent in the seams.
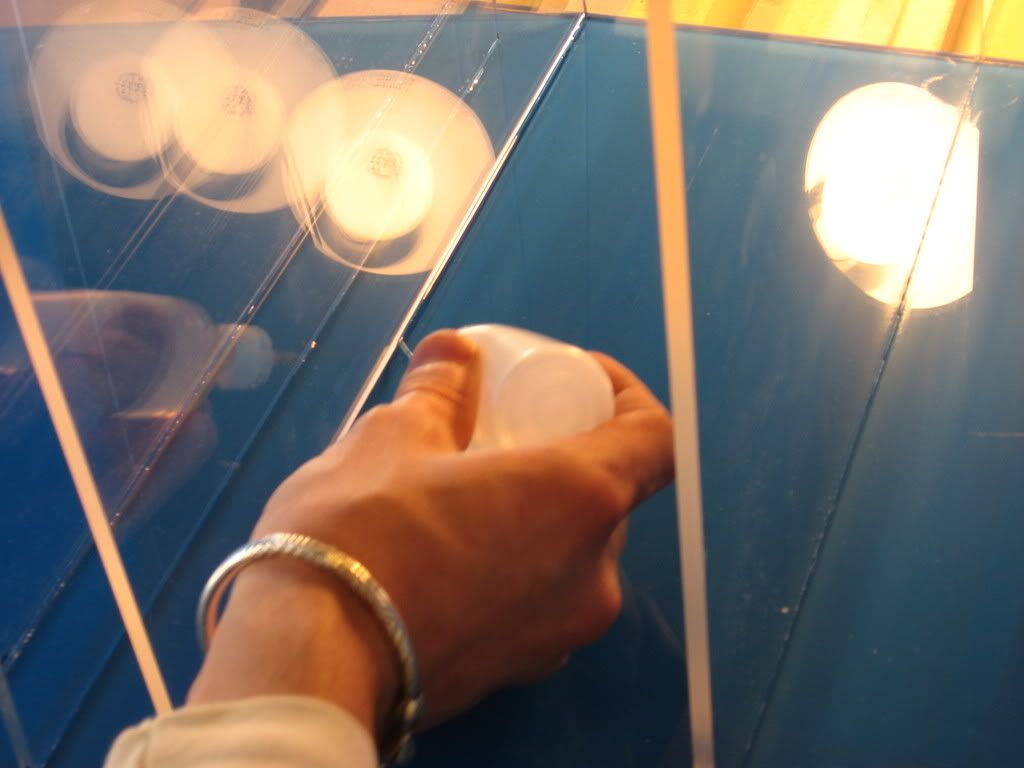  Making progress 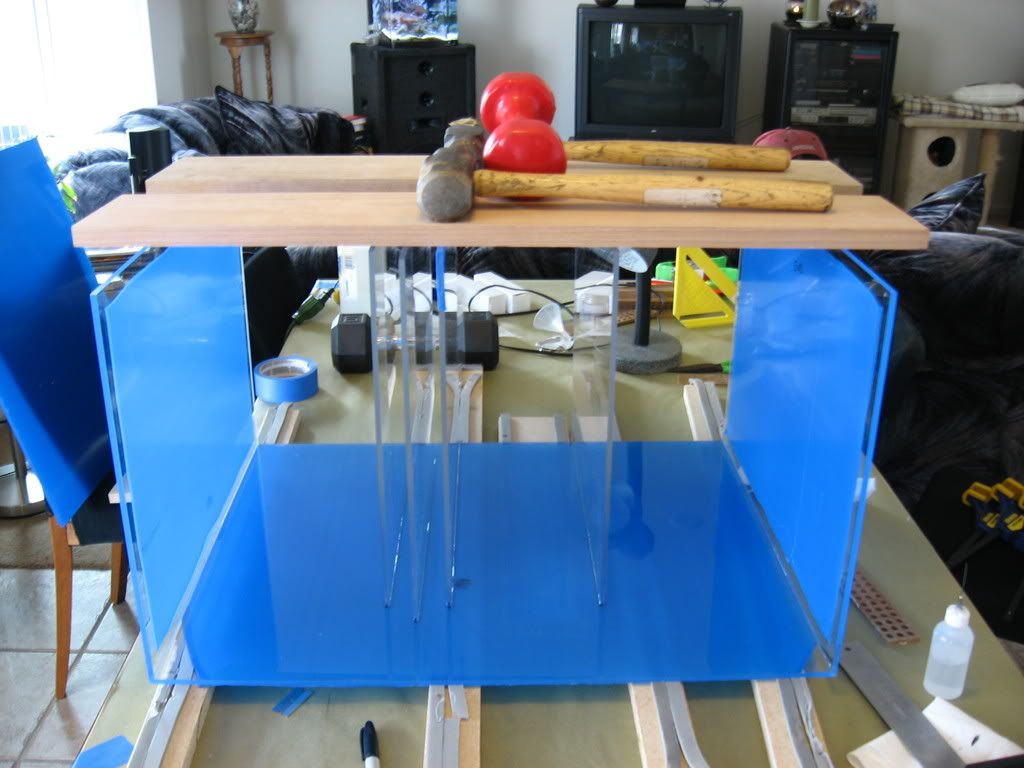 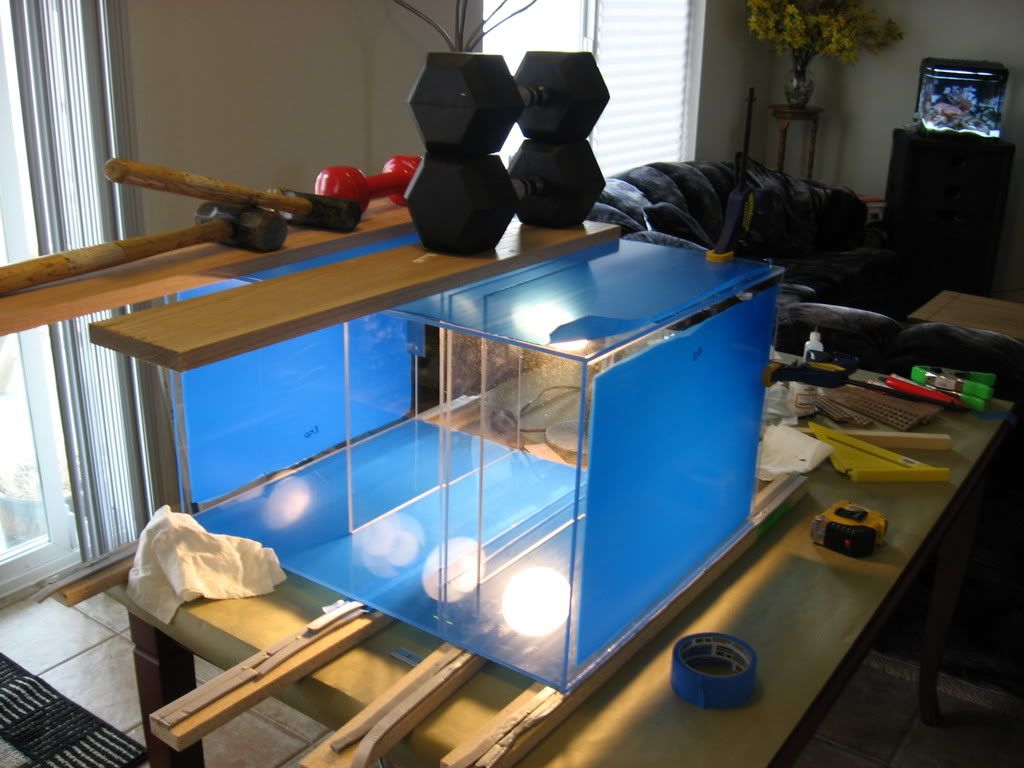 Everything joined, but the top and bottom, just waiting for things to dry. 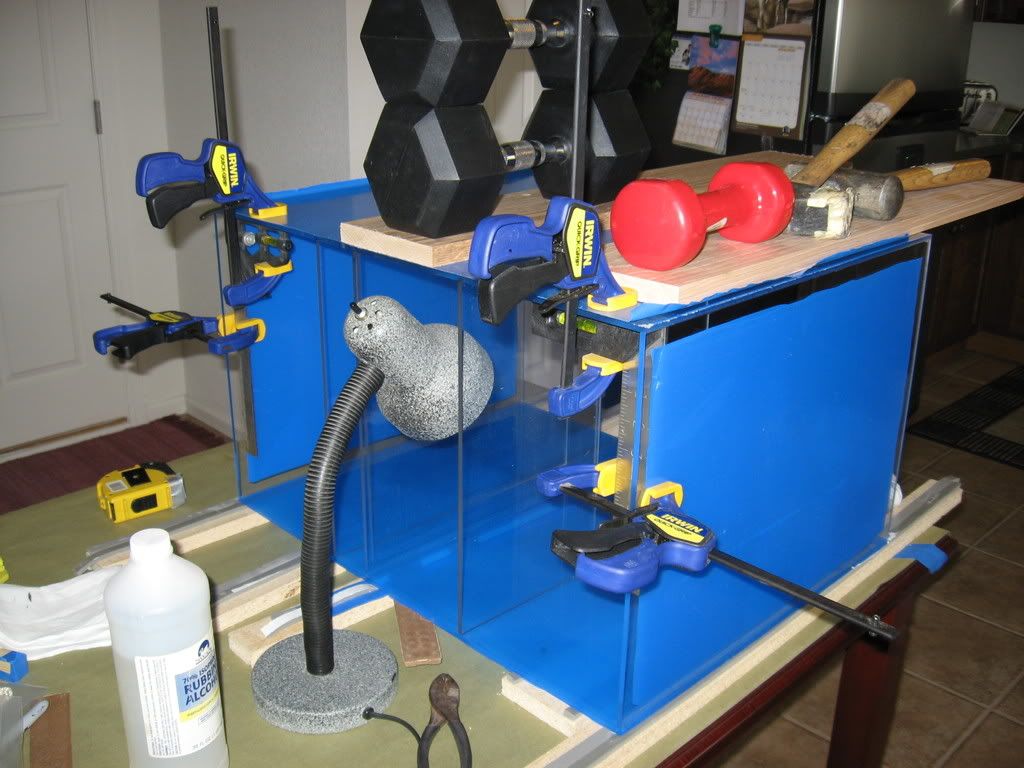 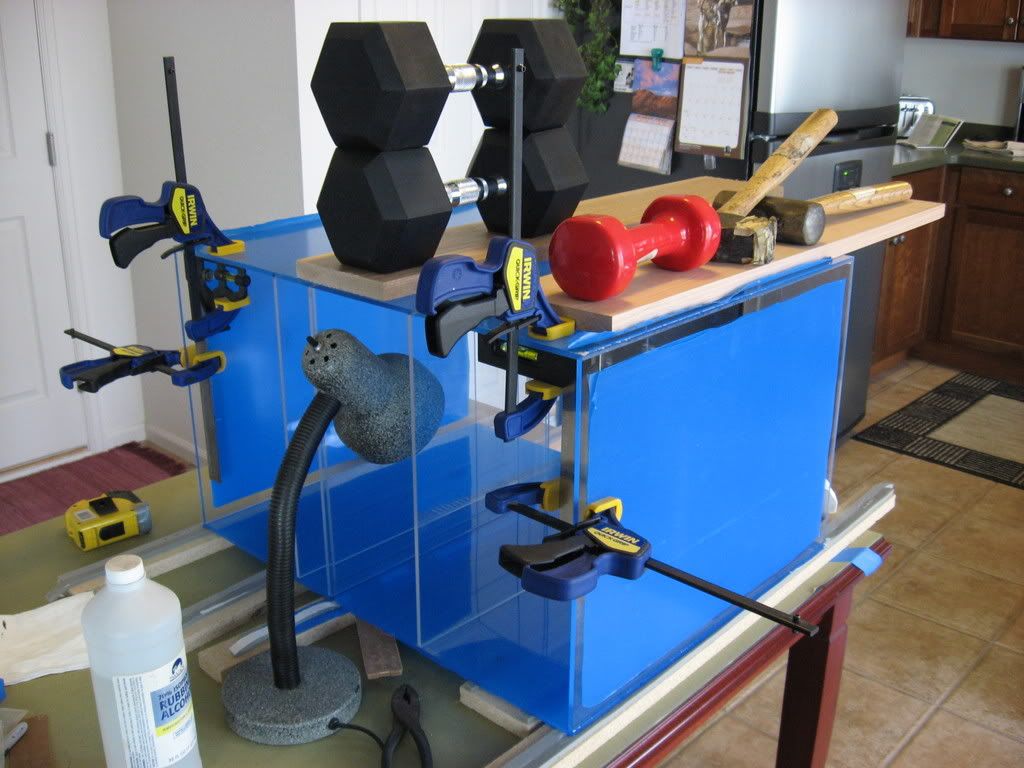 It's hard to tell in the pic but the joins turned out great. A couple of bubbles. But not bad, and completely livable for a refugium. 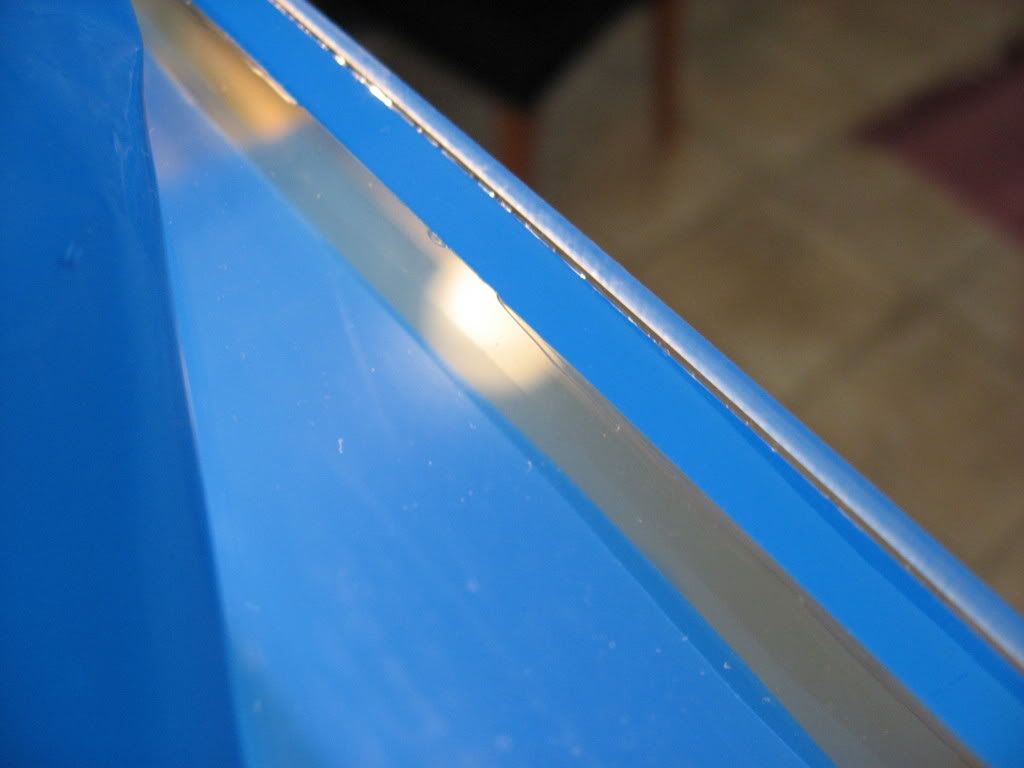 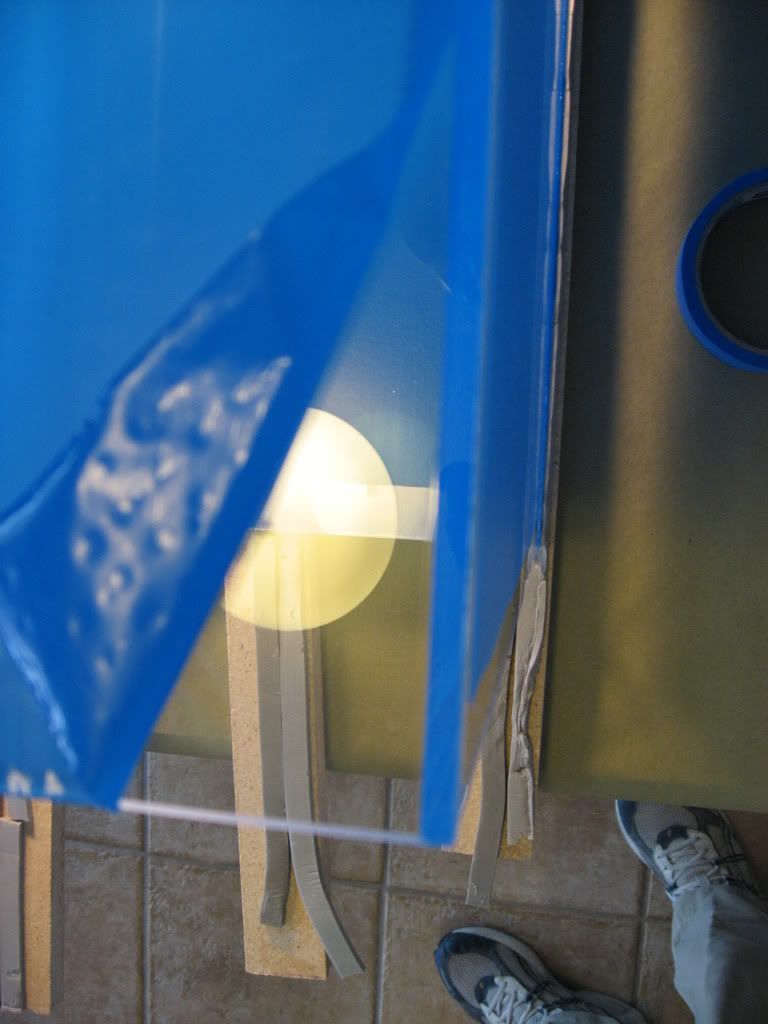 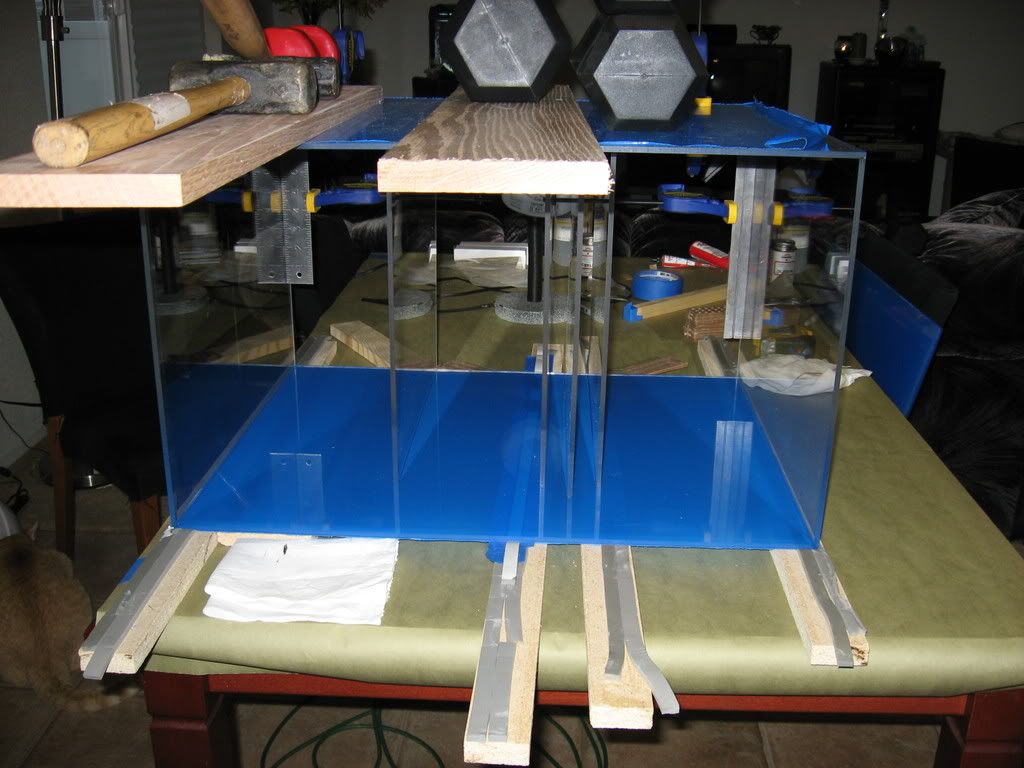
__________________
Make it a Great Day!!!! Current Tank Info: 60 gal SPS cube, with 25 gal refugium, 400W MH, DIY Lumenarc III, DIY skimmer, DIY stand and canopy. 40 breeder LPS with 40 gallon sump, DIY stand, 250W MH |
|
|
|
|
03/17/2008, 08:44 AM
|
#41 |
|
Registered Member
Join Date: May 2005
Location: Never,Never Land
Posts: 7,061
|
Daymmmm dude,simply outstanding work.I cant wait to see this thing going.When is the tank comming,or are you making that too?
__________________
We the few have done so much,for so long,for so little.That we are now qualified to do anything with nothing. ____________________________________________________________________________ Current Tank Info: RR 90 Maganvore sump,250w Hamilton fixture,VorTec's ASM skimmer. |
|
|
|
|
03/17/2008, 08:48 AM
|
#42 |
|
Registered Member
Join Date: Dec 2003
Location: Denver, Colorado
Posts: 9,579
|
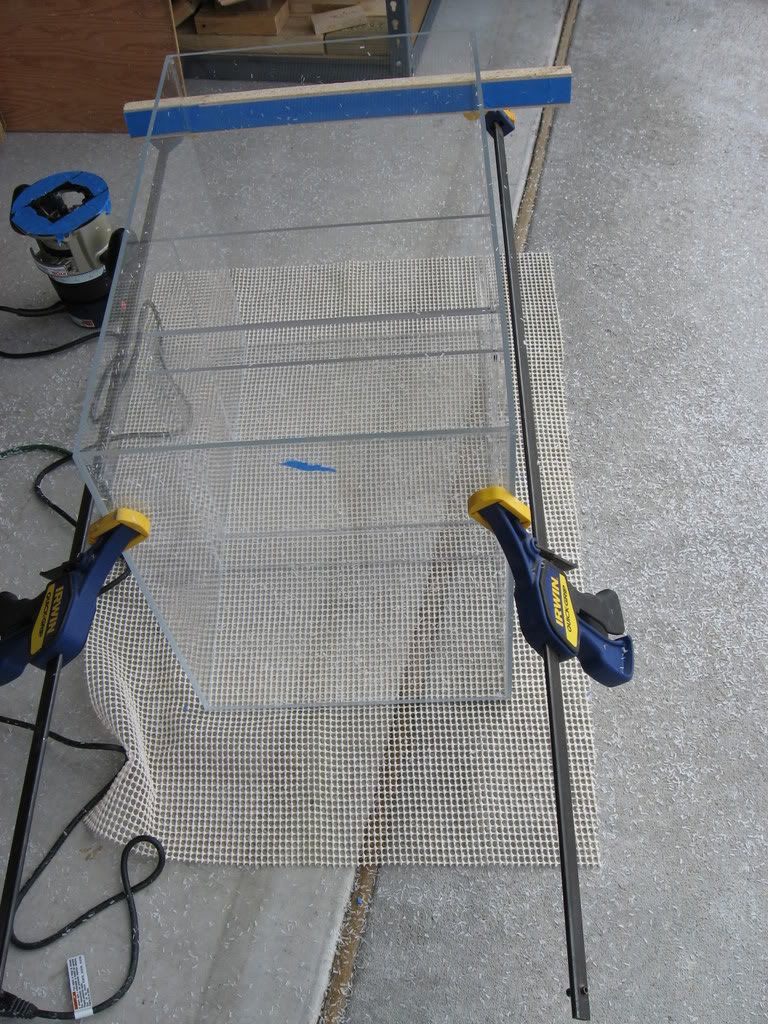
Ready for the bottom to go on.
  Obviously we used the pins method of gluing. I took a guitar string (little E) ad cut it into little pieces. 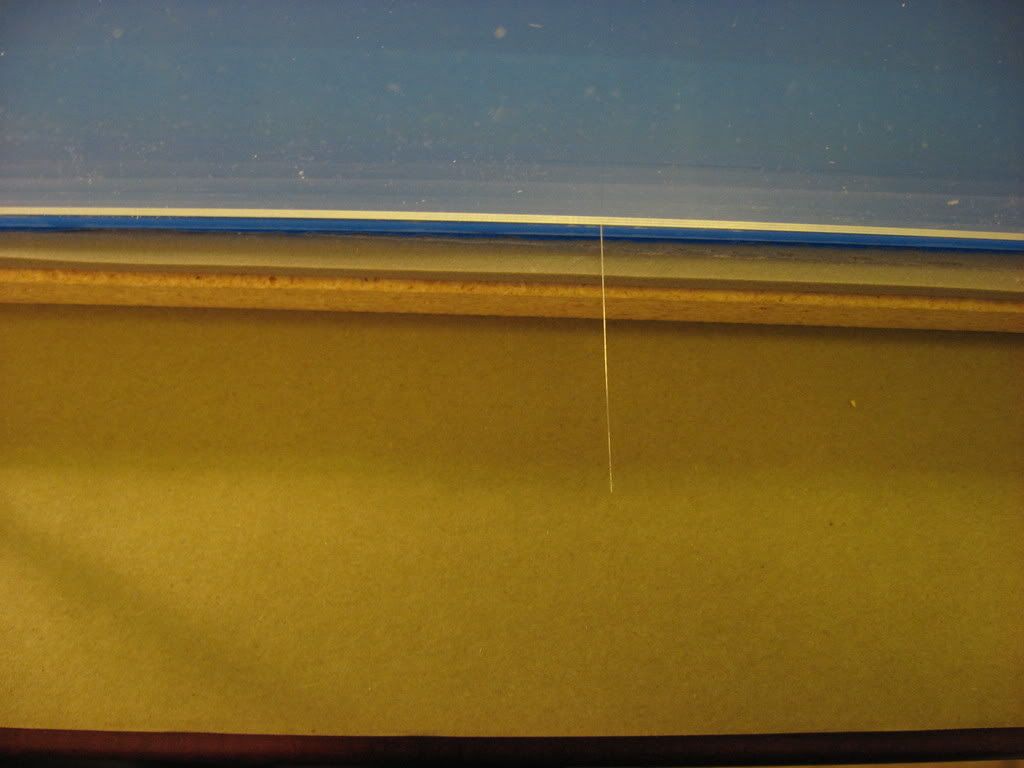 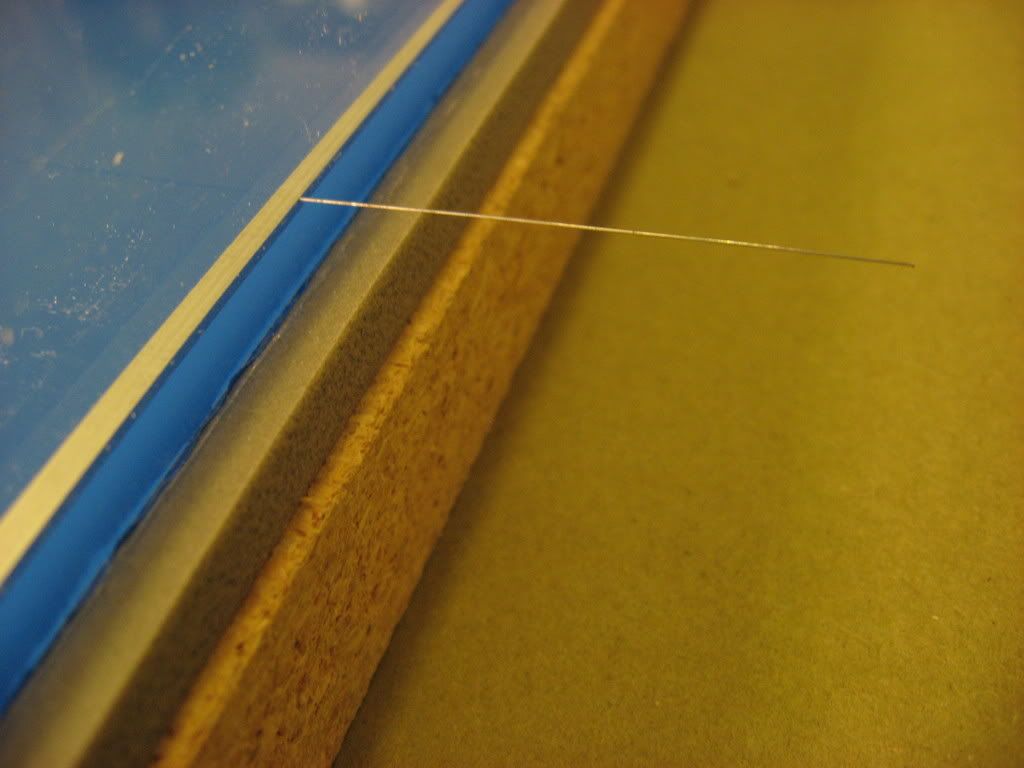 And the next morning, getting some sun. 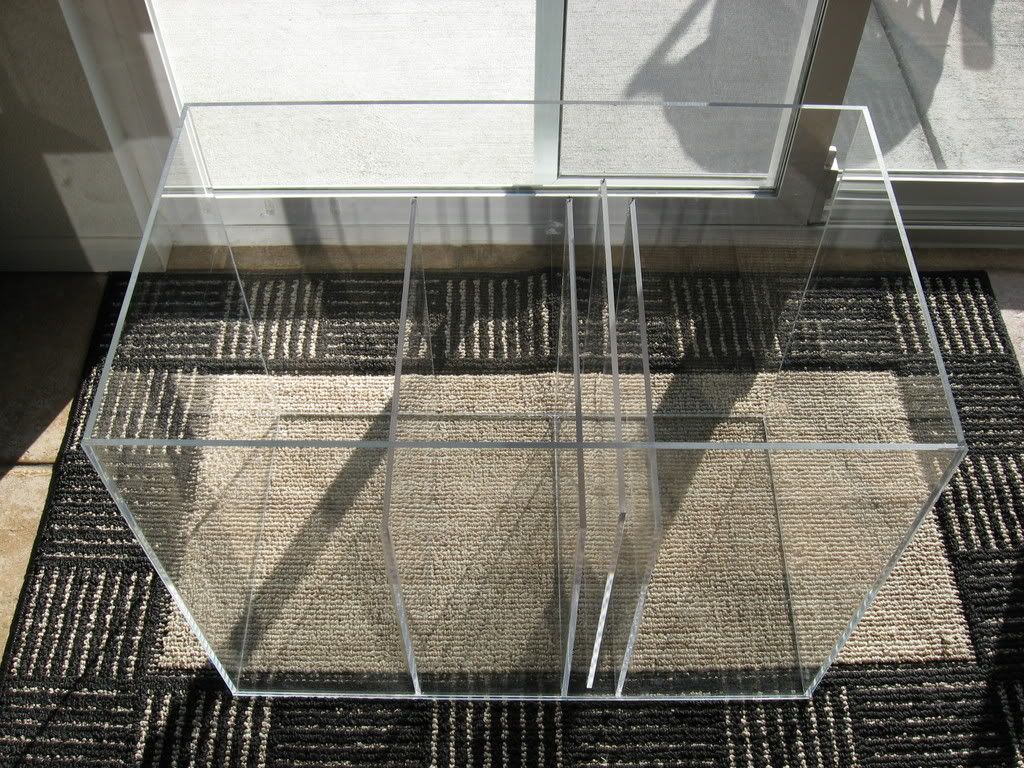 After a week I did a water test on it. I filled up the two end chambers to make sure they were sealed up good.  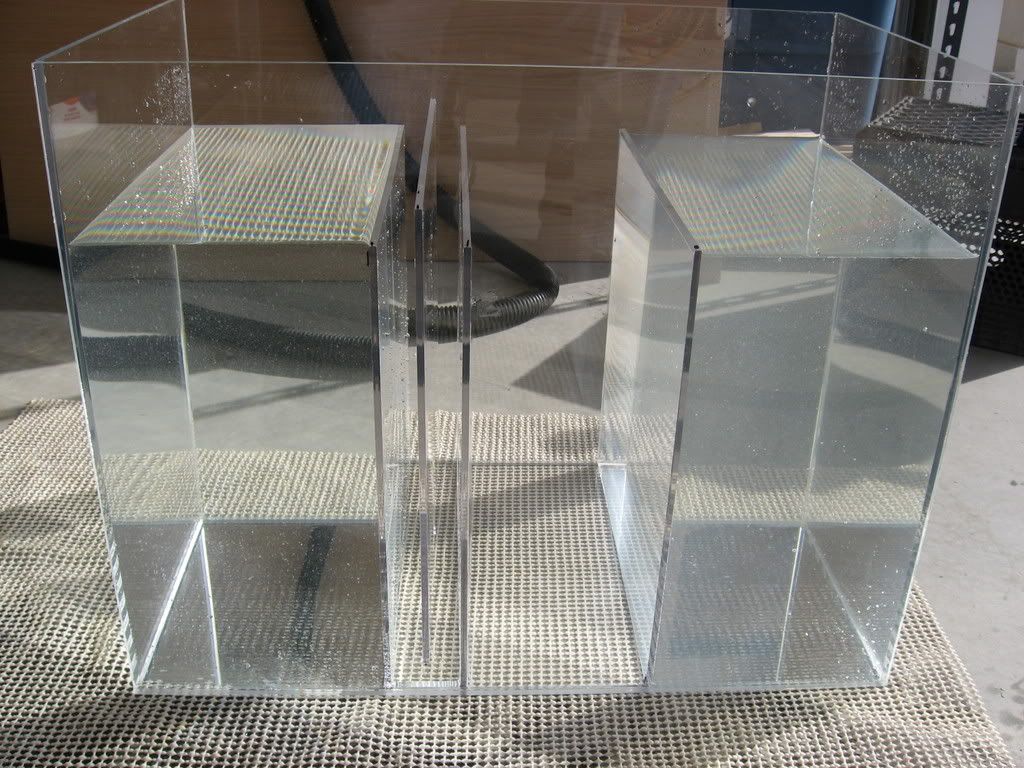 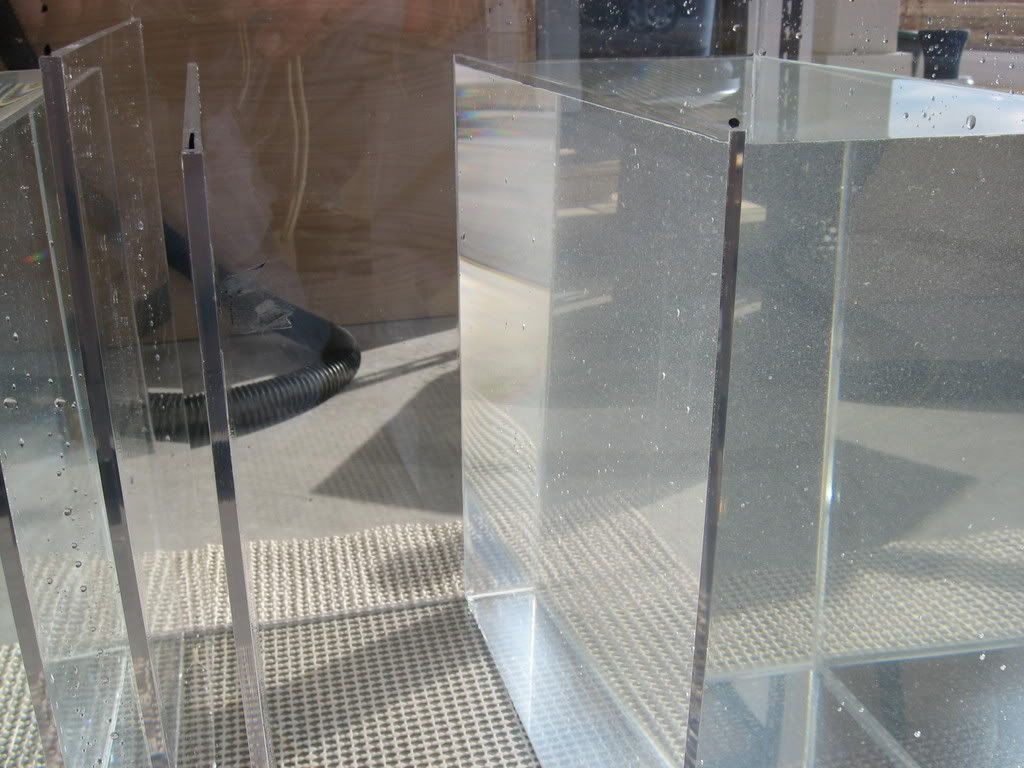 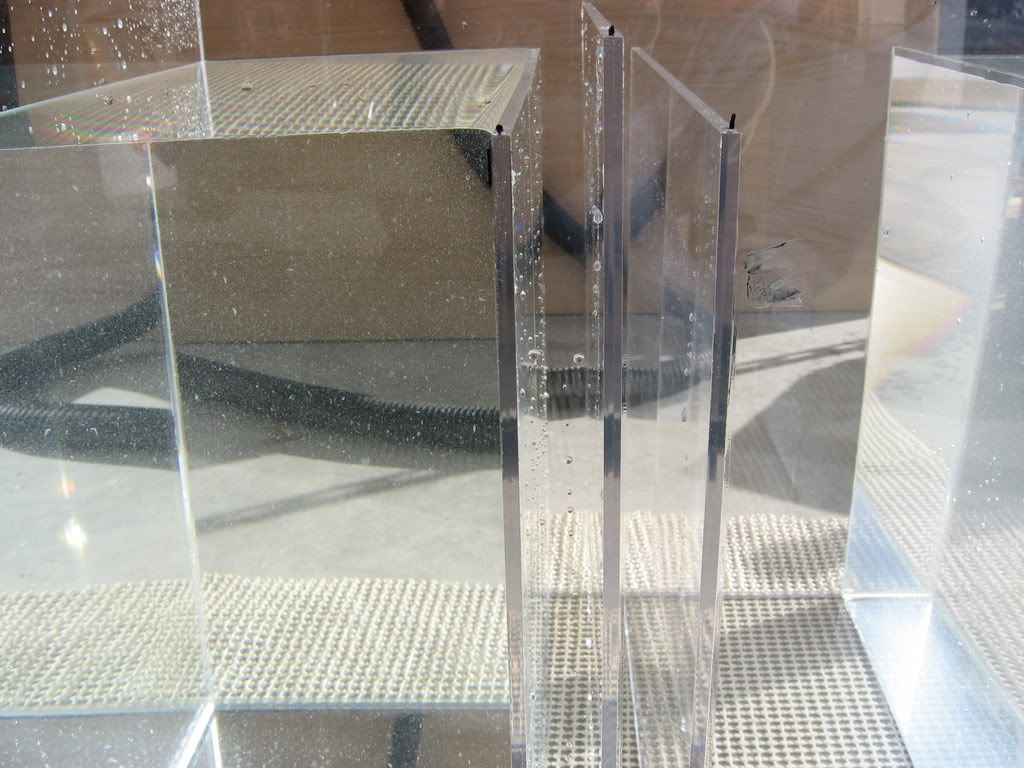
__________________
Make it a Great Day!!!! Current Tank Info: 60 gal SPS cube, with 25 gal refugium, 400W MH, DIY Lumenarc III, DIY skimmer, DIY stand and canopy. 40 breeder LPS with 40 gallon sump, DIY stand, 250W MH |
|
|
|
|
03/17/2008, 09:12 AM
|
#43 |
|
Registered Member
Join Date: Dec 2003
Location: Denver, Colorado
Posts: 9,579
|
After an hour or so, I filled the baffle area to test and make sure that held too.
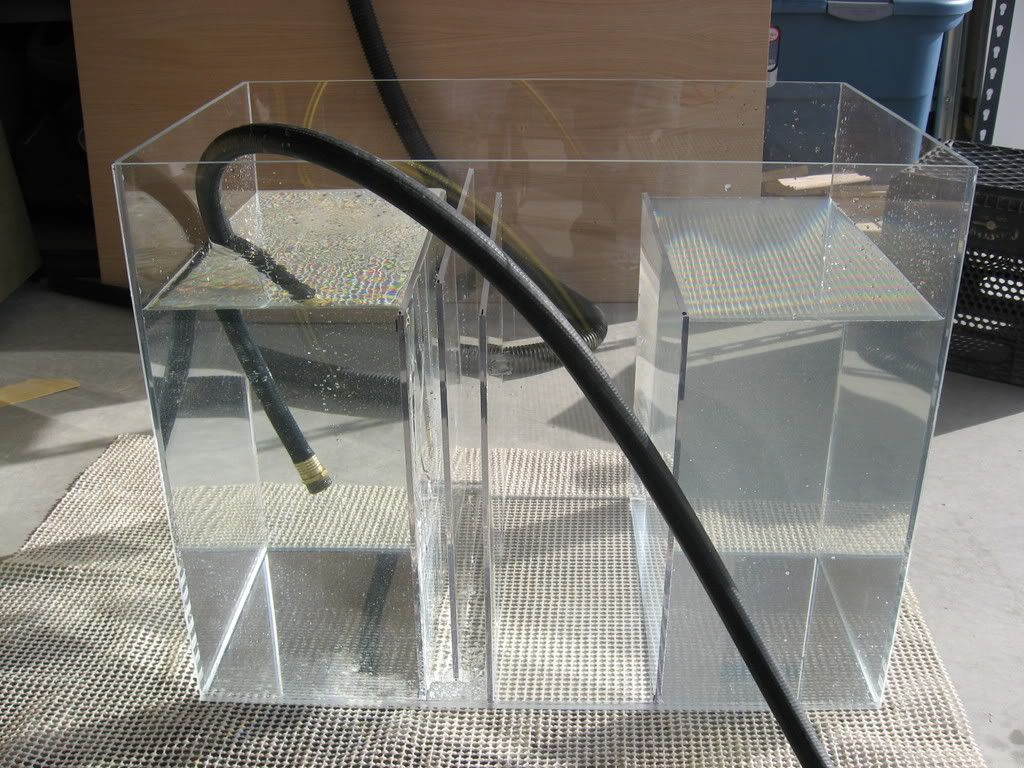  And after testing that I filled the whole thing up... 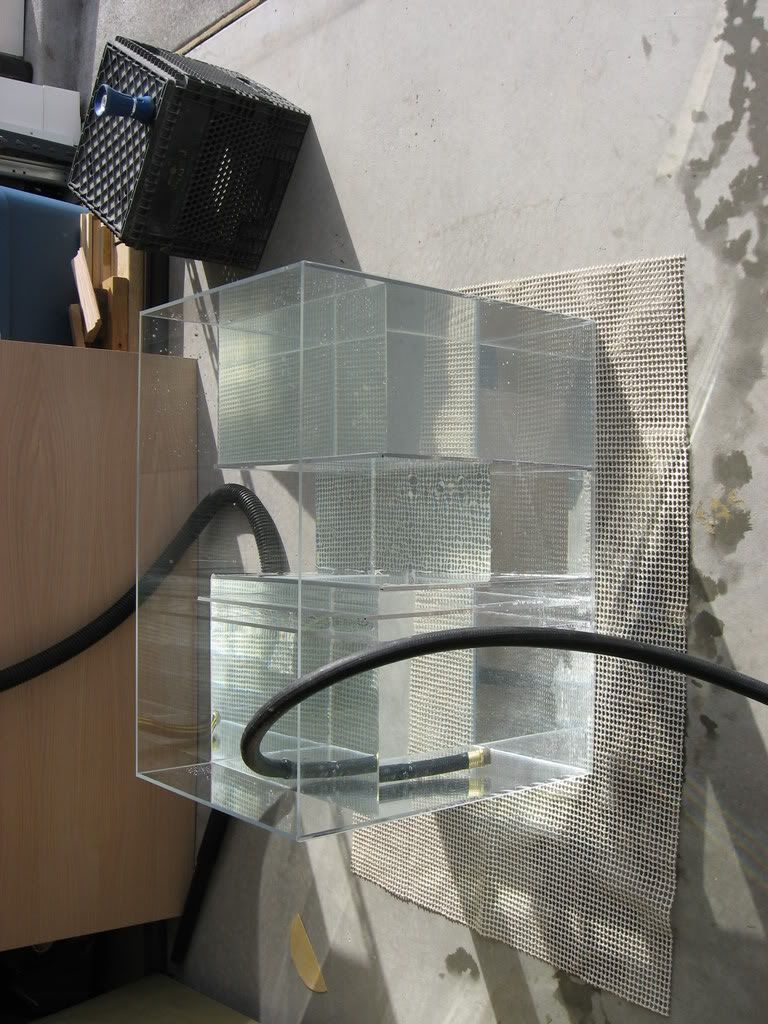 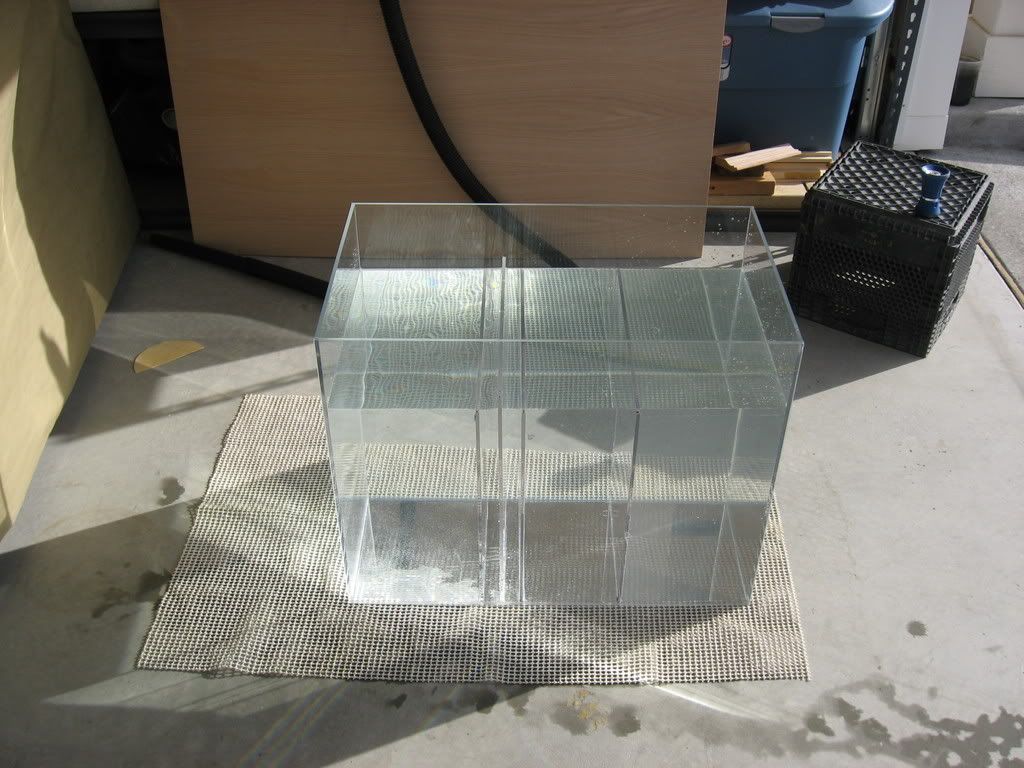 Next, I emptied it all out and dried it. Time to make the top. I took my same 1/2" flush router bit. Drilled a 9?16" hole, dropper er in, and started cutting. 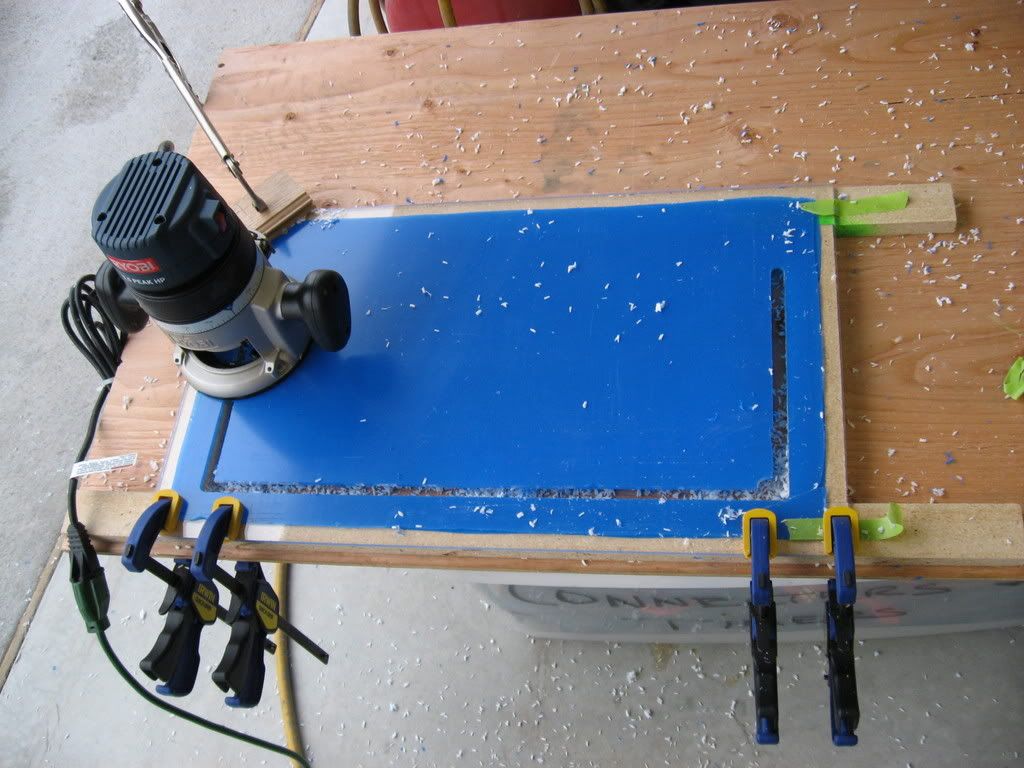 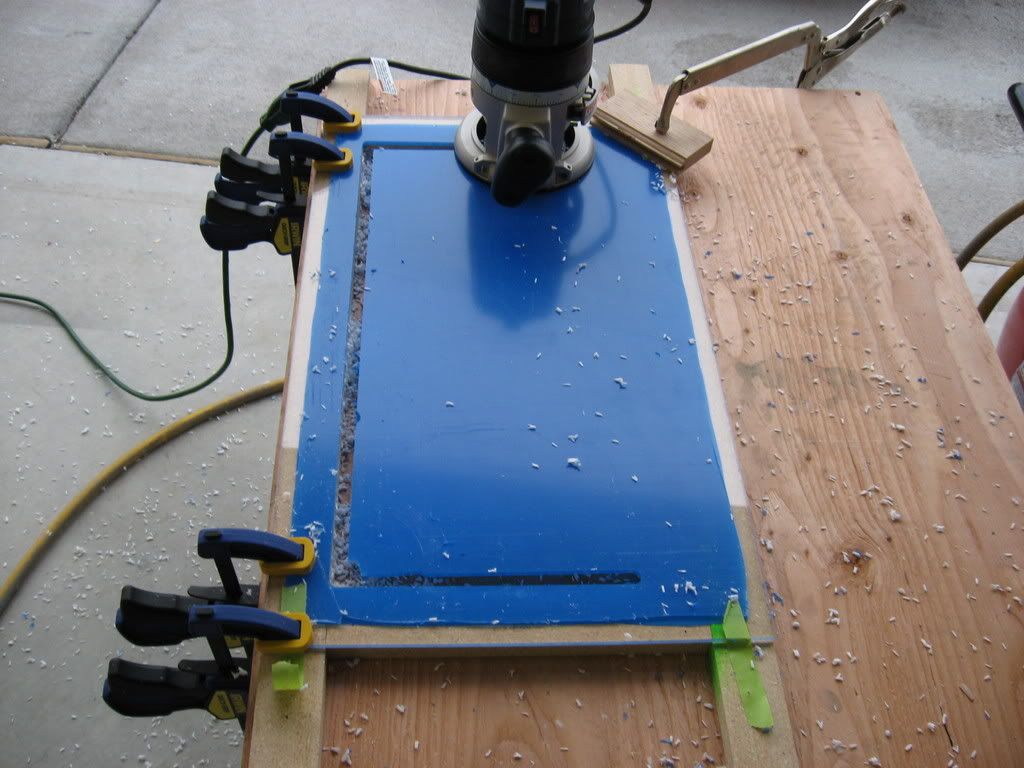 Finished cutting 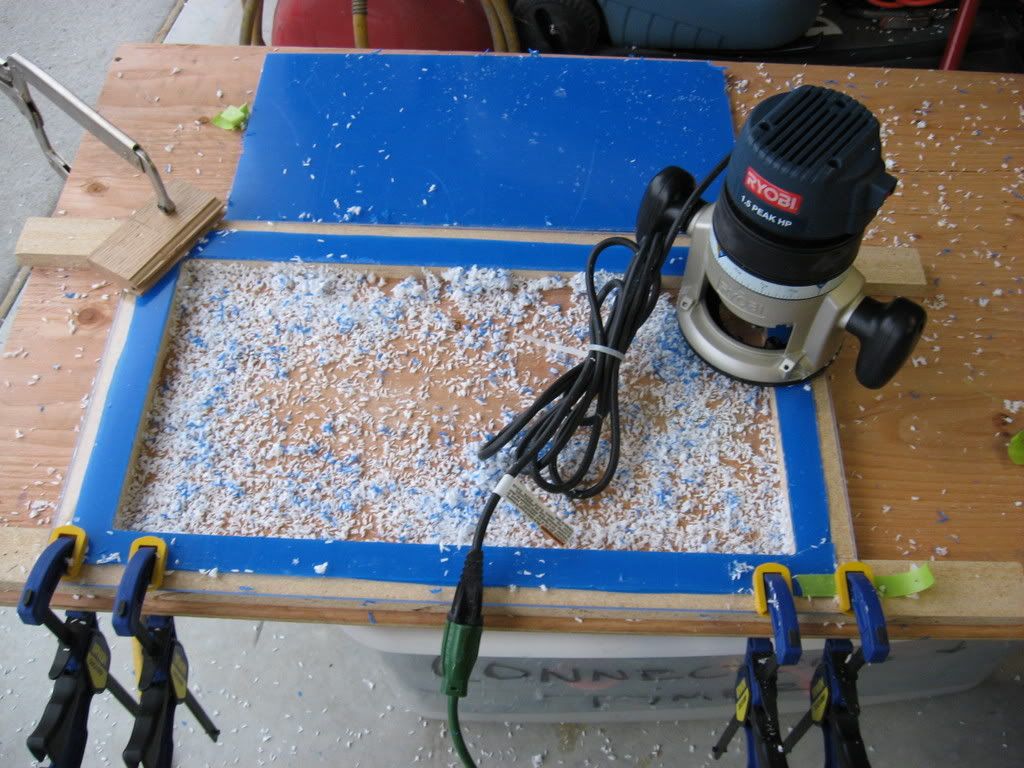 All cleaned up 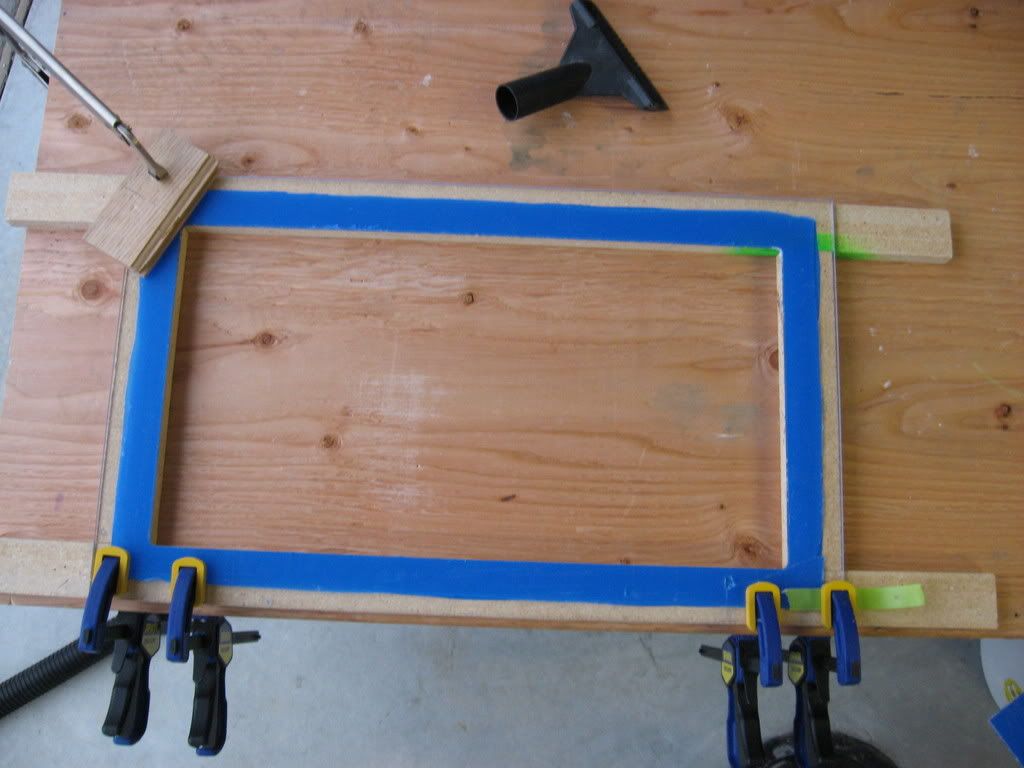 And in place 
__________________
Make it a Great Day!!!! Current Tank Info: 60 gal SPS cube, with 25 gal refugium, 400W MH, DIY Lumenarc III, DIY skimmer, DIY stand and canopy. 40 breeder LPS with 40 gallon sump, DIY stand, 250W MH |
|
|
|
|
03/17/2008, 09:20 AM
|
#44 |
|
Registered Member
Join Date: Oct 2007
Location: Lincoln
Posts: 5,521
|
Stand and Sump is looking great. Cant wait to see the tank!
|
|
|
|
|
03/17/2008, 09:21 AM
|
#45 |
|
Registered Member
Join Date: Dec 2003
Location: Denver, Colorado
Posts: 9,579
|
Before I could actually join the top I had to cut all the pieces flush. The sides and bottom were easy. But when the pieces were cut the were not cut the same height, so I had to se up a jig so I could flush route the top, so it would sit on even. I took a piece of scrap wood clamped it were I wanted it and routed away.....
    Thanks again BLKTANG, I am having a company in Oregon build the tank for me. Envision Acrylics, here is there link http://www.envisionacrylics.com/index.html From what I have seen this guys work is AWESOME!!!
__________________
Make it a Great Day!!!! Current Tank Info: 60 gal SPS cube, with 25 gal refugium, 400W MH, DIY Lumenarc III, DIY skimmer, DIY stand and canopy. 40 breeder LPS with 40 gallon sump, DIY stand, 250W MH |
|
|
|
|
03/18/2008, 07:42 AM
|
#46 |
|
Registered Member
Join Date: Dec 2003
Location: Denver, Colorado
Posts: 9,579
|
Well, I finished up the sump last night. I used a 45degree chamfer router bit and put a slight chamfer on all the edges, just to "soften" them. I polished some of the scratches, and it looks really awesome.
I should have some more progress pics tonight. Thanks for looking Spleify
__________________
Make it a Great Day!!!! Current Tank Info: 60 gal SPS cube, with 25 gal refugium, 400W MH, DIY Lumenarc III, DIY skimmer, DIY stand and canopy. 40 breeder LPS with 40 gallon sump, DIY stand, 250W MH |
|
|
|
|
03/18/2008, 08:10 AM
|
#47 |
|
Registered Member
Join Date: Apr 2007
Location: Virginia
Posts: 2,230
|
I'm insanely jealous of your shop, and that you have an area to do this! Since I moved about 6 months ago, my shop access has been extremely limited. Making anything is tough without the proper tools. Keep the pics coming!
|
|
|
|
|
03/18/2008, 09:28 AM
|
#48 |
|
Registered Member
Join Date: Mar 2003
Location: Phoenix, AZ
Posts: 3,210
|
wow.. u are quite the woodworker... I am always amazed at the talent on this board.
__________________
Vertex Alpha 300 Skimmer, AI SOL Blue, Neptune Apex Controlled 360 gallon Reef Current Tank Info: born 6/26/2008- 340 reef + 100 fuge, 300lbs of figi LR |
|
|
|
|
03/25/2008, 11:44 PM
|
#49 |
|
Registered Member

Join Date: Jan 2008
Location: Aurora
Posts: 85
|
Your work is amazing to say the least .
|
|
|
|
|
03/25/2008, 11:51 PM
|
#50 |
|
Registered Member
Join Date: Dec 2003
Location: Denver, Colorado
Posts: 9,579
|
Wow! Thanks so much for all the great comments. I have made some more progress and will be updating everything hopefully this weekend.
Thanks again Spleify
__________________
Make it a Great Day!!!! Current Tank Info: 60 gal SPS cube, with 25 gal refugium, 400W MH, DIY Lumenarc III, DIY skimmer, DIY stand and canopy. 40 breeder LPS with 40 gallon sump, DIY stand, 250W MH |
|
|
|
|
|
|


