
|
|
 09/26/2011, 08:55 PM
|
#3801 |
|
Registered Member
Join Date: Nov 2009
Location: Alaska
Posts: 1,268
|
Is it possible to use 1" PVC instead of 1 1/2" and still have it function just fine? If i lose a little bit of GPH it is fine. Also Do i have to use a sanitary T? What will happen, if anything, if i use a regular T? i cant find any sanitary T's locally.
Thanks for the help, trying to get a 29 as a peninsula style tank up ASAP and use the BeanAnimal overflow. I dont think i have room on the 13" end for 1 1/2" tubing. |

|

|
|
09/26/2011, 09:12 PM
|
#3802 | |
|
Registered Member.
Join Date: Jul 2002
Location: St Petersburg, Florida
Posts: 1,017
|
Quote:
Regular T's will work just fine.
__________________
John With sufficient thrust, pigs fly just fine. When I'm Finally holding all the cards, why is everyone else playing chess? Worrying Works! 90% of the things I worry about never happen Current Tank Info: 125g w 50g sump, Water Blaster 7000 return pump, Vertex IN 180 Skimmer, BRS GFO reactor, BRS Carbon reactor, 2 x 250w XM-10k MH Lights with 2 x 110w VHO super actinics |
|
|
|
|
|
09/26/2011, 09:28 PM
|
#3803 | |
|
Registered Member
Join Date: Nov 2009
Location: Alaska
Posts: 1,268
|
Quote:
Also, will i need 1 or 2 1 3/4" glass hole cutters from glass-holes for the 3 holes i need to drill? |
|
|
|
|
|
09/26/2011, 09:48 PM
|
#3804 | |
|
Registered Member.
Join Date: Jul 2002
Location: St Petersburg, Florida
Posts: 1,017
|
Quote:
__________________
John With sufficient thrust, pigs fly just fine. When I'm Finally holding all the cards, why is everyone else playing chess? Worrying Works! 90% of the things I worry about never happen Current Tank Info: 125g w 50g sump, Water Blaster 7000 return pump, Vertex IN 180 Skimmer, BRS GFO reactor, BRS Carbon reactor, 2 x 250w XM-10k MH Lights with 2 x 110w VHO super actinics |
|
|
|
|
|
09/26/2011, 10:33 PM
|
#3805 |
|
Premium Member
 Join Date: Jun 2007
Location: santa cruz mountains
Posts: 1,268
|
barfly - agree was combining the 3 down to a pair of pipes... but anyway, thanks for the explanation...
|
|
|
|
|
09/27/2011, 09:39 AM
|
#3806 |
|
Registered Member
Join Date: Mar 2011
Location: brooklyn NY
Posts: 529
|
i nkow its been asked a million times before but im having a hard time finding the john guest fitting needed. my local HD is a mess not very well stocked and impossible to find anything
would this work? http://www.bulkreefsupply.com/store/...ct-murlok.html |
|
|
|
|
09/27/2011, 01:41 PM
|
#3807 |
|
Registered Member
Join Date: Sep 2011
Location: Colorado
Posts: 36
|
Bean - I would greatly appreciate your assistance with a setup. I've noticed that almost all setups have a small coast to coast overflow box mounted inside of the tank and then the bulkheads mounted through the back glass and then the drains run down the back. That's how I saw you did it on your site.
However, my question is...will this system work if the drains are drilled through the floor and kept internally in the tank? In other words, if I made it like a "standard" overflow box (from the top of the tank all the way to the bottom), but had it go all the way across the tank (coast to coast). I hope I'm explaining it right. Also, another question, if I did make the overflow from the top to the bottom of the tank, how deep (front to back) would be the minimum I could go with it? I plan on using 1 1/2" piping all the way (including 1 1/2" bulkheads). It's a 110g (5' x 2' x 1.5') tank and I have yet to drill the holes. However, I was hoping to put the bulkheads in the floor of the tank instead of out the back of the tank and then run it directly down into the sump below the tank. Here is a pic of my tank so you can see what tank I'm talking about  So, I was thinking about installing a sheet of black acrylic from one end of the tank to the other and from top to bottom to create a giant overflow box in the back of the tank. However, I would like to do this with minimal depth since I only have 18" of display depth. So, if I had to place the sheet 4" from the back of the tank, that would still give me 14" of display for everything. But if I end up having to do it 6" into the tank, then that drops my display depth to just 12" and I'm not sure I want to do that. I'd like to make it a shallow as possible, but still have it work properly and effectively. Anyway, I was just wondering if it was possible and/or suggested. I haven't really seen anyone do your system through the bottom of the tank, only out the back. Thanks again for your help and awesome job on changing reefing forever.  Take care, Mat
__________________
Mat I have no snappy quip to put here. LOL! Current Tank Info: 135g fish/reef tank under construction :) |
|
|
|
|
09/27/2011, 02:23 PM
|
#3808 | |
|
Registered Member
Join Date: Feb 2003
Location: Pittsburgh
Posts: 20,772
|
Quote:
The 4th bulkhead could serve as a second open channel. The system would be set to be stable at the lowest surge point or flow and the open channels and siphon would increase in flow as the surge peaked. |
|
|
|
|
|
09/27/2011, 02:34 PM
|
#3809 | ||
|
Registered Member
Join Date: Feb 2003
Location: Pittsburgh
Posts: 20,772
|
Quote:
Quote:
|
||
|
|
|
|
09/27/2011, 05:50 PM
|
#3810 | |
|
Registered Member
Join Date: Oct 2009
Location: Houston TX
Posts: 1,411
|
Quote:
 
__________________
Felix Nice to meet you! Current Tank Info: 60 Gallon Cube |
|
|
|
|
|
09/27/2011, 06:14 PM
|
#3811 |
|
Registered Member
Join Date: Jan 2009
Location: Palmdale
Posts: 2,556
|
i can attest to the needing to get to bottom of overflow box. First fish i put in tank, (yesterday), immediatly jumped into overflow, and i had to "fish" him out...
__________________
~SFVR Member~ 125 Gal Long/50 Gal sump, 2xMP40QD,Aquamax CONES CO-03/Speed Wave dc return 4x AI Sol Blues/Director + 2 80w T5 retrofit/Apex Controller Current Tank Info: 125 gal 72X18X22 |
|
|
|
|
09/27/2011, 09:20 PM
|
#3812 | |
|
Registered Member
Join Date: Apr 2004
Location: Austin, TX
Posts: 2,218
|
Quote:
This is a HUGE deal for me, since my overflow box is quite narrow and once I plumb this system up and glue everything in, it would be EXTREMELY difficult to disassemble it and switch to a different drain system. Additionally, by using the BeanAnimal system, I am able to avoid the use of a bubble tower beneath my drains since this is supposed to be silent and basically free of bubbles. So if ANYONE out there is using this system successfully along with a wavebox, or if anyone has tried it and failed, that would be very valuable information for me. I simply cannot move forward with my tank setup until I resolve this issue. I realize from reading the thread that the system is supposed to be airtight, and hard plumbing including glueing of all fittings is recommended, but would it be okay for me to glue up the whole thing EXCEPT for the pipe that connects to the bulkheads in my overflow box? That part should be submerged at all times, and therefore air tight, and that would allow me to simply lift it out of the overflow if it doesn't work with my waveboxes?
__________________
The Dude abides Current Tank Info: building a new home tank l 450g office tank with Deltec everything |
|
|
|
|
|
09/27/2011, 10:57 PM
|
#3813 |
|
Premium Member
Join Date: Jun 2007
Location: santa cruz mountains
Posts: 1,268
|
BeanAnimal -
Any recommendations for how to setup your system whereby the sump is located on the other side of the house (40 feet horizontal, about 3 feet down, vertically)? Do you recommend running 3 independent lines or is it okay to combine the Open and Emergency below the tank? Am I going to hear noise from the Open channel since it's not a vertical free fall into the sump? Any suggestions? 
|
|
|
|
|
09/28/2011, 08:16 AM
|
#3814 |
|
Registered Member
Join Date: Feb 2003
Location: Pittsburgh
Posts: 20,772
|
Tony, the system works by using both a siphon and an open channel. You have a long horizontal run AND a clumb back up into the sump. That means that the water is going to back up at the bottom of the drop (display side) AT LEAST to the height of the top of the sump plumbing. This may or may not cause surging, splashing, etc. It may also create an air locked system if you are not careful.
If you do NOT put a pre-sump (a grant) at the bottom of the display drop (just above the height of the other sump), then you run the risk of entraining air along the entire run to the main sump. So, the "open channel" ends at the bottom of the drop because of the climb to the main sump. You can run (3) properly sized pipes but may or may not get splashing at the bottom of the drop. You can also run 1 larger pipe. As I said above, the entire 40 foot horizontal run (1, 2 or 3 pipes) will be full because the water has to back up high enough to run over into the main sump. To be safe, the pipe(s) needs to be large enough to handle the full flow of the system without allowing detritus to settle out due to decreased velocity. This is going to be somewhat tough. The main sump side will likely need to be vented at the top to prevent airlock and splashing. Sorry if my answers are vague, but you have a large number of variables to deal with. |
|
|
|
|
09/28/2011, 08:18 AM
|
#3815 |
|
Registered Member
Join Date: Feb 2003
Location: Pittsburgh
Posts: 20,772
|
Dudester, you can set the system up without cementing the components internal to the overflow box.
I think with a bit of thought, you can free up the 4th bulkhead if needed
|
|
|
|
|
09/28/2011, 09:11 AM
|
#3816 | |
|
Premium Member
Join Date: Jun 2007
Location: santa cruz mountains
Posts: 1,268
|
Quote:
So let me fill in some blanks: - I have a pair of 2" drains and an additional 1.5" available if I need it for this purpose already run the long distance from the display to the sump. - I have bulkheads whereby I could avoid the elevation at the main sump and just flow directly in below water level. - Having experimented, I can confirm that it's very easy to end up with an air lock situation. Main question: - Do you recommend going with the dual sump approach? If so, any tips on how best to configure it to avoid getting air locked between the two sumps, given that the first sump basically sits just above the second vertically. Last edited by tonyespinoza; 09/28/2011 at 09:23 AM. |
|
|
|
|
|
09/28/2011, 09:21 AM
|
#3817 | |||
|
Registered Member
Join Date: Feb 2003
Location: Pittsburgh
Posts: 20,772
|
Quote:
Quote:
Quote:
|
|||
|
|
|
|
09/28/2011, 10:04 AM
|
#3818 |
|
Premium Member
Join Date: Jun 2007
Location: santa cruz mountains
Posts: 1,268
|
Ok, thanks BeanAnimal!
|
|
|
|
|
09/29/2011, 11:35 AM
|
#3819 | |
|
Registered Member
Join Date: Sep 2011
Location: Colorado
Posts: 36
|
Quote:
So, if I made the setup like yours (not all the way down the tank), I shouldn't have a problem using black acrylic for the entire setup, correct? That should adhere to the glass with regular clear aquarium silicone and not have any "pressure" issues, correct? One of the main reasons I considered going all the way to the bottom with the overflow box is because I've heard of issues of the coast to coast overflow box "shadowing" on the bottom of the tank and blocking out the light. Is this an issue? If so, how would it be resolved? As for the tempered glass, I understand that as well. I did check and none of the glass (including the bottom) is tempered, so that wouldn't have been an issue. However, I definitely checked into that before I bought the tank (thinking I was going to drill through the bottom). Now, it might not matter if I'm going through the back glass with your setup. Nemosworld - I'm thinking maybe I'll do what you did. Just put the returns through the back on each end of the tank and then create the coast to coast overflow box in between the returns. Did you just use black acrylic for your overflow box and then used regular clear aquarium silicone to attach it to the rear of the tank? How about attaching each piece of the overflow together to make the "L"; did you just use silicone on that too? Thanks again for the info.  Mat
__________________
Mat I have no snappy quip to put here. LOL! Current Tank Info: 135g fish/reef tank under construction :) |
|
|
|
|
|
09/29/2011, 03:29 PM
|
#3820 | |
|
Registered Member
Join Date: Apr 2004
Location: Austin, TX
Posts: 2,218
|
Quote:
__________________
The Dude abides Current Tank Info: building a new home tank l 450g office tank with Deltec everything |
|
|
|
|
|
09/29/2011, 07:11 PM
|
#3821 | |
|
Registered Member
Join Date: Mar 2011
Location: brooklyn NY
Posts: 529
|
Quote:
I re-read the very first pages and most questions truly are answered in the first 10 pages of this thread. Bean you really do have an insane amount of patience dealing with us bonehead noobs. I salute you! (radio beer commercial voice lol) Now the hunt for spaflex begins...neither HD or Lowes had it. Not sure if they were out of stock or if they carry it at all....the employees at both places are very confrontational and abrasive. I had a basket full of pvc fittings i was picking up and decided to go somewhere else to buy them because of the attitude of the guy helping me. I need to find a local mom and pop hardware store and start bringing my business to them instead. Diy is fun for the most part but it can be frustrating as hell sometimes trying to find misc items. the fun is starting to be sucked out of this build and its starting to feel like work work rather than fun work |
|
|
|
|
|
09/30/2011, 09:17 PM
|
#3822 |
|
Registered Member
Join Date: Nov 2010
Posts: 4
|
Spaflex at TruValue HW.
Jim |
|
|
|
|
10/02/2011, 05:32 PM
|
#3823 |
|
Registered Member
Join Date: Feb 2009
Location: Southeast Michigan
Posts: 165
|
holes in bottom of tank?
anybody have any pics or a drawing of doing this using a tank that has holes drilled in the bottom? I have two 1 1/2" bulk heads and 2 2" bulk heads at the bottom of my built in center overflow. Do I just bring stand pipes up the the levels bean has documented and then add my valves to the drain piping where it exists the bottom of the tank under the stand? If that is the case, do I still need to have the elbows on the top? probably not since the water will be sucked into #2 and if it gets too high it will spill into #3 and if it gets too too high #1 correct?
|
|
|
|
|
10/03/2011, 06:39 PM
|
#3824 |
|
Registered Member
Join Date: Mar 2011
Location: brooklyn NY
Posts: 529
|
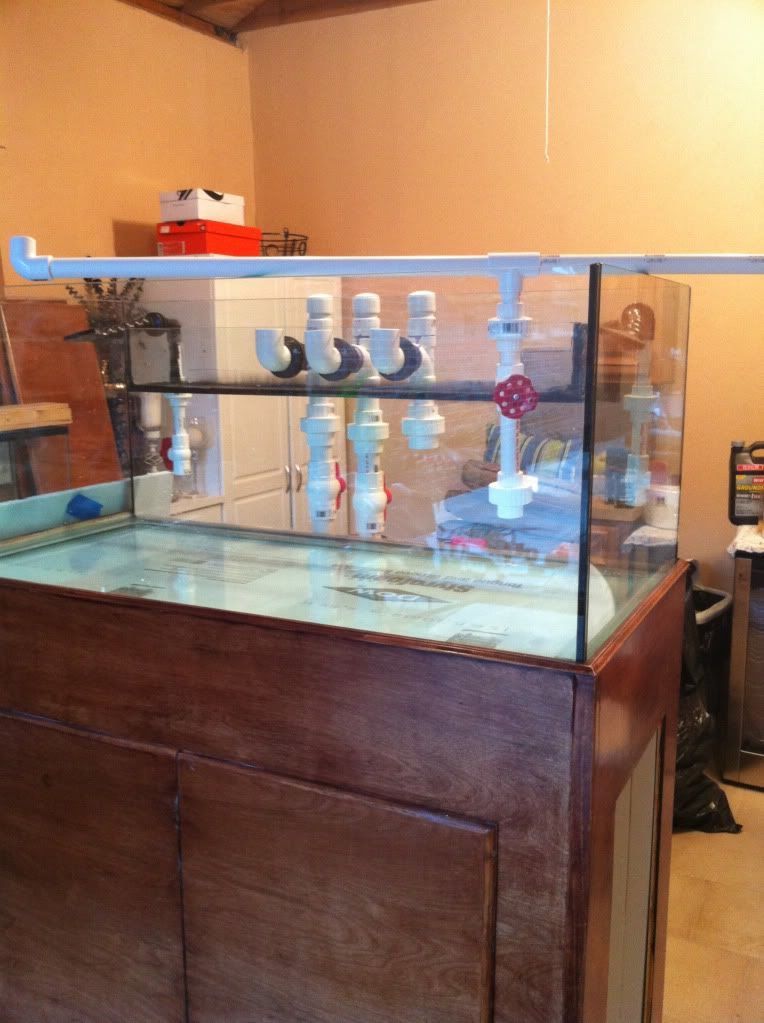
Ok so I finally made some progress. Please let me know if anyone sees anything that may be problematic.
First drilled the 3rd hole (tank came with 2 1.5" holes already). 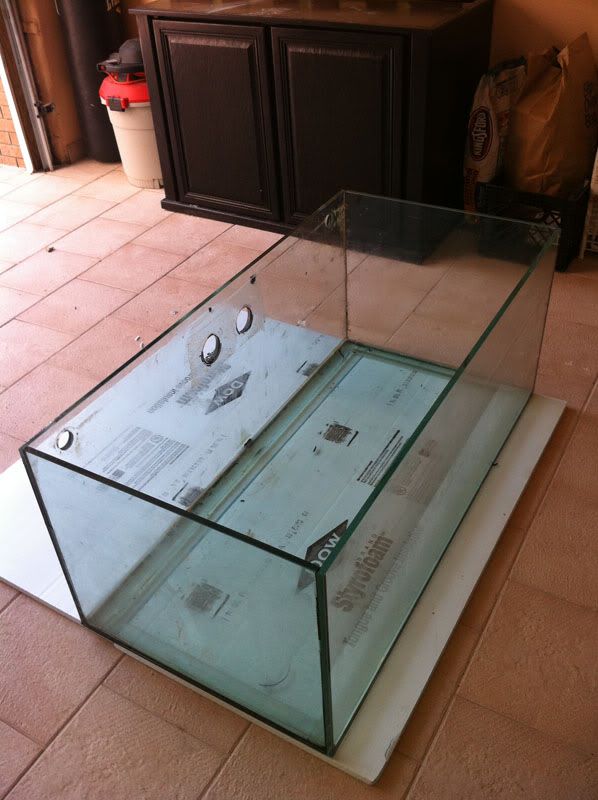 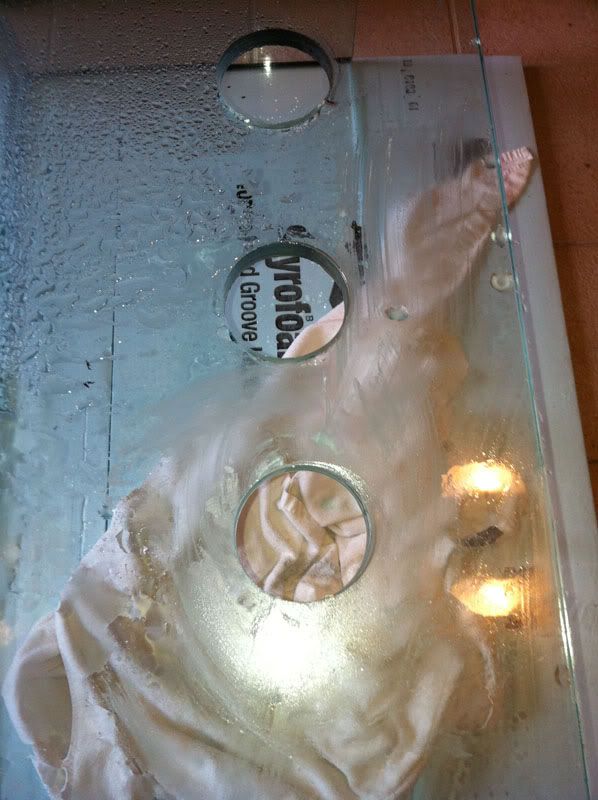 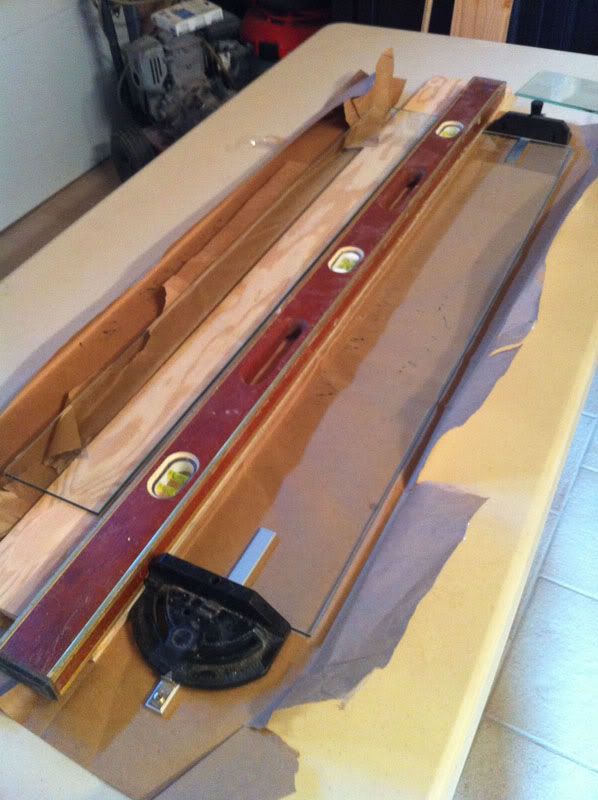 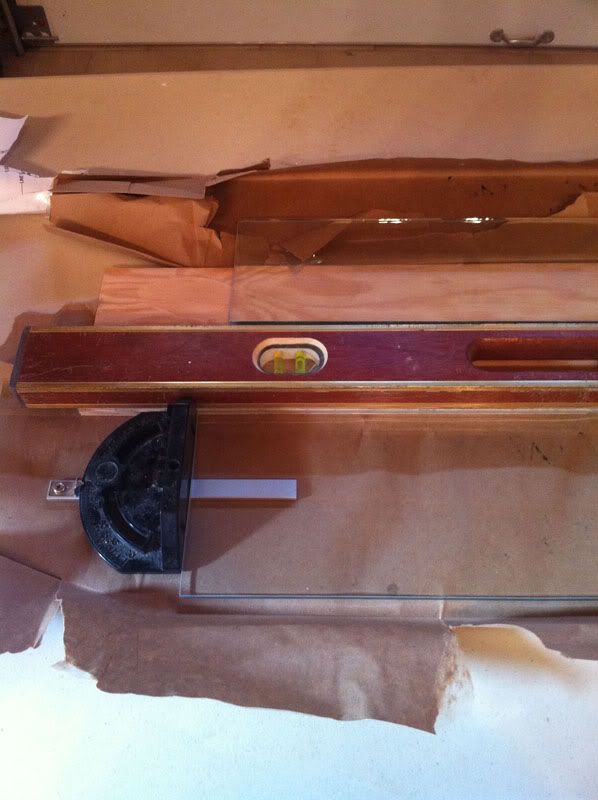 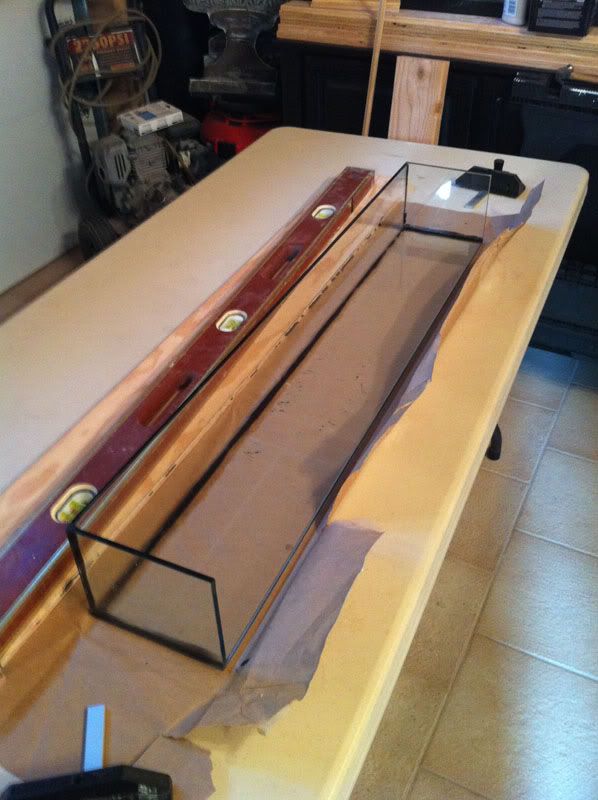 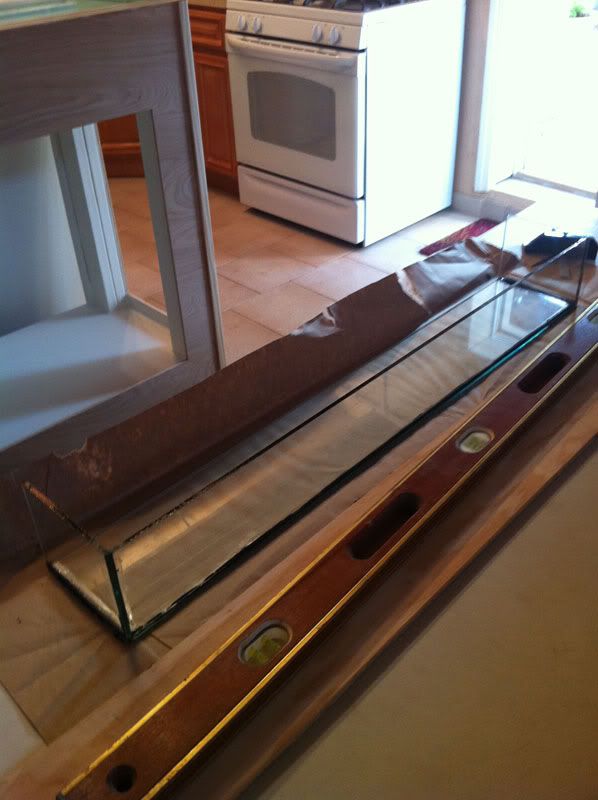  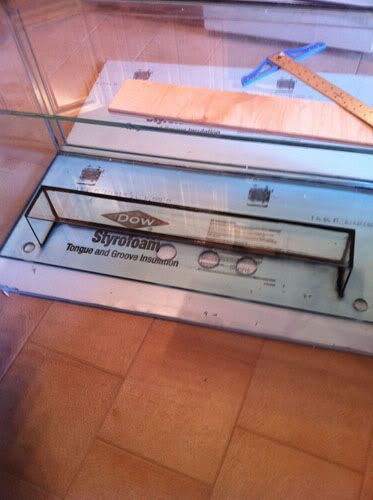
|
|
|
|
|
10/03/2011, 06:43 PM
|
#3825 |
|
Registered Member
Join Date: Mar 2011
Location: brooklyn NY
Posts: 529
|
Still working on the returns but this is what i have so far.
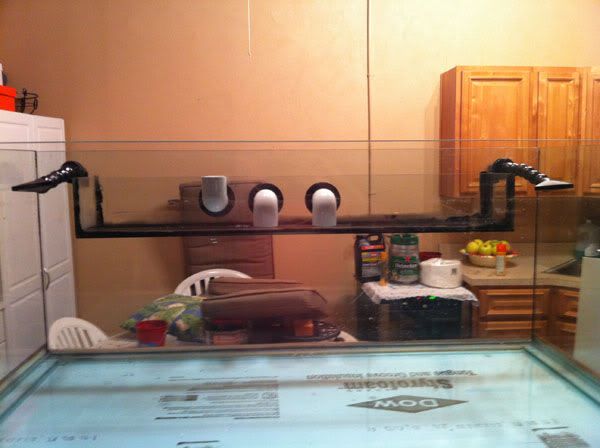   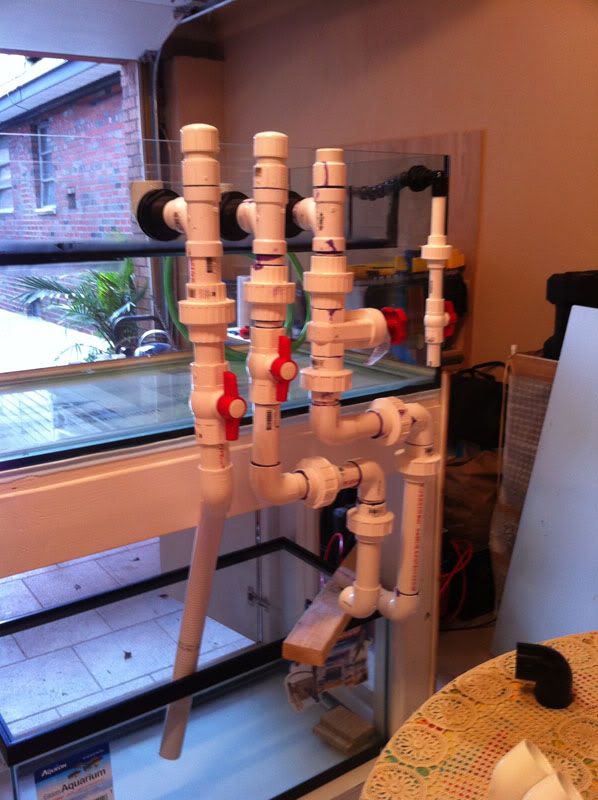 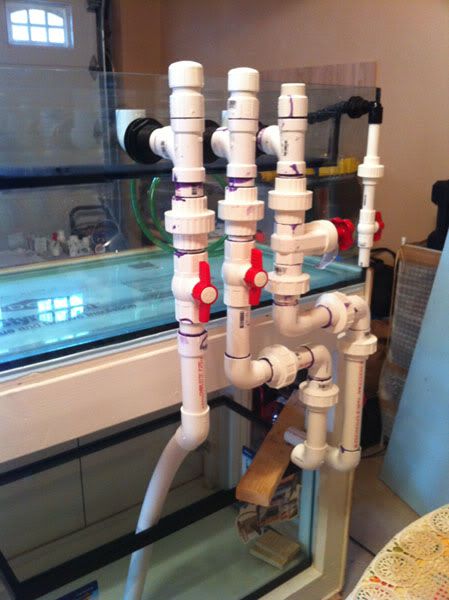 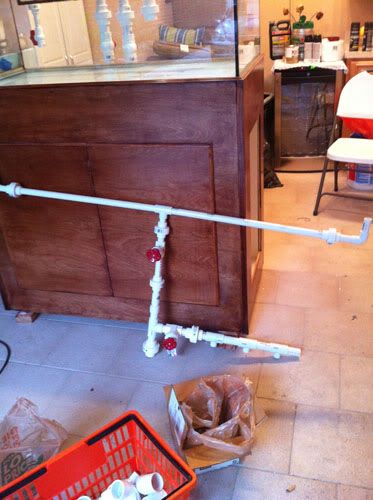 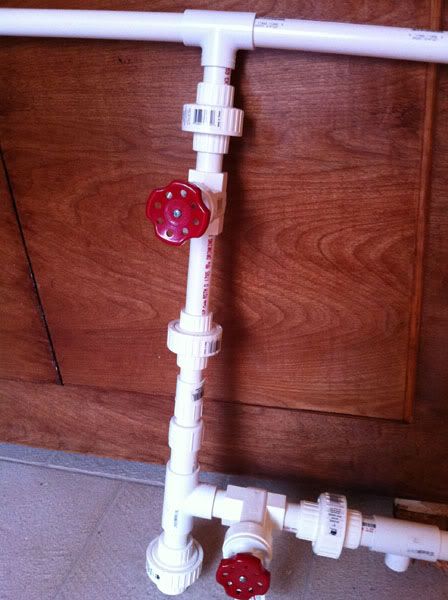 Was going to paint everthing black to cover my sloppy plumbing  Please if anyone sees something thats off let me know i put in enough unions that i think i can avoid having to hack anything off heres a link to my build if anyone is interested http://www.reefcentral.com/forums/sh....php?t=2063516 Last edited by BrklynArch; 10/03/2011 at 06:49 PM. |
|
|
|
 |
| Tags |
| beananimal, plumbing |
|
|


