
|
|
|
|||||||
 |
| Thread Tools |
 04/29/2009, 06:45 PM
|
#1 |
|
Registered Member
Join Date: Nov 2003
Location: C. Springs, CO
Posts: 4,530
|
Calvin415's DIY 12ft Tank Summary (Pic Intense!!!)
Iâve decided to compile my build into a new thread with less talk, and more pictures so you donât have to read through 62 pages over 2 threads. If you would like to read through all the trials and failures of this build click here.
Hereâs where it all began, with an idea!!! 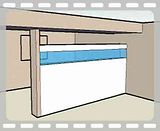
__________________
-February 2007 nTOTM "The problem with America is stupidity. Why don't we just take the safety labels off of everything and let the problem solve itself" Current Tank Info: ADA 60-P |

|

|
|
04/29/2009, 06:46 PM
|
#2 |
|
Registered Member
Join Date: Nov 2003
Location: C. Springs, CO
Posts: 4,530
|
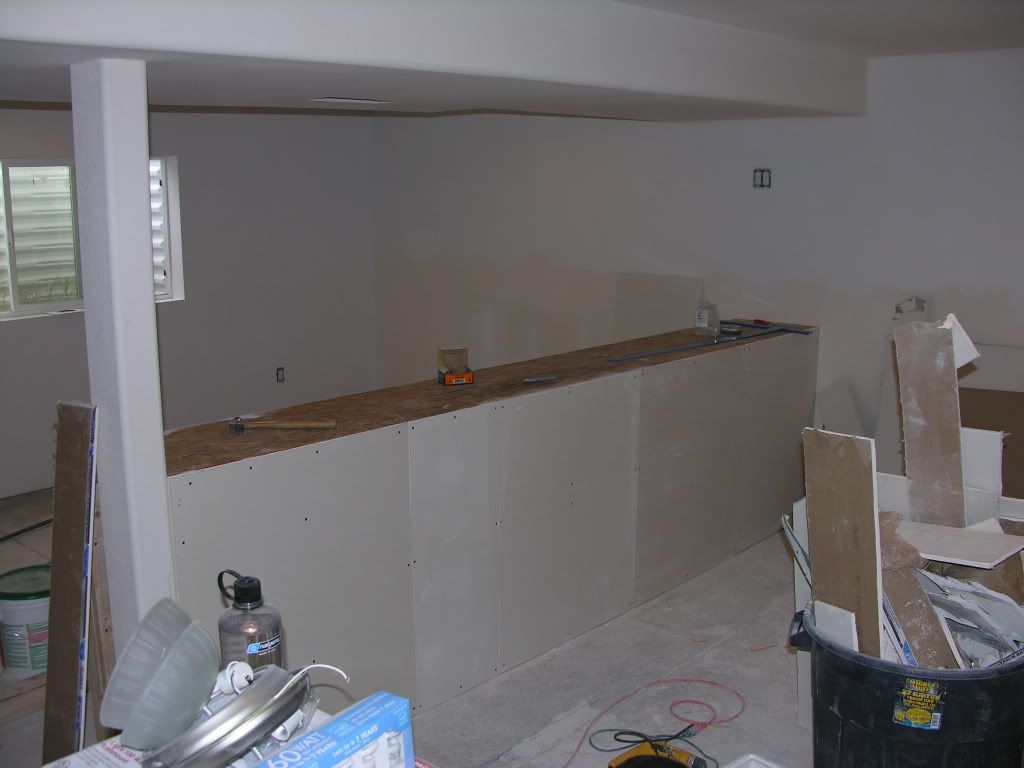
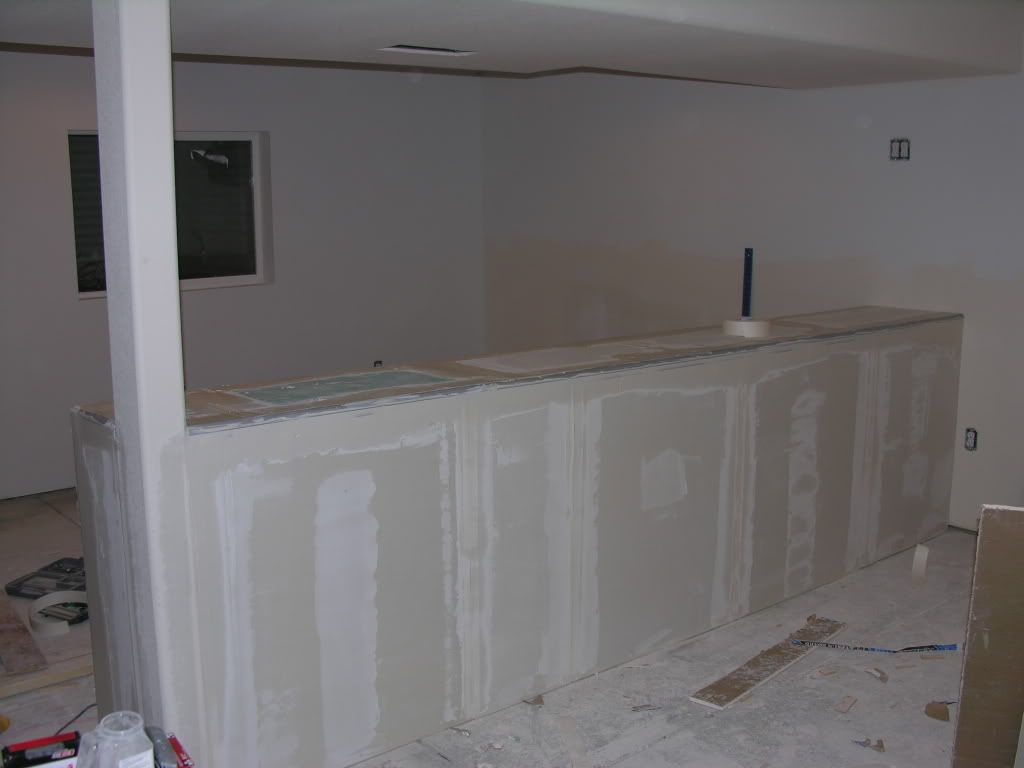
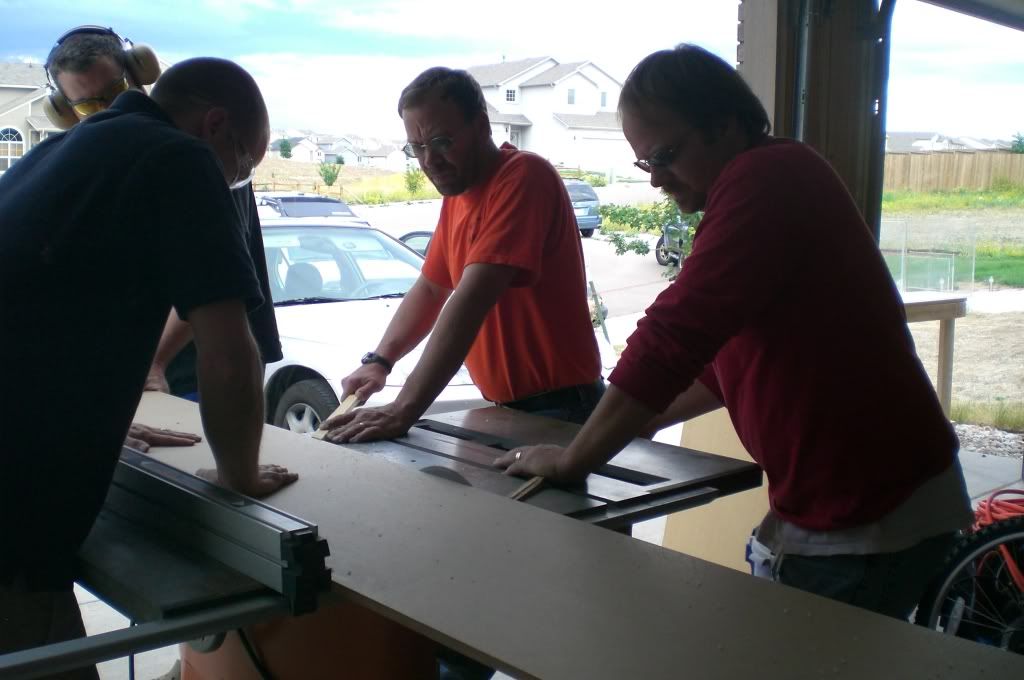
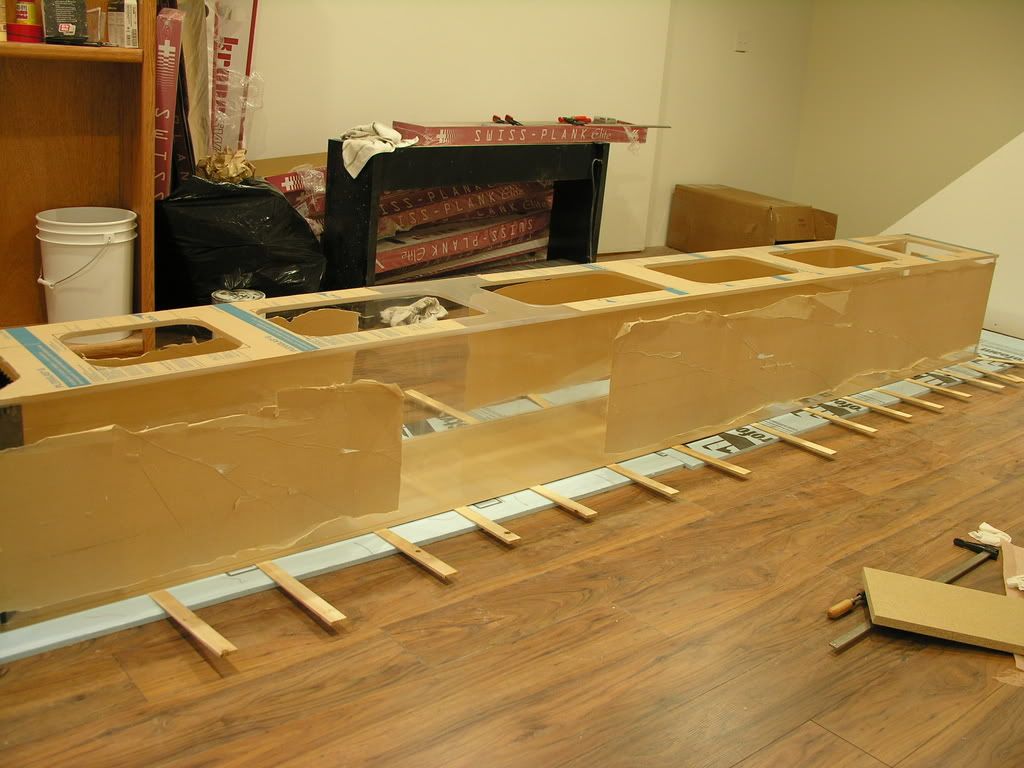
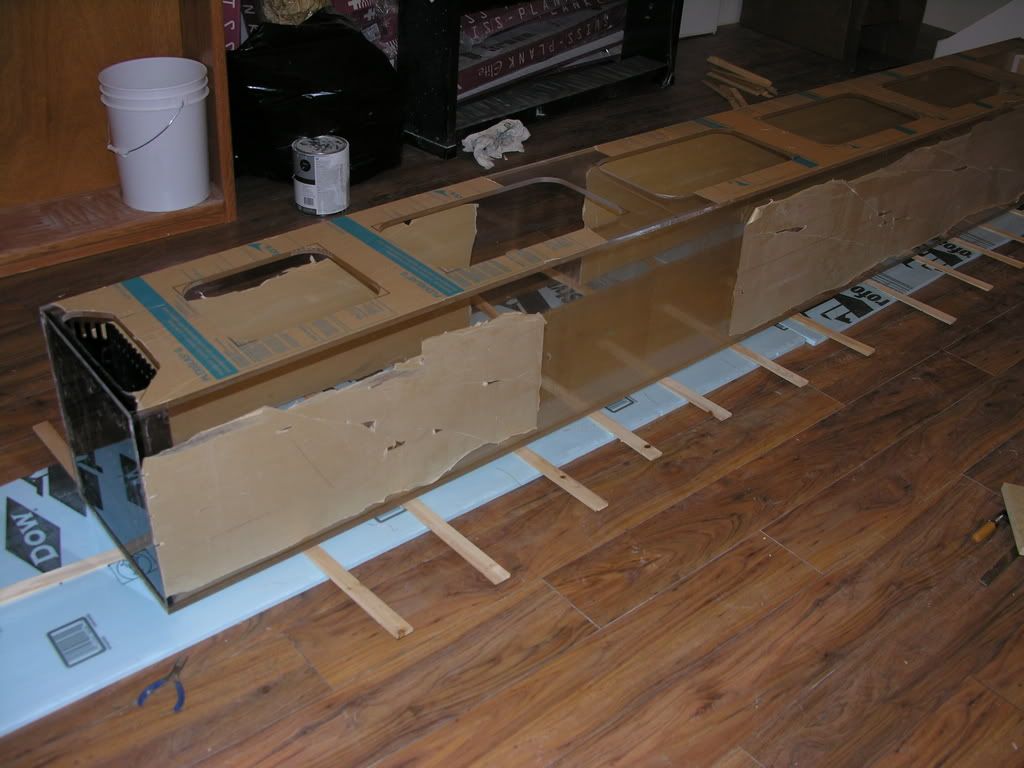
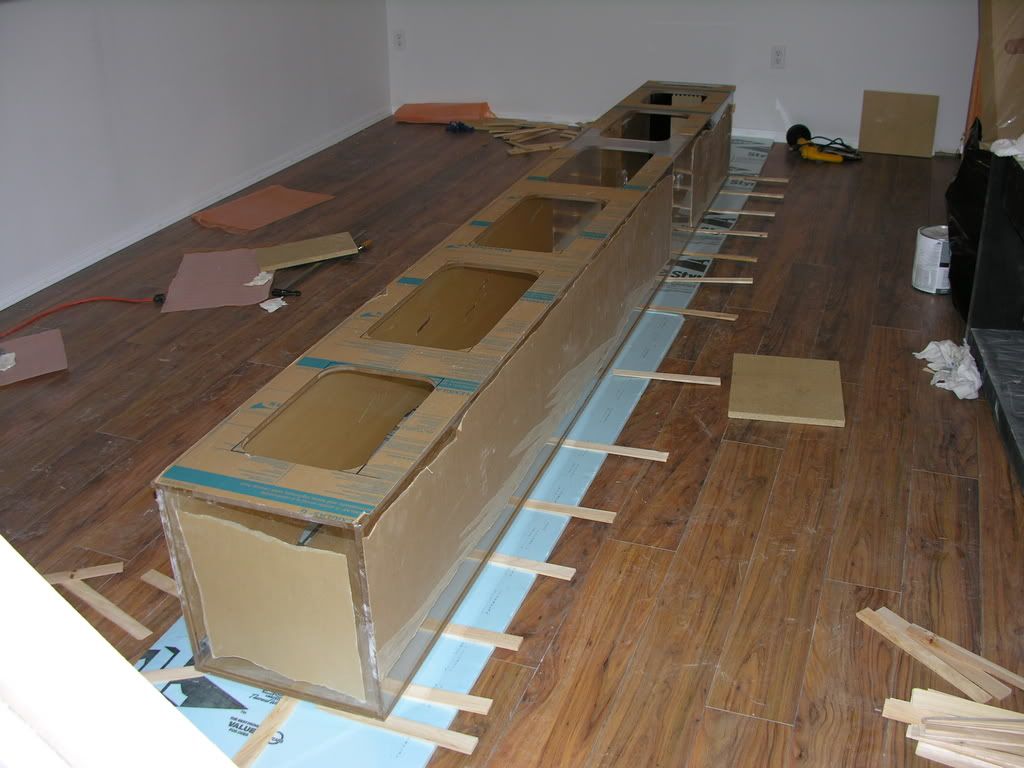
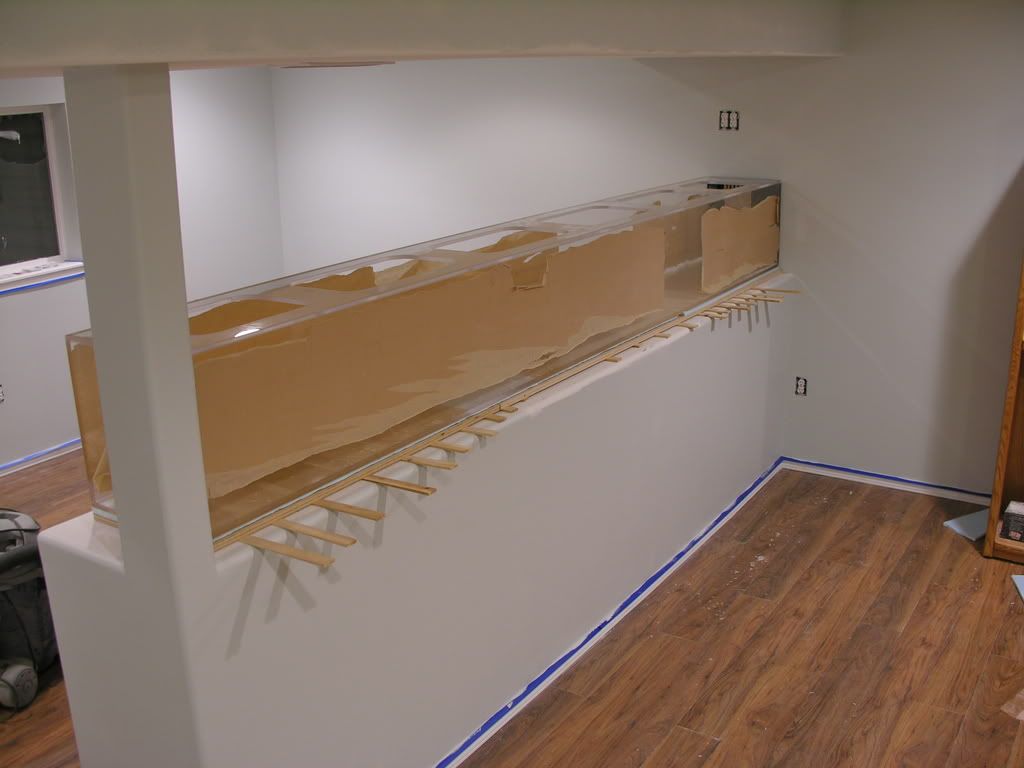
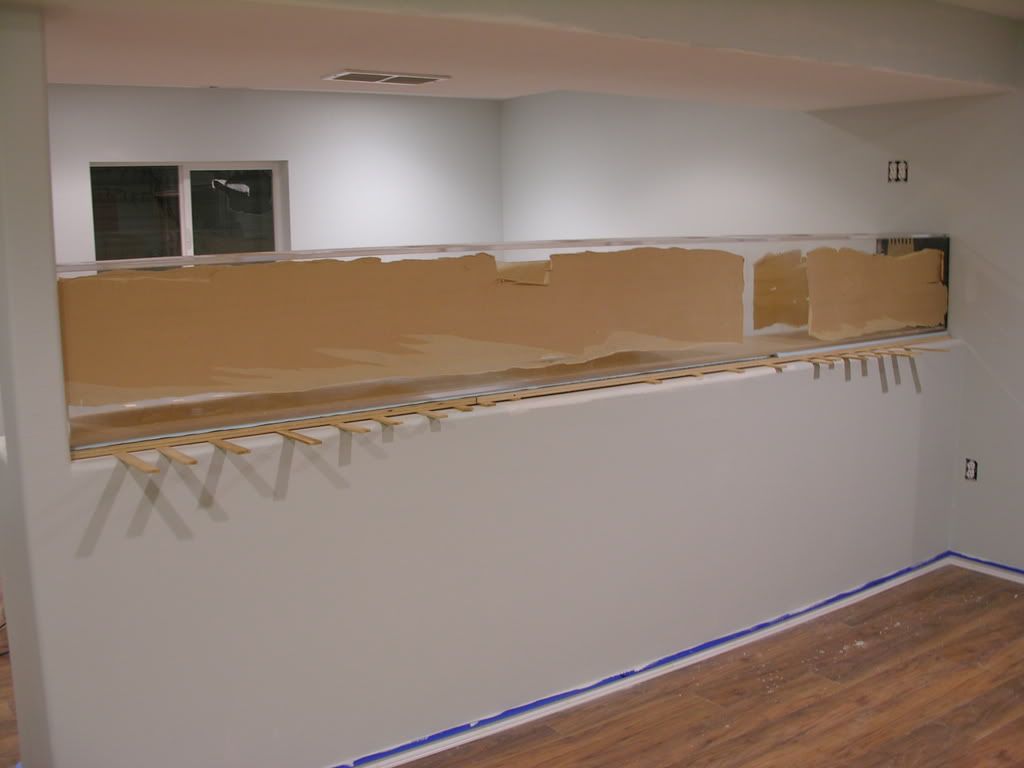
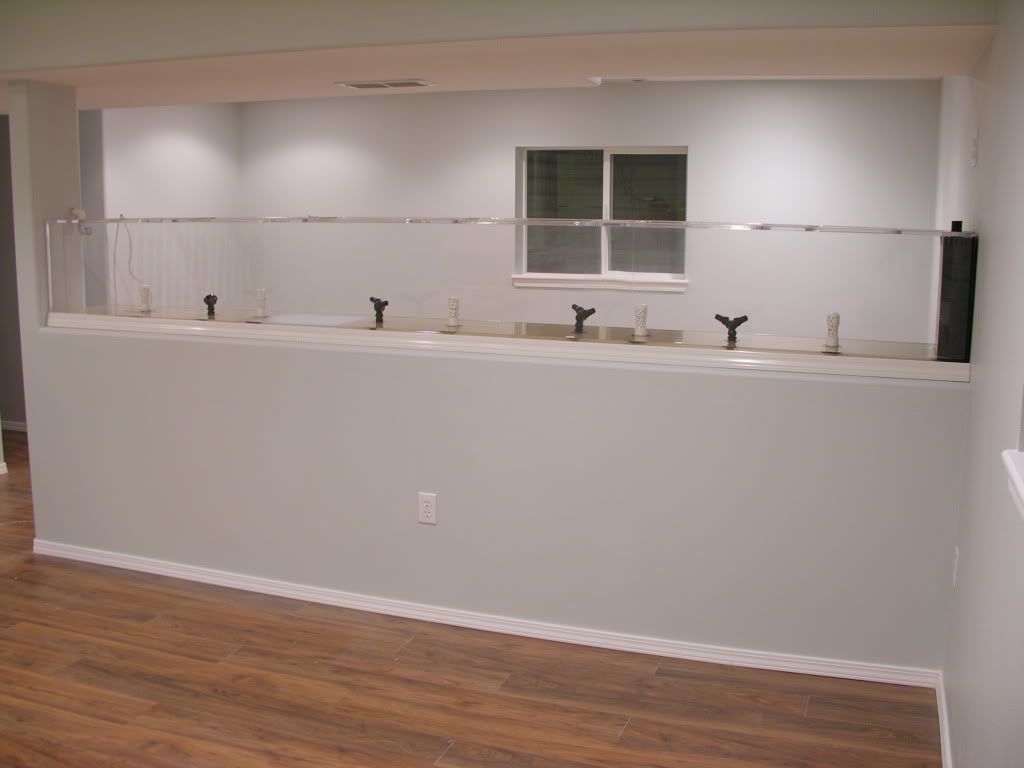
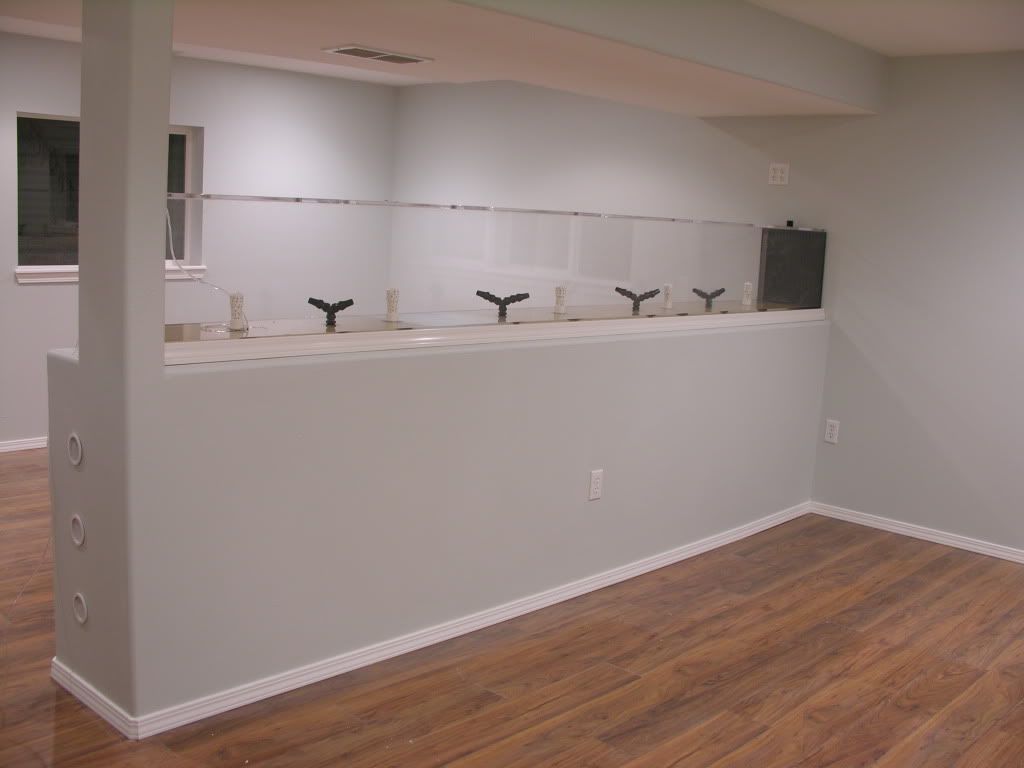
Construction of the stand/wall begins as we work to finish the basement, please note final framing before dry wall is not show, there is more faming than shown:
   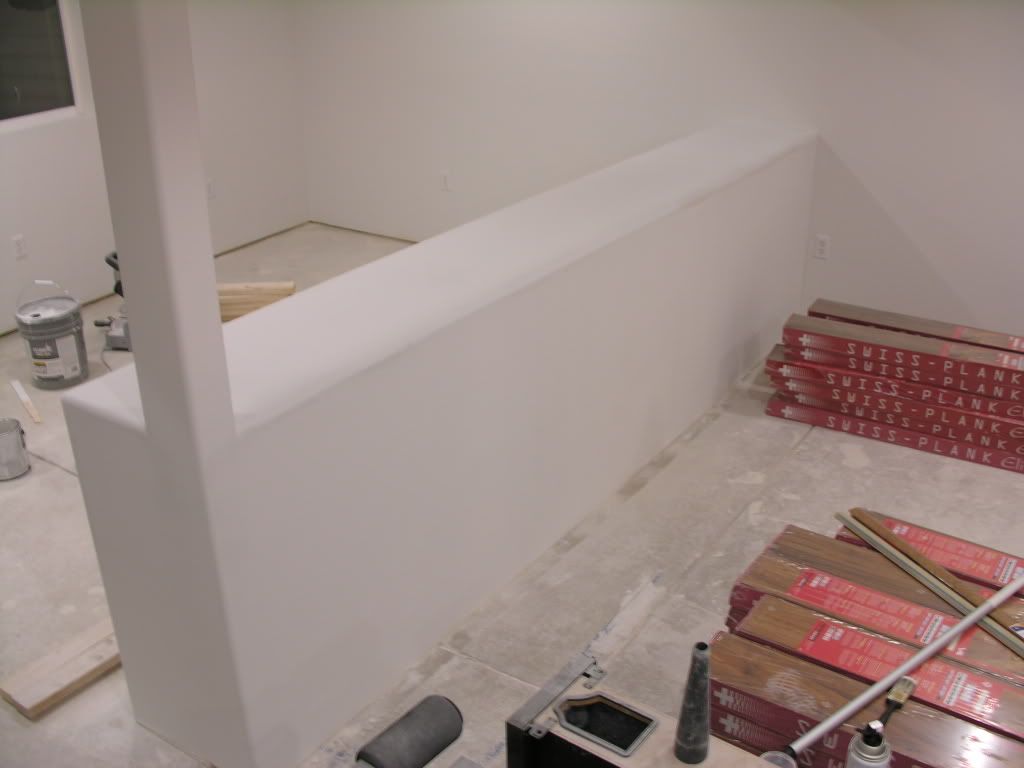 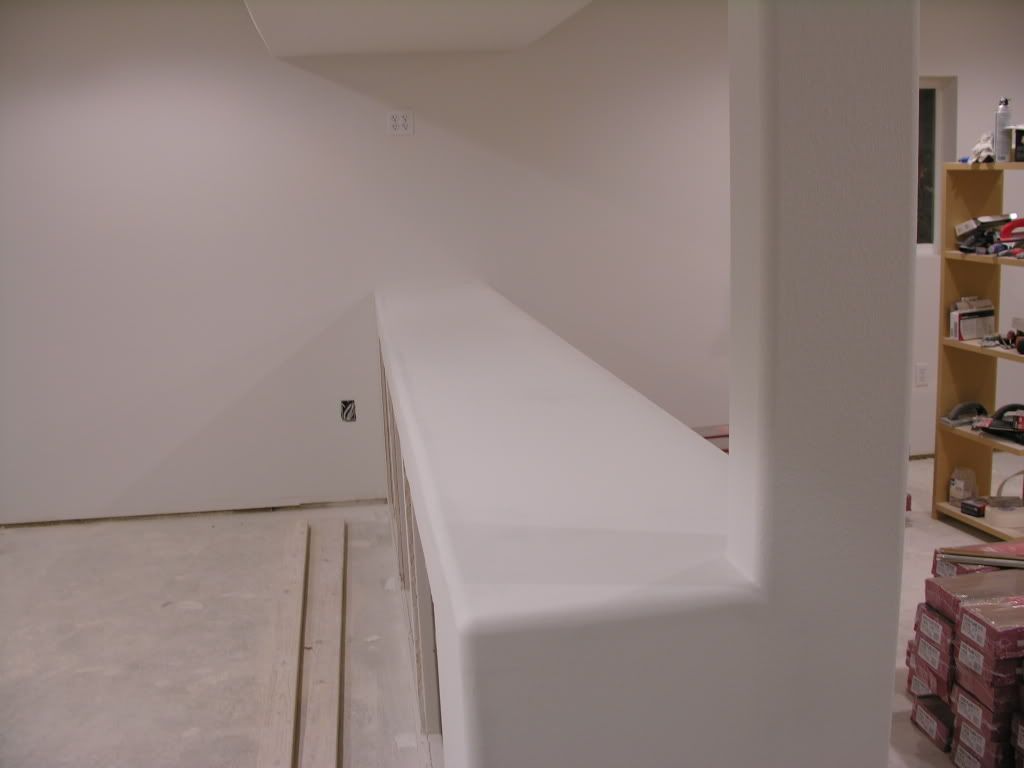  Floors are installed and the acrylic cutting has started. Here are 8â and 4â pieces placed end to end. 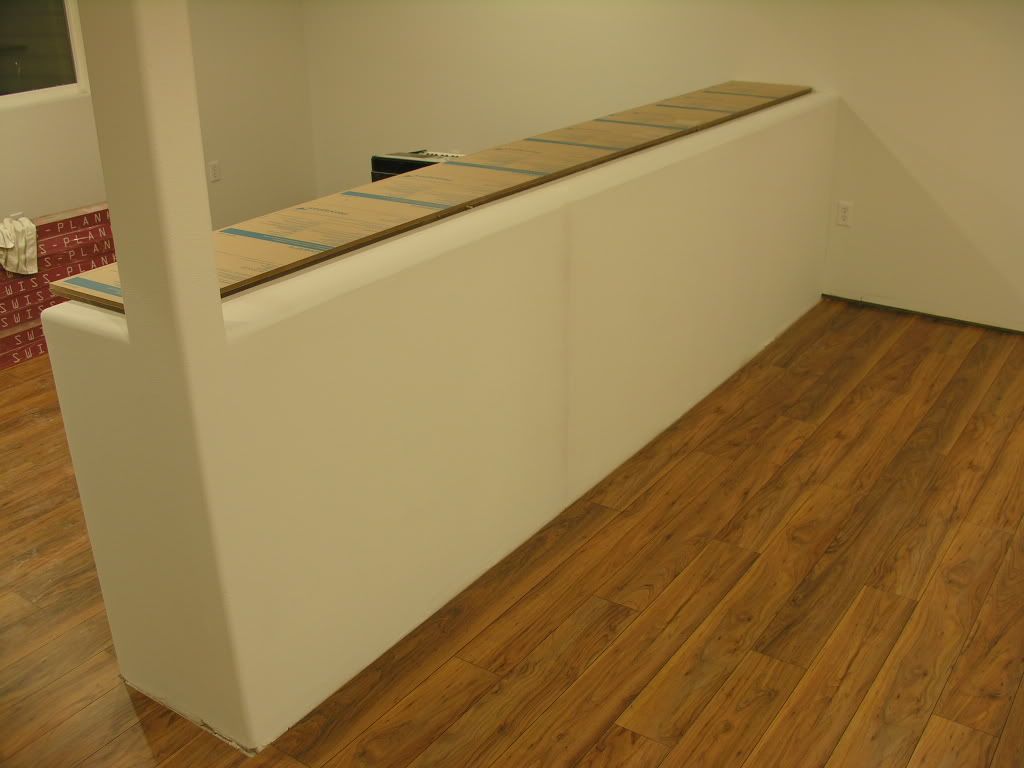
__________________
-February 2007 nTOTM "The problem with America is stupidity. Why don't we just take the safety labels off of everything and let the problem solve itself" Current Tank Info: ADA 60-P |
|
|
|
|
04/29/2009, 06:47 PM
|
#3 |
|
Registered Member
Join Date: Nov 2003
Location: C. Springs, CO
Posts: 4,530
|
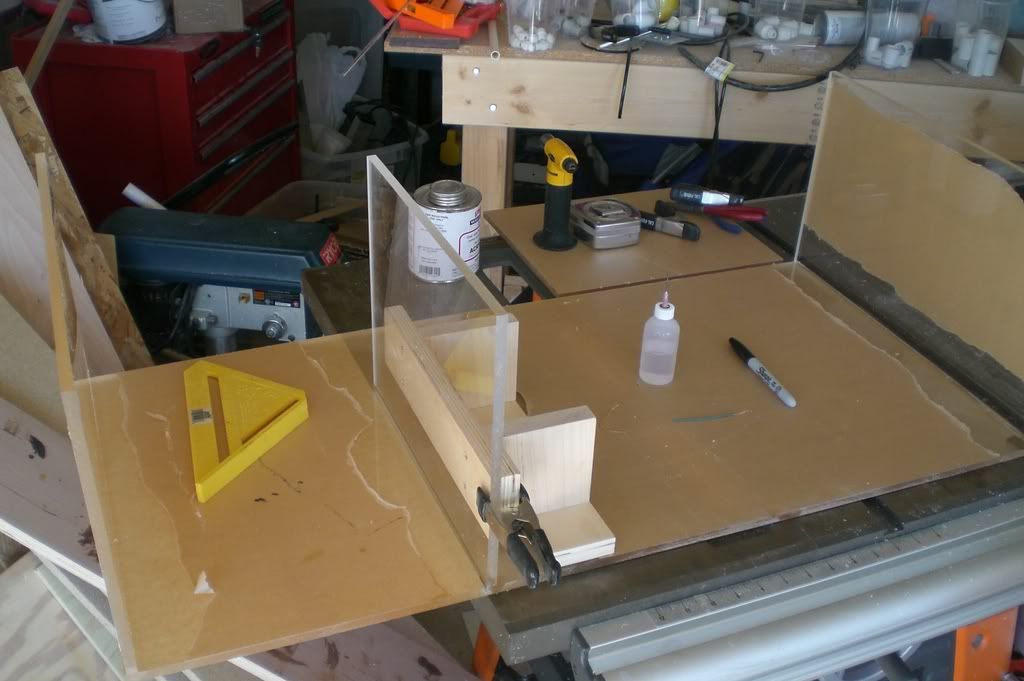
So, when a piece of acrylic just isnât long enough, here is how to weld acrylic end to end: First tape off the ends of the pieces⦠For those who need a visual: 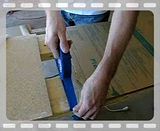 Cut off the excess: 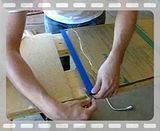 Clamp down one side: 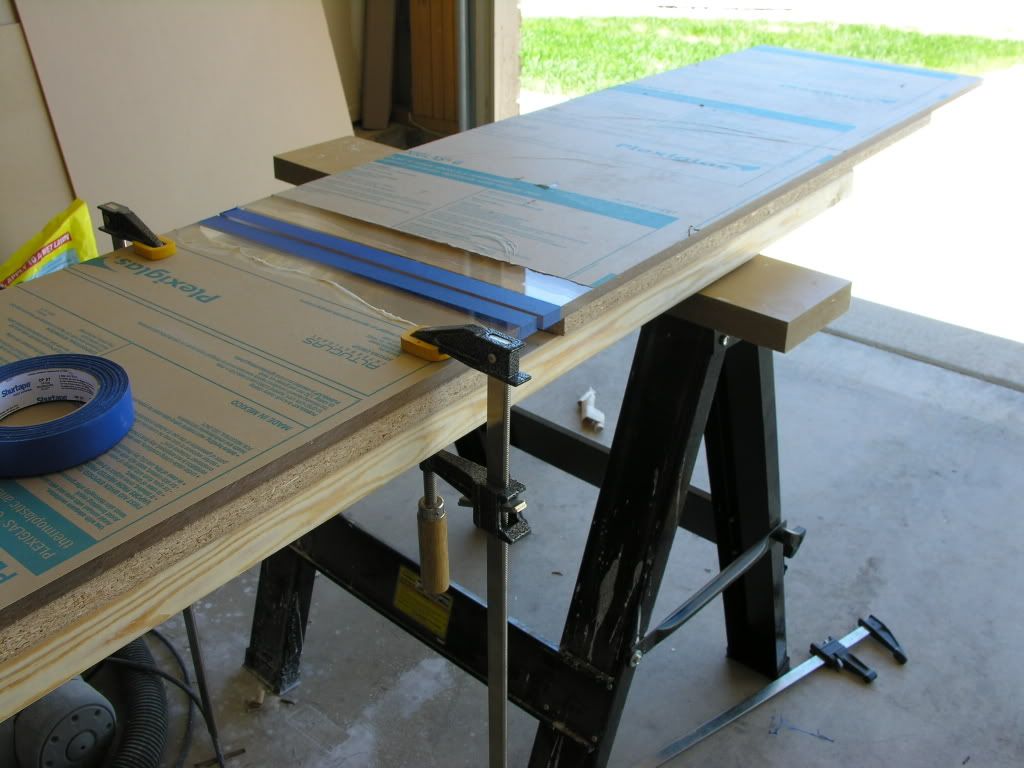 Note the gap for the WeldOn 42: 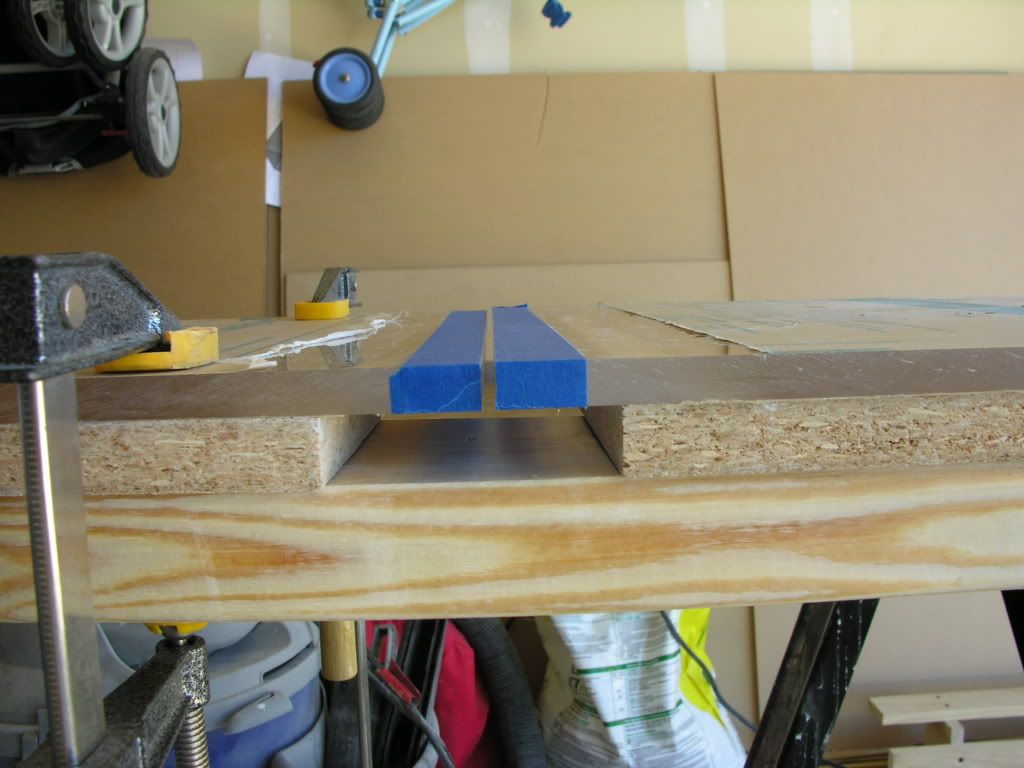 42 Gun, just like a caulking gun, only about 125 times more expensive; The 42 cartridge has 2 tubes (2-part epoxy) combined into a single cartridge and the long tip is for mixing the 2-parts together before they come out. 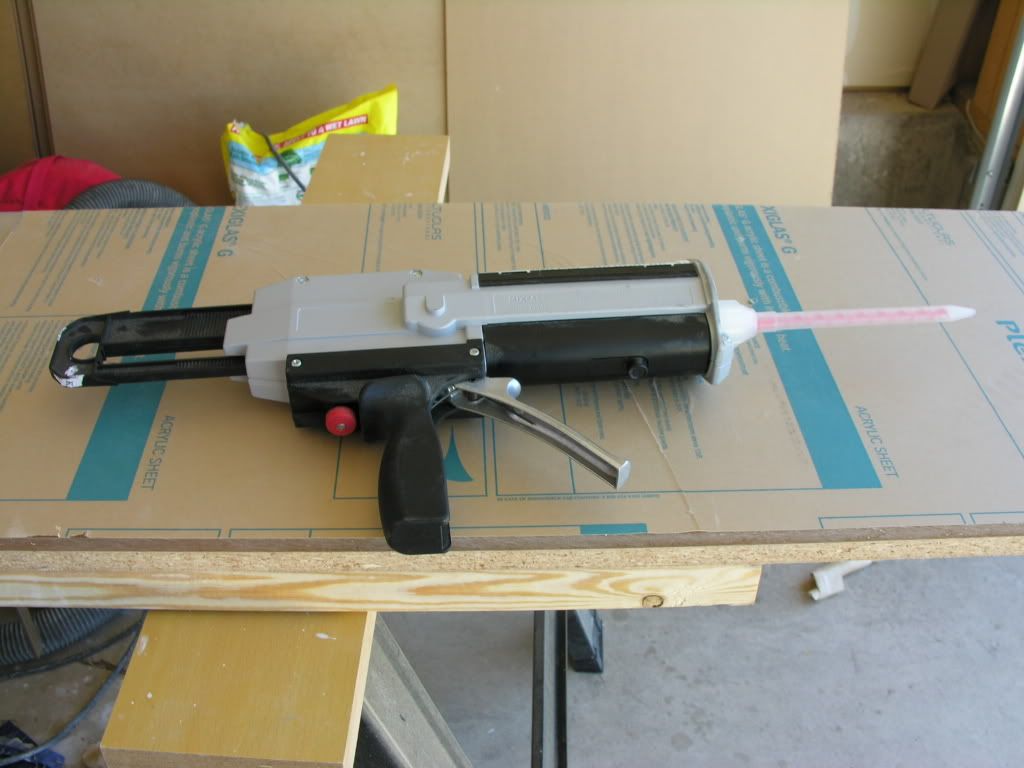 Place tape under the gap to keep the 2-part from running out: 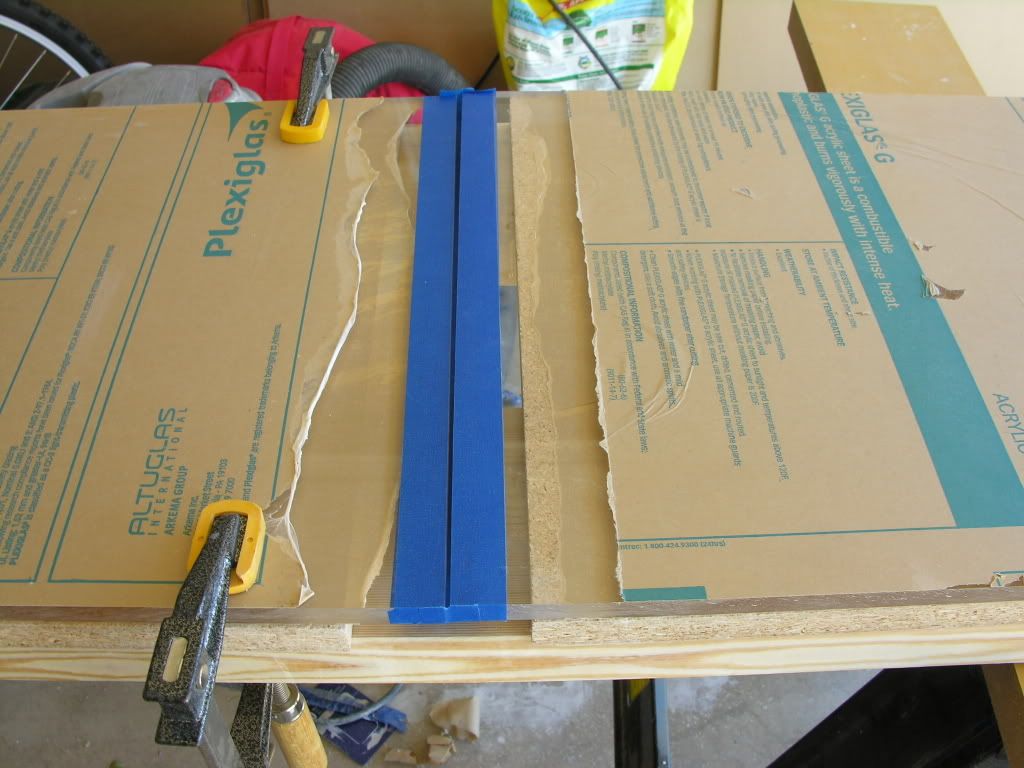 Applying the 42:  Squeeze the pieces together: 
__________________
-February 2007 nTOTM "The problem with America is stupidity. Why don't we just take the safety labels off of everything and let the problem solve itself" Current Tank Info: ADA 60-P |
|
|
|
|
04/29/2009, 06:48 PM
|
#4 |
|
Registered Member
Join Date: Nov 2003
Location: C. Springs, CO
Posts: 4,530
|
And un-tape one side to see how the weld turned out:
 Another angle: 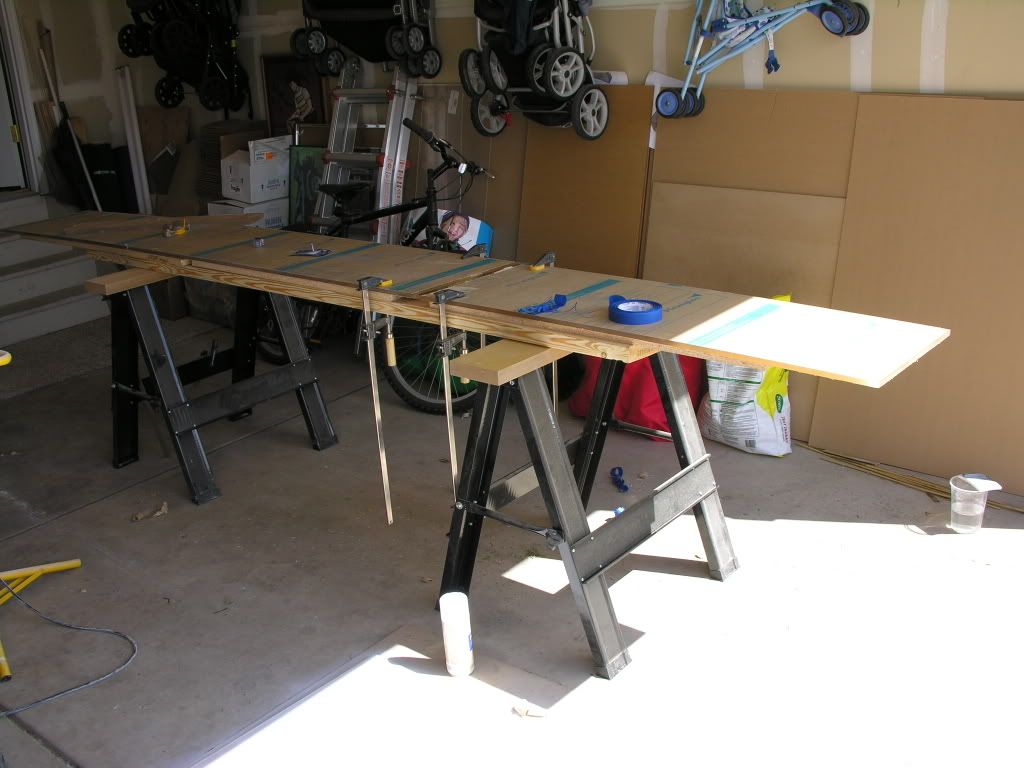 Tape removed: 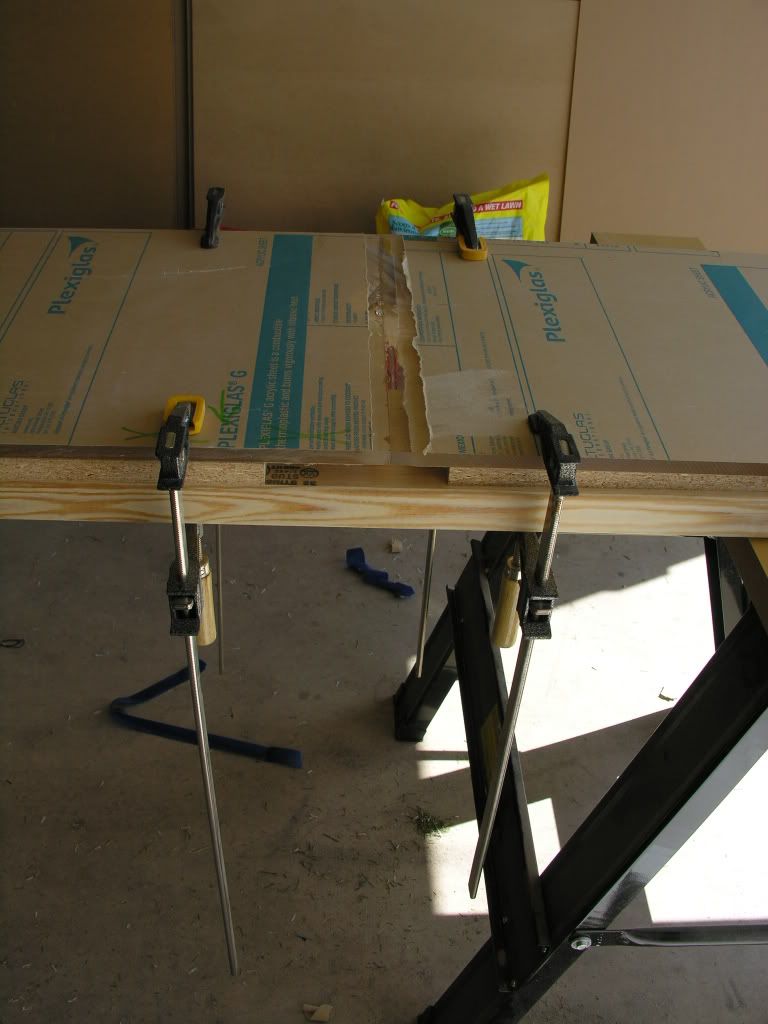 Glue is setup, it sets up completely clear: 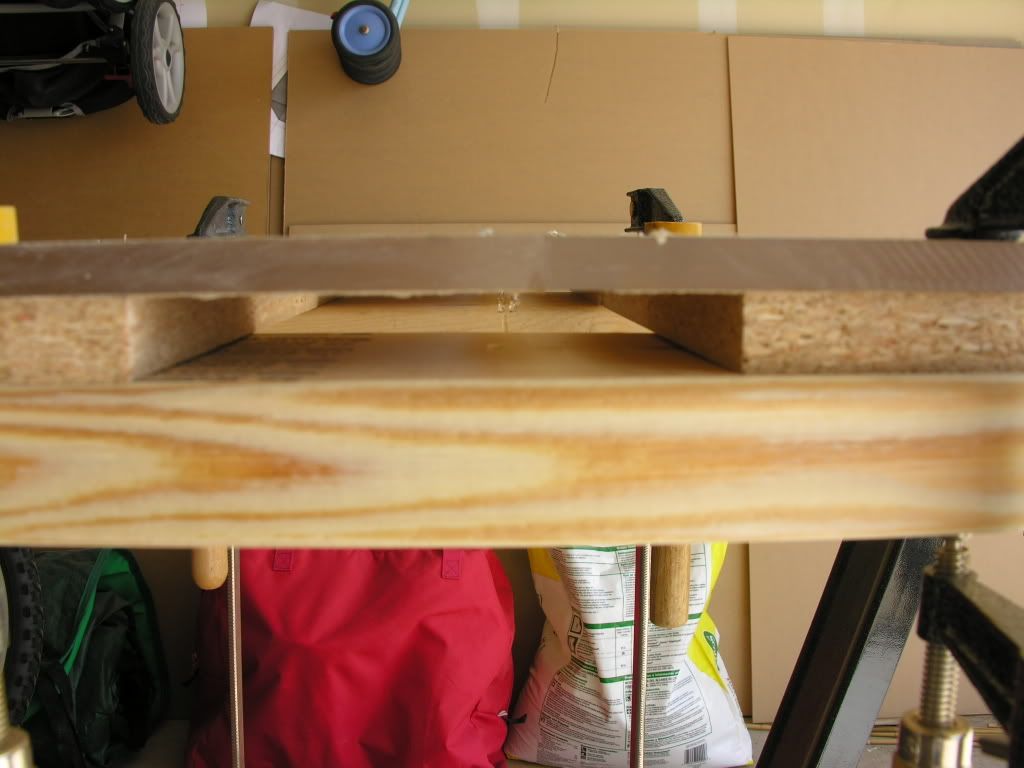 These drips are rock hard: 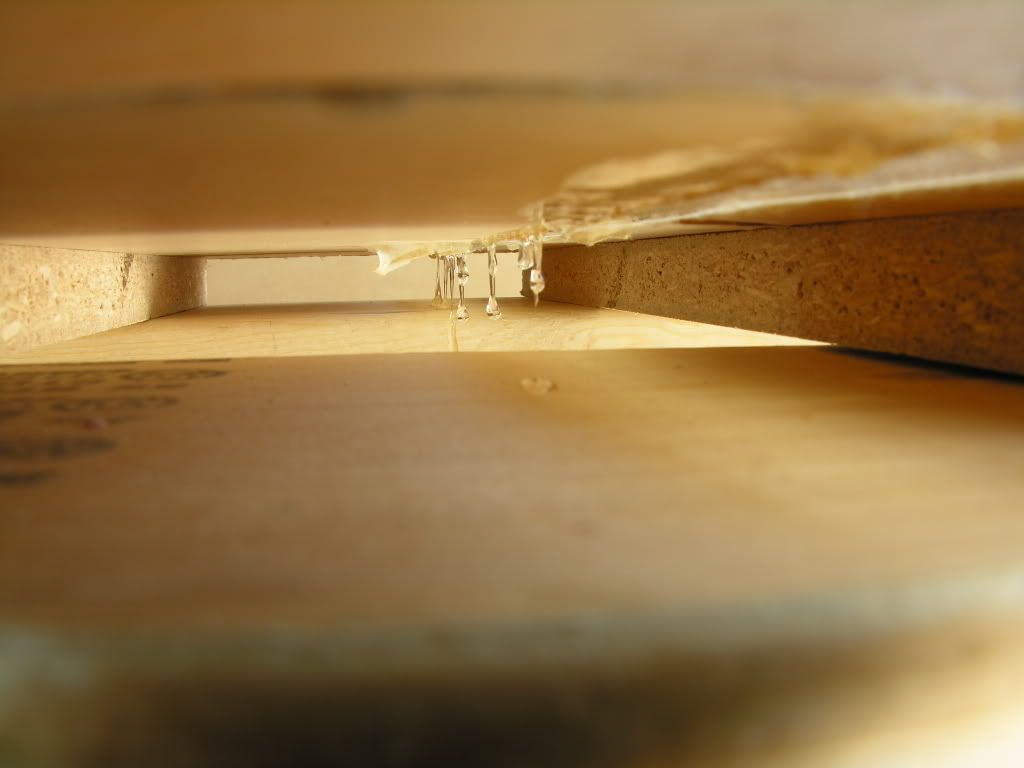 From the side, before sanding out the seam:  And just to show how strong WeldOn 42 is: 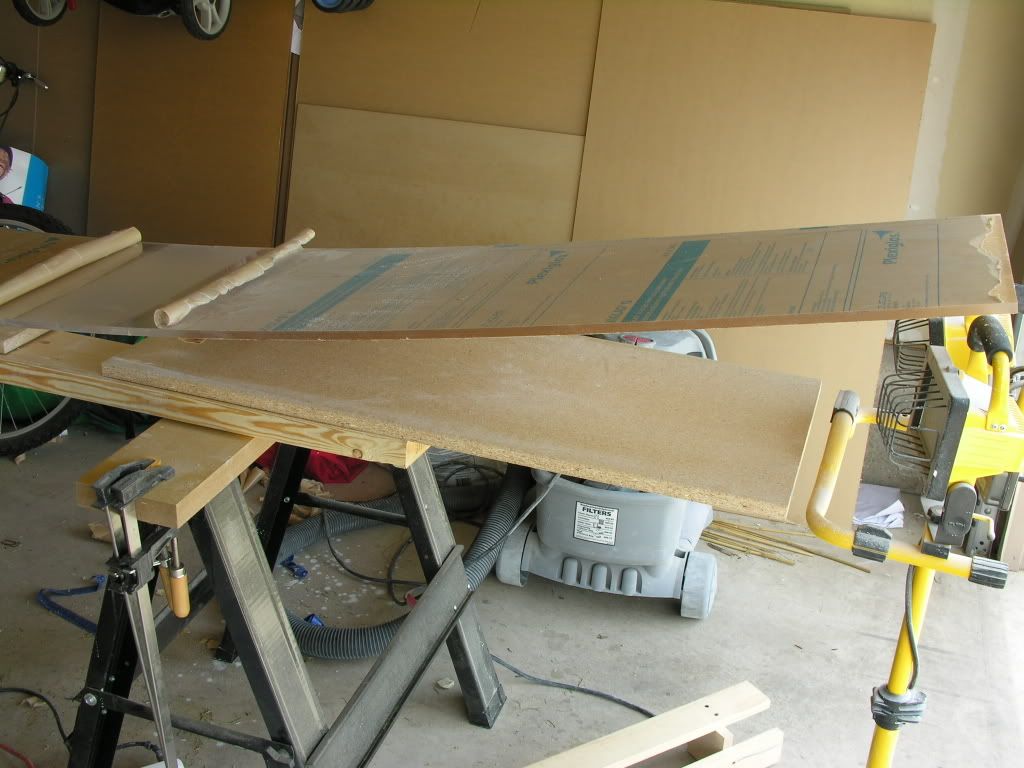
__________________
-February 2007 nTOTM "The problem with America is stupidity. Why don't we just take the safety labels off of everything and let the problem solve itself" Current Tank Info: ADA 60-P |
|
|
|
|
04/29/2009, 06:49 PM
|
#5 |
|
Registered Member
Join Date: Nov 2003
Location: C. Springs, CO
Posts: 4,530
|
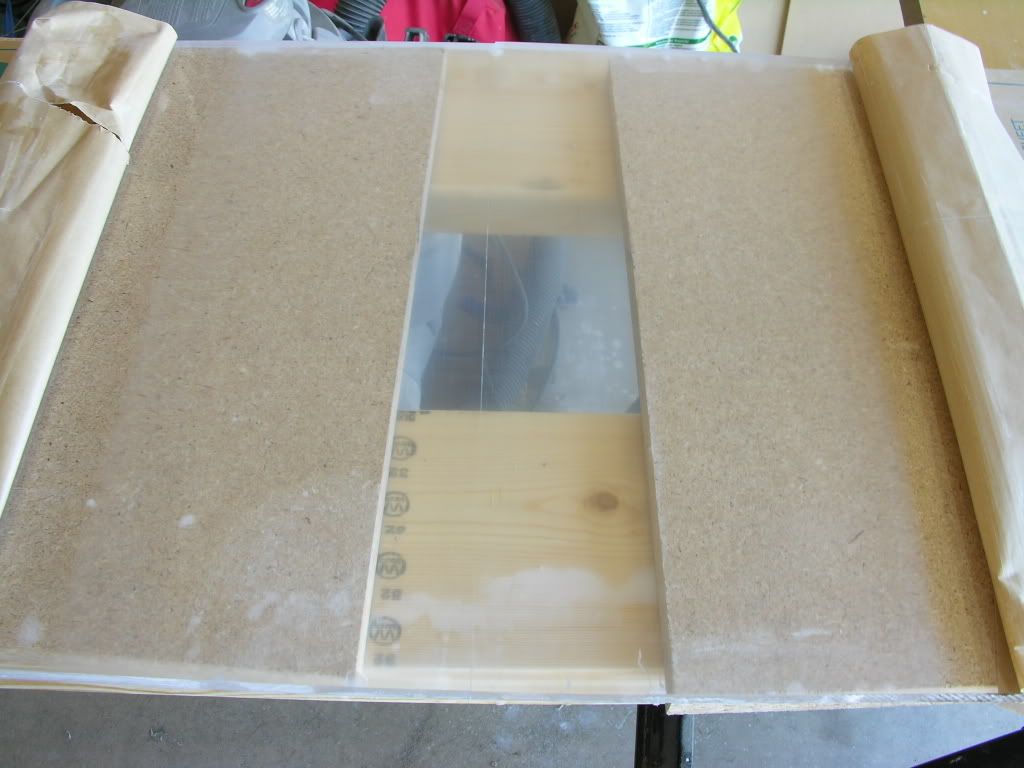
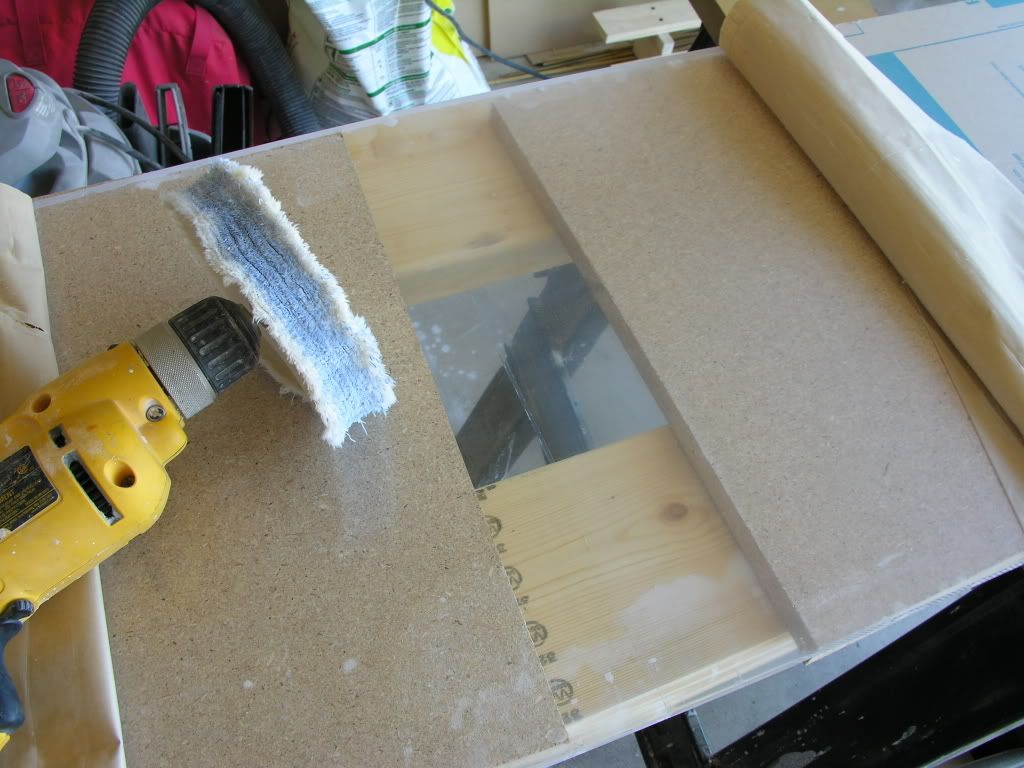
How to sand acrylic, you can use this for scratch removal as well:
Initial sanding with 120 grit (for scratch removal you shouldnât need to use anything as rough as 220):  200 grit dry: 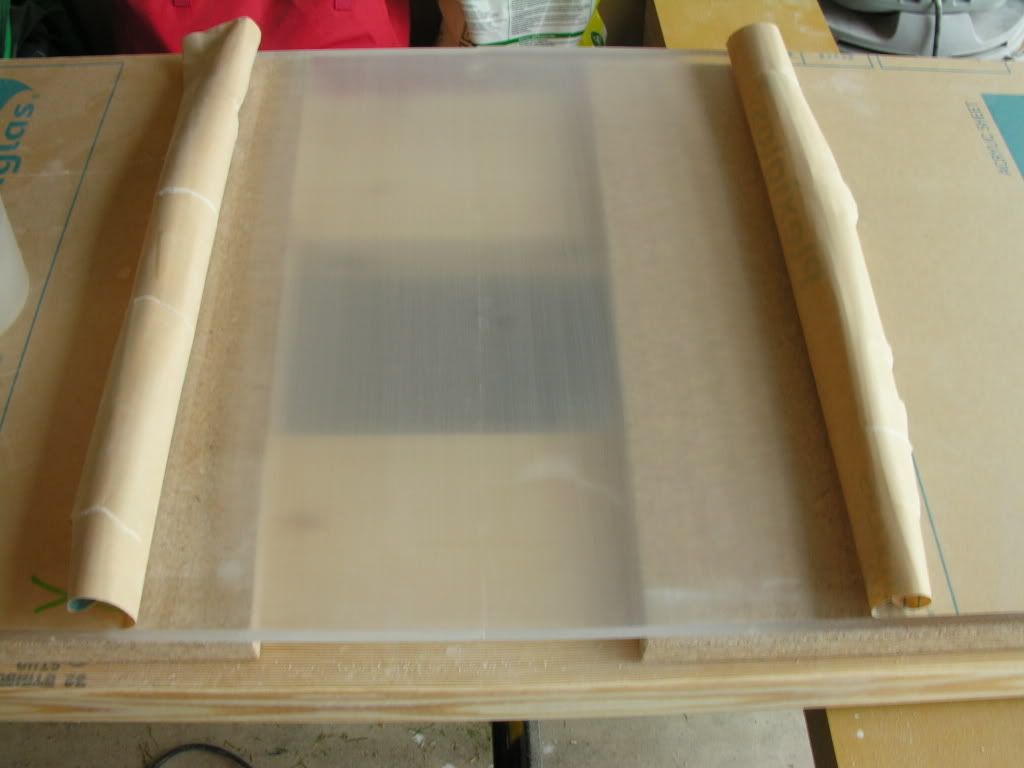 220 wet: 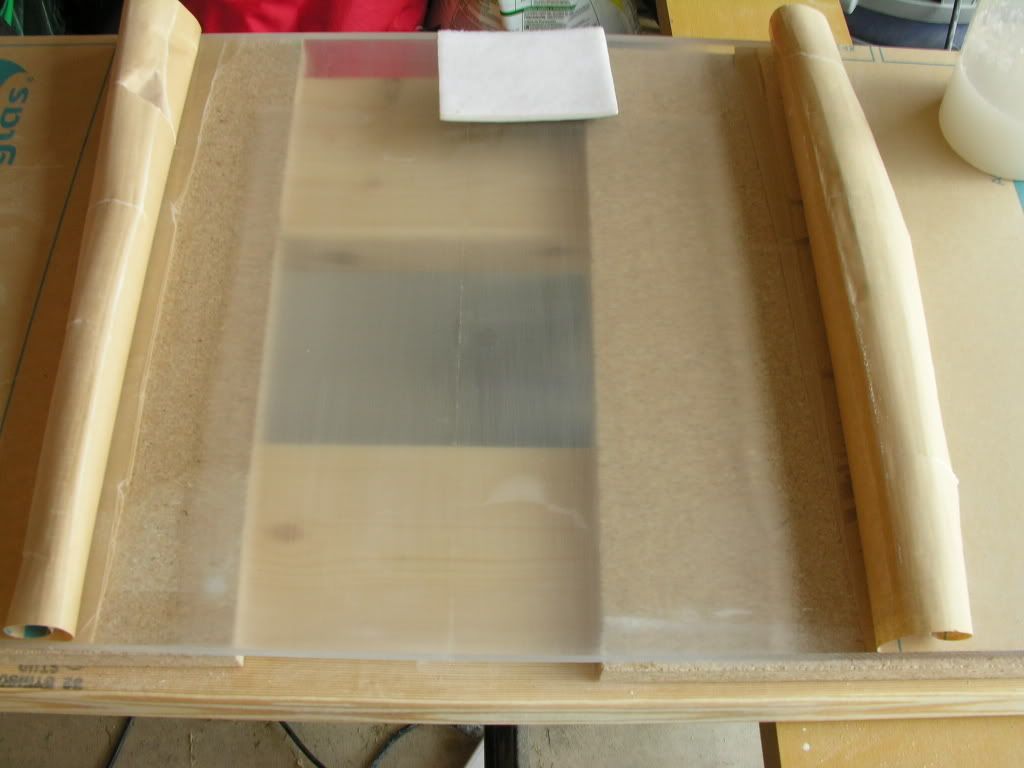 400 wet: 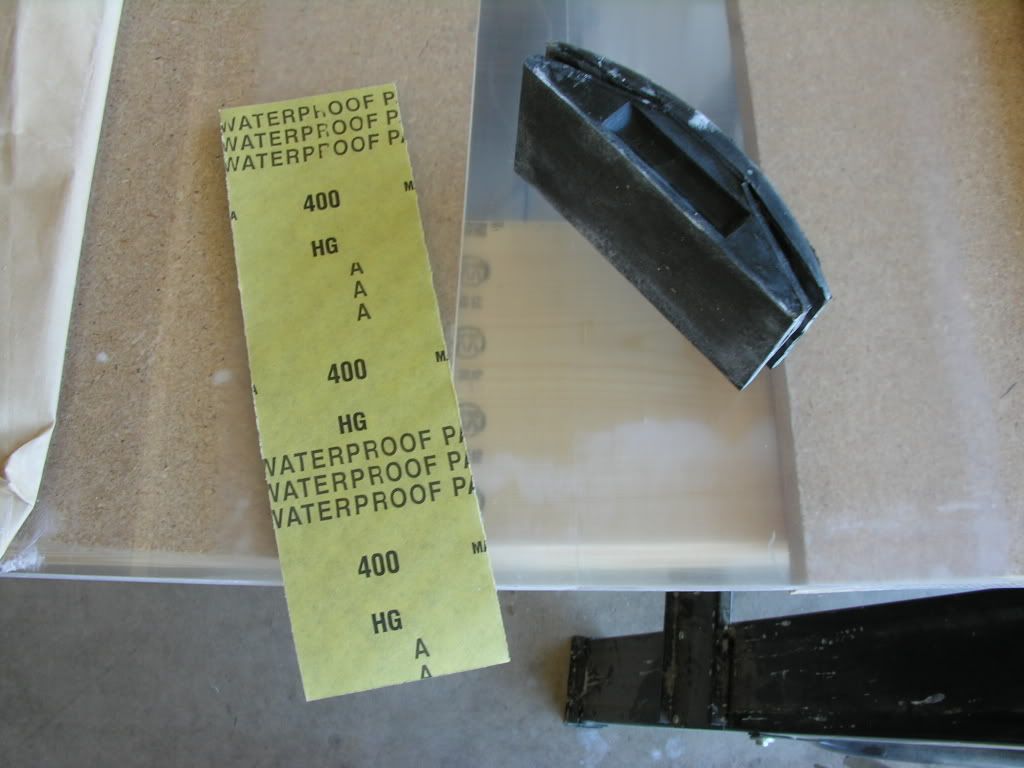 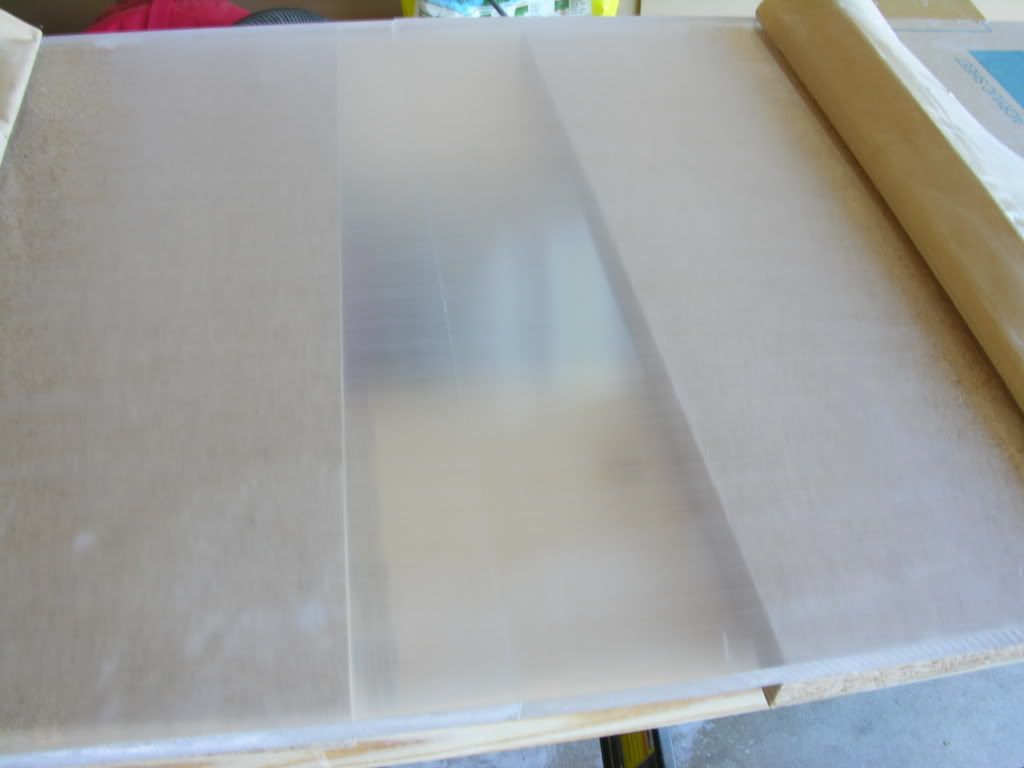 600 wet: 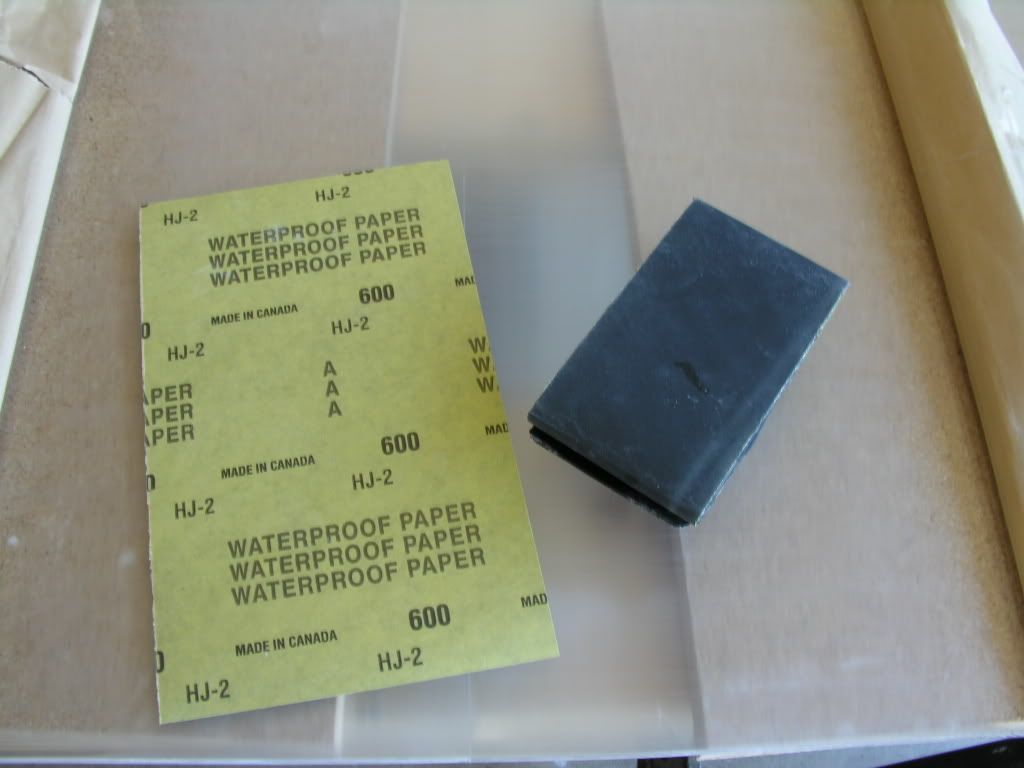 What it looks like while sanding with water: 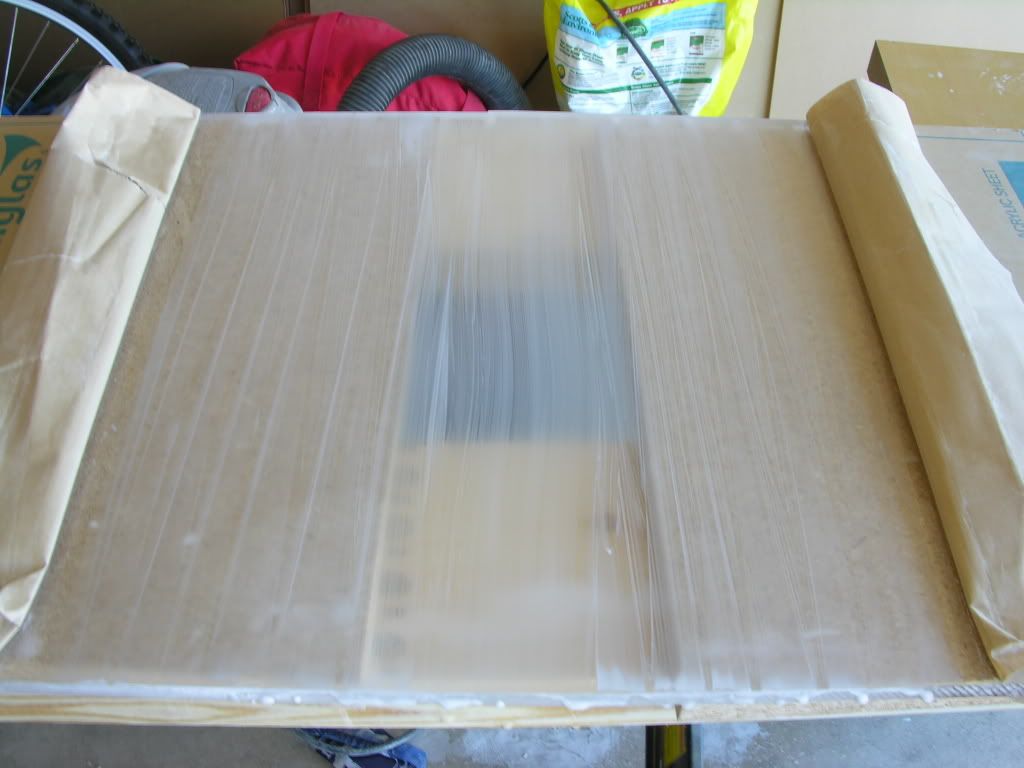 Toweled dry: 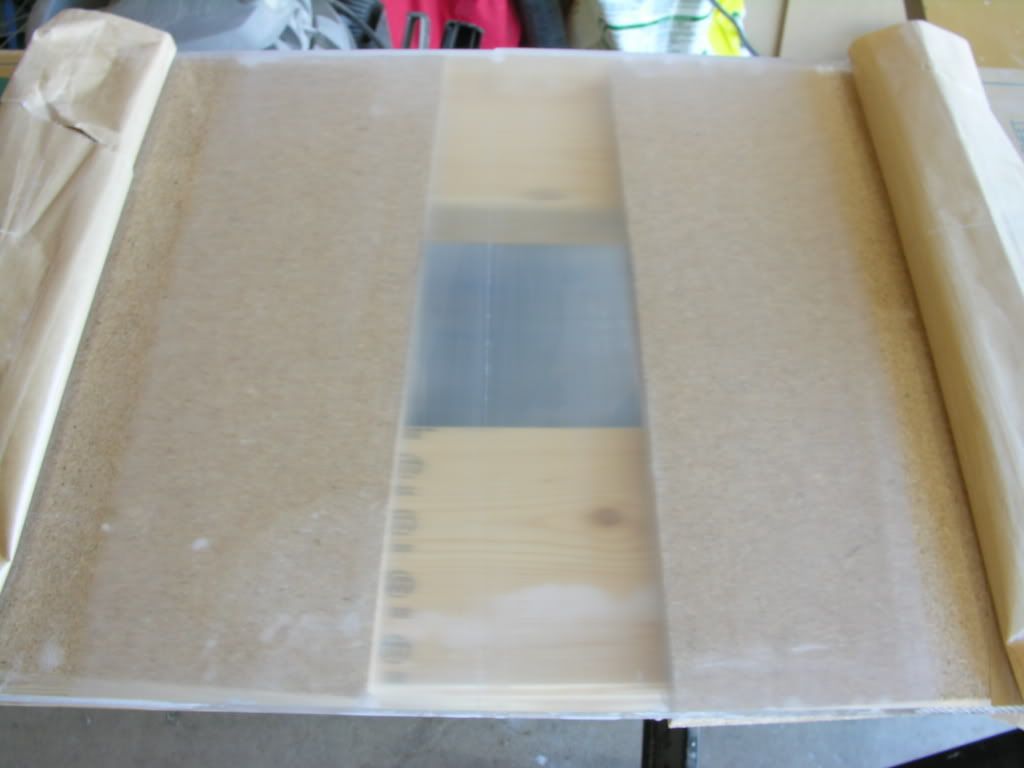
__________________
-February 2007 nTOTM "The problem with America is stupidity. Why don't we just take the safety labels off of everything and let the problem solve itself" Current Tank Info: ADA 60-P |
|
|
|
|
04/29/2009, 06:50 PM
|
#6 |
|
Registered Member
Join Date: Nov 2003
Location: C. Springs, CO
Posts: 4,530
|
1500 wet:
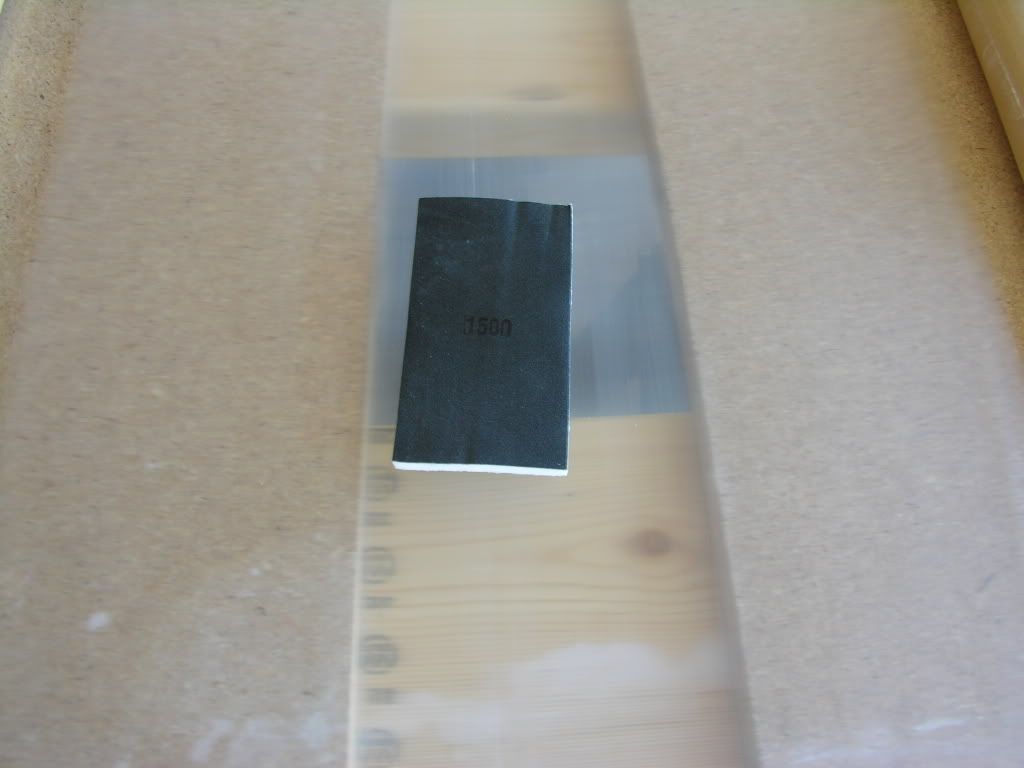  1800 wet: 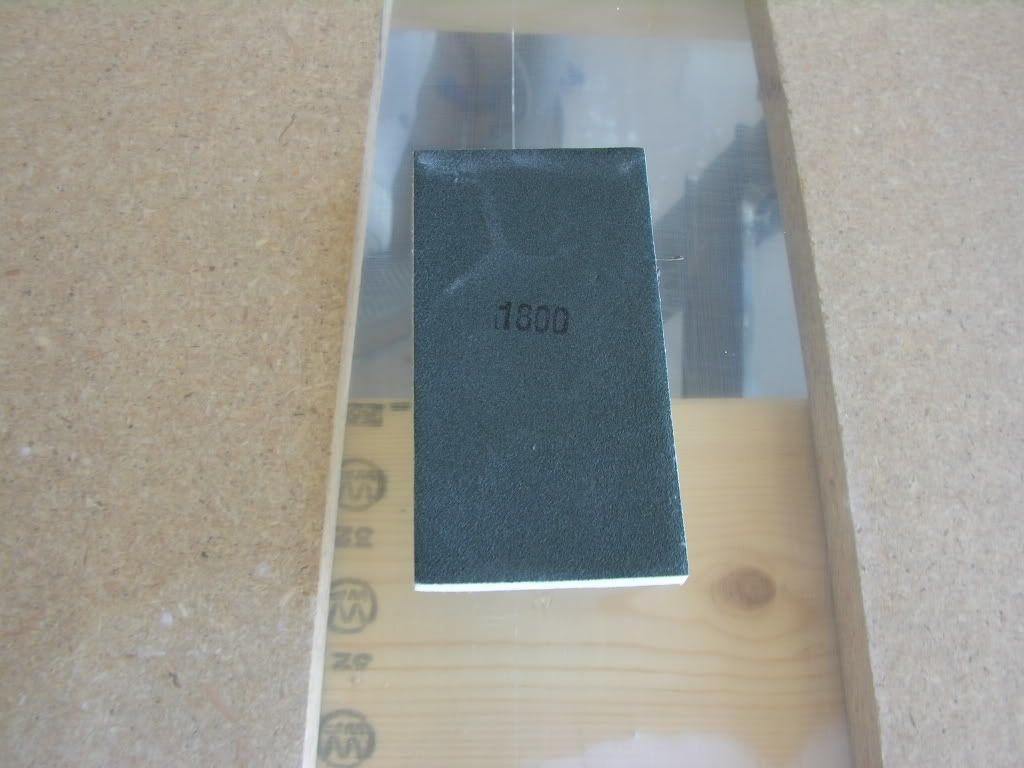 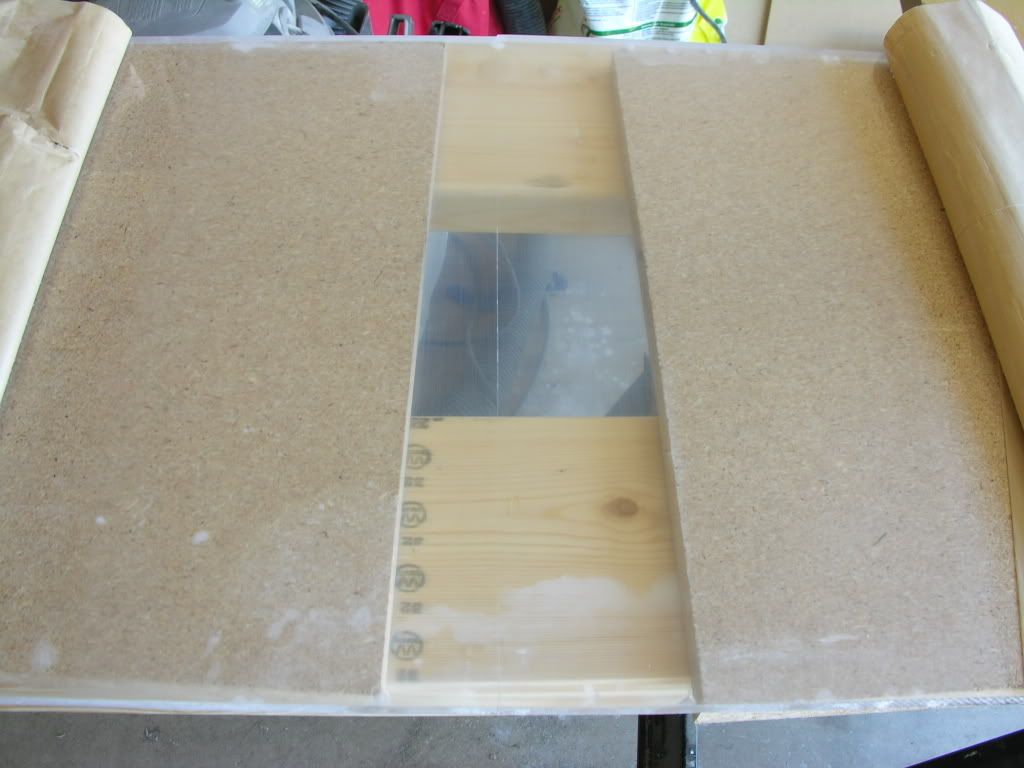 2400 wet: 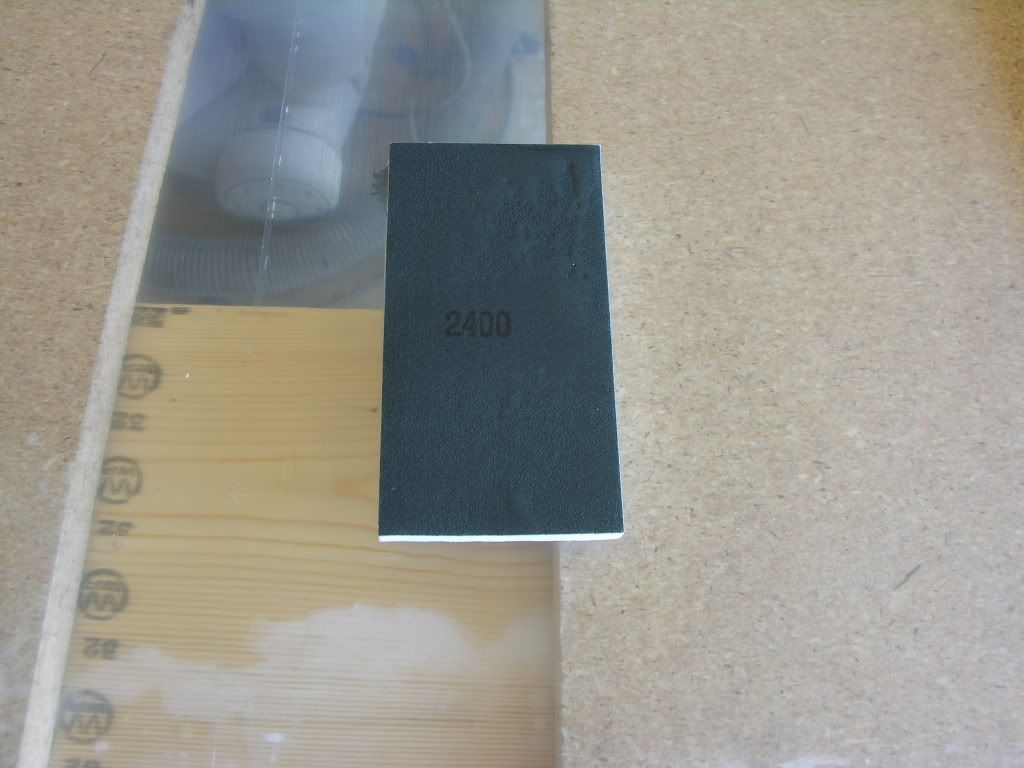 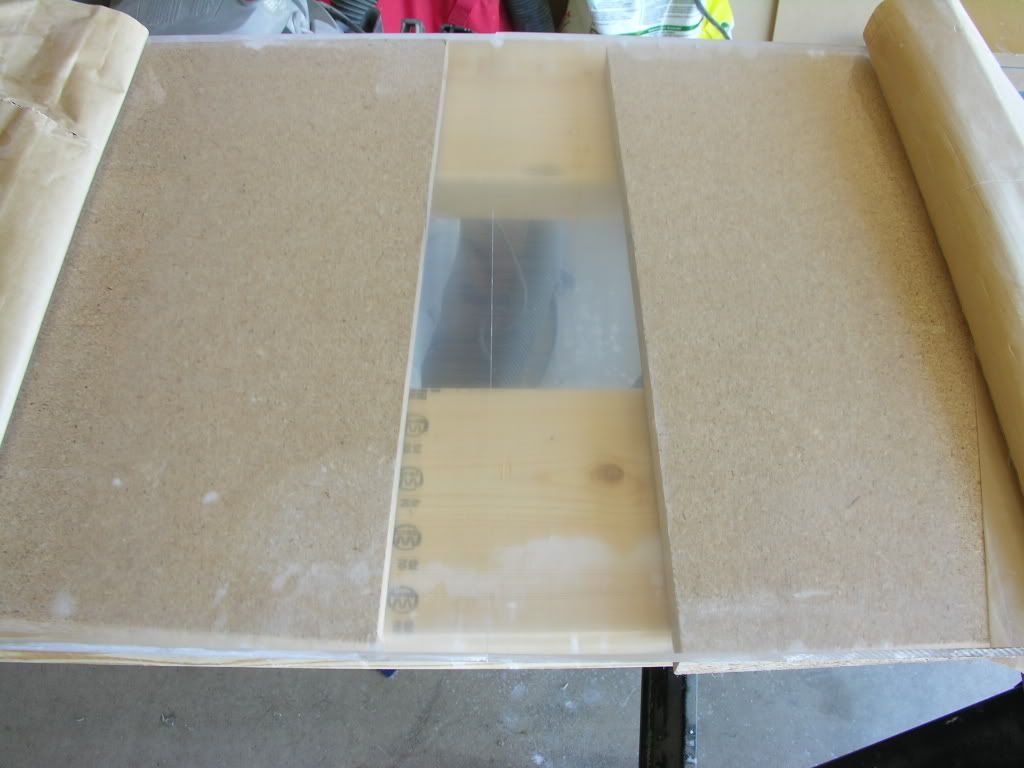 3200 wet: 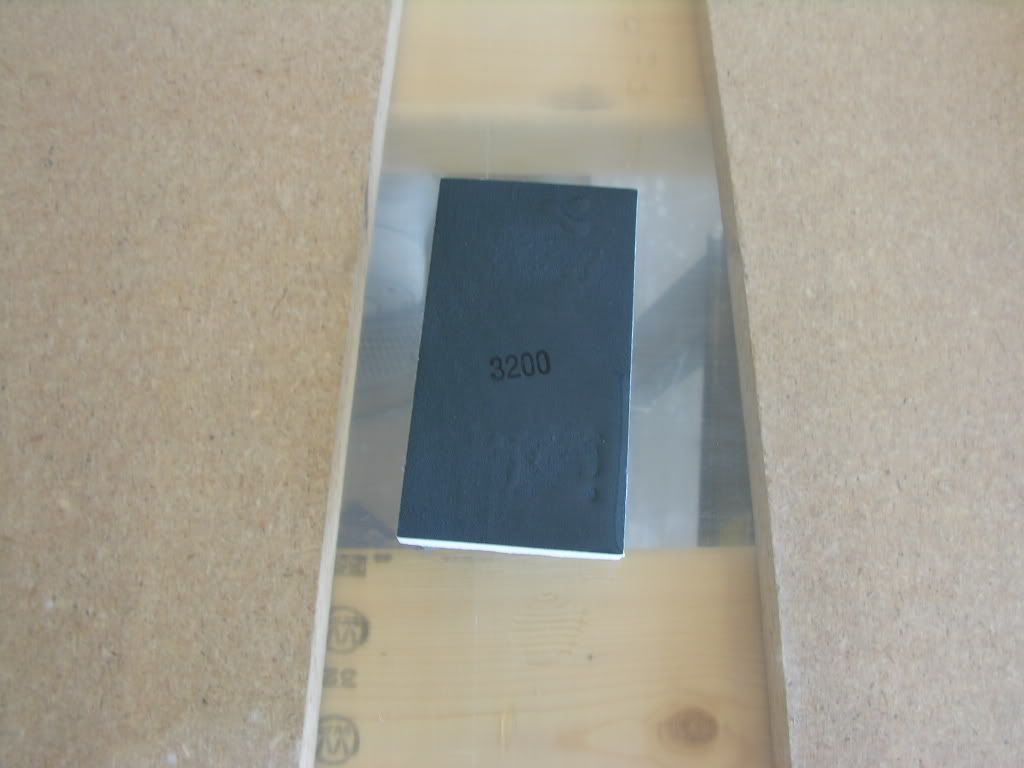 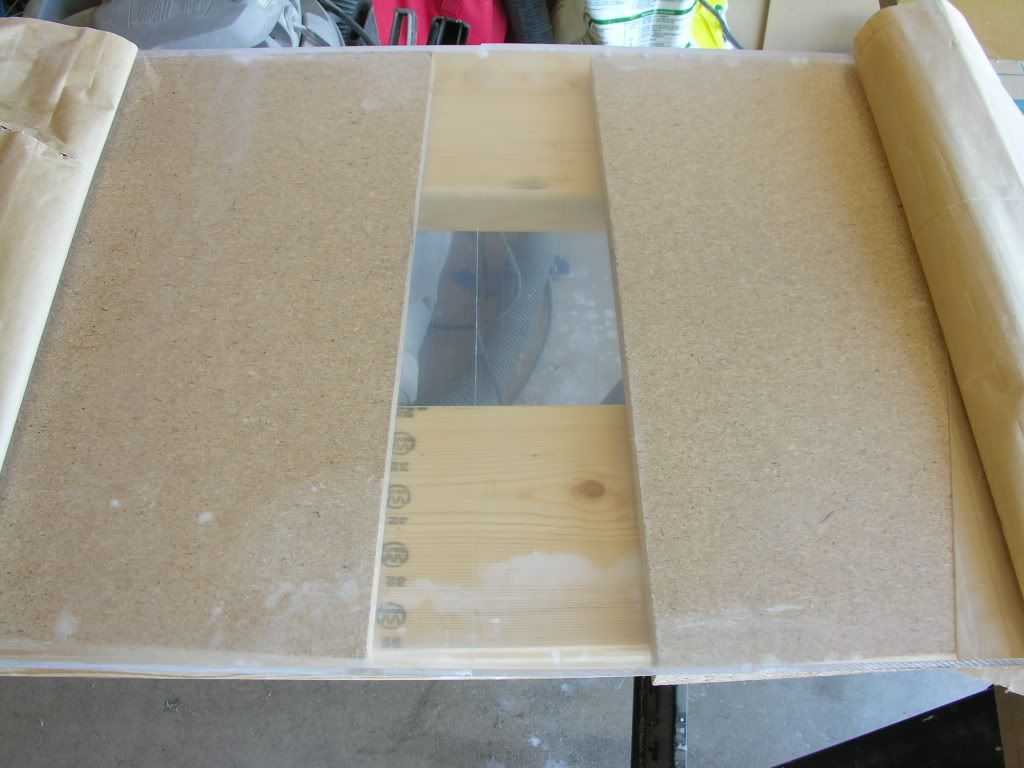 After 3200 is 3600, 4000, 6000, 8000, and 12000 if you can get to 4000 you can probably buff out the haze without going higher. Here is what I buff with: 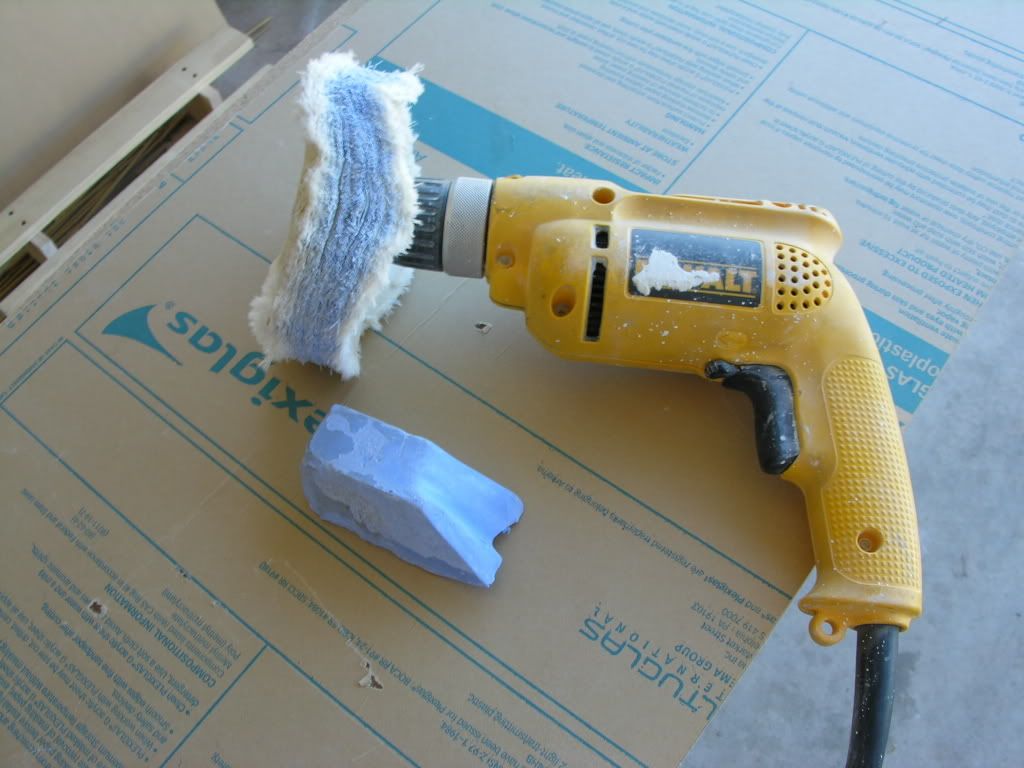
__________________
-February 2007 nTOTM "The problem with America is stupidity. Why don't we just take the safety labels off of everything and let the problem solve itself" Current Tank Info: ADA 60-P |
|
|
|
|
04/29/2009, 06:50 PM
|
#7 |
|
Registered Member
Join Date: Nov 2003
Location: C. Springs, CO
Posts: 4,530
|
½ buffed:
 Completely buffed: 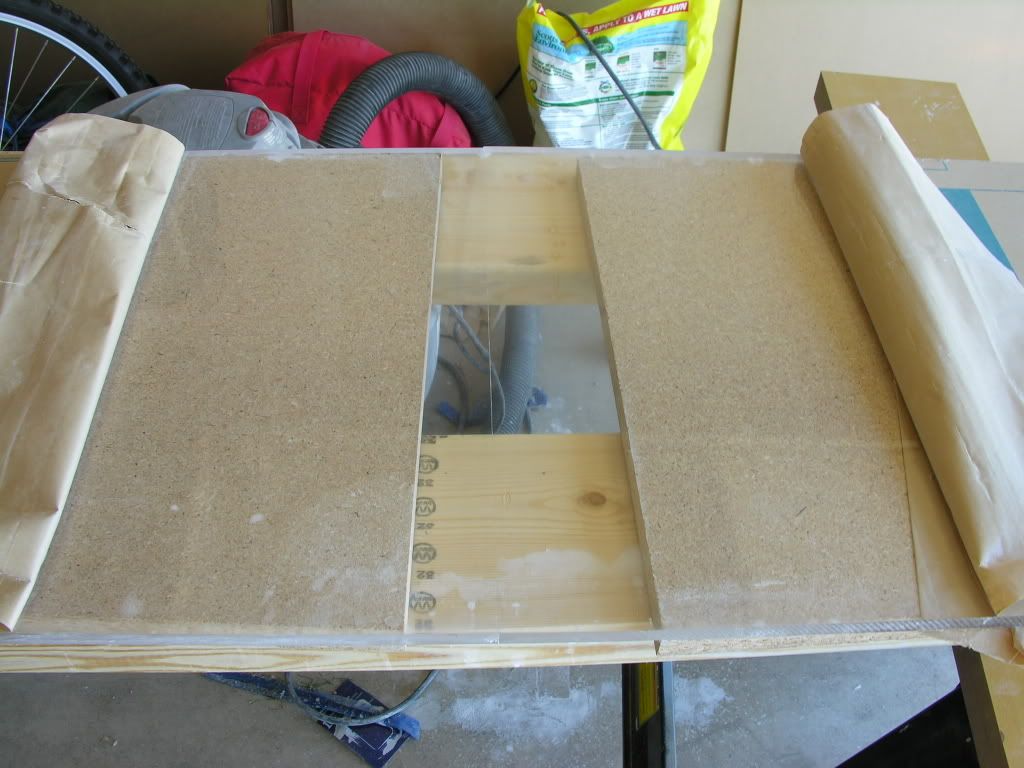 For those who really need to see how to sand here⦠Please note you change direction after every grit and sand until all previous sanding lines have been removed: 400 Grit:  600 Grit:  1500 Grit: 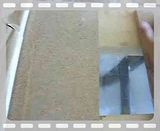 1800 Grit: 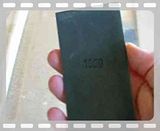
__________________
-February 2007 nTOTM "The problem with America is stupidity. Why don't we just take the safety labels off of everything and let the problem solve itself" Current Tank Info: ADA 60-P |
|
|
|
|
04/29/2009, 06:51 PM
|
#8 |
|
Registered Member
Join Date: Nov 2003
Location: C. Springs, CO
Posts: 4,530
|
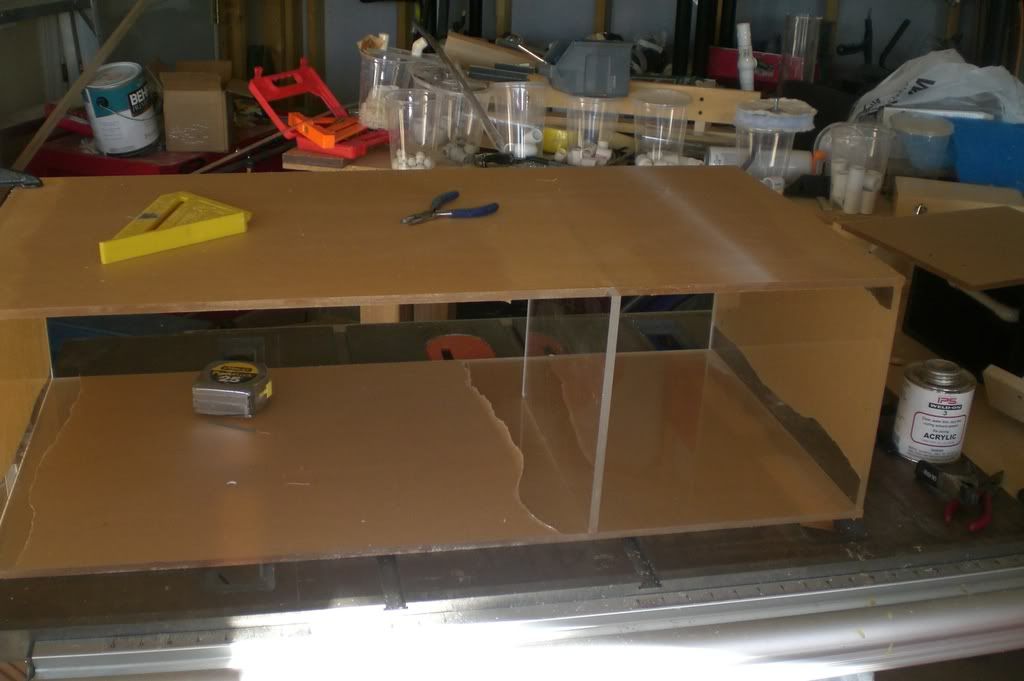
It wasnât tough to cut, just tough to keep it against the fence for 12â
   Overflow is cut: 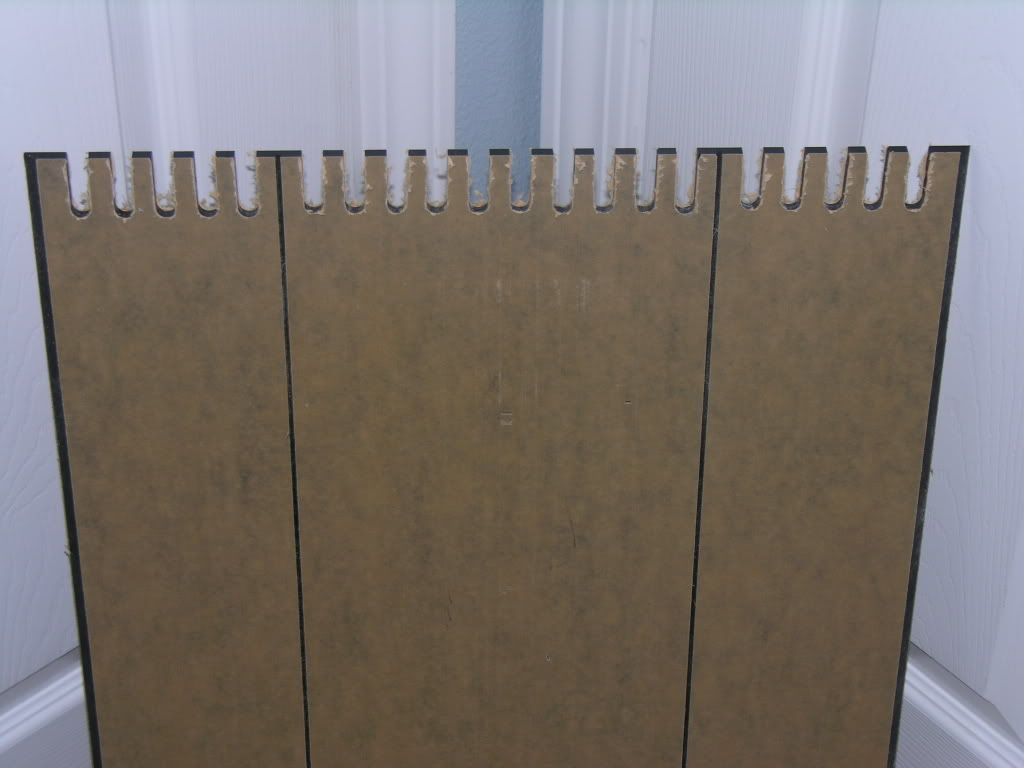 Bent to shape: 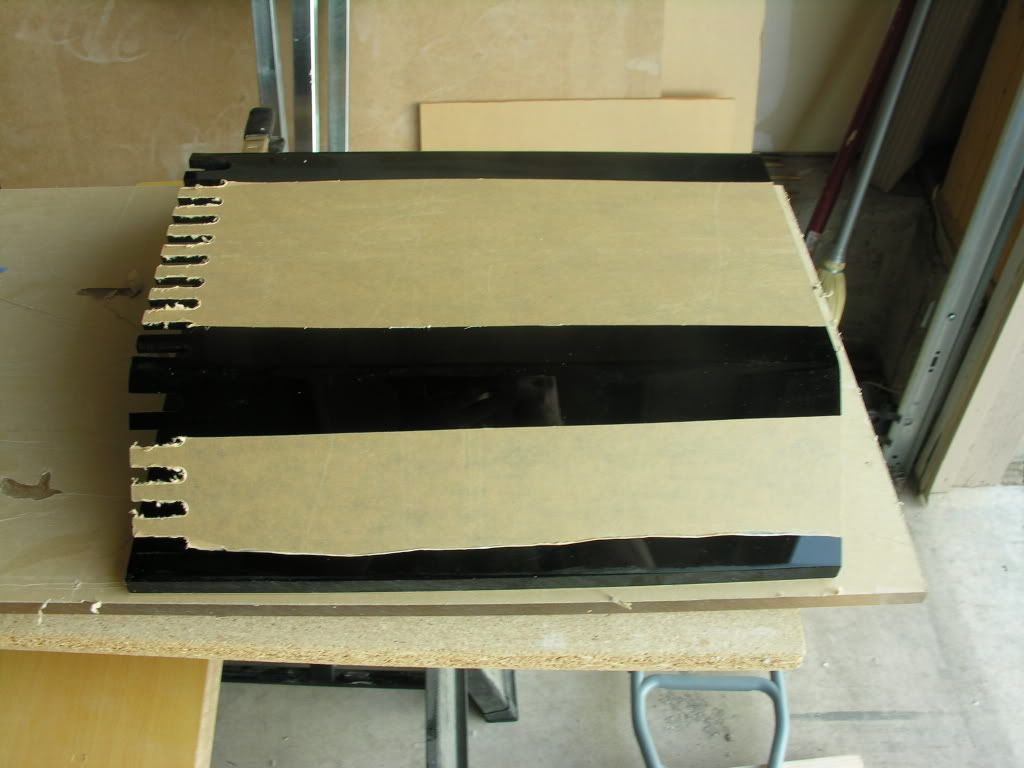 And welded to the end: 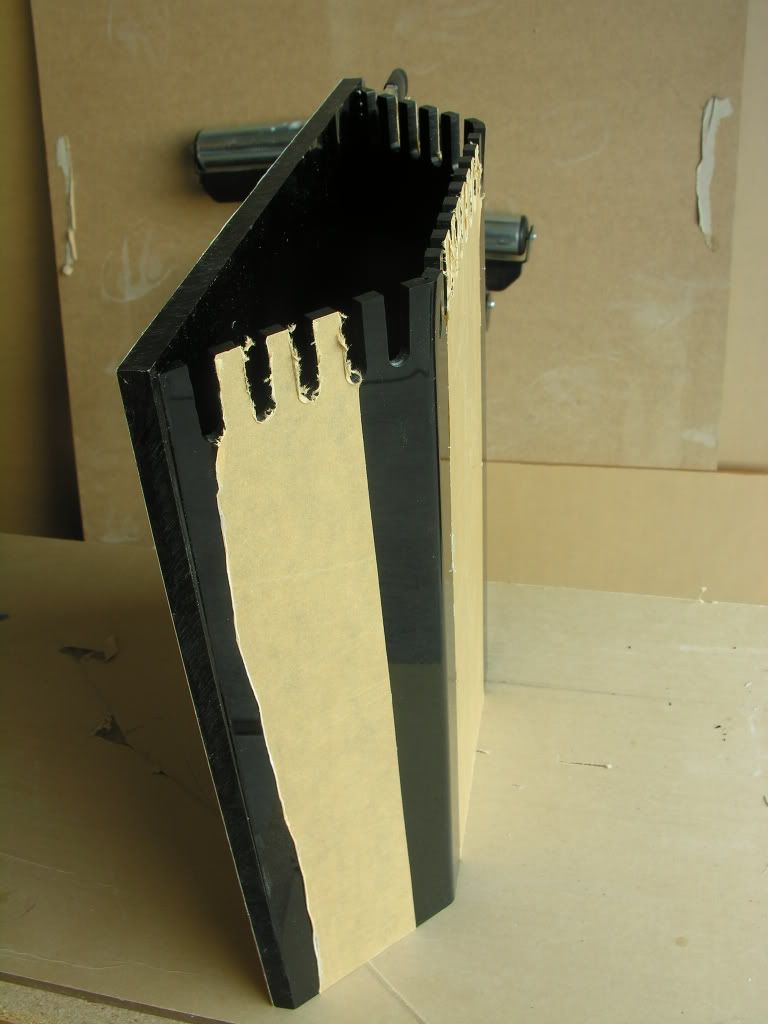 Bulkheads fit just right: 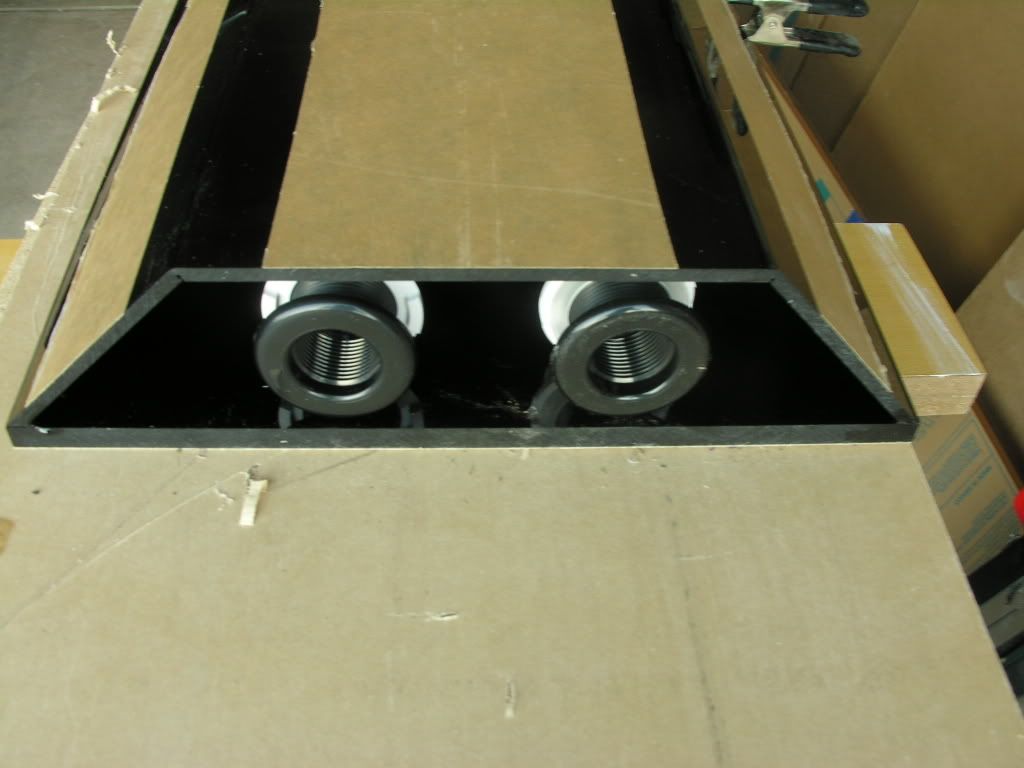 Starting to look like pieces of a tank: 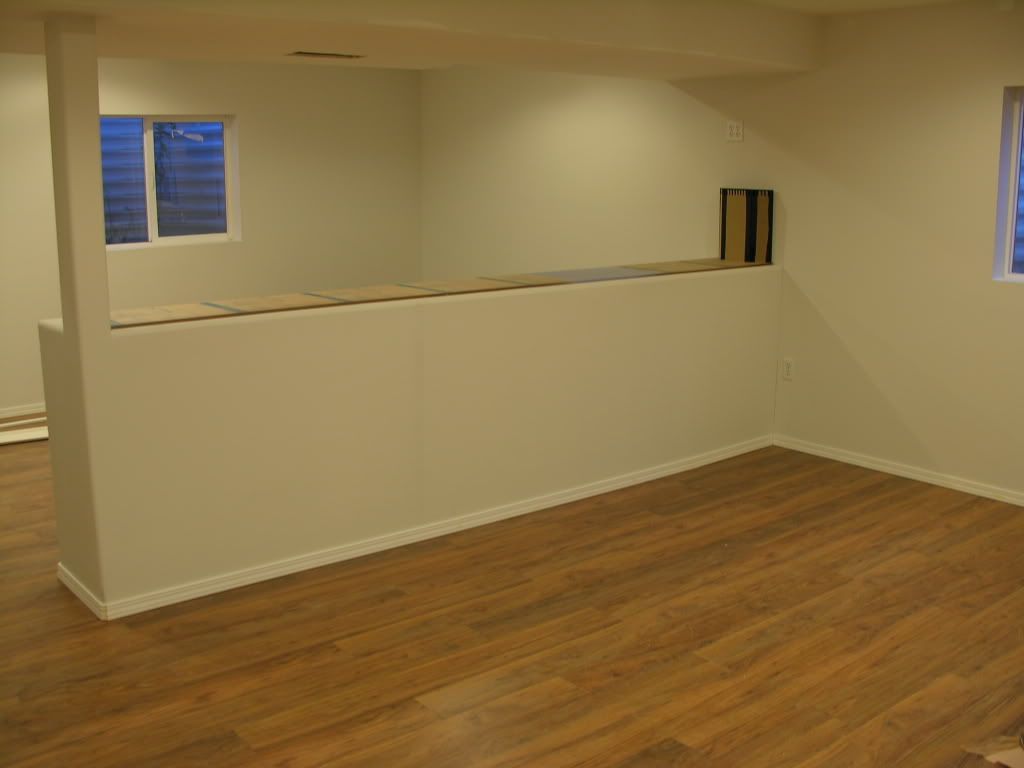 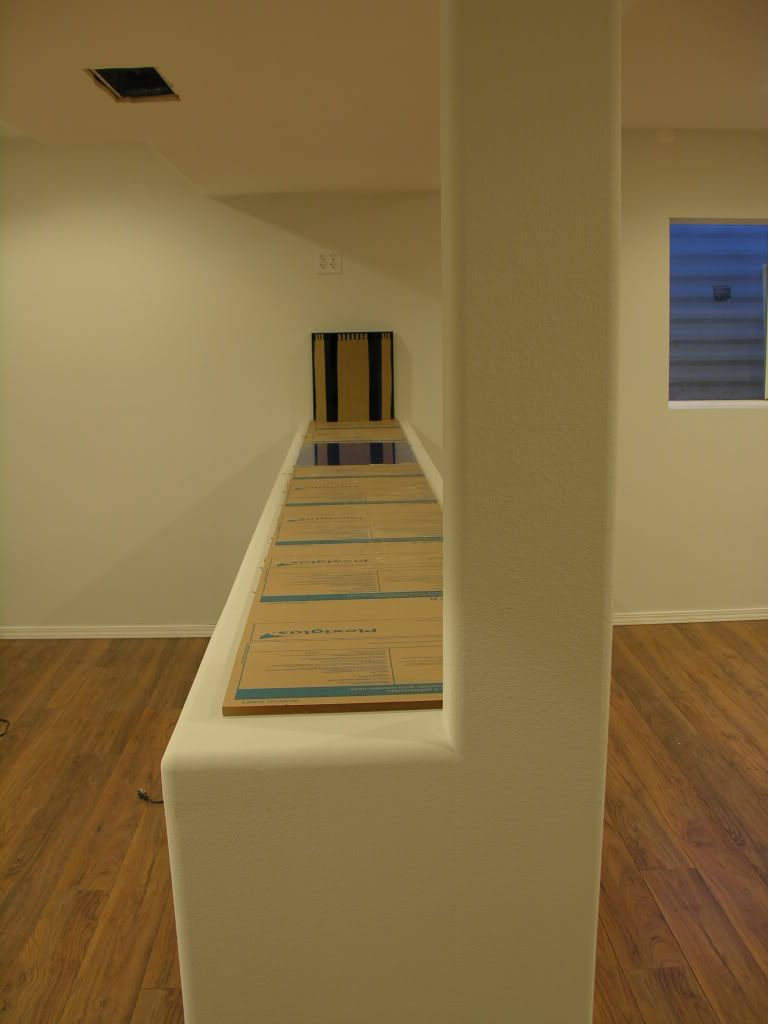
__________________
-February 2007 nTOTM "The problem with America is stupidity. Why don't we just take the safety labels off of everything and let the problem solve itself" Current Tank Info: ADA 60-P |
|
|
|
|
04/29/2009, 06:53 PM
|
#9 |
|
Registered Member
Join Date: Nov 2003
Location: C. Springs, CO
Posts: 4,530
|
How to cut the opening for the bracing, here are two methods:
The first method is without a template the second is with a template. First, mark out your area... 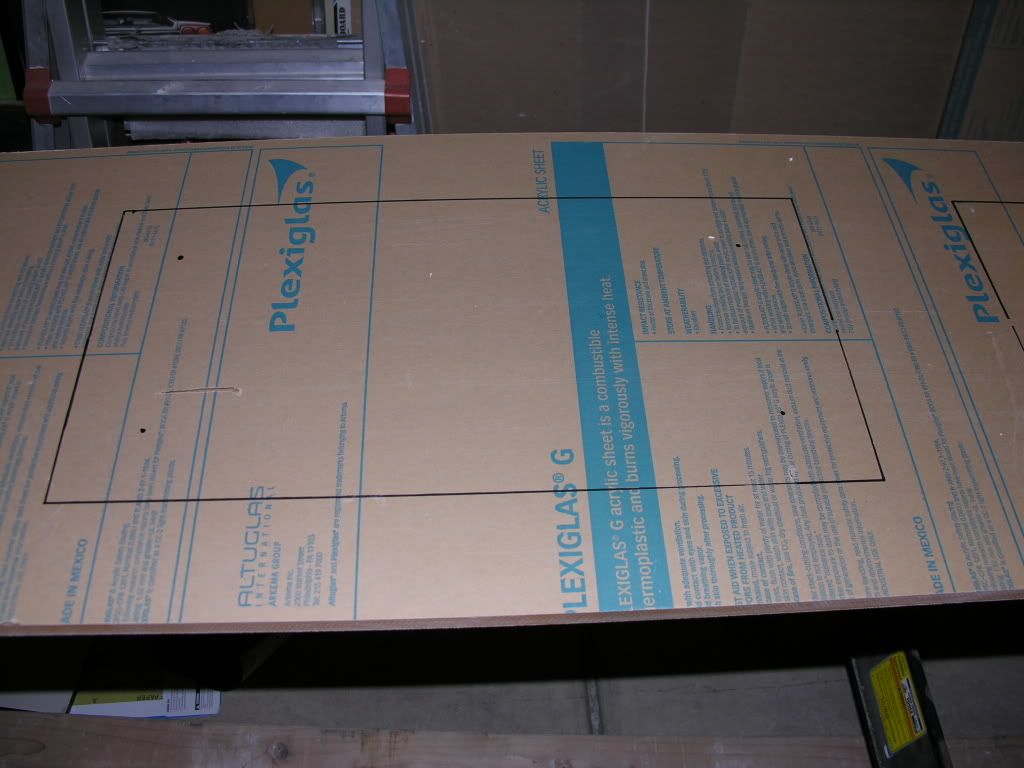 Next, drill out each corner with a 1-2" radius (2-4" diameter) hole saw, this step is important as the curve really strengthens the bracing. I've seen many tops crack in these corners when they are cut to a square or small radius. 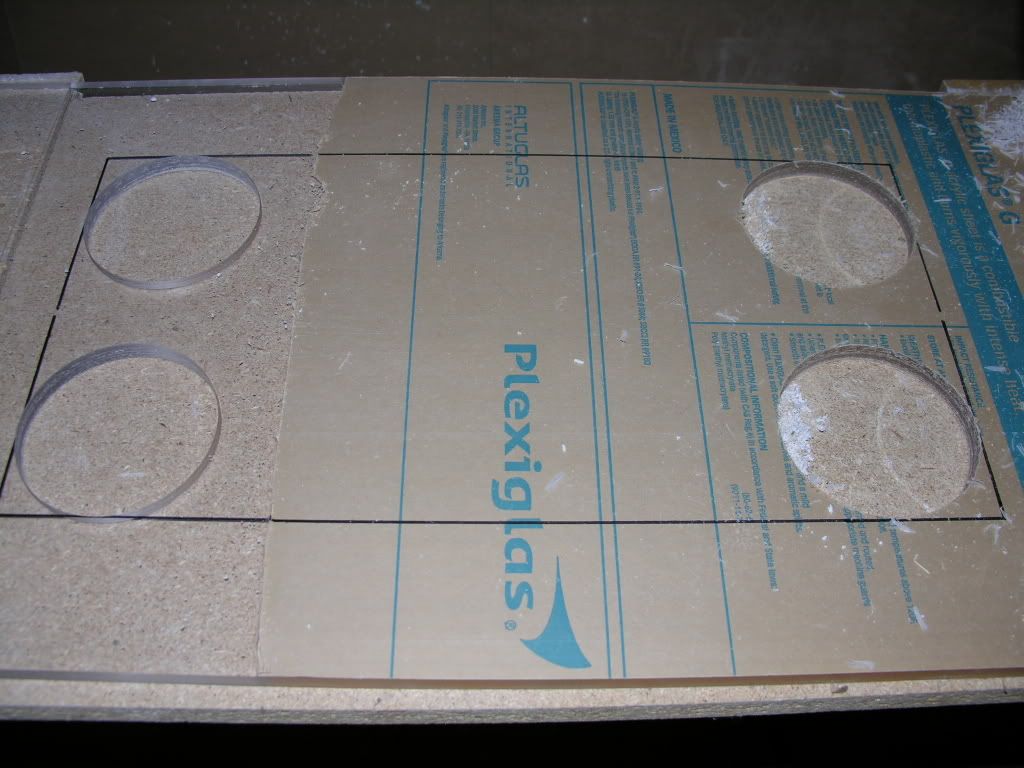 Next is to router from tangent to tangent along the edge of your access hole. First is clamp a straight edge alone the line to give your router a guide, or you can move it in a little for a quick rough cut and allow for an easy and clean final pass.  Rough cut: 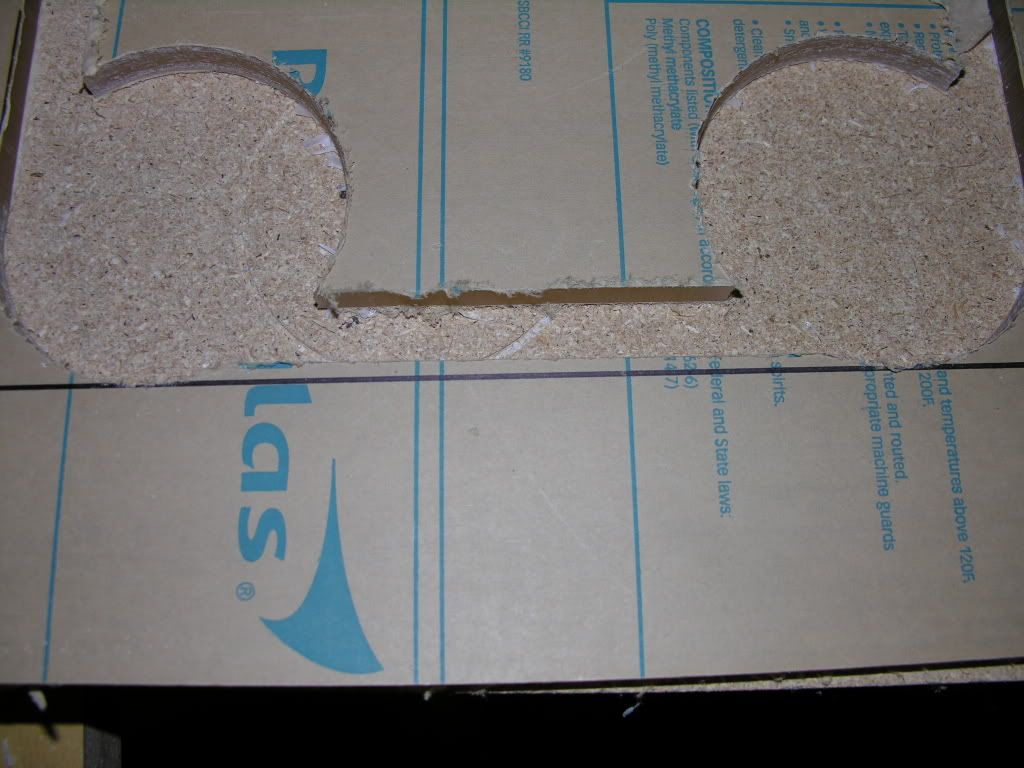 Final Pass: 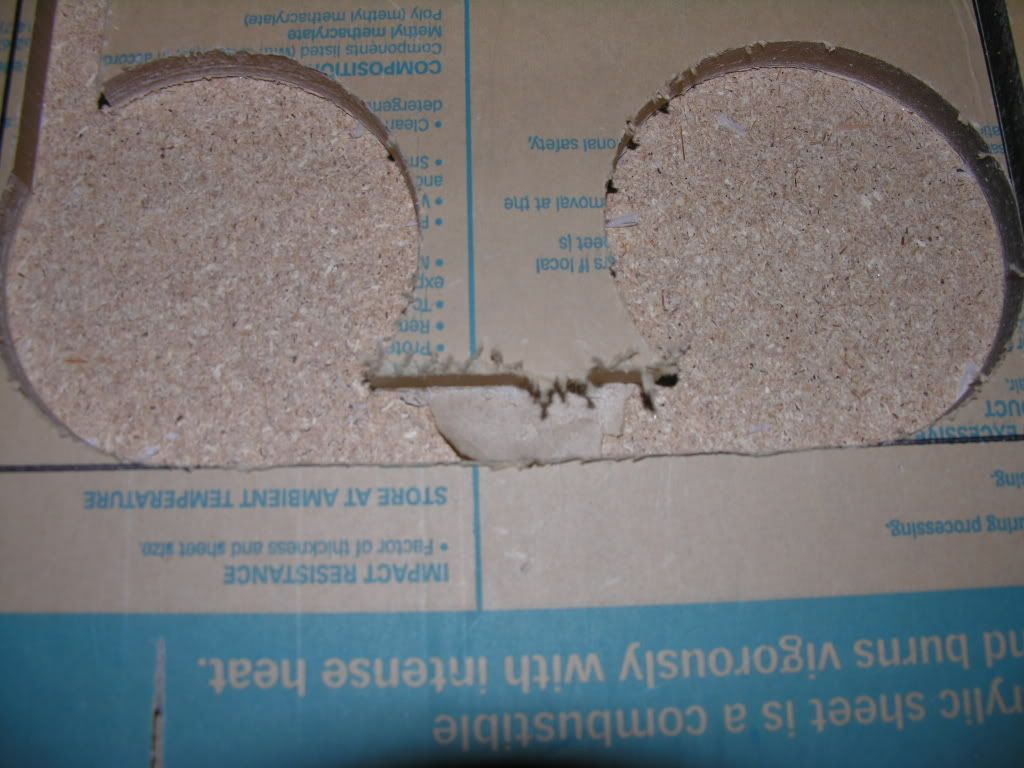 Do this for all 4 sides: 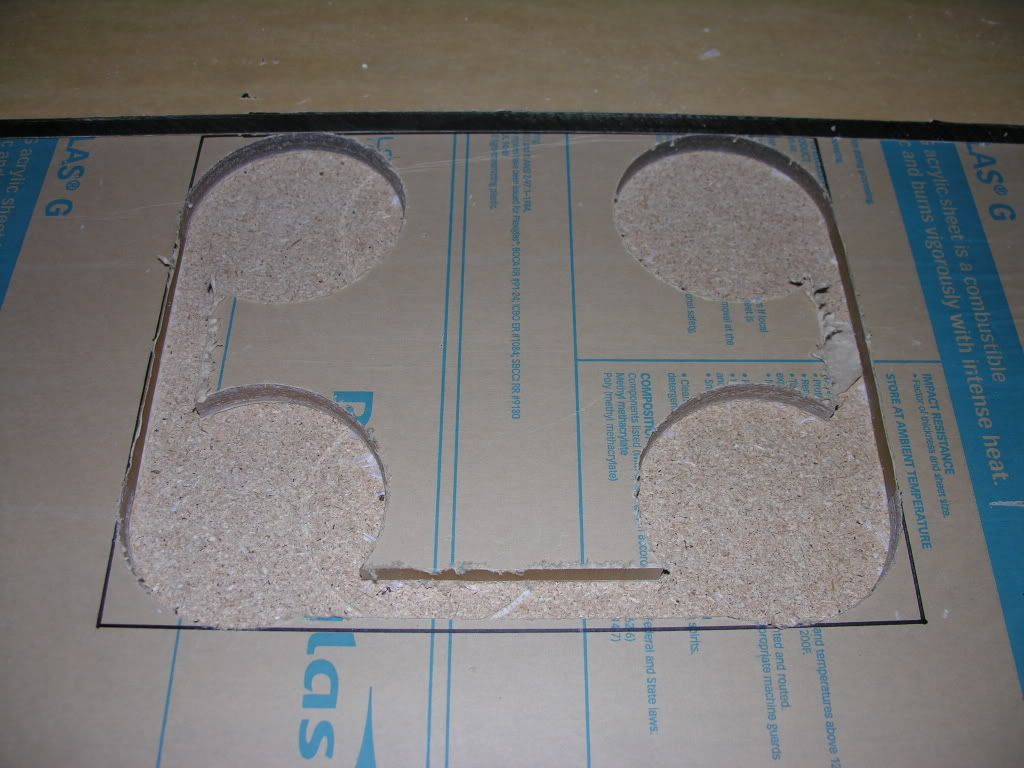 And youâre done: 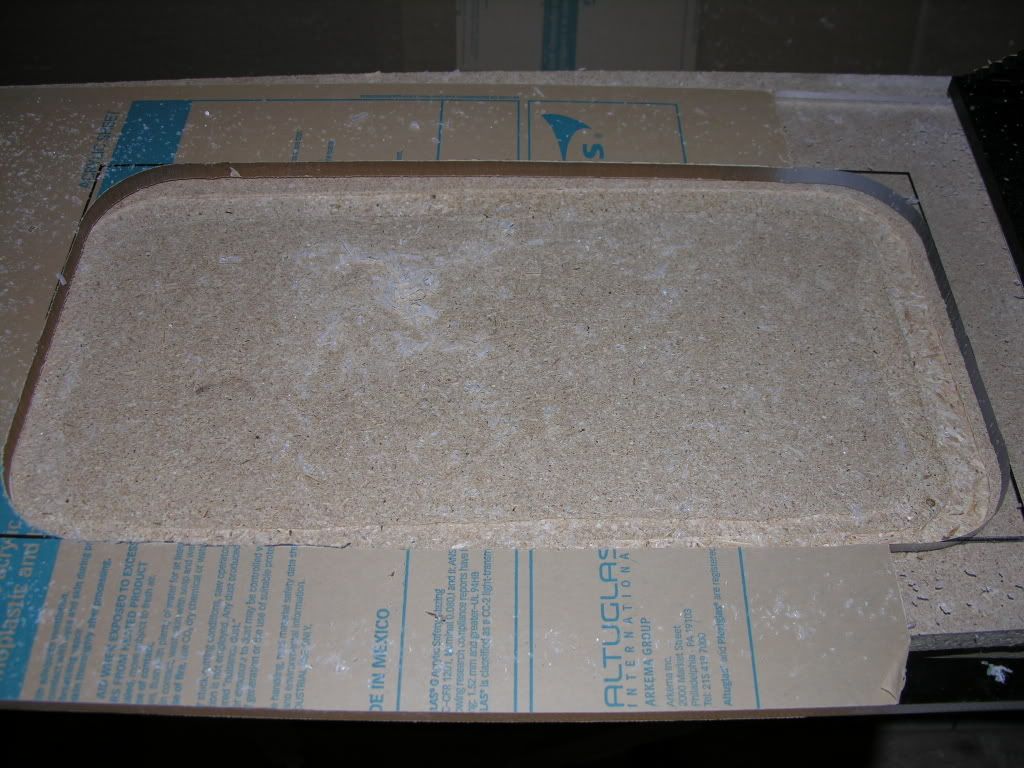
__________________
-February 2007 nTOTM "The problem with America is stupidity. Why don't we just take the safety labels off of everything and let the problem solve itself" Current Tank Info: ADA 60-P |
|
|
|
|
04/29/2009, 06:53 PM
|
#10 |
|
Registered Member
Join Date: Nov 2003
Location: C. Springs, CO
Posts: 4,530
|
The second method is with a jig. First you have to build the jig, and this is done by using the same method above only with MDF or another suitable material. Then position the jig where you want the access hole.
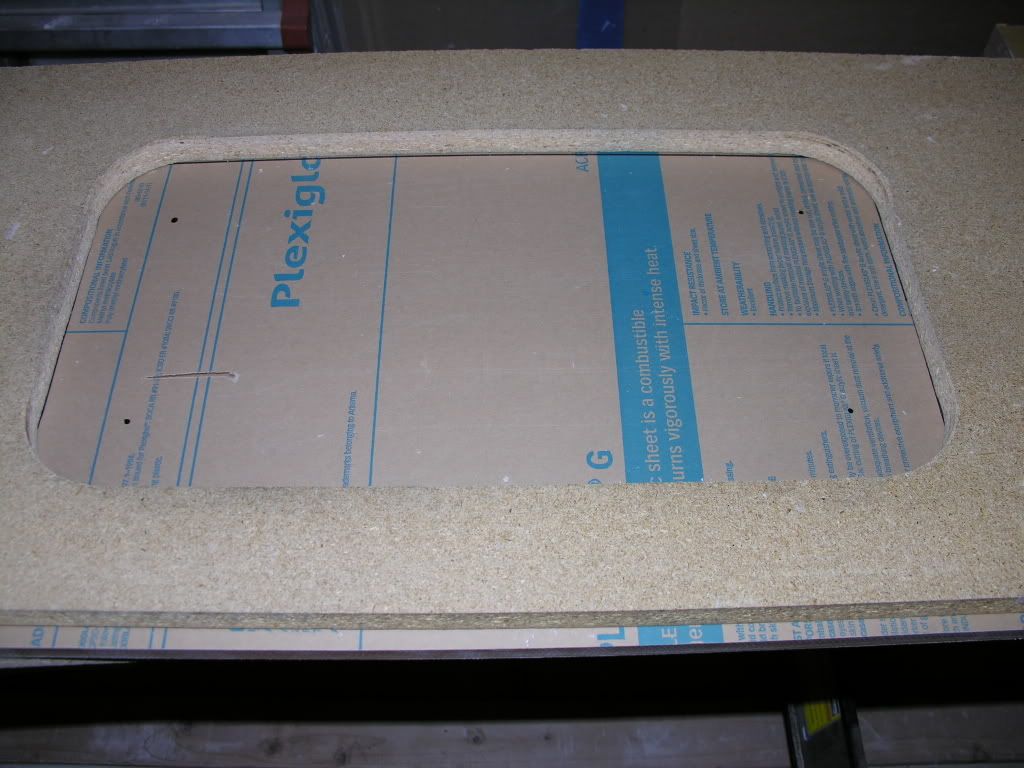 Drill a pilot hole large enough to drop your router bit into: 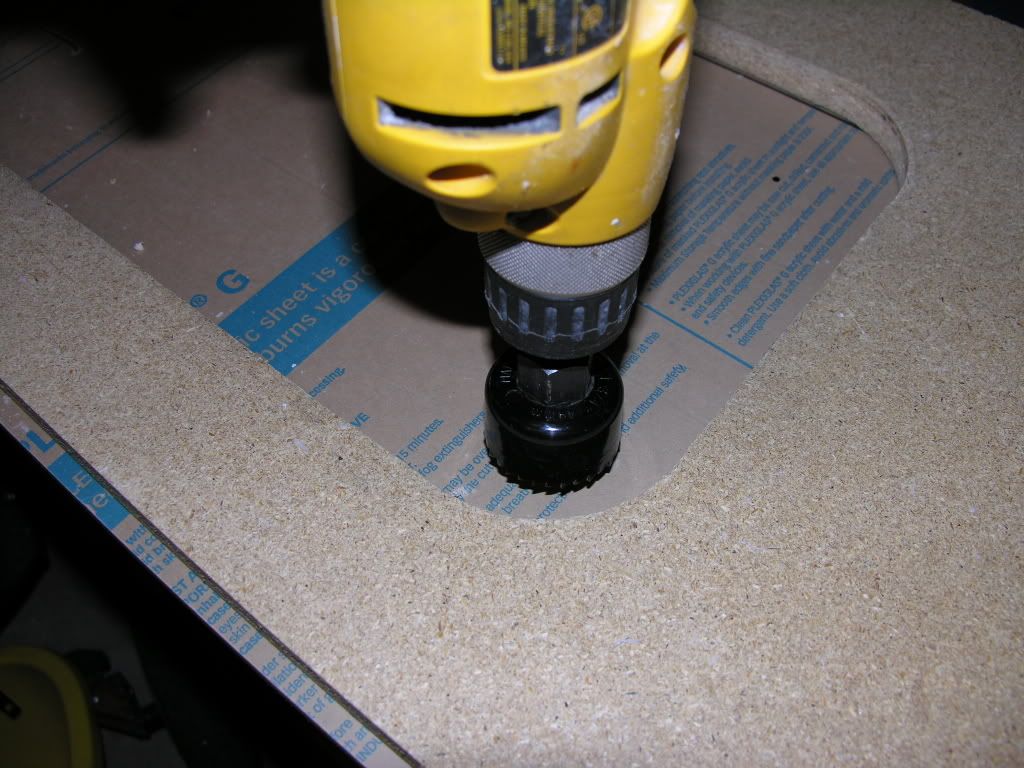 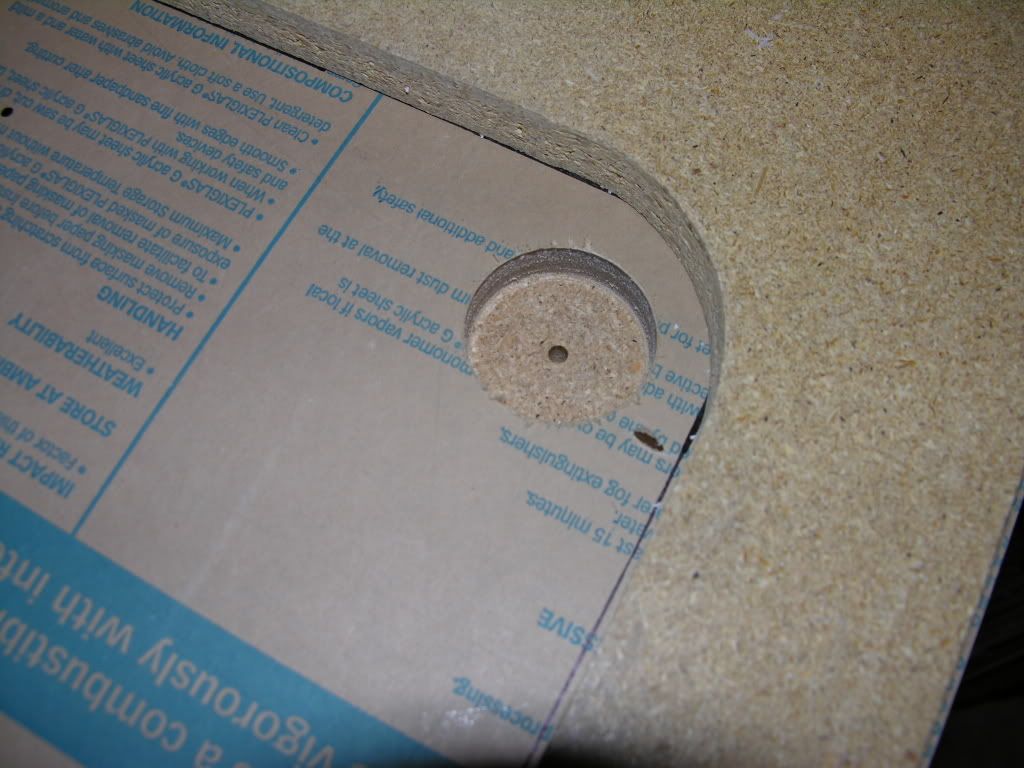 Here is the router bit I use... It's a flush trim bit, but with the bearing mounted on the bottom instead. 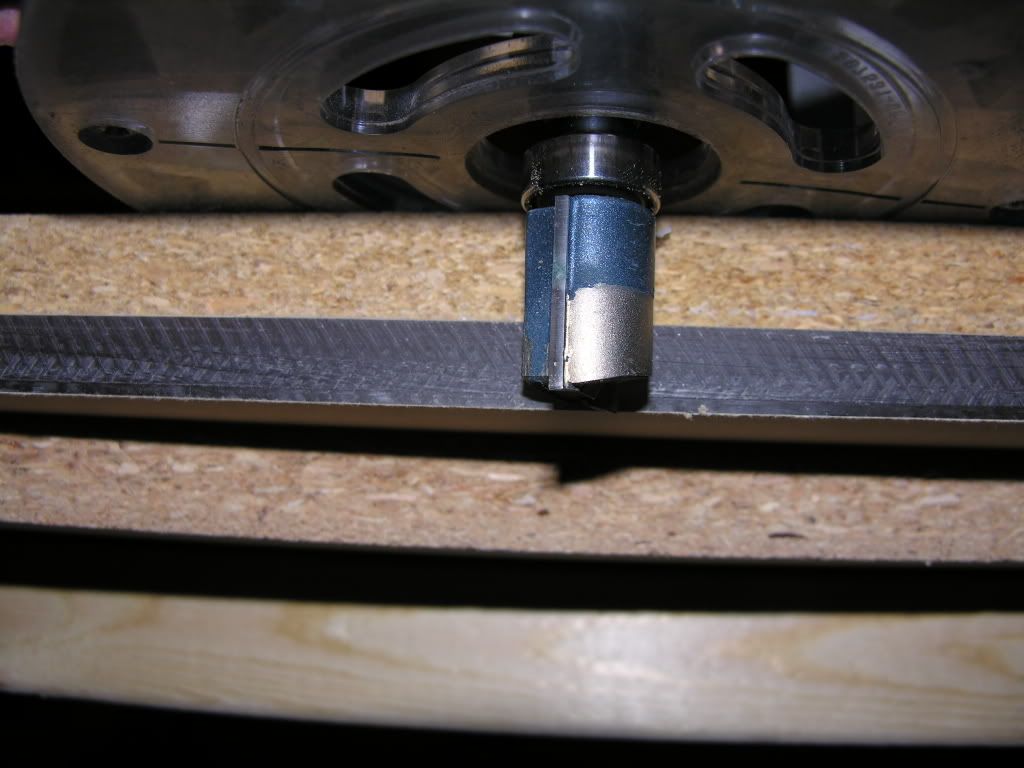 I run an initial pass as a rough cut and then a final pass to remove the last of the material. This final pass reduces chipping and heat on the bit as there is less material to remove. 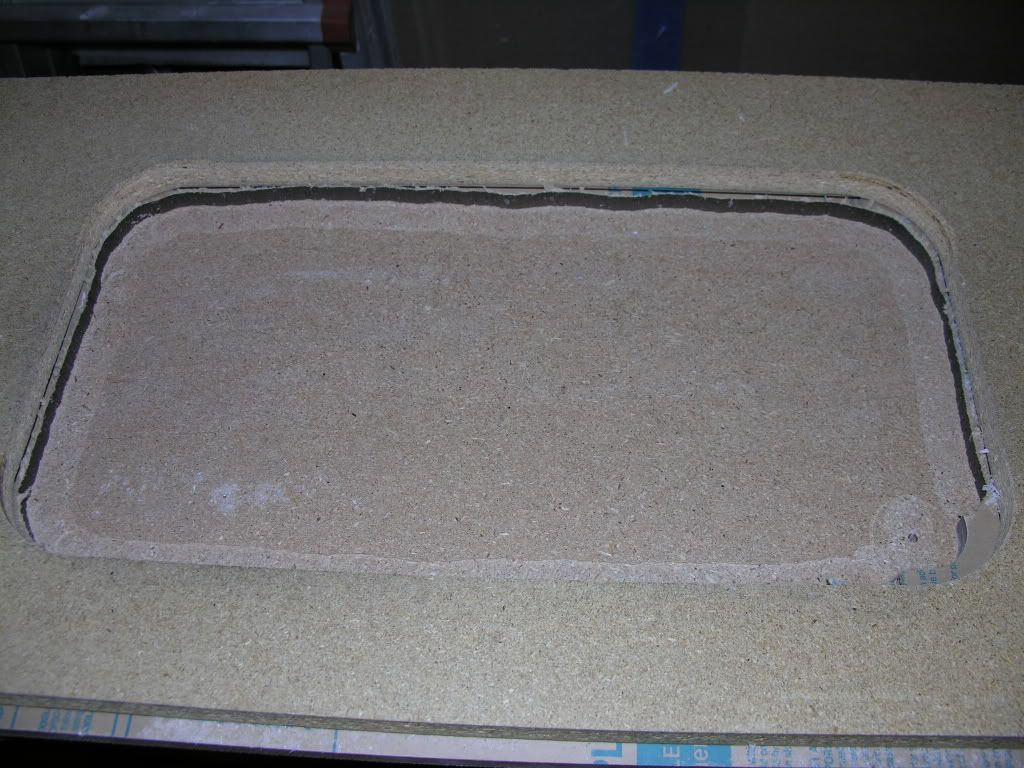 and all done: Be warned... I vacuumed between each shot, as you, your router, your acrylic, and work space will be covered in this! 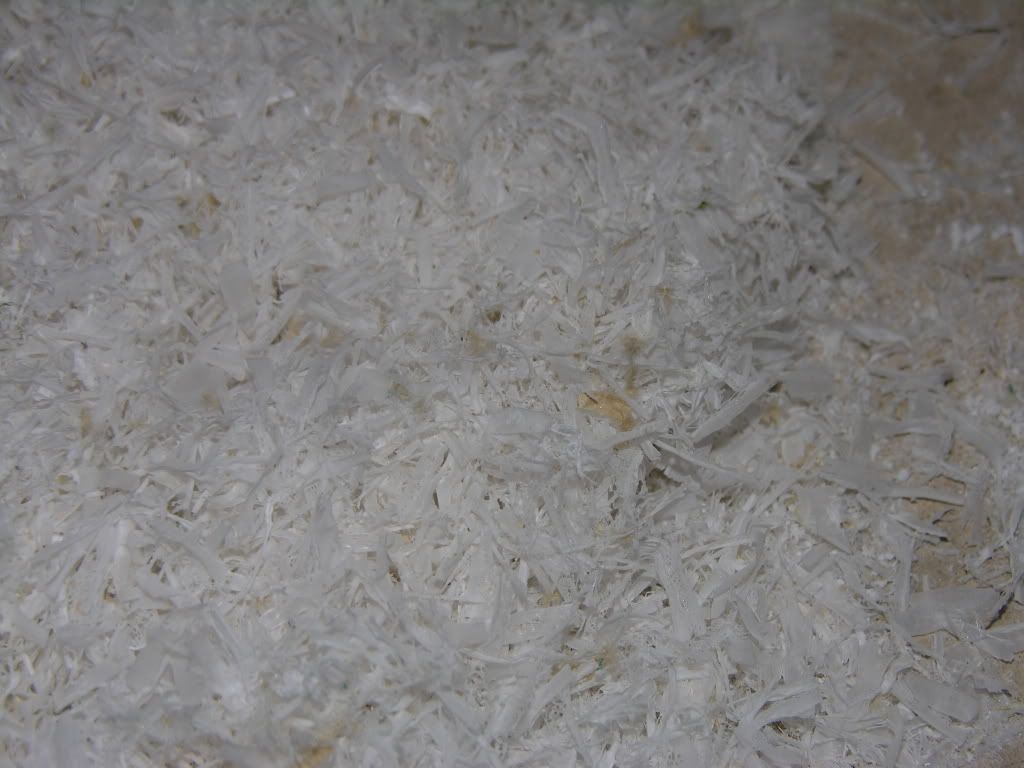 And after 6 of these plus overflow opening the top was finished: 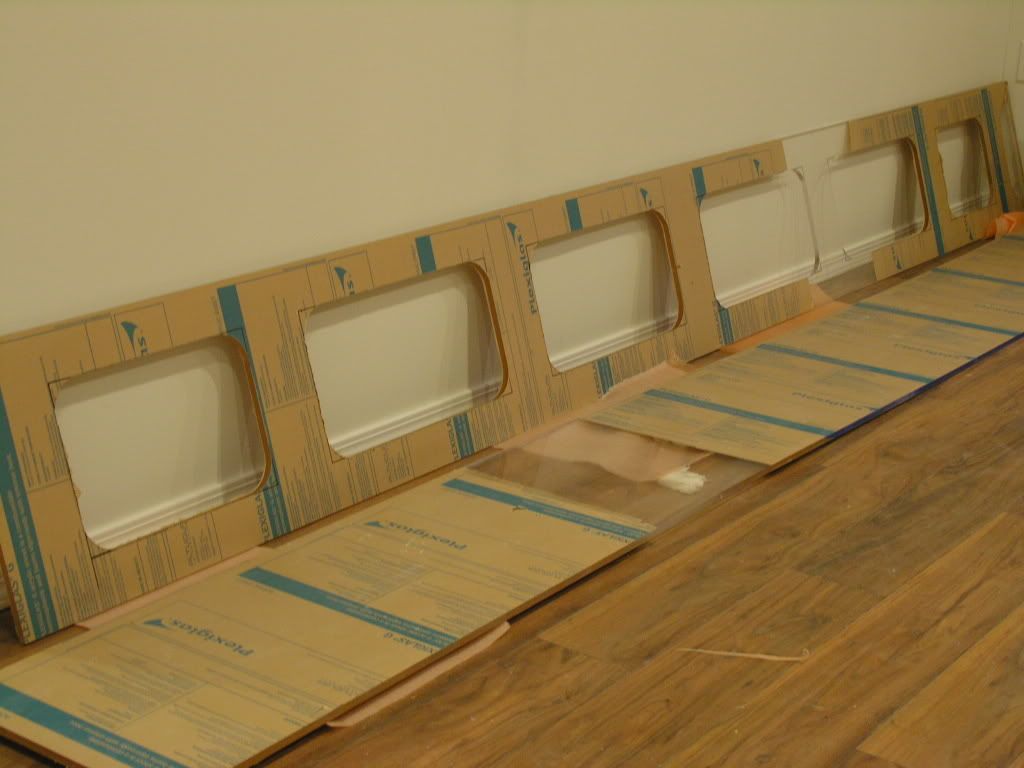 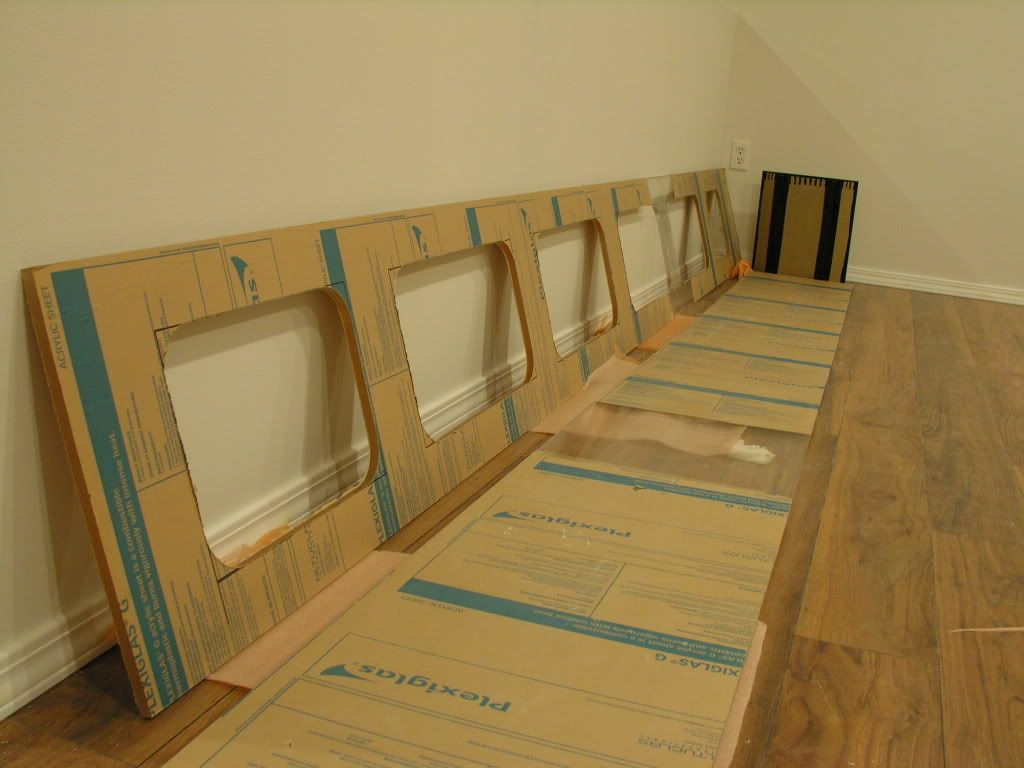 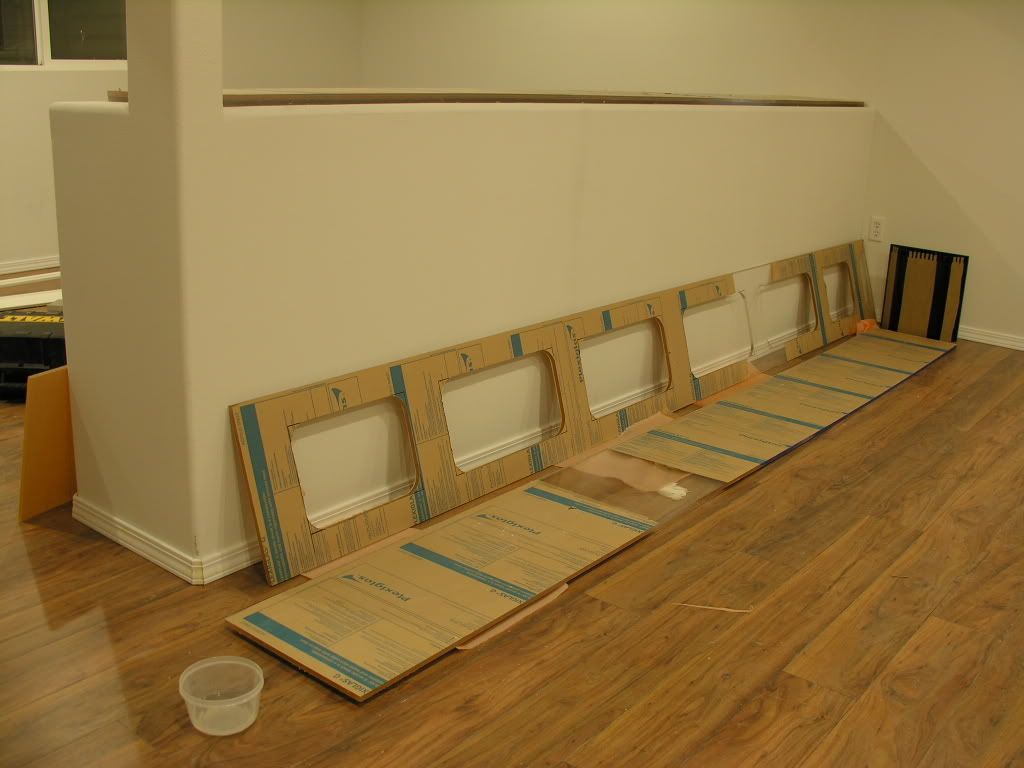
__________________
-February 2007 nTOTM "The problem with America is stupidity. Why don't we just take the safety labels off of everything and let the problem solve itself" Current Tank Info: ADA 60-P |
|
|
|
|
04/29/2009, 06:54 PM
|
#11 |
|
Registered Member
Join Date: Nov 2003
Location: C. Springs, CO
Posts: 4,530
|
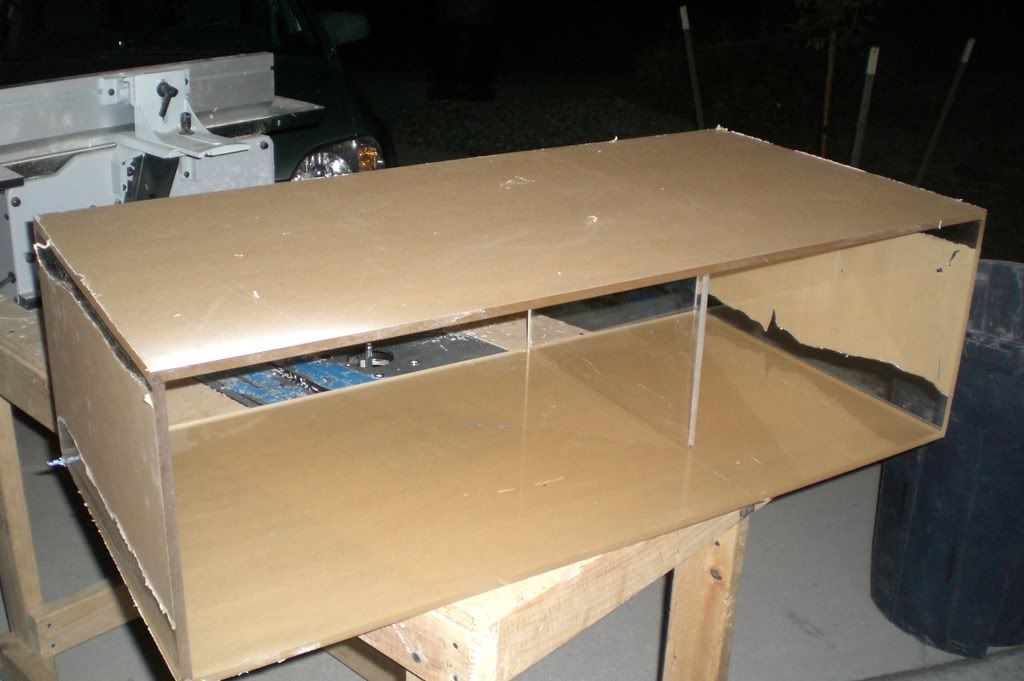
Building the tank:
For pins I use 2 strands of copper wires, twisted together. 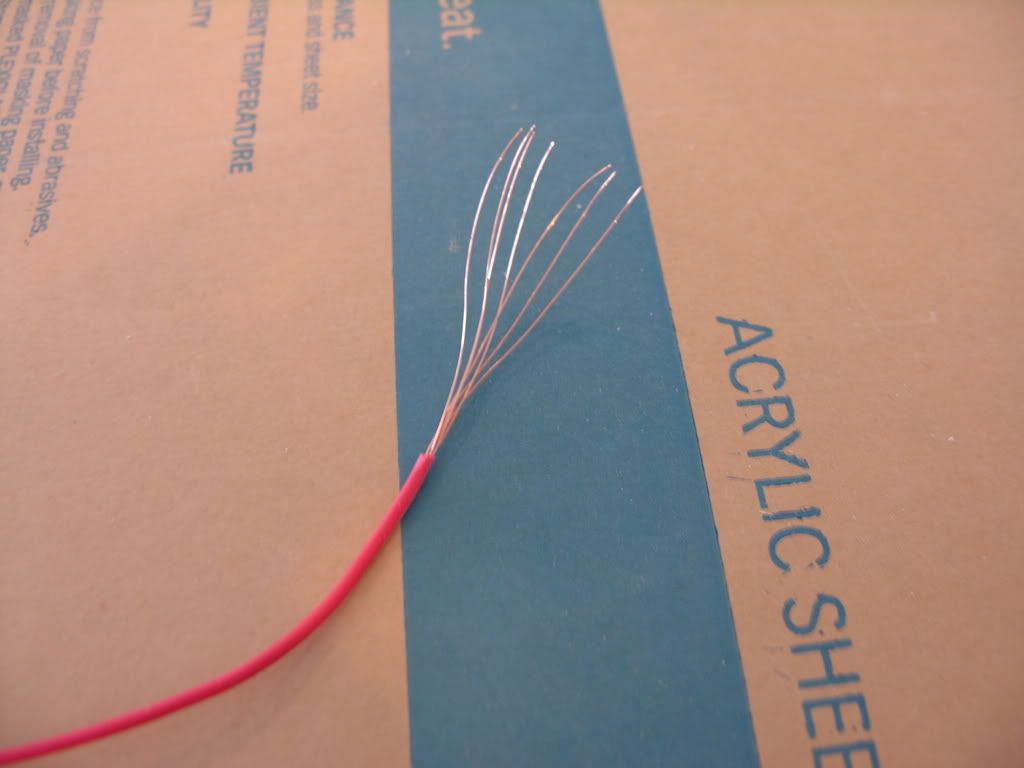 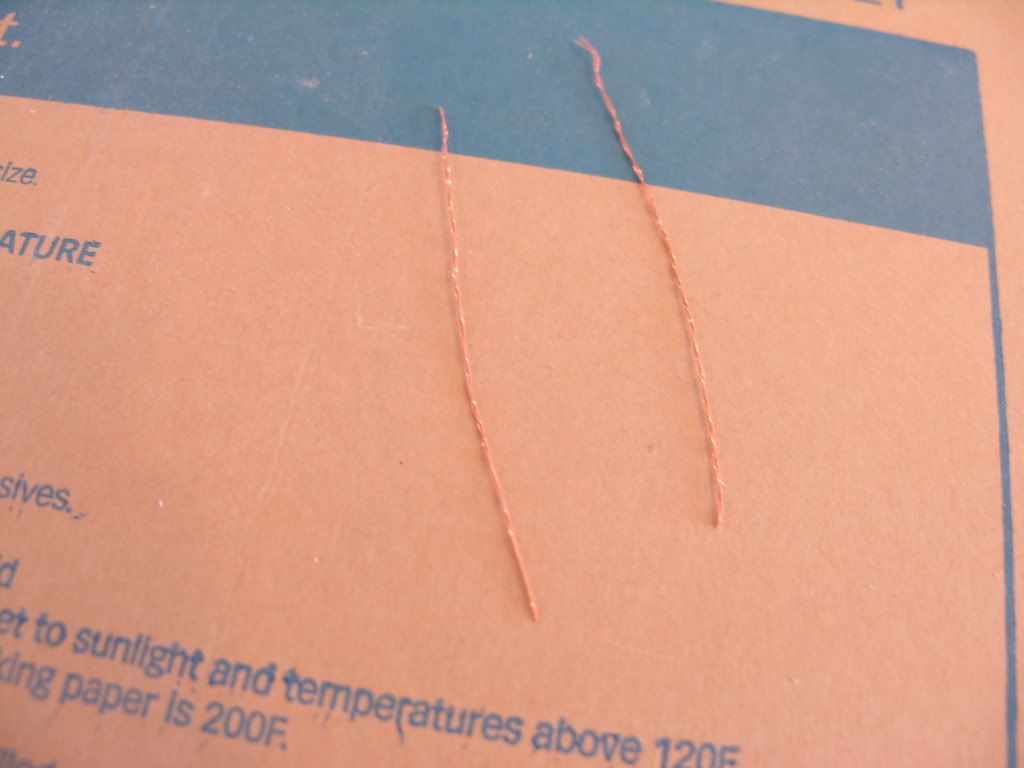 Clamp the end at a 90* angle, and ensure it's also 90* to the edge. 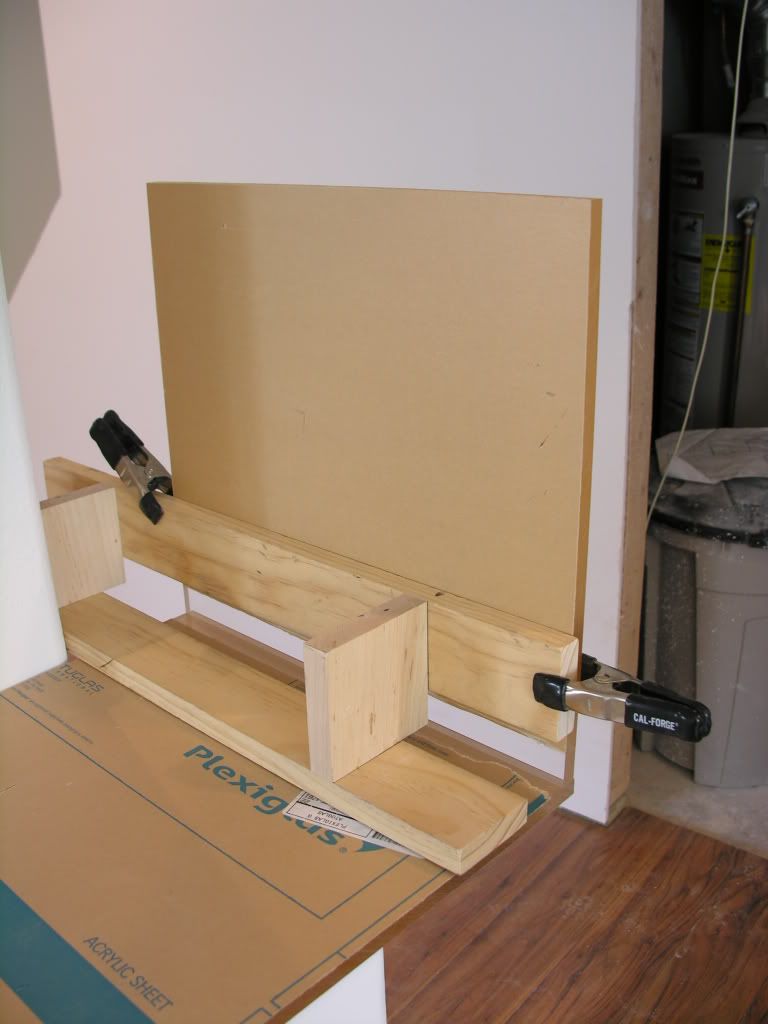 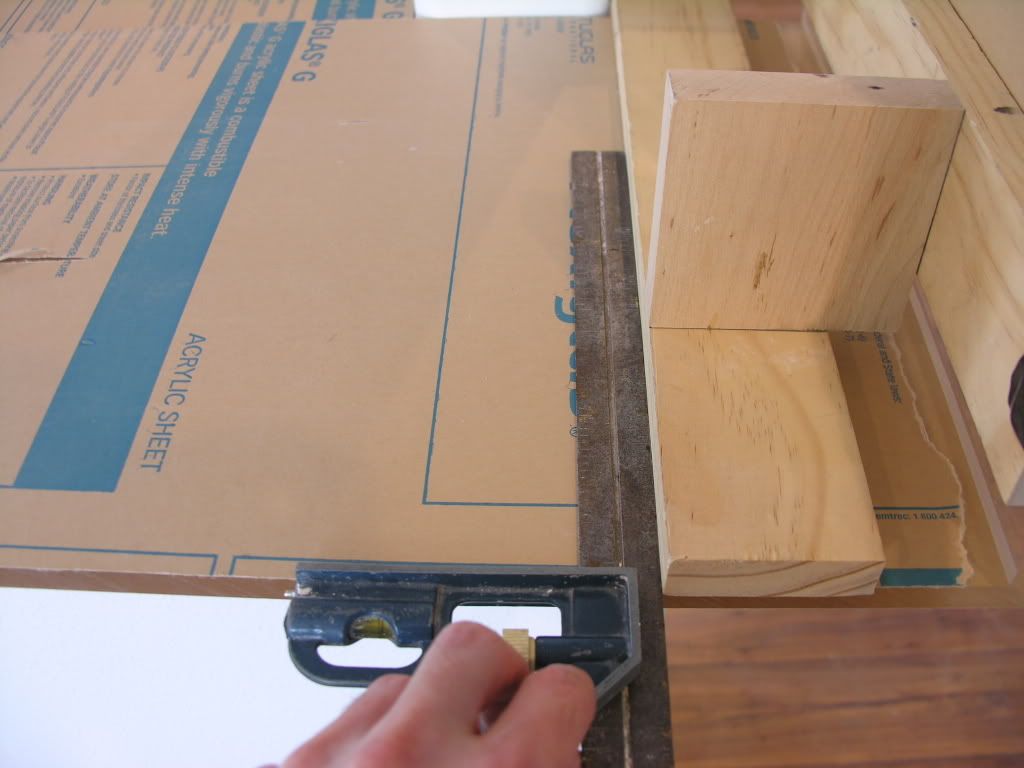 Space your material with the wire pins and apply your solvent (I use WeldOn 3; in our climate 4 evaporates too quickly). I'm using a 16g syringe in the pictures but I use a bottle for the other welds and would recommend a bottle over a syringe, as I don't like the inconsistency of the plunger. Sometimes it's easy to push; sometime it's like a rock. 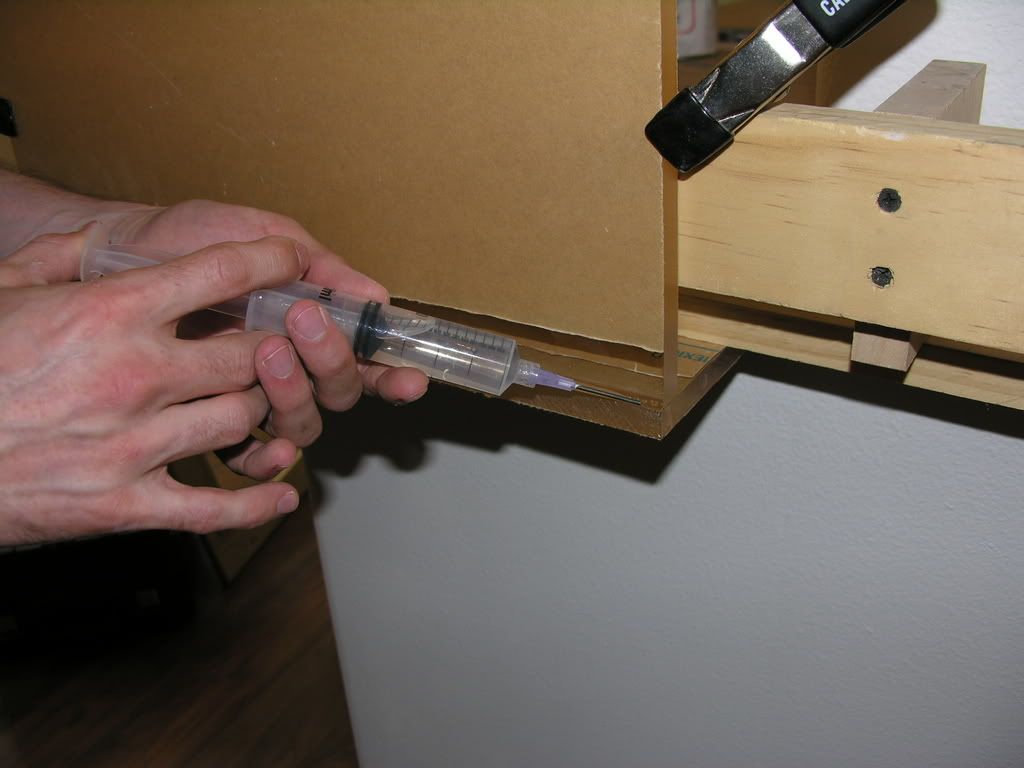 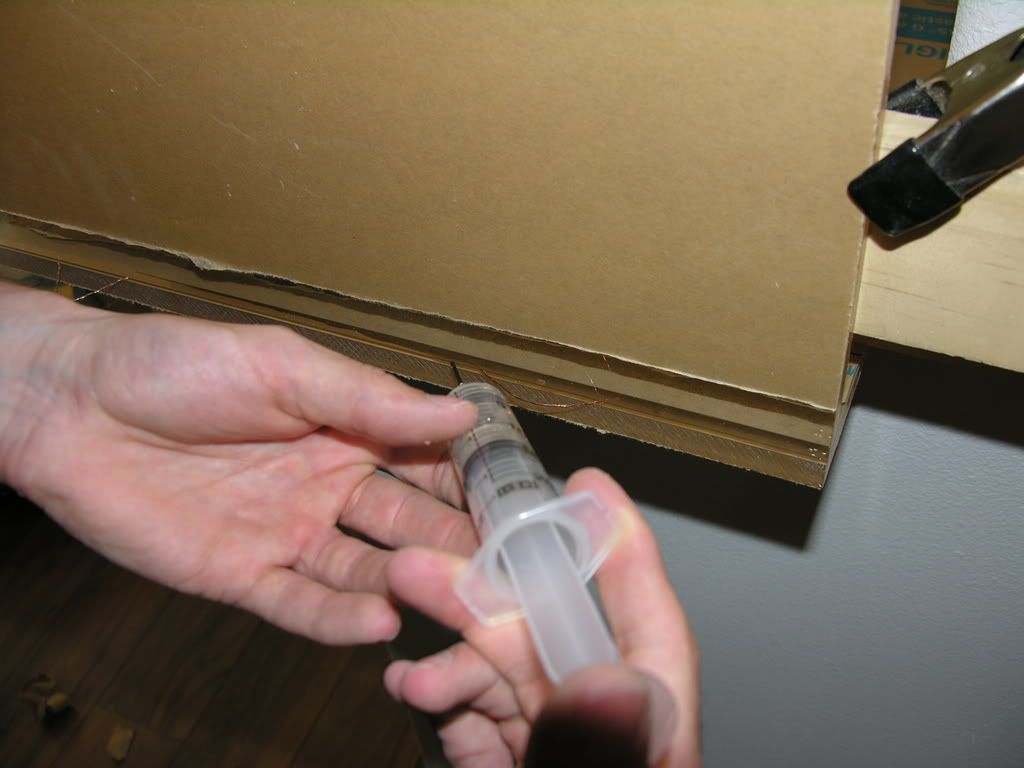 Once it's soaked and pins are pulled I apply 2 clamps. If you are able to lay your setup on a flat surface where it is evenly supported you should not need any clamps. As this is hanging off the end of the stand the clamps are in place to support the tank from underneath. I don't tighten them much; just enough to keep them from falling and bring the bottom snug to the side panel. 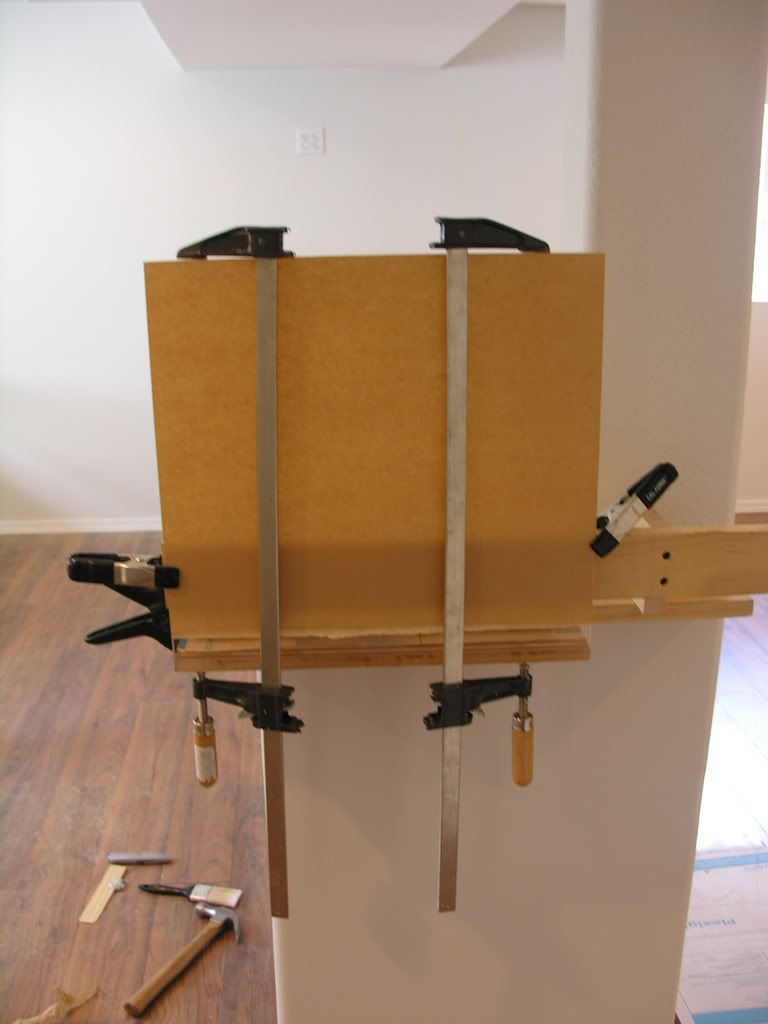 After 4 welds you should have something that looks like this, the pieces in the middle are to support the acrylic and prevent it from sagging: 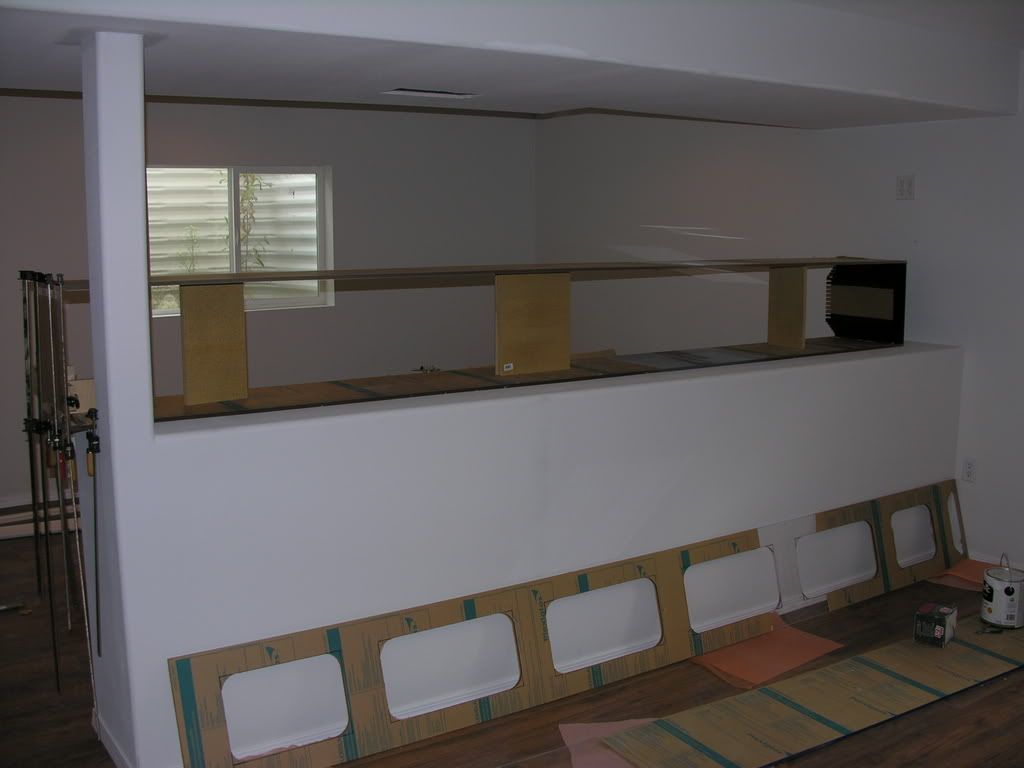
__________________
-February 2007 nTOTM "The problem with America is stupidity. Why don't we just take the safety labels off of everything and let the problem solve itself" Current Tank Info: ADA 60-P Last edited by calvin415; 04/29/2009 at 07:07 PM. |
|
|
|
|
04/29/2009, 06:55 PM
|
#12 |
|
Registered Member
Join Date: Nov 2003
Location: C. Springs, CO
Posts: 4,530
|
Top and bottom are applied using the same pin method and with shims and stryo to ensure a level surface during the bonding. I place pins ever 6-12 inches along with a shim and then shim until the pin is snug and wonât fall out. Apply your solvent (this distance took 2 of us to apply it all in approx 1:30) and pull the pins starting at same place you started the solvent. The larger your needle the fast the solvent will flow, the two of us used 16ga needles each.
__________________
-February 2007 nTOTM "The problem with America is stupidity. Why don't we just take the safety labels off of everything and let the problem solve itself" Current Tank Info: ADA 60-P |
|
|
|
|
04/29/2009, 06:56 PM
|
#13 |
|
Registered Member
Join Date: Nov 2003
Location: C. Springs, CO
Posts: 4,530
|
Unfortunately the stand wasnât perfectly flat so I ended up having to shim in a ¾â piece of ply to help support the tank evenly and then placed a ½â piece of foam over the ply.
  Next was to drill the tank for the closed loop, drilling around all the supports under the tank: 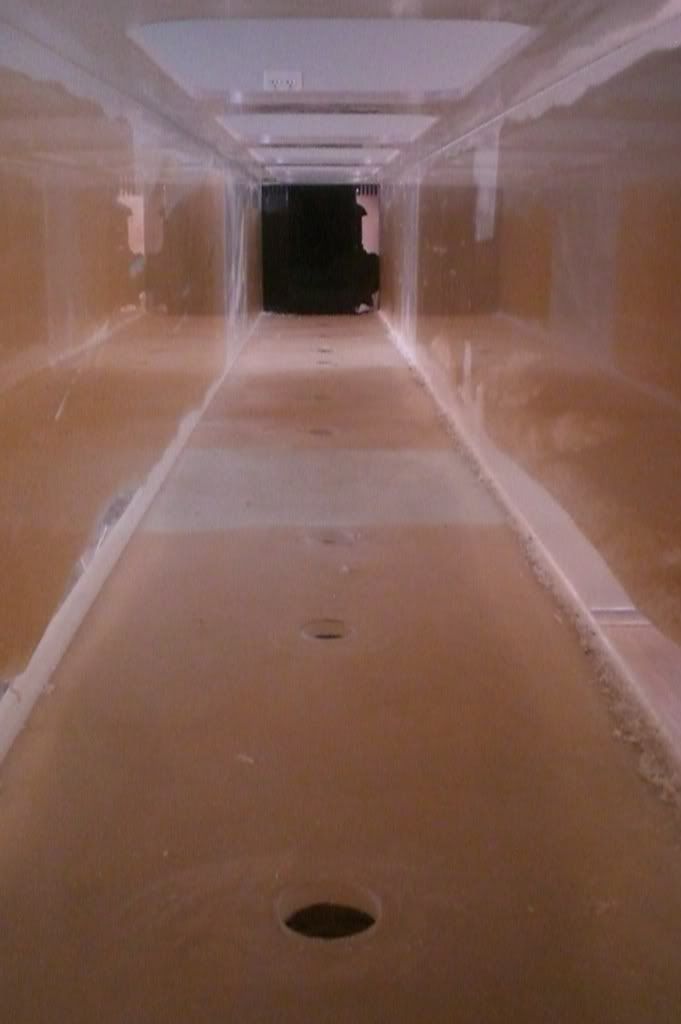 In the overflow, the hole on the left will feed the recir skimmer, the hole on the right is for excess water that doesnât make it into the skimmer (this will ensure bubbles to not form in the skimmer feed) and the center hole is a pass through for the wires to the canopy.  Here is what it looks like from underneath plumbed, the valve on the drain is to ensure I am able to keep constant pressure on the skimmer feed line without getting bubbles. 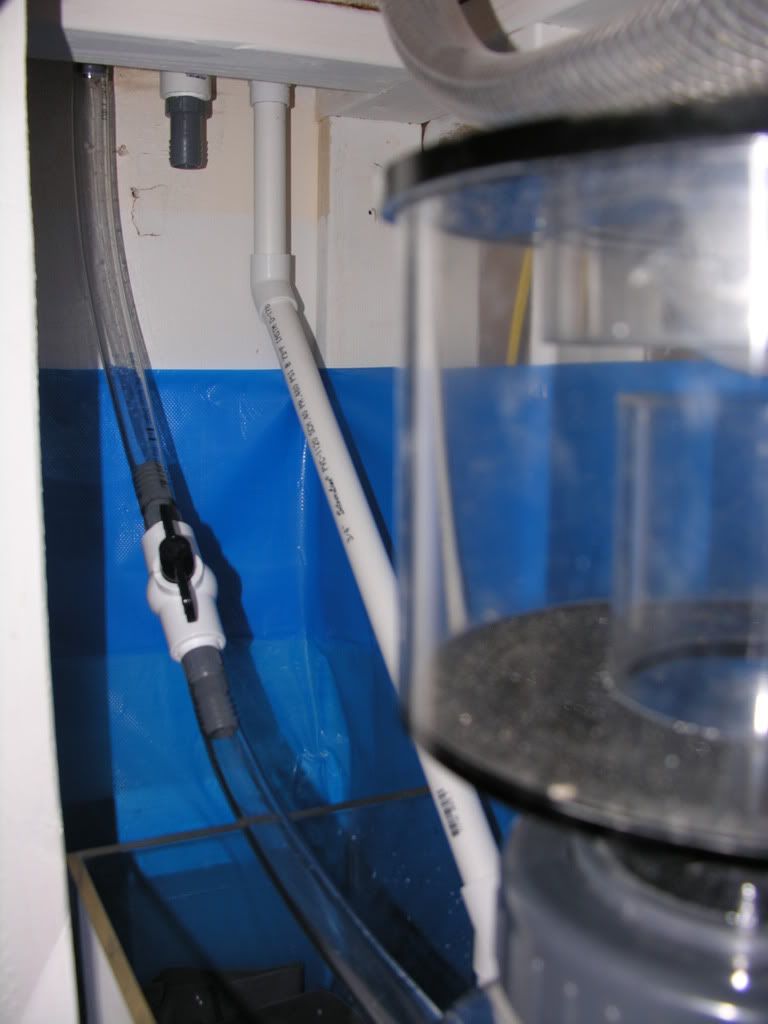 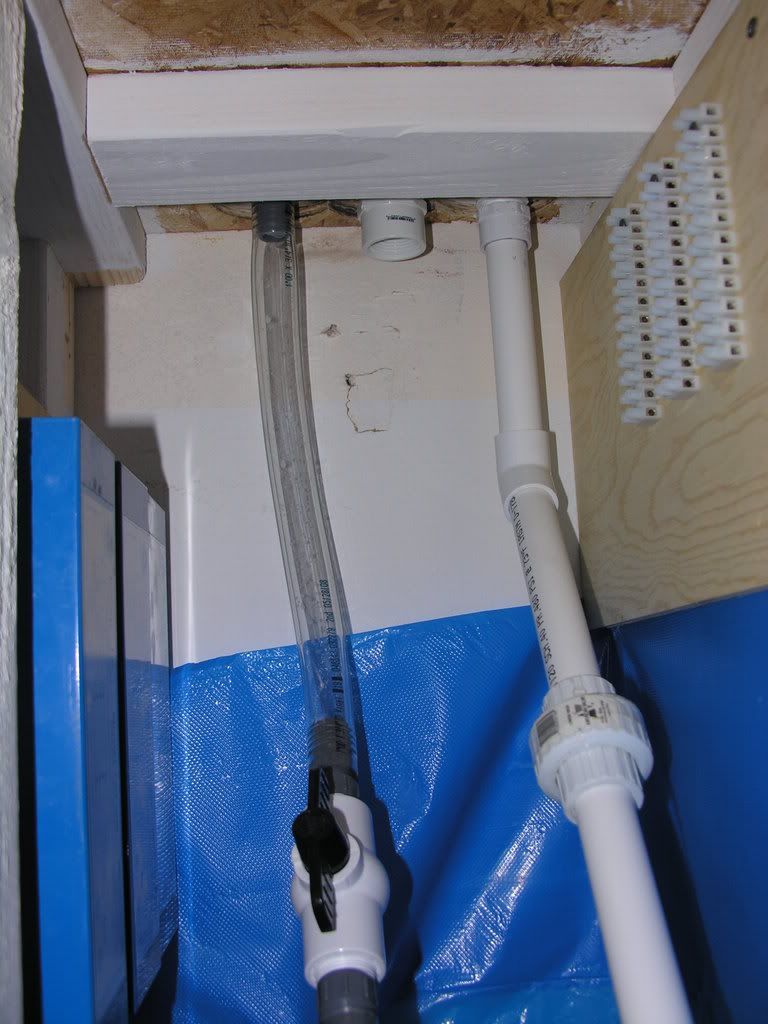 Due to all the layers, it was a chore to drill all the holes for the circulation. 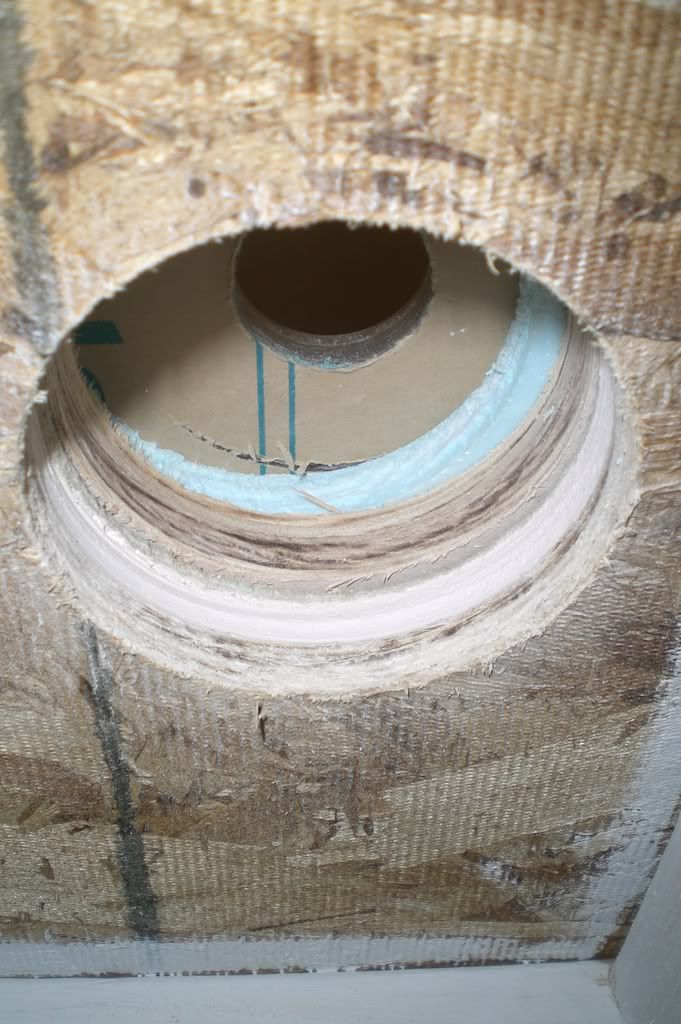 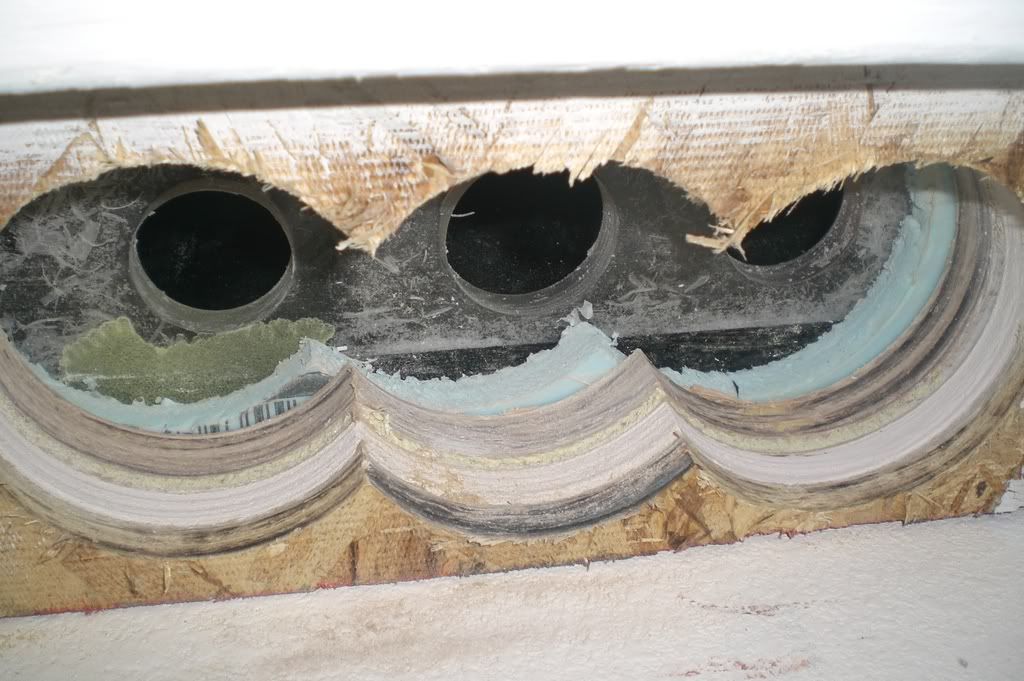 1/2" OSB on bottom, 1/2" drywall, spray foam to level the tank, 3/4" oak ply, 1/2" foam, 1/2" acrylic. Again, each hole took a while... 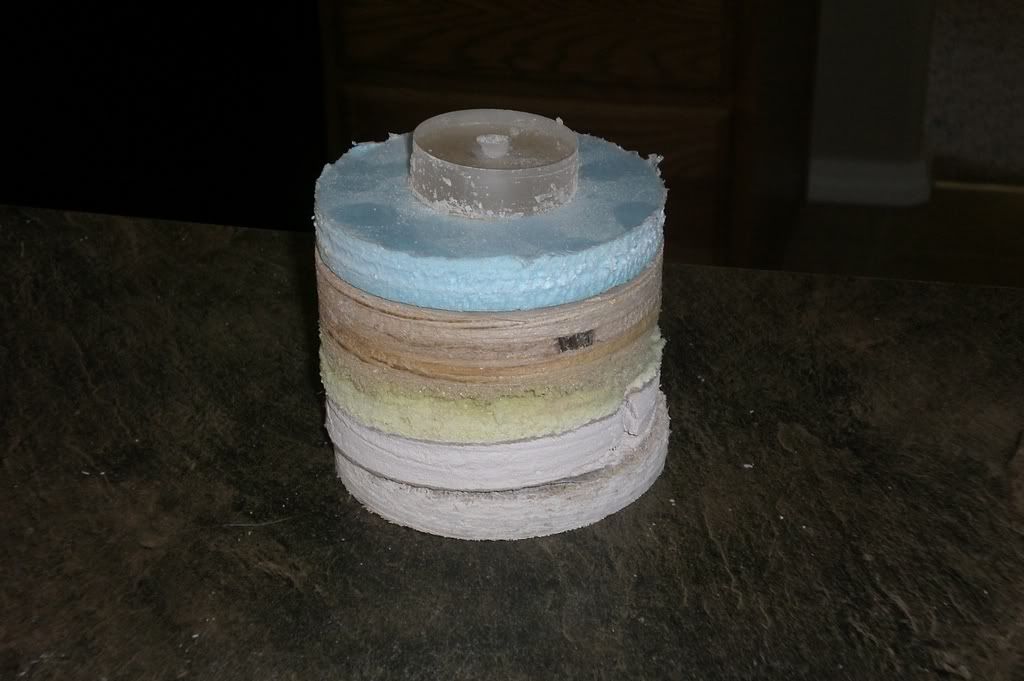
__________________
-February 2007 nTOTM "The problem with America is stupidity. Why don't we just take the safety labels off of everything and let the problem solve itself" Current Tank Info: ADA 60-P |
|
|
|
|
04/29/2009, 06:57 PM
|
#14 |
|
Registered Member
Join Date: Nov 2003
Location: C. Springs, CO
Posts: 4,530
|
The Closed Loop is plumbed through the bottom of the tank:
 5 drains (one is now plugged leaving 4 drains) feed the bottom pipe which is (2") w/ 5 1" bushings and nips, the upper pipe is the return line (1.5") w/ 4 1" bushings and nips. The 2â pipe feeds the dart at the end and is returned through the 1.5â pipe which in turn feeds all the loc-lines. 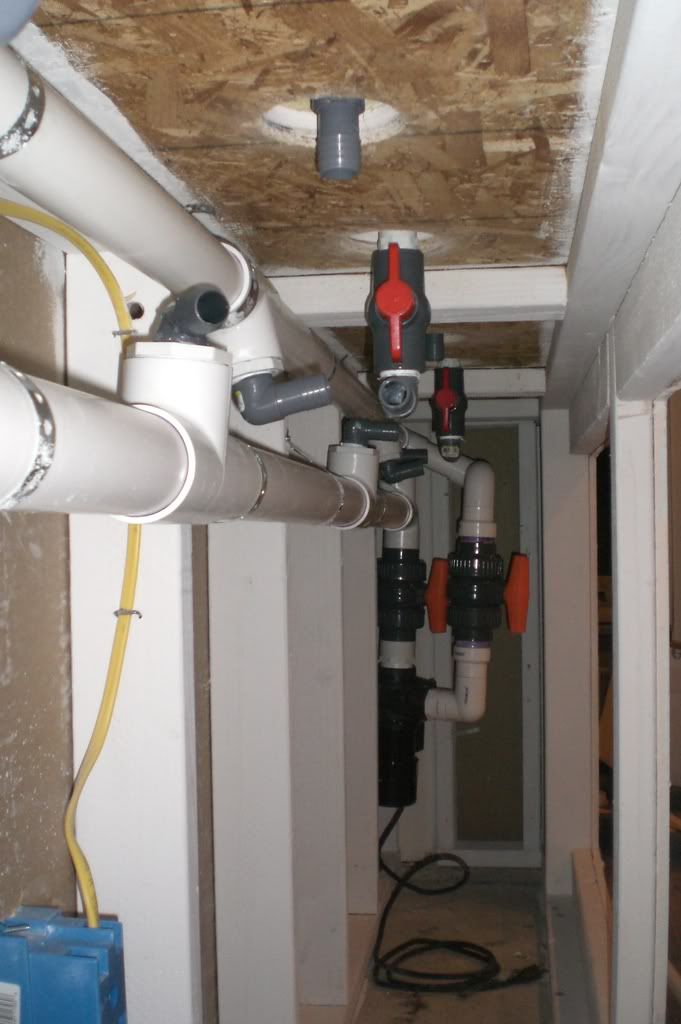 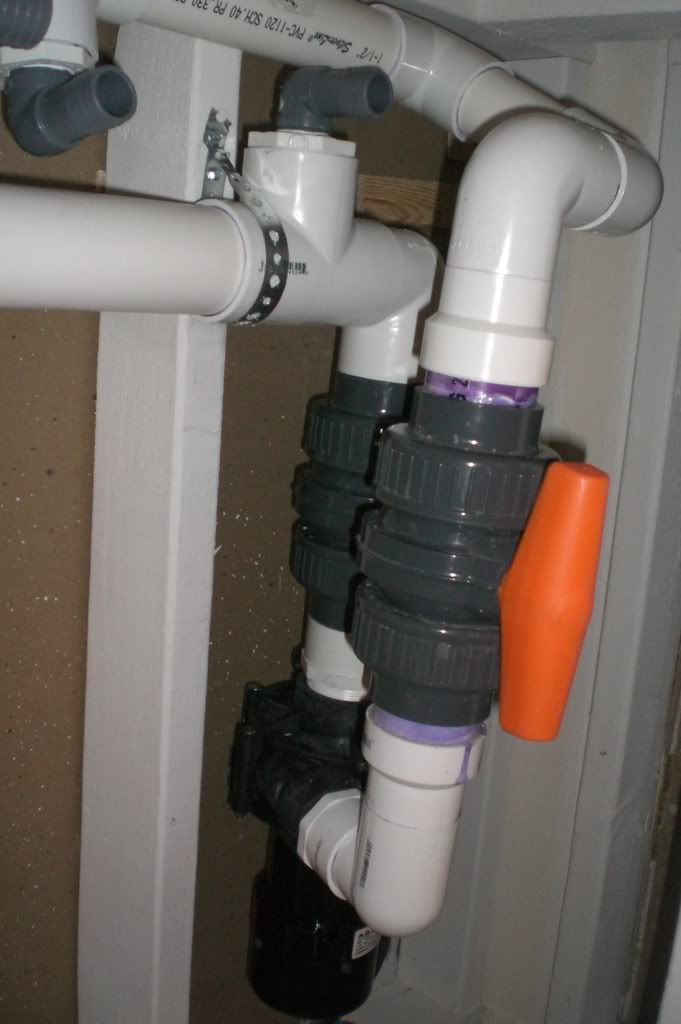 Connections to and from the tank: 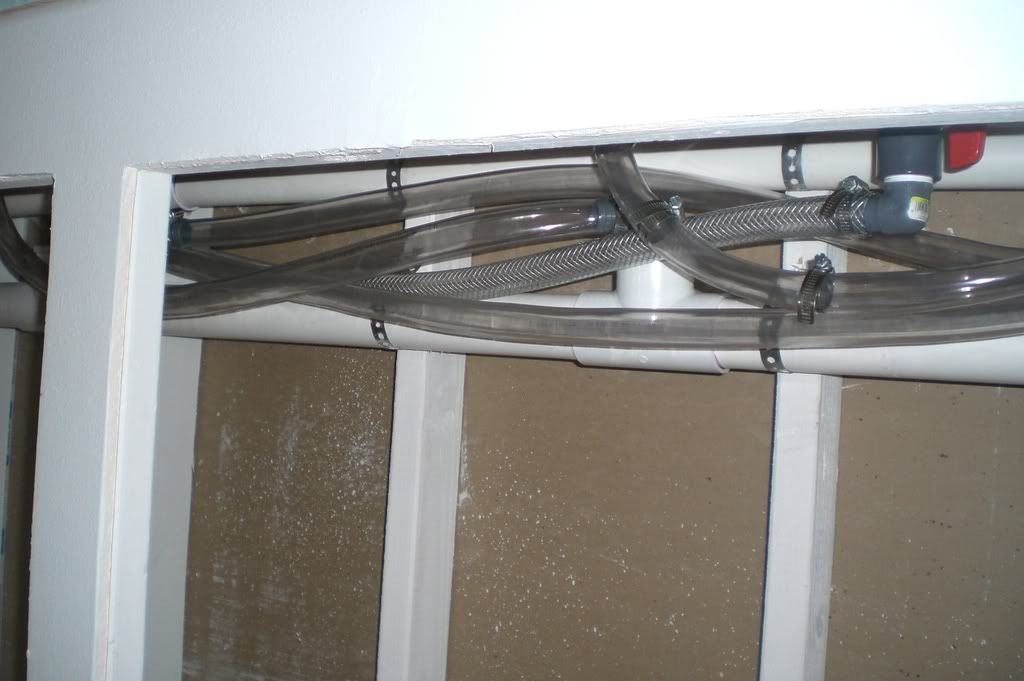 Loc-lines installed: 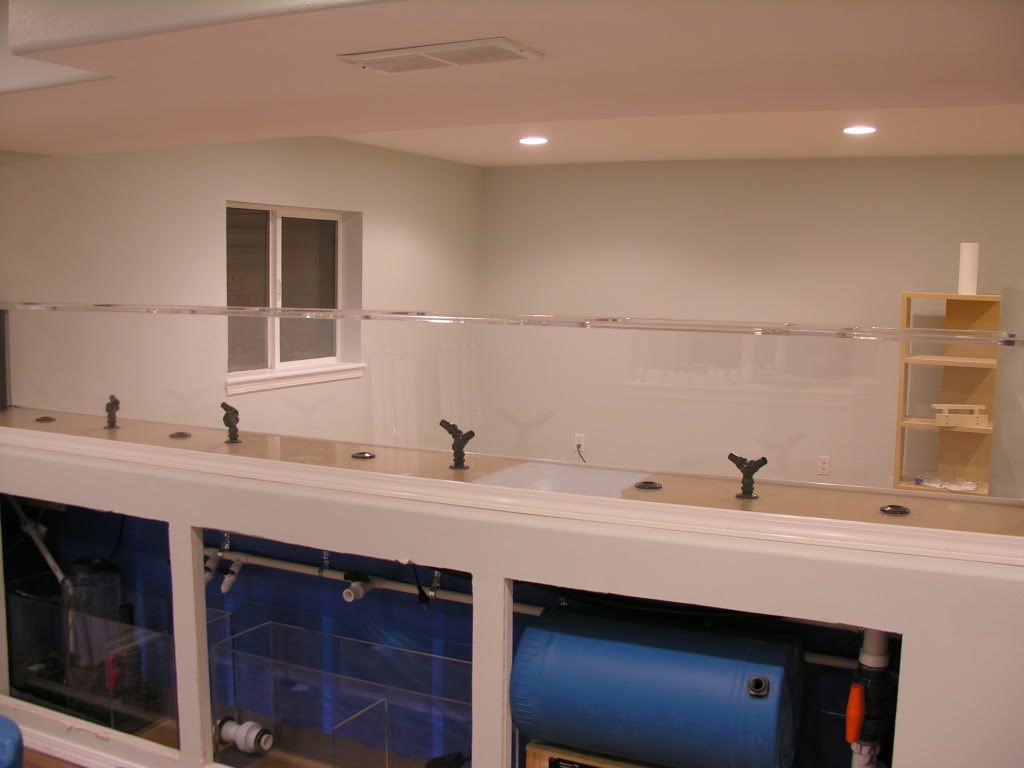 The tank will require 2 sumps plumbed together to allow me to place them under the tank. Each opening is only 36â wide so that is the limit on each sump. I installed styrofoam on top of the concrete followed by a shower plan liner (PVC Sheet) to catch any drips or leaks. Then put in the sumps: 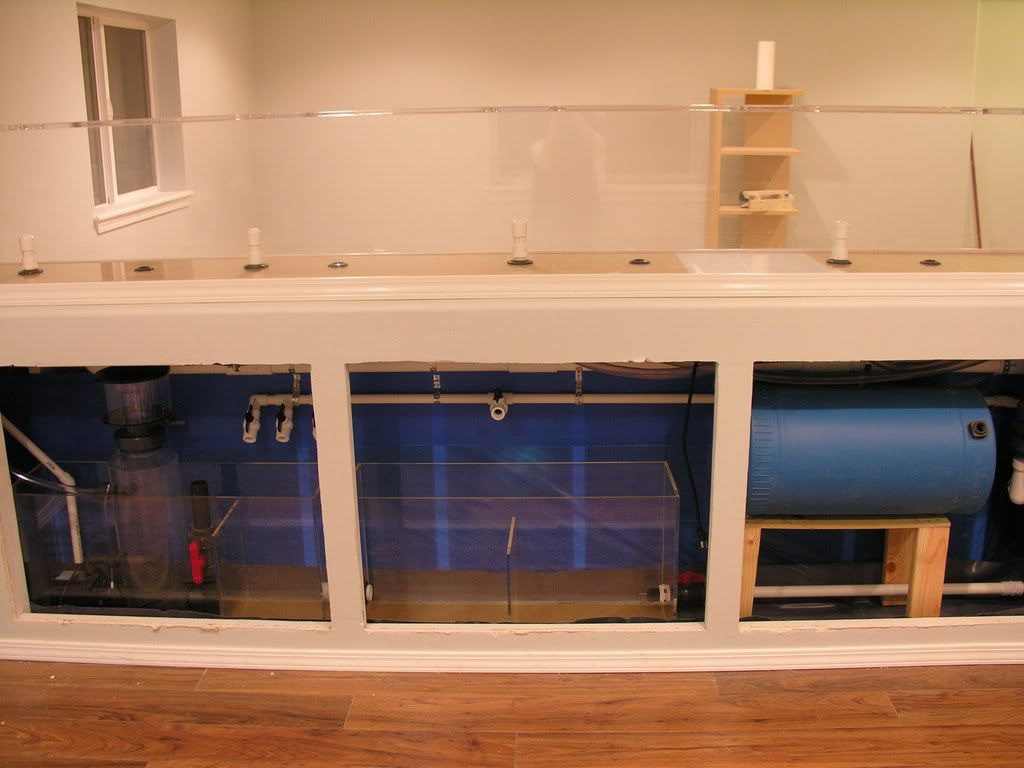 Plumbed together: 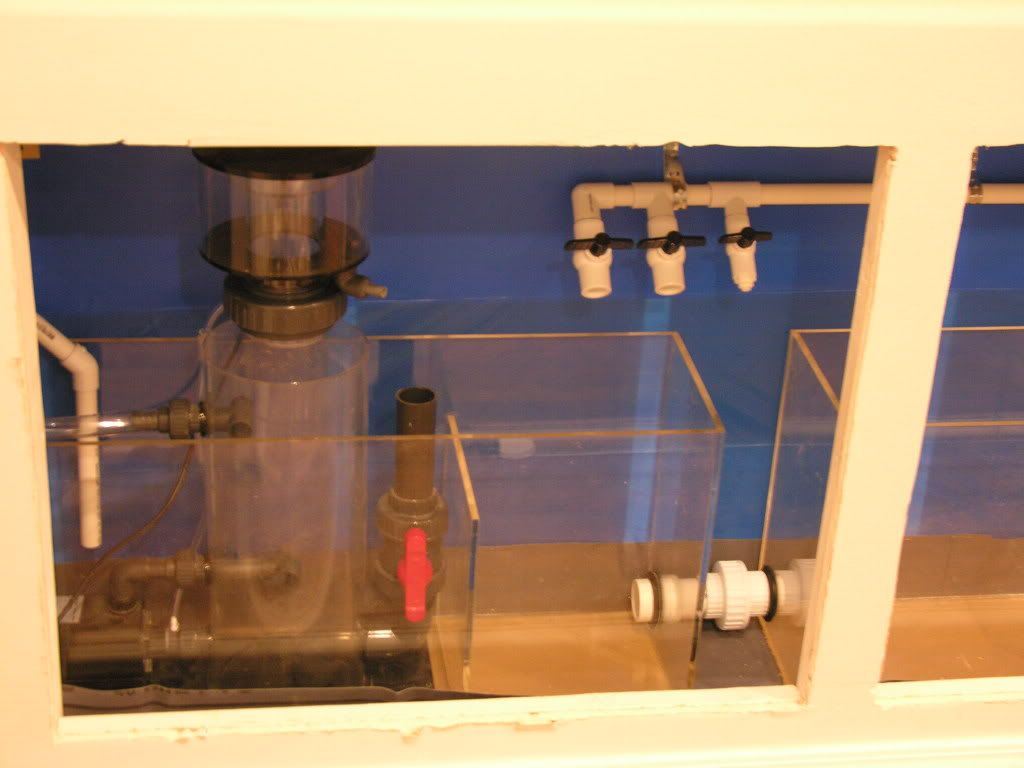 ATO will be handled by this float valve and fed by the 15g water barrel on its side: 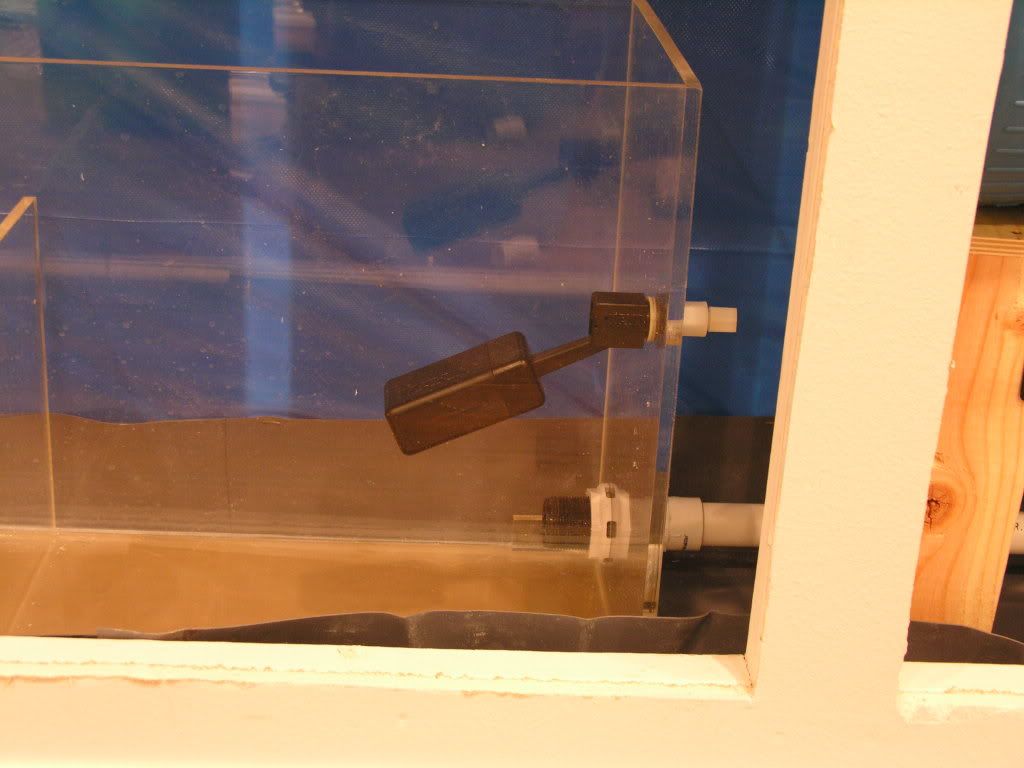
__________________
-February 2007 nTOTM "The problem with America is stupidity. Why don't we just take the safety labels off of everything and let the problem solve itself" Current Tank Info: ADA 60-P |
|
|
|
|
04/29/2009, 06:57 PM
|
#15 |
|
Registered Member
Join Date: Nov 2003
Location: C. Springs, CO
Posts: 4,530
|
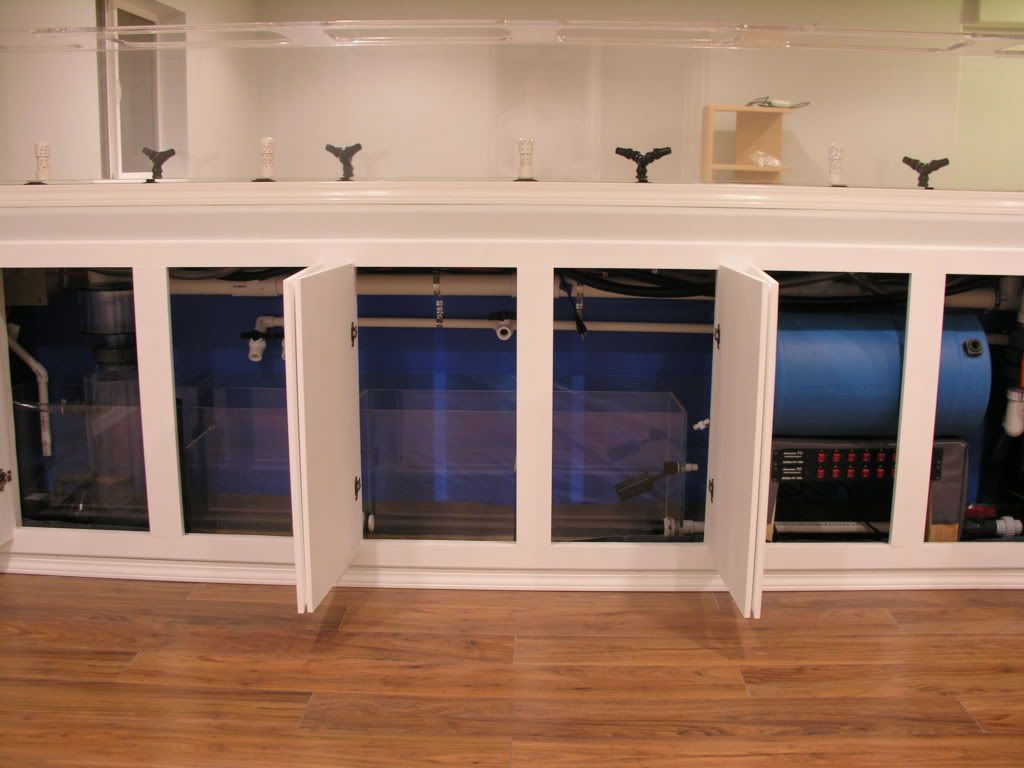
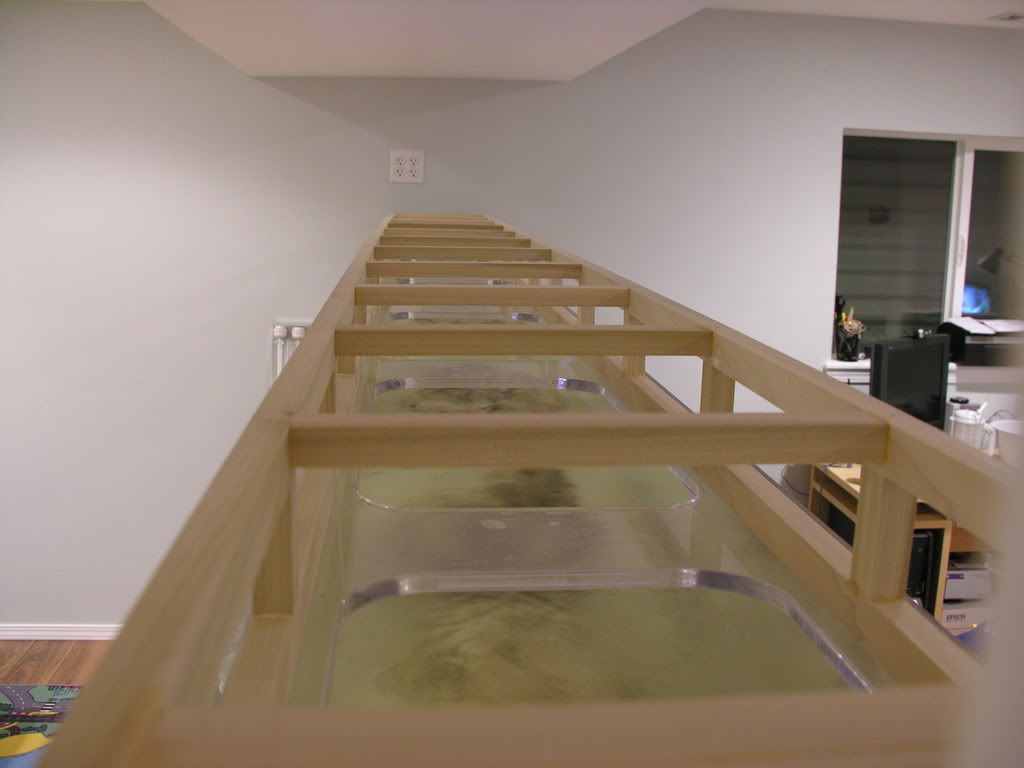
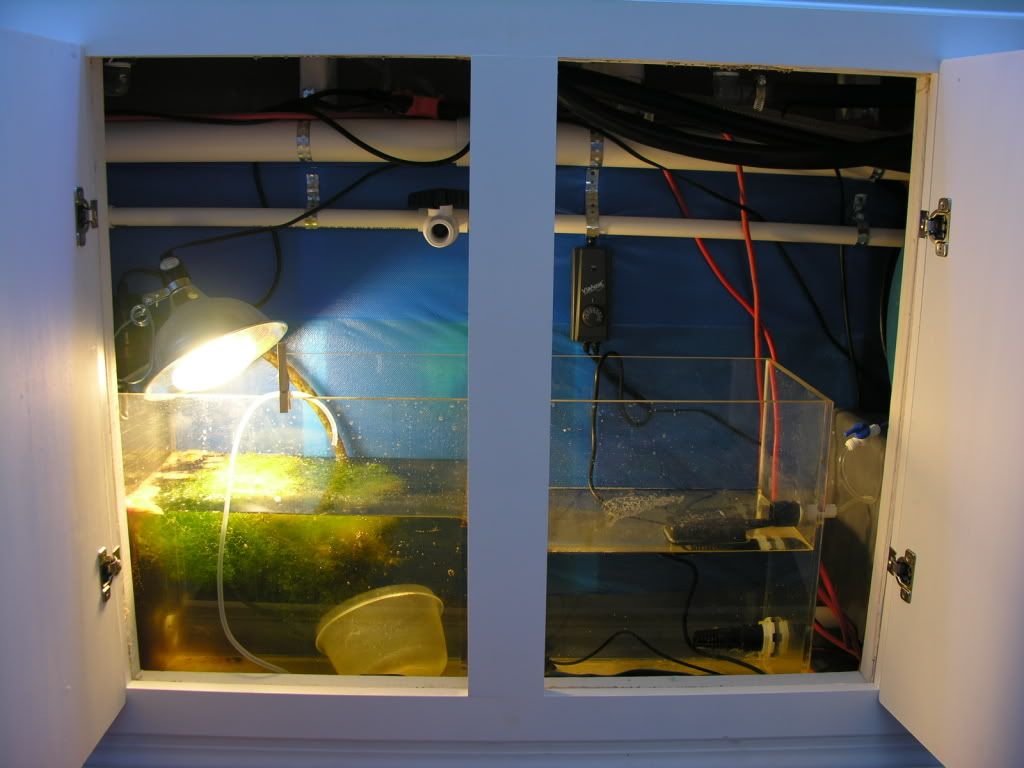
Here is the assembly of one of the sumps
    The ventilation will be handled by 3 of these PC fans: 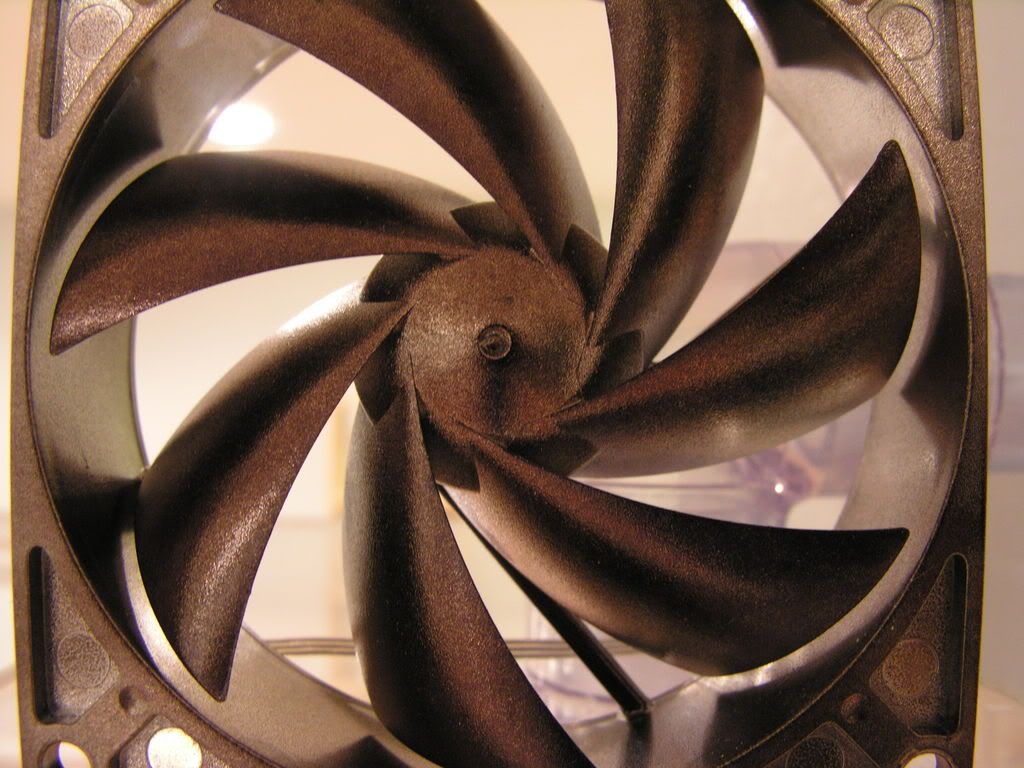 Installed here: 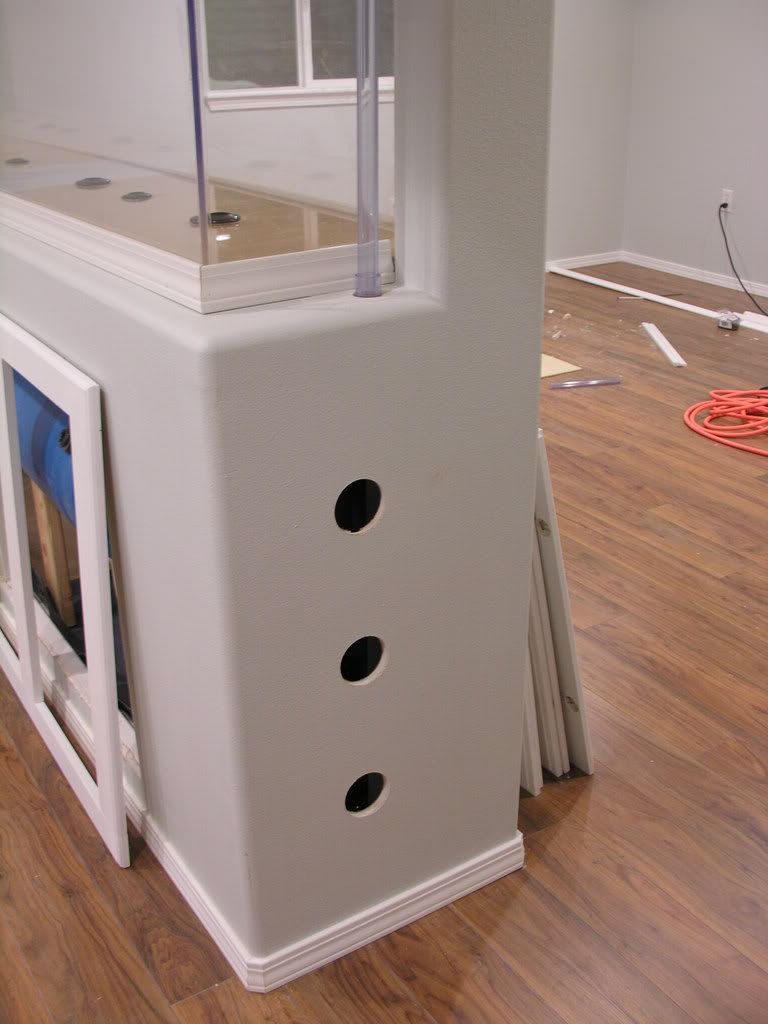 Pulling air from the opposite end of the stand to help keep fresh air around the sump and control humidity. This vent also has the 3 IC660 ballast installed behind it, so the fresh air helps to keep them cool. 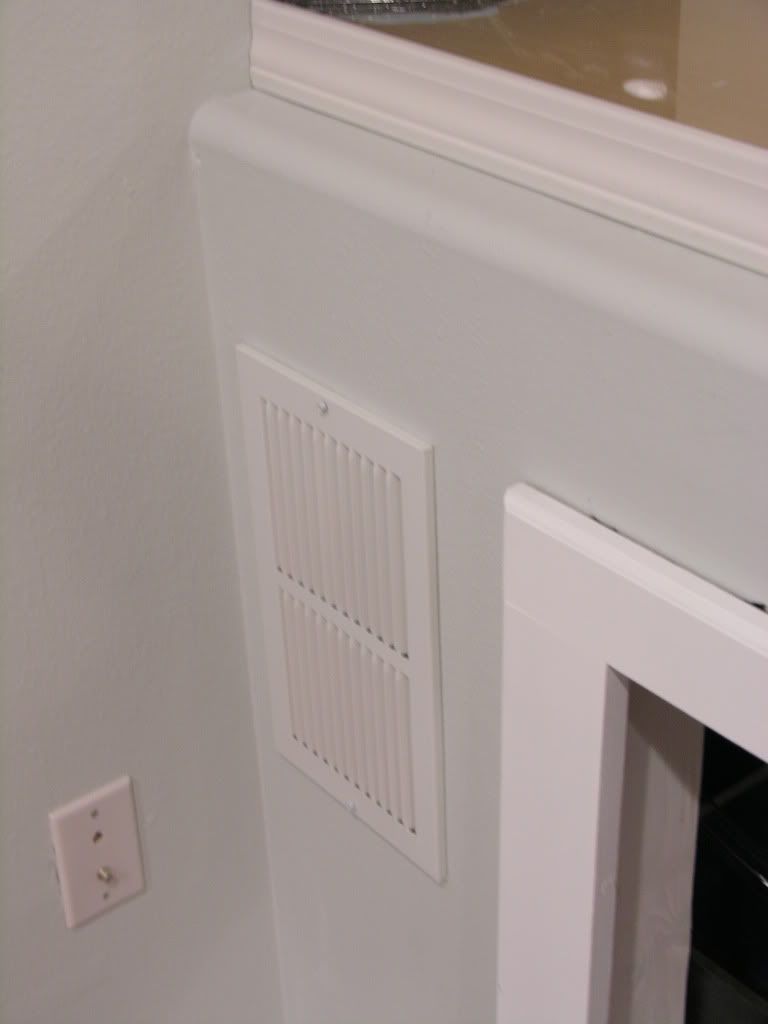 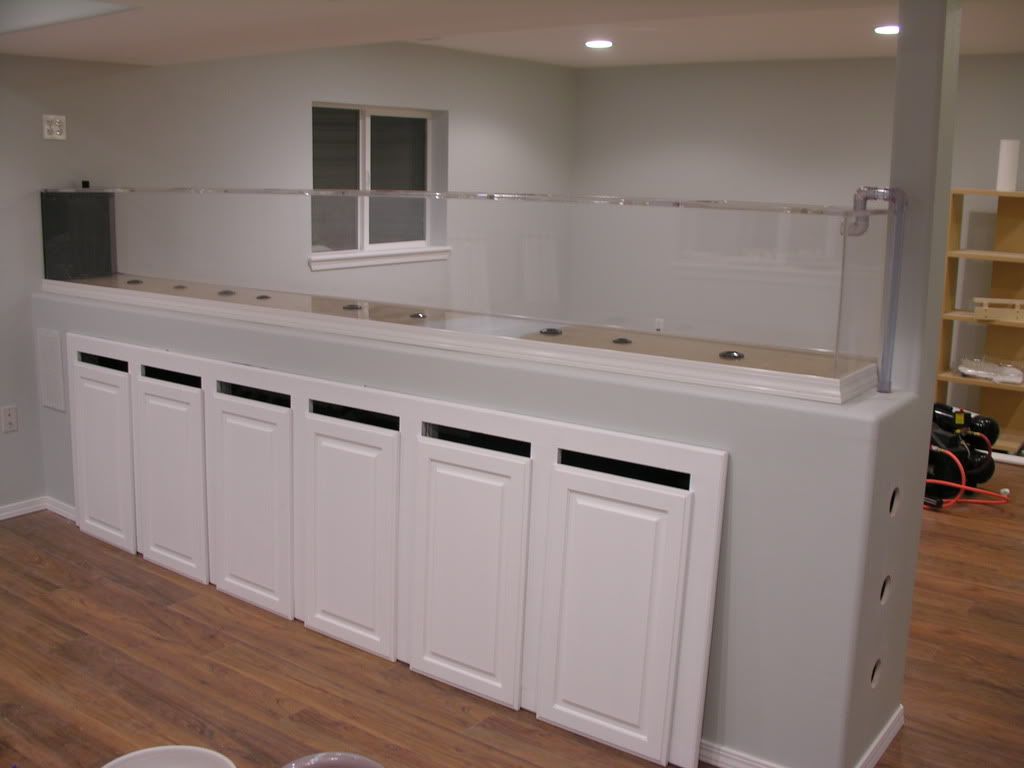
__________________
-February 2007 nTOTM "The problem with America is stupidity. Why don't we just take the safety labels off of everything and let the problem solve itself" Current Tank Info: ADA 60-P |
|
|
|
|
04/29/2009, 06:58 PM
|
#16 |
|
Registered Member
Join Date: Nov 2003
Location: C. Springs, CO
Posts: 4,530
|
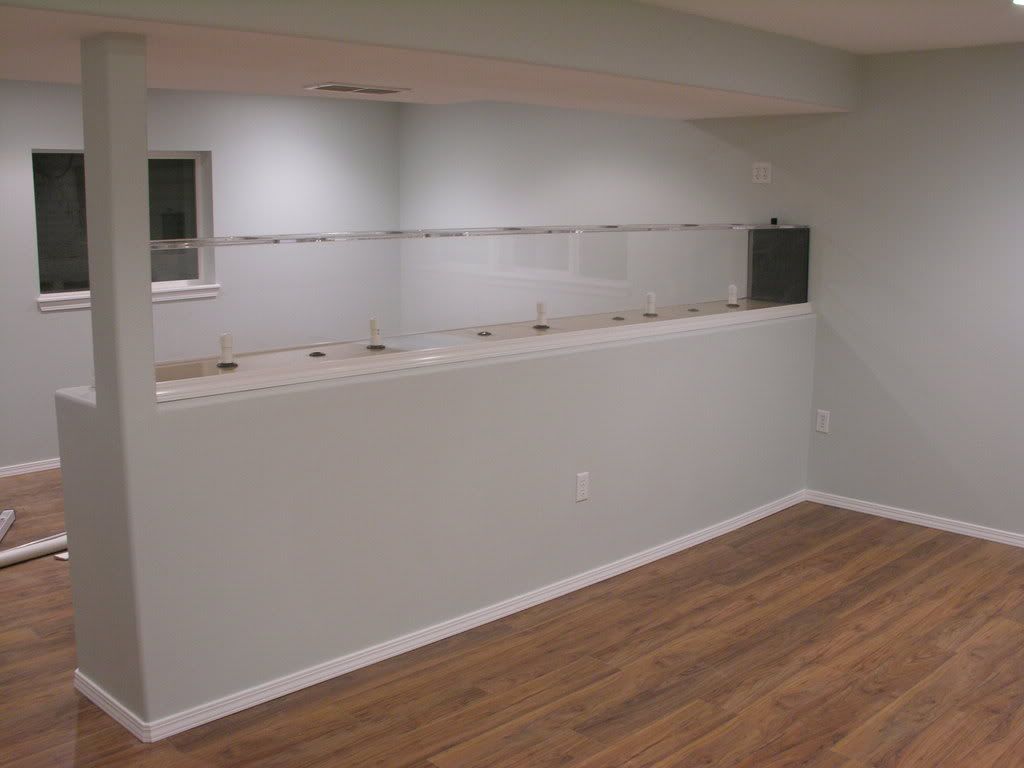
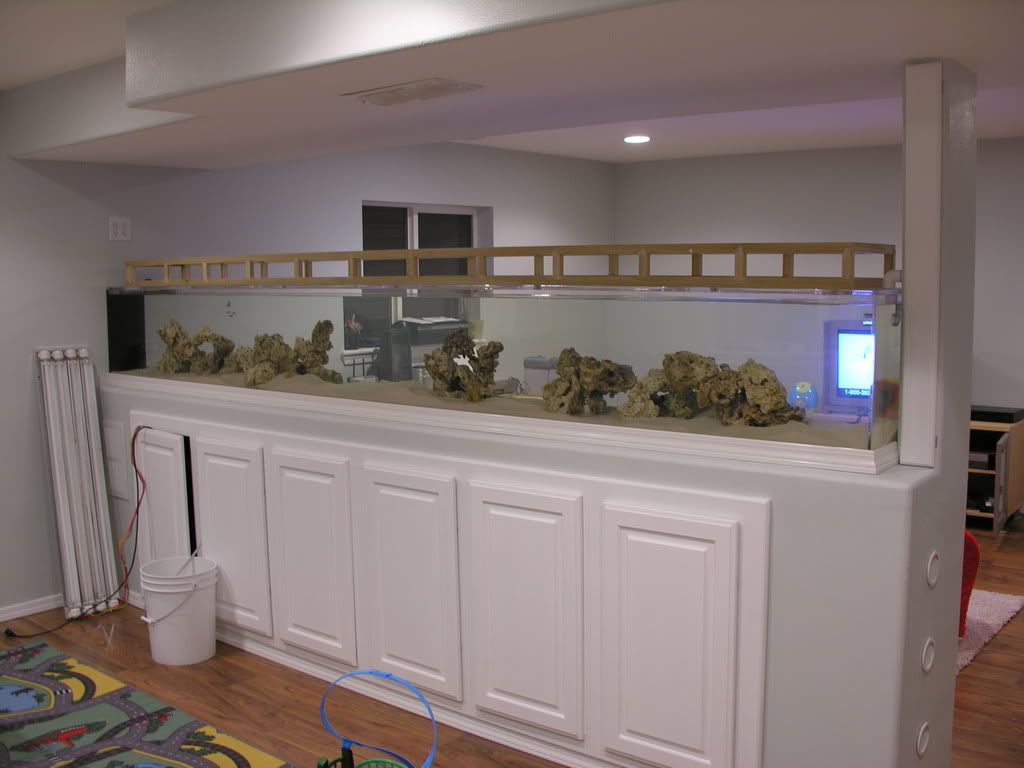
The return pipe was the hardest to solve for, but eventually solved by building a chase (which should have been built before the tank was installed, but turned out okay working around the tank).
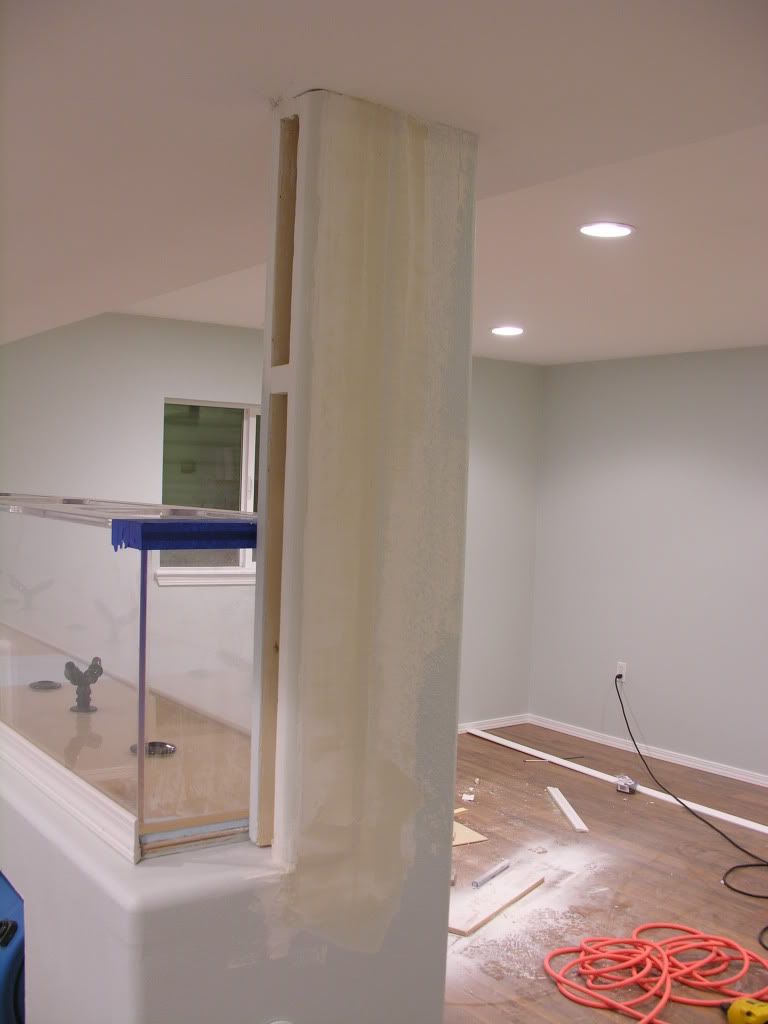 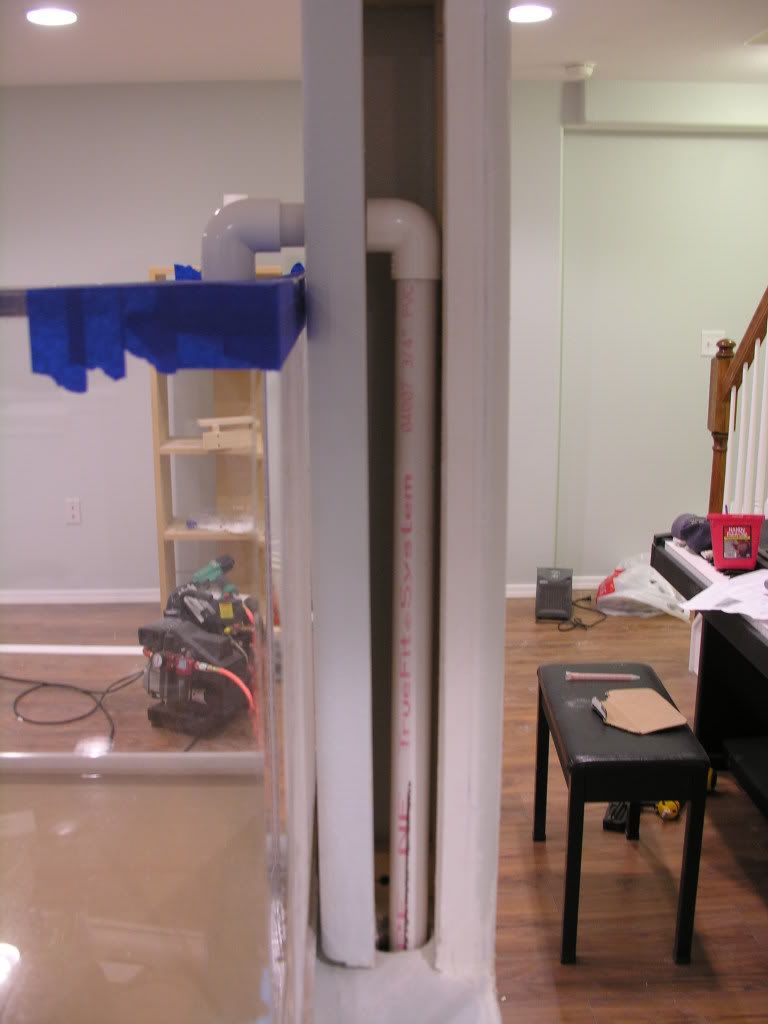 Unfortunately it cuts off a lot of the end view: 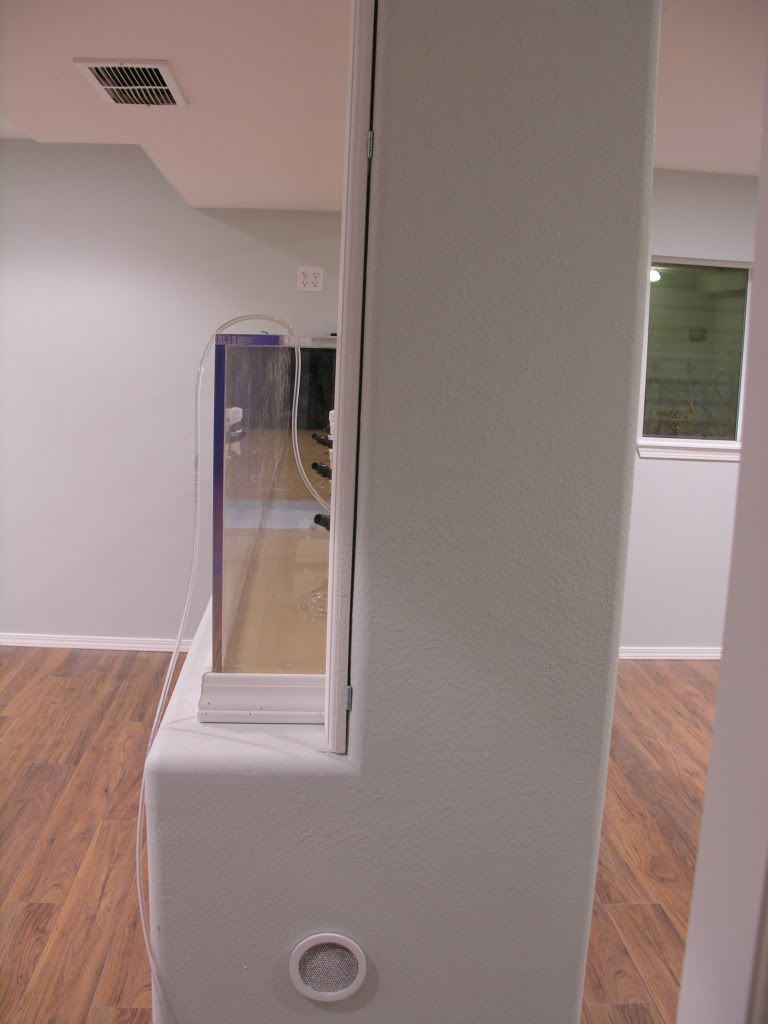
__________________
-February 2007 nTOTM "The problem with America is stupidity. Why don't we just take the safety labels off of everything and let the problem solve itself" Current Tank Info: ADA 60-P |
|
|
|
|
04/29/2009, 06:58 PM
|
#17 |
|
Registered Member
Join Date: Nov 2003
Location: C. Springs, CO
Posts: 4,530
|
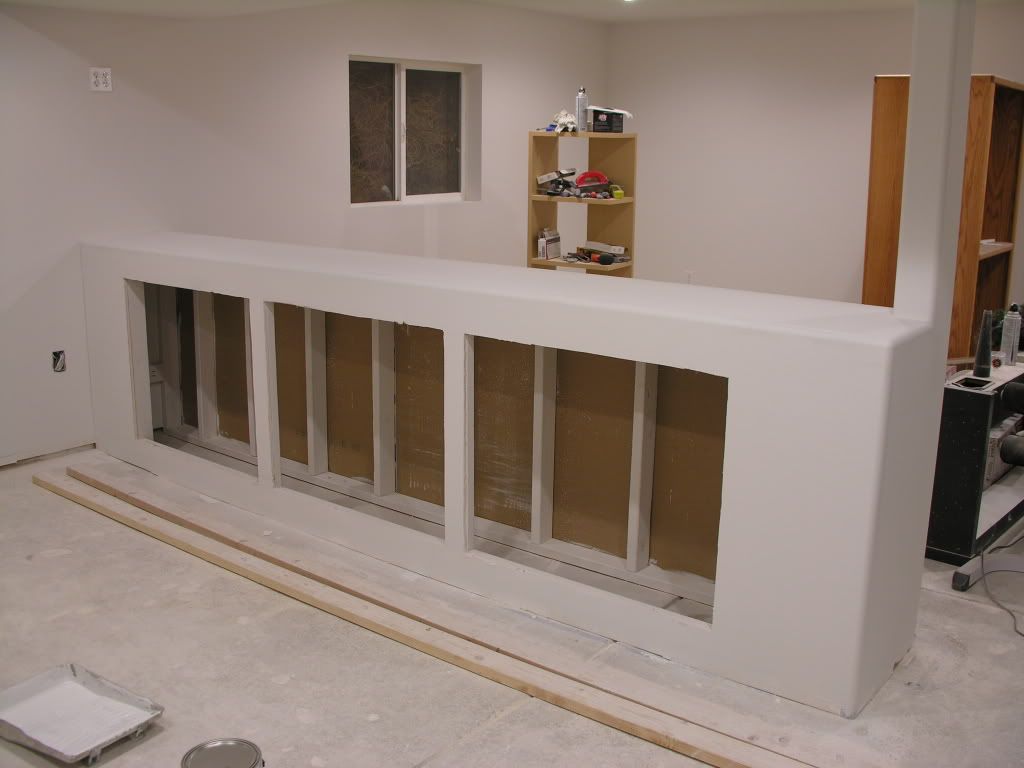
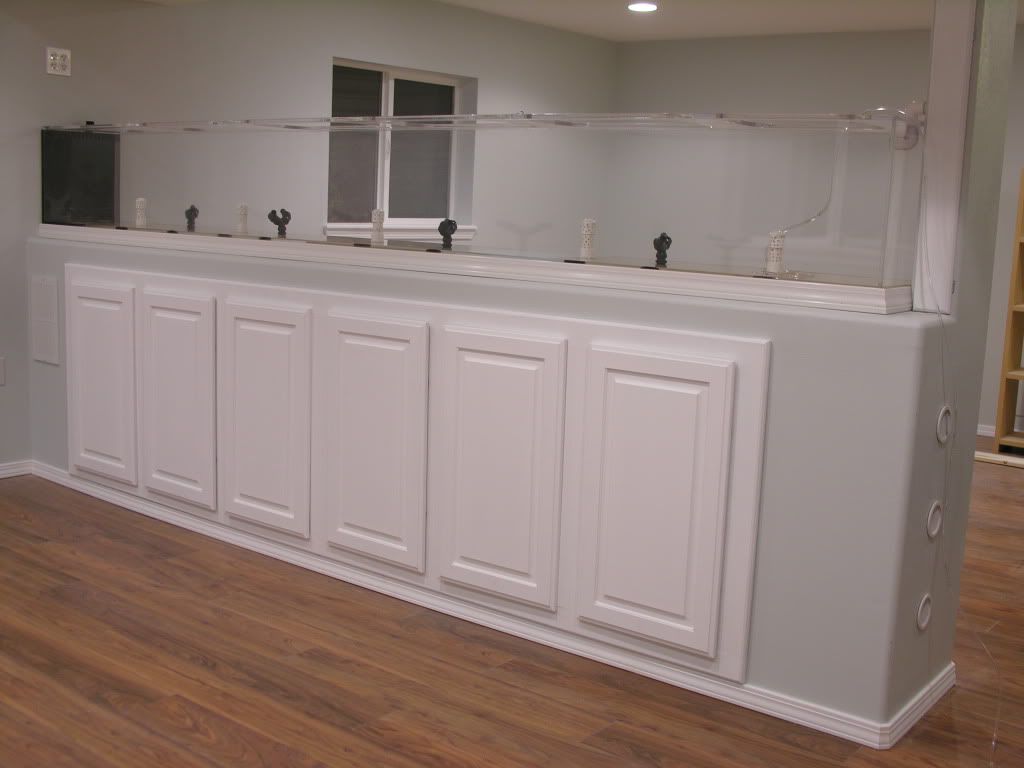
The piece in the center of each door frame work is attached with pocket screws which will allow me to remove it should I need to for sump/equipment work.
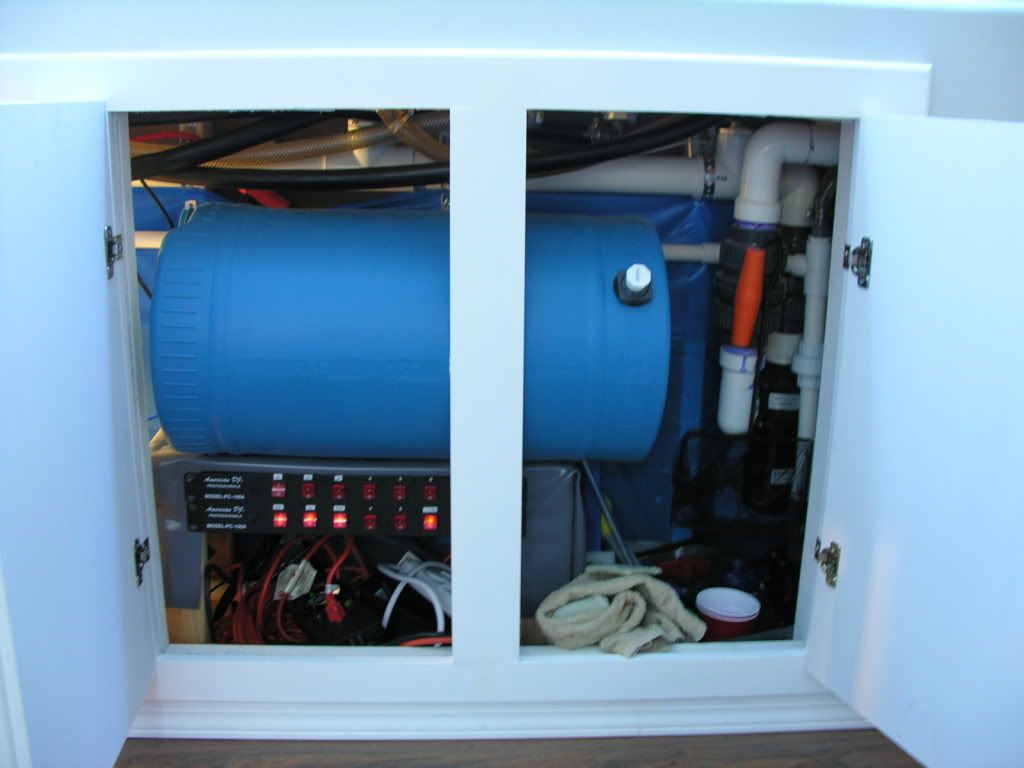
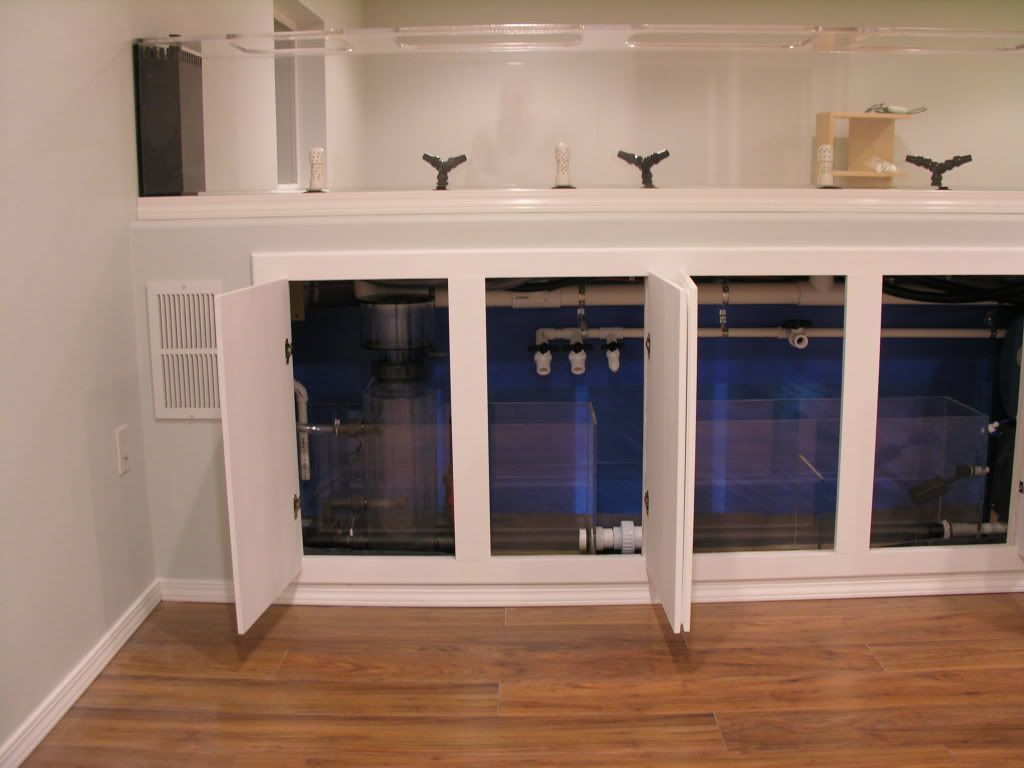   Utility room is behind the louvered door keeping a 55g barrel of RODI water and my 15g water change barrel out of site: 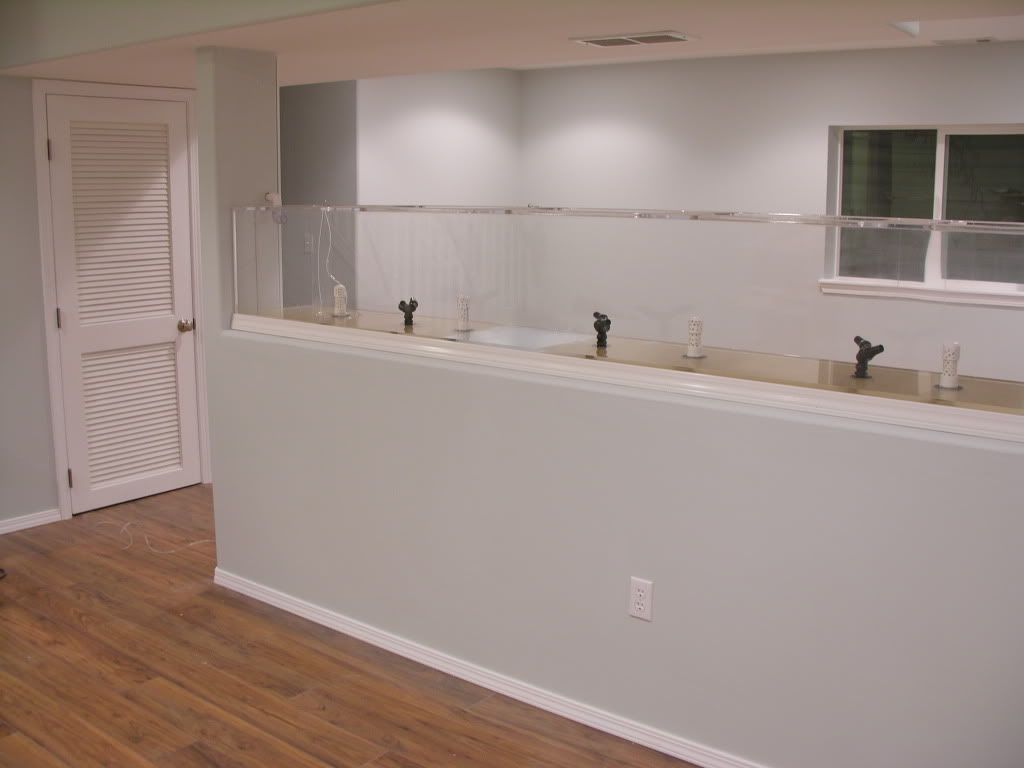 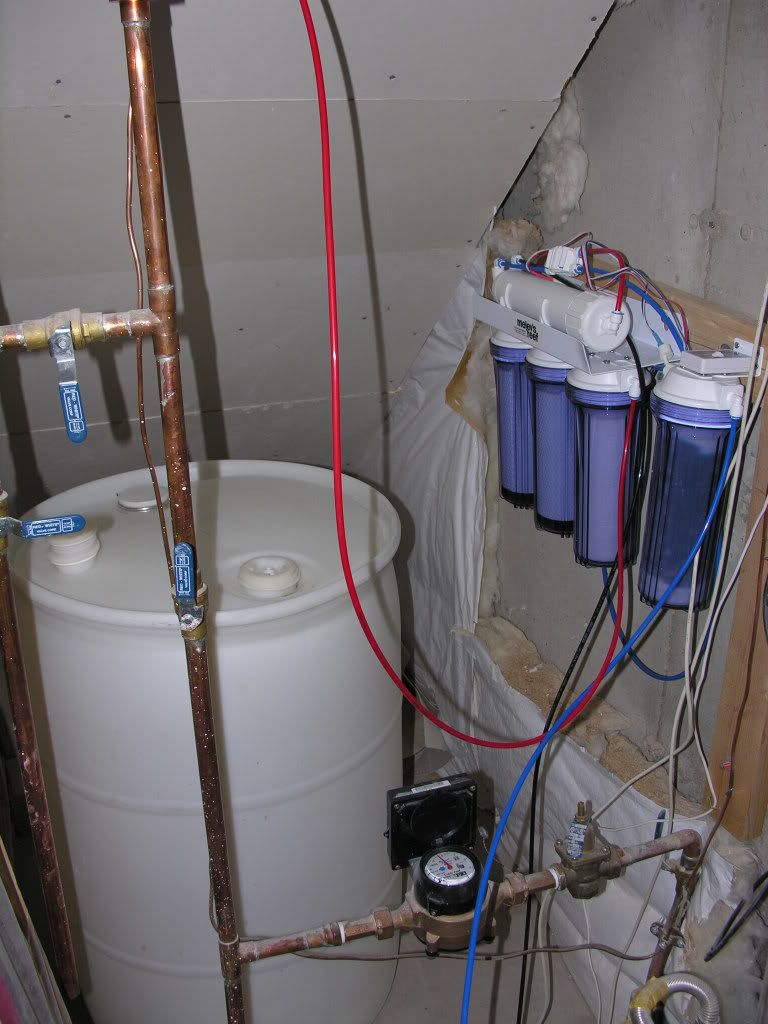
__________________
-February 2007 nTOTM "The problem with America is stupidity. Why don't we just take the safety labels off of everything and let the problem solve itself" Current Tank Info: ADA 60-P |
|
|
|
|
04/29/2009, 06:59 PM
|
#18 |
|
Registered Member
Join Date: Nov 2003
Location: C. Springs, CO
Posts: 4,530
|
FTS during filling from RO/DI
   And a test of the CL:  And a diagram to show all the flow through the tank: 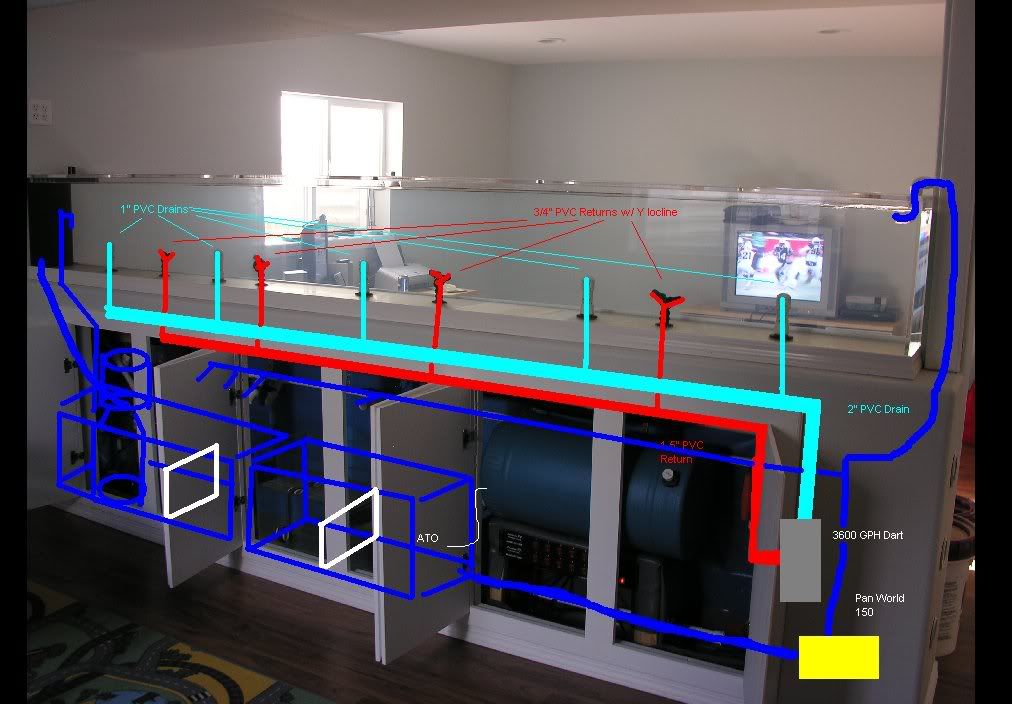 Again here's the two drains (the black pipe in the center is for wires to the pendant). The one on the left is entirely underwater to prevent bubbles from getting into the skimmer, the one on the right is a durso which is a back up to the skimmer drain. 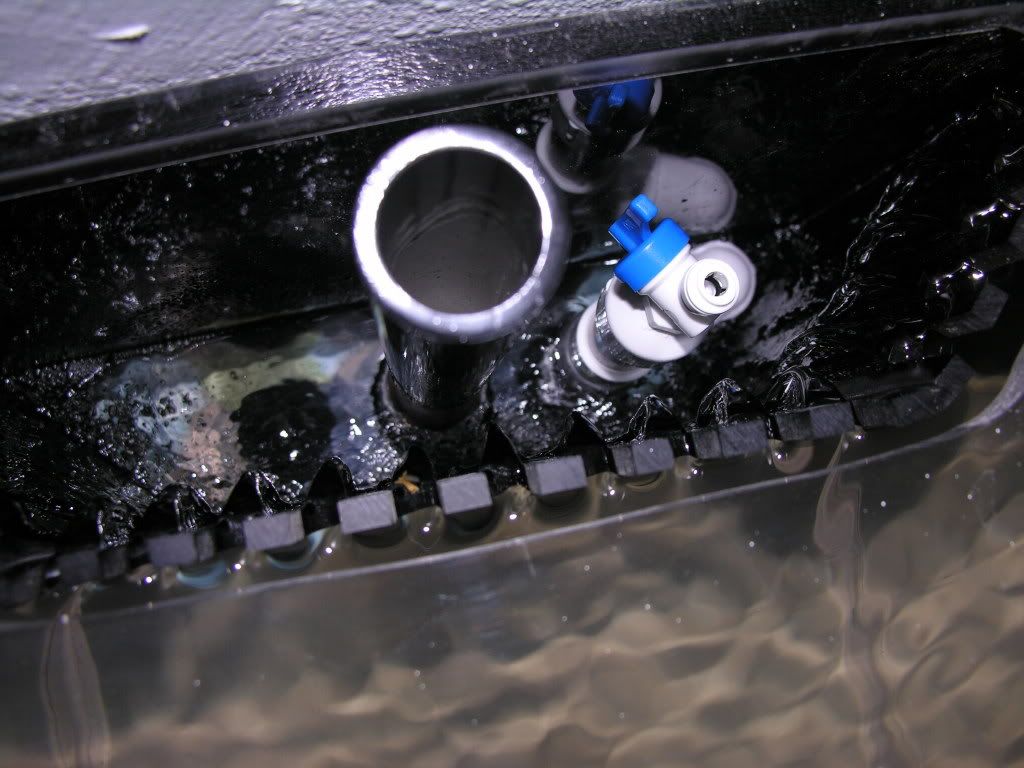 Another below shot: 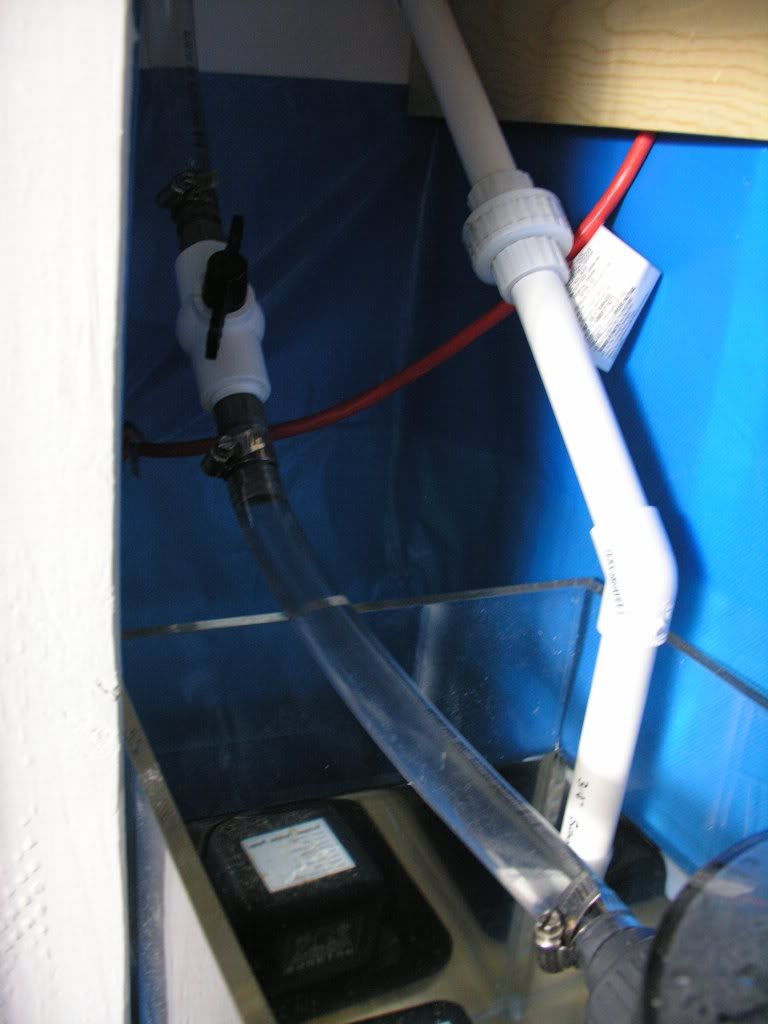 Misc Equipment feed from the return pump: 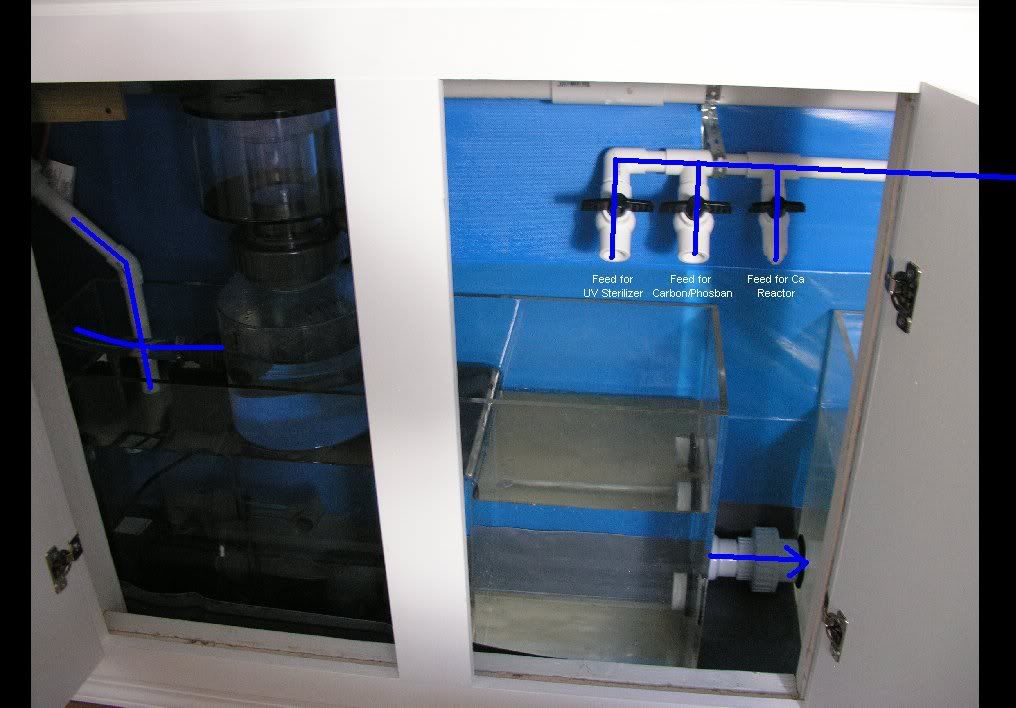 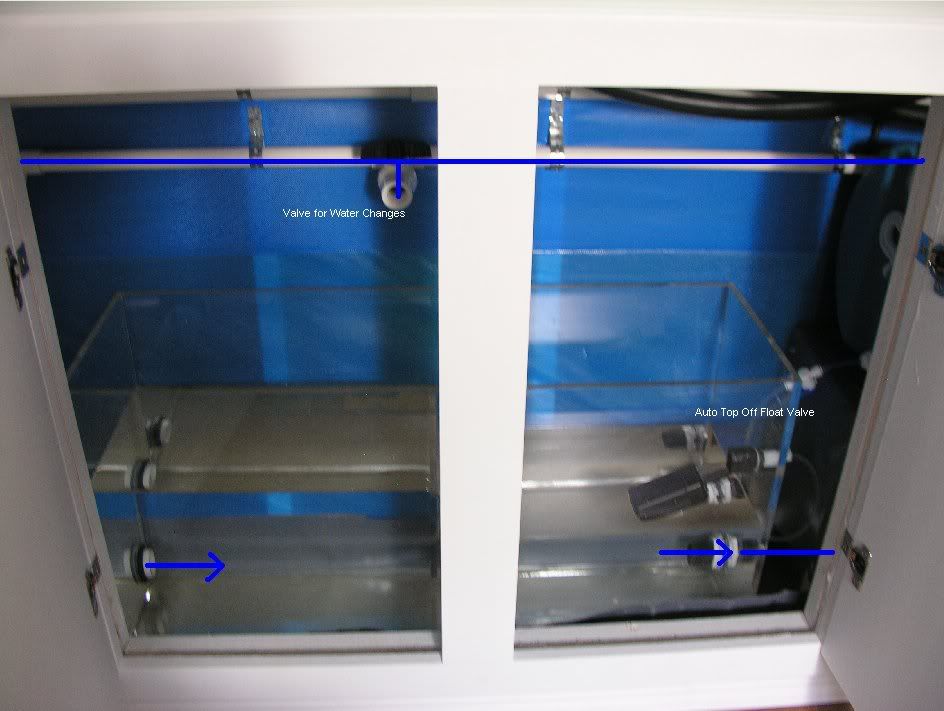
__________________
-February 2007 nTOTM "The problem with America is stupidity. Why don't we just take the safety labels off of everything and let the problem solve itself" Current Tank Info: ADA 60-P |
|
|
|
|
04/29/2009, 07:00 PM
|
#19 |
|
Registered Member
Join Date: Nov 2003
Location: C. Springs, CO
Posts: 4,530
|
The canopy is under construction:
  The 1" pipe is packed with wires, in-fact I had to move the connections into the pendant because the thicker wire I bought wouldn't fit! 32 wires in all! 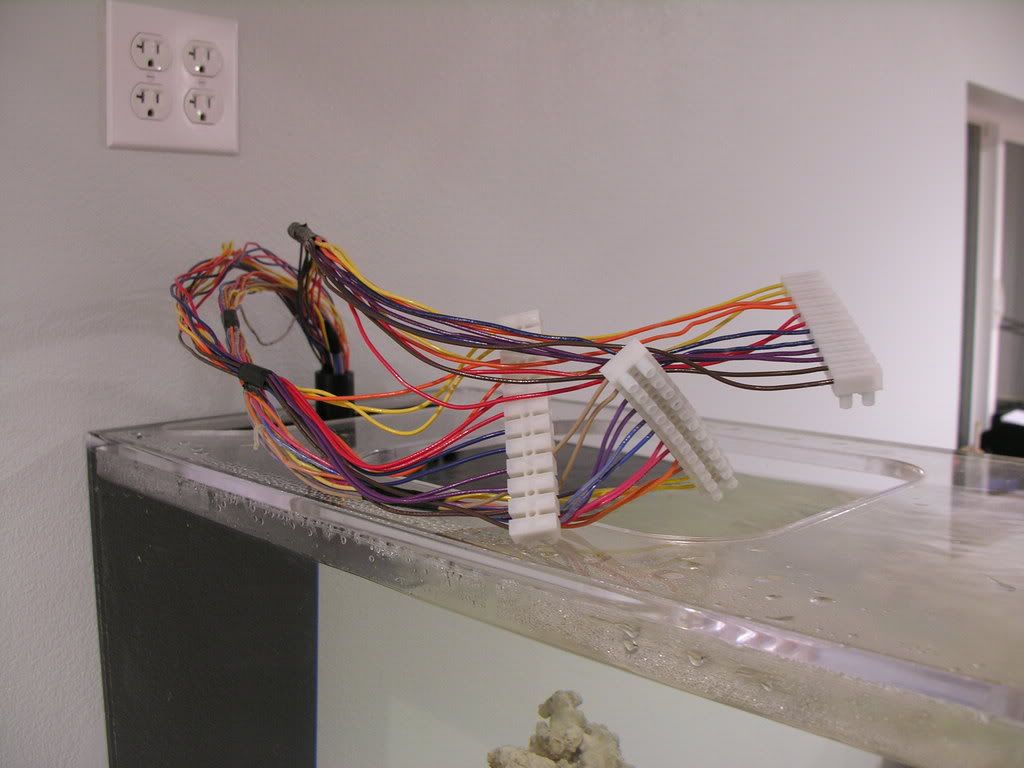 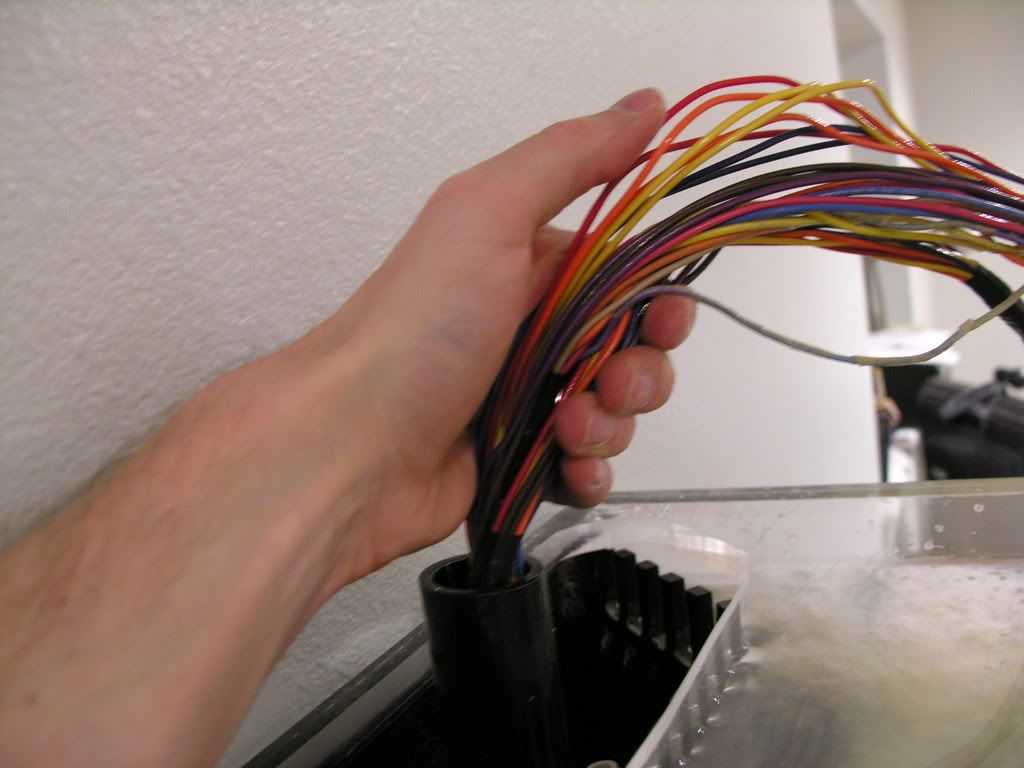 Bulb Test: 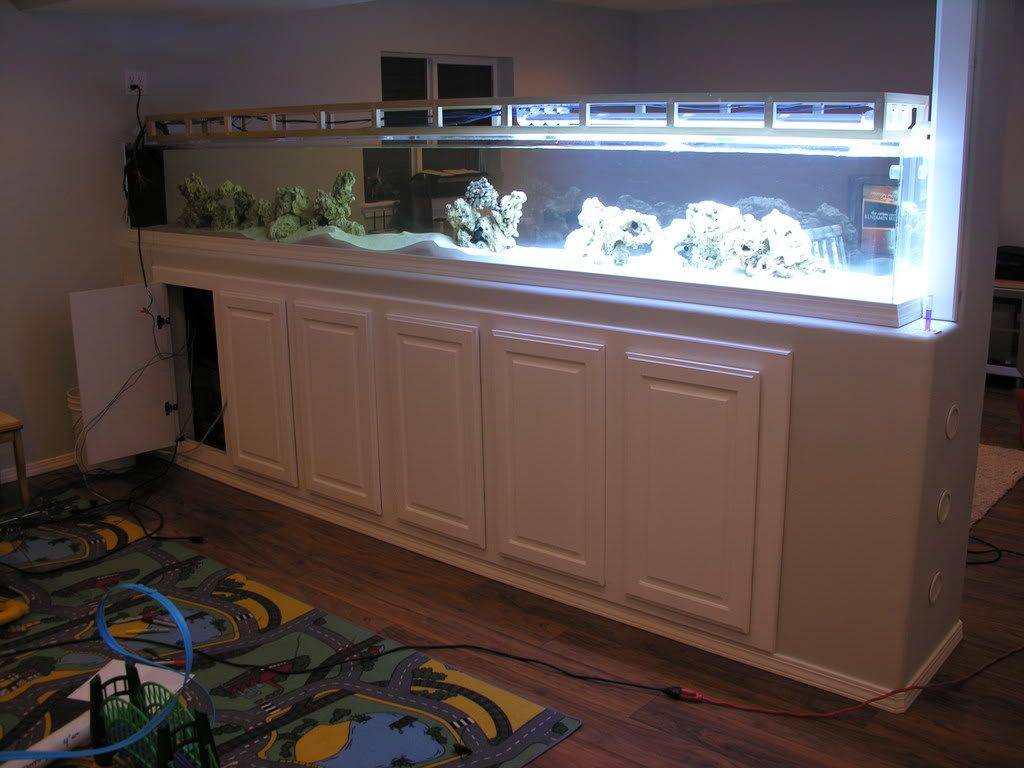 Gives you an idea of how itâs all wired, this times 3: 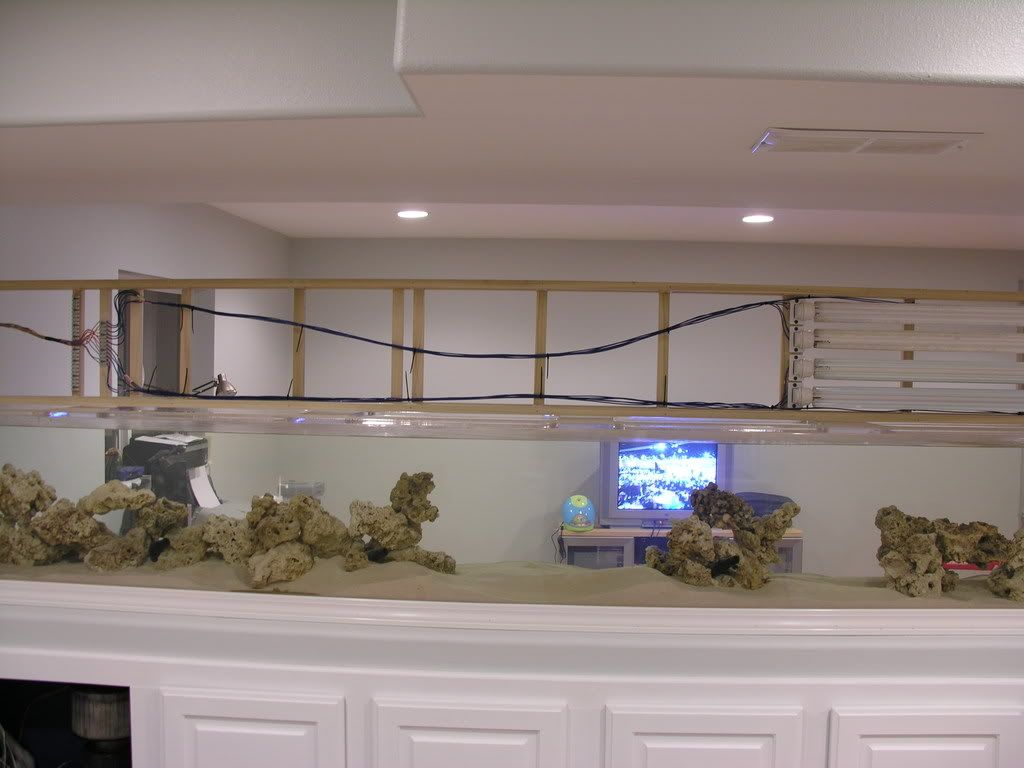  And all wired up: 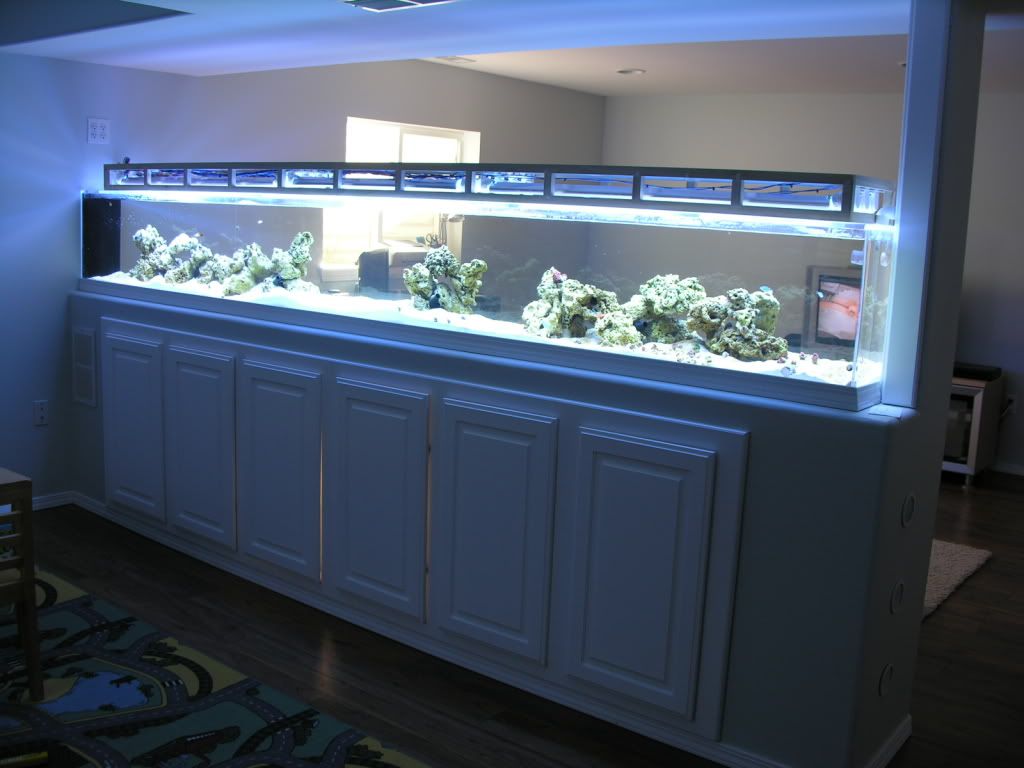 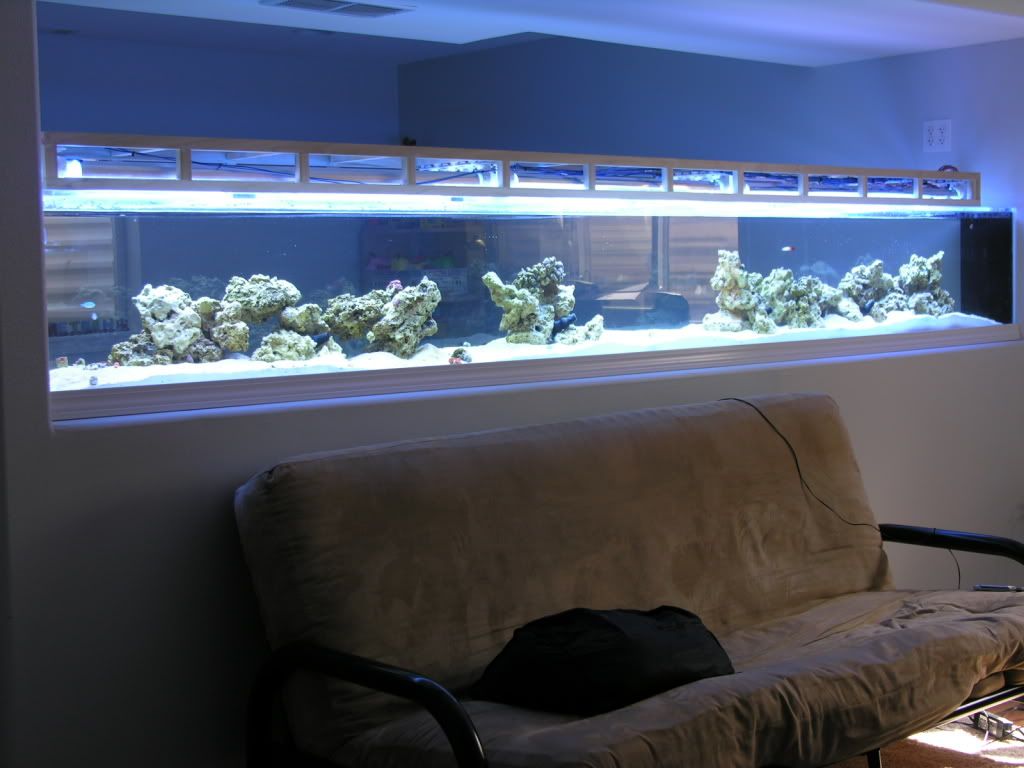 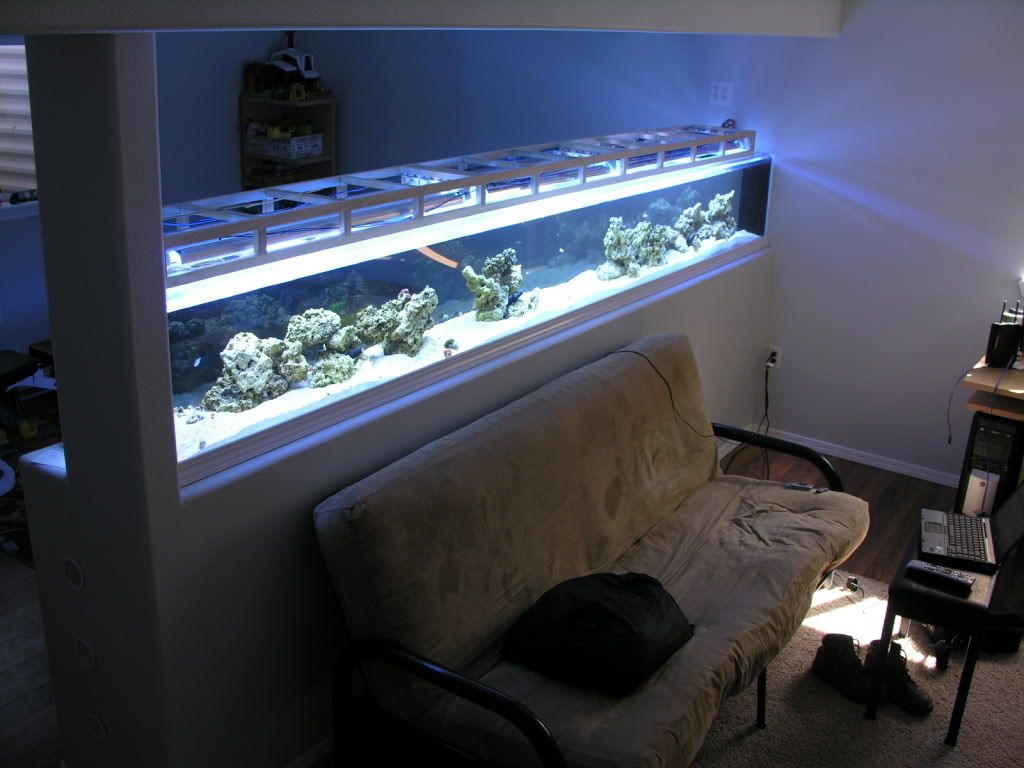
__________________
-February 2007 nTOTM "The problem with America is stupidity. Why don't we just take the safety labels off of everything and let the problem solve itself" Current Tank Info: ADA 60-P |
|
|
|
|
04/29/2009, 07:01 PM
|
#20 |
|
Registered Member
Join Date: Nov 2003
Location: C. Springs, CO
Posts: 4,530
|
The system running:
__________________
-February 2007 nTOTM "The problem with America is stupidity. Why don't we just take the safety labels off of everything and let the problem solve itself" Current Tank Info: ADA 60-P |
|
|
|
|
04/29/2009, 07:02 PM
|
#21 |
|
Registered Member
Join Date: Nov 2003
Location: C. Springs, CO
Posts: 4,530
|
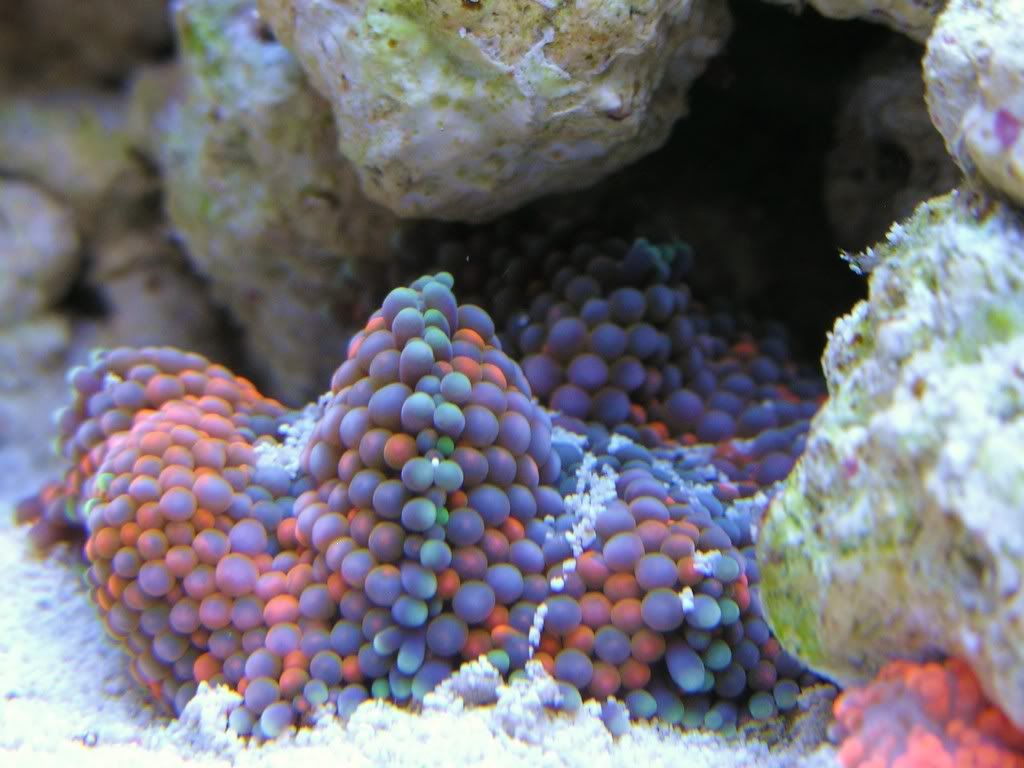
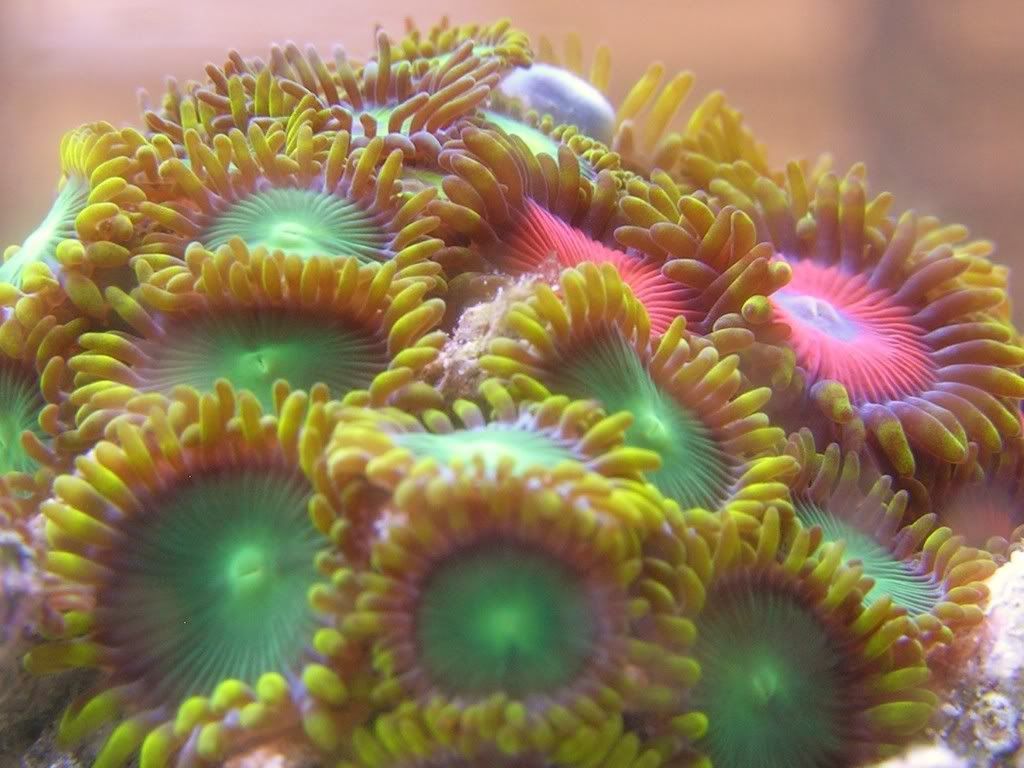
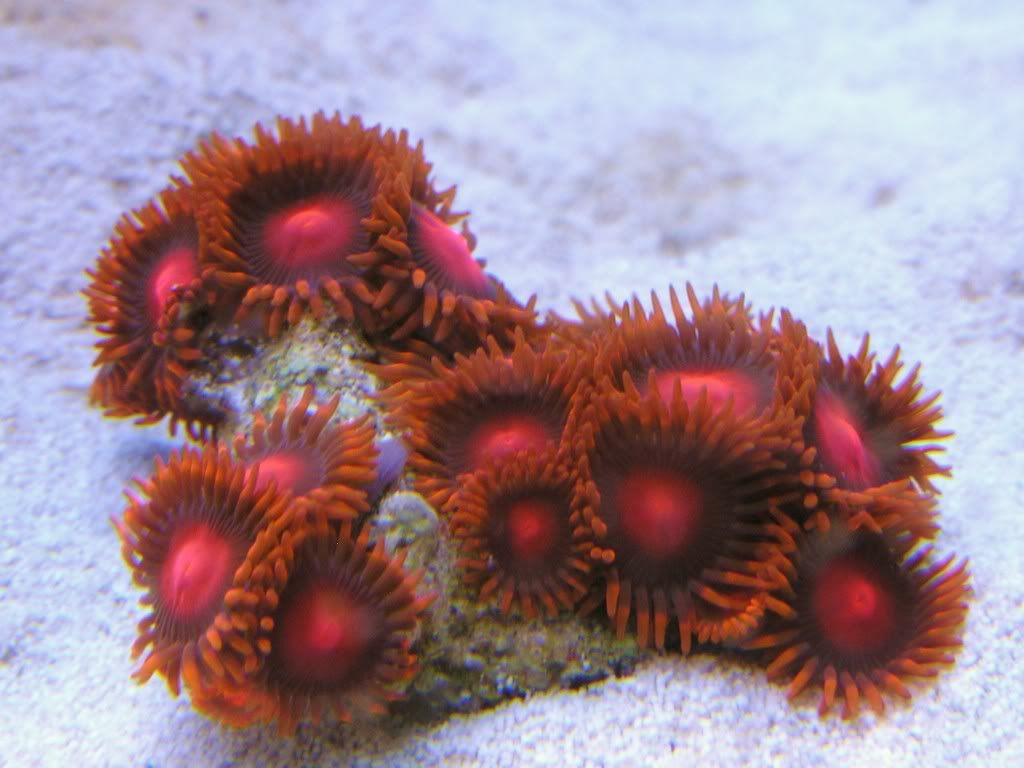
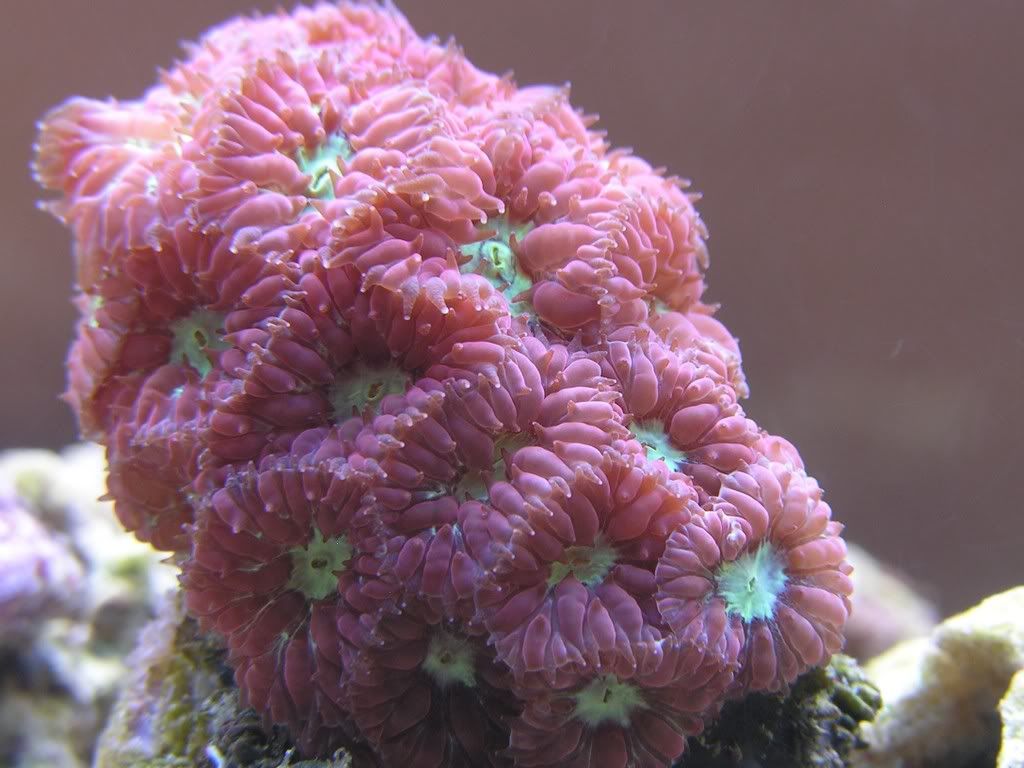
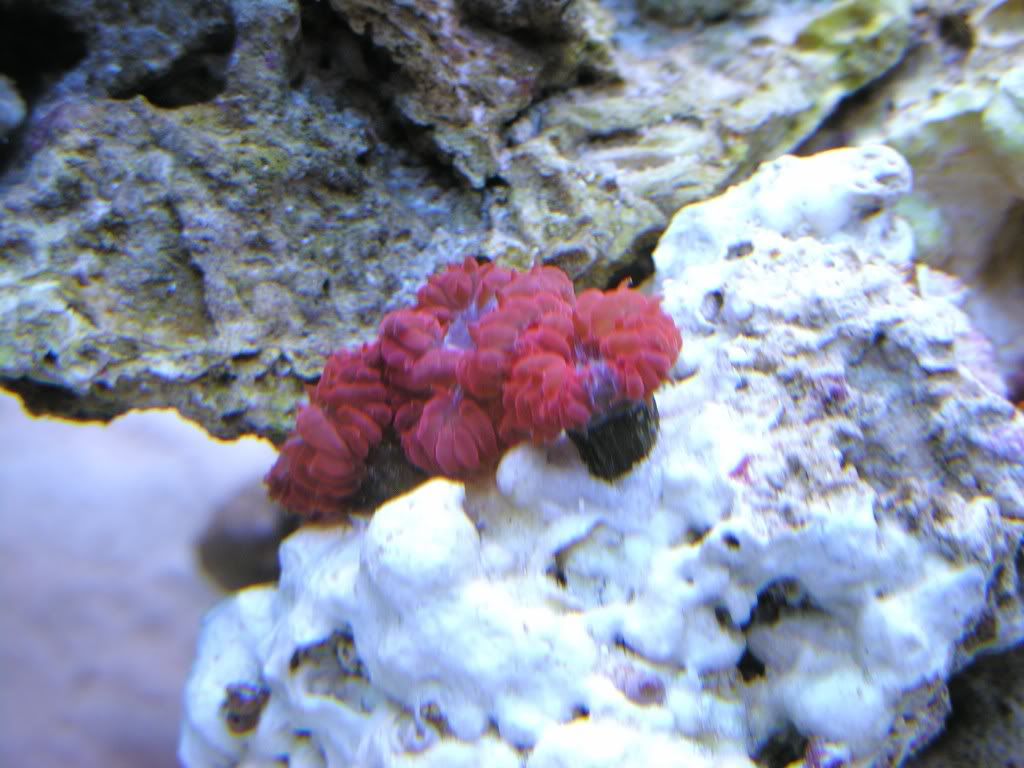
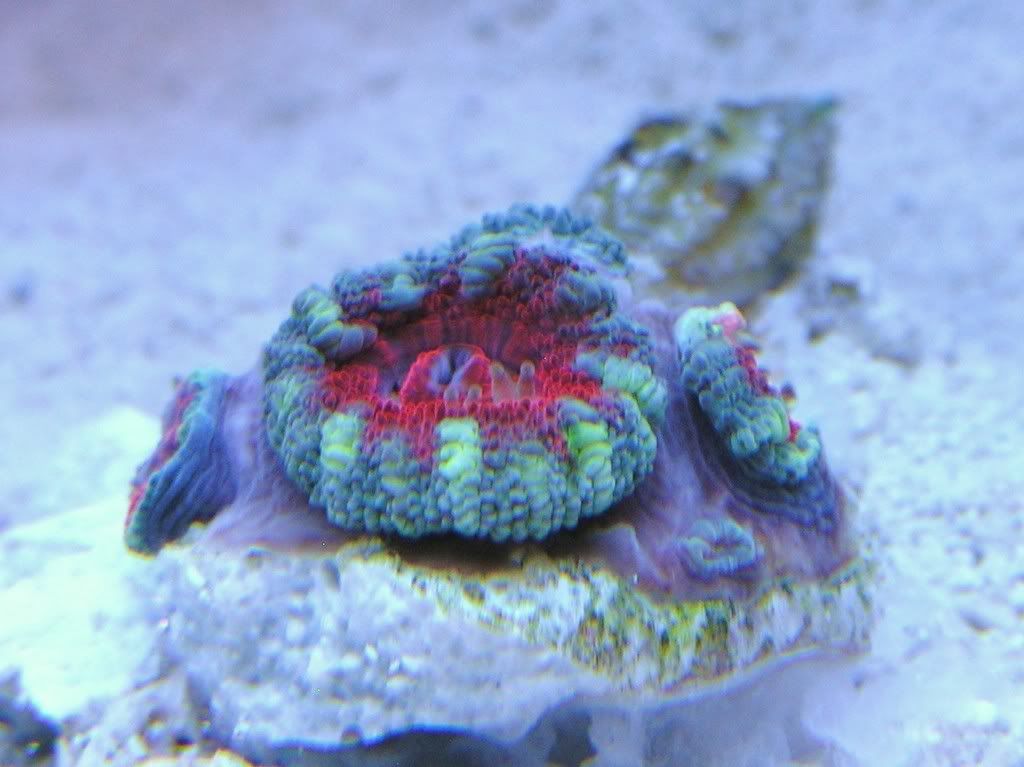
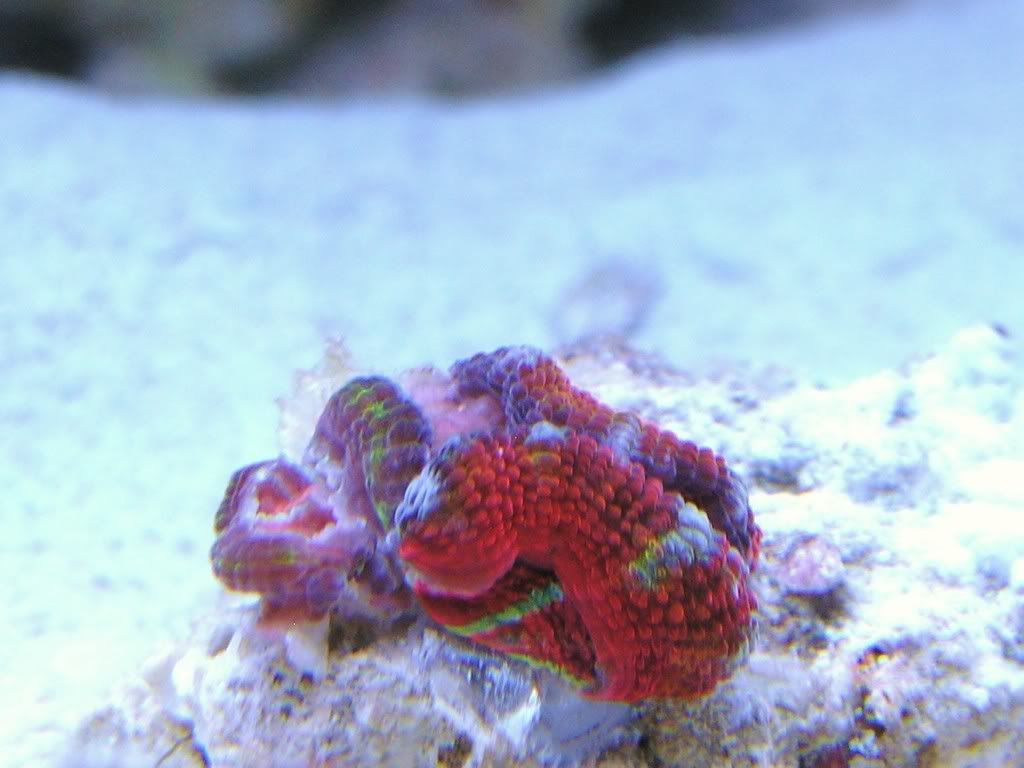
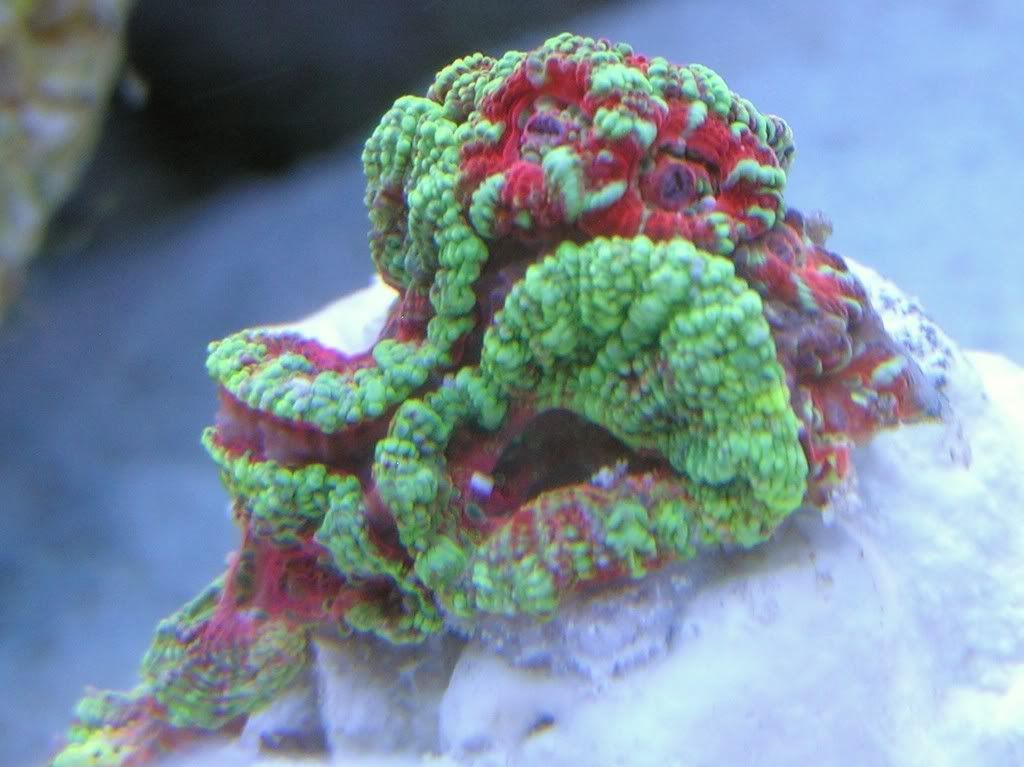
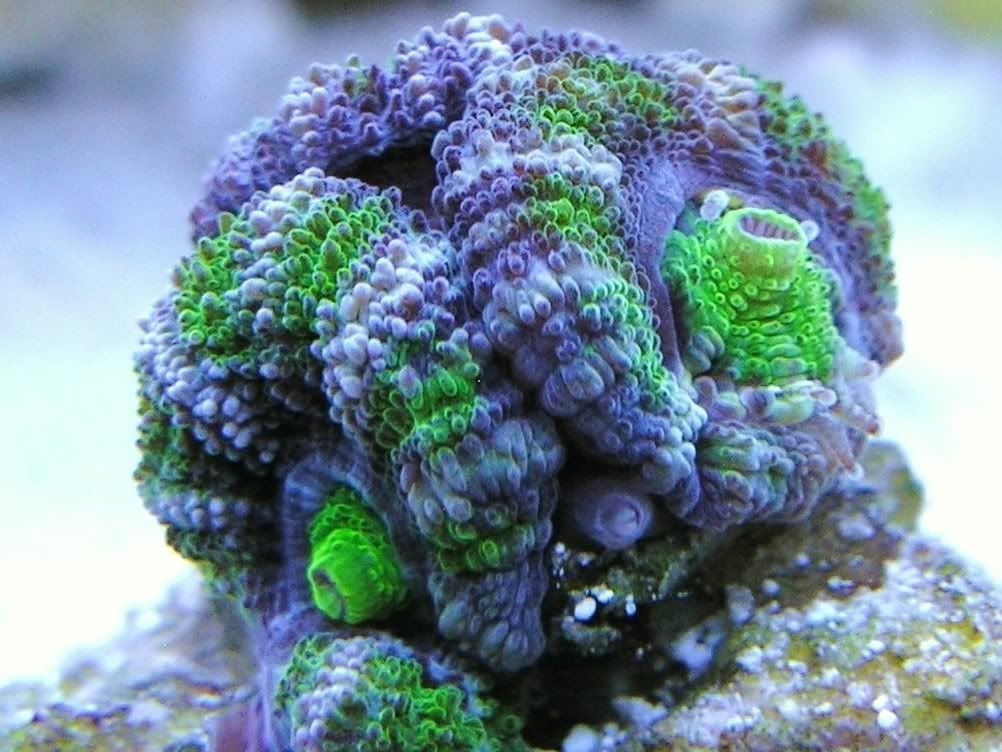
And some of the corals currently in the tank:
__________________
-February 2007 nTOTM "The problem with America is stupidity. Why don't we just take the safety labels off of everything and let the problem solve itself" Current Tank Info: ADA 60-P |
|
|
|
|
04/29/2009, 07:03 PM
|
#22 |
|
Registered Member
Join Date: Nov 2003
Location: C. Springs, CO
Posts: 4,530
|
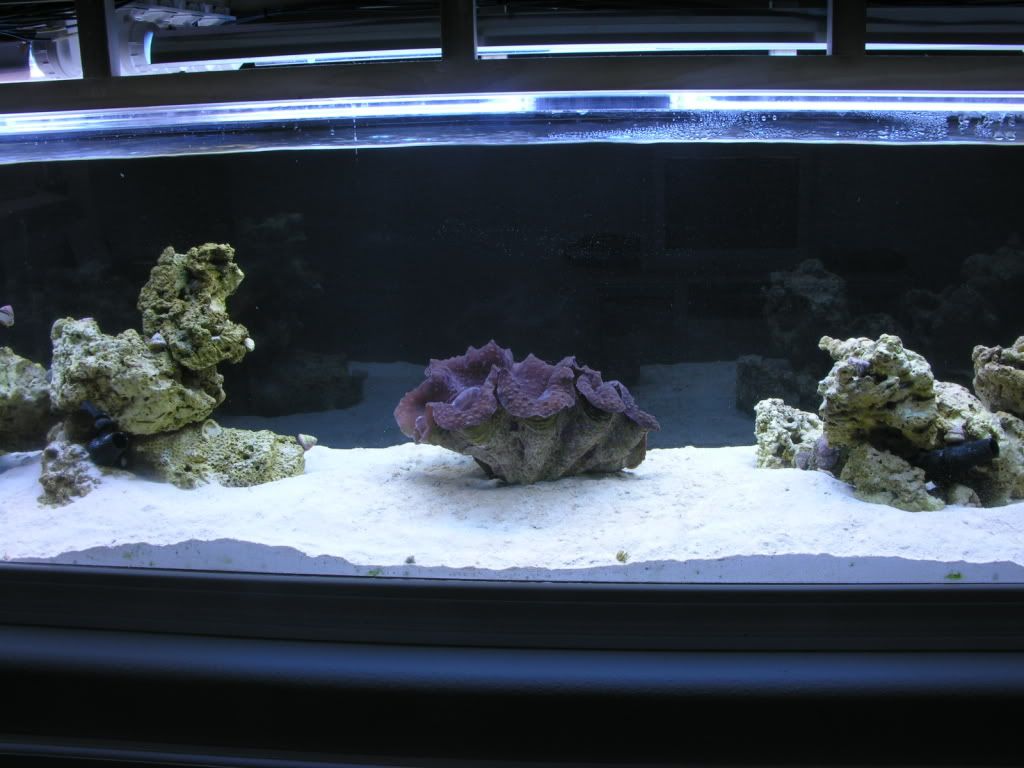
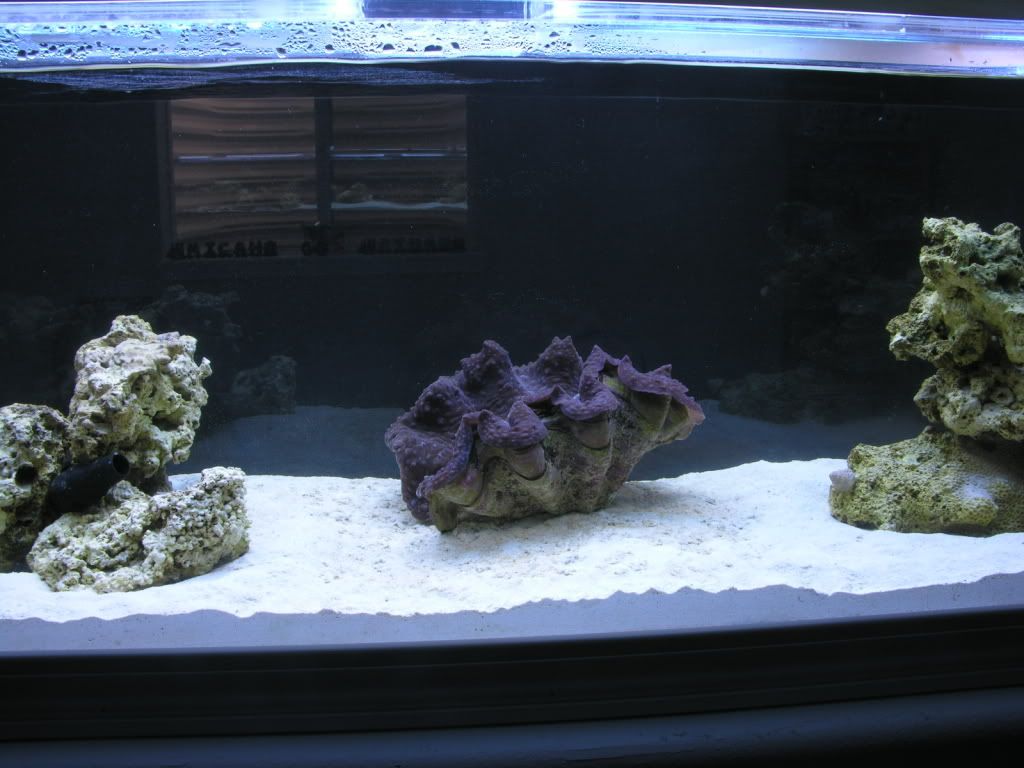
And my Gigas:
__________________
-February 2007 nTOTM "The problem with America is stupidity. Why don't we just take the safety labels off of everything and let the problem solve itself" Current Tank Info: ADA 60-P |
|
|
|
|
04/29/2009, 07:06 PM
|
#23 |
|
Registered Member
Join Date: Nov 2003
Location: C. Springs, CO
Posts: 4,530
|
And that concludes the summary up to this point... 1 year has now passed from initial idea and end to end test welds, we'll see what the next year holds with stocking the tank. Thanks for taking the time to load all these pics!
-Eric
__________________
-February 2007 nTOTM "The problem with America is stupidity. Why don't we just take the safety labels off of everything and let the problem solve itself" Current Tank Info: ADA 60-P |
|
|
|
|
04/29/2009, 08:45 PM
|
#24 |
|
Registered Member
Join Date: Feb 2005
Location: largo FL (Please send me frags)
Posts: 984
|
Simply amazing!!! i had been following the other thread for a while now but this just summarizes everything. You do grade A work.
Mark
__________________
Ummm Ummm Good Current Tank Info: 210g with 55g sump, DIY skimmer, 3 250watt MH, 2 T5, aqua controller, sailfin tang, chromis, pair of clowns, royal gramma....and more to come :) |
|
|
|
|
04/29/2009, 11:02 PM
|
#25 |
|
Registered Member
Join Date: Apr 2009
Location: Central Massachusetts
Posts: 374
|
there really needs to be a jaw dropping emoticon, this is ridiculous. nicely done.
now spend 1/100th the time/money and replace that old tv! 
|
|
|
|
|
|
|


