
|
|
|
|||||||
 |
| Thread Tools |
 03/11/2008, 09:01 PM
|
#1 |
|
Registered Member
 Join Date: Dec 2003
Location: Denver, Colorado
Posts: 9,579
|
My 60 Gal cube and custom stand and canopy!! Lots of DIY, and lots of pics!!
Hello all,
This has been a long road so far, but I think I am ready to start a build thread. I will be putting together a 60 Gal cube system. I am having the tank professionally built, but pretty much everything else I will try and make/build myself. I am camera happy and documented everything I have done so far, so pictures will be plentiful. Like most people, I am definitely on a budget, and will try to save money when I can, but I am not going to cheap out. Please bare with me as this still may take a while, but I will update as often as I can. The stand is 24"W X 30"D X 42"H, it was made out of a 2 X 4 skeleton, and faced with red oak. Anything that is visible, and some things not visible, will be red oak. Here is the beginning of the stand: 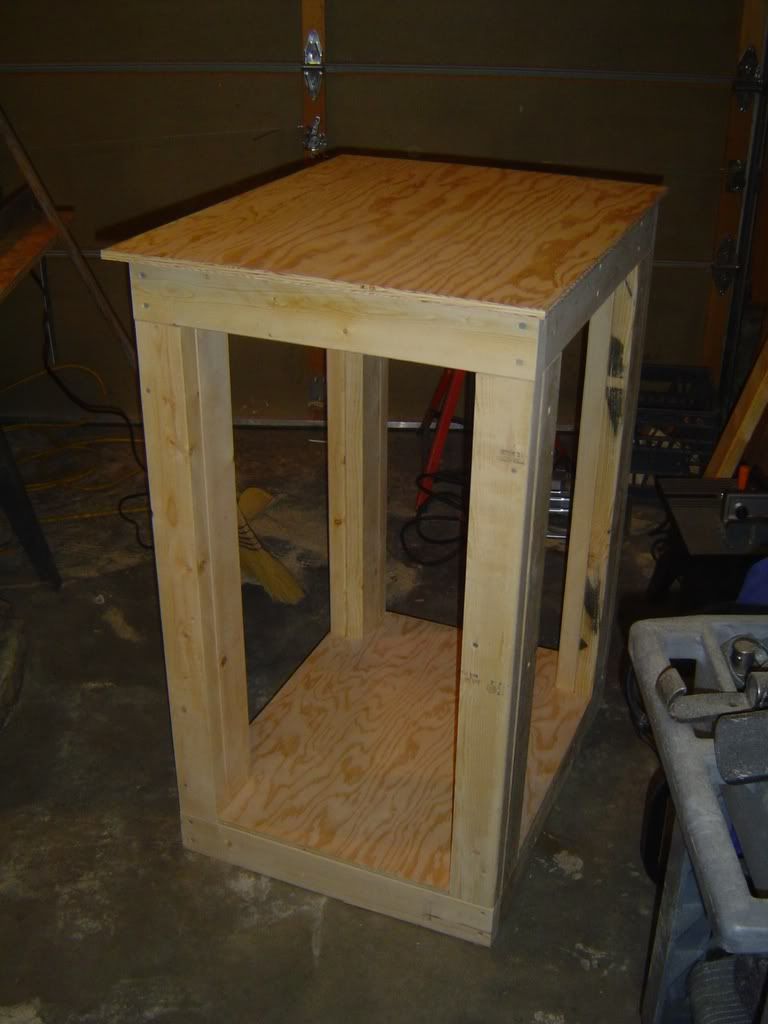 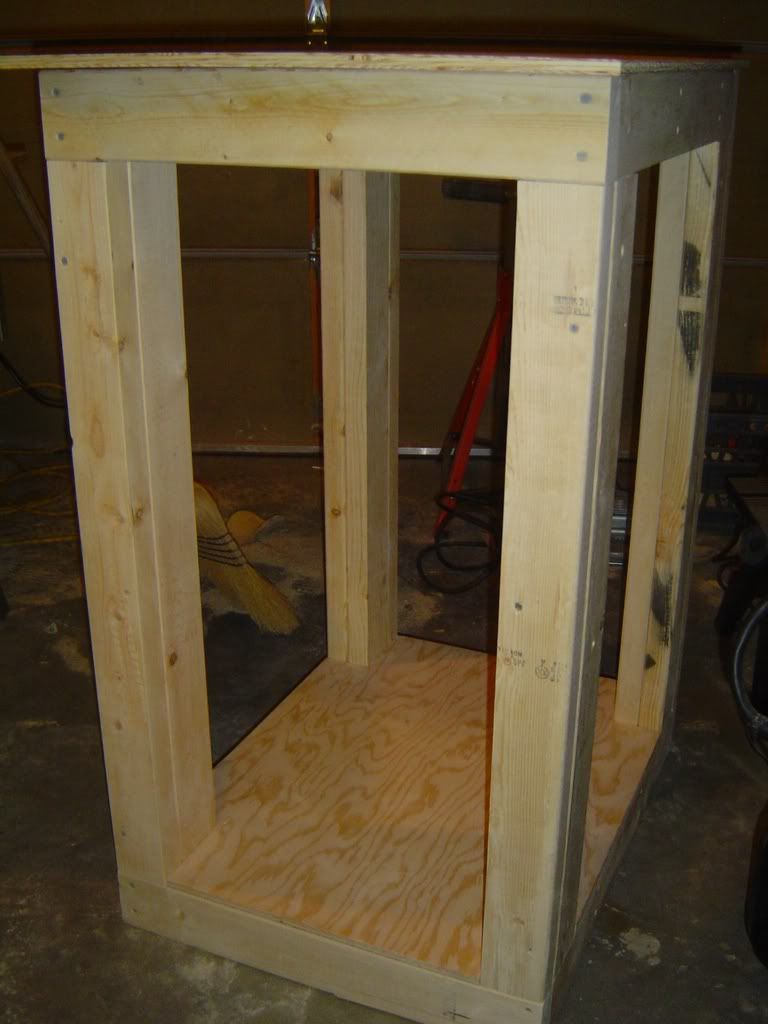 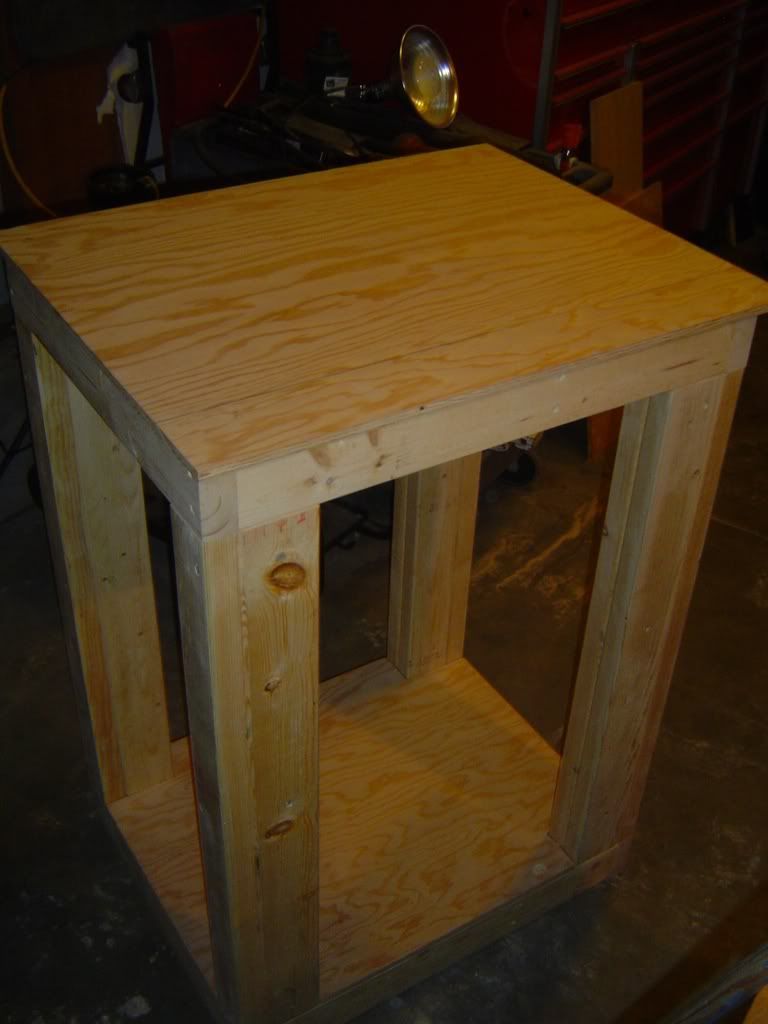  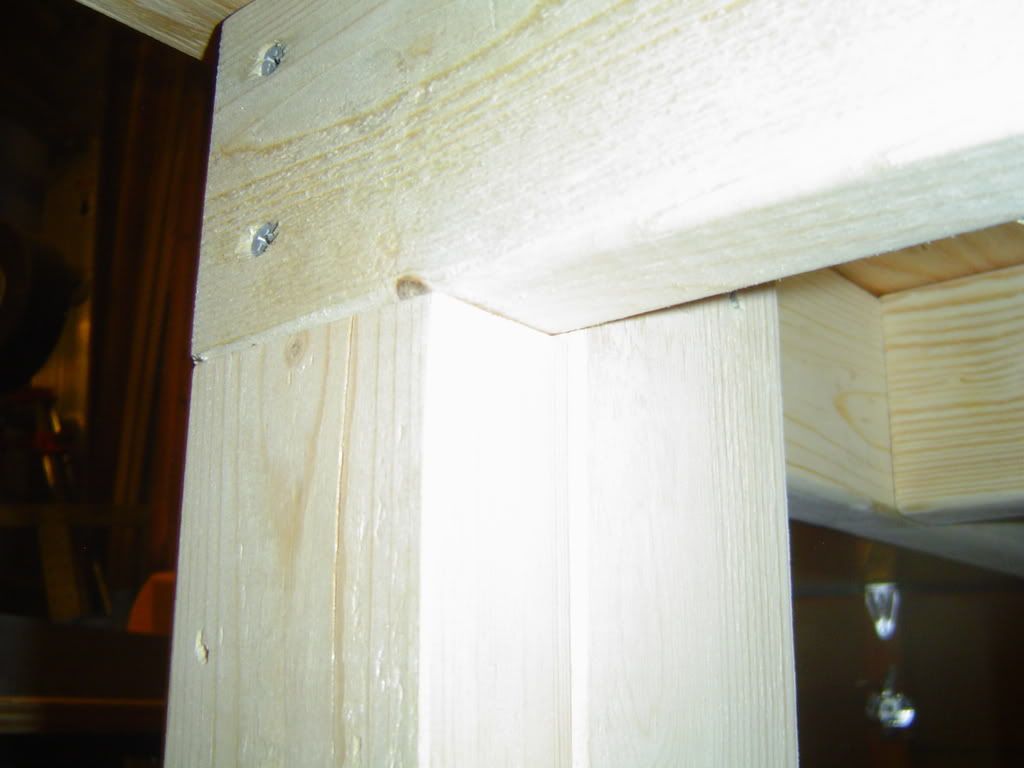 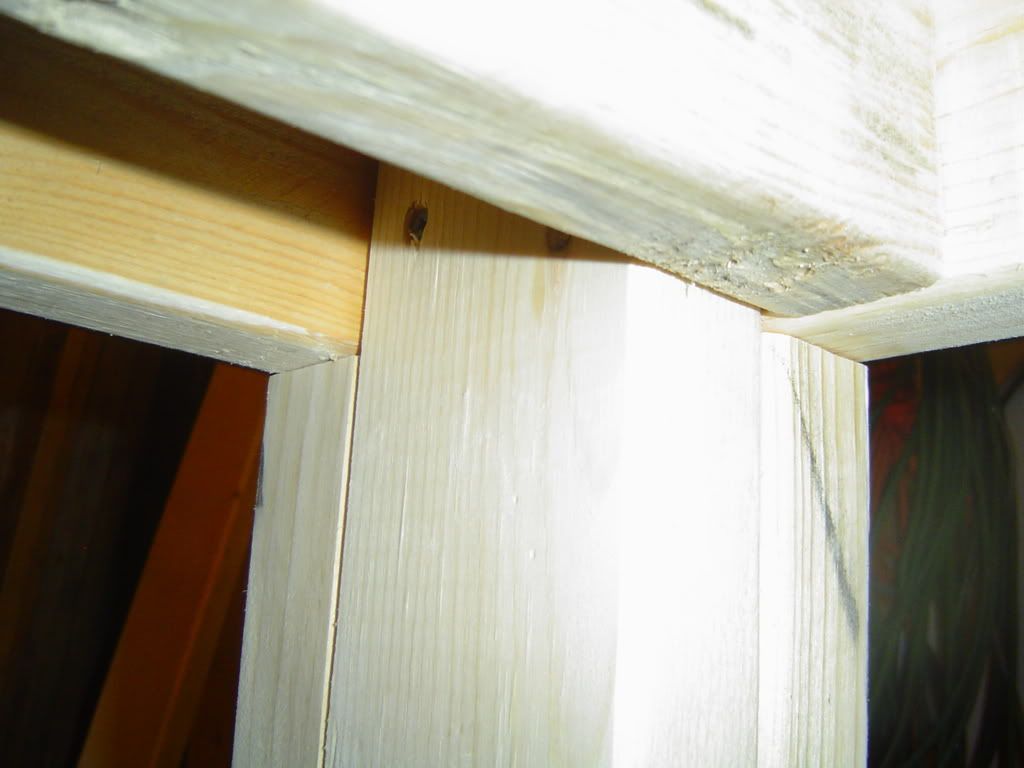 Stay tuned. Much more to come!!
__________________
Make it a Great Day!!!! Current Tank Info: 60 gal SPS cube, with 25 gal refugium, 400W MH, DIY Lumenarc III, DIY skimmer, DIY stand and canopy. 40 breeder LPS with 40 gallon sump, DIY stand, 250W MH |

|

|
|
03/11/2008, 09:16 PM
|
#2 |
|
Registered Member
Join Date: Dec 2003
Location: Denver, Colorado
Posts: 9,579
|
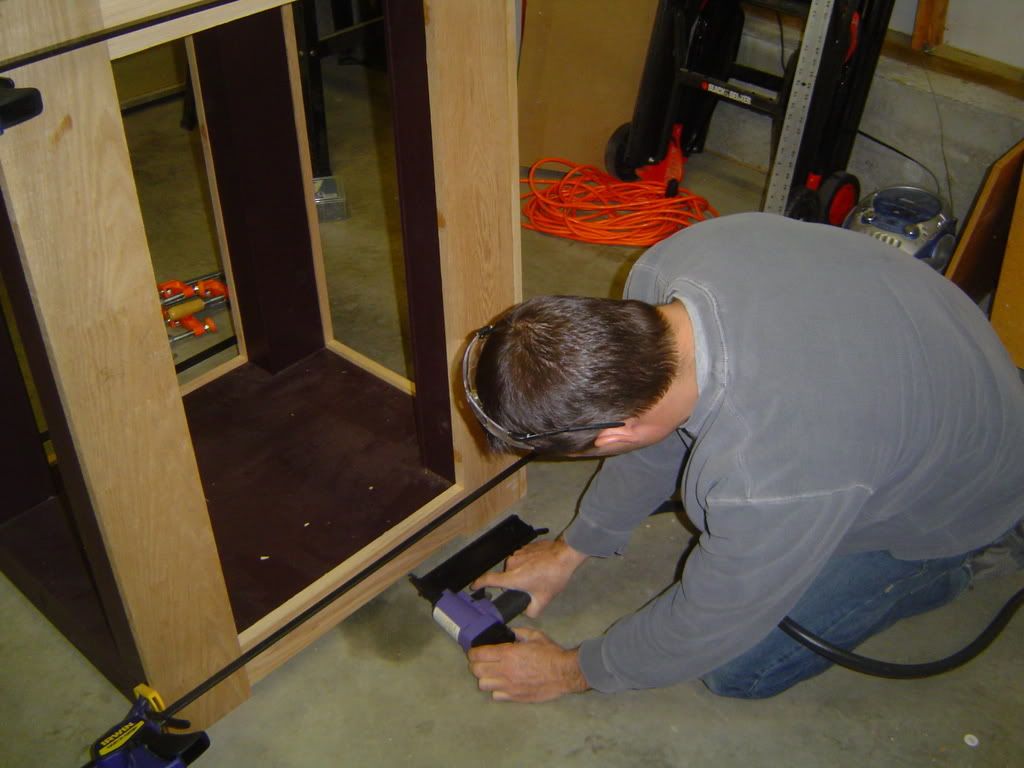
So on the inside of the stand, I didn't want to look in and see 2 X 4's. I had some 1/8" veneer, so I cut and ripped some strips to face the 2 X 4's.
   I glued and nailed all the pieces in place. Titebond II glue and a pneumatic brad nailer.
__________________
Make it a Great Day!!!! Current Tank Info: 60 gal SPS cube, with 25 gal refugium, 400W MH, DIY Lumenarc III, DIY skimmer, DIY stand and canopy. 40 breeder LPS with 40 gallon sump, DIY stand, 250W MH |
|
|
|
|
03/11/2008, 09:30 PM
|
#3 |
|
Registered Member
Join Date: Dec 2003
Location: Denver, Colorado
Posts: 9,579
|
Well, after doing that, I decided I didn't like looking at the seams on the corners of the veneer facing.
So, I said to my self, "self, you really should do something about this". So I did. Took a 2 X 4 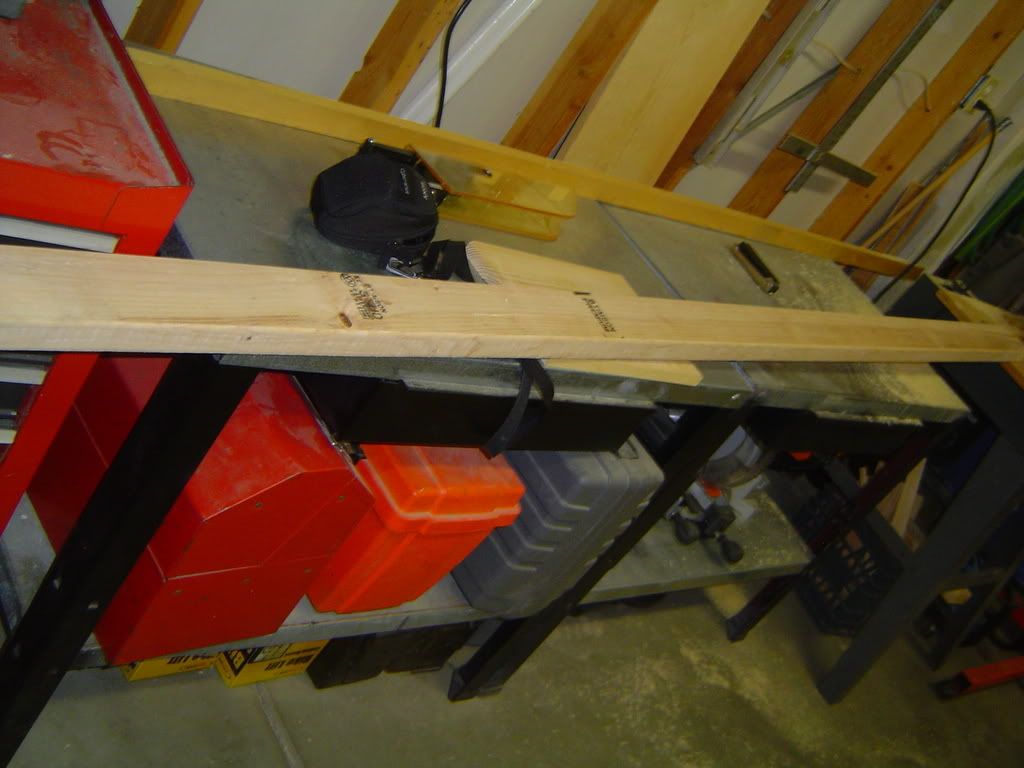 I made some practice cuts on the right, and the actual cuts on the left. 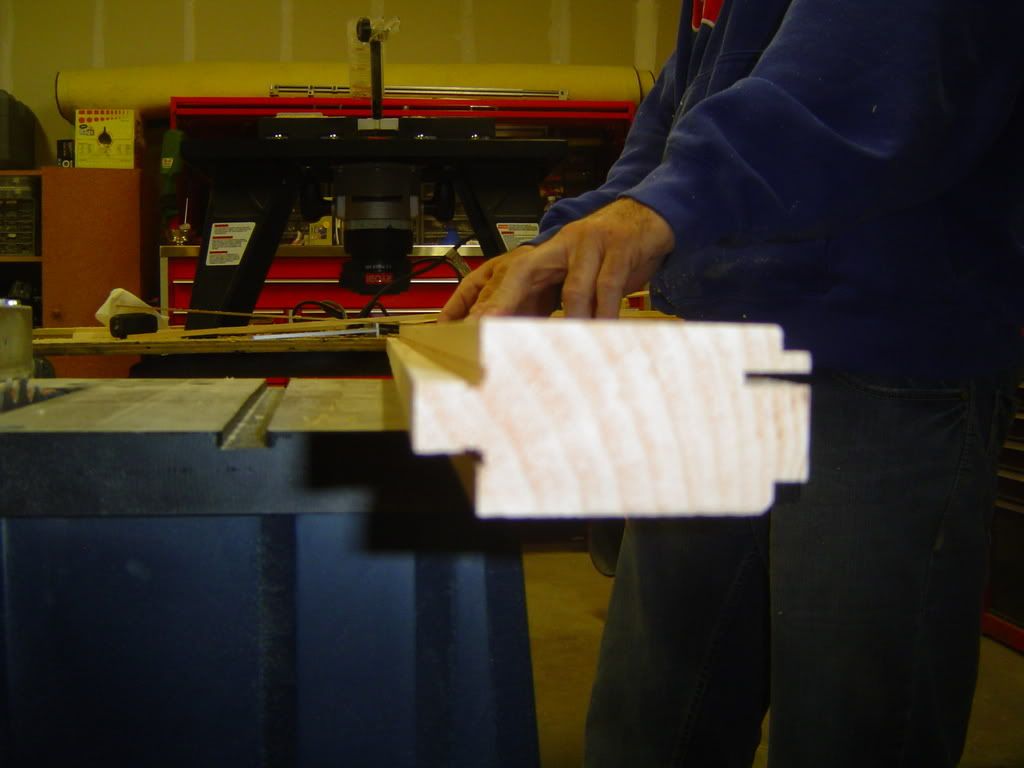 This is my buddy Brian, routing the notch out. Brian was a HUGE help with this build. Thanks bud. 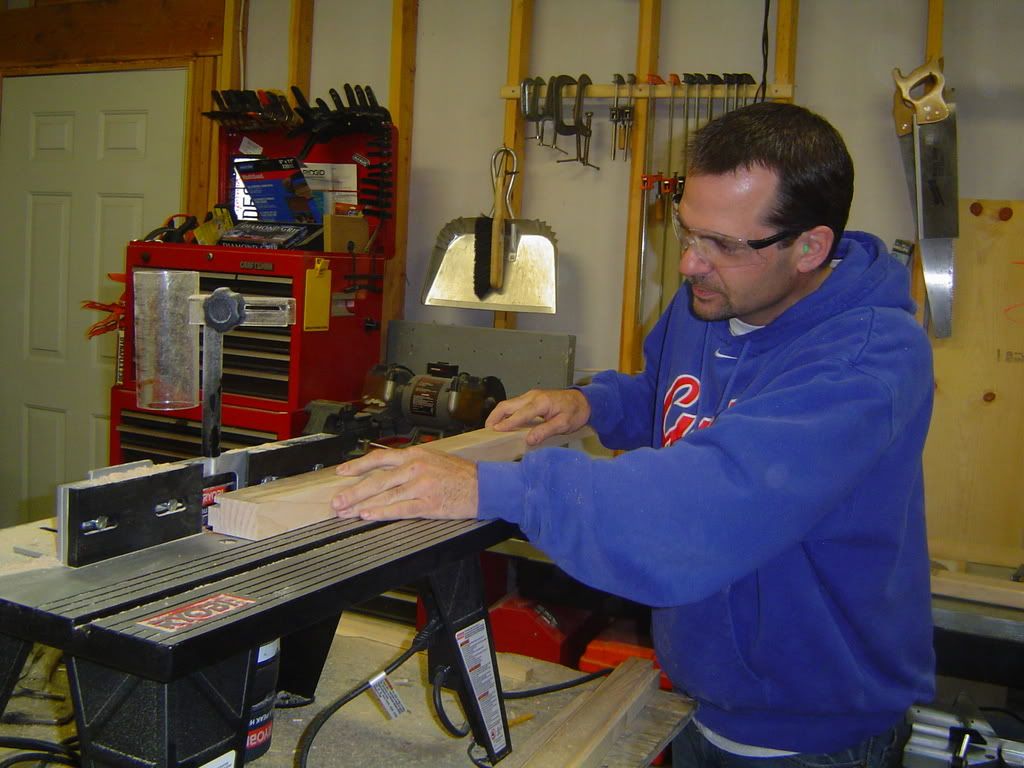 Adjusting the table saw. 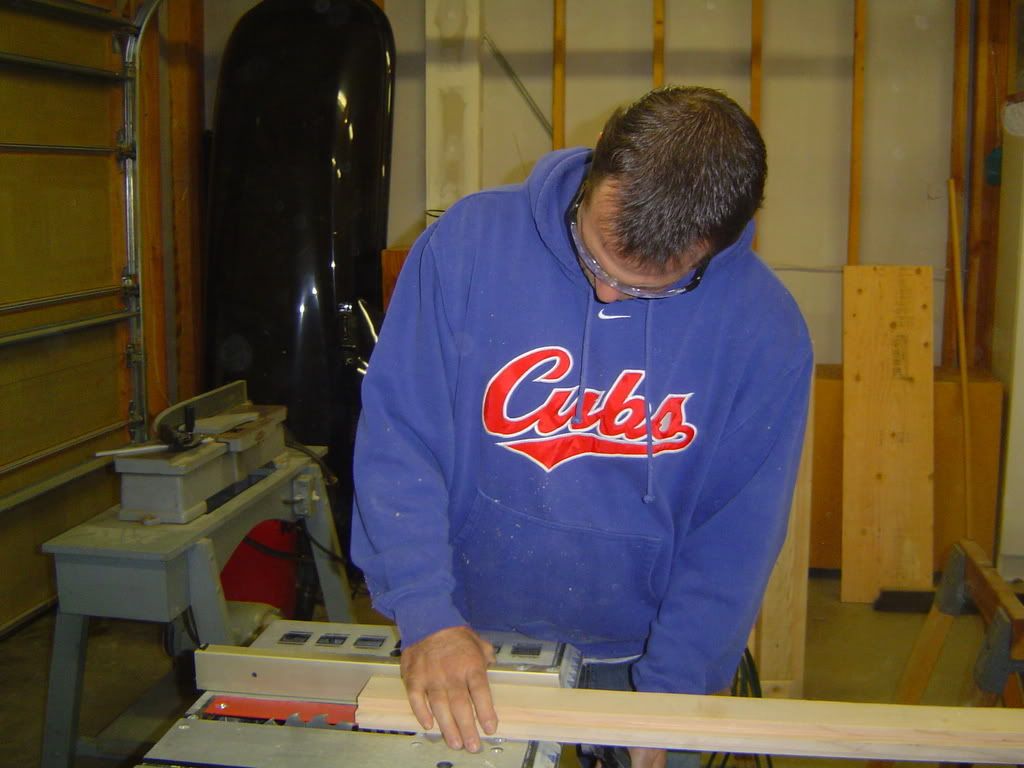 And viola, home made corner pieces. Cost less than a dollar to make. 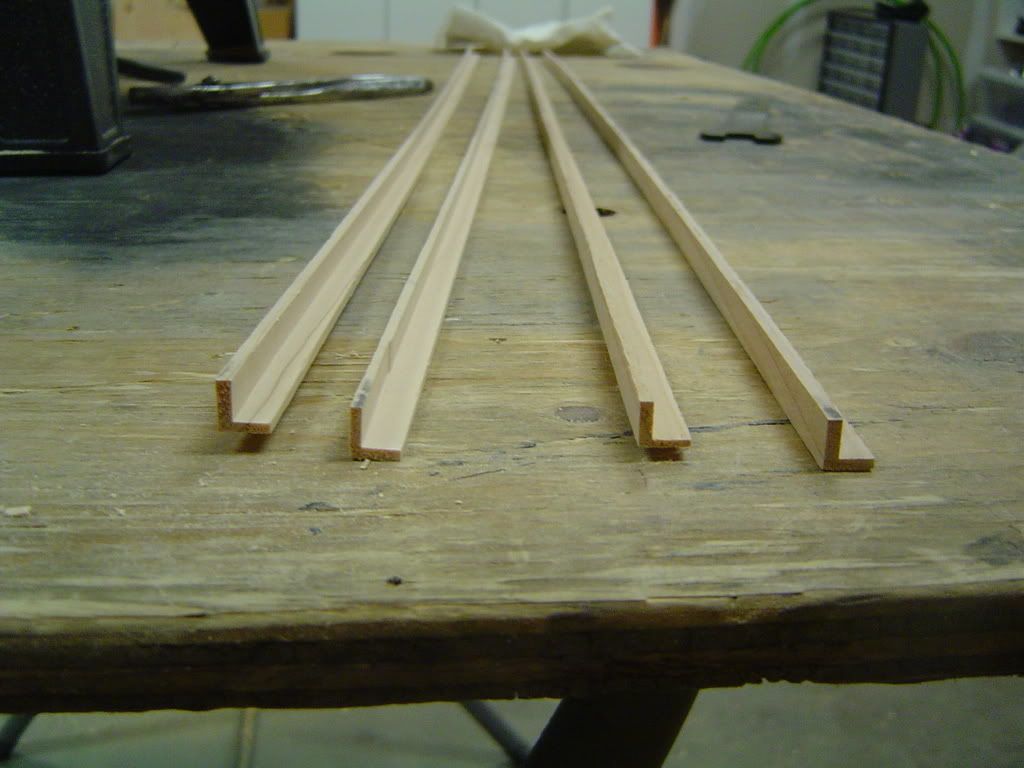 And this is the 2 X 4 afterward. 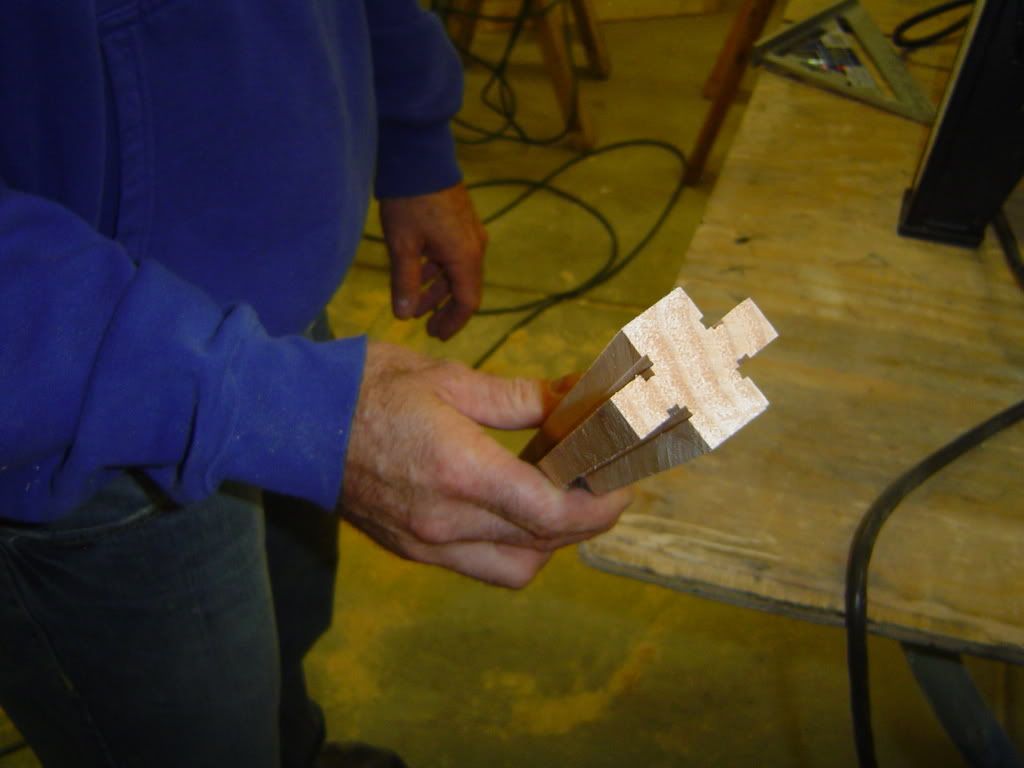
__________________
Make it a Great Day!!!! Current Tank Info: 60 gal SPS cube, with 25 gal refugium, 400W MH, DIY Lumenarc III, DIY skimmer, DIY stand and canopy. 40 breeder LPS with 40 gallon sump, DIY stand, 250W MH |
|
|
|
|
03/11/2008, 09:33 PM
|
#4 |
|
Likey the bikey
Join Date: Dec 2004
Location: Colorado
Posts: 3,371
|
Leif - you can't stop there!???
__________________
Mike On hiatus. I'm either out riding my bicycle, playing with my family, or throwing ferts in my planted tank. Or working. I hope I'm not doing that though. Current Tank Info: 140 DIY Cube |
|
|
|
|
03/11/2008, 09:40 PM
|
#5 |
|
Registered Member
Join Date: Dec 2003
Location: Denver, Colorado
Posts: 9,579
|
I'm waiting for photobucket to load.
Jeopardy tune playing......... Stay tuned!!
__________________
Make it a Great Day!!!! Current Tank Info: 60 gal SPS cube, with 25 gal refugium, 400W MH, DIY Lumenarc III, DIY skimmer, DIY stand and canopy. 40 breeder LPS with 40 gallon sump, DIY stand, 250W MH |
|
|
|
|
03/11/2008, 09:43 PM
|
#6 |
|
Registered Member
Join Date: Jan 2007
Location: Fl/Pa now
Posts: 456
|
i need a step by step on the corner moulding
 ...lookin good! ...lookin good!
__________________
crayons go one drawer higher Current Tank Info: year 1/2 still new 90rr :( |
|
|
|
|
03/11/2008, 09:44 PM
|
#7 |
|
Registered Member
Join Date: Dec 2003
Location: Denver, Colorado
Posts: 9,579
|
Ok, skeleton built and level. I was pretty happy with the buid.
Now time to caulk and seal it. 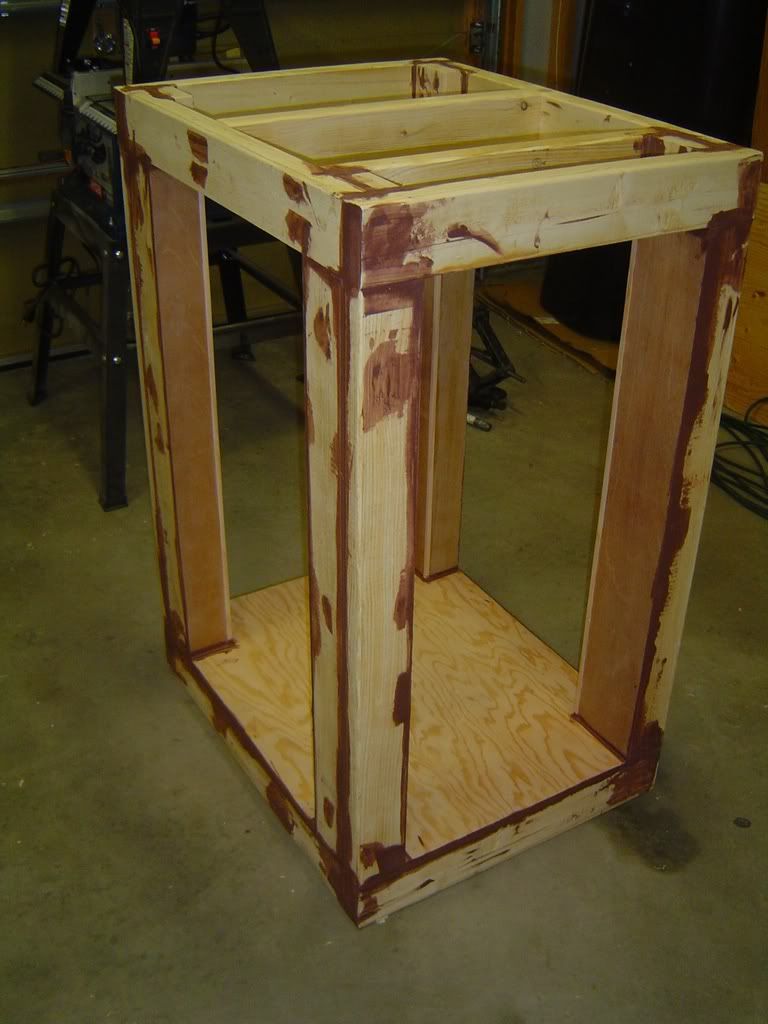 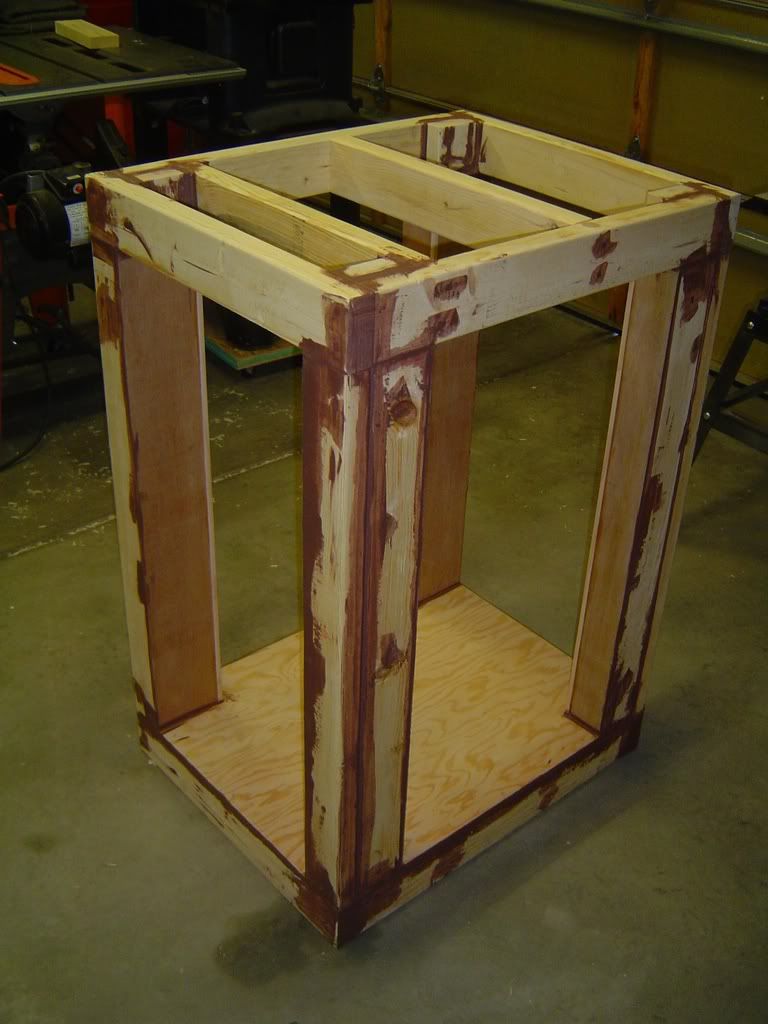 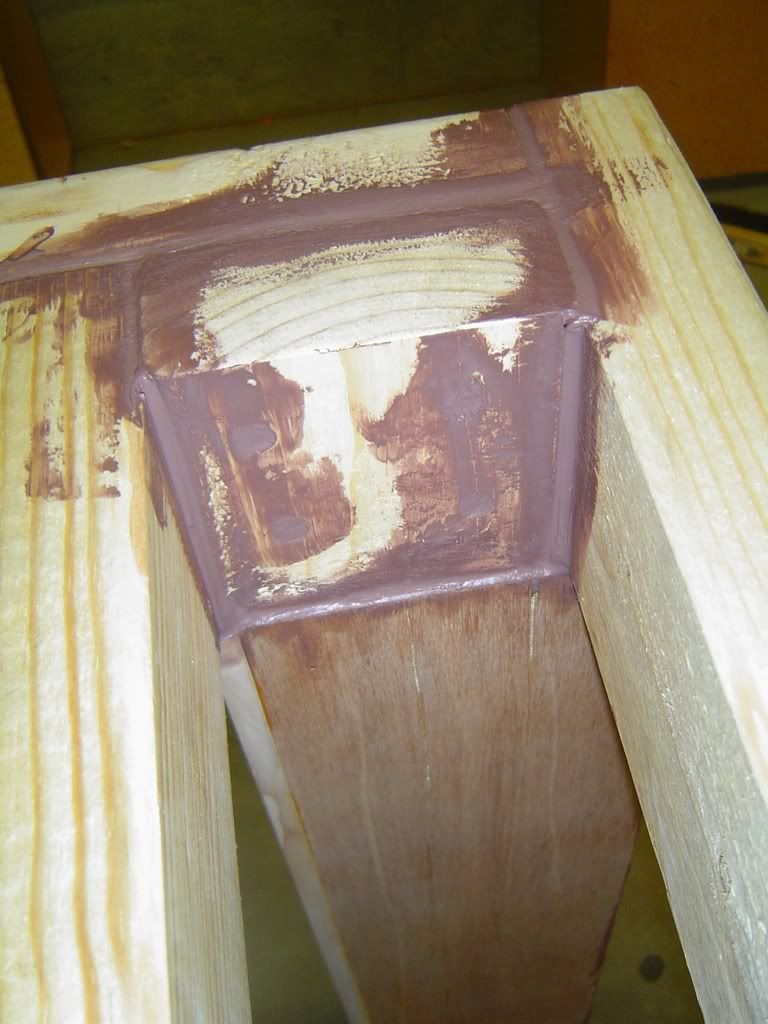 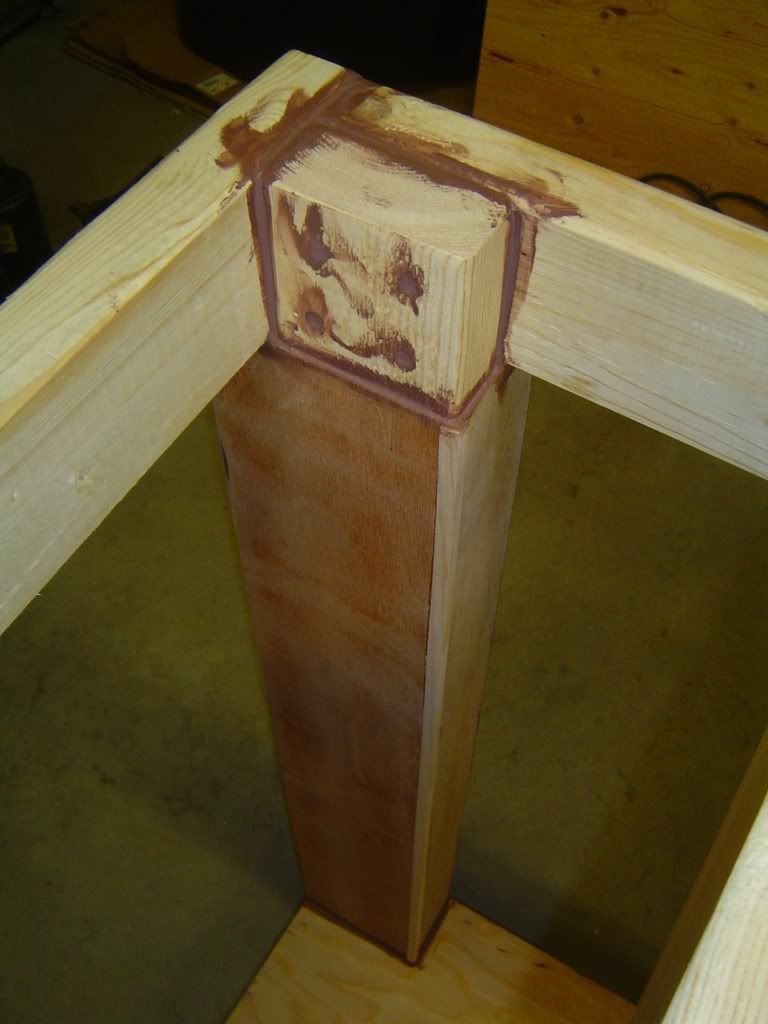 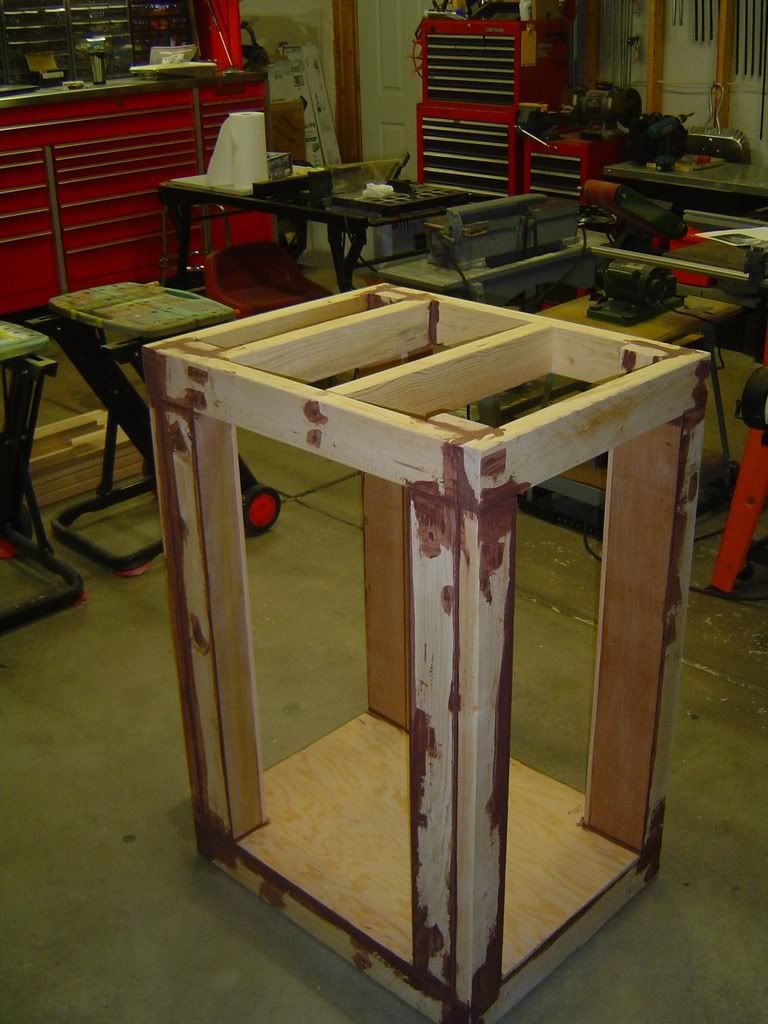 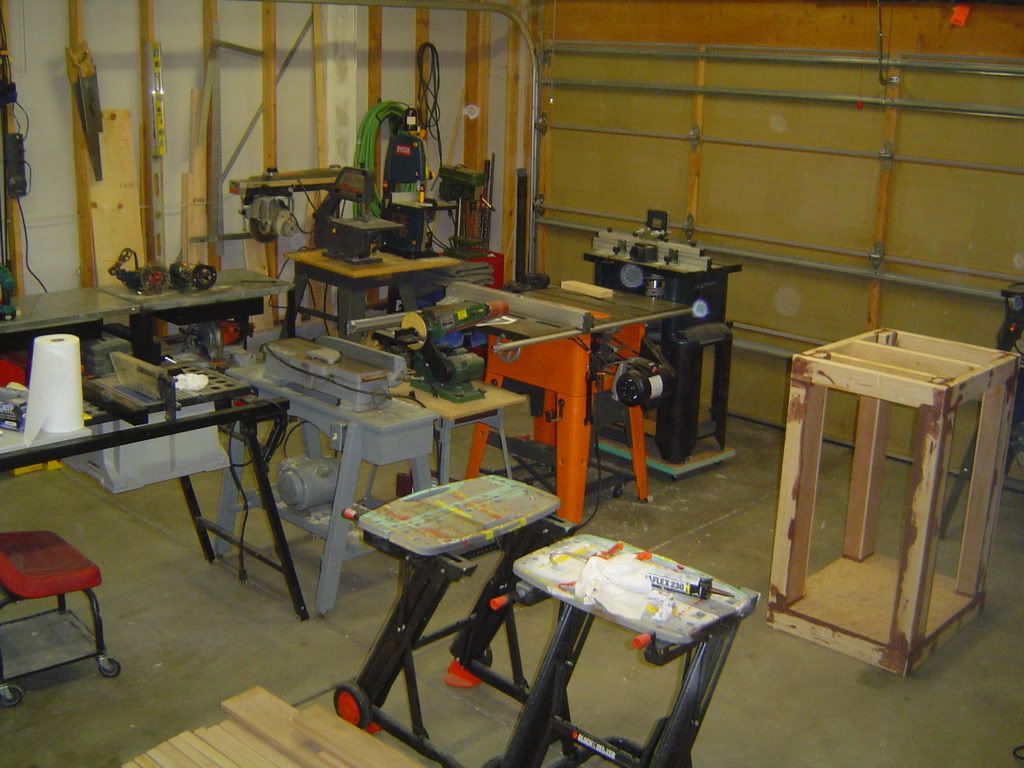
__________________
Make it a Great Day!!!! Current Tank Info: 60 gal SPS cube, with 25 gal refugium, 400W MH, DIY Lumenarc III, DIY skimmer, DIY stand and canopy. 40 breeder LPS with 40 gallon sump, DIY stand, 250W MH |
|
|
|
|
03/11/2008, 09:56 PM
|
#8 |
|
Registered Member
Join Date: Dec 2003
Location: Denver, Colorado
Posts: 9,579
|
On goes the paint.
I used this: 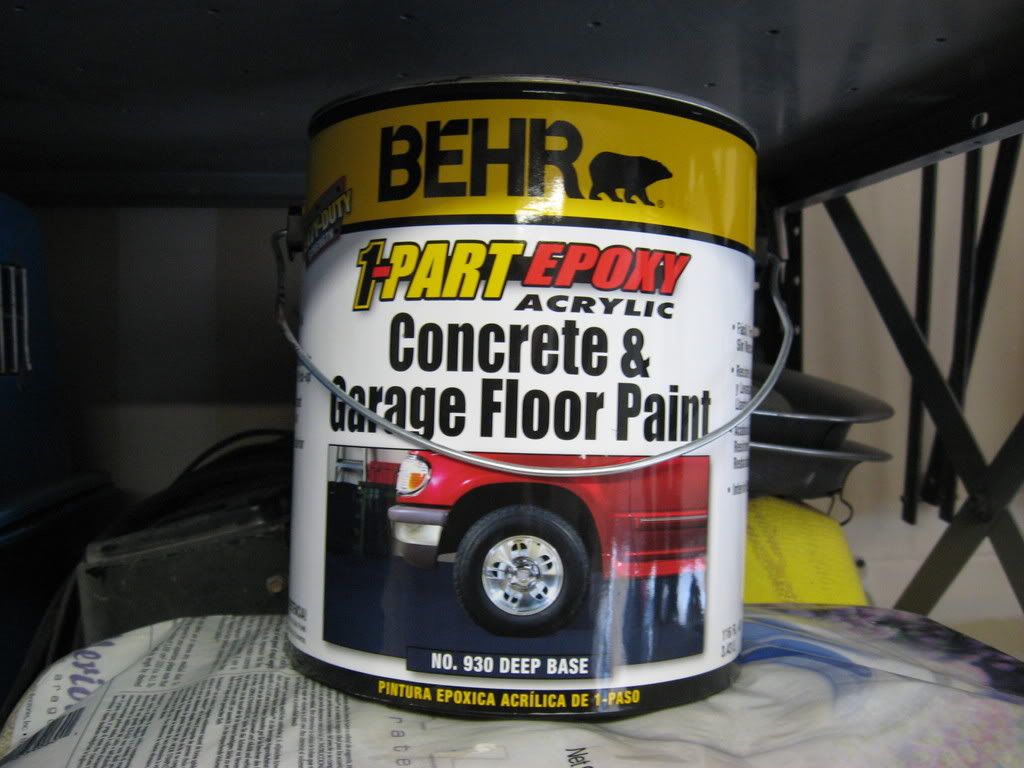 In case you were wondering, yes I am the REALLY good lookin guy in the photo  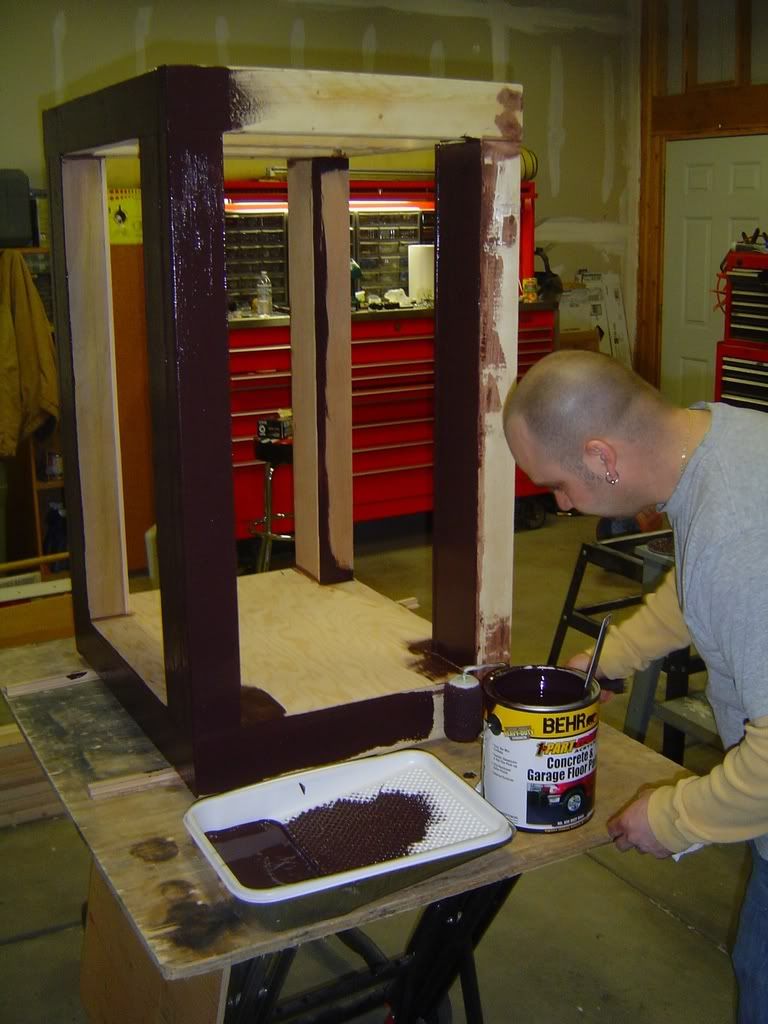 Here is Brian again, smoothing out brush stroke marks. 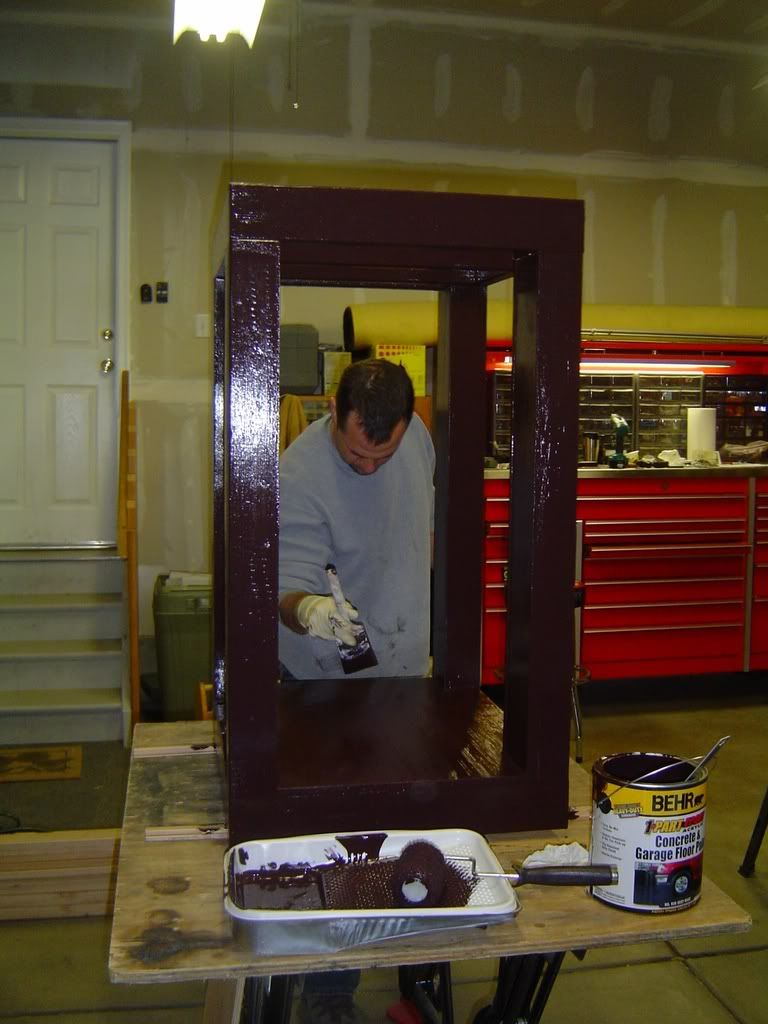 Done 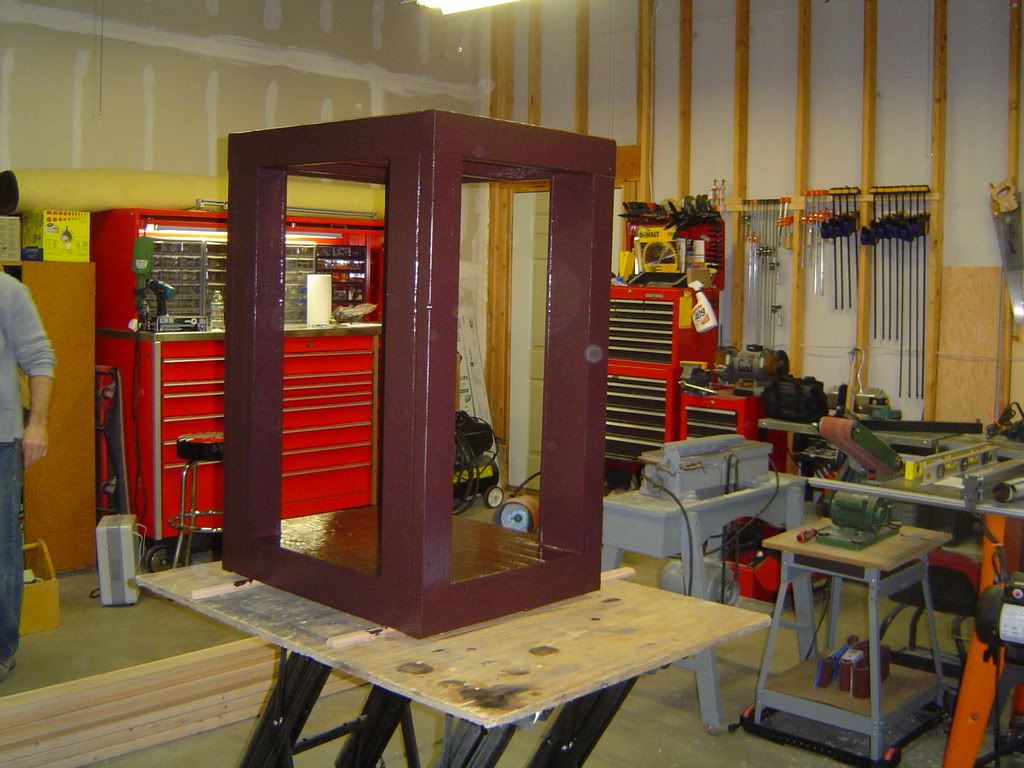 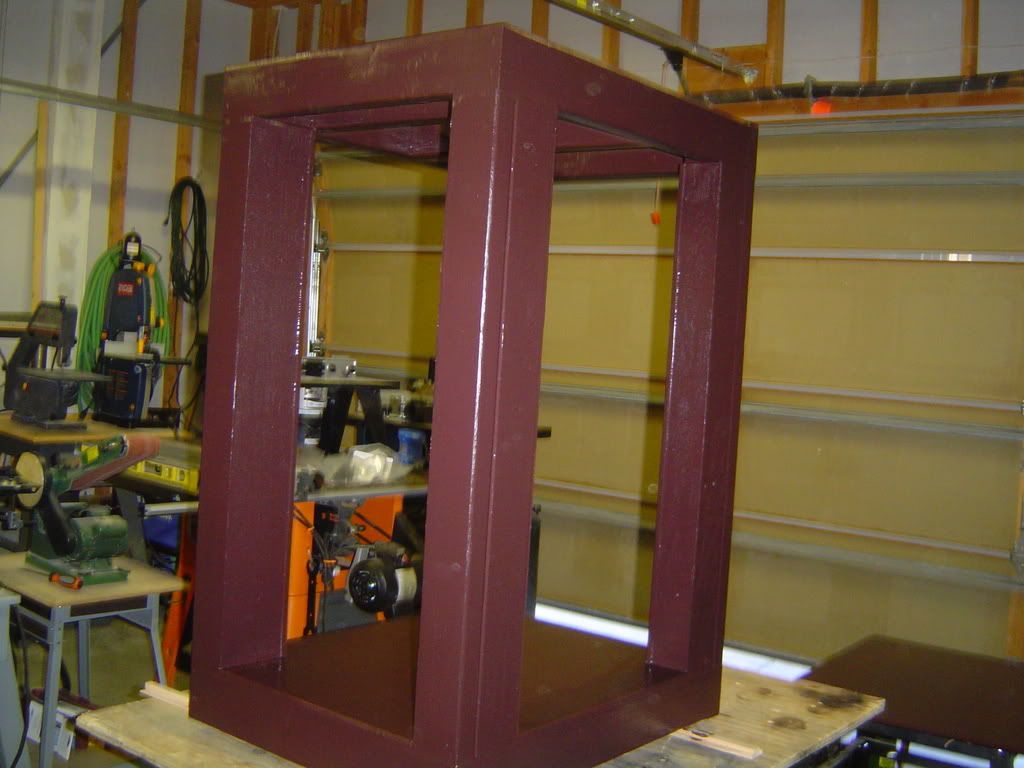 And the top 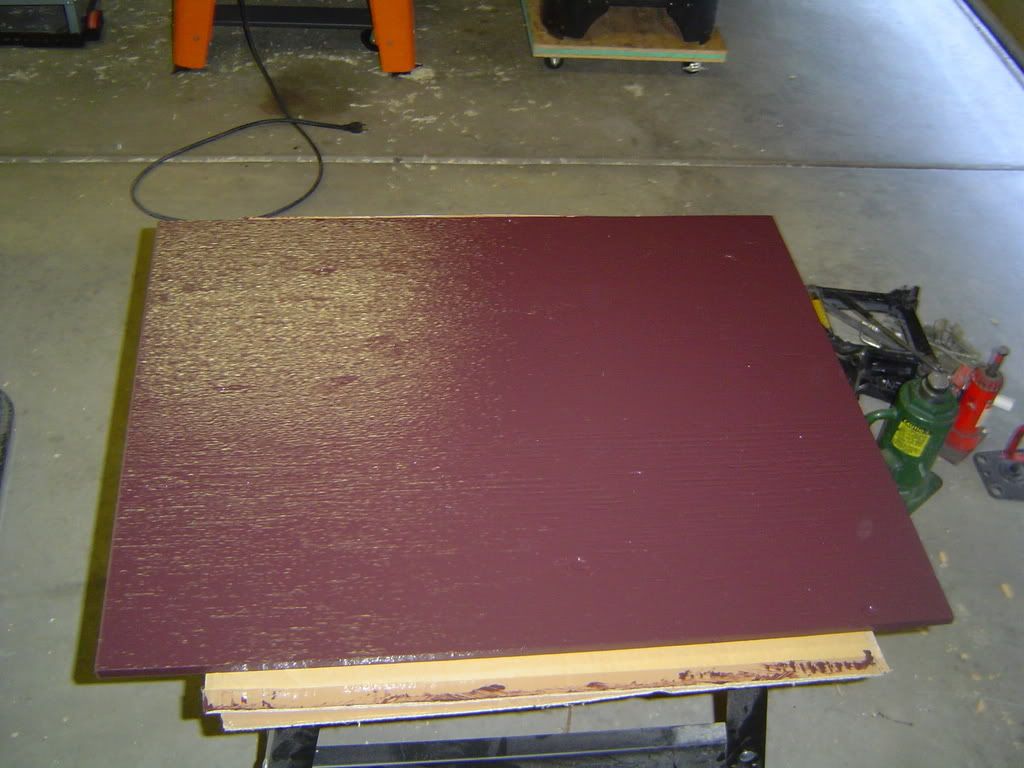 It dries to a satin finish. Thanks for looking. Spleify Lots more to come.
__________________
Make it a Great Day!!!! Current Tank Info: 60 gal SPS cube, with 25 gal refugium, 400W MH, DIY Lumenarc III, DIY skimmer, DIY stand and canopy. 40 breeder LPS with 40 gallon sump, DIY stand, 250W MH |
|
|
|
|
03/11/2008, 10:07 PM
|
#9 |
|
Registered Member
Join Date: Dec 2003
Location: Denver, Colorado
Posts: 9,579
|
leebo_28, I decided on the size. Set the 1/4" straight router bit to appropriate height. Made the cuts. Set the table saw to appropriate width, and just a little high. Made the cut, flipped it over made second cut. DONE!! woohoo $1 corner trim, and I didn't even have to leave the house.
HTH Spleify
__________________
Make it a Great Day!!!! Current Tank Info: 60 gal SPS cube, with 25 gal refugium, 400W MH, DIY Lumenarc III, DIY skimmer, DIY stand and canopy. 40 breeder LPS with 40 gallon sump, DIY stand, 250W MH |
|
|
|
|
03/11/2008, 10:39 PM
|
#10 |
|
Registered Member
Join Date: Dec 2003
Location: Denver, Colorado
Posts: 9,579
|
Now for the oak facing.
Clamping the pieces. 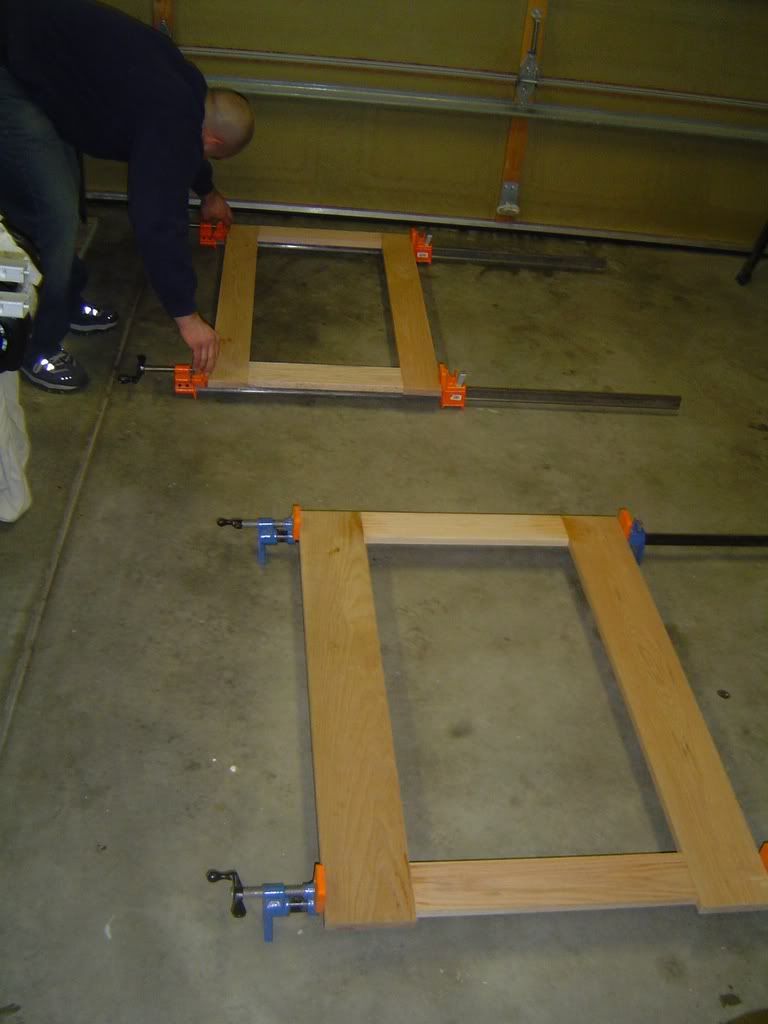 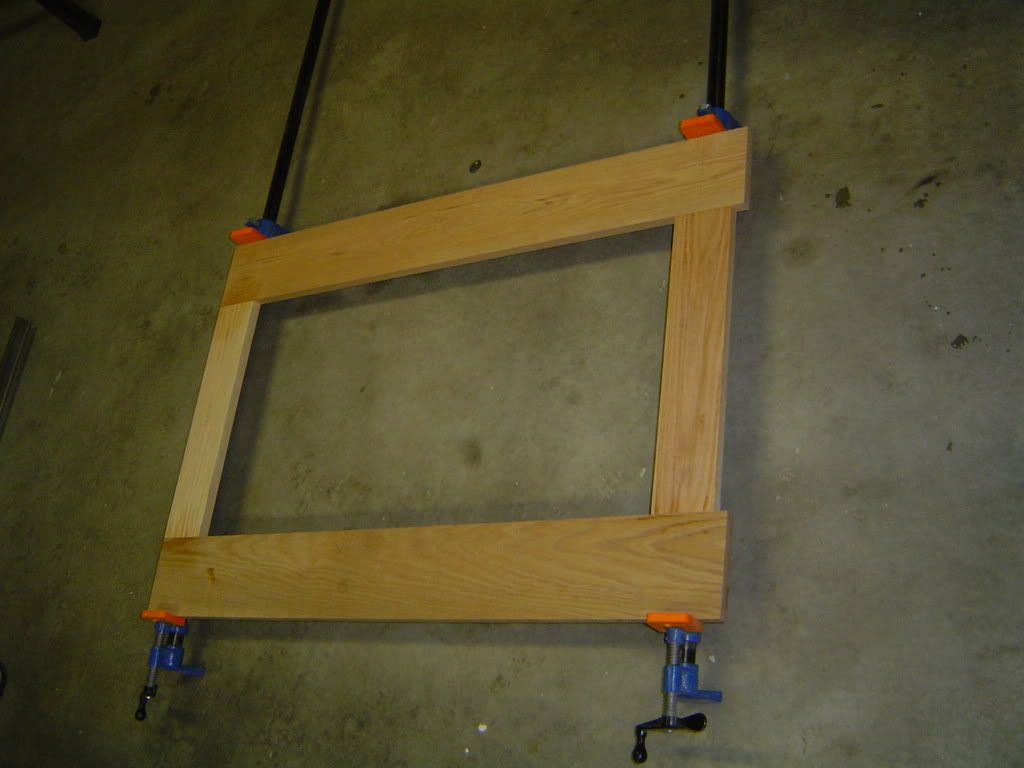 Constructing the three sides together. For this I of coarse glued, and used a Kreg tool.  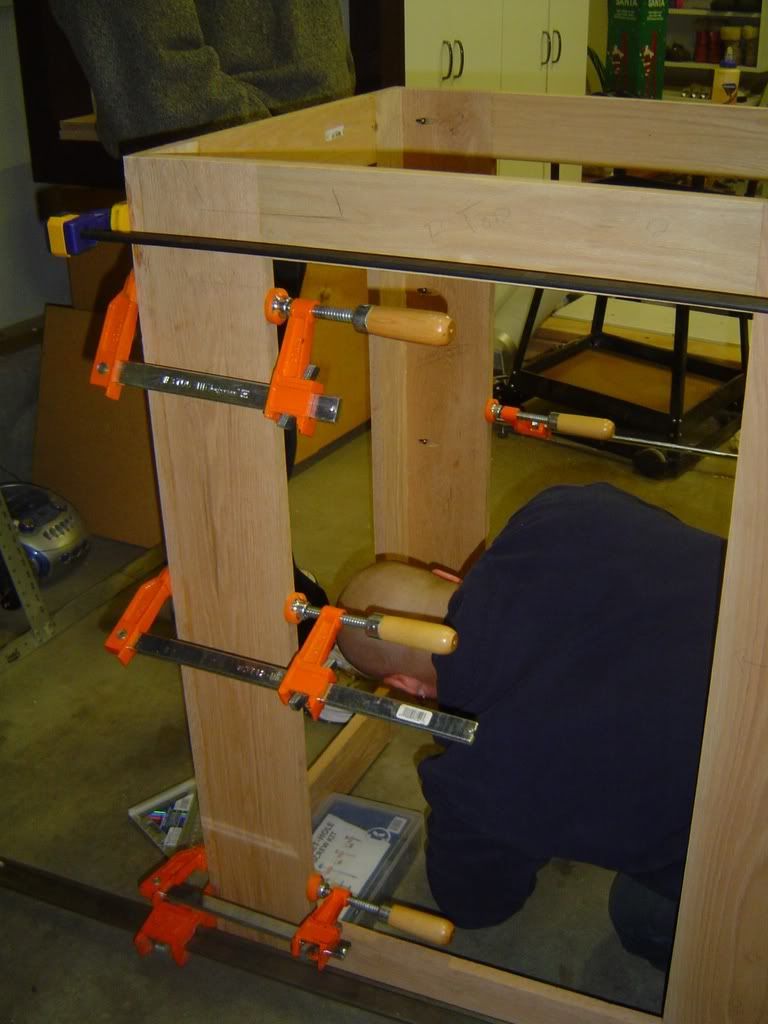 And sliding it in place, fits like a glove, like it was made for it   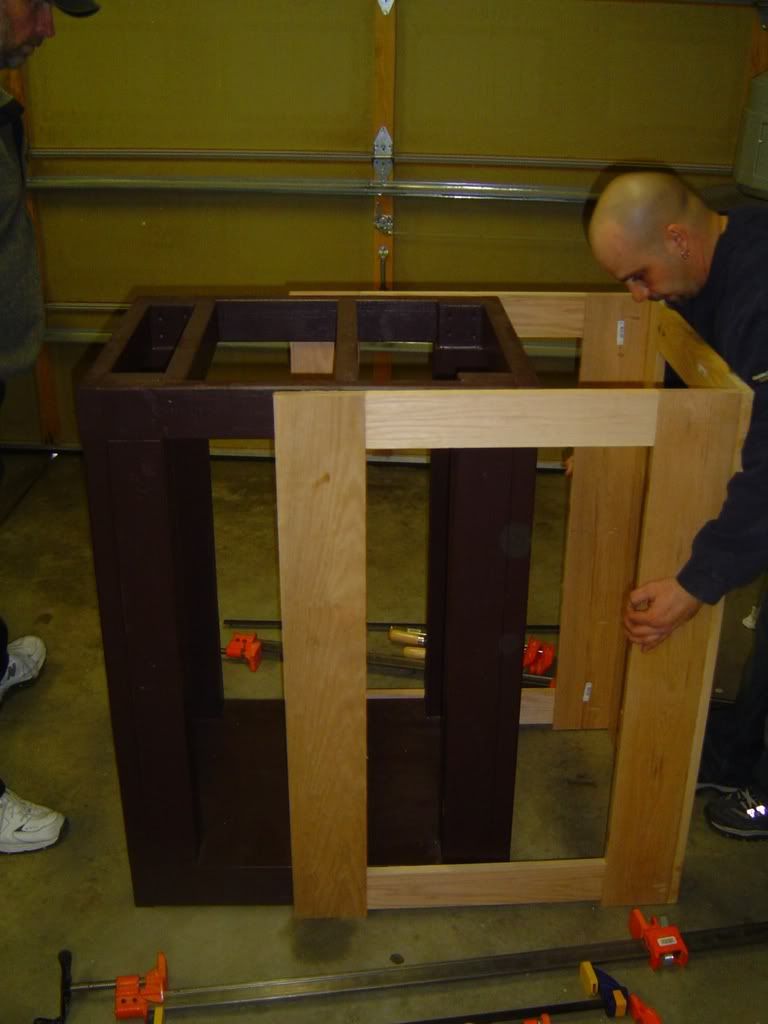 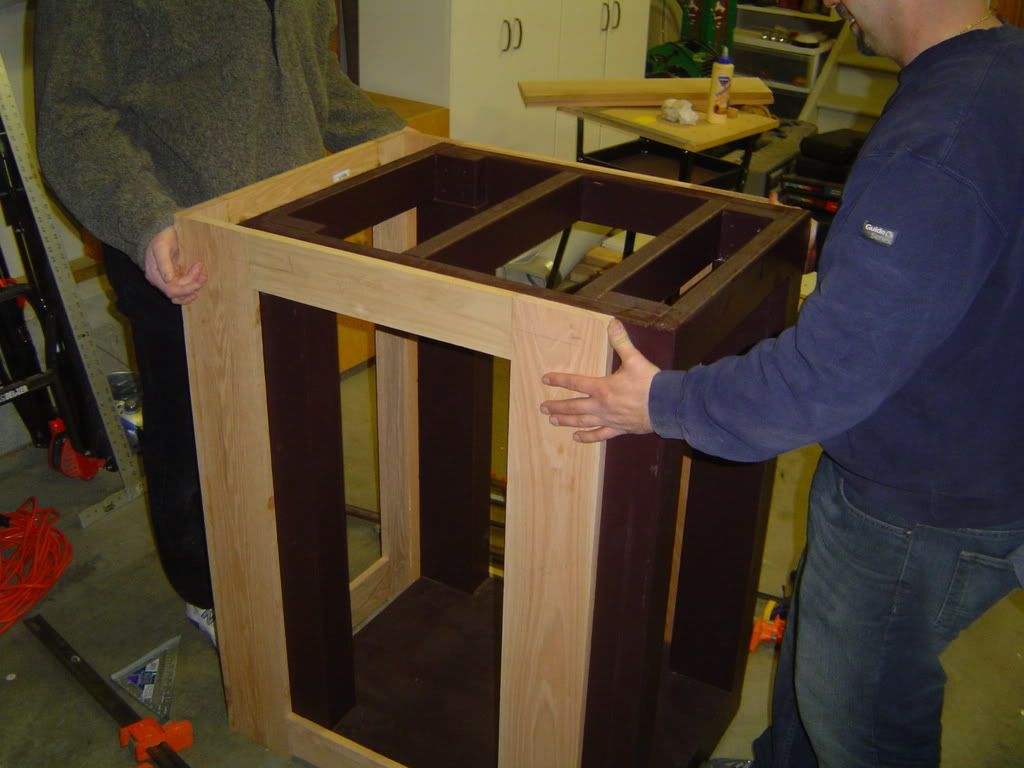
__________________
Make it a Great Day!!!! Current Tank Info: 60 gal SPS cube, with 25 gal refugium, 400W MH, DIY Lumenarc III, DIY skimmer, DIY stand and canopy. 40 breeder LPS with 40 gallon sump, DIY stand, 250W MH |
|
|
|
|
03/11/2008, 10:44 PM
|
#11 |
|
Registered Member
Join Date: Dec 2003
Location: Denver, Colorado
Posts: 9,579
|
Nailin er down
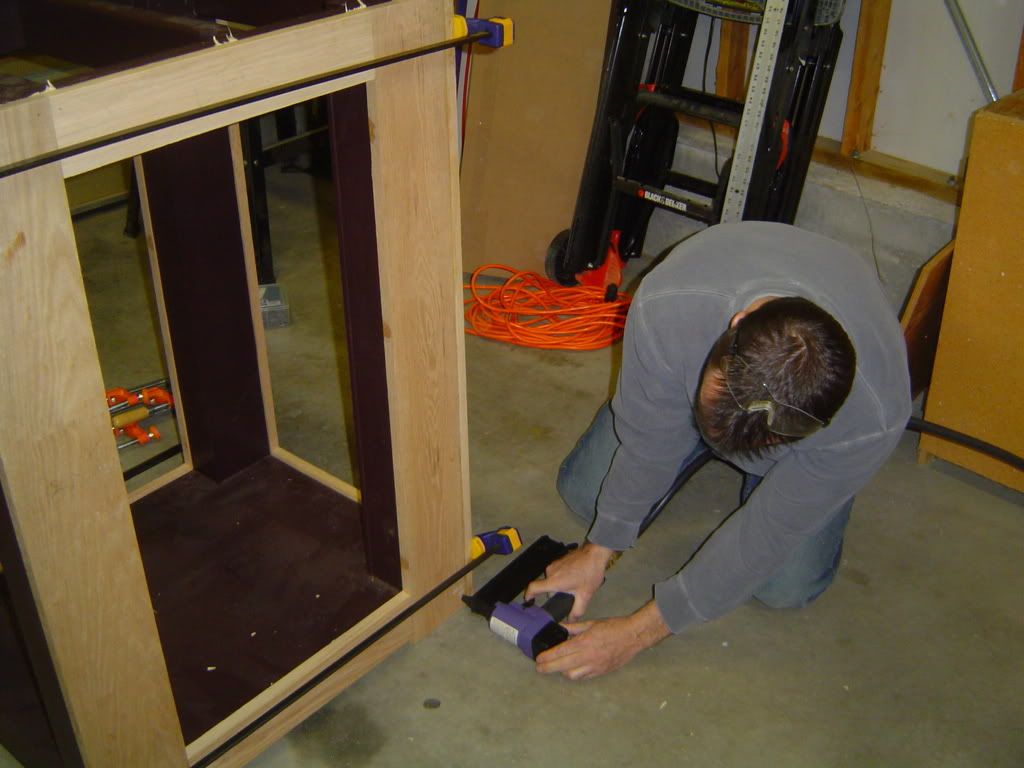  Bottom shot 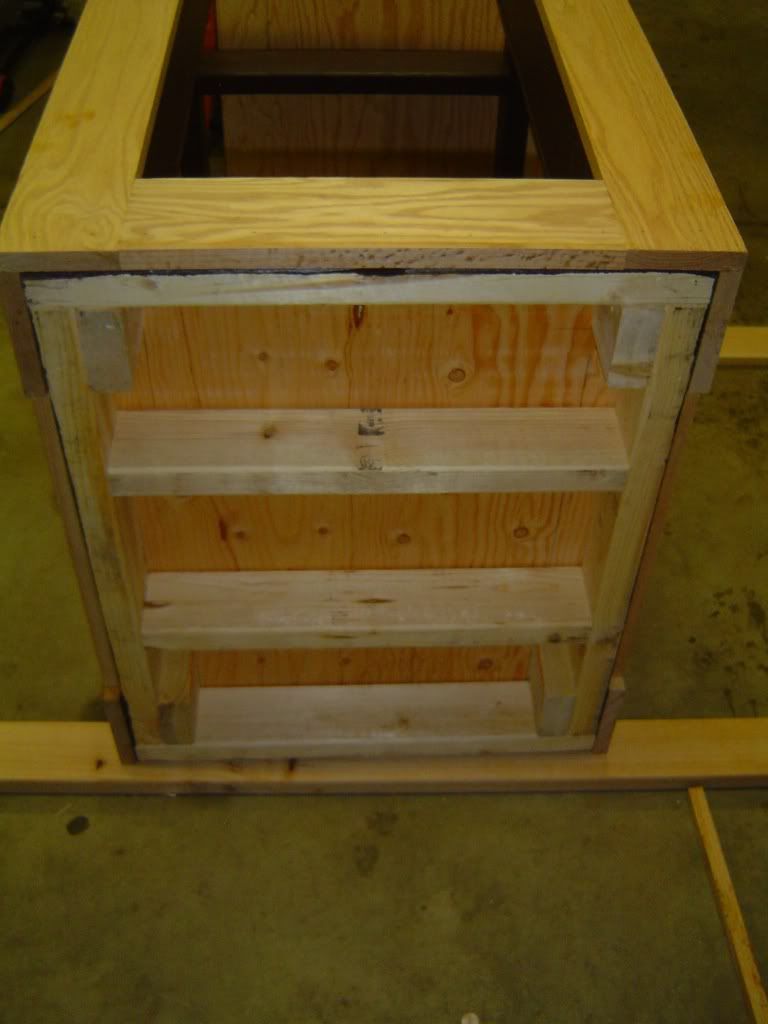 Some filler pieces 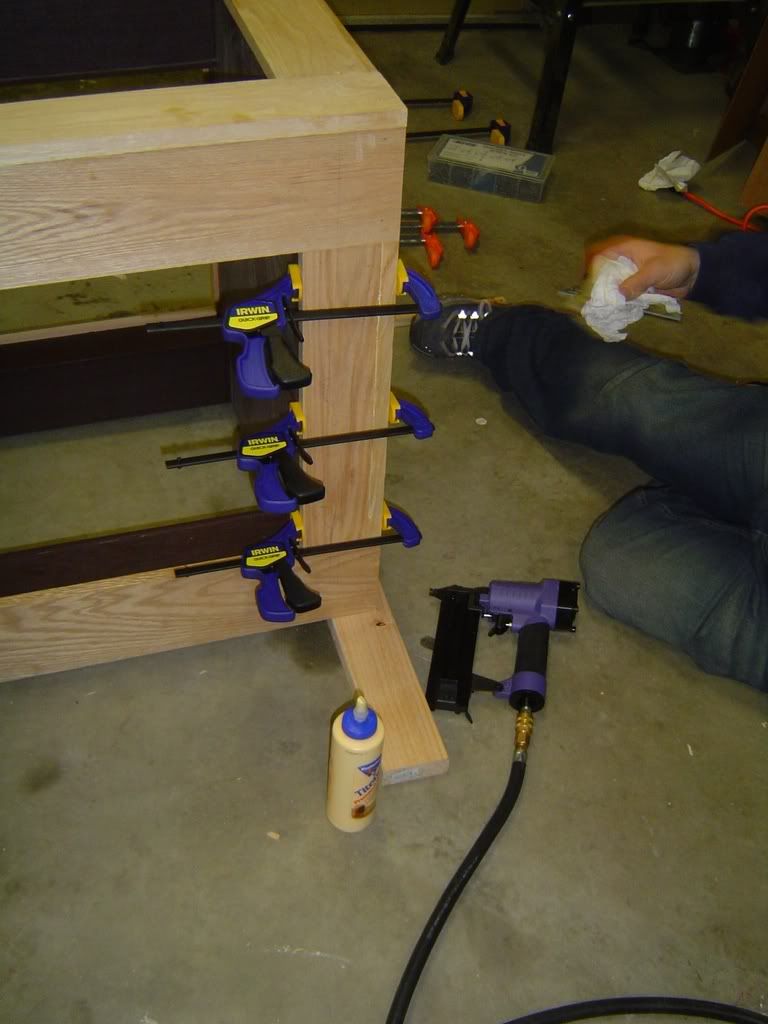 Done!! Front left 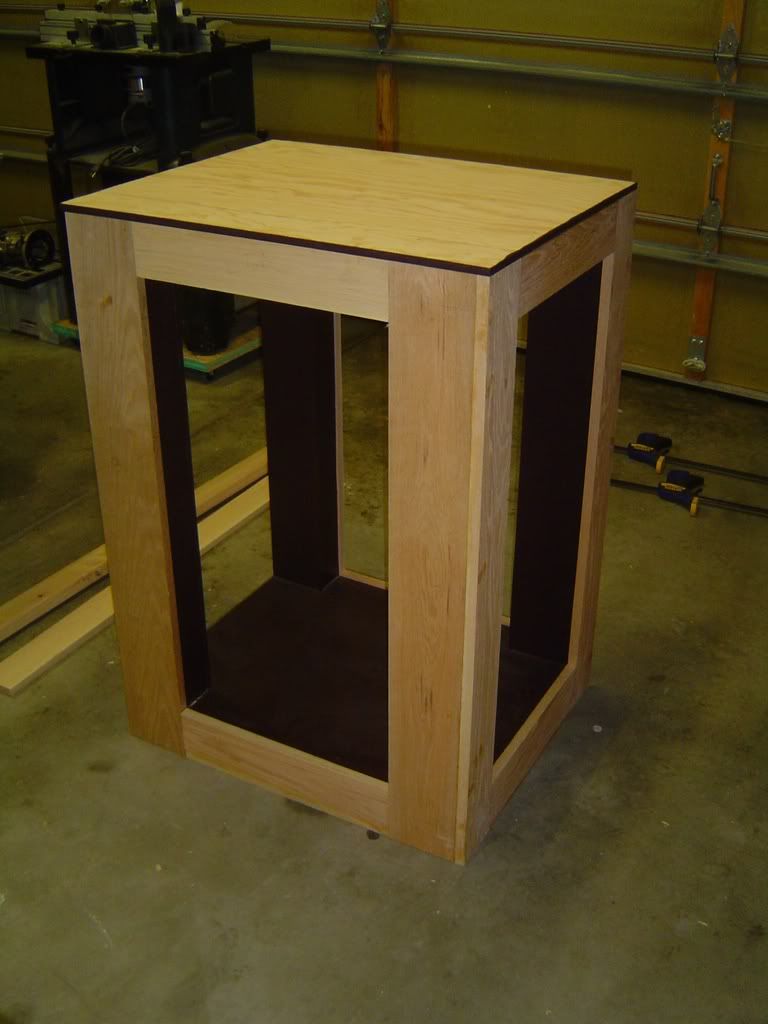 Back right 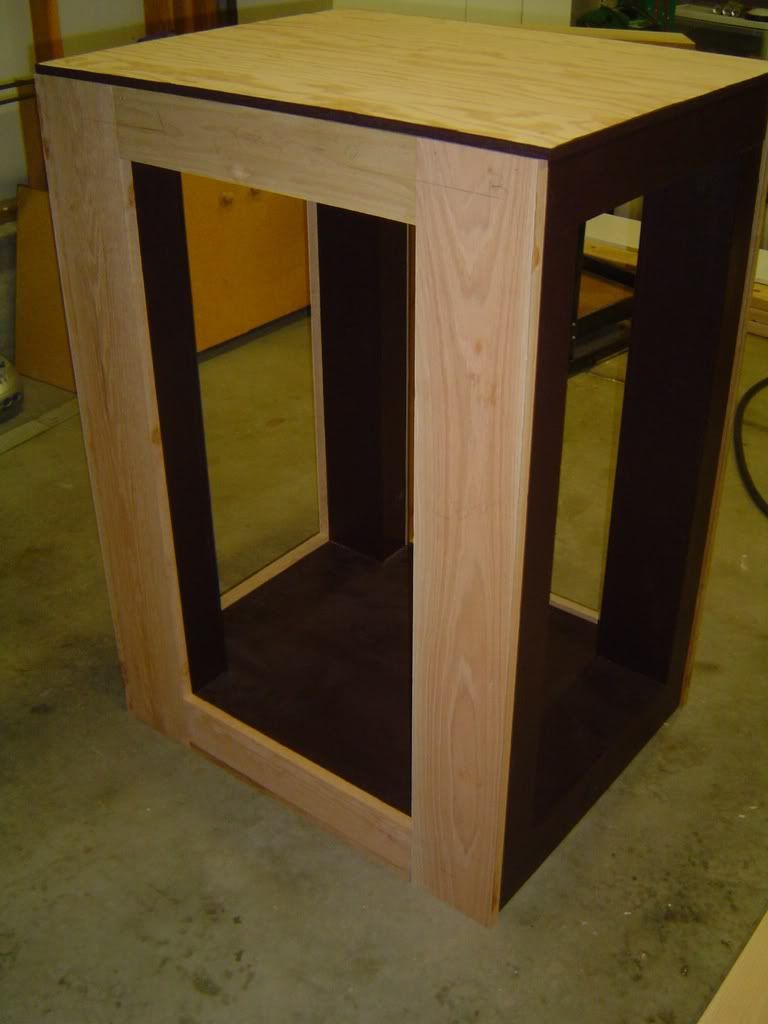
__________________
Make it a Great Day!!!! Current Tank Info: 60 gal SPS cube, with 25 gal refugium, 400W MH, DIY Lumenarc III, DIY skimmer, DIY stand and canopy. 40 breeder LPS with 40 gallon sump, DIY stand, 250W MH |
|
|
|
|
03/11/2008, 10:46 PM
|
#12 |
|
NULL
Join Date: Mar 2007
Posts: 977
|
Hey man, gotta sweet setup coming along! Cant wait to see more pics
__________________
-Marc |
|
|
|
|
03/11/2008, 10:54 PM
|
#13 | |
|
Registered Member
Join Date: Jan 2007
Location: Fl/Pa now
Posts: 456
|
Quote:
thanks again..lee
__________________
crayons go one drawer higher Current Tank Info: year 1/2 still new 90rr :( |
|
|
|
|
|
03/11/2008, 10:59 PM
|
#14 |
|
rppvt
Join Date: May 2005
Location: Los Angeles
Posts: 484
|
Forget the STAND! I want the GARAGE!
|
|
|
|
|
03/11/2008, 11:04 PM
|
#15 |
|
Registered Member
Join Date: Jan 2008
Location: Pompano Beach, Fl
Posts: 315
|
sweet man! coming along nicely. actually setting up a new 150 gal. myself
|
|
|
|
|
03/11/2008, 11:06 PM
|
#16 |
|
Registered Member
Join Date: Dec 2003
Location: Denver, Colorado
Posts: 9,579
|
No problen leebo_28, I hope you can help out the relatives.
Thanks rppvt, That's our wood shop we put together over at my buddy Brians house. We both wanted a wood shop, and he had some things and I had some things. So we combined what we had and went and got some other stuff together and split the costs. Works out great!! Thanks Robgixxer, how is your build going?
__________________
Make it a Great Day!!!! Current Tank Info: 60 gal SPS cube, with 25 gal refugium, 400W MH, DIY Lumenarc III, DIY skimmer, DIY stand and canopy. 40 breeder LPS with 40 gallon sump, DIY stand, 250W MH |
|
|
|
|
03/12/2008, 12:37 AM
|
#17 |
|
Registered Member
Join Date: Jan 2008
Location: florida
Posts: 180
|
you paint your fish tank stand before you paint your 'wood shop'
lol nice man!!!
__________________
click red house for 30L build thread! -Evan |
|
|
|
|
03/12/2008, 01:08 PM
|
#18 |
|
Registered Member
Join Date: Jan 2007
Location: Fl/Pa now
Posts: 456
|
updates?
__________________
crayons go one drawer higher Current Tank Info: year 1/2 still new 90rr :( |
|
|
|
|
03/12/2008, 05:45 PM
|
#19 |
|
Registered Member
Join Date: Dec 2003
Location: Denver, Colorado
Posts: 9,579
|
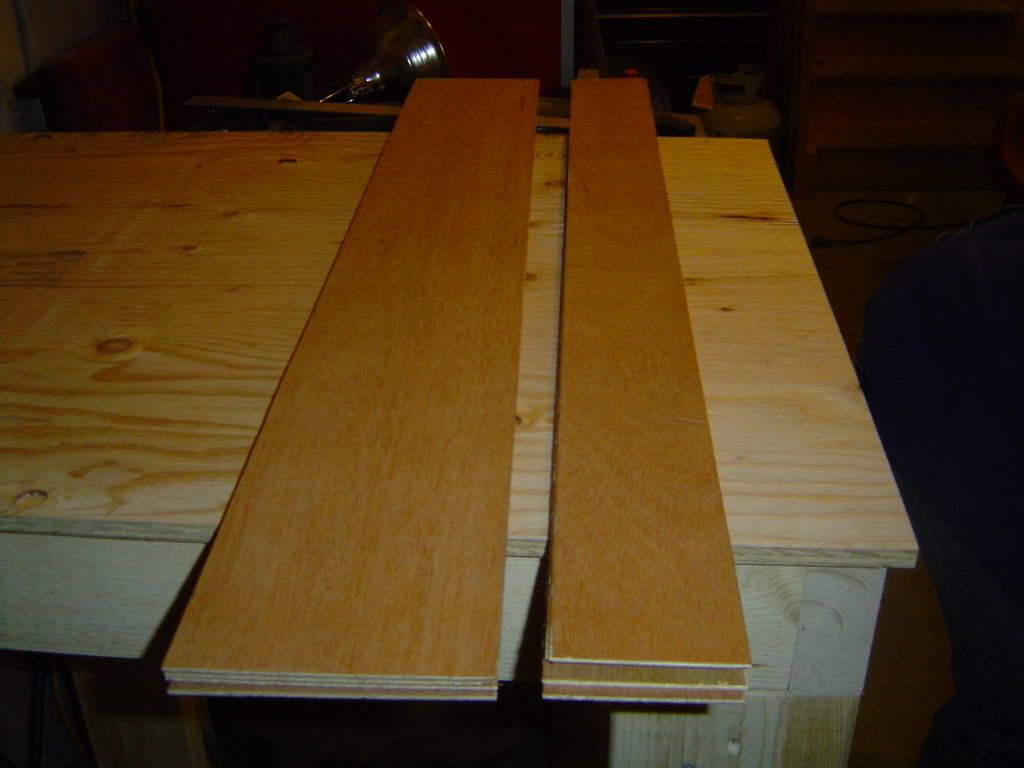
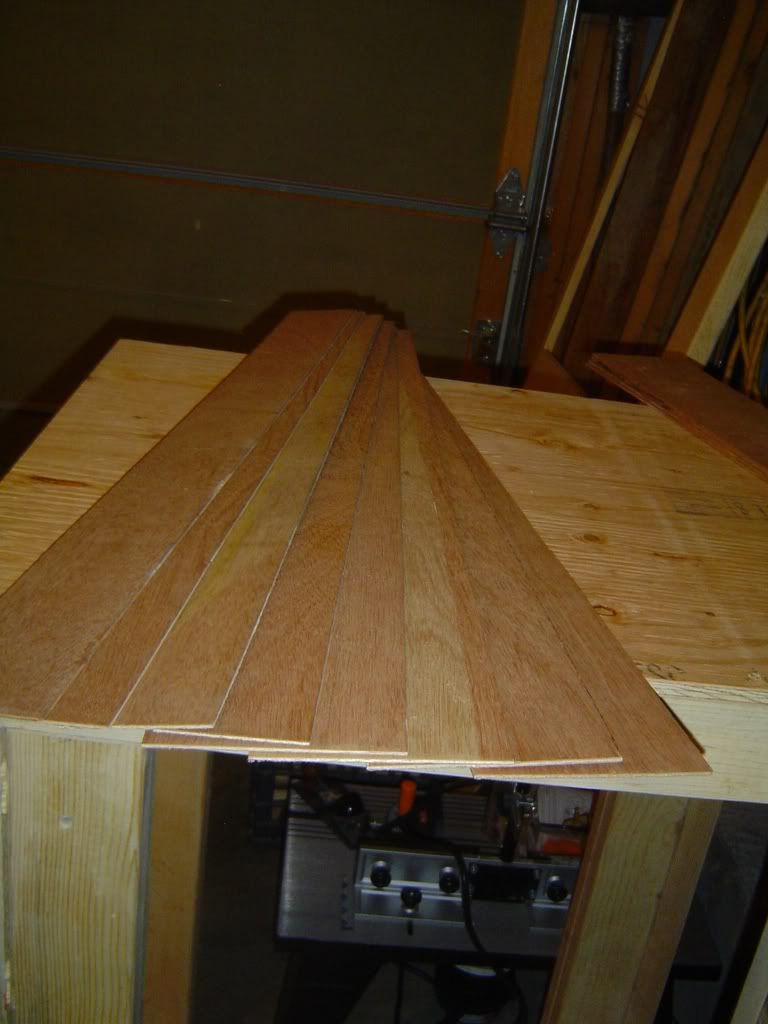
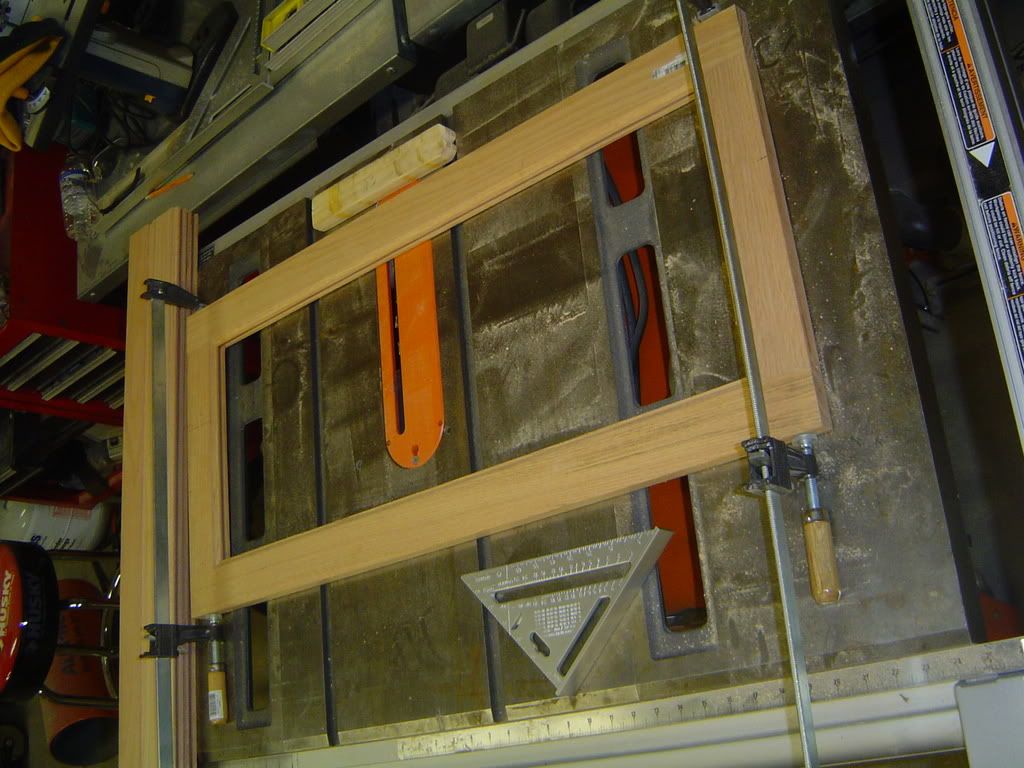
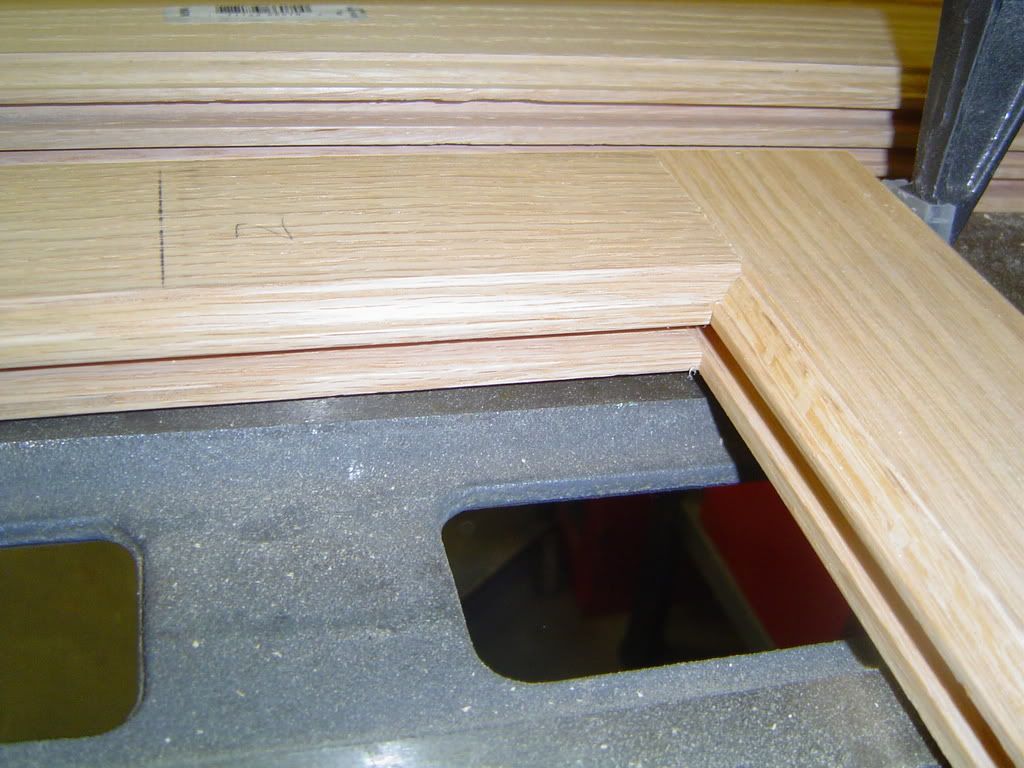
Ok, so on to the doors. I used a router kit from Rockler woodworking tools to cut the joints for the doors.
Here goes: 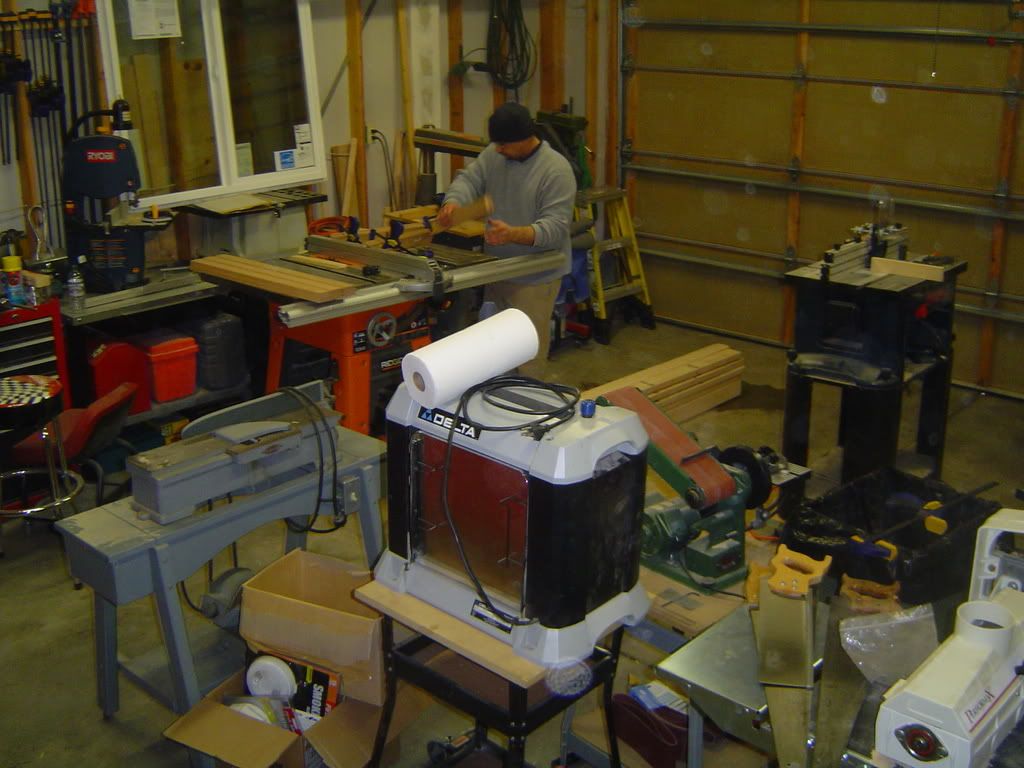 All the pieces got routed long ways. 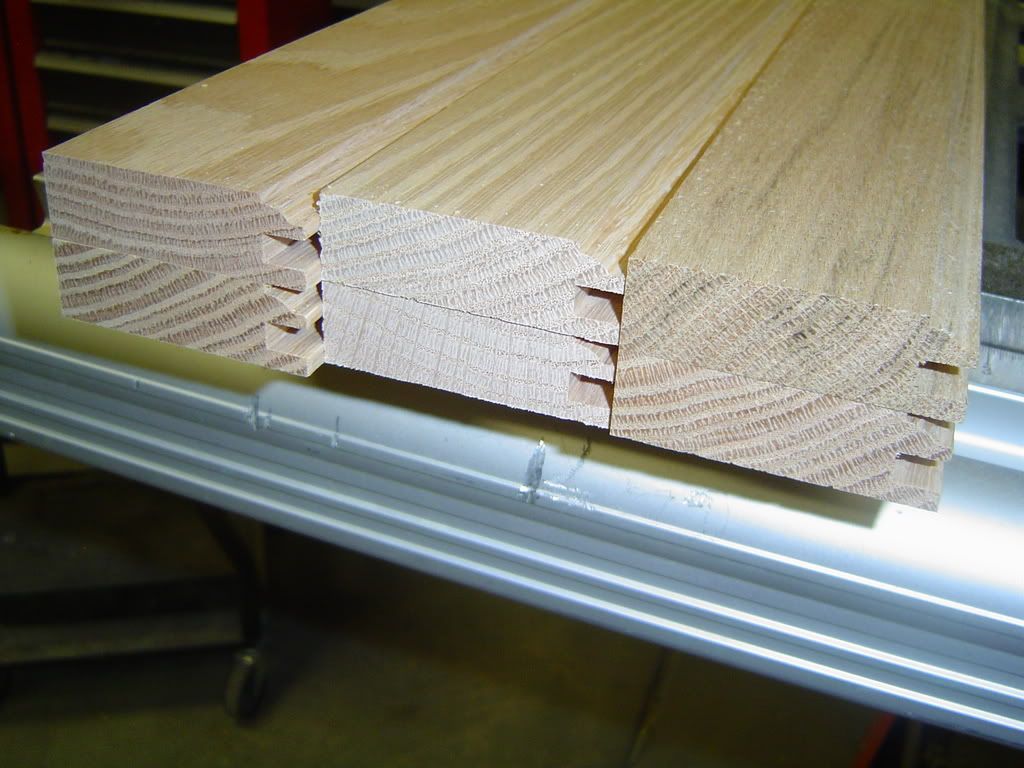 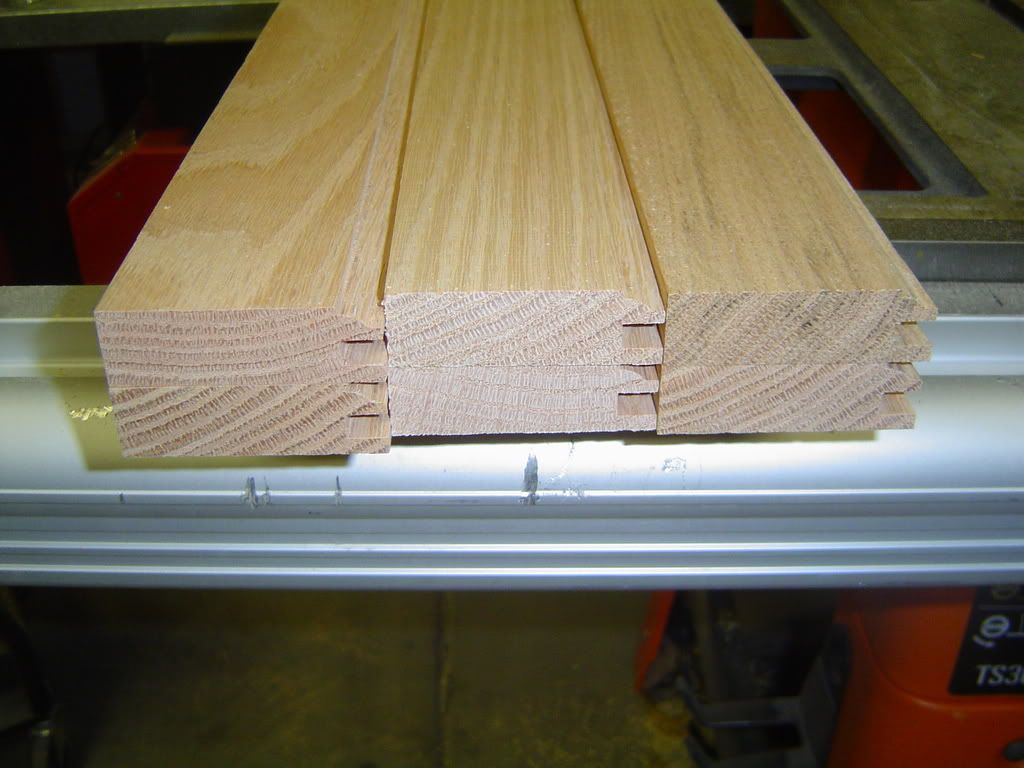 I clamped each set together and cut them to length. 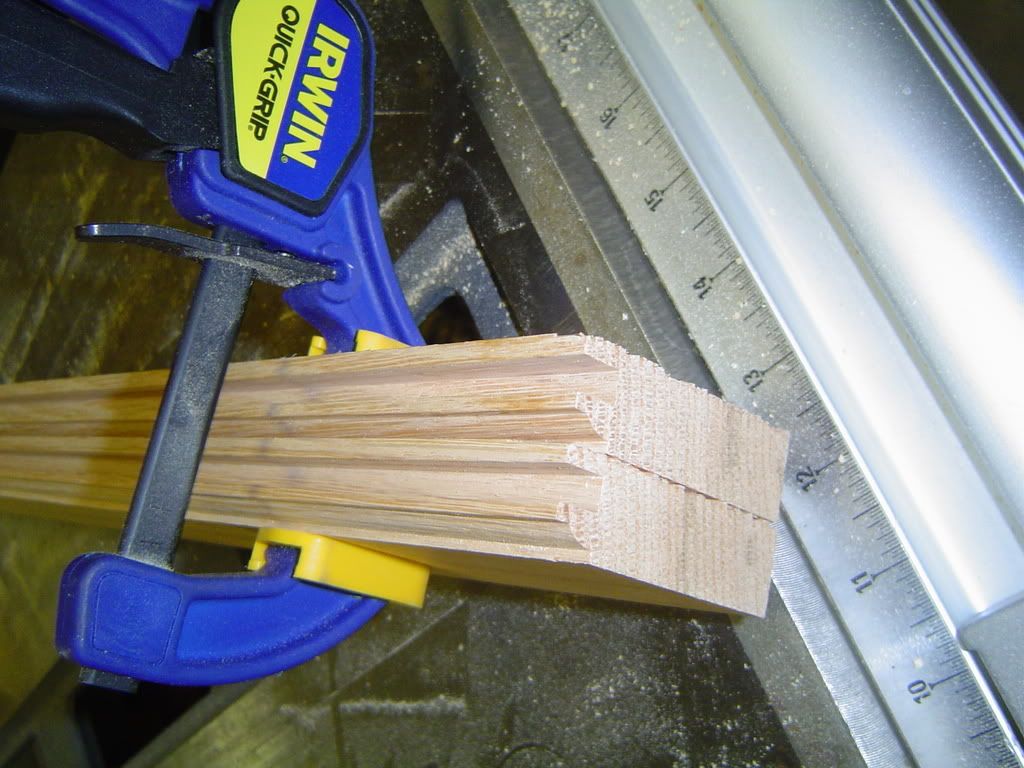 You can see the window in the back ground behind me, we put that in a couple weeks ago. We would work so long out in the shop, and go outside it was pitch black out and we would never know. It's great now, and tons more natural light. 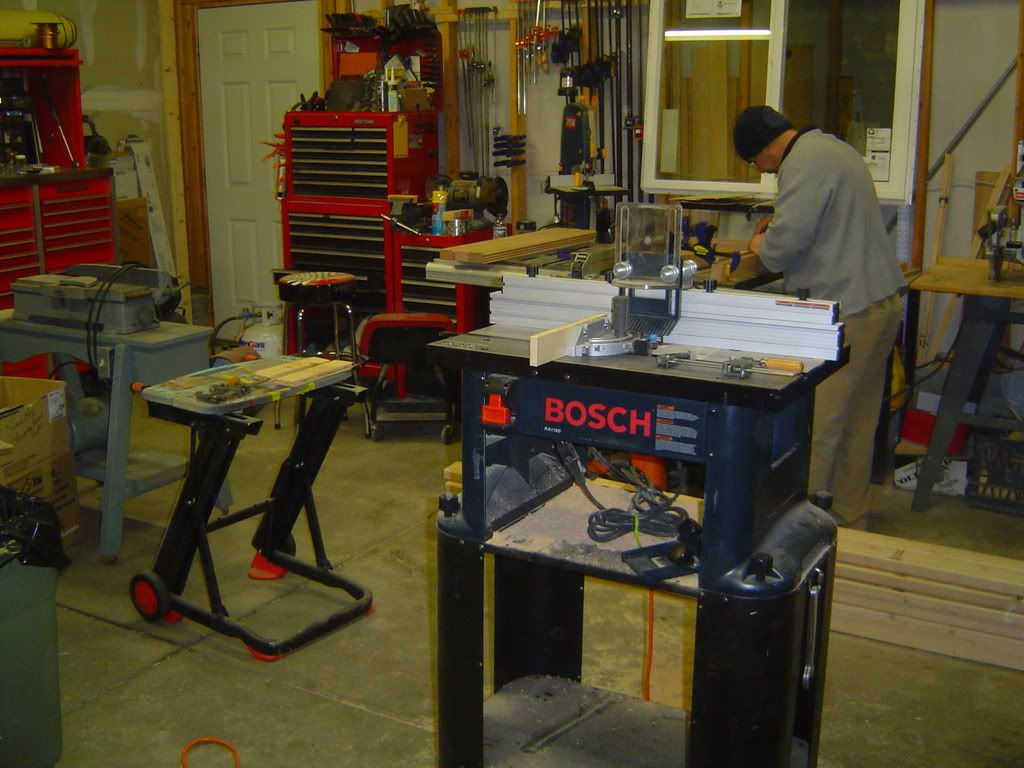 Here is a great fence we made to make routing the ends much easier. 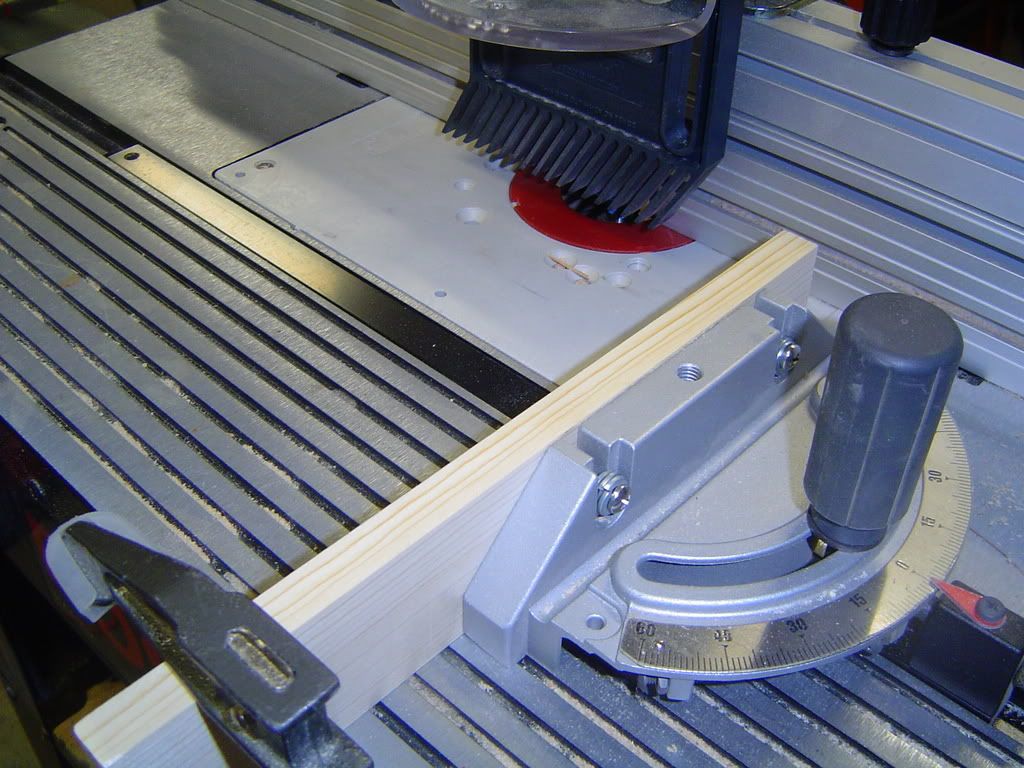
__________________
Make it a Great Day!!!! Current Tank Info: 60 gal SPS cube, with 25 gal refugium, 400W MH, DIY Lumenarc III, DIY skimmer, DIY stand and canopy. 40 breeder LPS with 40 gallon sump, DIY stand, 250W MH |
|
|
|
|
03/12/2008, 05:49 PM
|
#20 |
|
Registered Member
Join Date: Dec 2003
Location: Denver, Colorado
Posts: 9,579
|
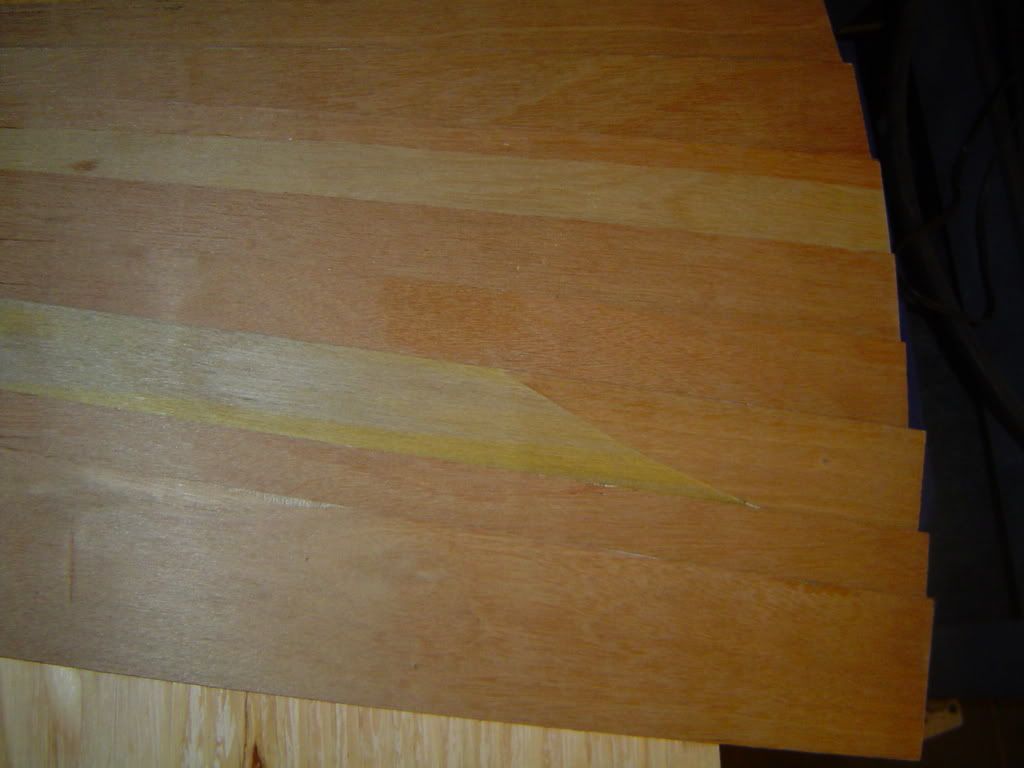
Dry fitting the frames.
  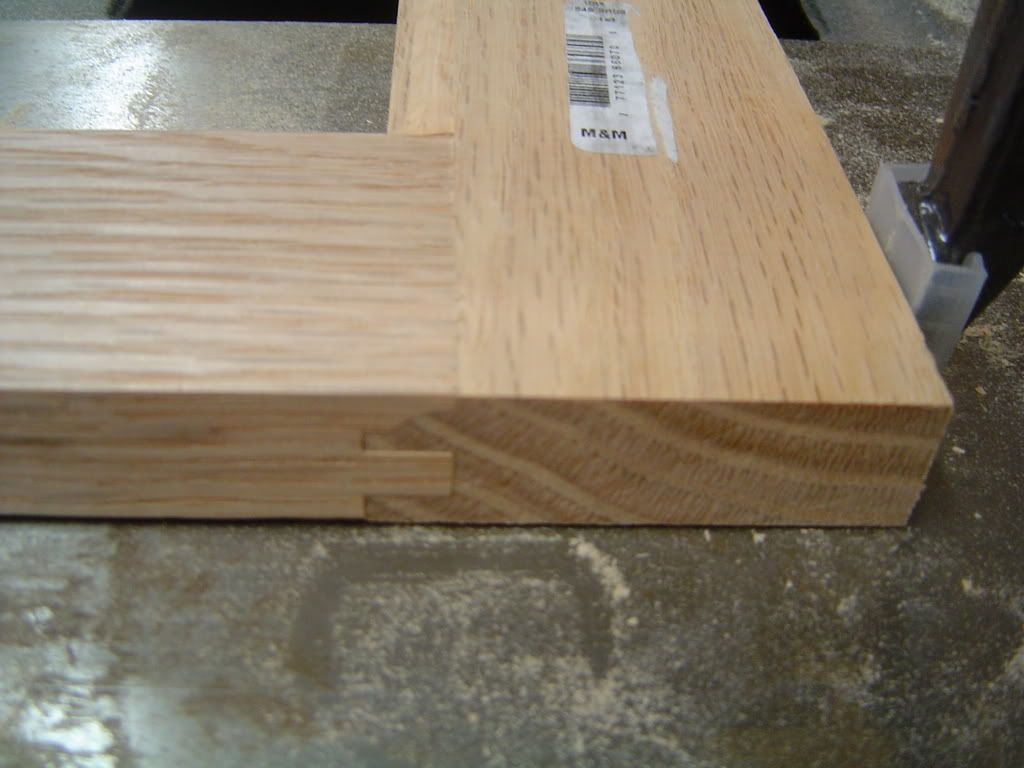 After this, I cut the center panels, glued all joints and clamped them all together.
__________________
Make it a Great Day!!!! Current Tank Info: 60 gal SPS cube, with 25 gal refugium, 400W MH, DIY Lumenarc III, DIY skimmer, DIY stand and canopy. 40 breeder LPS with 40 gallon sump, DIY stand, 250W MH |
|
|
|
|
03/12/2008, 06:18 PM
|
#21 |
|
Registered Member
Join Date: Dec 2003
Location: Denver, Colorado
Posts: 9,579
|
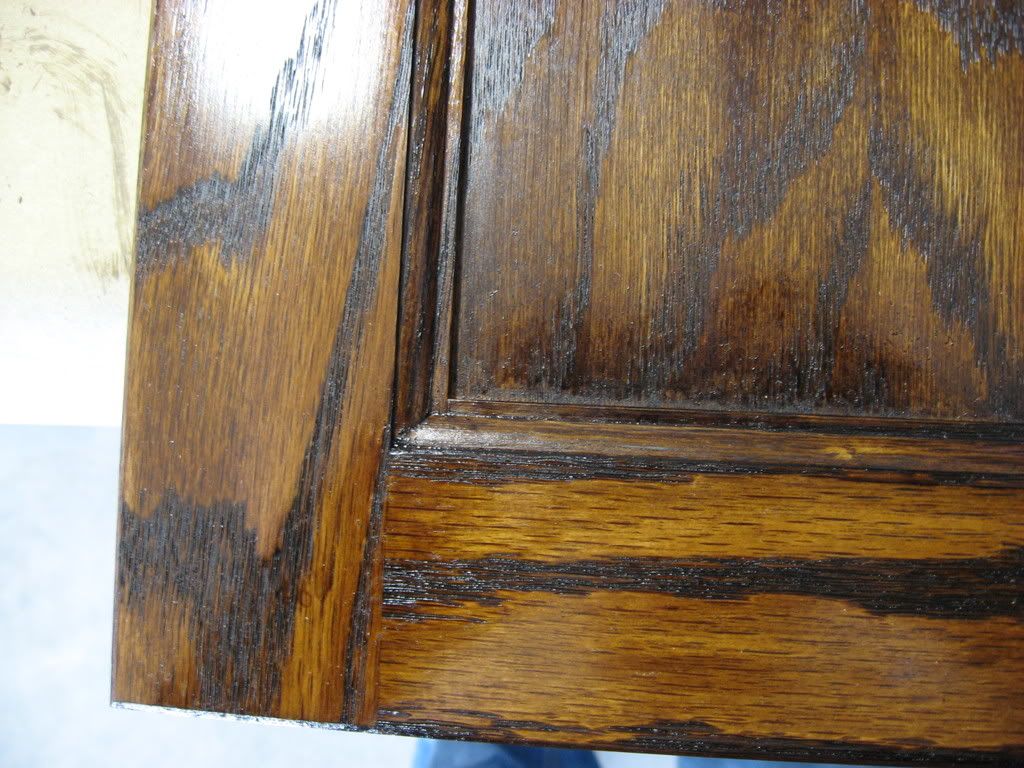
Alright, so I got the stand home, and started to slack on the photos. I sanded everything down with 180 grit to smooth and even everything out, then followed that up with 320.
This is the stain I used on it, great stuff. 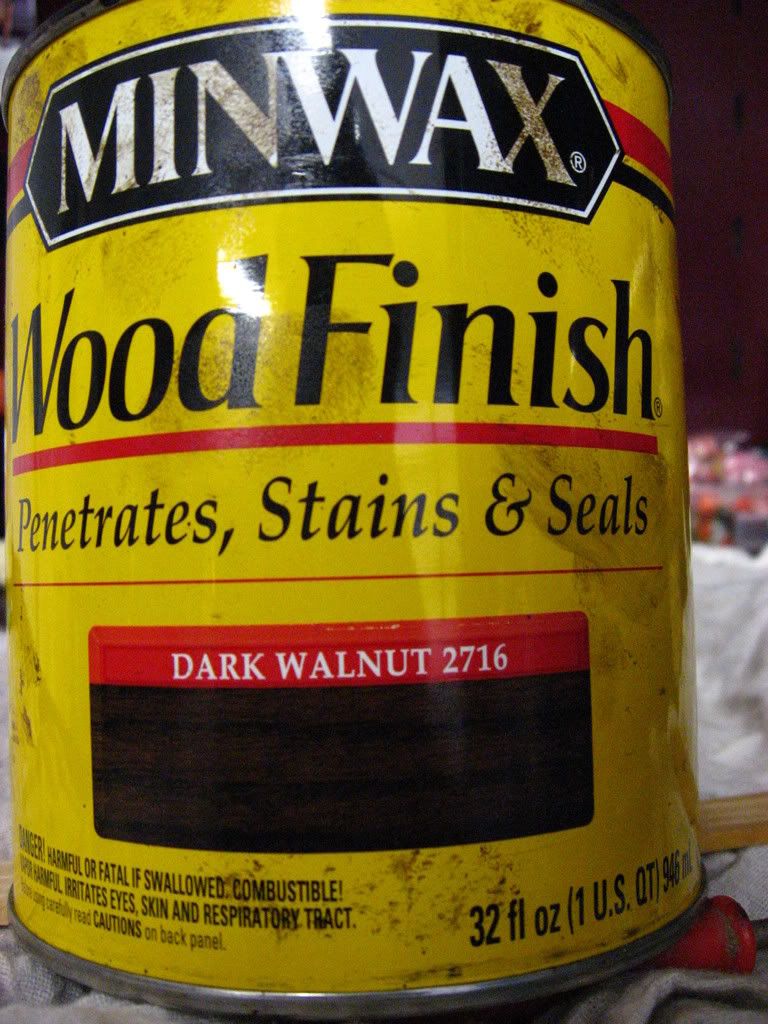 This is the putty i used  Here is the stand with 2 coats of stain on it 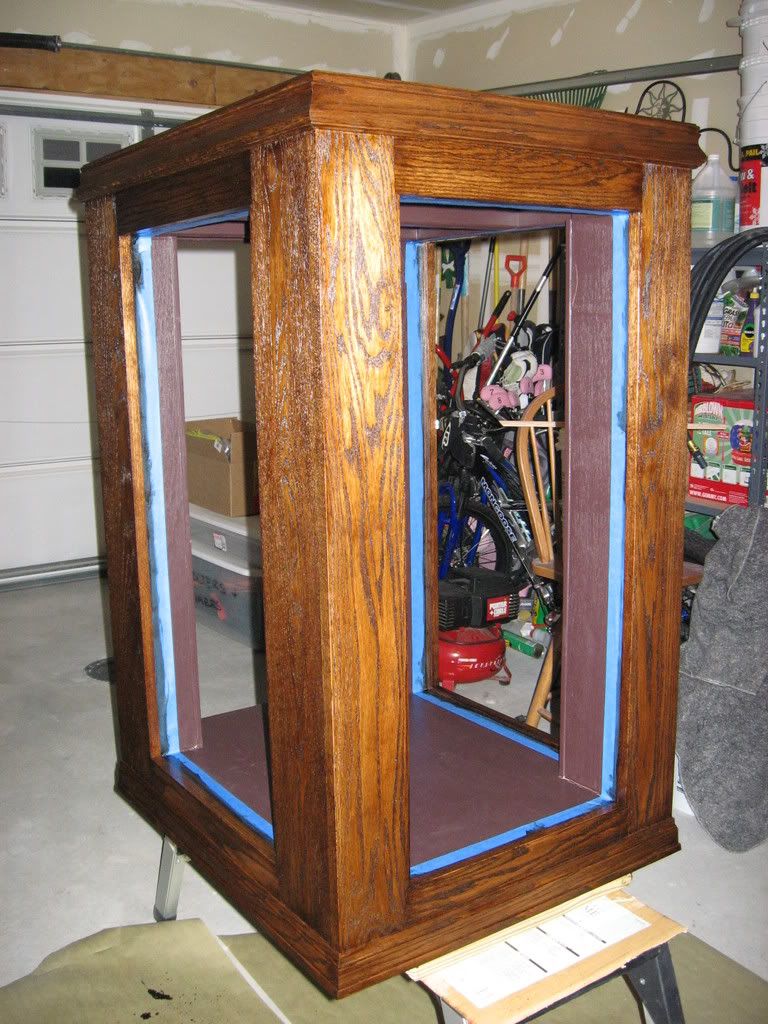 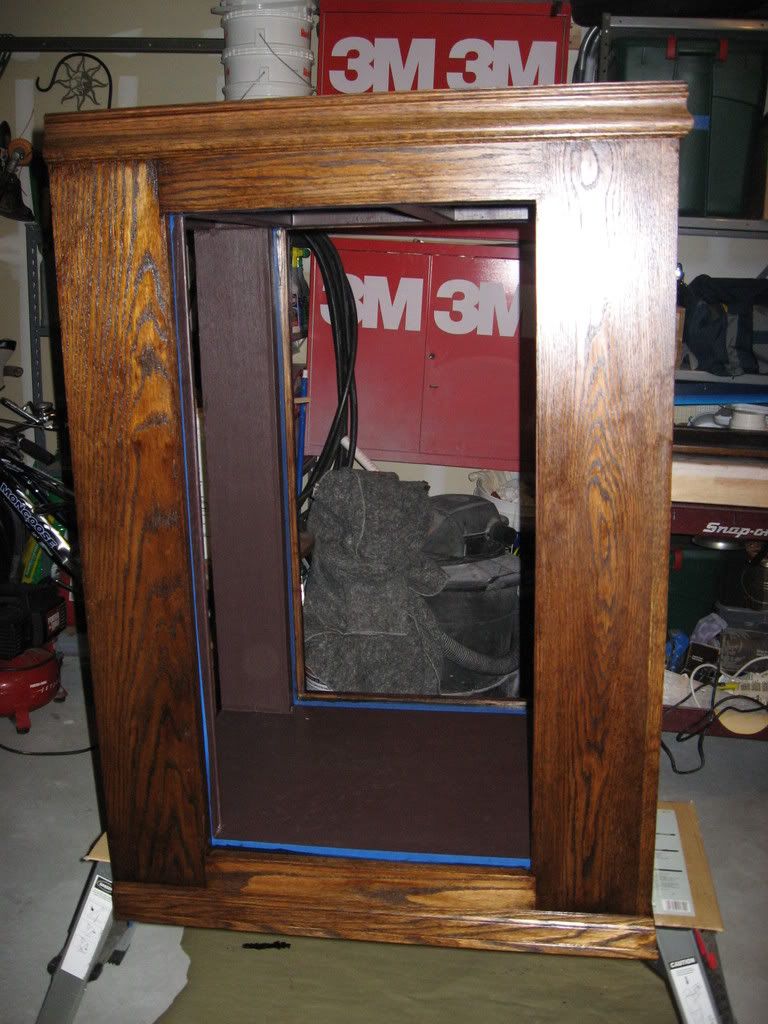 And the doors 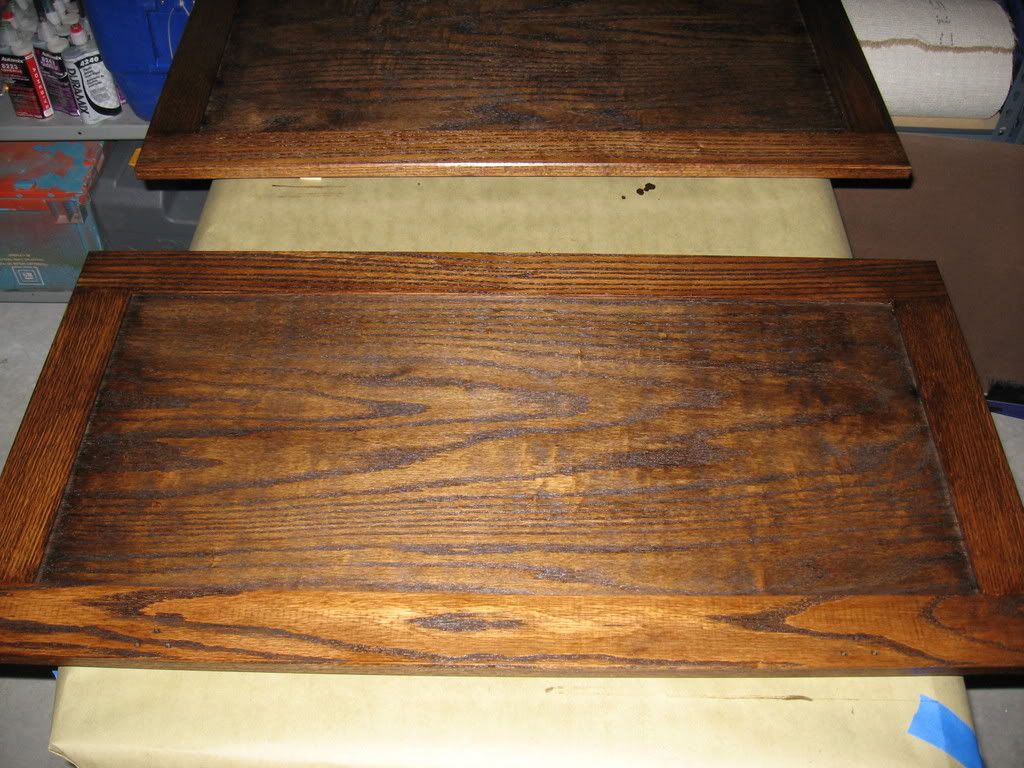 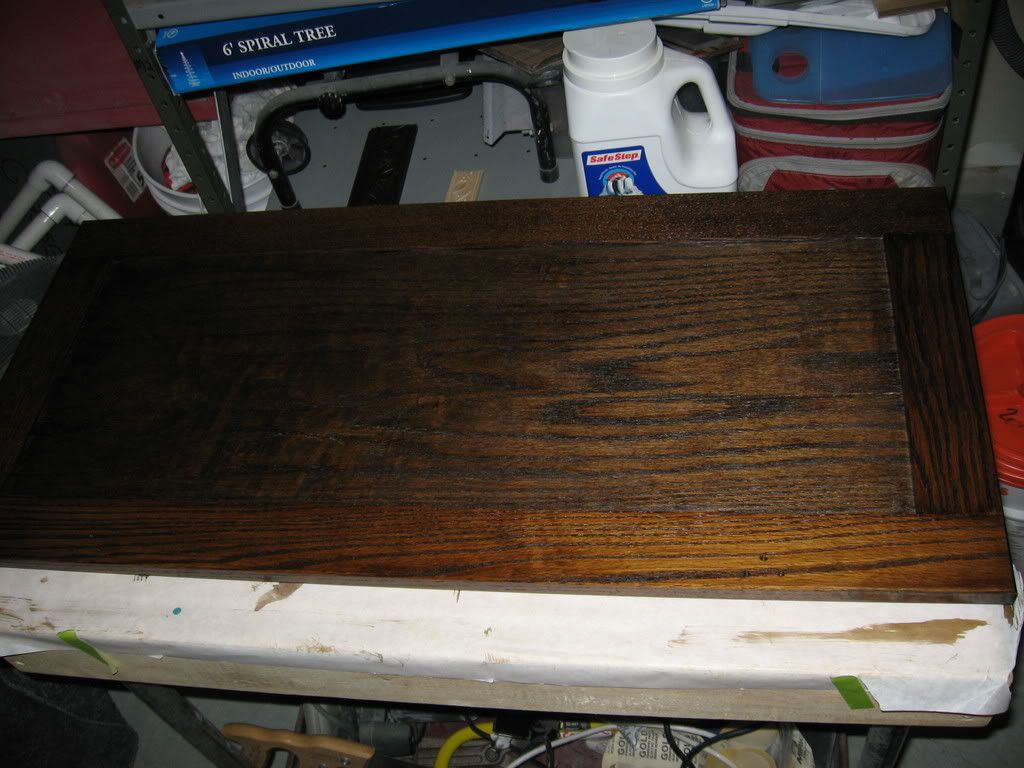
__________________
Make it a Great Day!!!! Current Tank Info: 60 gal SPS cube, with 25 gal refugium, 400W MH, DIY Lumenarc III, DIY skimmer, DIY stand and canopy. 40 breeder LPS with 40 gallon sump, DIY stand, 250W MH |
|
|
|
|
03/12/2008, 06:23 PM
|
#22 |
|
Registered Member
Join Date: Dec 2003
Location: Denver, Colorado
Posts: 9,579
|
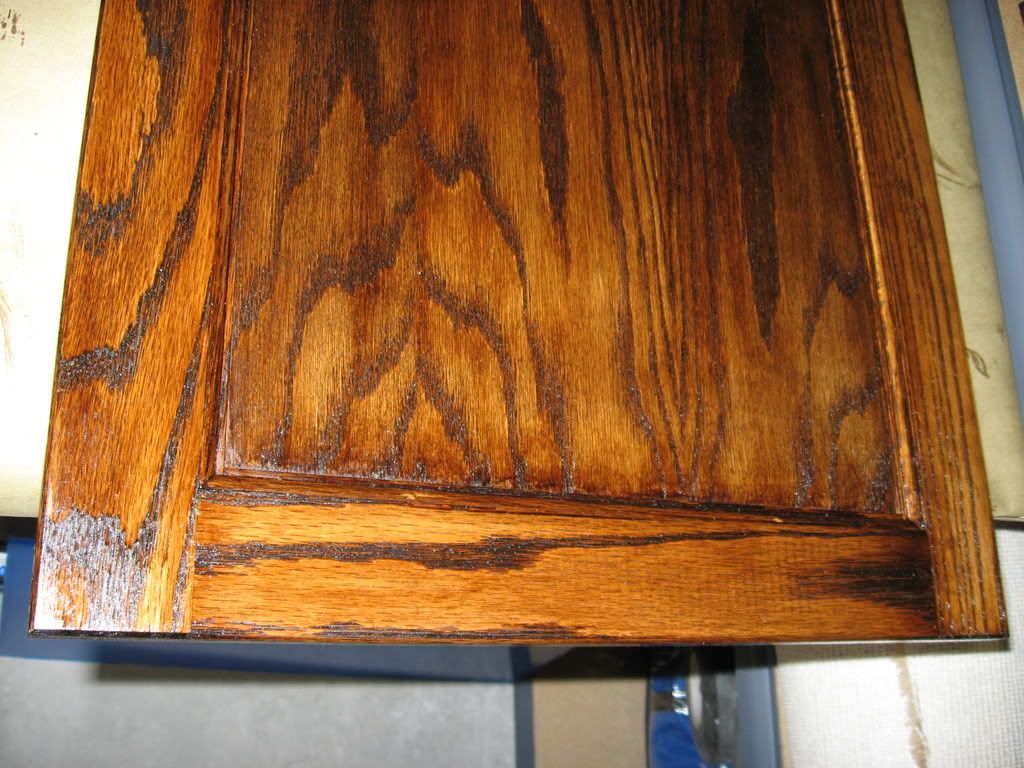
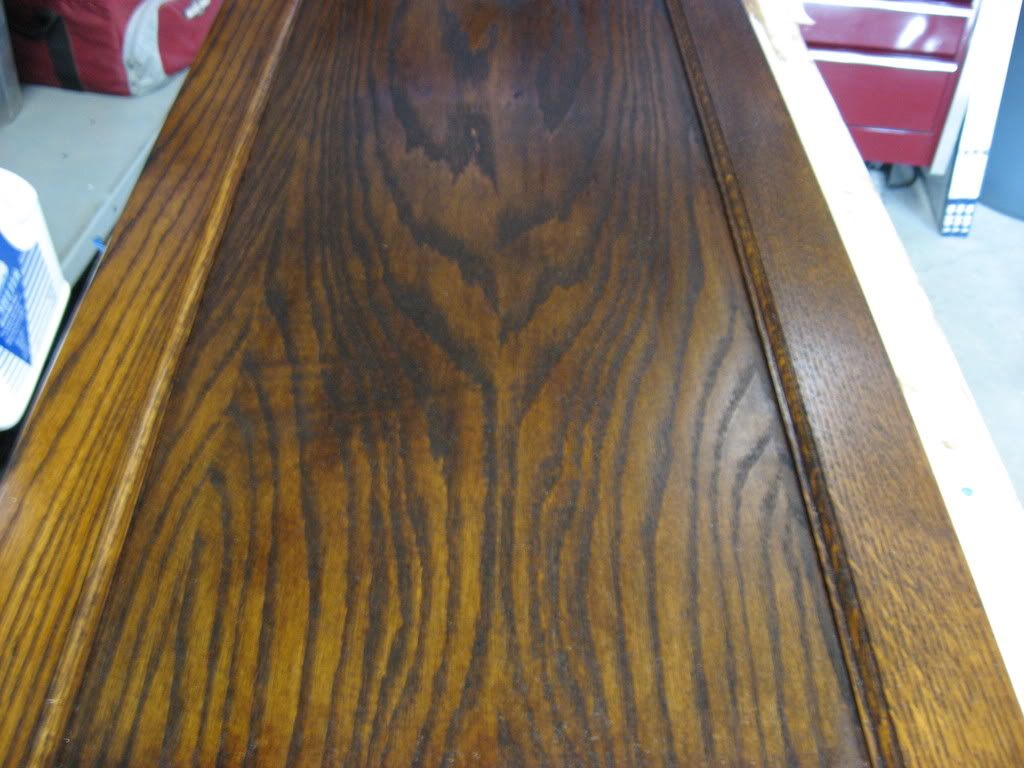
Here it is with 4 coats of stain on it.
__________________
Make it a Great Day!!!! Current Tank Info: 60 gal SPS cube, with 25 gal refugium, 400W MH, DIY Lumenarc III, DIY skimmer, DIY stand and canopy. 40 breeder LPS with 40 gallon sump, DIY stand, 250W MH |
|
|
|
|
03/12/2008, 06:27 PM
|
#23 |
|
Registered Member
Join Date: Dec 2003
Location: Denver, Colorado
Posts: 9,579
|
And some more
__________________
Make it a Great Day!!!! Current Tank Info: 60 gal SPS cube, with 25 gal refugium, 400W MH, DIY Lumenarc III, DIY skimmer, DIY stand and canopy. 40 breeder LPS with 40 gallon sump, DIY stand, 250W MH |
|
|
|
|
03/12/2008, 07:01 PM
|
#24 |
|
Registered Member
Join Date: Dec 2003
Location: Denver, Colorado
Posts: 9,579
|
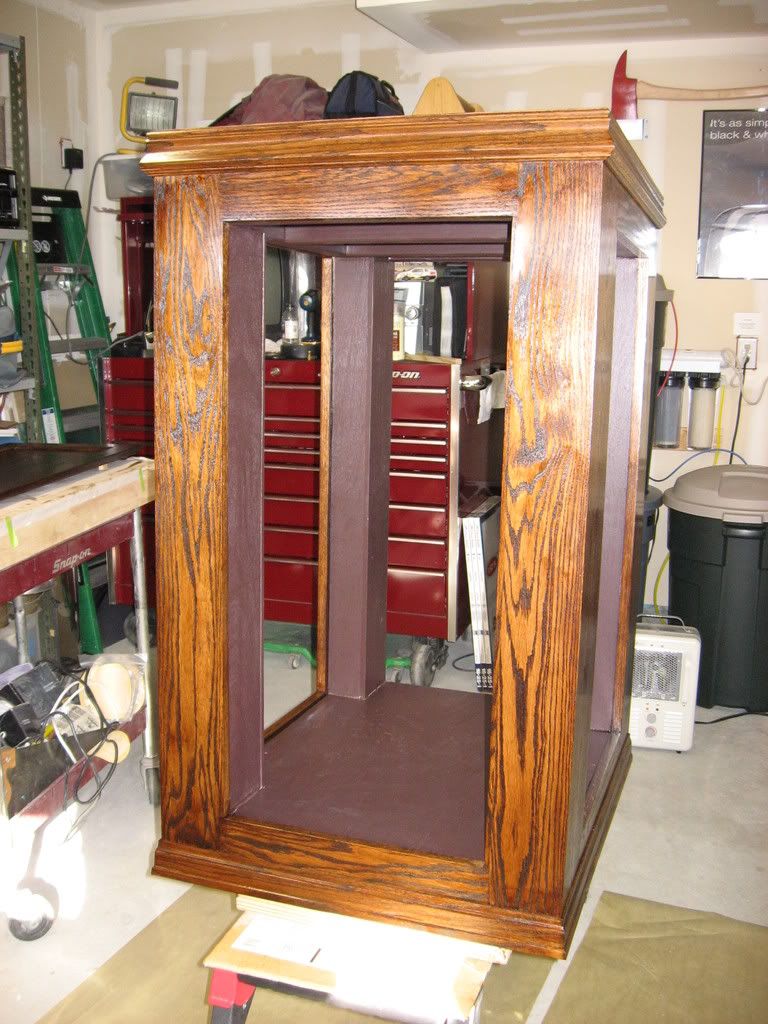
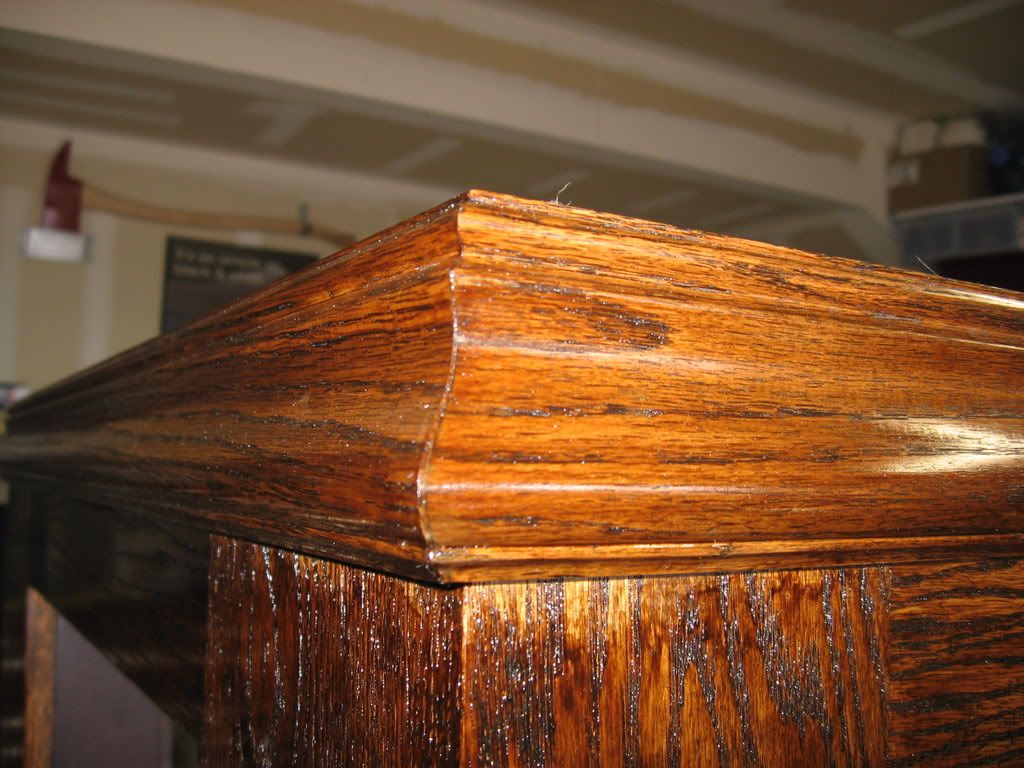
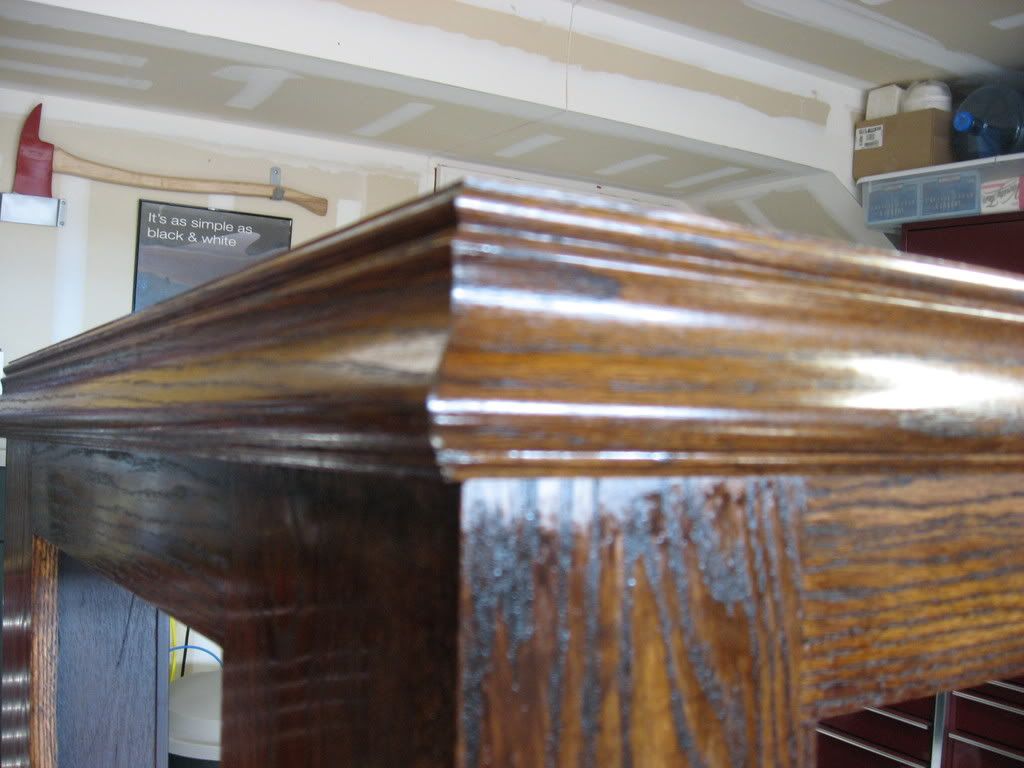
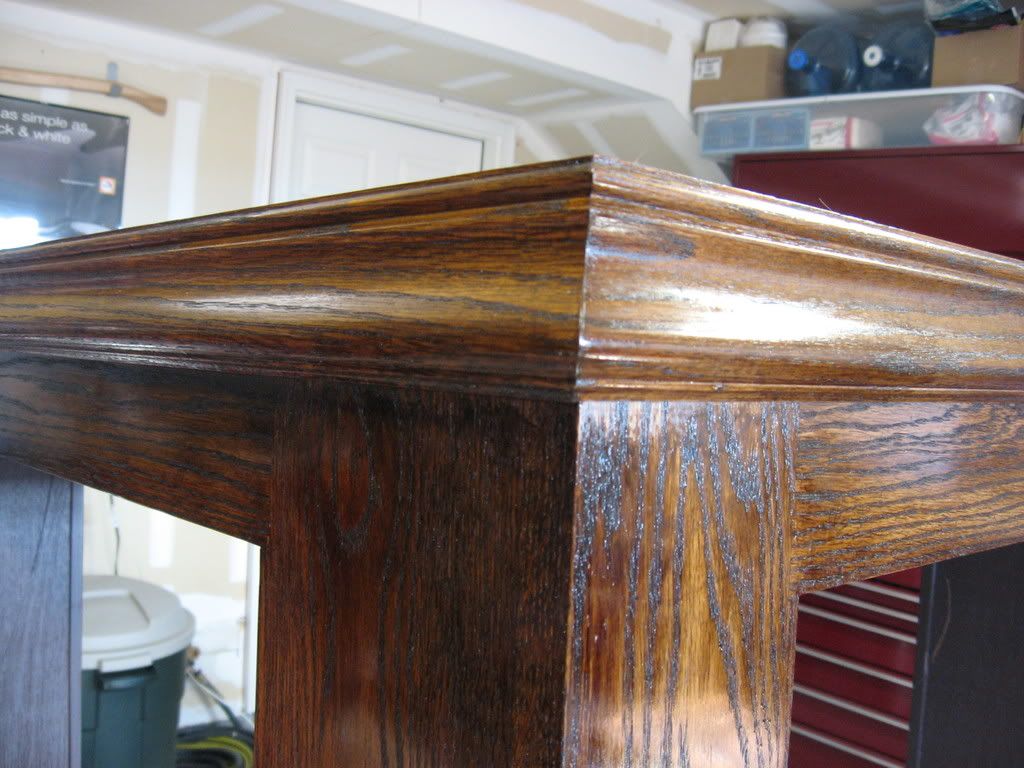
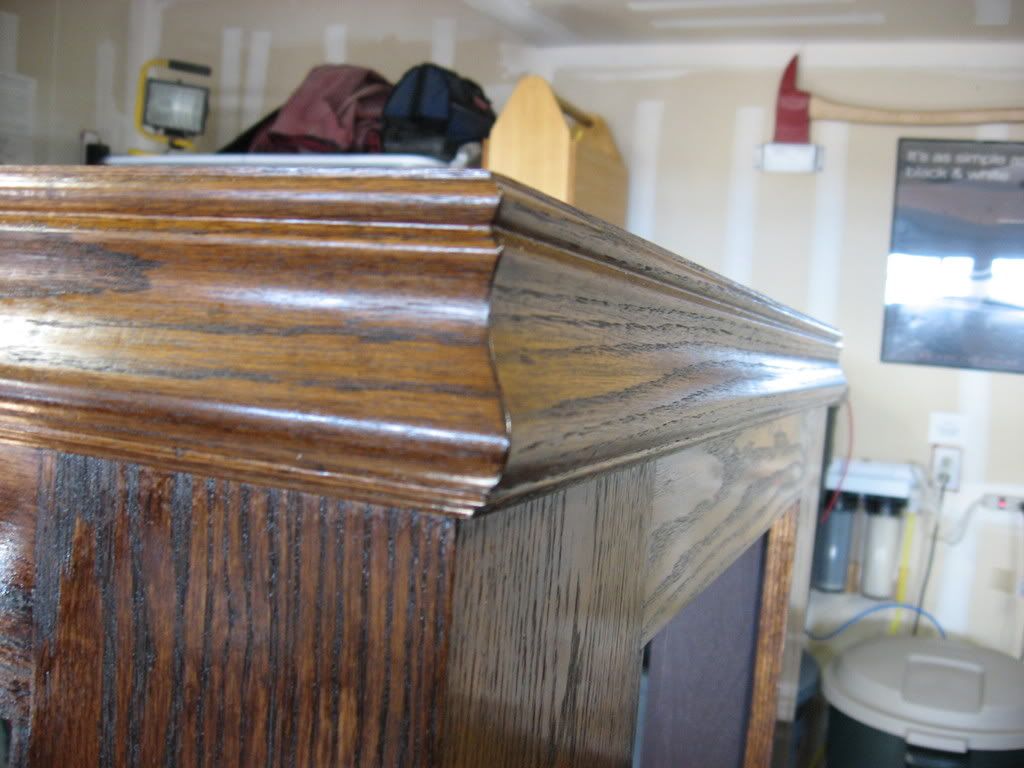
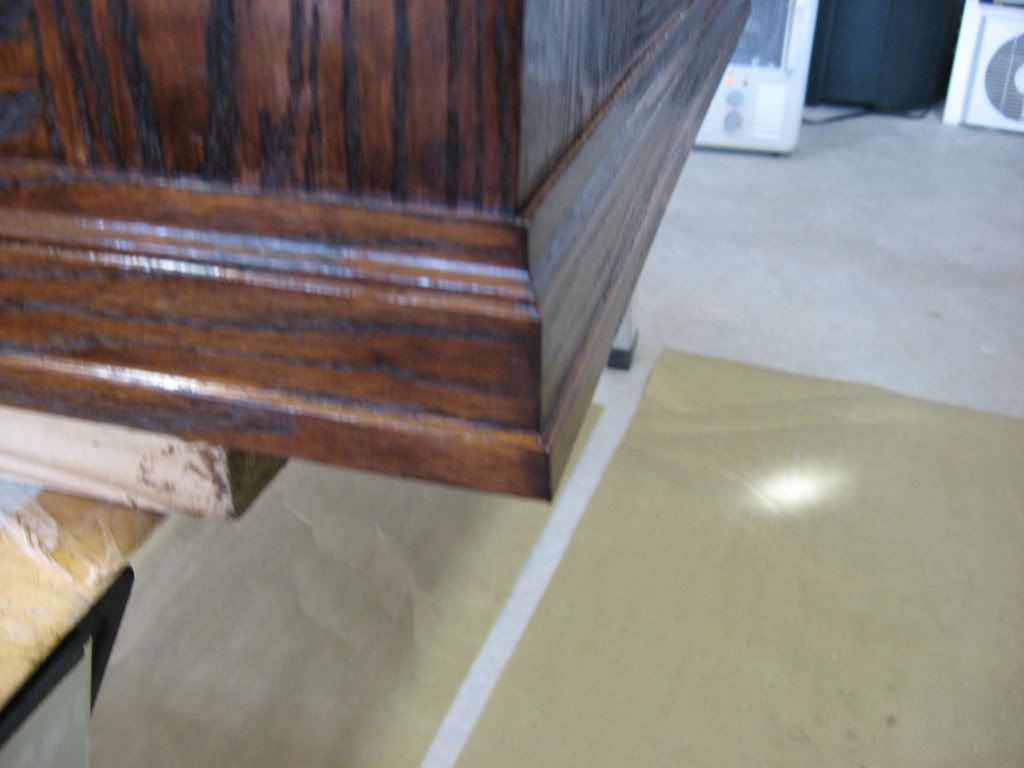
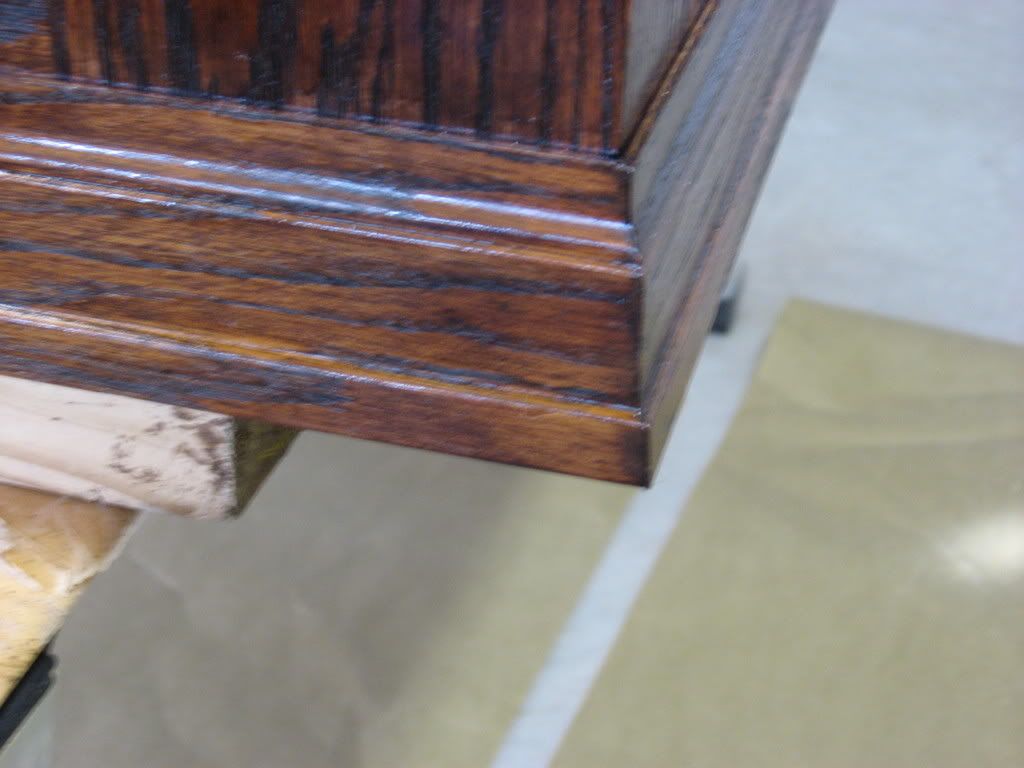
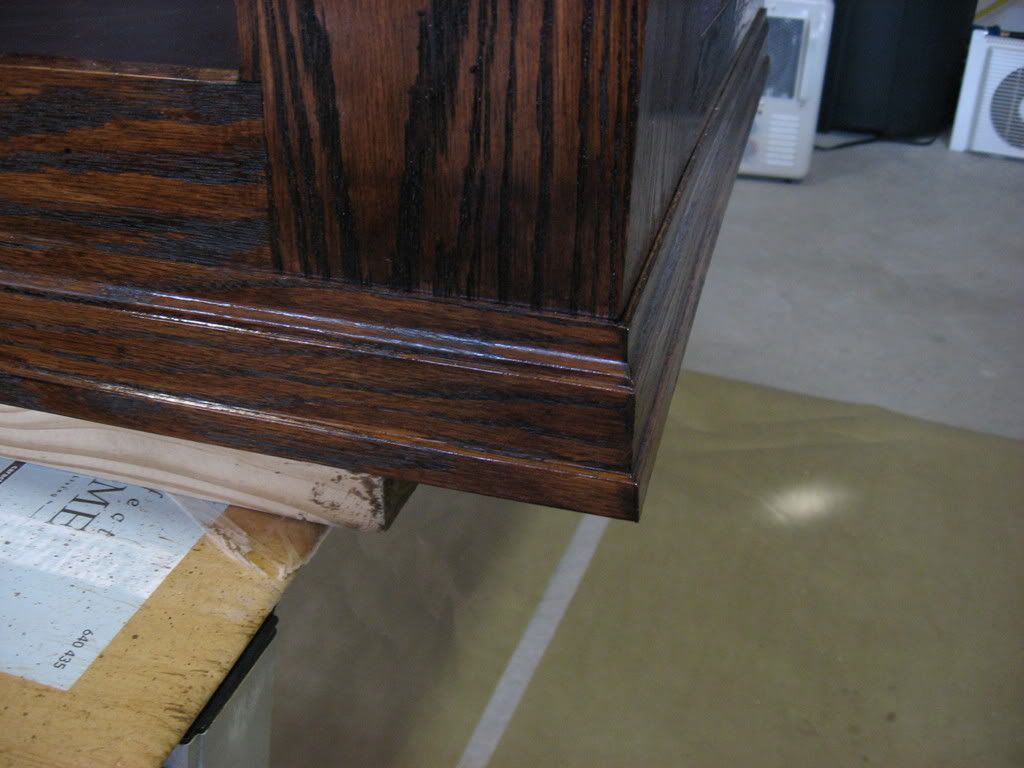
Ok, all masked up and ready for clear.
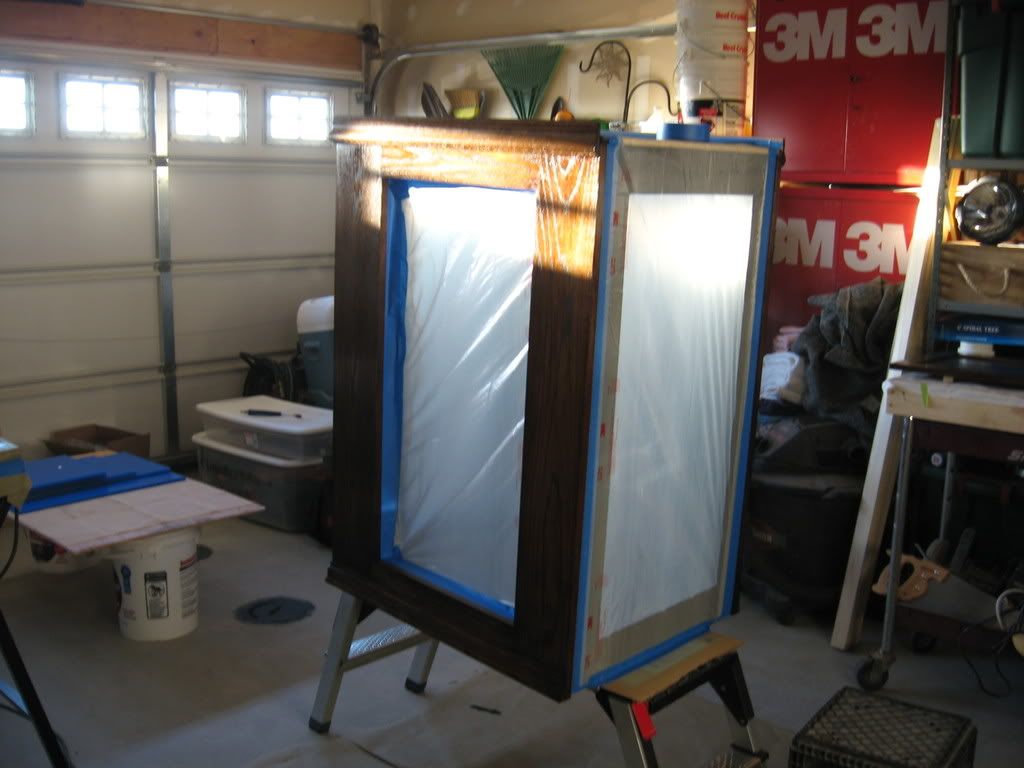 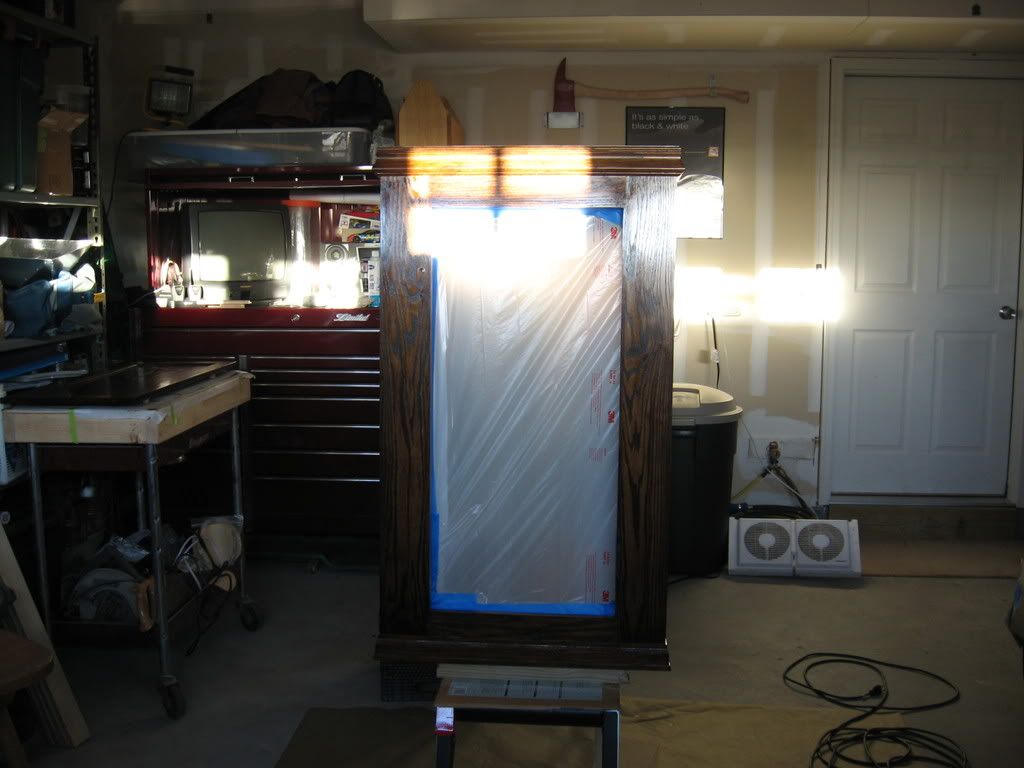 I sprayed the first coat of clear, then lightly sanded it all down with 320 grit and 0000 steel wool. Then recoated. Here it is with 2 coats of clear. 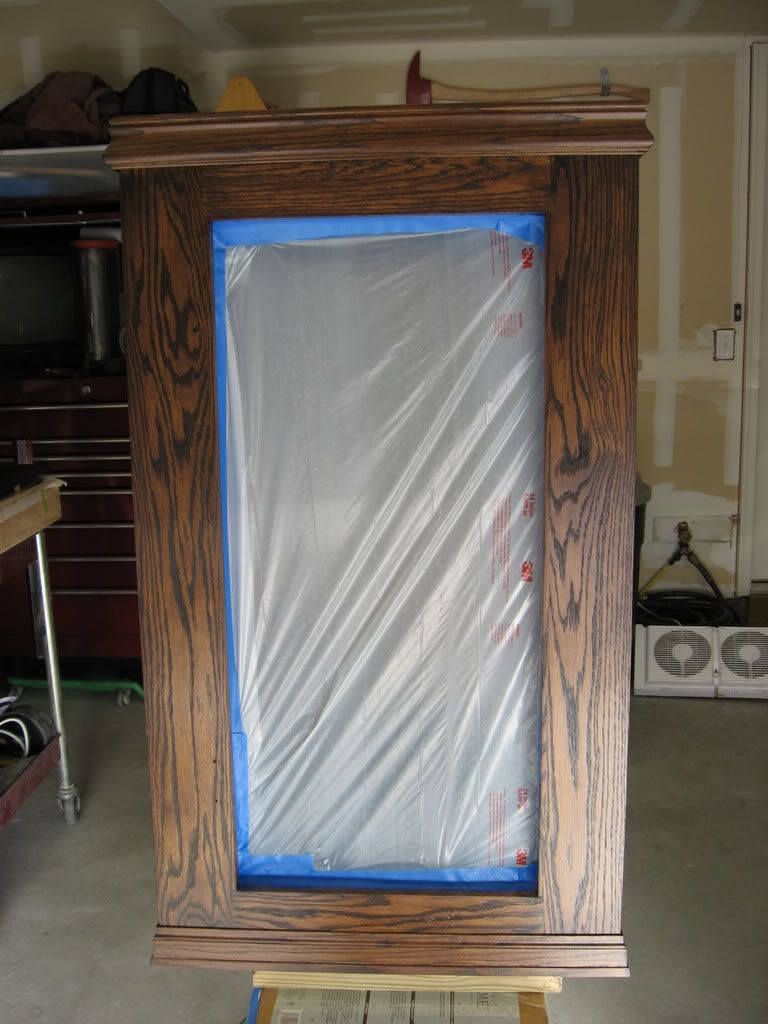 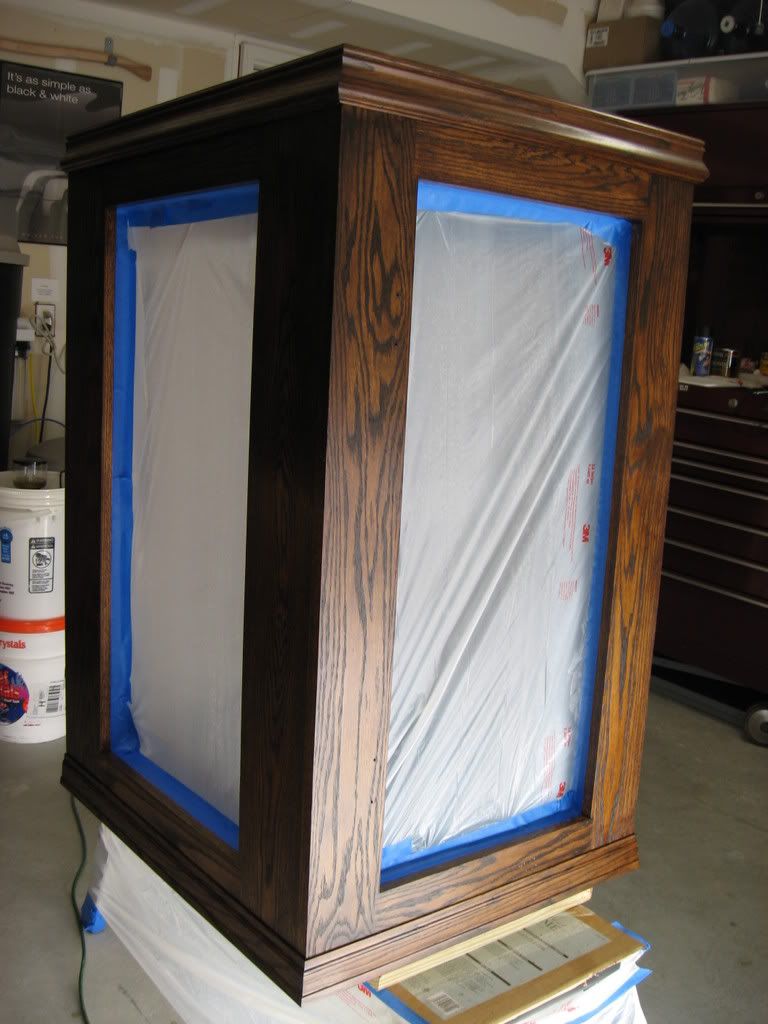 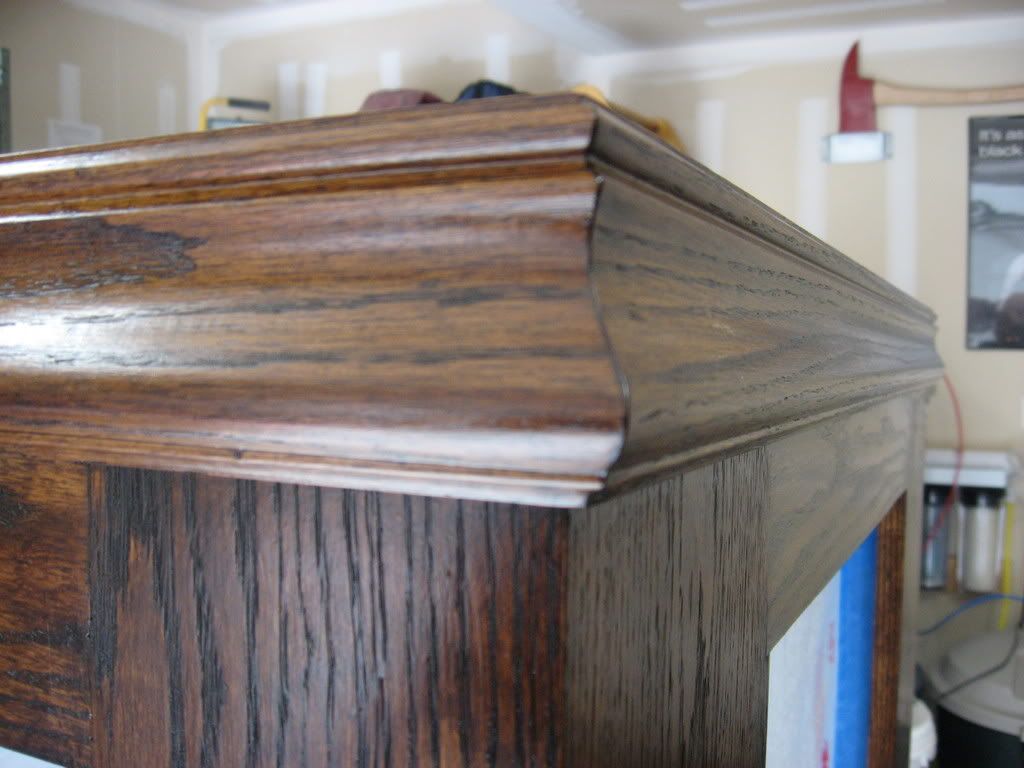 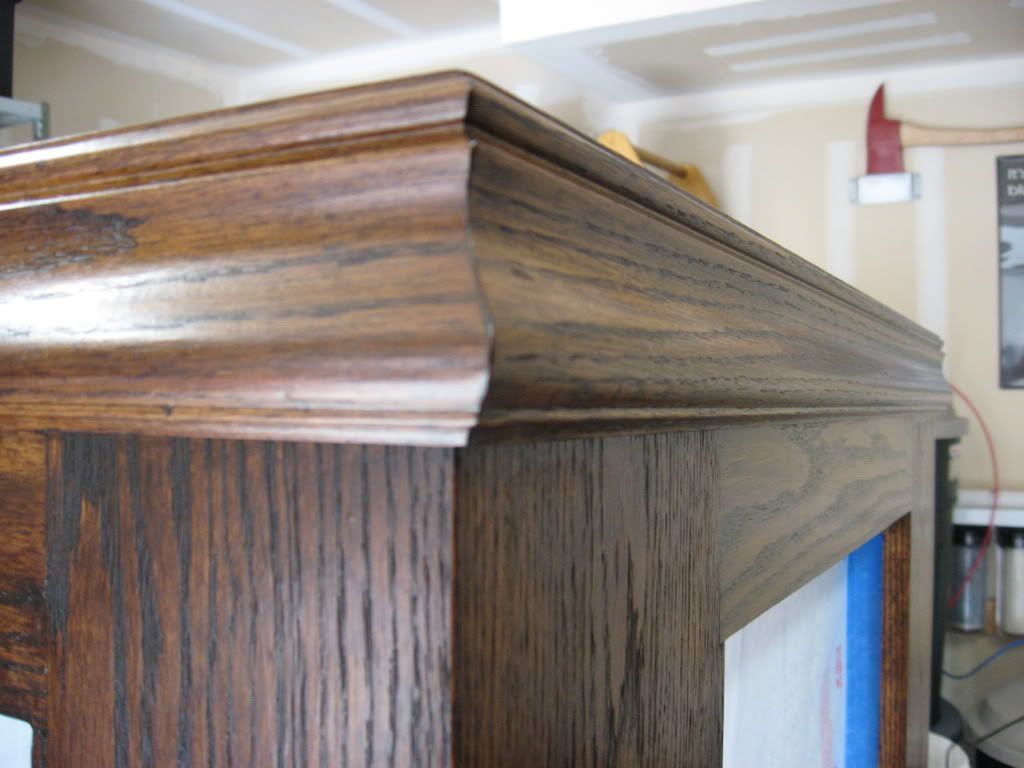 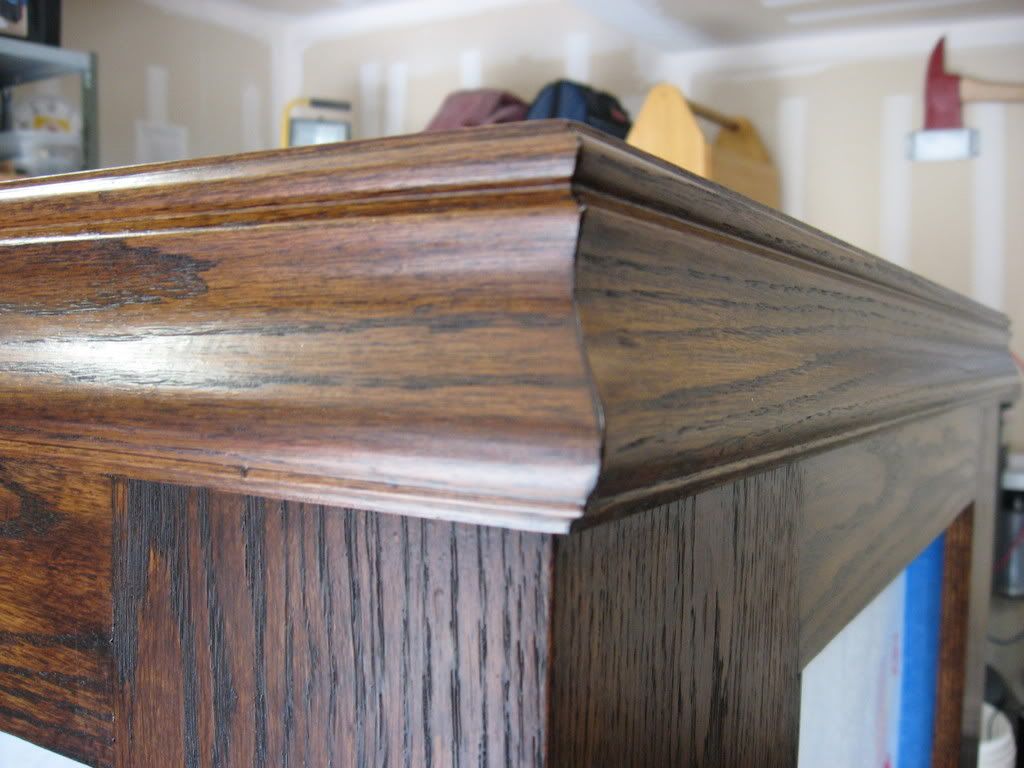 The back of the doors after recoating 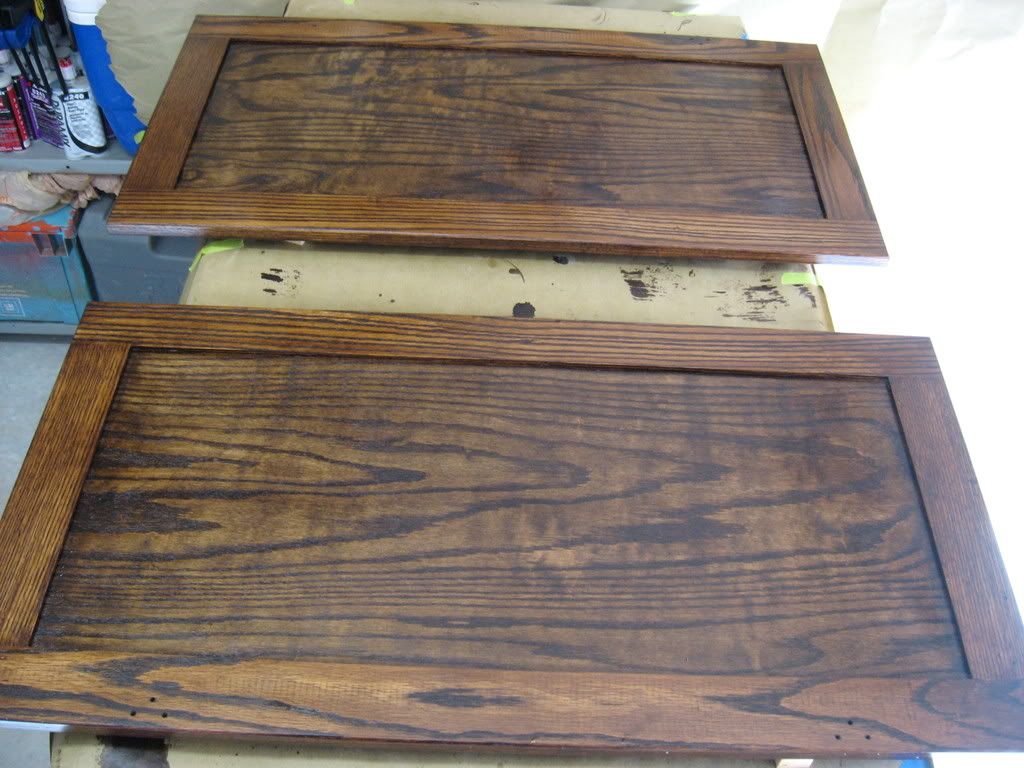 Right now the doors are sitting with 3 coats on them, I will sand one more time then put one final caot on, for a total of 4. I let each coat set for at least 2 days in between.
__________________
Make it a Great Day!!!! Current Tank Info: 60 gal SPS cube, with 25 gal refugium, 400W MH, DIY Lumenarc III, DIY skimmer, DIY stand and canopy. 40 breeder LPS with 40 gallon sump, DIY stand, 250W MH |
|
|
|
|
03/12/2008, 07:04 PM
|
#25 |
|
Registered Member
Join Date: Jun 2005
Location: New Jersey
Posts: 882
|
Wow amazing woodworking skills there. Looks great so far.
|
|
|
|
|
|
|


